
My 1985 Rx-7 GS: Project "Gus"

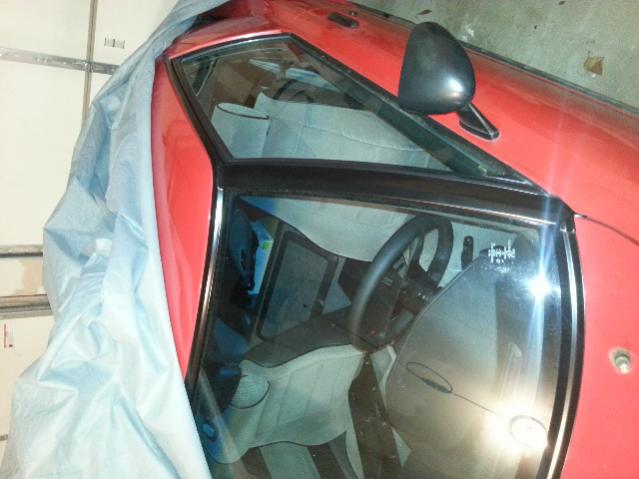
Alright, I wanted to officially let everyone know that I am back on track with this project. I've been working on it a lot, just not posting much info about it. My master's degree is finally done so I have more time to work on the car in the evenings and weekends again. Made some custom 1984 IMSA/GTU replica stickers that to my knowledge are the correct sticker for my 1985 to be displaying. They came out really nice. I can't believe how original it ended up looking. Goes on the inside of the glass just like the originals.  Hooray for persistence on this one. Took me a long time to get it right.
Picked up an FC transmission from a wrecker that is about 2 hours away from me. I'm going to swap the tail end of my FB transmission over to the FC one. When I combine this with my GSL rear end I will be getting pretty much the same ratios in 1-4, but a much better cruising RPM in 5th. I think I calculated that I'll be doing about 2700 rpm in 5th at 70-75 mph. Much better than the FB trans that really makes the car scream on the interstate.
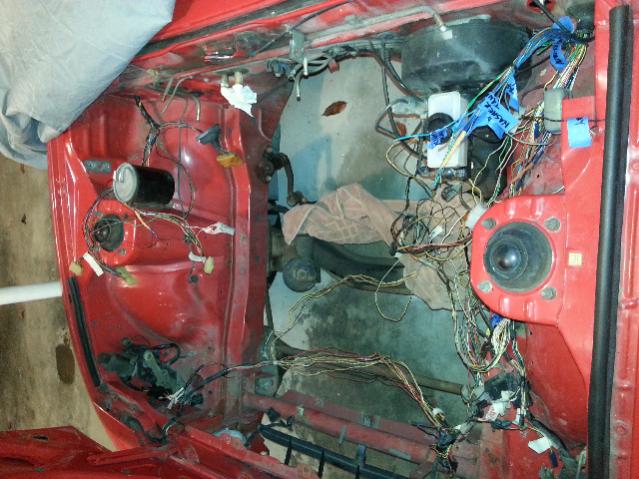
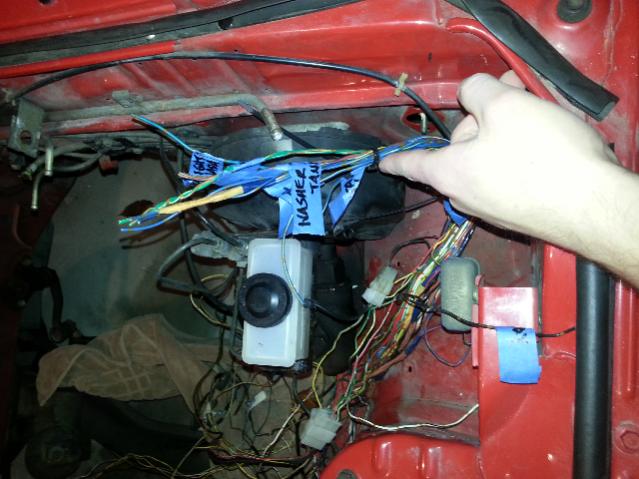
I have also been spending LOTS of time with the wiring diagrams. I've got the passenger side engine bay harness completely deleted and it is no longer needed. I'm planning to pull the dash and chase all the wiring back to where it originates. I've also got a nice fistfull of wires that are tagged in blue on the driver's side of the bay that I'll be taking out as well. Need to pull the dash to get rid of them also. My goal is to be down to only the wires that I need for the alt, tach, ignition, headlights, gauges, etc. No extra emissions wiring AT ALL in this car when I'm done. At least that's my goal.
Hooray for persistence on this one. Took me a long time to get it right.Picked up an FC transmission from a wrecker that is about 2 hours away from me. I'm going to swap the tail end of my FB transmission over to the FC one. When I combine this with my GSL rear end I will be getting pretty much the same ratios in 1-4, but a much better cruising RPM in 5th. I think I calculated that I'll be doing about 2700 rpm in 5th at 70-75 mph. Much better than the FB trans that really makes the car scream on the interstate.
I have also been spending LOTS of time with the wiring diagrams. I've got the passenger side engine bay harness completely deleted and it is no longer needed. I'm planning to pull the dash and chase all the wiring back to where it originates. I've also got a nice fistfull of wires that are tagged in blue on the driver's side of the bay that I'll be taking out as well. Need to pull the dash to get rid of them also. My goal is to be down to only the wires that I need for the alt, tach, ignition, headlights, gauges, etc. No extra emissions wiring AT ALL in this car when I'm done. At least that's my goal.
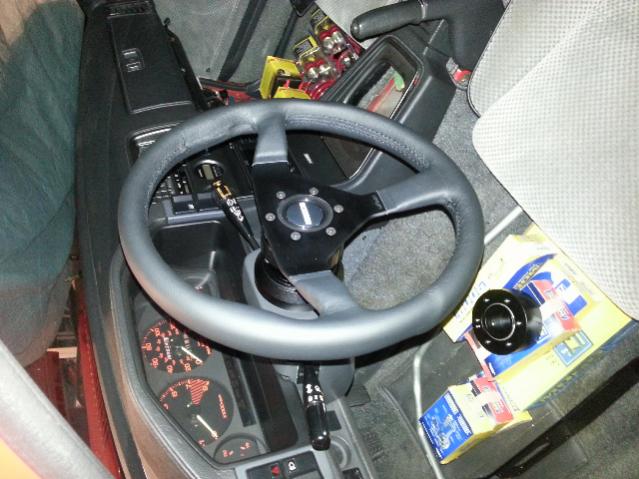
Also switched out my Grant Challenger steering wheel for something a little nicer. Switched to a Momo Monte Carlo black leather wheel, and I made a custom Mazda horn button for the middle. I'm also using it with an NRG short hub and NRG quick disconnect. Gives me more leg room than the stock ship's wheel, but I can also still see the gauges pretty well through the middle. I decided the Grant wheel was tacky looking, and it also cut right through the middle of the speedometer and tach with I was sitting the in car. I couldn't see any of the gauges. Also, went ahead and bought the NRG steering lock to complete the whole setup. This way I can pull the steering wheel off using the quick disconnect and then lock the column for some extra theft protection.
Painted the windshield trim about a year ago. Sanded it all down, cleaned it off with acetone, and taped off the whole car. Hit it with some of the green self etching primer, and then followed right after with 2-3 coats of Rustoleum semi-gloss black. My favorite treatment for the windshield trim. Puts it right back to a factory appearance IMO.
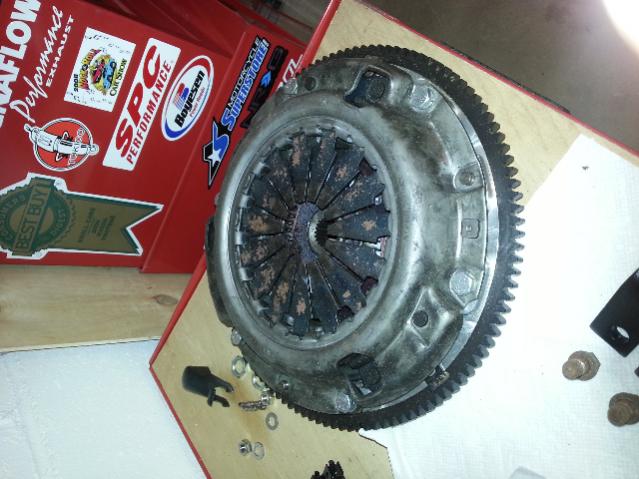
Found a new in box Fidanza flywheel on e-bay that I'll be matching up with my barely used Exedy clutch and pressure plate. Bought a new throwout bearing and pilot bearing/seal to go with everything. The old bearing felt kinda gritty and rough when I took everything apart. I just didn't trust that it was healthy. Also the PO had an affinity for spraying white lithium grease on everything. All over the clutch pedal, the slave cylinder. Not sure what he was thinking. Something tells me he didn't do the clutch job quite right.
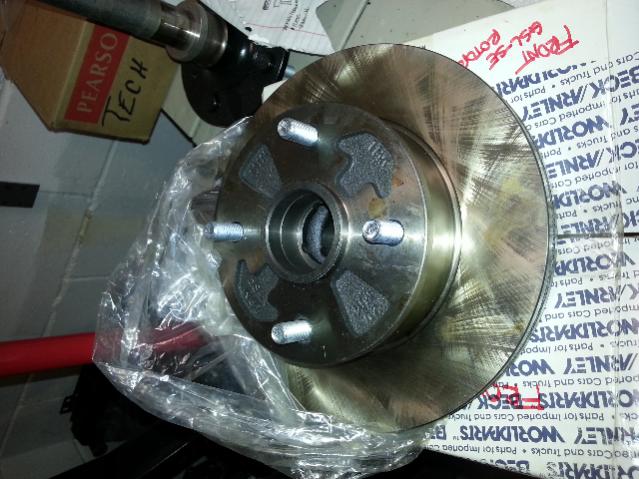
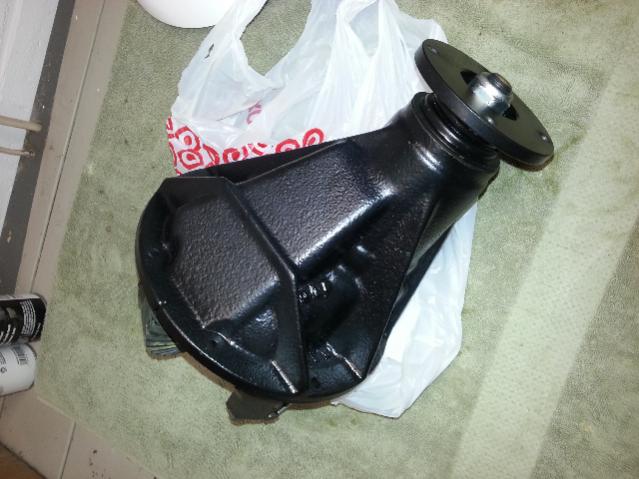
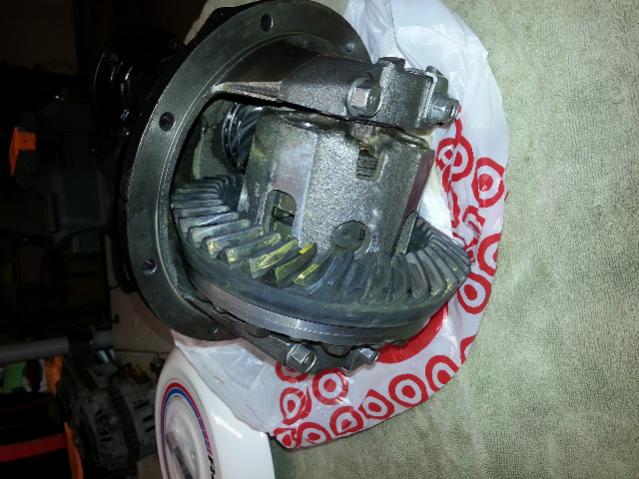
Pressed in new wheel studs on my front two new GSL-SE brake rotors, and also new studs on my GSL-SE axles. I'm going to be using GSL-SE brakes all the way around, GSL-SE axles in the back, but the better GSL differential. Pictures of the finished differential rebuild are also attached. Got the pinion preload down to a perfect 14 in-lbs (12 in-lbs if you deduct the oil seal drag). Set up the backlash twice before I finally got it right. Settled in nice at about 0.003"-0.004" all the way around on all the gear teeth. I measured all of the discs in the LSD unit also. Most of them measured 1.99mm or 2.00mm. They have practically no wear at all. Some of the ones I measured even came out to 2.01mm. Not sure how that's possible, but they are in like new shape. I think this is going to be a nice gear set once I get it running. First differential I've rebuilt and luckily the guy who owned the donor car was gentle on it, and changed the oil often. Everything was very clean with little wear.
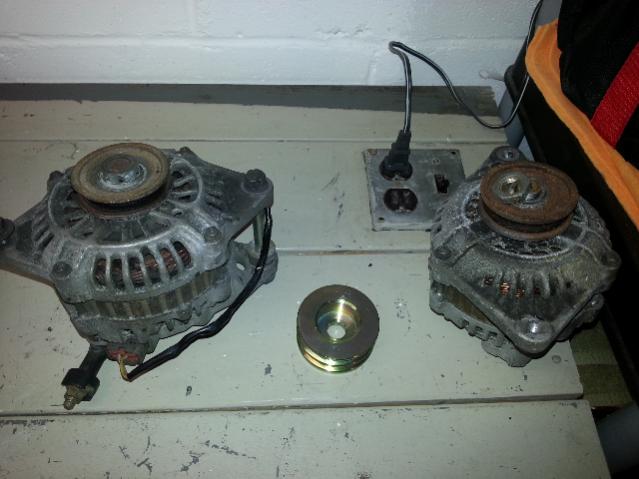
Also picked up an FC alternator (80 amp version) to replace the crappy 50 amp FB alternator. The FC alternator is going to be getting polished and inspected. Sounds like it may need some new bearings. Unfortunately it's a little noisy when I spin it by hand. I'm going to be tearing it down to check out the guts. Got a dual alternator pulley (not underdriven) from Banzai Racing to use on the new alternator, as well as a matched set of belts. The Banzai Racing pulley is a really nice piece and got it with the belts for about $50 or so. Money well spent in my opinion, to keep the water pump belts from slipping at high RPM hopefully. Plus Banzai Racing is only a couple hours from me so I got the parts next day!
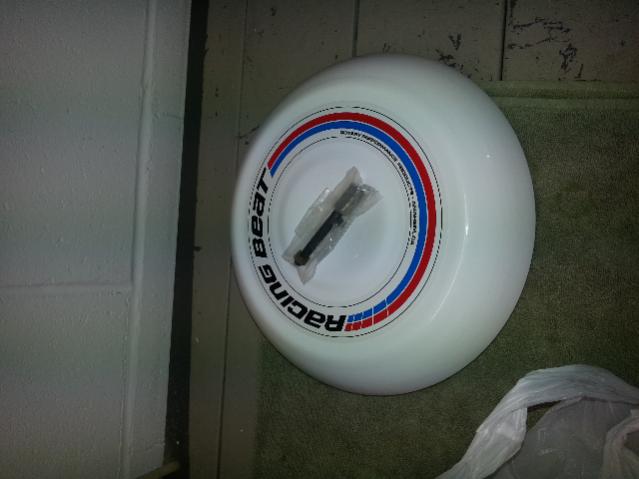
Final new acquisition is the Racing Beat air cleaner housing. I'm planning to paint or powdercoat it blue and put the factory style white vinyl lettering on the top. Trying to keep this car looking as factory as possible. I think it will be a cool touch that true rotary geeks and FB owners will notice and appreciate. No one else will be able to tell that it's an aftermarket air cleaner.
Painted the windshield trim about a year ago. Sanded it all down, cleaned it off with acetone, and taped off the whole car. Hit it with some of the green self etching primer, and then followed right after with 2-3 coats of Rustoleum semi-gloss black. My favorite treatment for the windshield trim. Puts it right back to a factory appearance IMO.
Found a new in box Fidanza flywheel on e-bay that I'll be matching up with my barely used Exedy clutch and pressure plate. Bought a new throwout bearing and pilot bearing/seal to go with everything. The old bearing felt kinda gritty and rough when I took everything apart. I just didn't trust that it was healthy. Also the PO had an affinity for spraying white lithium grease on everything. All over the clutch pedal, the slave cylinder. Not sure what he was thinking. Something tells me he didn't do the clutch job quite right.
Pressed in new wheel studs on my front two new GSL-SE brake rotors, and also new studs on my GSL-SE axles. I'm going to be using GSL-SE brakes all the way around, GSL-SE axles in the back, but the better GSL differential. Pictures of the finished differential rebuild are also attached. Got the pinion preload down to a perfect 14 in-lbs (12 in-lbs if you deduct the oil seal drag). Set up the backlash twice before I finally got it right. Settled in nice at about 0.003"-0.004" all the way around on all the gear teeth. I measured all of the discs in the LSD unit also. Most of them measured 1.99mm or 2.00mm. They have practically no wear at all. Some of the ones I measured even came out to 2.01mm. Not sure how that's possible, but they are in like new shape. I think this is going to be a nice gear set once I get it running. First differential I've rebuilt and luckily the guy who owned the donor car was gentle on it, and changed the oil often. Everything was very clean with little wear.
Also picked up an FC alternator (80 amp version) to replace the crappy 50 amp FB alternator. The FC alternator is going to be getting polished and inspected. Sounds like it may need some new bearings. Unfortunately it's a little noisy when I spin it by hand. I'm going to be tearing it down to check out the guts. Got a dual alternator pulley (not underdriven) from Banzai Racing to use on the new alternator, as well as a matched set of belts. The Banzai Racing pulley is a really nice piece and got it with the belts for about $50 or so. Money well spent in my opinion, to keep the water pump belts from slipping at high RPM hopefully. Plus Banzai Racing is only a couple hours from me so I got the parts next day!
Final new acquisition is the Racing Beat air cleaner housing. I'm planning to paint or powdercoat it blue and put the factory style white vinyl lettering on the top. Trying to keep this car looking as factory as possible. I think it will be a cool touch that true rotary geeks and FB owners will notice and appreciate. No one else will be able to tell that it's an aftermarket air cleaner.
If you don't mind can you tell me what the part number is for the nrg steering wheel hub? I have a wood nrg wheel and I'm wanting to put it in my 84 but can't find one listed for a first gen, thanks
Should be the SRK-160H. When I installed mine it was rubbing slightly on the round collar extrusion on the steering column surround. I lightly filed down the steering column surround to give it a little more clearance where it mates up against the hub. I probably only had to remove about 1/16". It didn't take much, but it was definitely rubbing on the NRG hub Honestly, you probably wouldn't have to do that but it was annoying to me since I tend to be a little bit on the OCD side. It made the wheel a little bit harder to turn also. Works great now though after a little bit of clearancing.
https://www.getnrg.com/products/quic...t-hub/srk-160h
https://www.getnrg.com/products/quic...t-hub/srk-160h
The SRK-160H is the short hub also. It is made to be used with the quick release. If you don't use the quick release with it, it probably won't work. Your steering wheel will be way too close to the dash.
Cool thank you for the part number. I was starting to think I want going to be able to use my wheel. I talked to a guy where I'm planning on ordering it from and he said they offer a spacer that's 0.5in thick that would bring the wheel closer to you, if your not using a quick disconnect. So I'm planning on going that route. Thanks again


Joined: Mar 2001
Posts: 31,849
Likes: 3,238
From: https://www2.mazda.com/en/100th/
Some of the ones I measured even came out to 2.01mm. Not sure how that's possible, but they are in like new shape.
Final new acquisition is the Racing Beat air cleaner housing. I'm planning to paint or powdercoat it blue and put the factory style white vinyl lettering on the top. Trying to keep this car looking as factory as possible. I think it will be a cool touch that true rotary geeks and FB owners will notice and appreciate. No one else will be able to tell that it's an aftermarket air cleaner.
Final new acquisition is the Racing Beat air cleaner housing. I'm planning to paint or powdercoat it blue and put the factory style white vinyl lettering on the top. Trying to keep this car looking as factory as possible. I think it will be a cool touch that true rotary geeks and FB owners will notice and appreciate. No one else will be able to tell that it's an aftermarket air cleaner.
i've measured a bunch of new parts, and it has me starting to wonder if the specs in the manual are the minimums. either that or the new parts are a tad bigger. i've got some used apex seals that were 10.5mm tall, and new is 10mm...
air cleaner will be cool, very neat idea
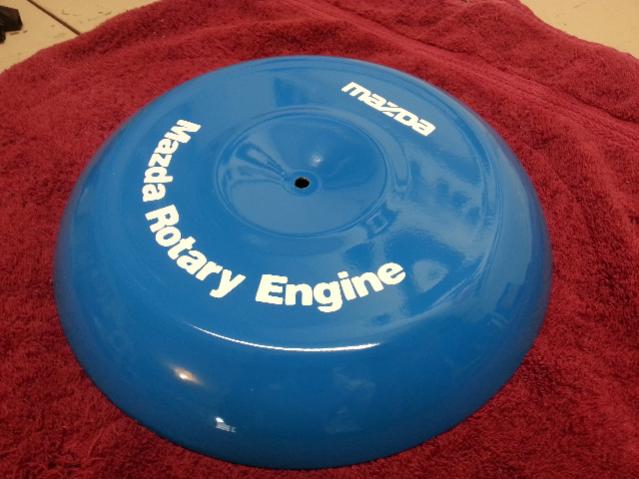
Got the air cleaner done. Turned out even better than I hoped it would. Really excited about putting this on top of the modified nikki!
Attachment 551292
Attachment 551292
Wow, that looks great! What an awesome idea. I was just about to buy a stock air cleaner for my Sterling because I wasn't big on the thought of having that big white thing in my engine bay, but I might actually go the route you did instead. How did you do the vinyl lettering? Are they new letters or were they taken from an existing air cleaner?
Brand new white adhesive vinyl that I made on a vinyl cutter. If you want some letters pm me. I can hook you up for the cost of vinyl. They will be identical to mine so of course they are sized for the rb air cleaner not the stock oem one.
If you want a good paint color get the dupli color engine enamel that is Ford blue. Exact match. Don't get old Ford blue just regular.
If you want a good paint color get the dupli color engine enamel that is Ford blue. Exact match. Don't get old Ford blue just regular.
Joined: May 2002
Posts: 5,972
Likes: 37
From: Ottawa, Soviet Canuckistan
Looking good Jamie! Glad to see that your attention to detail is as high as ever. It's nice to see your new (well new-er) ride come together. I'll have to keep in mind the restoration tips for the rear hatch area plastics. Mine are in terrible shape!
I like the minimalist approach. You should totally do a wire tuck and try to match the weight removal de-cluttering with an attempt to simplify the look of the engine bay too. I've often thought about different ways to go ultra-simple in the engine bay. I love my Sterling but I've often wondered what it'd be like to get a side-draft on a lake-cities manifold to put the carb down low and clear off the top of the keg. Get an alternator relocation kit to put it down where the A/C and power steering used to be, do a 2nd gen leading ignition off a CAS with a controller and just cap the trailing plugs, with a wire tuck... Really highlight the keg. But I chose to go in a similar vein to what you're doing - basically looking back and going "If I was a Mazda engineer but not constrained by some of the choices they were forced with, what would this car look like?". I don't regret it, I love the look I ended up with, but some day I totally want a second FB to do my minimalist look on!
Cheers,
Jon
Joined: May 2002
Posts: 5,972
Likes: 37
From: Ottawa, Soviet Canuckistan
I first asked myself that question just before swapping all 3 cats, the air pump, the ACV, the rat's nest and the whole rest of it for my Racing Beat exhaust and some block-off plates. Then I looked at it and went "Yes. This is simpler, less prone to failure, more powerful, and a much more elegant solution", and it all went from there.

Thread
Thread Starter
Forum
Replies
Last Post