My 1985 Rx-7 GS: Project "Gus"


Glazedham42 you are doing some very awesome work on Gus! I really appreciate how you really pay attention to detail. I see your in Indiana, I live in Chicago every year my fiancee and I spend a few weeks in Michigan City IN. Be nice to have a seven to cruise with next time Im down there. Goodluck!

I'm thinking that I may get a Sterling carb for full out performance, and then keep this one with stock jetting that I'm working on for better fuel mileage.
Glazedham42 you are doing some very awesome work on Gus! I really appreciate how you really pay attention to detail. I see your in Indiana, I live in Chicago every year my fiancee and I spend a few weeks in Michigan City IN. Be nice to have a seven to cruise with next time Im down there. Goodluck!
My biggest wish would be to drive this car to Deal's Gap when it is done, maybe next summer. I've been wanting to go for several years, and going in my own FB would be the icing on the cake. It would be awesome to get a bunch of Illinois, Michigan, Indiana, Ohio, Kentucky guys together and head down there in a big group.
Just a stupid fantasy of mine.


Next year I'll be in one of the 7s, hopefully the 79, though the MSM was pretty dern fun up there.
No pistons baby
Joined: Feb 2011
Posts: 171
Likes: 0
From: Edmonton, Alberta, Canada
Whoa! Just read up on your VERY THOROUGH removal of the A/C. Mine had the A/C removed long before I bought it, but in the cold days of the winter the heater just couldn't keep up... maybe I have a bunch of holes left by some numb-nuts who ripped out the A/C! I'ma check this as soon as it stops raining here. Gorgeous job glazedham.


Whoa! Just read up on your VERY THOROUGH removal of the A/C. Mine had the A/C removed long before I bought it, but in the cold days of the winter the heater just couldn't keep up... maybe I have a bunch of holes left by some numb-nuts who ripped out the A/C! I'ma check this as soon as it stops raining here. Gorgeous job glazedham.
I'll post some updates tonight. I've been working on doing the FC water housing swap.
Jamie
Alright gents, it's time for a big Gus update. Haven't really shown you much lately. I've been making some more progress lately, so I thought I needed to do an update. Here we go...
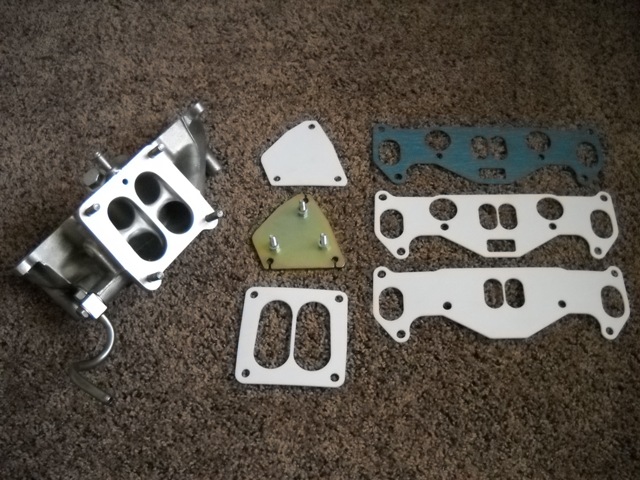
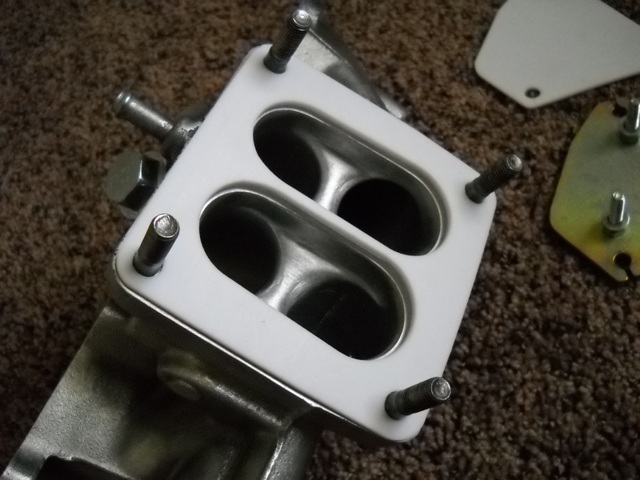
Here is the finished RX-3 intake manifold. I had some custom Teflon gaskets cut for it by my local water jet guy. I'm still not 100% sure how they'll work but hopefully all goes according to plan. My hope is that they will seal properly, and insulate the intake manifold to help keep it cool. Another benefit is that they will be reusable. So I can pull the carb/intake manifold off as many times as I want to and not have to worry about wasting paper gaskets. I'll also be using freeze plugs in the coolant passages to make it even EASIER to pull the manifold off. No more mess for me!
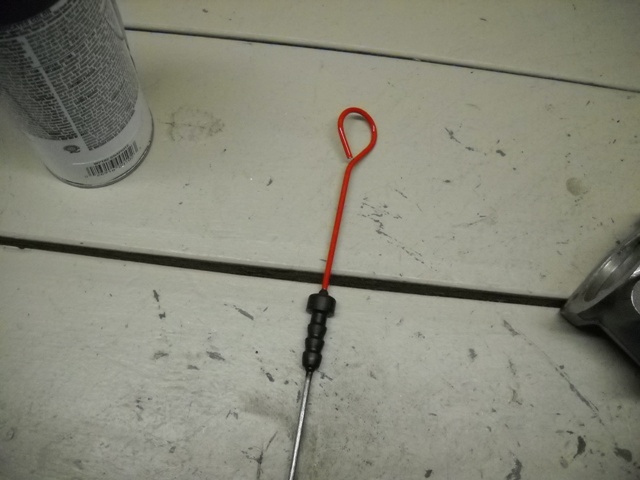
The original oil dipstick was looking pretty rusty and nasty so I cleaned it up and painted it. Looks like brand new! I could have replaced it with a new fancy rotor shaped one, or something equally wacky. But my goal on this build is to do all the mods I normally do, but keep everything so stockish looking that no one will know. I'm trying to keep everything super tasteful. So, a quick shot of red paint and the dip stick is done and looks like it could have been original to the car in 1985.
Here is the big one that I've been working on. The FULL ALUMINUM water pump and water pump housing. This is SOOOOO much lighter than all the stock cast iron stuff. I couldn't believe how much lighter it felt in my hand. It should take about 8-10 pounds off the high point of the engine, which will no doubt help with handling. I used a water pump housing from an S4 FC and a replacement FB water pump made by GMB. Everything was purchased online.
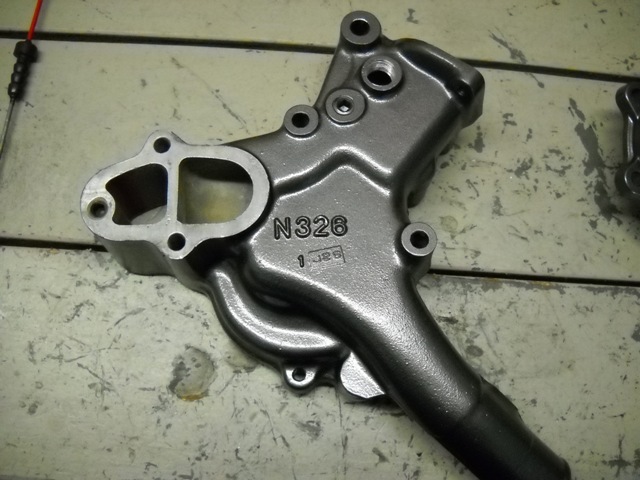
One of the tricks of the swap is the mismatched mounting holes. The FC water housing has an extra hole that the FB pump doesn't use. I didn't want it to leak, so I cut some threads in the water housing and epoxied a set screw in it with JB Weld. I did this on both sides of the hole because I'm mildly OCD. If you do this make sure that you recess the set screw enough that the pump can still mount flush.
Here is the finished RX-3 intake manifold. I had some custom Teflon gaskets cut for it by my local water jet guy. I'm still not 100% sure how they'll work but hopefully all goes according to plan. My hope is that they will seal properly, and insulate the intake manifold to help keep it cool. Another benefit is that they will be reusable. So I can pull the carb/intake manifold off as many times as I want to and not have to worry about wasting paper gaskets. I'll also be using freeze plugs in the coolant passages to make it even EASIER to pull the manifold off. No more mess for me!
The original oil dipstick was looking pretty rusty and nasty so I cleaned it up and painted it. Looks like brand new! I could have replaced it with a new fancy rotor shaped one, or something equally wacky. But my goal on this build is to do all the mods I normally do, but keep everything so stockish looking that no one will know. I'm trying to keep everything super tasteful. So, a quick shot of red paint and the dip stick is done and looks like it could have been original to the car in 1985.
Here is the big one that I've been working on. The FULL ALUMINUM water pump and water pump housing. This is SOOOOO much lighter than all the stock cast iron stuff. I couldn't believe how much lighter it felt in my hand. It should take about 8-10 pounds off the high point of the engine, which will no doubt help with handling. I used a water pump housing from an S4 FC and a replacement FB water pump made by GMB. Everything was purchased online.
One of the tricks of the swap is the mismatched mounting holes. The FC water housing has an extra hole that the FB pump doesn't use. I didn't want it to leak, so I cut some threads in the water housing and epoxied a set screw in it with JB Weld. I did this on both sides of the hole because I'm mildly OCD.
If you do this make sure that you recess the set screw enough that the pump can still mount flush.
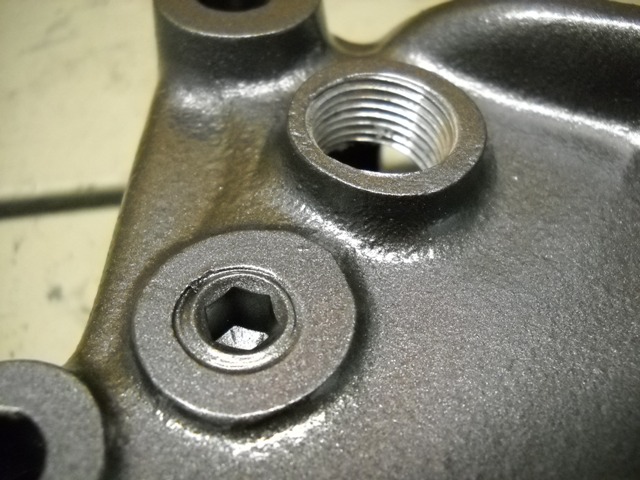
The FC water housing also had a nipple on the back that goes to some nonsense the FB doesn't believe in. I pulled that thing out and tapped the hole for a set screw as well. It also got coated with JB Weld when I installed it. The whole water housing also got a nice coat of paint when I was done. I really like the dupli color wheel paint. It stick to aluminum really well, dries fast, and is very tough. You have to try to scratch it when it's done. I would really recommend this paint to anyone that hasn't tried it yet. It's my favorite by far. Only comes in 2 or 3 colors, but I love the stuff. I'll be using it to paint my engine as some point, just because of the durability.
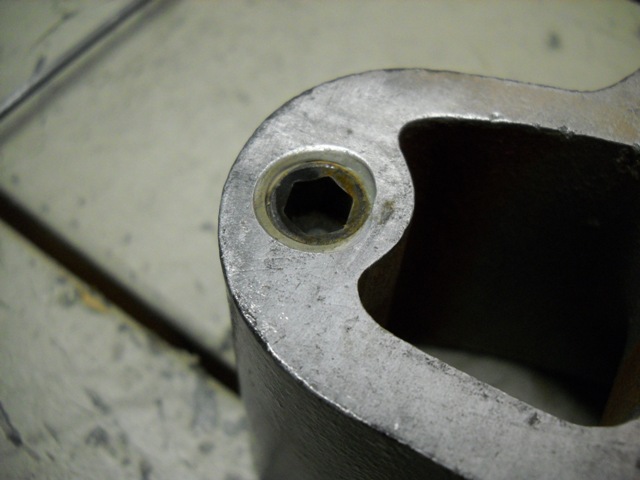
The crown jewel of this swap is my control for the electric Taurus fan. I love the Painless fan control kit that Summit Racing carries. It comes with a wetted thermostat, all the wiring, a relay, and a fuse. Has a wiring diagram too. I'll be pairing it with a stock 180 F Mazda thermostat. The Painless fan kit will turn the Taurus fan on at 200 F and it will turn off at 185 F. It has always worked FLAWLESSLY on all my cars in the past, and I've gotten to where I can't live without it now. You can see where I tapped the FC water housing for 3/8-18 NPT. That is where the thermostat for the Painless fan kit goes. I think that the hole Mazda put in was a little off center, because my 3/8-18 NPT hole is a little off center. It should work fine with some teflon tape though.
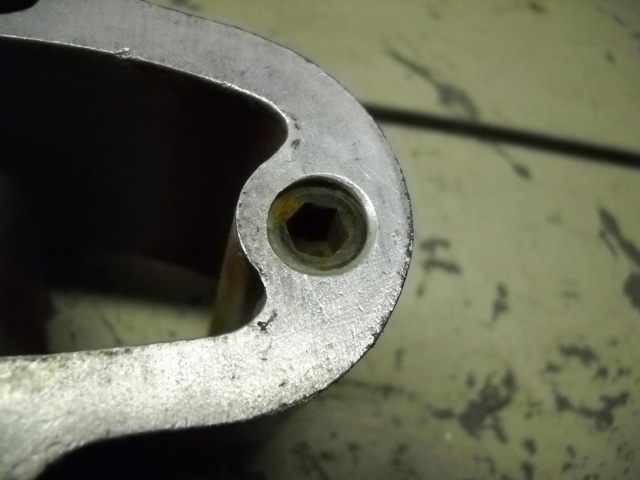
Here is the other side of the hole that I plugged.
Here is the GMB aluminum water pump I'll be using. You can see the big stud I had to put in for the alternator bracket. The FC water housing doesn't use this hole, so you have to modify the FB water pump to compensate. I tapped the hole on the water pump for 7/16-14 and got a stud from the hardware store to install. I JB welded the stud into the threaded hole and it should be ready to go now.
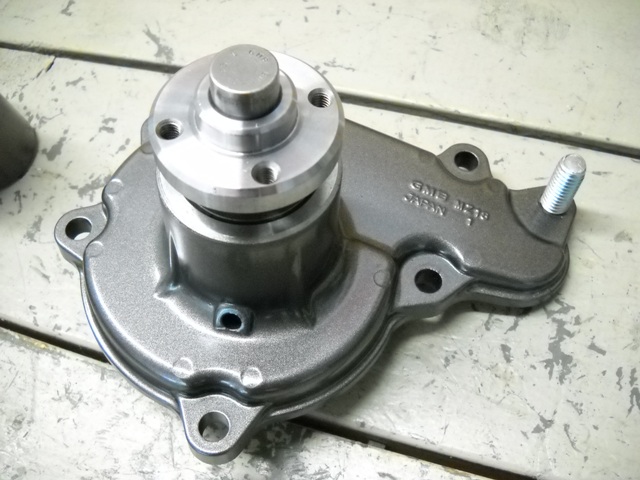
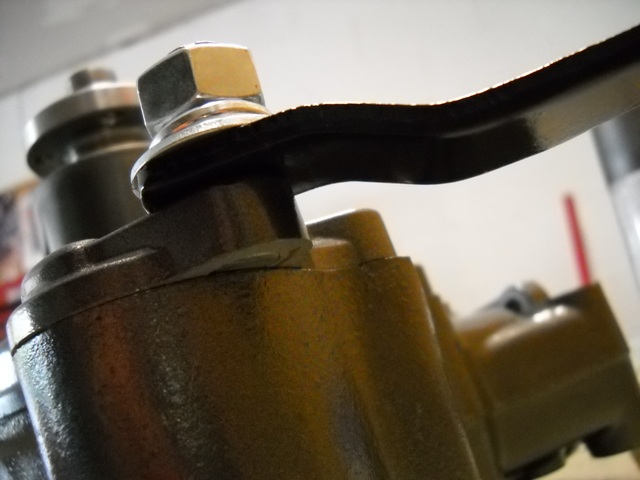
Here's a shot of the back showing how the whole mess fits together. You can see that the FC water housing doesn't quite match up in that area to the FB pump. That is why you must install the stud in the FB pump. Doing that will allow you to keep the stock alternator bracket. Make sure that the stud doesn't protrude past the sealing surface of the pump when you install it. You need to be able to tighten this thing down so that it won't leak.
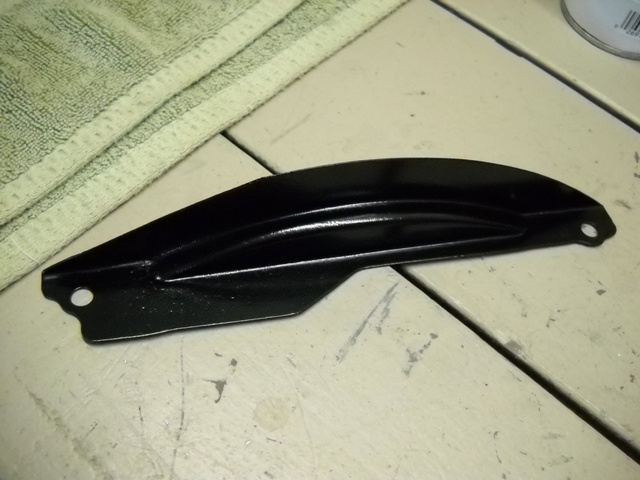
Here is one of those inspection plates / covers. Mine was all rusty and gross so I repainted it. Nothing too special here.
The crown jewel of this swap is my control for the electric Taurus fan. I love the Painless fan control kit that Summit Racing carries. It comes with a wetted thermostat, all the wiring, a relay, and a fuse. Has a wiring diagram too. I'll be pairing it with a stock 180 F Mazda thermostat. The Painless fan kit will turn the Taurus fan on at 200 F and it will turn off at 185 F. It has always worked FLAWLESSLY on all my cars in the past, and I've gotten to where I can't live without it now. You can see where I tapped the FC water housing for 3/8-18 NPT. That is where the thermostat for the Painless fan kit goes. I think that the hole Mazda put in was a little off center, because my 3/8-18 NPT hole is a little off center. It should work fine with some teflon tape though.
Here is the other side of the hole that I plugged.
Here is the GMB aluminum water pump I'll be using. You can see the big stud I had to put in for the alternator bracket. The FC water housing doesn't use this hole, so you have to modify the FB water pump to compensate. I tapped the hole on the water pump for 7/16-14 and got a stud from the hardware store to install. I JB welded the stud into the threaded hole and it should be ready to go now.
Here's a shot of the back showing how the whole mess fits together. You can see that the FC water housing doesn't quite match up in that area to the FB pump. That is why you must install the stud in the FB pump. Doing that will allow you to keep the stock alternator bracket. Make sure that the stud doesn't protrude past the sealing surface of the pump when you install it. You need to be able to tighten this thing down so that it won't leak.
Here is one of those inspection plates / covers. Mine was all rusty and gross so I repainted it. Nothing too special here.
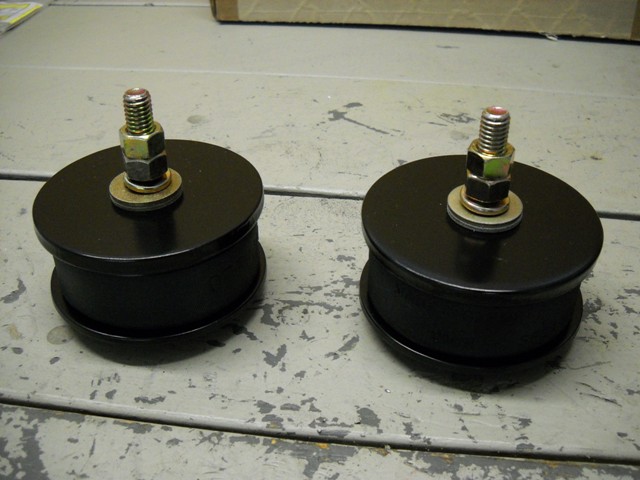
Here is a shot of my hockey puck engine mounts all finished and painted.
I got a Russell brand aluminum fuel filter to use once I get everything back together. I like these because they are small, use two normal hose barbs, and you can take them apart very easily to clean them.

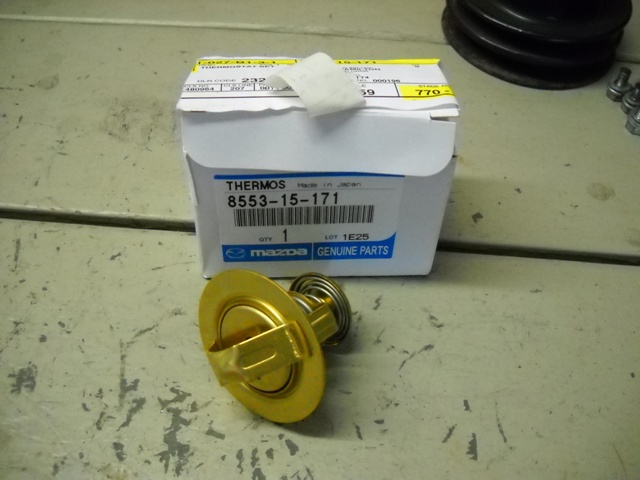
Here's the Mazda thermostat I'll be using.
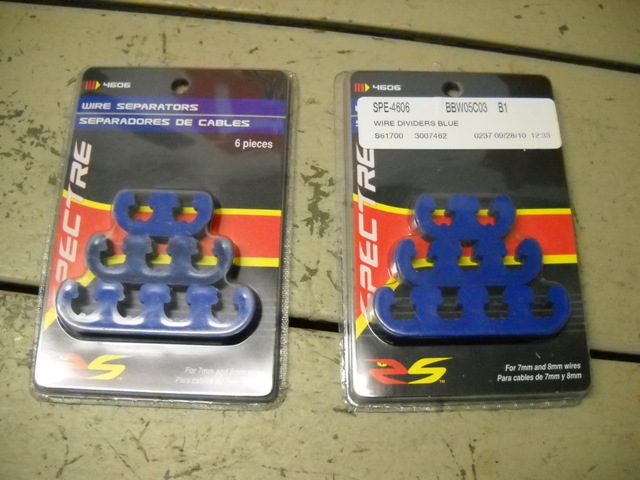
Got some el cheapo spark plug wire separators to use. The blue will match the plug wires I'm going to use.
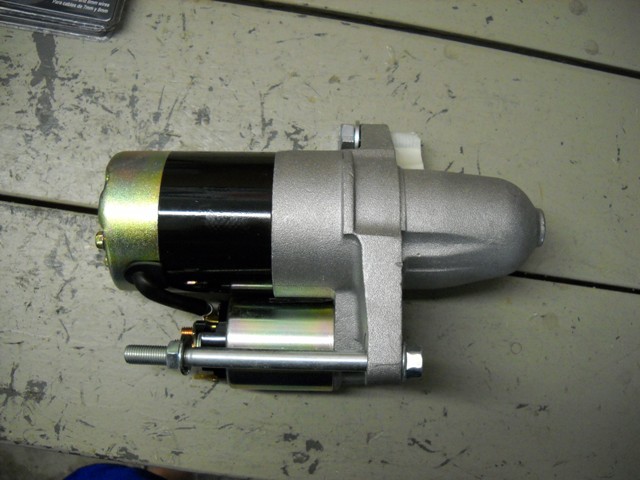
Scored this FC starter on E-bay for about $70. I got the longer bolt to allow me to use it with the FB transmission. This starter wasn't completely necessary, but I'm just not a big fan of the FB starter. I hate the sound it makes when it cranks. Sounds like your battery is dead all the time, and it's loud as all get out.
I got a Russell brand aluminum fuel filter to use once I get everything back together. I like these because they are small, use two normal hose barbs, and you can take them apart very easily to clean them.
Here's the Mazda thermostat I'll be using.
Got some el cheapo spark plug wire separators to use. The blue will match the plug wires I'm going to use.
Scored this FC starter on E-bay for about $70. I got the longer bolt to allow me to use it with the FB transmission. This starter wasn't completely necessary, but I'm just not a big fan of the FB starter. I hate the sound it makes when it cranks. Sounds like your battery is dead all the time, and it's loud as all get out.
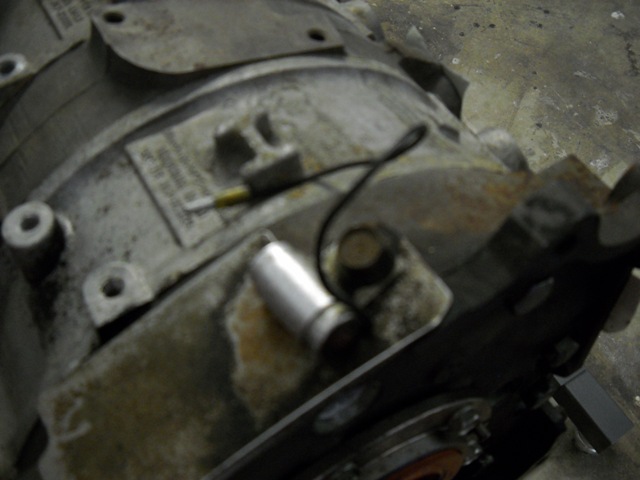
Final picture is a question for you guys. What the heck does this little silver canister thing do? I used to know, but have long since forgotten. Can I throw it in the trash? Why is it there?