
FrankenRex Will Rise: stuffing a GSL-SE into a'79 SA

Thread Starter


Joined: Feb 2004
Posts: 1,204
Likes: 101
From: Euless, TX
A cool front decided to roll through Texas, so I felt like I should get something done.
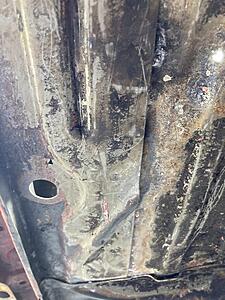
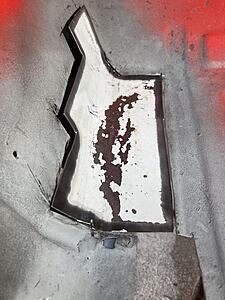
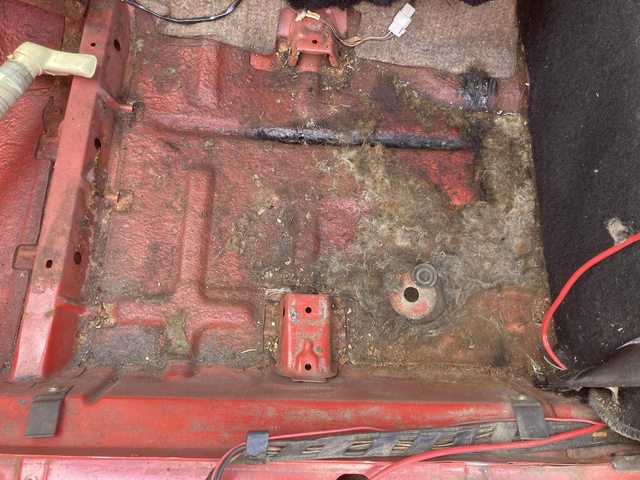
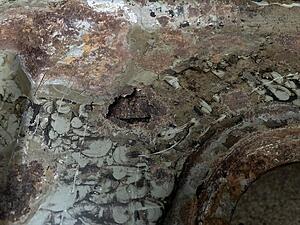
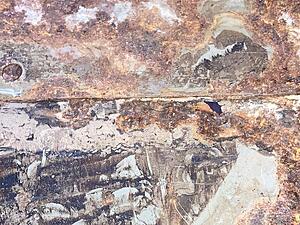
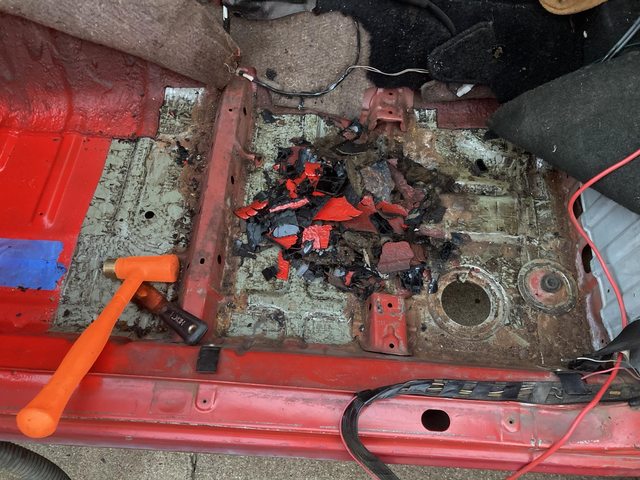
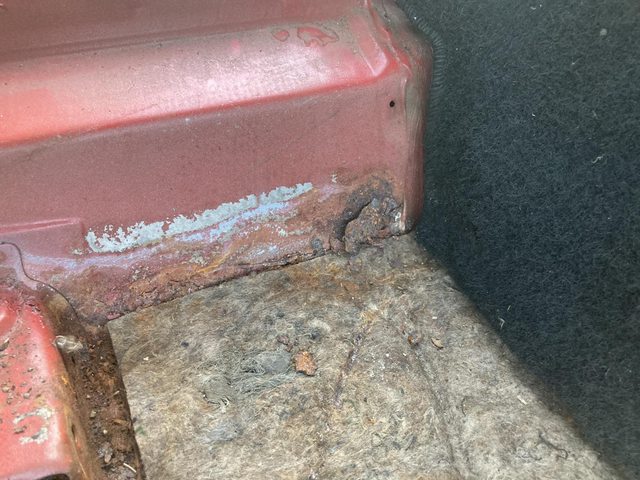
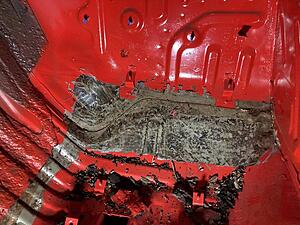
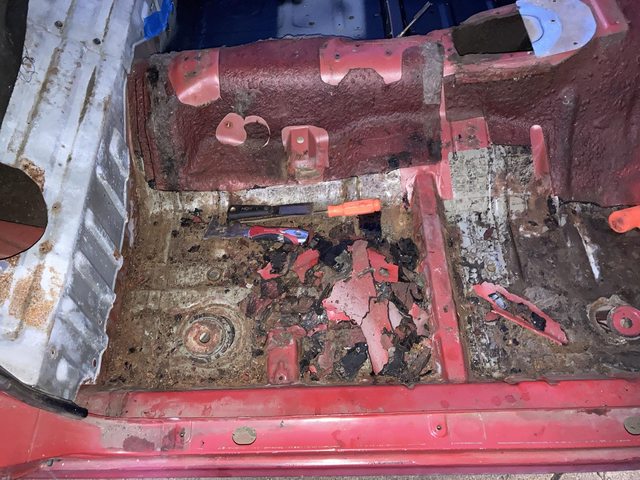
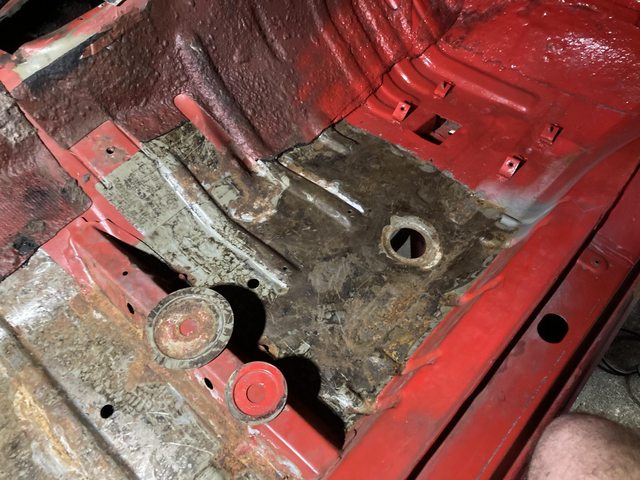
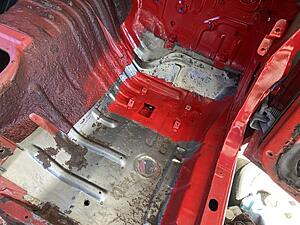
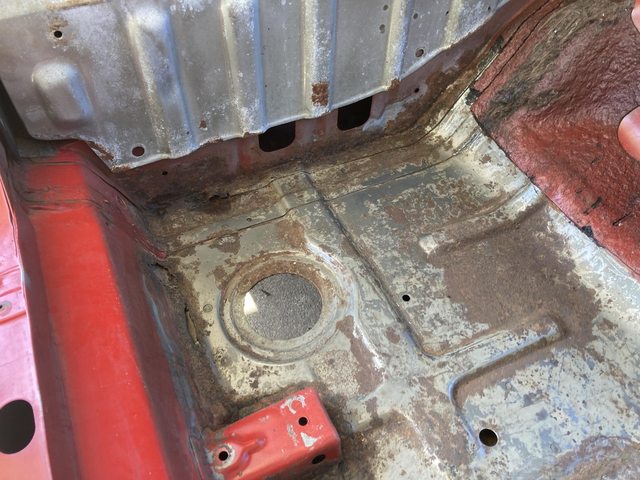
Long-time readers may recall we left the RX-7 at this:
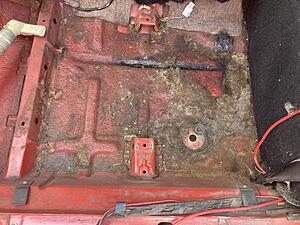
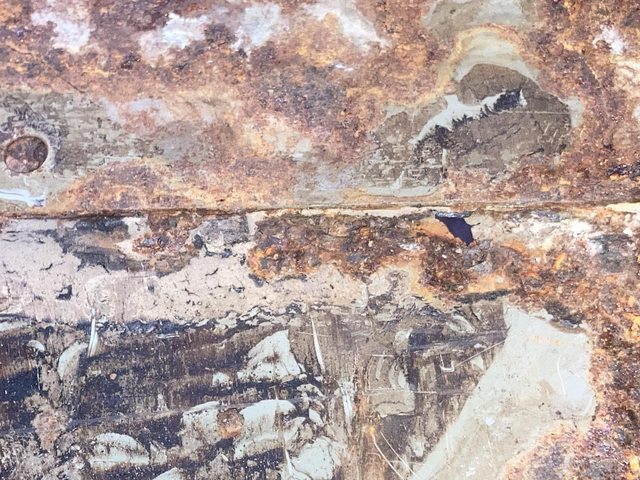
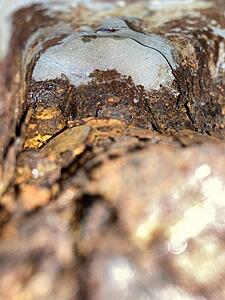
Hmmm. A little rust in there.
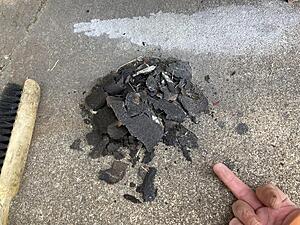
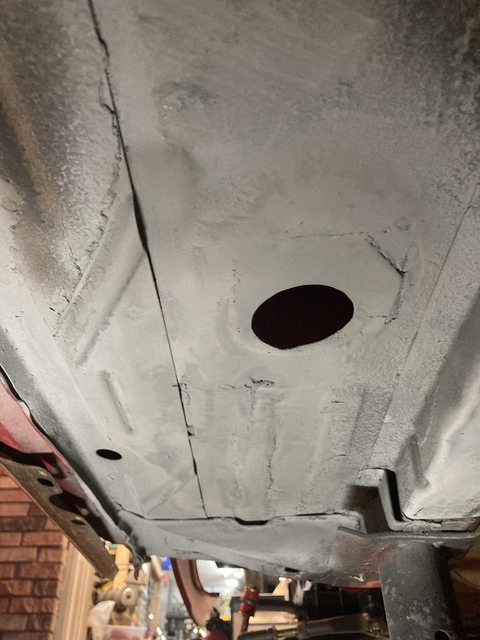
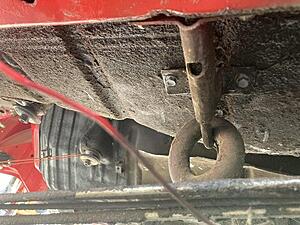
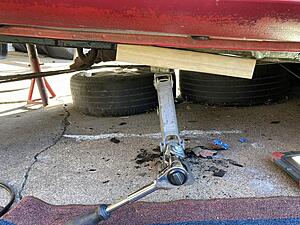
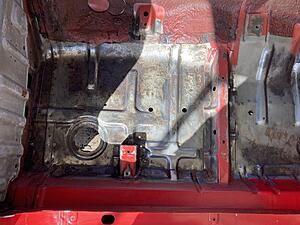
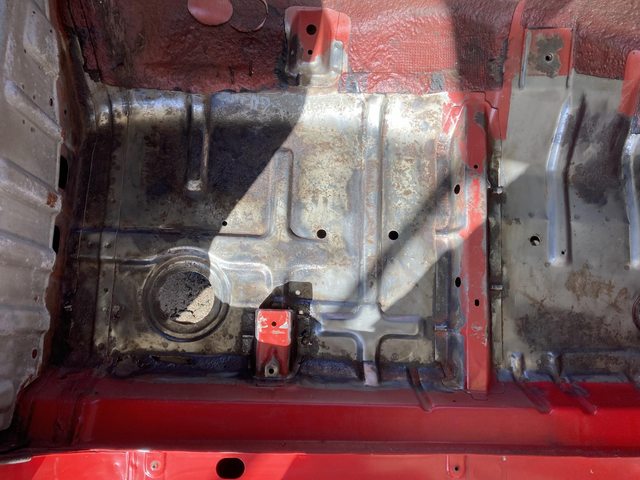
Before welding, I decided it would be a good idea to remove the undercoating on the bottom of the floorpan. I did *not* need a fire under there.
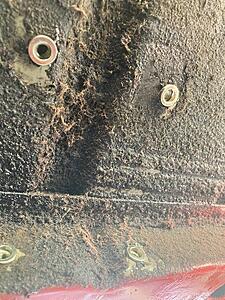
Got a lot off:

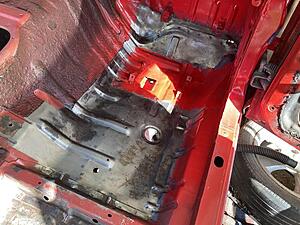
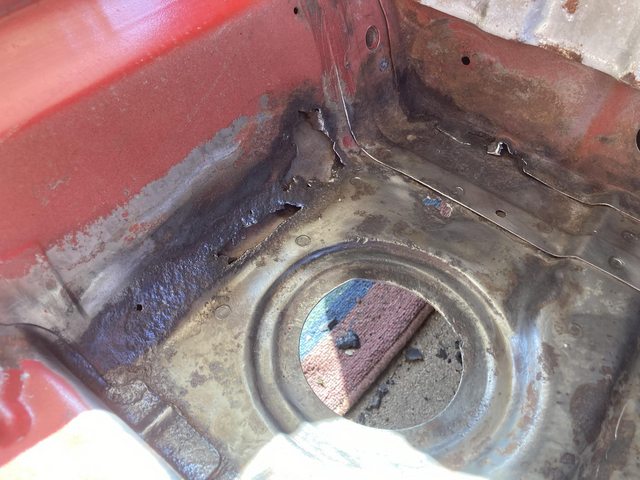
Oof, my frame rails. **** you, previous owner.

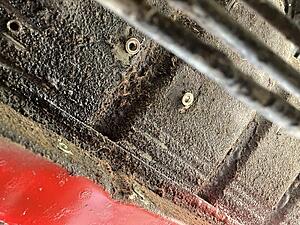
Mess
(Banana finger for scale)
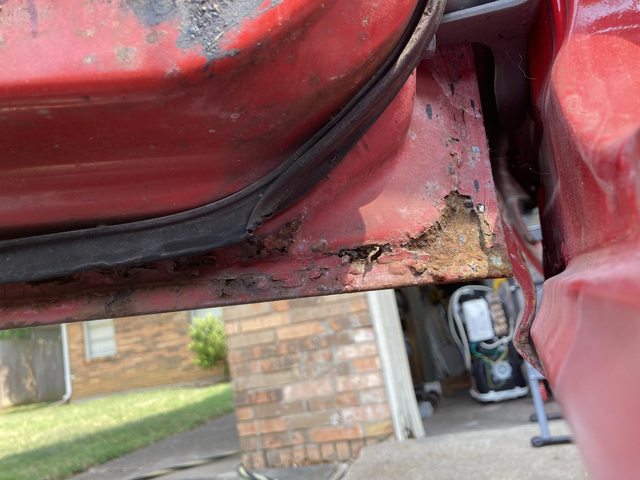
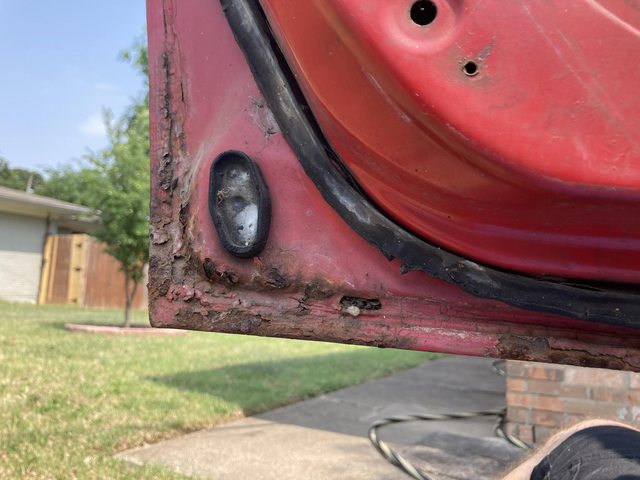
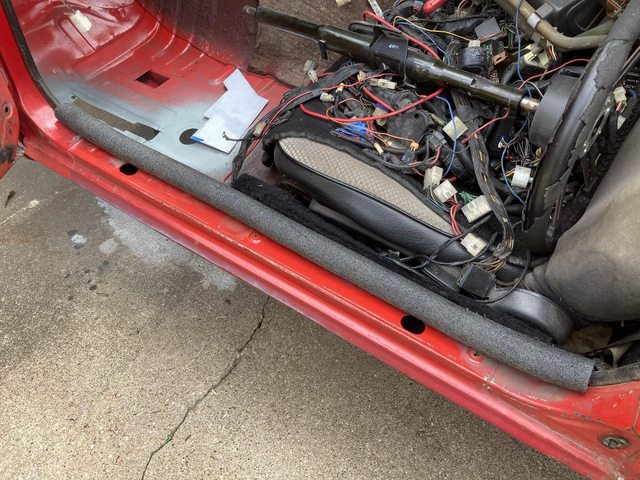
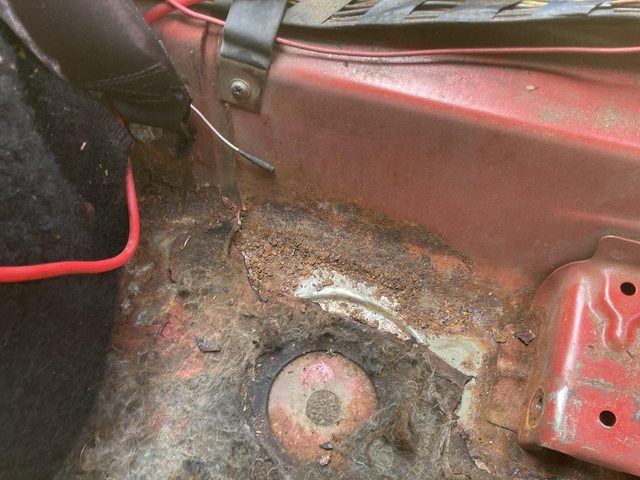
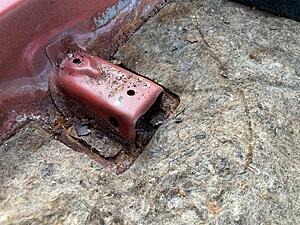
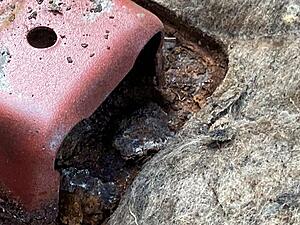
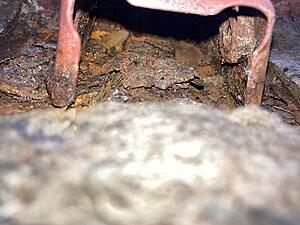
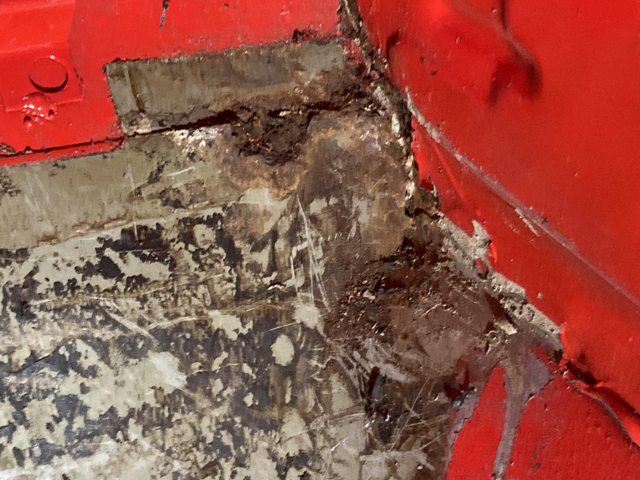
Noticed some rust in the bottom of the door:

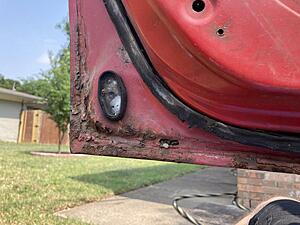
Blargh. Might be repairable. Looks like the drain holes weren't. I vacuumed up all the leaves and dirt in the bottom of the door to hopefully hold that at bay, and treated it with rust converter when I did the floor further along.
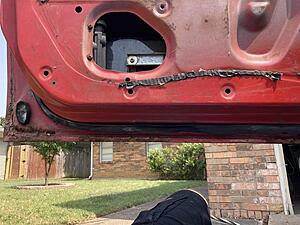
I do have a spare pair of doors if needed.
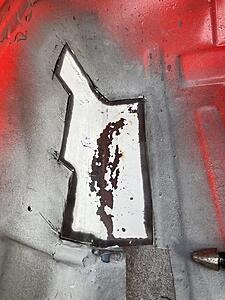
Long-time readers may recall we left the RX-7 at this:

Hmmm. A little rust in there.
Before welding, I decided it would be a good idea to remove the undercoating on the bottom of the floorpan. I did *not* need a fire under there.
Got a lot off:


Oof, my frame rails. **** you, previous owner.
Mess
(
Noticed some rust in the bottom of the door:

Blargh. Might be repairable. Looks like the drain holes weren't. I vacuumed up all the leaves and dirt in the bottom of the door to hopefully hold that at bay, and treated it with rust converter when I did the floor further along.
I do have a spare pair of doors if needed.
Thread Starter
Joined: Feb 2004
Posts: 1,204
Likes: 101
From: Euless, TX
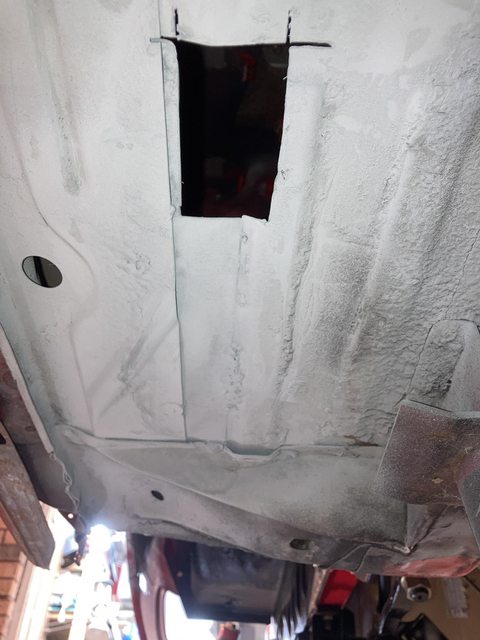
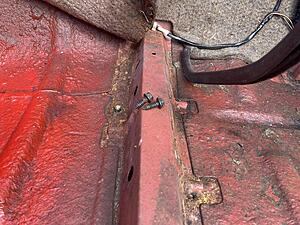
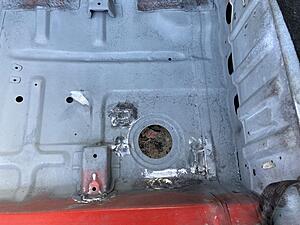
I was concerned about all those pinholes still in the floor pan, so I hit it with a knotted wire wheel.

Pictured: no longer "pinholes".
Marked for deletion:
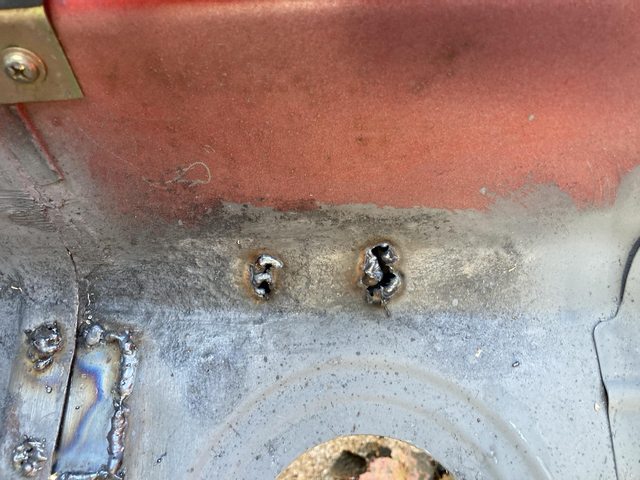
Finding and marking the spot welds, since this is where two sections of the sheet metal overlap and are welded together:

Deleted:
Wire-wheeled and treated:

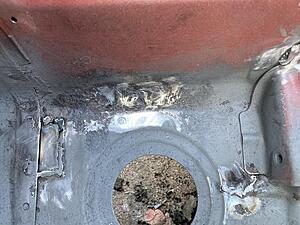
I already had a template for the more rearward patch, the one with the drain hole, so I started with that.
Ugly welds partially ground:


Pictured: no longer "pinholes".
Marked for deletion:

Finding and marking the spot welds, since this is where two sections of the sheet metal overlap and are welded together:
Deleted:

Wire-wheeled and treated:

I already had a template for the more rearward patch, the one with the drain hole, so I started with that.


Ugly welds partially ground:

Thread Starter
Joined: Feb 2004
Posts: 1,204
Likes: 101
From: Euless, TX
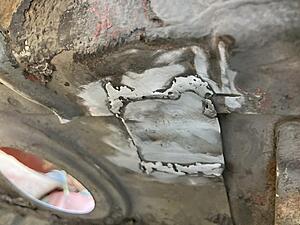
Ground:


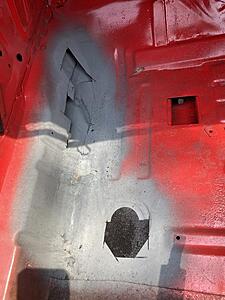
At that point it was starting to get even cooler as the cool front *really* came in, with a bit of wind, not to mention, you know, darkness. So I hit it with the galvanizing spray, and cleaned up for the night.

Not bad!
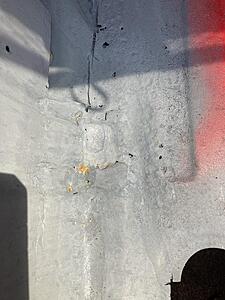
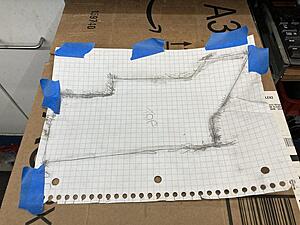
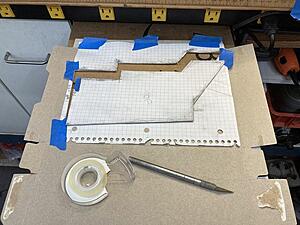
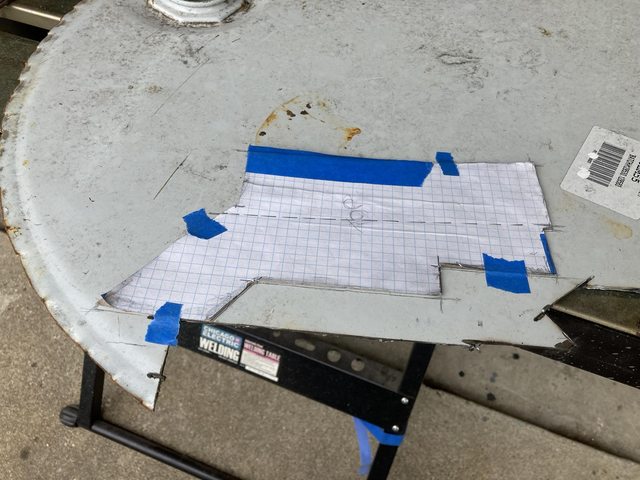
I did have enough daylight to lay out a template with the time-honored graphite method.
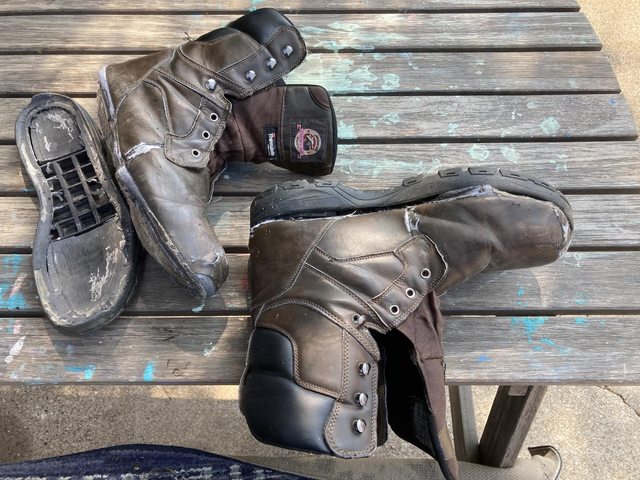
BTW, Brahma boots are cheap junk:
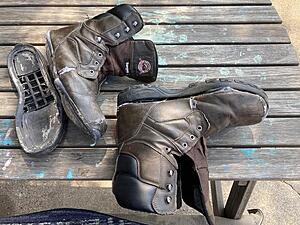
Not even leather. To be fair, these were from a thrift store, and I've worn them off and on for a while. This failure mode just really irritates me.
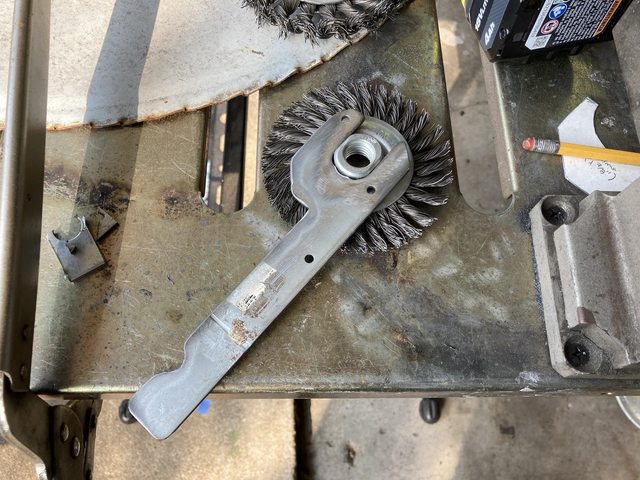
I also made a wrench to get the wire wheels off of my grinders, since nothing I had would both fit the flats and also fit in the gap between the wheel and the grinder body.

Just a chunk of heavy steel strapping I had hanging around, obviously used to make something else previously.
At that point it was starting to get even cooler as the cool front *really* came in, with a bit of wind, not to mention, you know, darkness. So I hit it with the galvanizing spray, and cleaned up for the night.

Not bad!
I did have enough daylight to lay out a template with the time-honored graphite method.

BTW, Brahma boots are cheap junk:
Not even leather. To be fair, these were from a thrift store, and I've worn them off and on for a while. This failure mode just really irritates me.
I also made a wrench to get the wire wheels off of my grinders, since nothing I had would both fit the flats and also fit in the gap between the wheel and the grinder body.
Just a chunk of heavy steel strapping I had hanging around, obviously used to make something else previously.
Thread Starter
Joined: Feb 2004
Posts: 1,204
Likes: 101
From: Euless, TX
Sunday it was nice. 70 degrees F for the high.
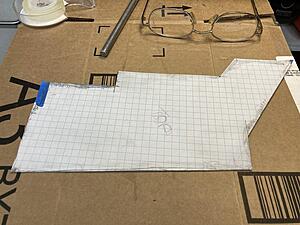
Template!
A little pipe insulation on the pinch weld to keep my ribs intact.
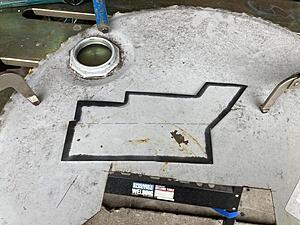
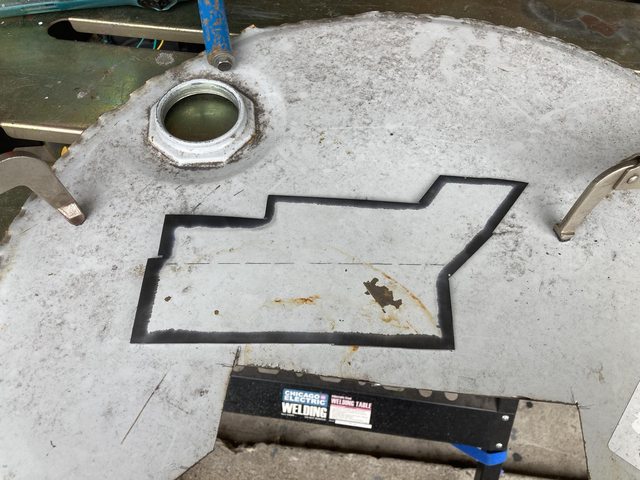
Ready to cut another ***** off this drum lid
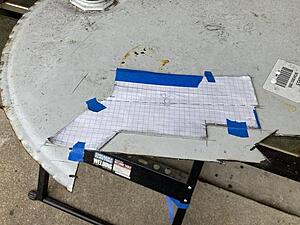
Boom!
That was the easy part. The hard part was bending it properly to fit.

That particular spot curves in like three different directions. It took a *lot* of fiddling to get it in there. A frustrating amount of fiddling.
At least I wasn't dripping sweat and slowly dying while doing it. Just wedging myself into the floorboard (yes, everything hurts today, Monday, thanks...)
Eventually, I got a halfway decent fit:
Lots of gaps I'm not happy about, but I'll get it done.
Got it this far:

until:
argh.
And that gap is terrible.
One trip to Home Despot later:

Template!


A little pipe insulation on the pinch weld to keep my ribs intact.
Ready to cut another ***** off this drum lid
Boom!
That was the easy part. The hard part was bending it properly to fit.
That particular spot curves in like three different directions. It took a *lot* of fiddling to get it in there. A frustrating amount of fiddling.
At least I wasn't dripping sweat and slowly dying while doing it. Just wedging myself into the floorboard (yes, everything hurts today, Monday, thanks...)
Eventually, I got a halfway decent fit:

Lots of gaps I'm not happy about, but I'll get it done.
Got it this far:
until:
argh.
And that gap is terrible.

One trip to Home Despot later:
Thread Starter
Joined: Feb 2004
Posts: 1,204
Likes: 101
From: Euless, TX
Grinding (too far in one spot - had to go back and re-weld, *and* made it too thin all around, causing a mess.)

Potato phone picture. No idea why it was out of focus. The wider spot toward the front of the car/lower end of the picture is a porcupine of wire I made trying to chase the metal burning through... Guess I should have cut back a little further initially. It was still a bit thin there, then I ground it thinner. It doesn't help that the metal I'm using as a patch is a gauge thicker than the actual car's sheet metal.
*Lots* of grinding dust...
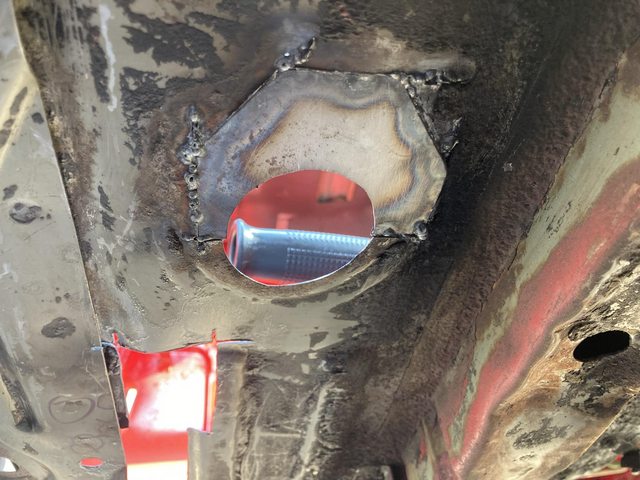
Ground back underneath - you can see the blob I was talking about. Also rosette-welded where the spot welds were in the interim.
All galvanized up:

I'll do the remaining little rectangle later. It was almost dark by this point.
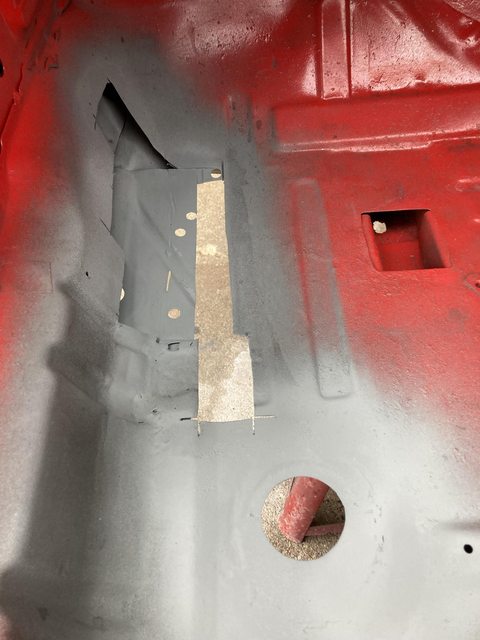
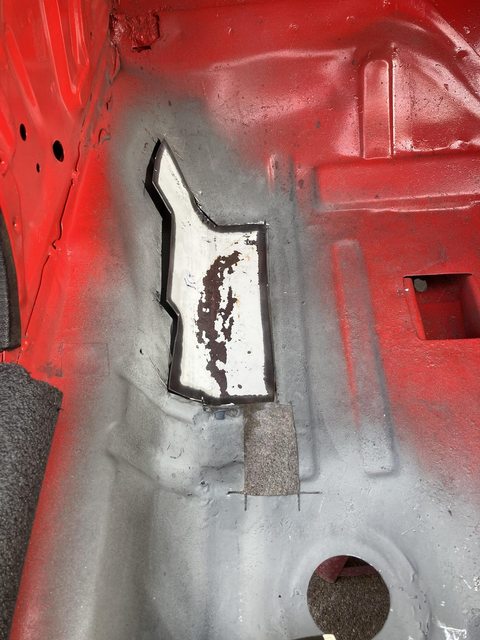
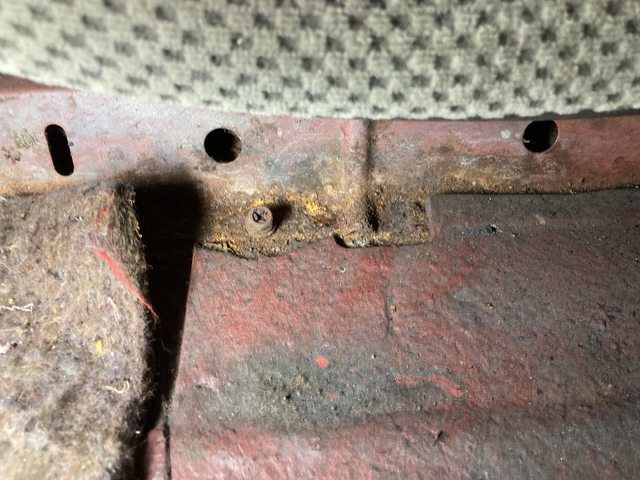
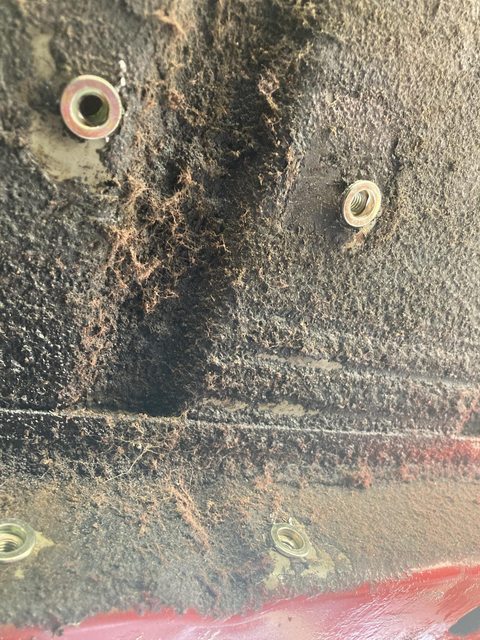
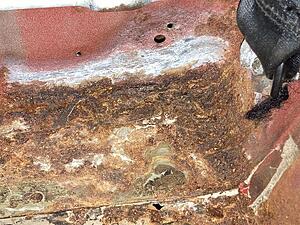
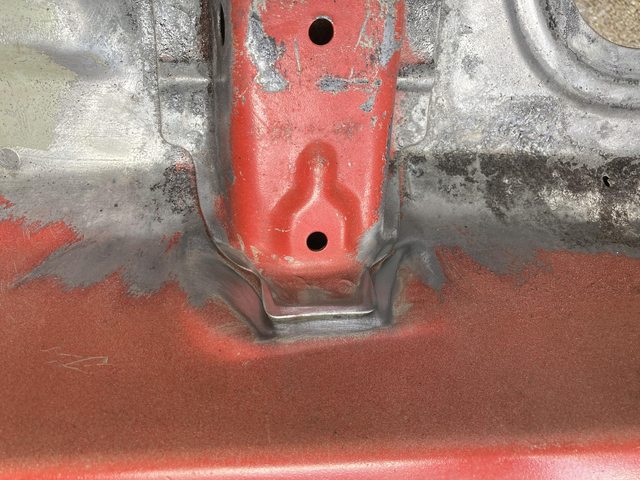
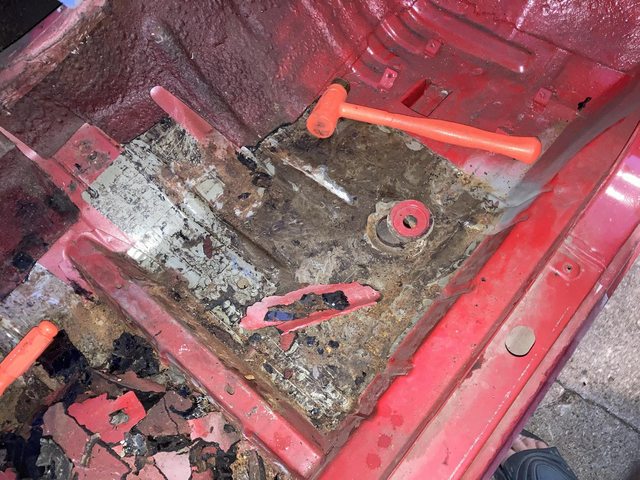
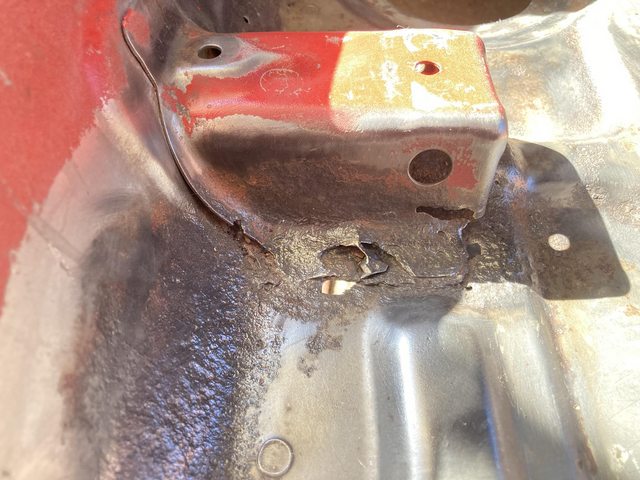
While cleaning up, I noted another area I need to apply some attention to:

This is the forward brace that the seat mounts to. No major calamity, I just need to get some rust convertor and paint on there before it gets nasty.
Have I mentioned just how much I hate rust?

Potato phone picture. No idea why it was out of focus. The wider spot toward the front of the car/lower end of the picture is a porcupine of wire I made trying to chase the metal burning through... Guess I should have cut back a little further initially. It was still a bit thin there, then I ground it thinner. It doesn't help that the metal I'm using as a patch is a gauge thicker than the actual car's sheet metal.
*Lots* of grinding dust...
Ground back underneath - you can see the blob I was talking about. Also rosette-welded where the spot welds were in the interim.

All galvanized up:

I'll do the remaining little rectangle later. It was almost dark by this point.
While cleaning up, I noted another area I need to apply some attention to:
This is the forward brace that the seat mounts to. No major calamity, I just need to get some rust convertor and paint on there before it gets nasty.
Have I mentioned just how much I hate rust?
Thread Starter
Joined: Feb 2004
Posts: 1,204
Likes: 101
From: Euless, TX
OK, where were we?
Saturday 5/28/22.
The expedition into the depths of the Workbench were successful! I found the top of it.

I need some space to work on a couple things, so the workbench got de-cluttered and generally cleaned. Mainly just packed up the plating mess, since I've got a new bin for that, and don't need it just this second, then cleaned up the mess that made all over the place. Also remounted my magnifying lamp into the workbench itself.
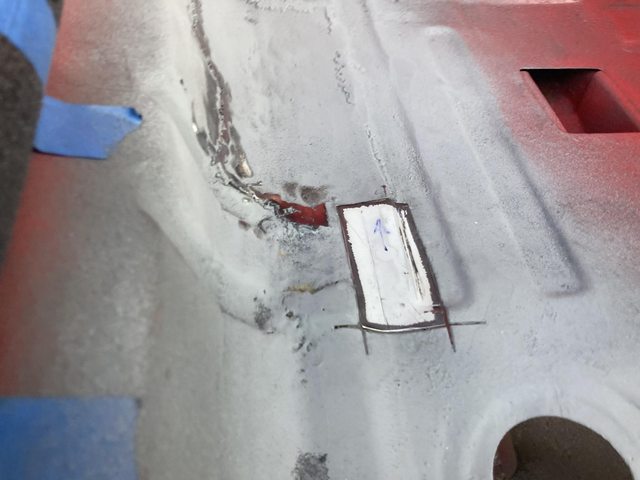
Now I can get to the remaining patch. Template, etc. This one's just a rectangle, so should be simple, right?
No.
It's anything but flat, and has part of a reinforcing rib in it...
Getting there:
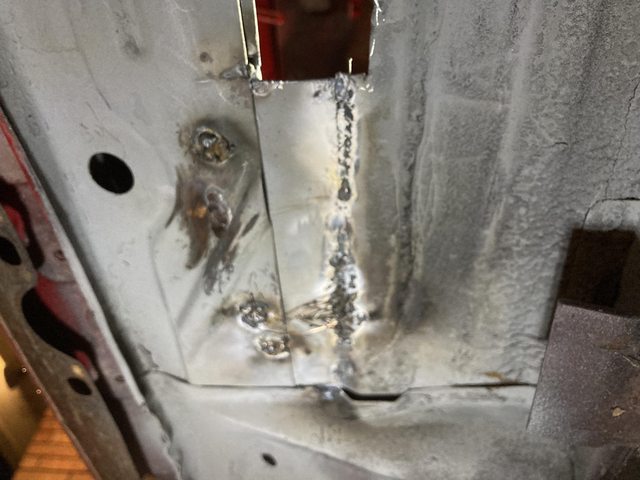
A little more careful trimming and tweaking and it looks pretty good:


Bead roller came through again on that rib.
Burned it:

Did a slightly better welding job this time around.
Ground back:

Found a few missed spots, so a few more tacks and more grinding,
(still not going for perfect. Obviously.)
Bottom:
Zinc spray:

Not bad!
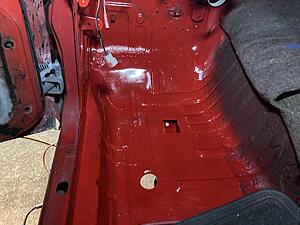
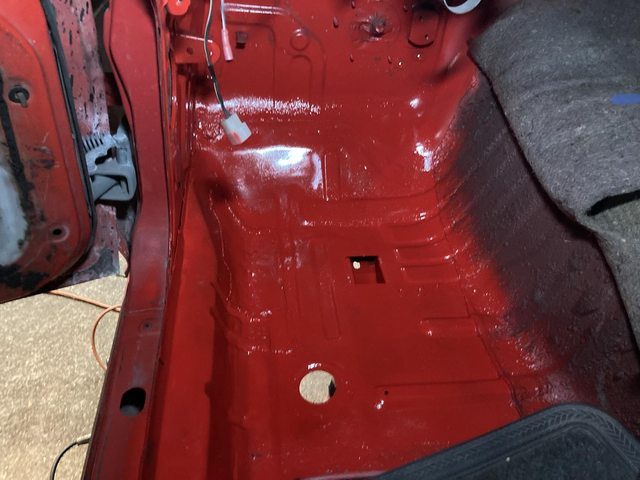
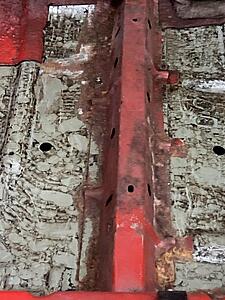
RED

Saturday 5/28/22.
The expedition into the depths of the Workbench were successful! I found the top of it.
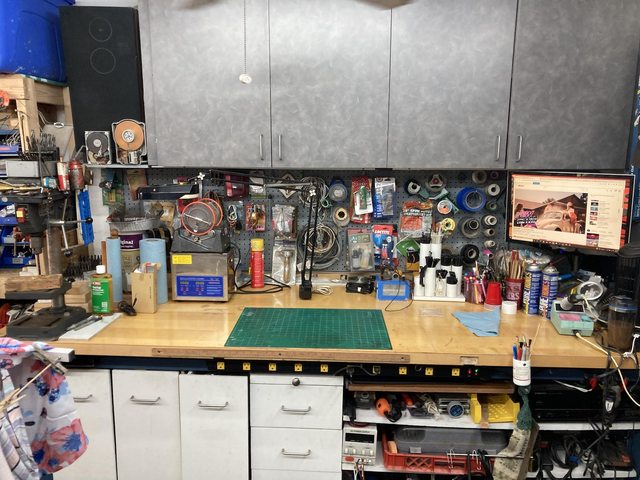
I need some space to work on a couple things, so the workbench got de-cluttered and generally cleaned. Mainly just packed up the plating mess, since I've got a new bin for that, and don't need it just this second, then cleaned up the mess that made all over the place. Also remounted my magnifying lamp into the workbench itself.
Now I can get to the remaining patch. Template, etc. This one's just a rectangle, so should be simple, right?
No.
It's anything but flat, and has part of a reinforcing rib in it...
Getting there:

A little more careful trimming and tweaking and it looks pretty good:
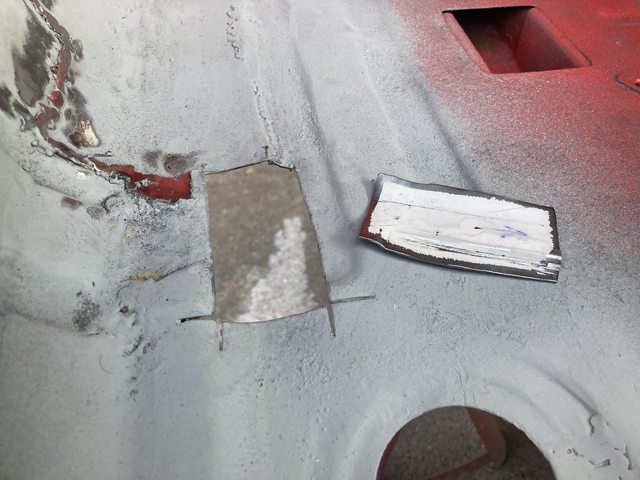
Bead roller came through again on that rib.
Burned it:
Did a slightly better welding job this time around.
Ground back:
Found a few missed spots, so a few more tacks and more grinding,
(still not going for perfect. Obviously.)
Bottom:

Zinc spray:
Not bad!
RED
Thread Starter
Joined: Feb 2004
Posts: 1,204
Likes: 101
From: Euless, TX
Sunday was a honey-do day with my mother-in-law, but Monday was Memorial Day holiday (If you served, thank you for your Service, and remember those who died to give us the opportunities we have in the US), so on the the rest of the driver's side floor!
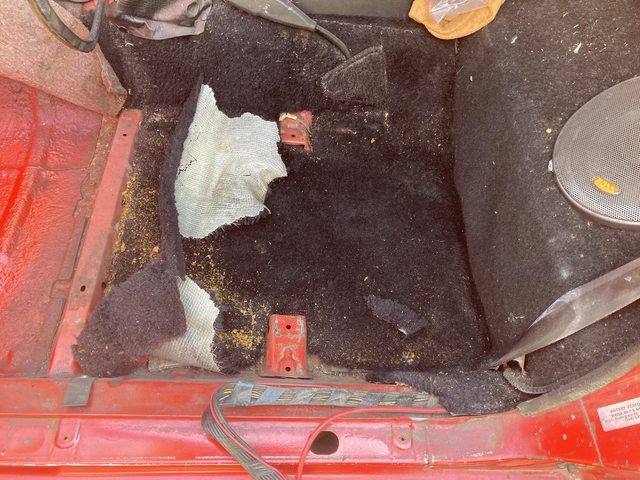
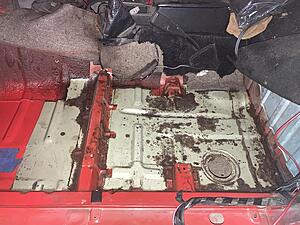
Seat out:

Lots of crumbling foam and junk.
Started vacuuming up that, but the carpet tore while handling it, so out it comes and into the bin.

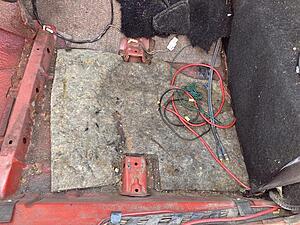
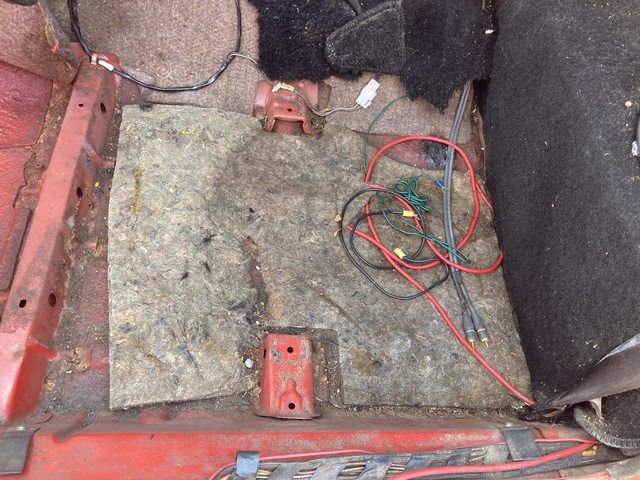
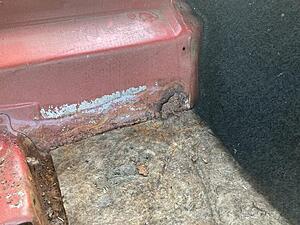
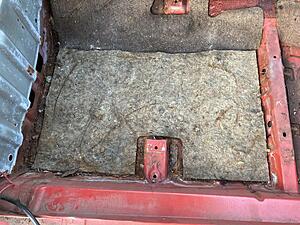
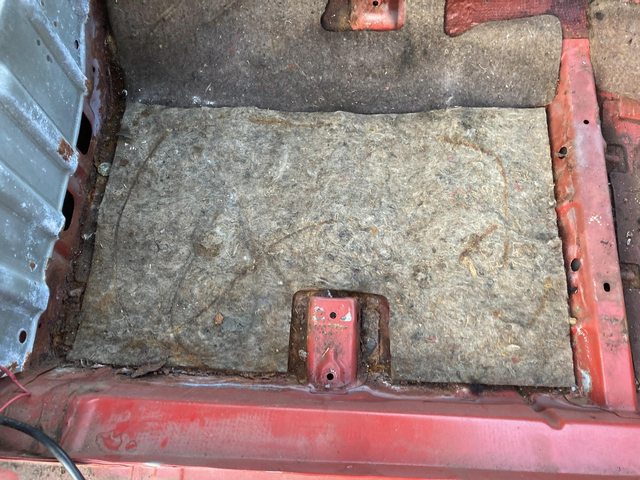
Sound deadener/water retainer out:
Initially doesn't look bad, but I'm concerned about those edges:
Rightfully so:

That's what I was bale to just pull out with bare fingers.
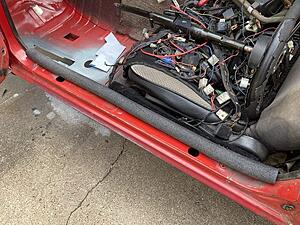
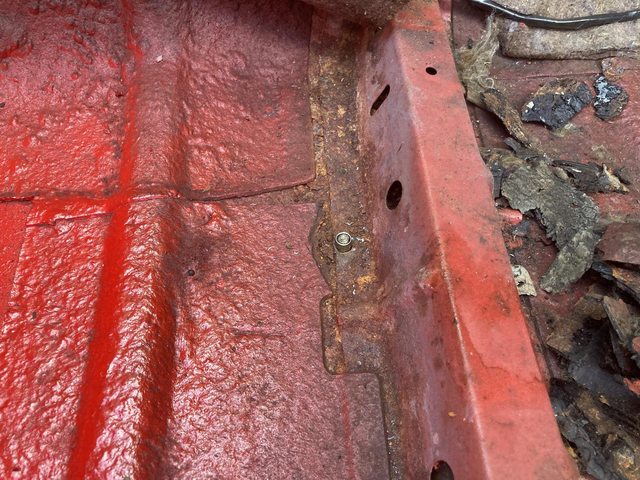
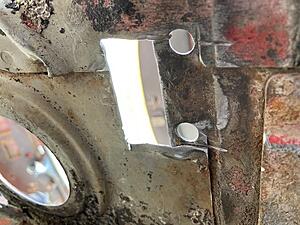
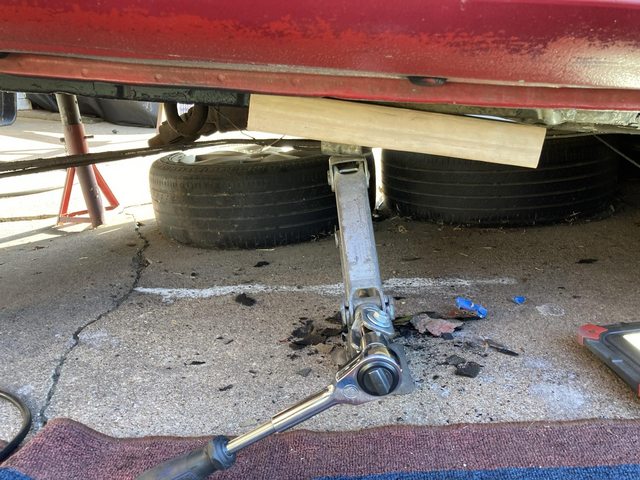
Short detour to install a set of threaded inserts into the floor and frame rail for the exhaust hanger.
This year didn't originally have a cat, so didn't have the hanger that goes here, but I've retrofitted a later exhaust (originally had a later-model engine when I got the car) so installed the hanger long ago with big *** sheet metal screws.
Worked OK, but a little janky.
Said hanger reinstalled:
That done, I seam sealed the overlap underneath

And then attacked it with bedliner.
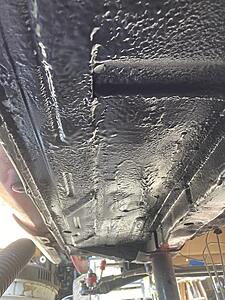
On further reflection, I think I'll be doing the bedliner on the inside too, to replace the asphalt sheet.
Seat out:

Lots of crumbling foam and junk.
Started vacuuming up that, but the carpet tore while handling it, so out it comes and into the bin.
Sound deadener/water retainer out:
Initially doesn't look bad, but I'm concerned about those edges:
Rightfully so:
That's what I was bale to just pull out with bare fingers.
Short detour to install a set of threaded inserts into the floor and frame rail for the exhaust hanger.
This year didn't originally have a cat, so didn't have the hanger that goes here, but I've retrofitted a later exhaust (originally had a later-model engine when I got the car) so installed the hanger long ago with big *** sheet metal screws.

Worked OK, but a little janky.
Said hanger reinstalled:

That done, I seam sealed the overlap underneath
And then attacked it with bedliner.

On further reflection, I think I'll be doing the bedliner on the inside too, to replace the asphalt sheet.
Thread Starter
Joined: Feb 2004
Posts: 1,204
Likes: 101
From: Euless, TX
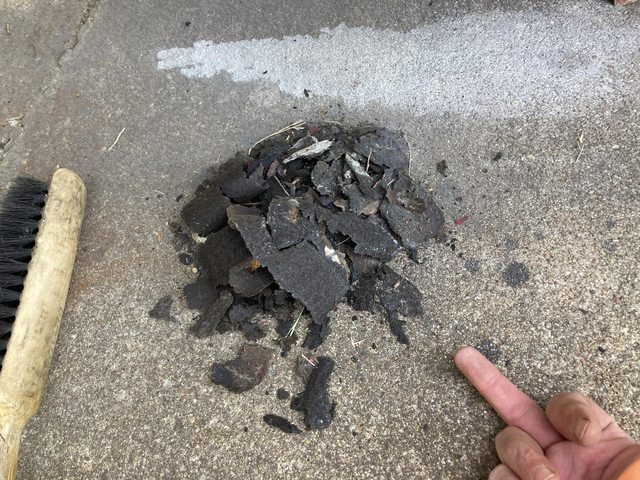
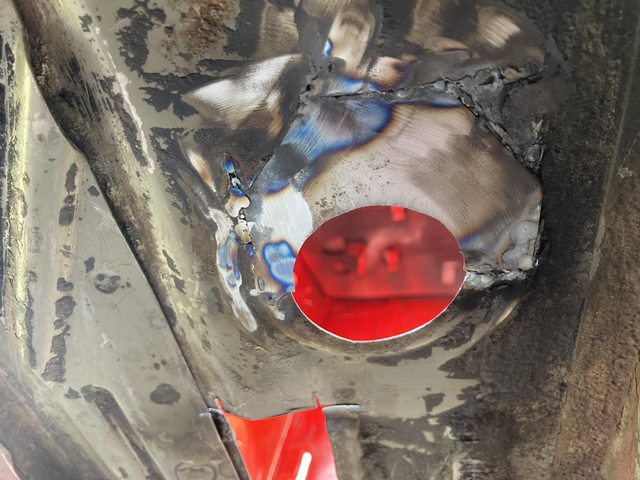
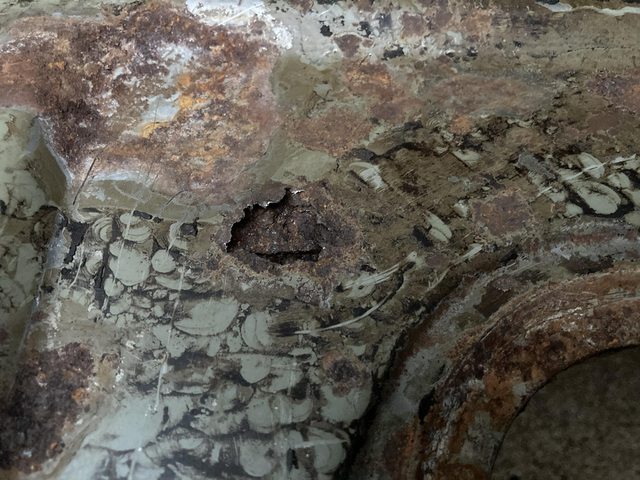
Getting after said asphalt sheet with a scraper and a hammer.
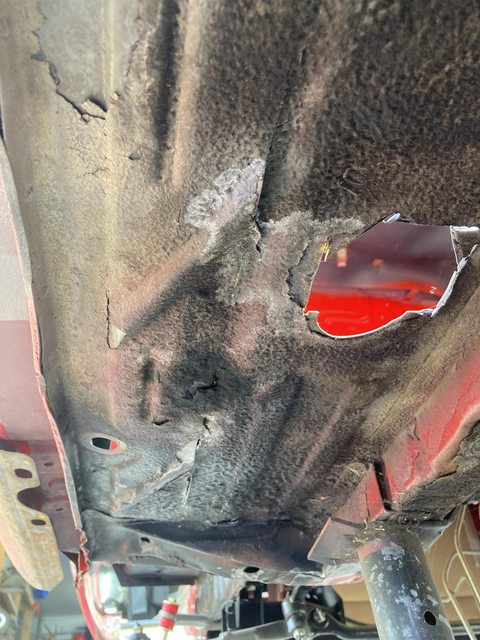
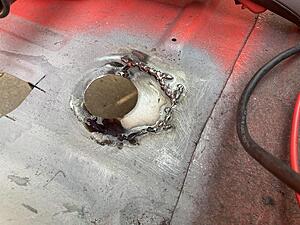
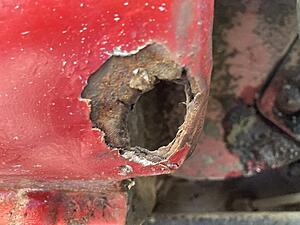
Surprise! that small hole was actually a big hole!
But wait, what's that above and to the left of the drain hole?
<sigh>
Well, OK. I can fix that. It's above where one side of the frame rail is spot-welded to the floor pan, so only partially "through".
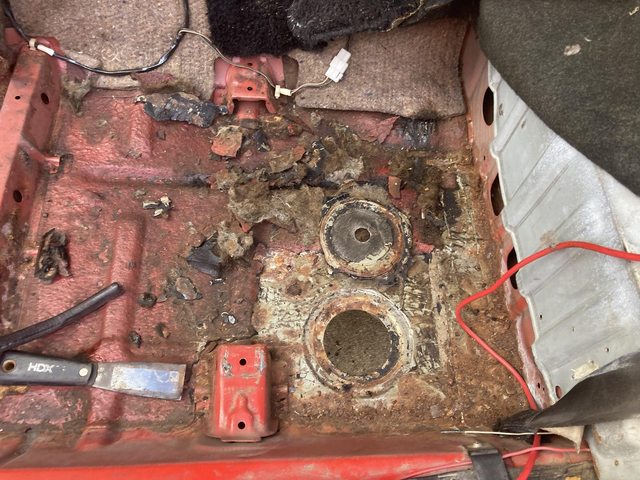
Now how about that bit on front of the seat?

(also not that this is where one of the threaded inserts ends up. I probably have the hanger too far forward compared to factory, and that's supposed to end up under the seat mounting crossmember.)
Turned out that area wasn't bad. Just some surface rust.
A big pile of asphalt:

All gone:
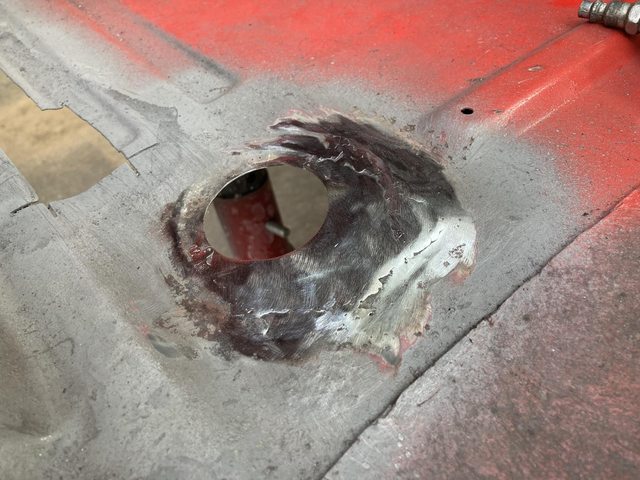
A better look at that rust hole:
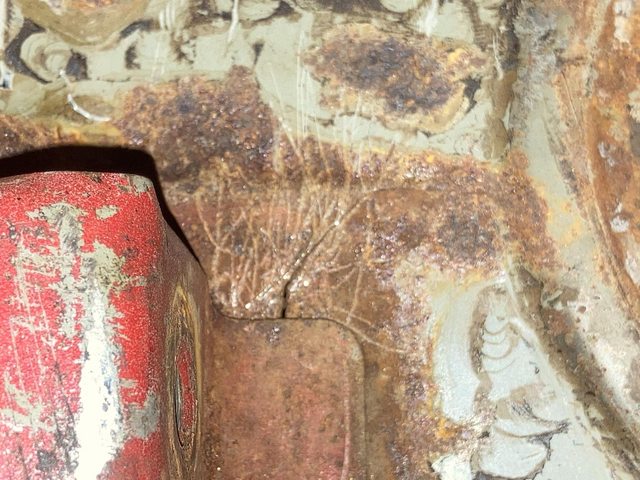
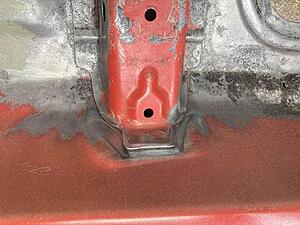
A crack where one of the rear seat mounts sits:

That'll need to be welded up.
Closer look at the from seat mounting crossmember area:
A bit of nastiness in the behind-the-seat area:
Guess I should have yanked the carpet years ago.
Ah, well.
After a bit of Goo Gone and mineral spirits to remove the remaining asphalt:
The factory primer held up pretty well, just, you know hard to fight water held against the floor with the carpet and padding.
I'll get after the rust next chance I have.
I can't wait to see the passenger side...
Surprise! that small hole was actually a big hole!
But wait, what's that above and to the left of the drain hole?

<sigh>
Well, OK. I can fix that. It's above where one side of the frame rail is spot-welded to the floor pan, so only partially "through".
Now how about that bit on front of the seat?
(also not that this is where one of the threaded inserts ends up. I probably have the hanger too far forward compared to factory, and that's supposed to end up under the seat mounting crossmember.)
Turned out that area wasn't bad. Just some surface rust.
A big pile of asphalt:
All gone:

A better look at that rust hole:
A crack where one of the rear seat mounts sits:
That'll need to be welded up.
Closer look at the from seat mounting crossmember area:
A bit of nastiness in the behind-the-seat area:


Guess I should have yanked the carpet years ago.
Ah, well.
After a bit of Goo Gone and mineral spirits to remove the remaining asphalt:

The factory primer held up pretty well, just, you know hard to fight water held against the floor with the carpet and padding.
I'll get after the rust next chance I have.
I can't wait to see the passenger side...
Thread Starter
Joined: Feb 2004
Posts: 1,204
Likes: 101
From: Euless, TX
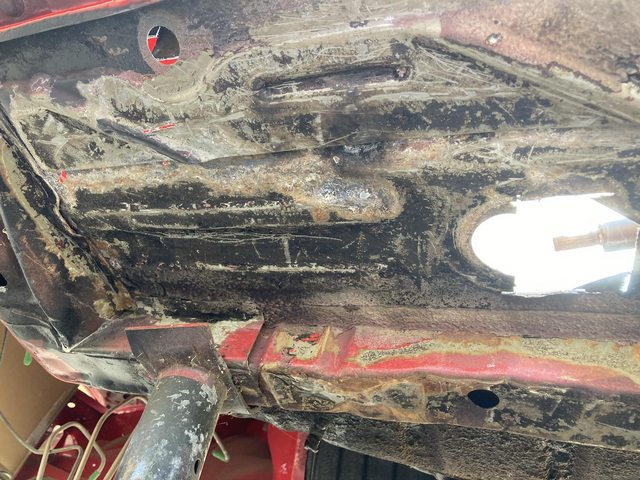
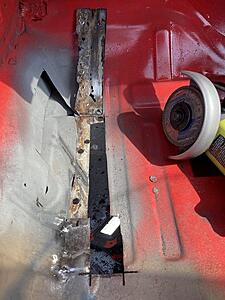
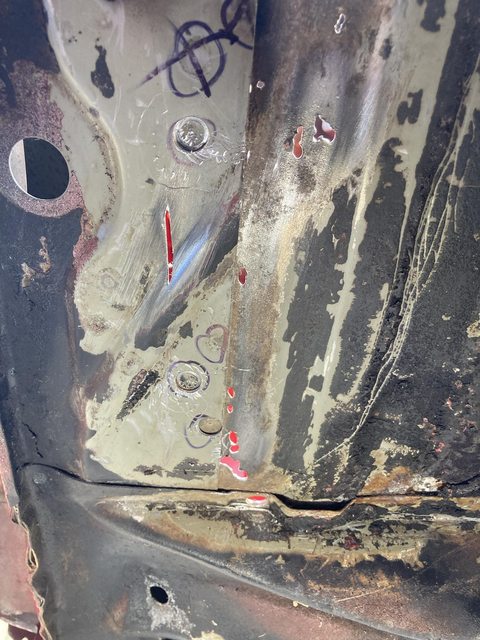
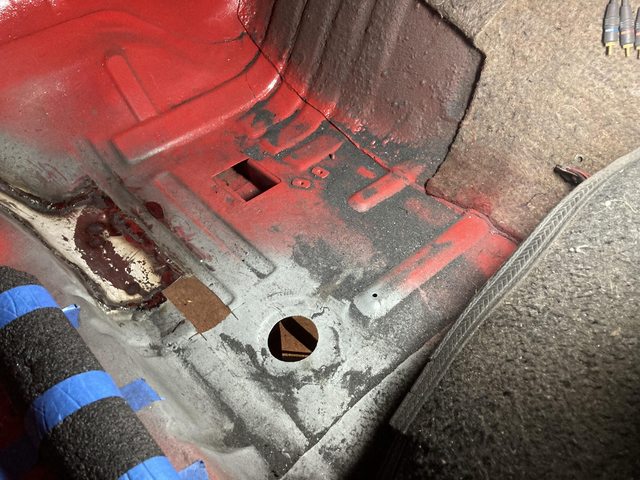
Sliced out the rust.
This bit was annoying, because not only was it an overlap with spot welds, but a triple layer:
Note the reinforcement at the top right of the photo. That's the rocker coming in to join the party.
Removed paint around the seat mount in preparation of seam welding it.
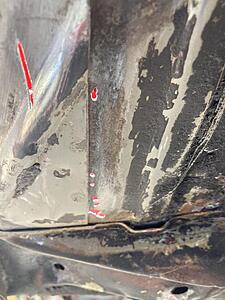
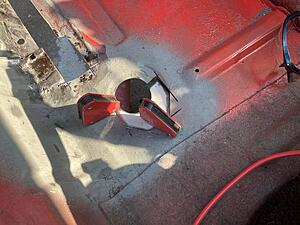
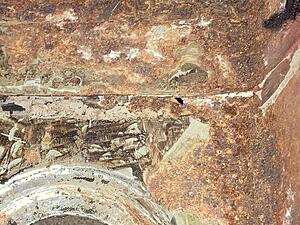
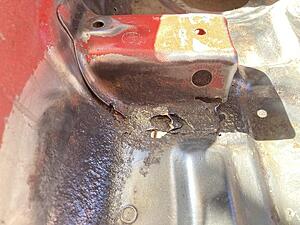
Noticed this in front of the rear wheel while crawling out from under the car:


Ah.
That's fiberglass on the inside.

I... think I might have "fixed" this years ago.
Doesn't look like I killed the rust effectively.
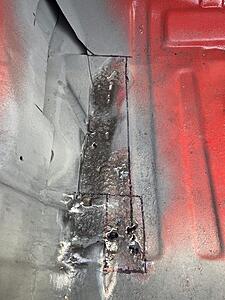
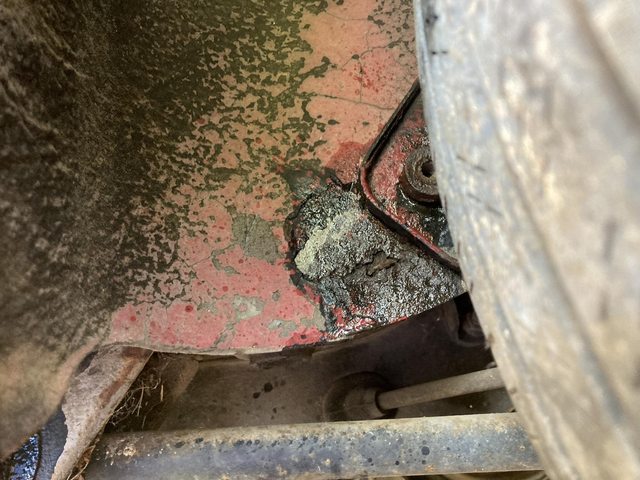
I also looked briefly at the rear control arm mounting location, and I'm not happy about it.
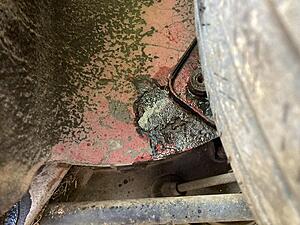
(that's after popping off a chunk of undercoating and splashing some phosphate on it.)
This is a common area for first gen RX-7s to rust out. It's got that reinforcing plate that likes to hold water and grime, and the storage bin area on the inside of it that also likes to hold water in the seam between the floor and wall. I'll be investigating that more thoroughly as I move rearward in the interior.
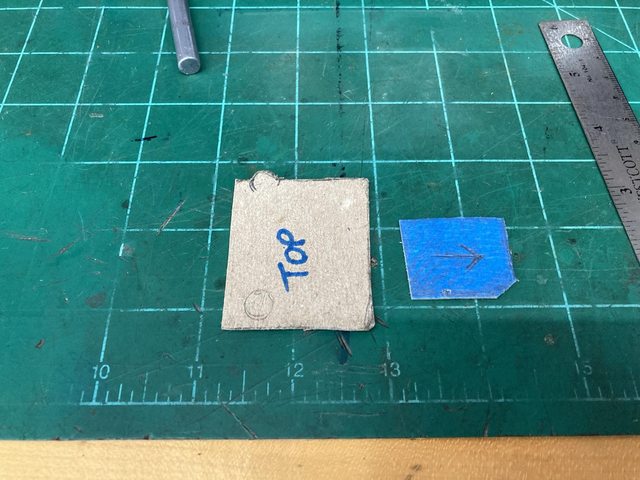
Templates.
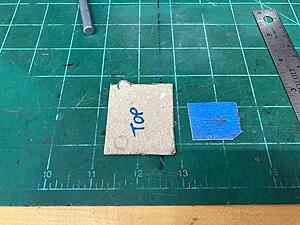
Trying out a new template material recommended by Puddin's Fab Shop on YT:
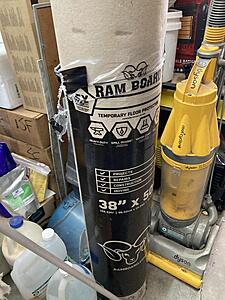
$30 for that roll, and of course it's useful for it's original purpose of covering floors during construction - which I will be doing.
Pretty easy to work with. Somewhere between cardboard and craft paper.
I forgot to take a picture when I gathered it up, but this is all the change I found in the well where the handbrake mounts, after washing it and running it through the jewelry polisher just for the hell of it. It was all filthy - you can see a couple of the pennies still didn't clean up after 30 minutes in the tumbler:
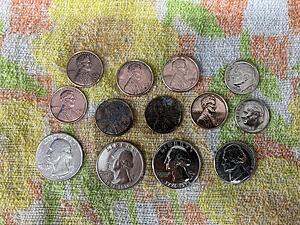
Making money back!
A mix of '70s and '90s, with a loan 1988 penny. Two of the quarters are bicentennials!
This bit was annoying, because not only was it an overlap with spot welds, but a triple layer:

Note the reinforcement at the top right of the photo. That's the rocker coming in to join the party.
Removed paint around the seat mount in preparation of seam welding it.
Noticed this in front of the rear wheel while crawling out from under the car:
Ah.
That's fiberglass on the inside.
I... think I might have "fixed" this years ago.

Doesn't look like I killed the rust effectively.
I also looked briefly at the rear control arm mounting location, and I'm not happy about it.
(that's after popping off a chunk of undercoating and splashing some phosphate on it.)
This is a common area for first gen RX-7s to rust out. It's got that reinforcing plate that likes to hold water and grime, and the storage bin area on the inside of it that also likes to hold water in the seam between the floor and wall. I'll be investigating that more thoroughly as I move rearward in the interior.
Templates.
Trying out a new template material recommended by Puddin's Fab Shop on YT:

$30 for that roll, and of course it's useful for it's original purpose of covering floors during construction - which I will be doing.
Pretty easy to work with. Somewhere between cardboard and craft paper.
I forgot to take a picture when I gathered it up, but this is all the change I found in the well where the handbrake mounts, after washing it and running it through the jewelry polisher just for the hell of it. It was all filthy - you can see a couple of the pennies still didn't clean up after 30 minutes in the tumbler:

Making money back!
A mix of '70s and '90s, with a loan 1988 penny. Two of the quarters are bicentennials!
Thread Starter
Joined: Feb 2004
Posts: 1,204
Likes: 101
From: Euless, TX
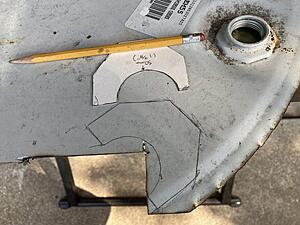
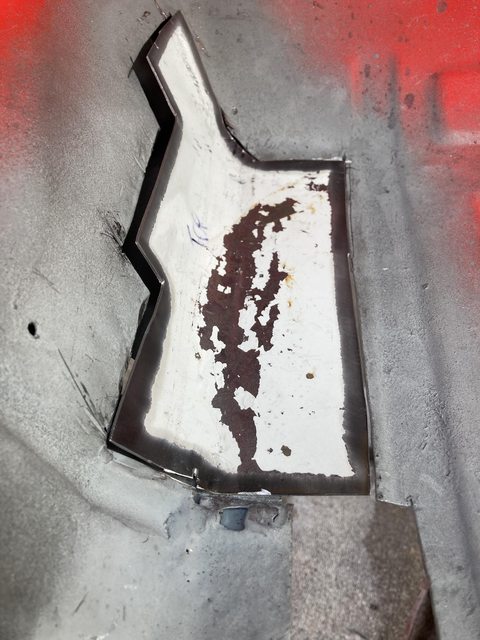
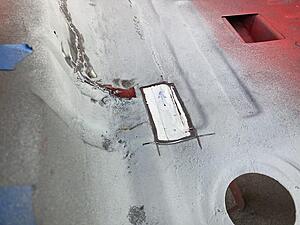
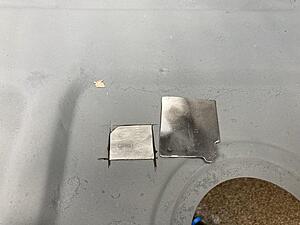
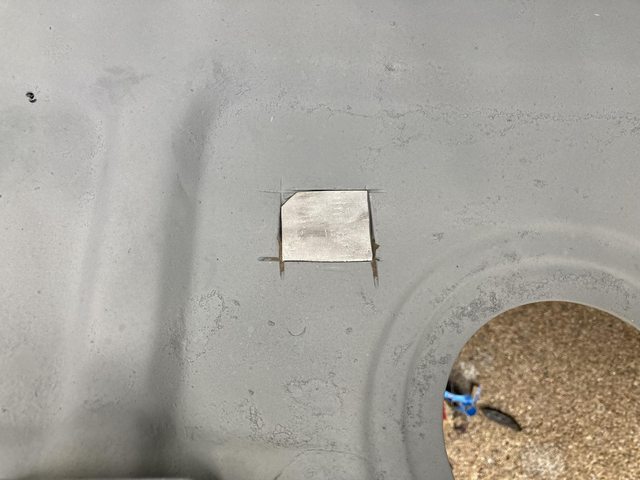
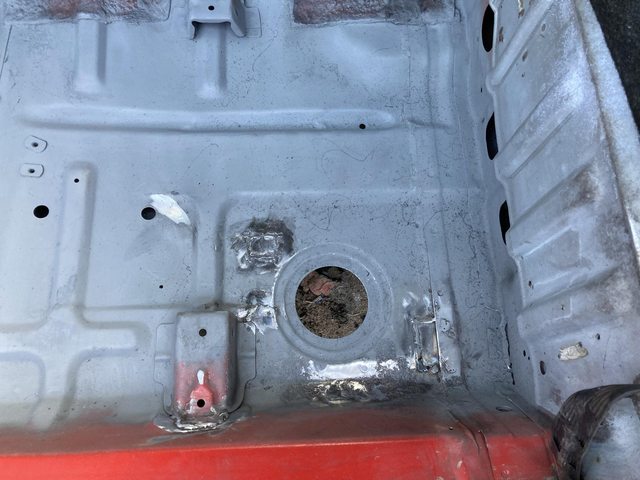
Small patch fitted:
Larger patch fitted:

(got a little too aggressive on the nub that fills the spot-weld cutout on the one side. Gaps will be filled...)
(No, I'm not going to do anything about that rust at the base of the storage bin panel, other that wire brushing it and applying phosphate.)
The two patches side-by-side:
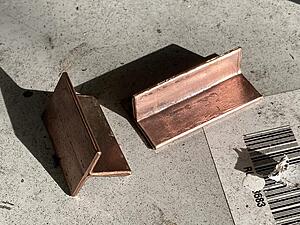
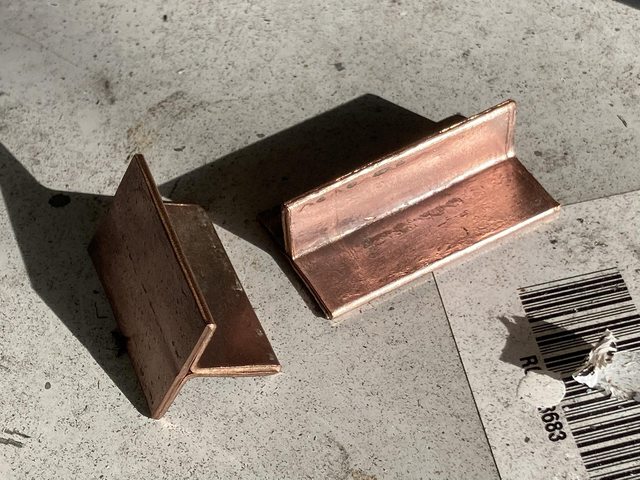
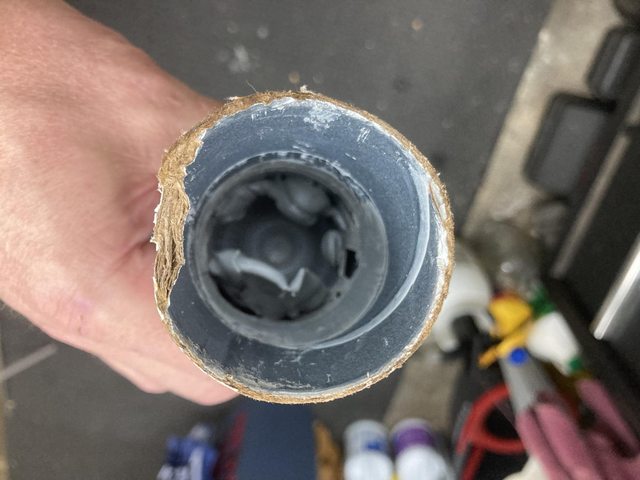
I finally made some copper backing plates out of chunks of used copper tubing:
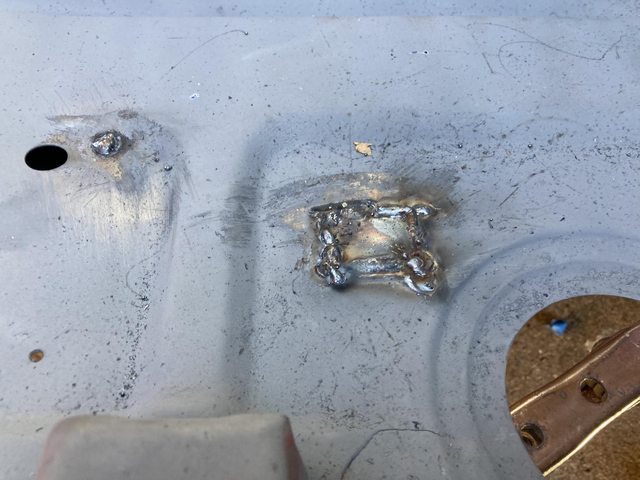
Because I blew out the corner on the small patch:
It was going pretty well up until then. The tight gaps helped immensely. Just got a little too aggressive filling the slit from cutting out the rust.
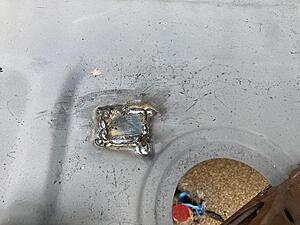
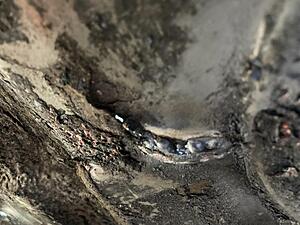
The backing plate worked great, actually:
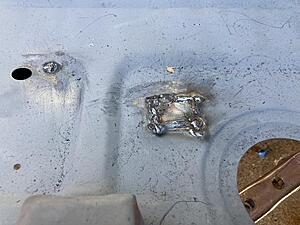
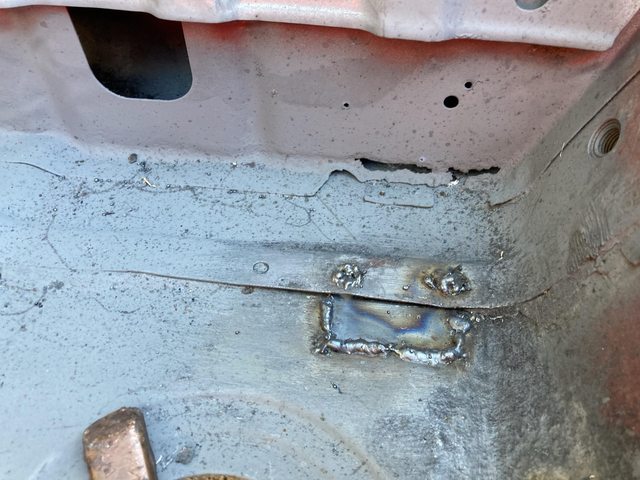
Other piece went in pretty well, too:

Then I tried to weld up the small holes on the side, and made a mess.
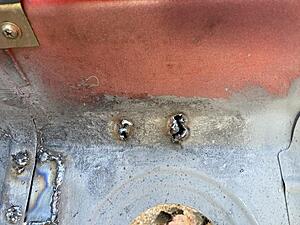
I *really* didn't want to cut another patch, so I just methodically filled it in. It was ugly, but functional.
I tried using a jack to get the floor and seat mount back to where they should be before welding, but it just... jacked the car up, since there's no engine.
I tried helping by applying a 260-pound downforce from the top (AKA, my butt), but eventually just had to smack it from below with a deadblow a bit.
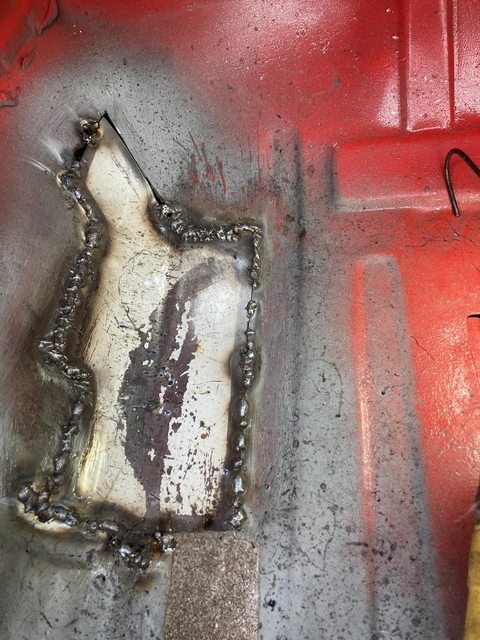
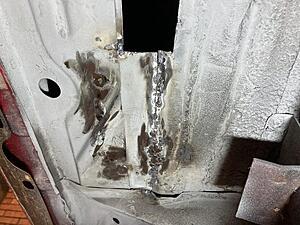
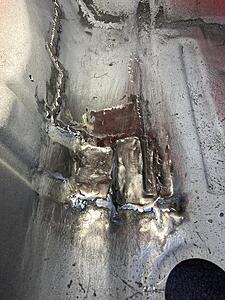
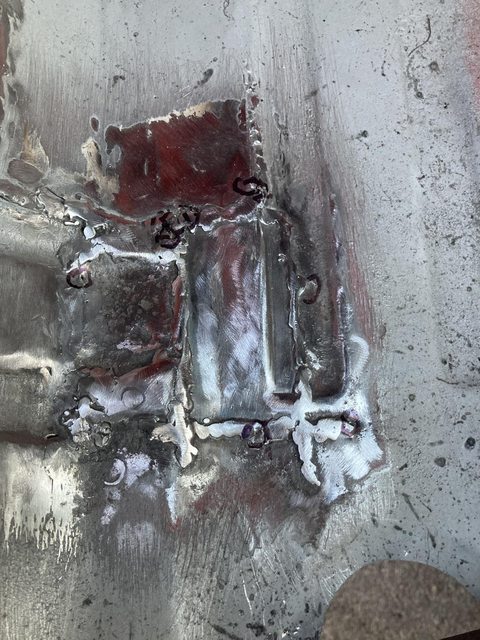
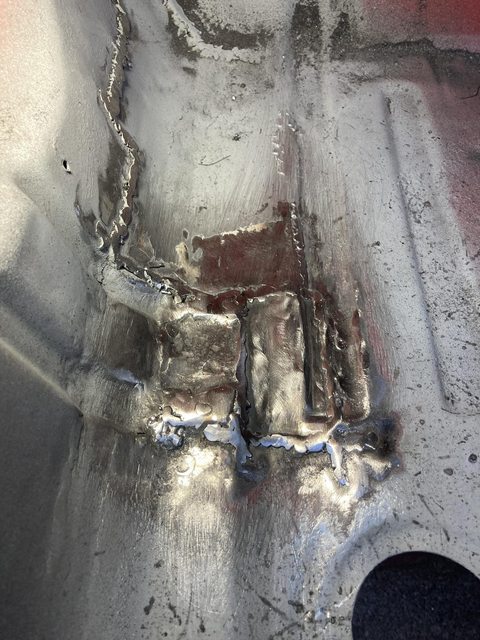
All welded up and ground back:
A fresh flap-wheel on the grinder did wonders. I hadn't realized how worn out the one I was using was. Also was a finer grit to start with, I think.
Larger patch fitted:

(got a little too aggressive on the nub that fills the spot-weld cutout on the one side. Gaps will be filled...)
(No, I'm not going to do anything about that rust at the base of the storage bin panel, other that wire brushing it and applying phosphate.)
The two patches side-by-side:

I finally made some copper backing plates out of chunks of used copper tubing:
Because I blew out the corner on the small patch:

It was going pretty well up until then. The tight gaps helped immensely. Just got a little too aggressive filling the slit from cutting out the rust.
The backing plate worked great, actually:
Other piece went in pretty well, too:
Then I tried to weld up the small holes on the side, and made a mess.
I *really* didn't want to cut another patch, so I just methodically filled it in. It was ugly, but functional.
I tried using a jack to get the floor and seat mount back to where they should be before welding, but it just... jacked the car up, since there's no engine.
I tried helping by applying a 260-pound downforce from the top (AKA, my butt), but eventually just had to smack it from below with a deadblow a bit.
All welded up and ground back:


A fresh flap-wheel on the grinder did wonders. I hadn't realized how worn out the one I was using was. Also was a finer grit to start with, I think.
Thread Starter
Joined: Feb 2004
Posts: 1,204
Likes: 101
From: Euless, TX
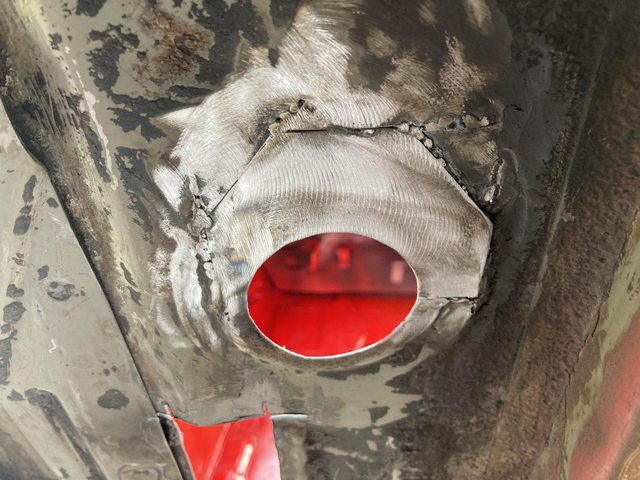
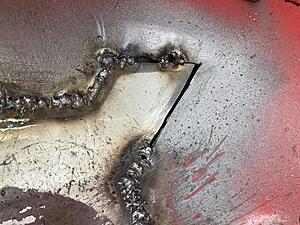
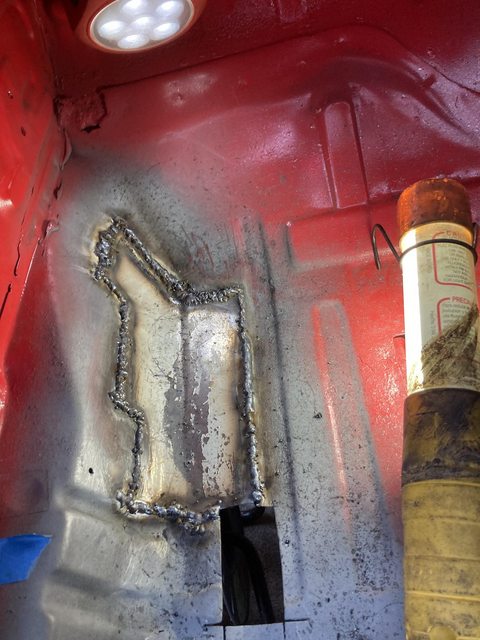
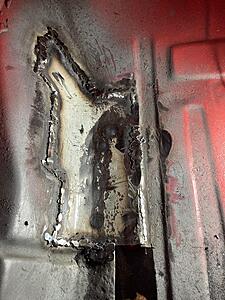
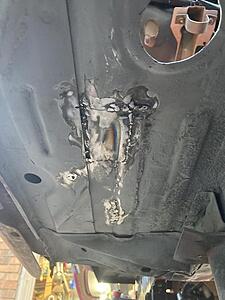
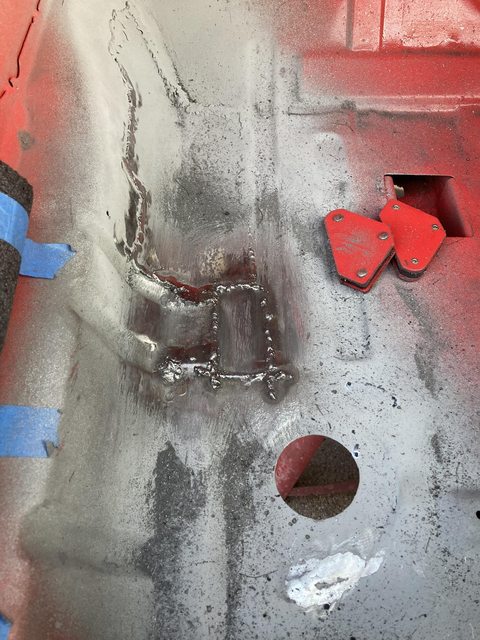
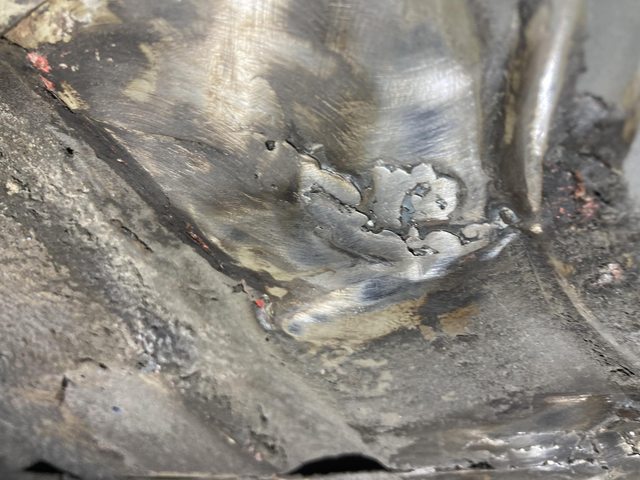
It took a couple iterations of grind - find hole - reweld on that side bit, but got it all nice enough eventually.
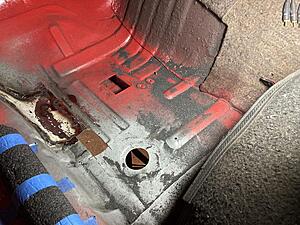
The crack by the seat mount took a bit more work. I discovered when I looked underneath that it went further - under the seat mount - that I realized from the top:
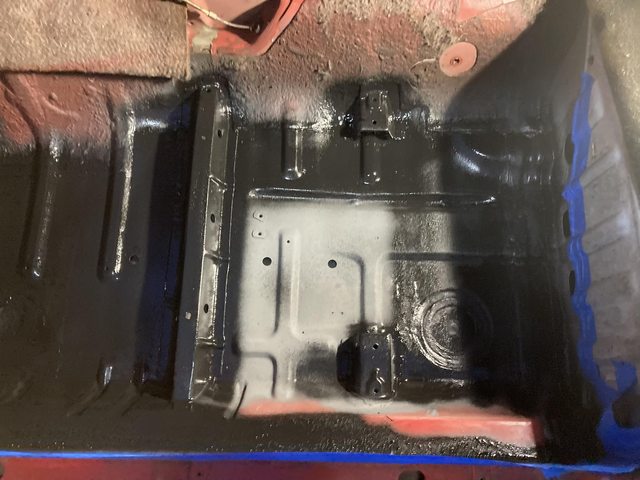
That done, it meant I could mark off an item on the list:

(also marked off "new radiator" because I didn't previously.)
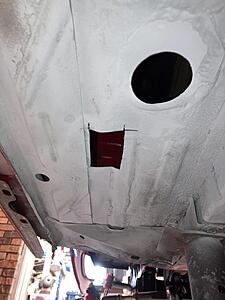
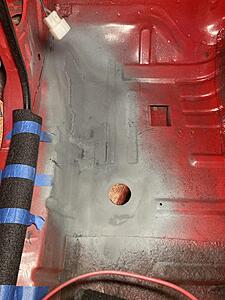
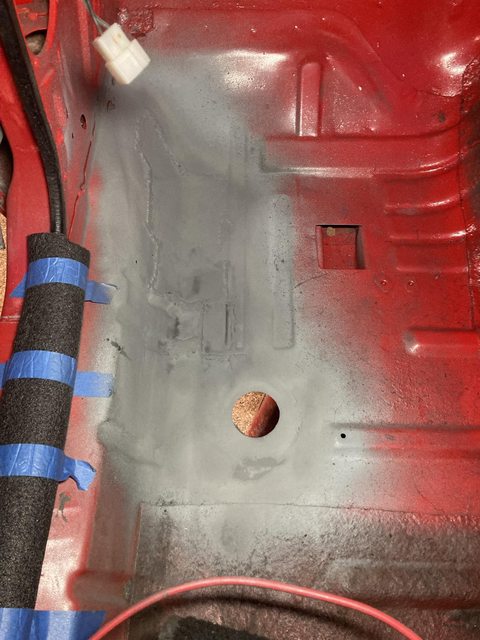
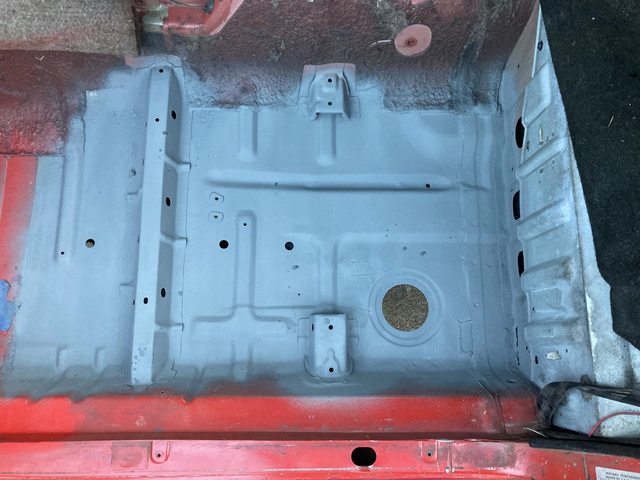
All zinc coated:
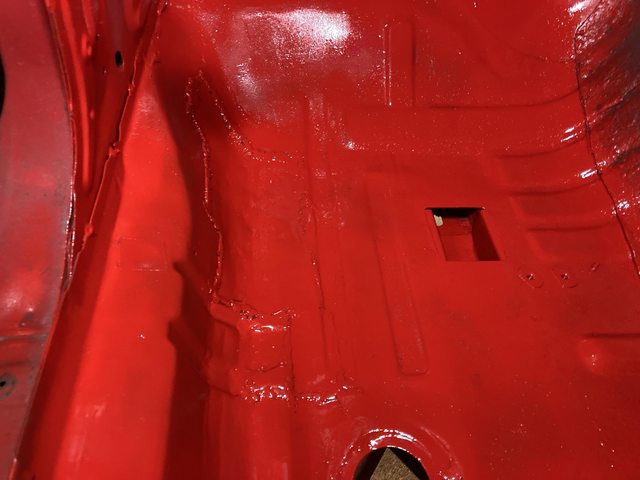
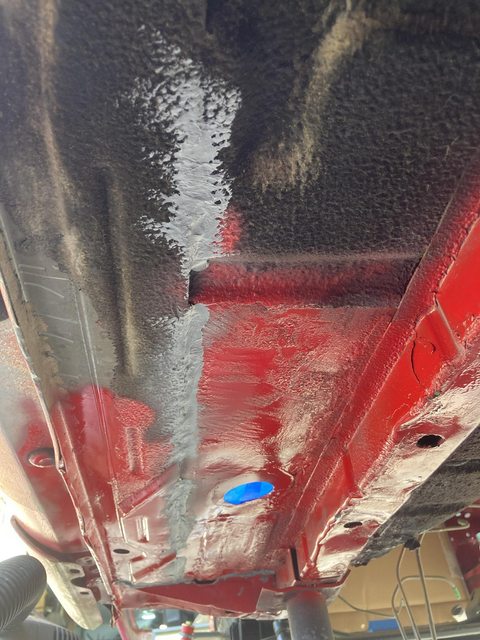
Wednesday I decided on a thing, and scuffed up the red paint, and put down seam sealer.
BTW, I hate 3M Dynatron seam sealer in the tube.
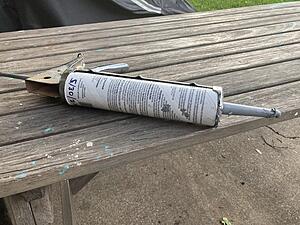
This tube may have been on the shelf too long - it was almost too stiff to use when I used it previously (5/30/22 as noted on the tube) and was almost impossible to get out now, not even two weeks later. I was forcing it our and applying by gloved finger, until it literally popped the seam on the cap and squirted out a *lovely* ribbon of sealer.

It was also making a mess inside:
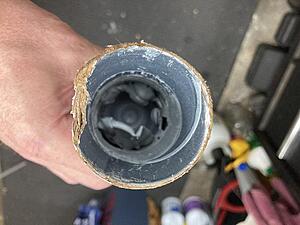
It really did not want to come out of the spout. This is after running a long screw down the spout to clear it even. Not sure where the problem is, but I had to throw out a half-full $17 tube. I stored it between uses capped with a silicone tube cap and in a sealed gallon Ziploc bag.
I ordered a can of brushable sealer instead for future use. Perhaps that will have better shelf life.
Moving on, sealer applied, and a bit of taping:
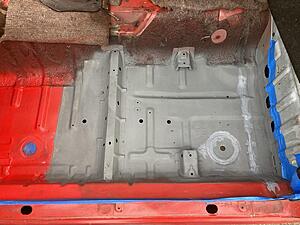
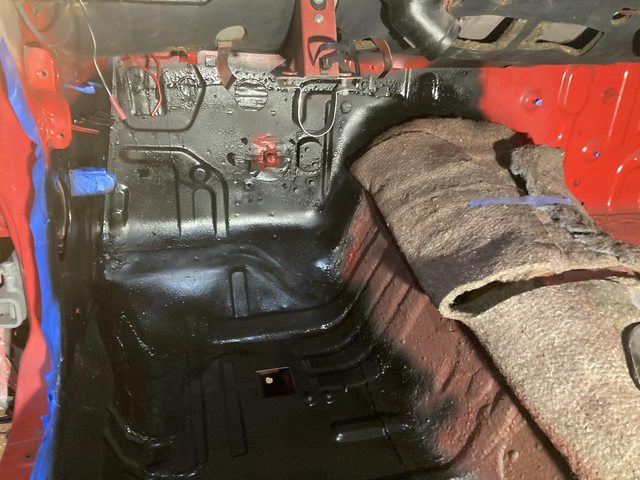
Boom! Spray bedliner:

....which promptly ran out before I was finished.

I just made the executive decision to buy the Herculiner roll/brush bedliner kit. $95 at O'Reilly's, in stock, and will do an entire 6' bed, which should be good for most of my interior and some of the underside (should I not use it on the underside? I feel like the actual undercoat is not effective, particularly.)
I'm only going to be using the bedliner on the lower floorpan - the original stuff on the trans tunnel is intact, and I'm not worried about it trapping water due to the location and angles involved.
I'll wait until can get a look at the passenger side floor before I roll out the bedliner, though, so I can do it all in one shot.
The crack by the seat mount took a bit more work. I discovered when I looked underneath that it went further - under the seat mount - that I realized from the top:


That done, it meant I could mark off an item on the list:
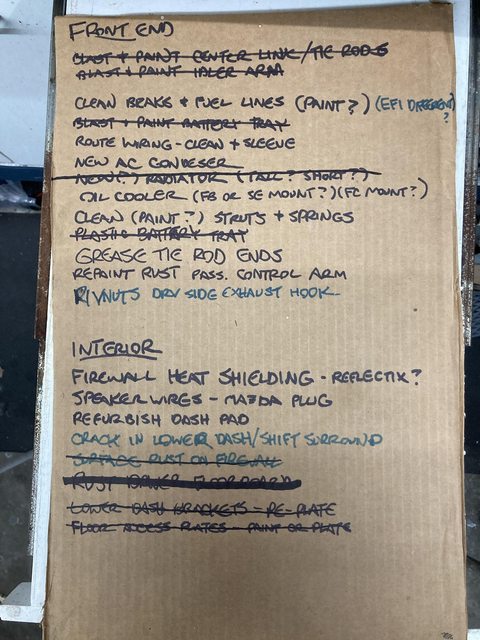
(also marked off "new radiator" because I didn't previously.)
All zinc coated:

Wednesday I decided on a thing, and scuffed up the red paint, and put down seam sealer.
BTW, I hate 3M Dynatron seam sealer in the tube.
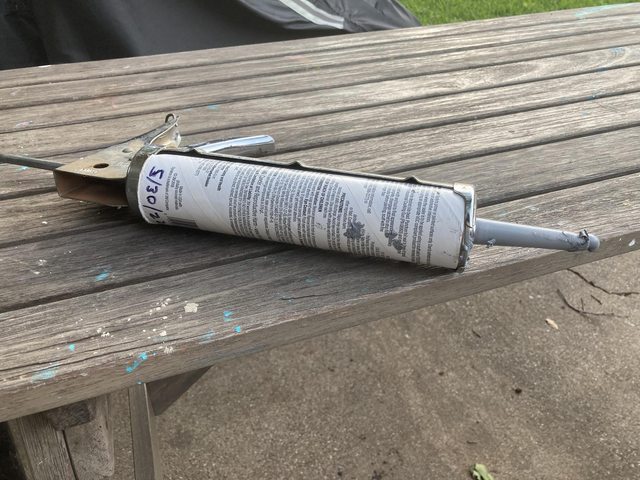
This tube may have been on the shelf too long - it was almost too stiff to use when I used it previously (5/30/22 as noted on the tube) and was almost impossible to get out now, not even two weeks later. I was forcing it our and applying by gloved finger, until it literally popped the seam on the cap and squirted out a *lovely* ribbon of sealer.

It was also making a mess inside:
It really did not want to come out of the spout. This is after running a long screw down the spout to clear it even. Not sure where the problem is, but I had to throw out a half-full $17 tube. I stored it between uses capped with a silicone tube cap and in a sealed gallon Ziploc bag.
I ordered a can of brushable sealer instead for future use. Perhaps that will have better shelf life.
Moving on, sealer applied, and a bit of taping:

Boom! Spray bedliner:
....which promptly ran out before I was finished.
I just made the executive decision to buy the Herculiner roll/brush bedliner kit. $95 at O'Reilly's, in stock, and will do an entire 6' bed, which should be good for most of my interior and some of the underside (should I not use it on the underside? I feel like the actual undercoat is not effective, particularly.)
I'm only going to be using the bedliner on the lower floorpan - the original stuff on the trans tunnel is intact, and I'm not worried about it trapping water due to the location and angles involved.
I'll wait until can get a look at the passenger side floor before I roll out the bedliner, though, so I can do it all in one shot.
Thread Starter
Joined: Feb 2004
Posts: 1,204
Likes: 101
From: Euless, TX
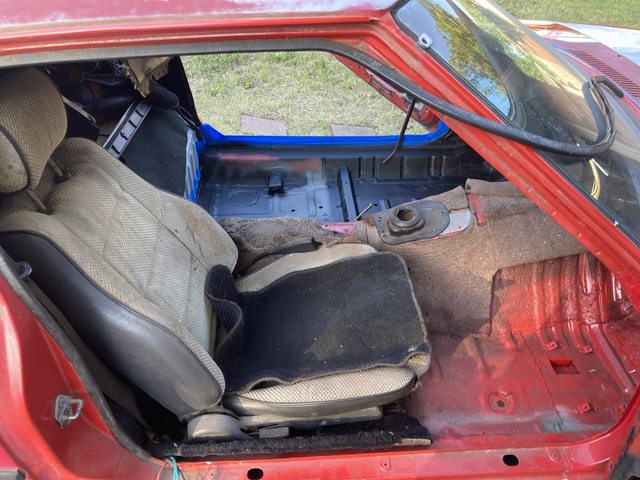
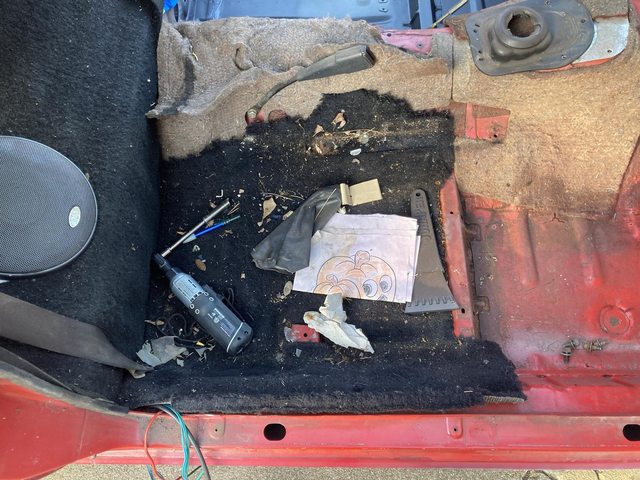
Back on the thing Saturday, this time the passenger side, with trepidation.
First, I had to remove this:
from here:

then remove that

...how long have those coloring sheets been under there? The car was parked in 2010, but my daughter is 21 this year. Oh, right, she would have been... 9. Also, that's where that scraper went. Only need the things like 5 days a year on alternating years, but whwen you need one...
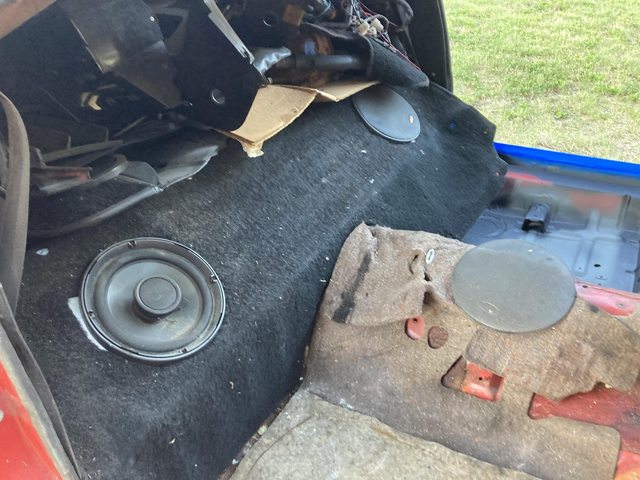
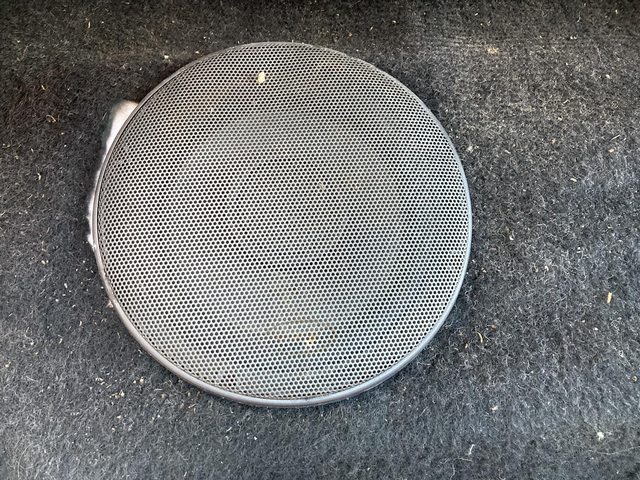
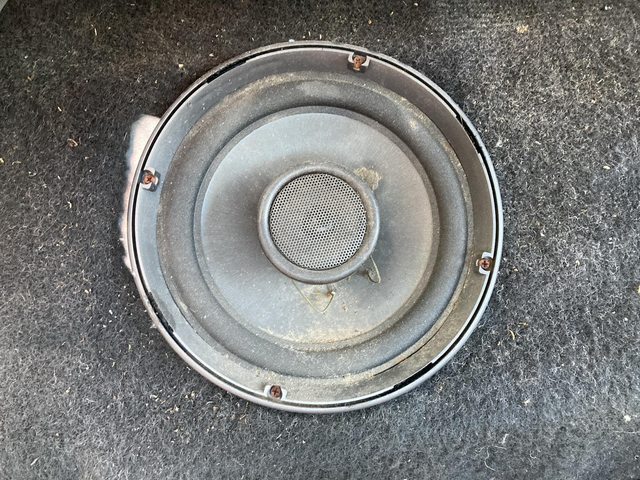
Decided to pull the rear speakers to get the wiring out of the way:
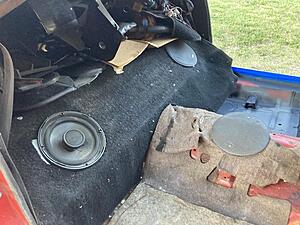
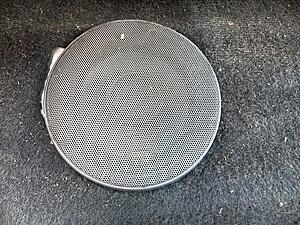

Boss 8" 2-ways. Adequate, and they still appear to be intact. I'll try them out later and see if they disintegrate immediately.
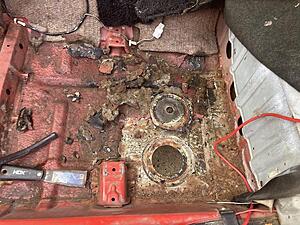
So. On to the actual objective. First sight on removing the carpet.
...Fffffff.
FFFFFFFFFFFFF...
First, I had to remove this:
from here:
then remove that
...how long have those coloring sheets been under there? The car was parked in 2010, but my daughter is 21 this year. Oh, right, she would have been... 9. Also, that's where that scraper went. Only need the things like 5 days a year on alternating years, but whwen you need one...
Decided to pull the rear speakers to get the wiring out of the way:
Boss 8" 2-ways. Adequate, and they still appear to be intact. I'll try them out later and see if they disintegrate immediately.
So. On to the actual objective. First sight on removing the carpet.

...Fffffff.
FFFFFFFFFFFFF...
Thread Starter
Joined: Feb 2004
Posts: 1,204
Likes: 101
From: Euless, TX
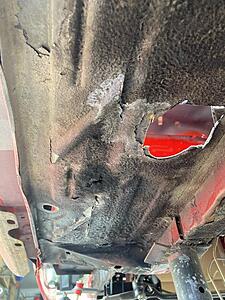
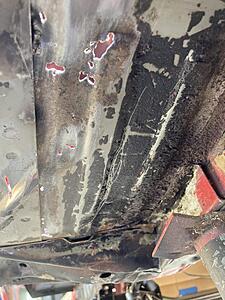
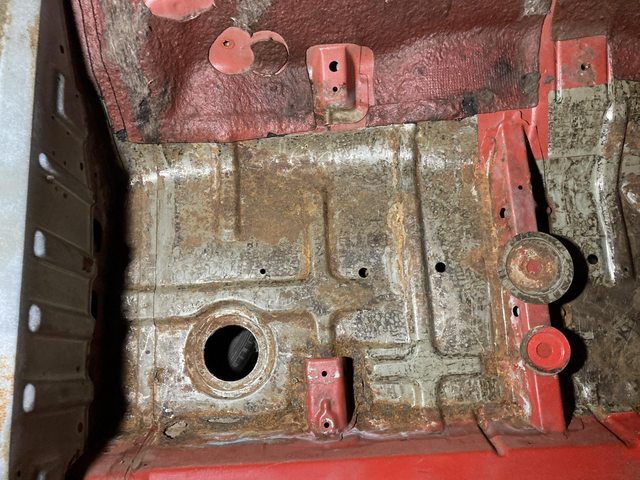
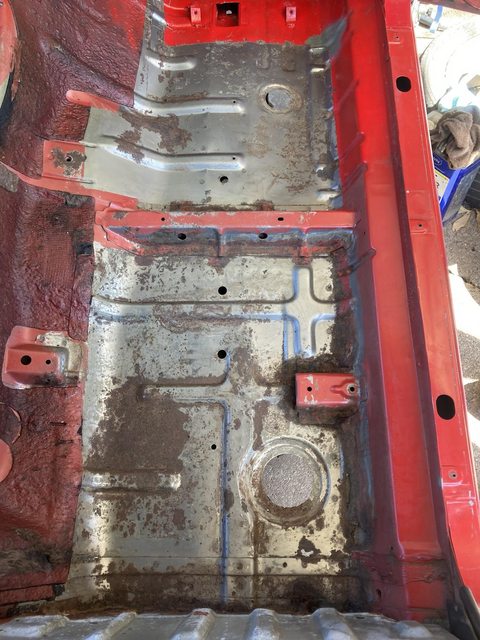
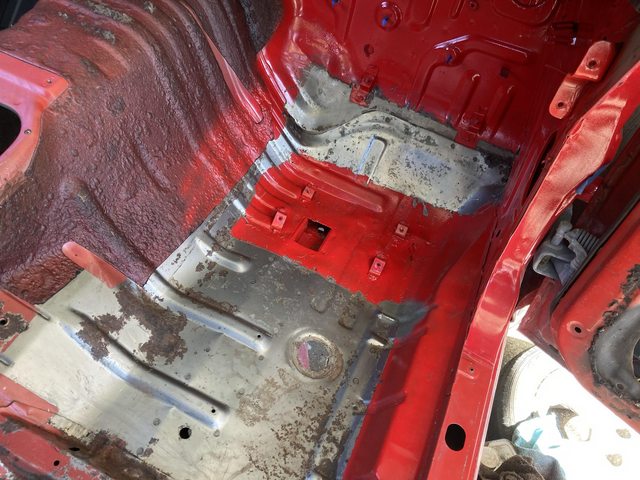
Removing the asphalt (and as you can see, the insulation from the trans tunnel as well.)

Including the front bit that I previously left alone:


F.

Meh.
F.
(do you see it?)

F!
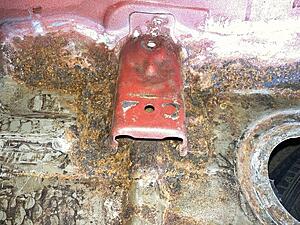
One last shot for Saturday:
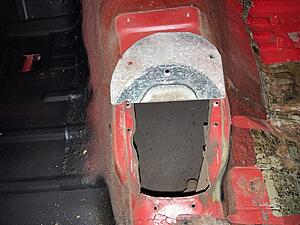
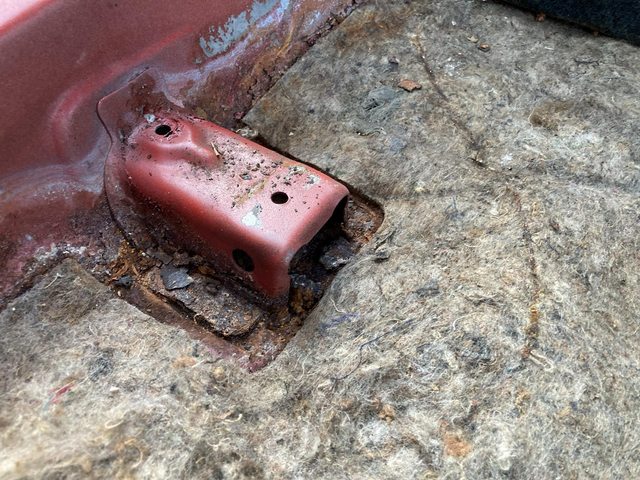
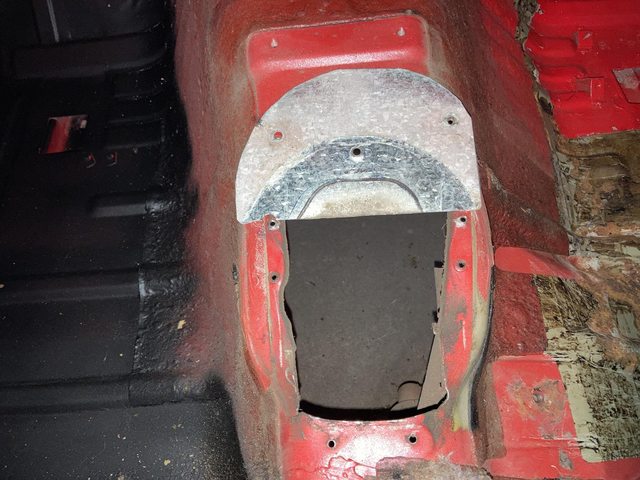
This is a modification to use a later transmission in an early car. For those that don't know, series 1 RX-7s use a direct-shifted transmission, which put the shifter rather far forward, with a bend in the shifter for clearance. The Series 2 and later transmissions had a remote rail shifter that allowed for a shorter straight lever, further back. I had to cut the hole back, and add a plate to cover the difference at the front. This old on is light gauge tin - I'll be replacing that with a heavier piece made from the same material I'm using for patching (AKA a 50 gallon drum top.)
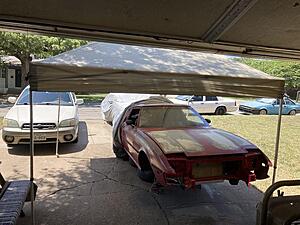
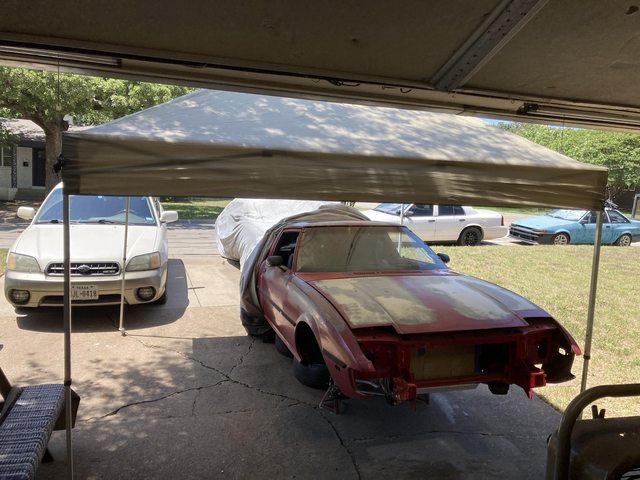
Sunday morning, the first order of business was shade:
Because:
Including the front bit that I previously left alone:

F.
Meh.

F.
(do you see it?)
F!
One last shot for Saturday:
This is a modification to use a later transmission in an early car. For those that don't know, series 1 RX-7s use a direct-shifted transmission, which put the shifter rather far forward, with a bend in the shifter for clearance. The Series 2 and later transmissions had a remote rail shifter that allowed for a shorter straight lever, further back. I had to cut the hole back, and add a plate to cover the difference at the front. This old on is light gauge tin - I'll be replacing that with a heavier piece made from the same material I'm using for patching (AKA a 50 gallon drum top.)
Sunday morning, the first order of business was shade:
Because:
Thread Starter
Joined: Feb 2004
Posts: 1,204
Likes: 101
From: Euless, TX
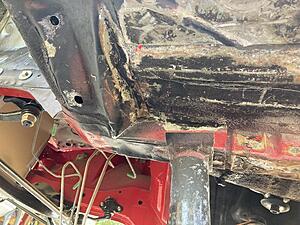
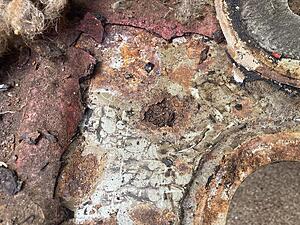
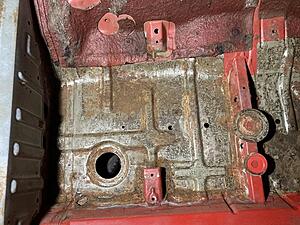
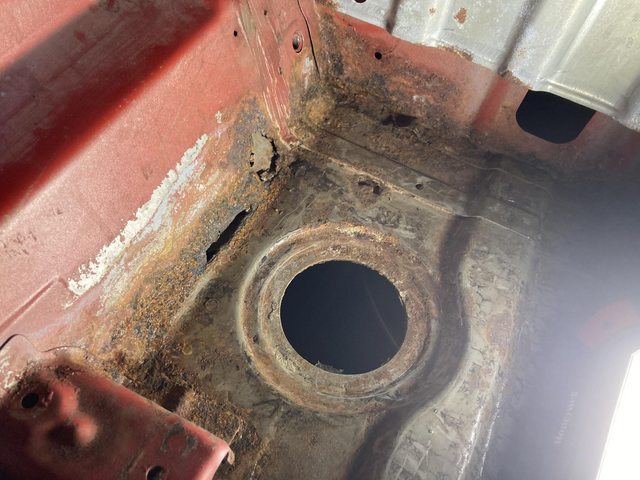
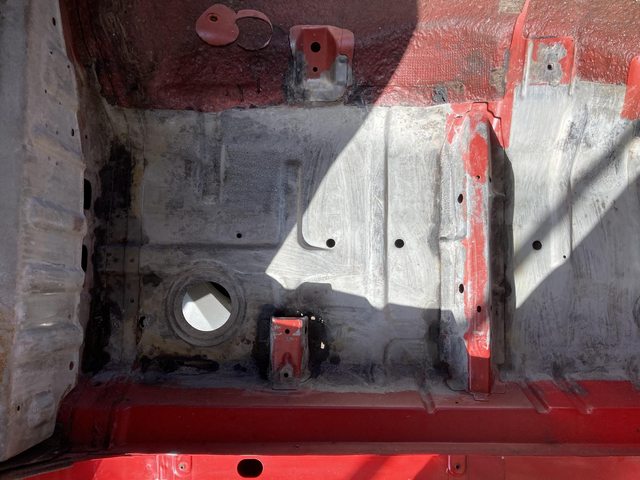
After a couple hours removing the remains of the asphalt:


Thankfully, the majority of the floorpan is clean, with a little surface rust.
After a boat-load of wire brushing:
...which of course opened up more holes. Note the daylight showing in the passenger footwell above,

and

and
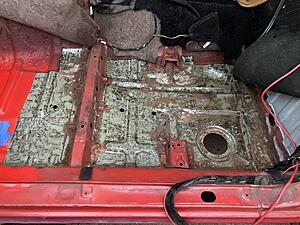
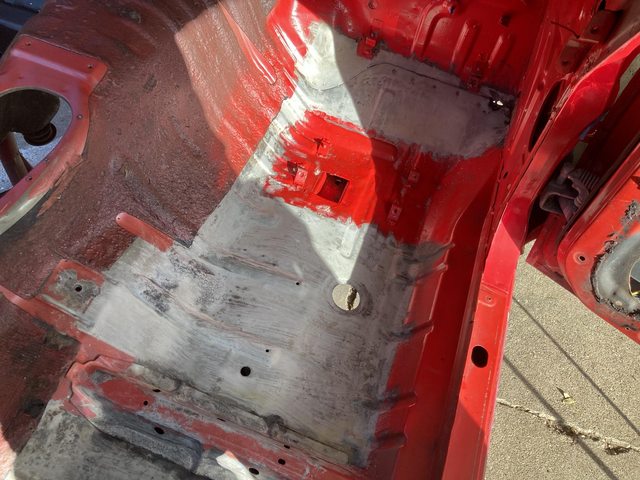
Phosphate applied:
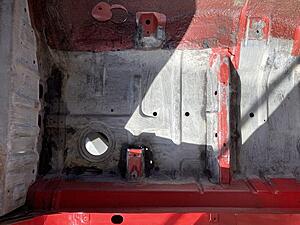

This time I got smart and used a diluted mix in a chemical sprayer (basically a heavy duty weed sprayer.) This also allowed me to spray it inside the seat mounting crossmember on both sides, and in the rockers.
I totally forgot to get picks of the underside, but I spent some time removing any loose undercoating, and some that wasn't loose, and spray phosphate under there, too.
A bit more welding in the future, if I don't melt going outside. Man, I wish I had a shop, or at least a clear garage...
I'm not entirely sure how I'm going to handle that seat mount. It still feels solid, amazingly, but those holes have to be filled, at least the ones in the floor.
Thankfully, the majority of the floorpan is clean, with a little surface rust.
After a boat-load of wire brushing:
...which of course opened up more holes. Note the daylight showing in the passenger footwell above,

and
and
Phosphate applied:
This time I got smart and used a diluted mix in a chemical sprayer (basically a heavy duty weed sprayer.) This also allowed me to spray it inside the seat mounting crossmember on both sides, and in the rockers.
I totally forgot to get picks of the underside, but I spent some time removing any loose undercoating, and some that wasn't loose, and spray phosphate under there, too.
A bit more welding in the future, if I don't melt going outside. Man, I wish I had a shop, or at least a clear garage...
I'm not entirely sure how I'm going to handle that seat mount. It still feels solid, amazingly, but those holes have to be filled, at least the ones in the floor.
Slow Car Fast
Joined: Sep 2020
Posts: 163
Likes: 70
From: Southwestern Virginia
Rust is extremely frustrating. I plan to tear into the 79' soon and there is not telling how much rust it has. Waiting to get completely finished on my 84 before I fully commit to that mess. Your commitment to detail in every spot of rust is very encouraging. Keep up the great work.
Thread Starter
Joined: Feb 2004
Posts: 1,204
Likes: 101
From: Euless, TX
Not a lot (well, no, actually) progress.
I did just get the multiprocess stick/TIG/plasma machine I backed on Kickstarter, so maybe my welds will improve.
...after a lot of practice with the new machine. I've never run TIG before.
Plasma cutter might make certain operation faster, though, for sure.
I did just get the multiprocess stick/TIG/plasma machine I backed on Kickstarter, so maybe my welds will improve.
...after a lot of practice with the new machine. I've never run TIG before.
Plasma cutter might make certain operation faster, though, for sure.
Thread Starter
Joined: Feb 2004
Posts: 1,204
Likes: 101
From: Euless, TX
Yeah, still no progress, sorry.
Though, if anyone has a wrecked SA/FB in north Texas, I need a chunk of the passenger floor with the rearward outboard seat mount. I'd really rather replace that with original steel than try to fabricobble one up. Hit me up.
Though, if anyone has a wrecked SA/FB in north Texas, I need a chunk of the passenger floor with the rearward outboard seat mount. I'd really rather replace that with original steel than try to fabricobble one up. Hit me up.

I can't help you with the floor .. however I do have a SA/FB Passenger Side Door (Right Side) if that helps.
The door is posted in the New RX7 Marketplace .. however it's a Canadian Listing so I don't imagine it gets many views in the USA.
https://www.rx7club.com/market/1159619
The door is posted in the New RX7 Marketplace .. however it's a Canadian Listing so I don't imagine it gets many views in the USA.
https://www.rx7club.com/market/1159619
Thread Starter
Joined: Feb 2004
Posts: 1,204
Likes: 101
From: Euless, TX
Starting to warm up, so hopefully I can get back on this thing soon.
Home projects and such getting in the way, of course, but "livable house" tends to triumph over "unnecessary sports car".
Home projects and such getting in the way, of course, but "livable house" tends to triumph over "unnecessary sports car".
Thread Starter
Joined: Feb 2004
Posts: 1,204
Likes: 101
From: Euless, TX
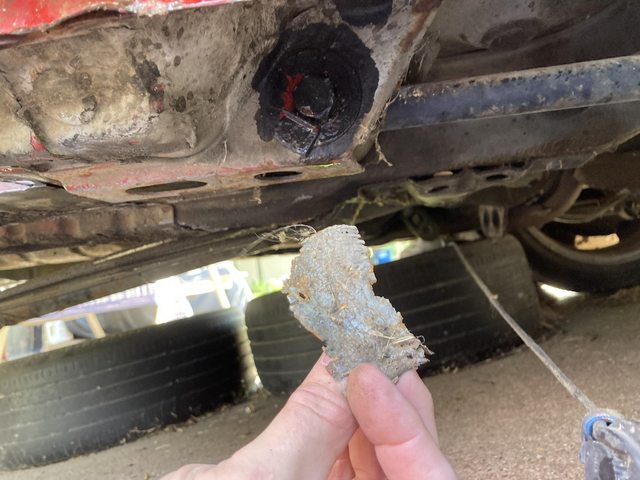
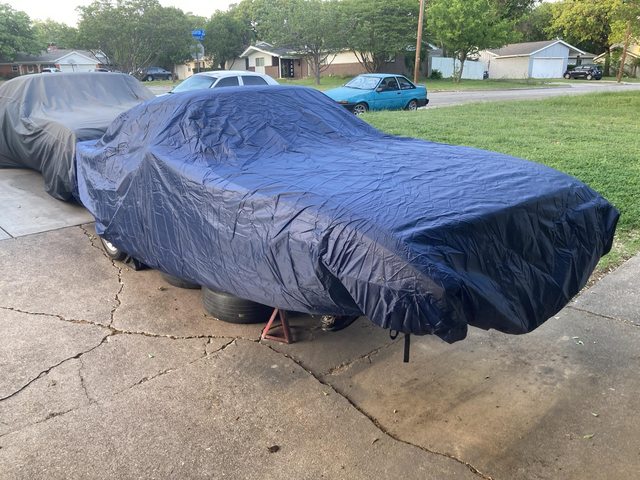
I looked briefly at my RX-7 this past weekend. The car cover was tattered, so I put a new cheap one on. First time in the sun this year, I think:
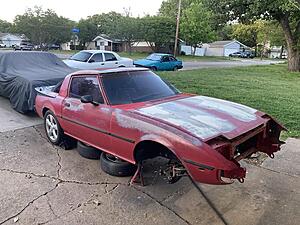
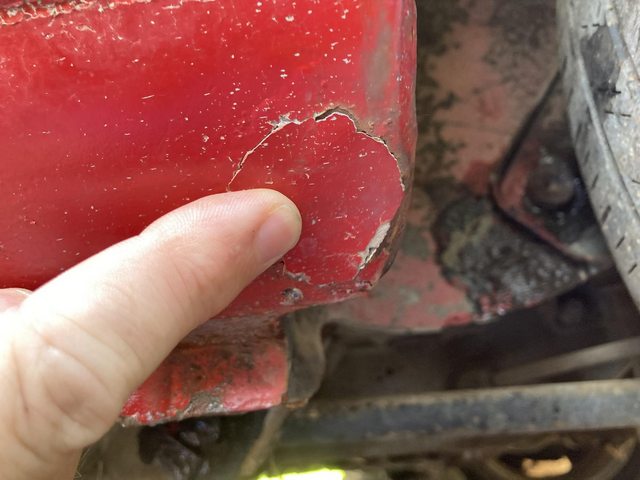
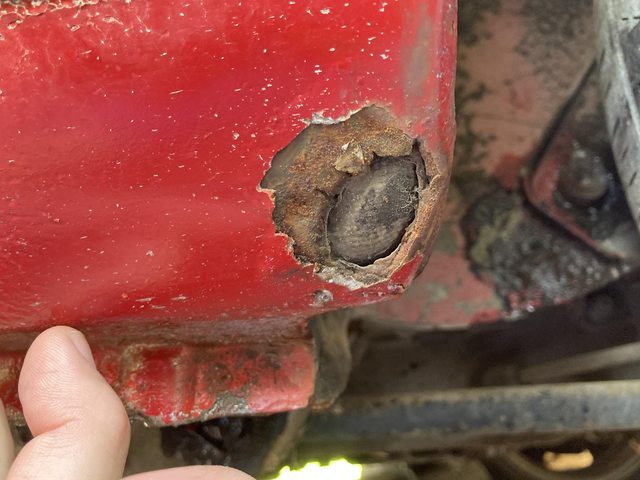
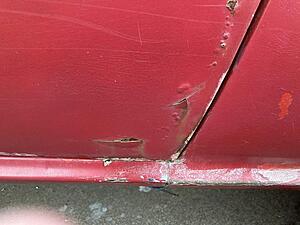
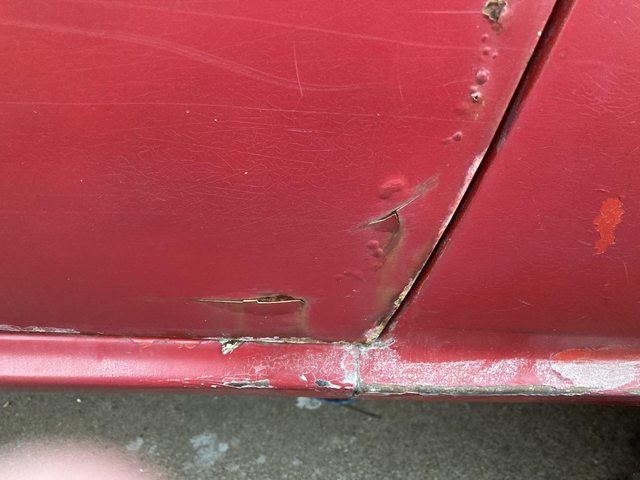
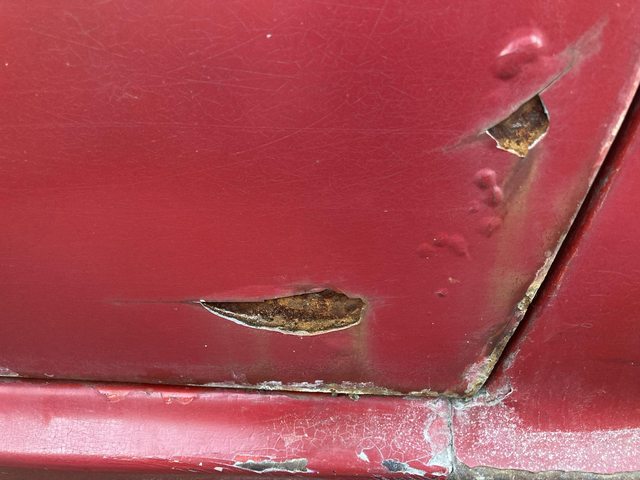
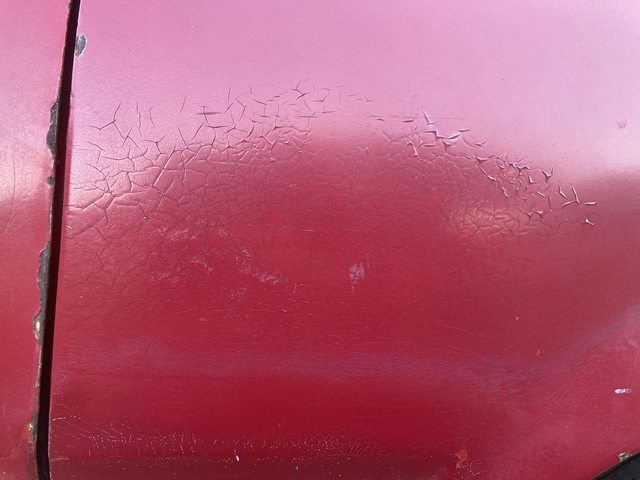
But of course I noticed the driver's door:

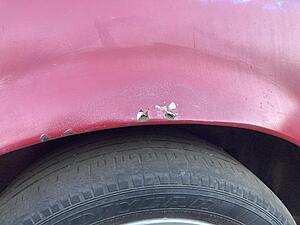
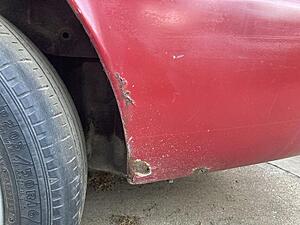
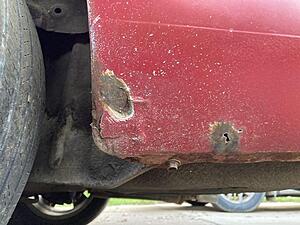
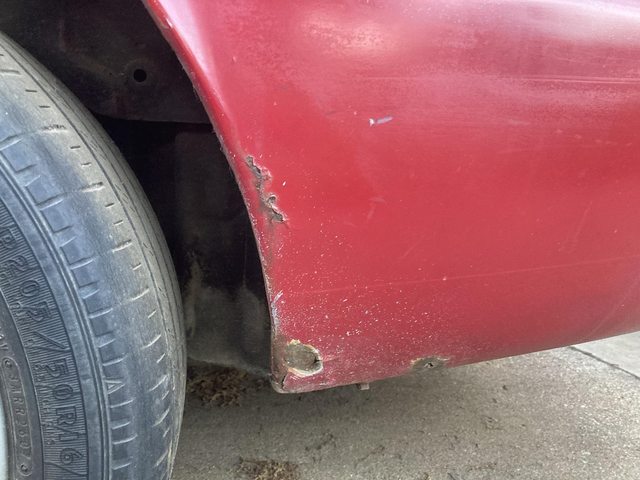
and driver's rear fender lip:
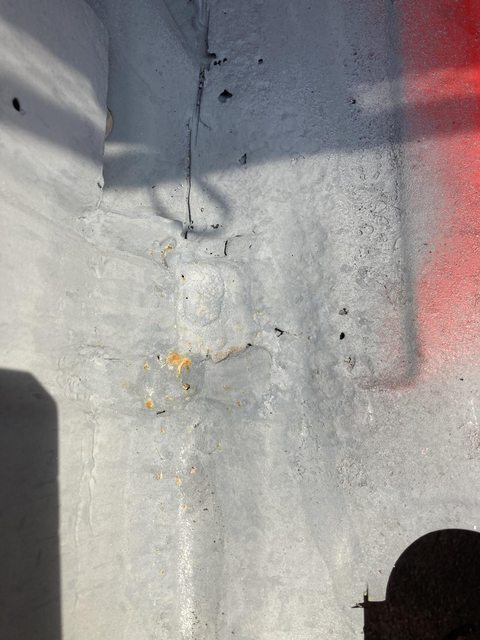
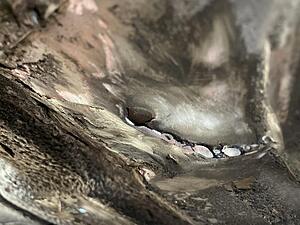
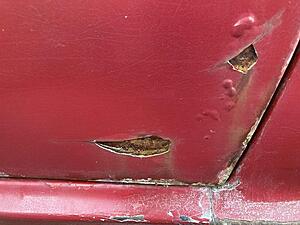
Little crazing behind the driver's door that might be concerning:

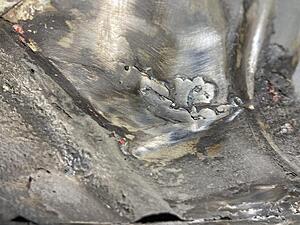
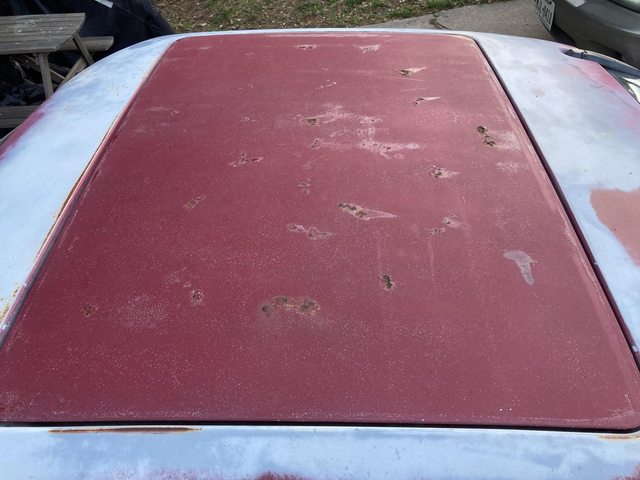
And of course the sunroof is rusting from the inside out:

Some of this I obviously already knew about - the rear fender rust I think has been treated, looks like. The popping bondo and bubbling on the driver's door is new. I have another set of doors, not to mention 3 other RX-7s, so no really big deal, but... <sigh>.
I'm leaning toward using one of them for floor pan slices, etc. since that one has a police-issued (theft) VIN that we do not have the title for. Might be un-title-able. It's already red, at least. '82 GSL automatic. I've already stolen the suspension out of it, then swapped that with the GSL-SE I have, so the '82 is sitting on my original '79 suspension, and the transmission is out, I think in my shed.
Anyway, new car cover.


But of course I noticed the driver's door:

and driver's rear fender lip:


Little crazing behind the driver's door that might be concerning:
And of course the sunroof is rusting from the inside out:
Some of this I obviously already knew about - the rear fender rust I think has been treated, looks like. The popping bondo and bubbling on the driver's door is new. I have another set of doors, not to mention 3 other RX-7s, so no really big deal, but... <sigh>.
I'm leaning toward using one of them for floor pan slices, etc. since that one has a police-issued (theft) VIN that we do not have the title for. Might be un-title-able. It's already red, at least. '82 GSL automatic. I've already stolen the suspension out of it, then swapped that with the GSL-SE I have, so the '82 is sitting on my original '79 suspension, and the transmission is out, I think in my shed.
Anyway, new car cover.
Last edited by Frankenrex; Apr 17, 2023 at 04:19 PM. Reason: typo
Thread Starter
Joined: Feb 2004
Posts: 1,204
Likes: 101
From: Euless, TX
Oof, almost two years?
My apologies. Life got kind of busy. For one thing, my dad passed in October of 2023 and I ended up inheriting his 1955 Chevy Bel Air, which has been off the road (literally - it was in a field) for 35 years, and I want to get that operational, but also house stuff, my wife's uncle passing and her being one of the few remaining heirs and the only one willing to actually handle the estate, etc.
Regardless, the 7 is still in the driveway, under a fresh new car cover (a Texas storm finally completely destroyed the old one, again.) We recently removed the 12A from the '82 theft-recovery VIN GSL I've mentioned before up-thread, for which I got paid a MegaSquirt set up for rotary. I think I'll be using that car for more parts since as far as I can determine it's not title-able as is. Hopefully it hasn't leaked and rotted out the floors as well...
