
Damic's Annabelle (SA)

Thread Starter
Senior Member
Joined: Aug 2008
Posts: 493
Likes: 0
From: Belgium (2800)
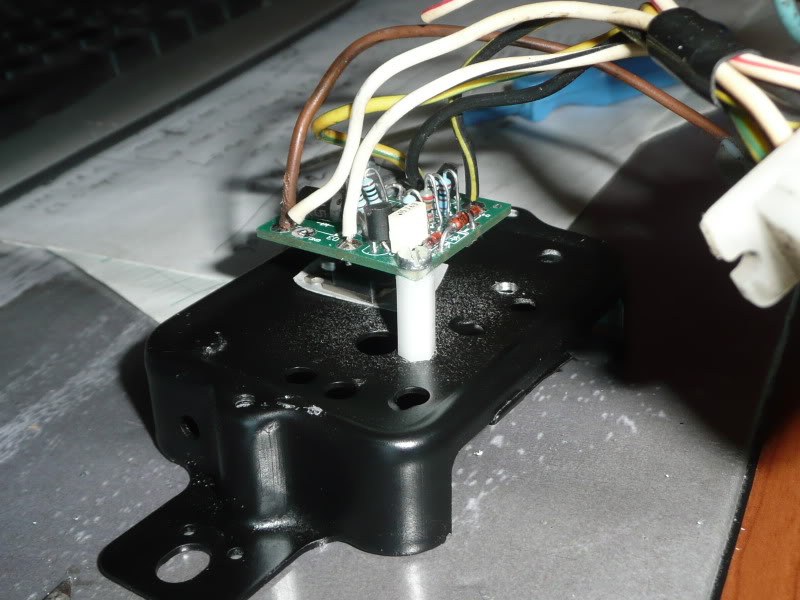
After almost 4 years it was time to change the small alternator regulator to the big one 
This is how it when in:
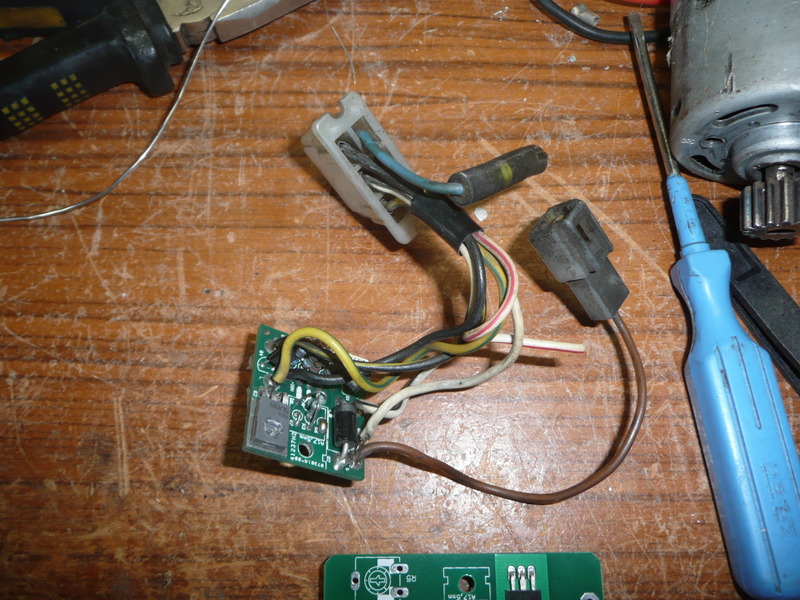
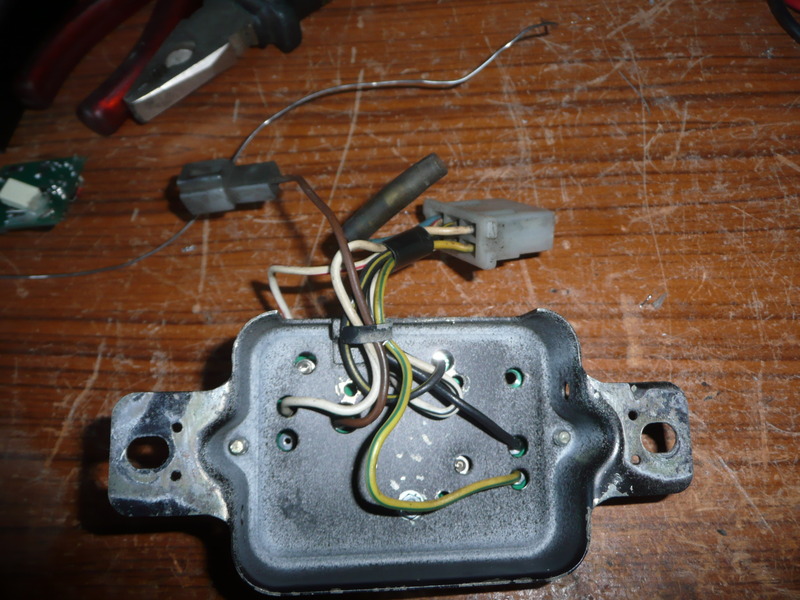
This is how it came out
Pre assemble the big pcb:
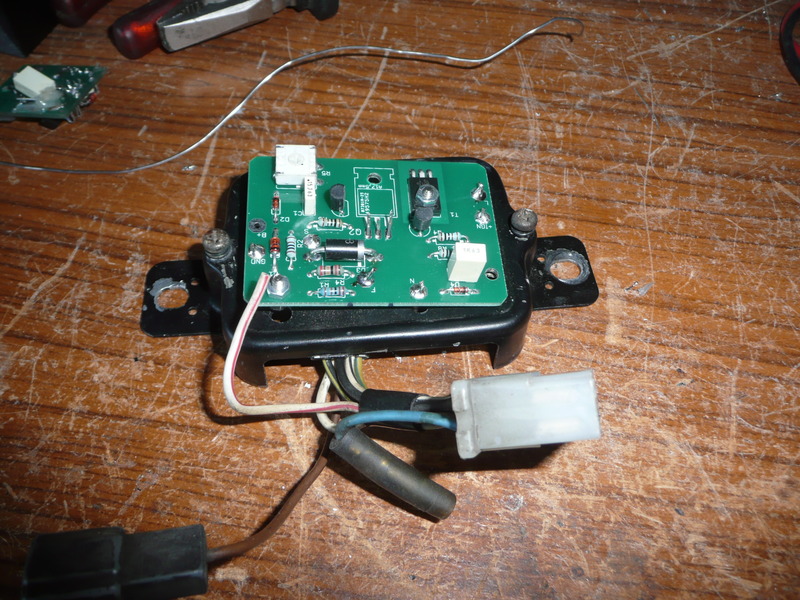
In side the can:
And now It gives 14V :party:
This is how it when in:

This is how it came out

Pre assemble the big pcb:

In side the can:

And now It gives 14V :party:


Thread Starter
Senior Member
Joined: Aug 2008
Posts: 493
Likes: 0
From: Belgium (2800)
Thread Starter
Senior Member
Joined: Aug 2008
Posts: 493
Likes: 0
From: Belgium (2800)
Yesterday I went to find some gremlins.
1. is the brake warning like that stays on on the dash
2. the trunk lid unlocker doesn't work anymore (a long time already)
1. The brake warning light was a quick find: the brake fluid level switch isn't fully open and with a led instead of a lamp, it quickly lights up.
2. in the past when I pushed the trunk button, one of the warning lights will come up. Now not anymore.
Q: does the solenoid work
A: yes when I add power to it from the interior light the solenoid goes TOINK
Q: does it get power without load
A: YES
Q: does it get power with load
A: nope
Q: is the mass still good
A: yes tested it with the interior lightning
Other steps todo:
* check the button, it can be broken
* check the connectors:
- X19 is in the left back corner
- X3 is in the left front corner of the dash
- X2 is after the instrument panel


Uggghhhh... I hate electrical gremlins... I'm not very smart with electrical stuff to begin with, so the Gremlins are at least one step ahead of me right off the bat.
It sounds like you're knowledgeable enough to logically chase down the source of your gremlin Damic. Good luck!
It sounds like you're knowledgeable enough to logically chase down the source of your gremlin Damic. Good luck!
Thread Starter
Senior Member
Joined: Aug 2008
Posts: 493
Likes: 0
From: Belgium (2800)
Thanks, fixed it.
* Button = ok (bridged it to see if the fault remained)
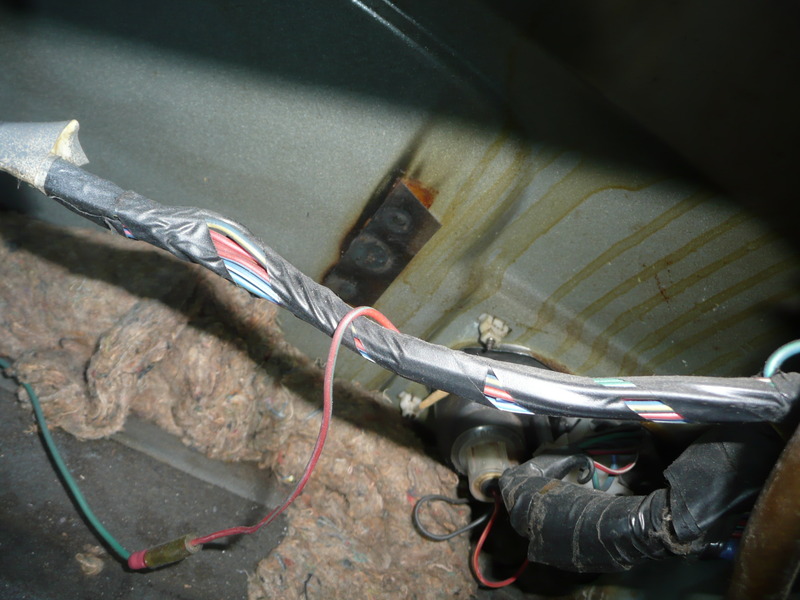
* Was scratching the whole time my head why the manuals state that the ground lead is black but mine is yellow/blue, so did a easy fix, removed the yellow/blue wire with plug out of the plastic thingie and made a black wire with plug and on the other side an eye and now it goes toink - toink - toink - toink - toink - toink (every time I press the button) /me = happy
Taped the other wire to the green/red wire for maybe future use.
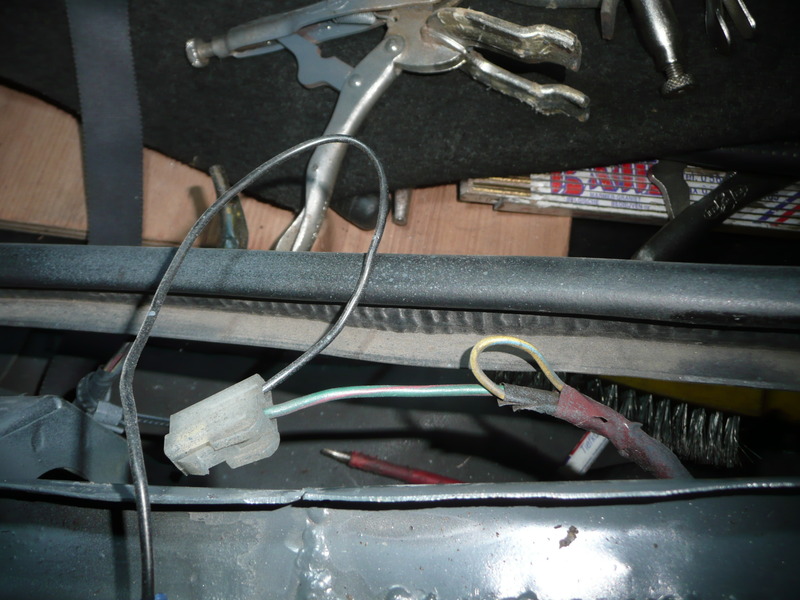
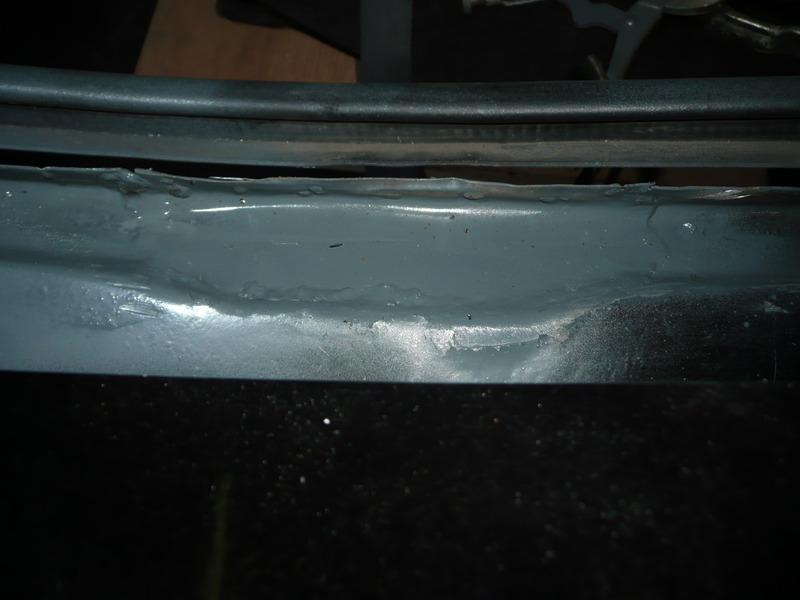
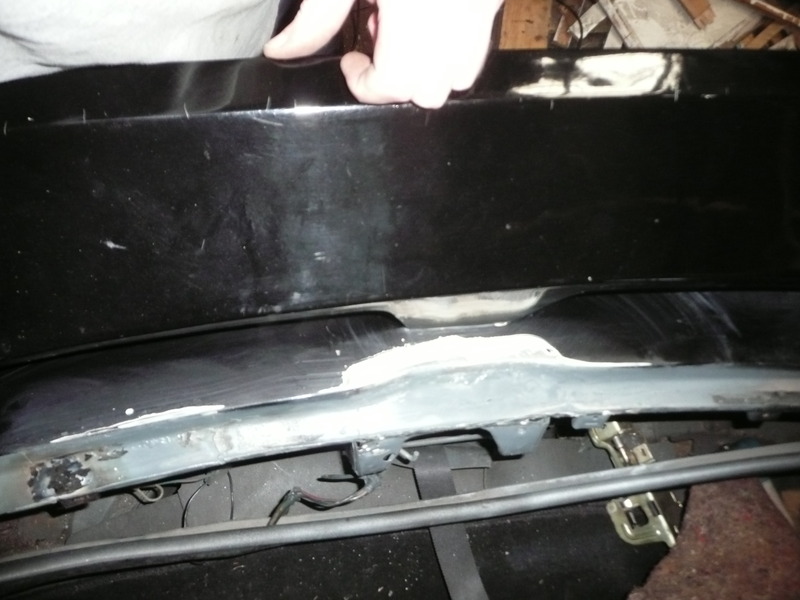
But there is more :'( found some more rust. 10cm from the right drain hole and where the locking mechanism is, that took more time then fixing electrical gremlins in this type of car :+
Right side
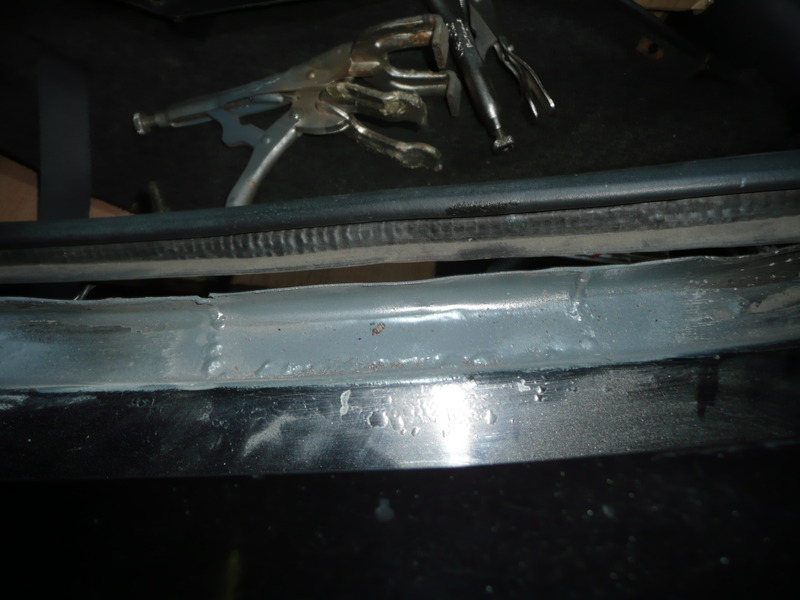
center
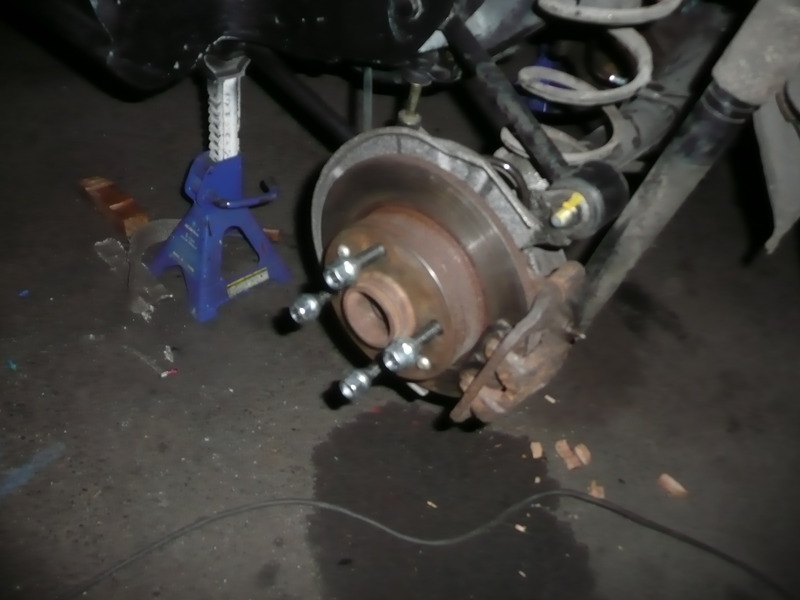
Installed the wheel studs a few weeks back, with loctite
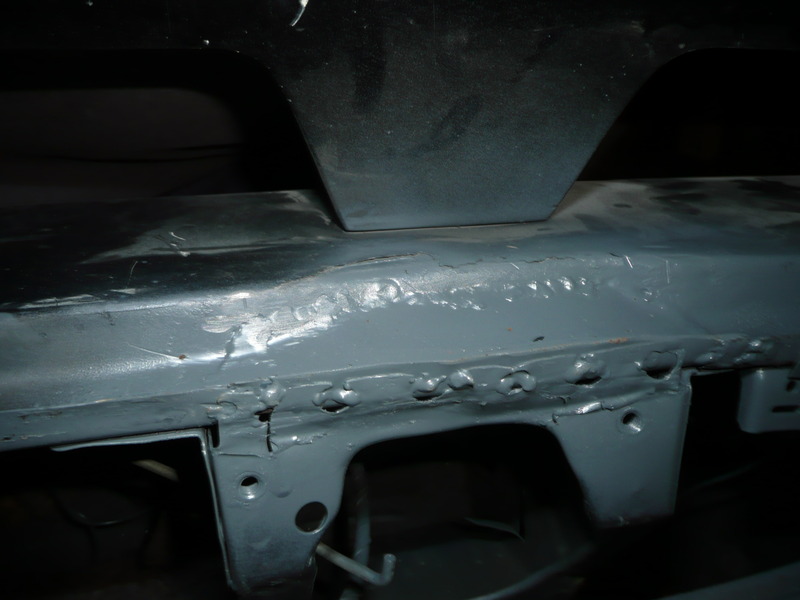
Ow and my car was a real SA sometime ago
They welded the holes of the license plate lighting shut
* Button = ok (bridged it to see if the fault remained)
* Was scratching the whole time my head why the manuals state that the ground lead is black but mine is yellow/blue, so did a easy fix, removed the yellow/blue wire with plug out of the plastic thingie and made a black wire with plug and on the other side an eye and now it goes toink - toink - toink - toink - toink - toink (every time I press the button) /me = happy
Taped the other wire to the green/red wire for maybe future use.

But there is more :'( found some more rust. 10cm from the right drain hole and where the locking mechanism is, that took more time then fixing electrical gremlins in this type of car :+
Right side

center


Installed the wheel studs a few weeks back, with loctite

Ow and my car was a real SA sometime ago

They welded the holes of the license plate lighting shut
Last edited by damic; Mar 19, 2017 at 01:49 PM. Reason: Pictures
Thread Starter
Senior Member
Joined: Aug 2008
Posts: 493
Likes: 0
From: Belgium (2800)
Paint was a little bit bubbly after the welding so some sanding was required, after some cleaning up I found something that I had forgotten to weld. Yes the thing where the screw of the interior piece goes thru. Lined everything out an drilled a hole so welding is easier (welds on the left op the photo).
Then I painted it and when it was drying (watching paint dry is idiotic) I removed the RX7 logo from the fender and sanded it and painted it with black primer
Result of today when it is dry

Then I painted it and when it was drying (watching paint dry is idiotic) I removed the RX7 logo from the fender and sanded it and painted it with black primer

Result of today when it is dry

Thread Starter
Senior Member
Joined: Aug 2008
Posts: 493
Likes: 0
From: Belgium (2800)
More on the rear hatch unlocker, I think there is a wire coming from the alternator regulator (not stated in the book) to prevent the hatch be unlocked when the engine is running. I can remember something like that vaguely.
Thread Starter
Senior Member
Joined: Aug 2008
Posts: 493
Likes: 0
From: Belgium (2800)
Yesterday I went on a trip to get this

Yes a FB gearbox, until mine gets repaired. Paid to much but hey it's my own fault I thought I red that it was overhauled
So that's going in one of these days (got a week of vacation)
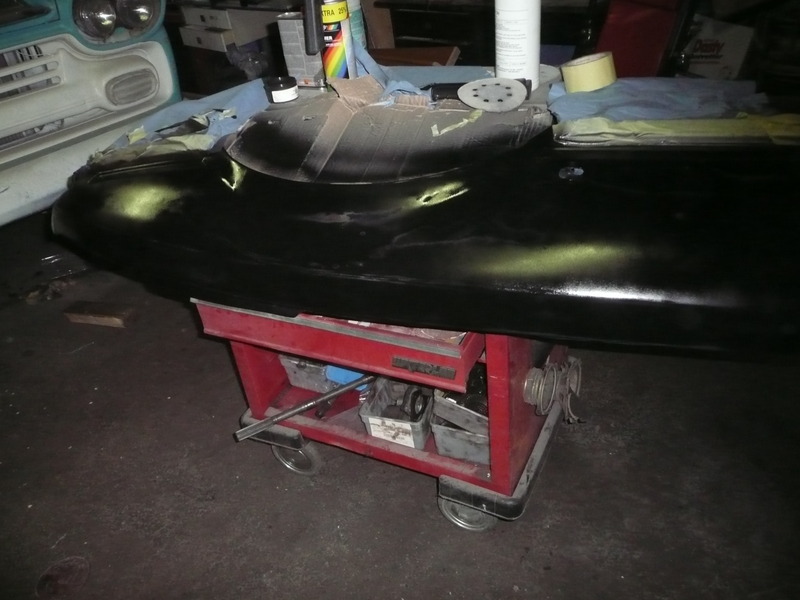
So further with the paint.
I was giving the fender a quick sanding but the I went on the route of sanding it so far as possible down
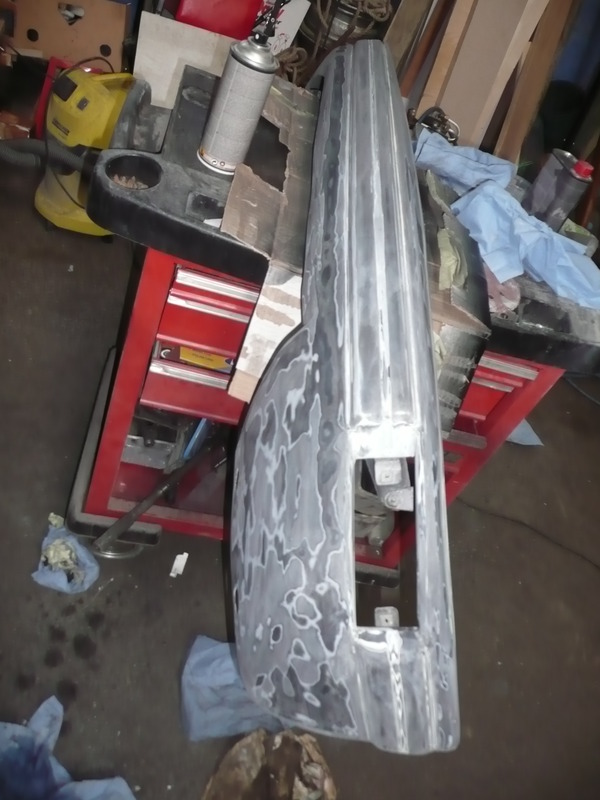
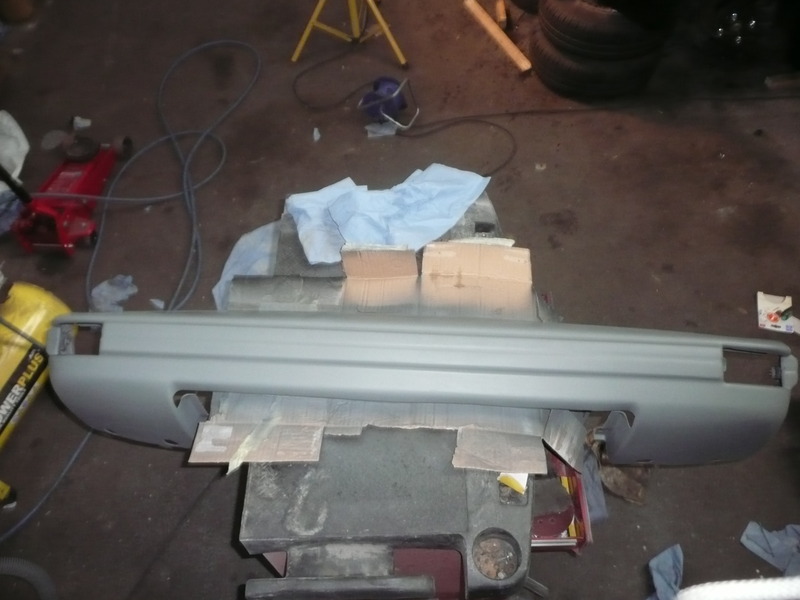
After some plastic primer and normal primer, it looks green/grayish
And when the paint was drying I assembled the left side already
Now she looks like a manta ray

Yes a FB gearbox, until mine gets repaired. Paid to much but hey it's my own fault I thought I red that it was overhauled
So that's going in one of these days (got a week of vacation
)So further with the paint.

I was giving the fender a quick sanding but the I went on the route of sanding it so far as possible down

After some plastic primer and normal primer, it looks green/grayish

And when the paint was drying I assembled the left side already

Now she looks like a manta ray
Last edited by damic; Apr 16, 2017 at 10:19 AM.
Thread Starter
Senior Member
Joined: Aug 2008
Posts: 493
Likes: 0
From: Belgium (2800)
More news:
went on a few trips to the gearbox overhauler to get the parts that I need to convert the gearbox to fit on a SA (the tail + shift thing is not enough). And now its back under the car, I put a liter of gearbox oil in it to see if its leaking or not.
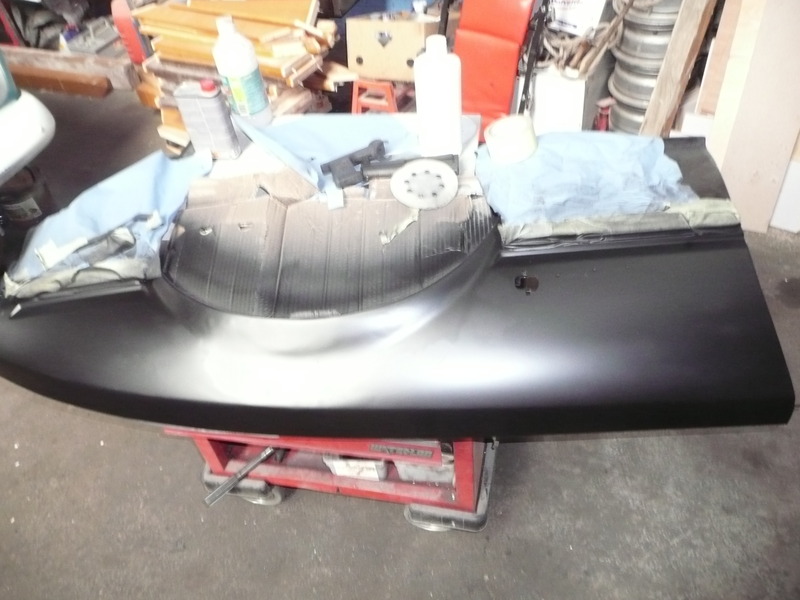
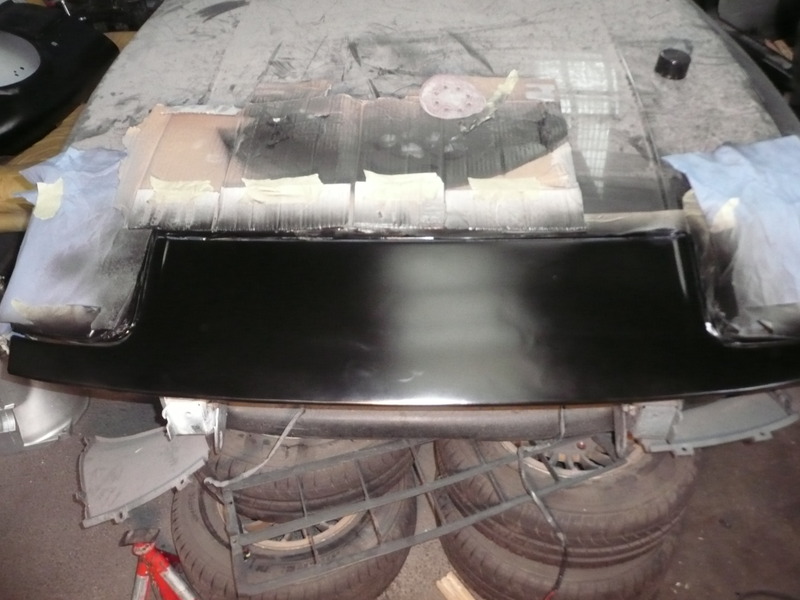
Painted the front bumper 3 layers of black and 2 clear coats
The bumper lights are also finished, ready to go in the bumper
For a project car, I bought some years ago a second hand turbo (from a diesel) it is spinning good but it needed a clean so I opened it and saw this:
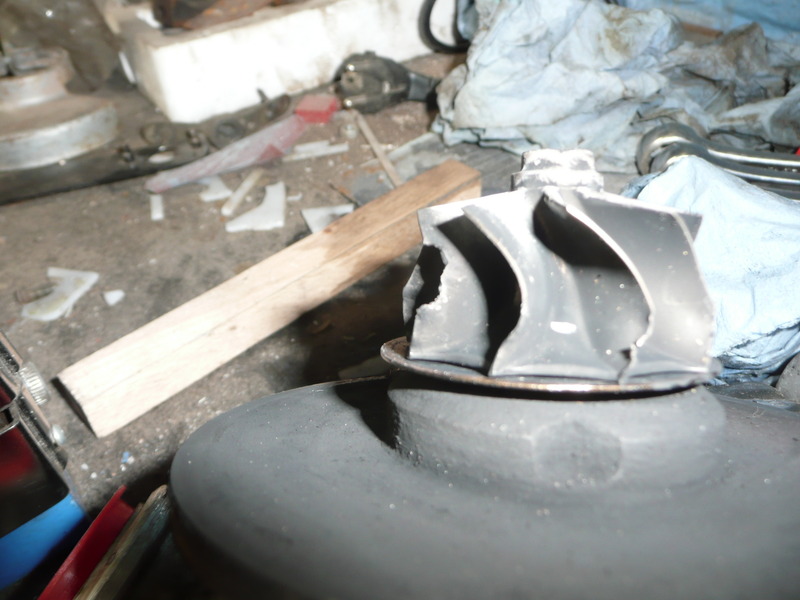
njom njom njom njom njom njom njom njom njom njom
went on a few trips to the gearbox overhauler to get the parts that I need to convert the gearbox to fit on a SA (the tail + shift thing is not enough). And now its back under the car, I put a liter of gearbox oil in it to see if its leaking or not.
Painted the front bumper 3 layers of black and 2 clear coats
The bumper lights are also finished, ready to go in the bumper
For a project car, I bought some years ago a second hand turbo (from a diesel) it is spinning good but it needed a clean so I opened it and saw this:

njom njom njom njom njom njom njom njom njom njom
Thread Starter
Senior Member
Joined: Aug 2008
Posts: 493
Likes: 0
From: Belgium (2800)
Something like that :|
Today I mounted everything up and did a brake test, it felt good so washed the car (was needed after 2 years of dust) and did a small trip to check everything.
Then went on a trip over the freeway and then to the gas station did a good 23km but I got a small list of problems
The list:
* bumper paint comes easily off if it gets touched, but the primer stays on
* the reverse light stays on (wrong switch?)
* brake fade (still some air in the system?)
* noise from the diff (oh no)
* right bumper light doesn't dimm when the blinker is on, weird I tested it that it worked
* the changes on the intake needs to be reversed, less power and it feels like I'm driving with turbo lagg
But it's feeling soooooo gooooood
Today I mounted everything up and did a brake test, it felt good so washed the car (was needed after 2 years of dust) and did a small trip to check everything.
Then went on a trip over the freeway and then to the gas station
did a good 23km but I got a small list of problemsThe list:
* bumper paint comes easily off if it gets touched, but the primer stays on
* the reverse light stays on (wrong switch?)
* brake fade (still some air in the system?)
* noise from the diff (oh no)
* right bumper light doesn't dimm when the blinker is on, weird I tested it that it worked
* the changes on the intake needs to be reversed, less power and it feels like I'm driving with turbo lagg
But it's feeling soooooo gooooood
Last edited by damic; Apr 21, 2017 at 10:42 AM.
Thread Starter
Senior Member
Joined: Aug 2008
Posts: 493
Likes: 0
From: Belgium (2800)
Reverted the changes in the intake, but I think its the gearbox, its pretty slow :/
So after a few "weeks" of thinking we think we have found the problem to the noise in the diff. It's not the diff, but the right brake pad toughing the rotor.
And I need to convert the dashboard unit back from red led's to lightbulbs, sometimes I see the warning light of the oil pressure coming up
The last days I tried to fix the led light but I just replaced it with a new one, tested everything it was ok so I put it back in the car but there's a flaw in it. Instead that the light stays off when its on blinking mode, it's now alternating
Thread Starter
Senior Member
Joined: Aug 2008
Posts: 493
Likes: 0
From: Belgium (2800)
Today I putted the light back in and the meter unit, everything "works" now except the noise of the brake pad and a little leak in the exhaust so when you are going good and let go of the throttle sometimes it goes POEF POEF POEF or one big POEF 
The light was a experimental error, the capacitors that are normally are used after a diode on the first tor weren't there but placed around the pcb and in "lab" conditions there aren't other devices that drain the load of the capacitors., Placed them where they should are and now its working :party: only now I saw (maybe it was the previous time also) that the left one dims sometimes when I brake :? bad positive or bad massa???
The light was a experimental error, the capacitors that are normally are used after a diode on the first tor weren't there but placed around the pcb and in "lab" conditions there aren't other devices that drain the load of the capacitors., Placed them where they should are and now its working :party: only now I saw (maybe it was the previous time also) that the left one dims sometimes when I brake :? bad positive or bad massa???
Last edited by damic; May 6, 2017 at 03:00 PM.
Thread Starter
Senior Member
Joined: Aug 2008
Posts: 493
Likes: 0
From: Belgium (2800)
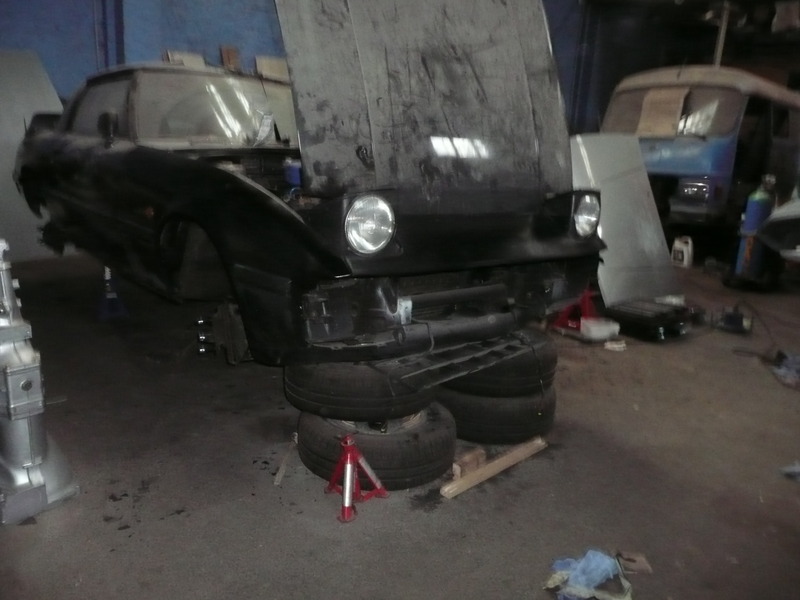
Today I put her back up on the jack-stands to see if I could find the leak, first check all the couplings, nothing to see, ow kee a leak test how to find the leak, just start the engine en feel for it (don't touch the exhaust it will burn you).
Same check the coupling nothing, then move to the back side and get exhaust gasses blown in your face, wait wut. Yes when I cut the 2 pipes from each other I cutted a little bit to deep.
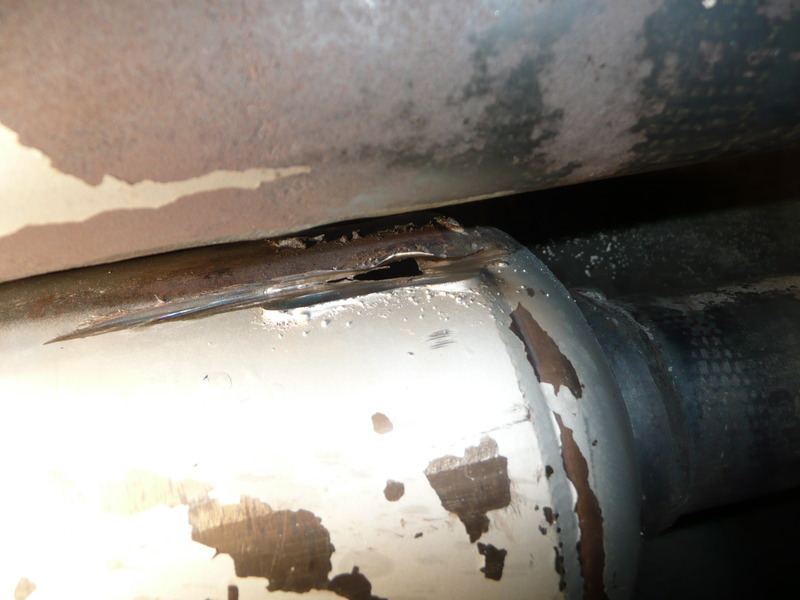
So take the welder out and start baking and then some use of the grinder
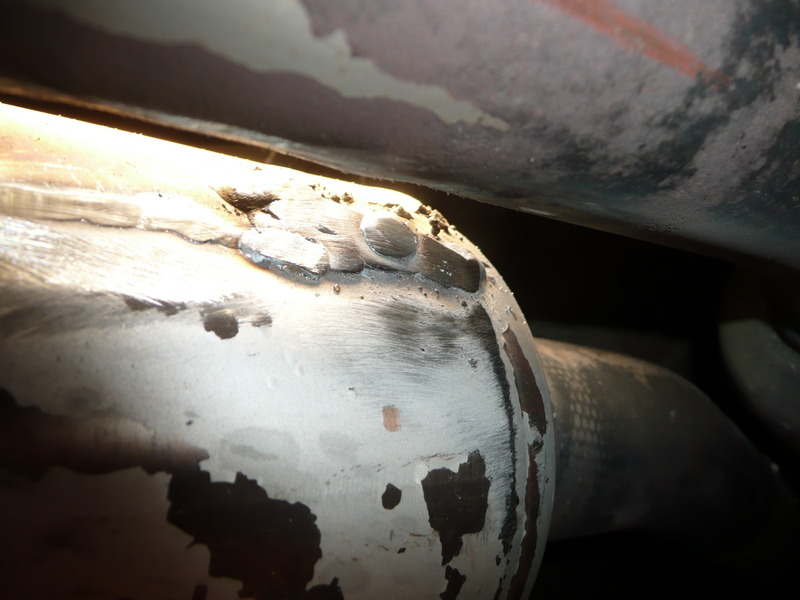
Success its closed and moooooaaaar poooowwwwwwaaaaaaahhhhhhhhhh and a nice steady A/F
Thread Starter
Senior Member
Joined: Aug 2008
Posts: 493
Likes: 0
From: Belgium (2800)
Previous sunday it was good weather and I went to the hangar todo some work, I opened the gate and said to my self, **** IT, start her up and go change your clothes and then drive to somewhere.
So that I did and when to a buddy that lives a hour away from me, so a nice long road test
Results:
* check brakes, maybe overhaul them
* have some resonance at the rear (heat shield or something like that)
* A/F of 16 when I'm cruising :o
* going to order some new shocks for the rear
So yesterday evening it was no to hot so I went to the hangar and do some work on my daily, when that was done I said to myself, lets see what that resonance is.
*Pictures following*
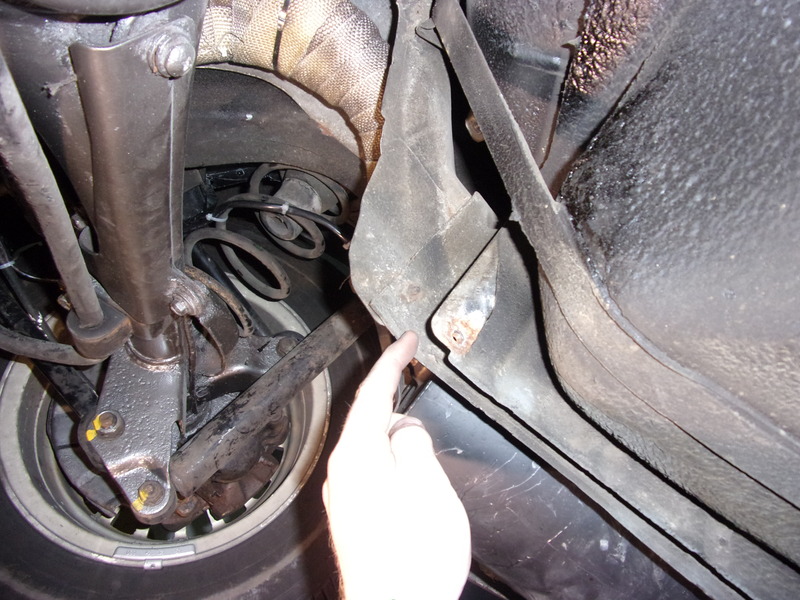
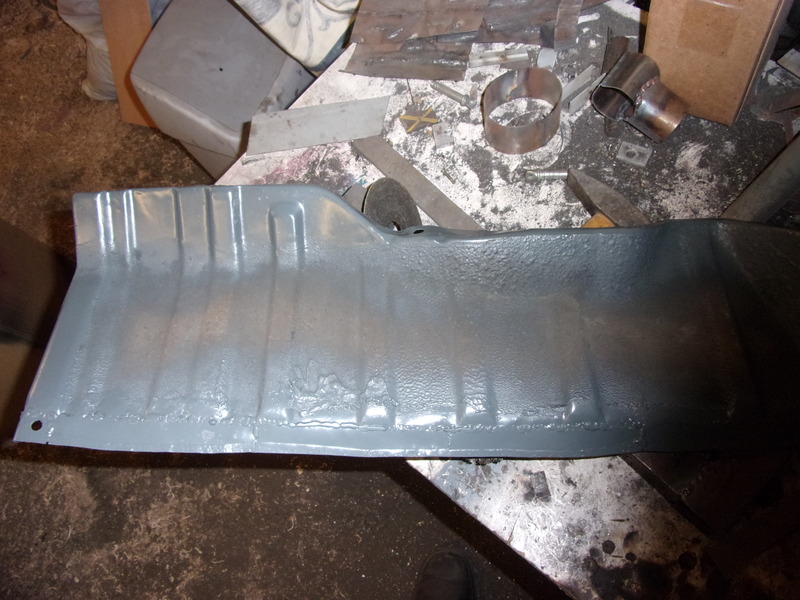
The heat shield around the muffler was touching the "rock" shield of the fuel tank, I gave it a push and it's back in its place, then a second problem I had is that the "rockj" shield was a little rusty on the bottom so I took it from under the car and cleaned it up after that i replaced 2 cm of metal.
Jup it was that rusty, not I need to coat it and then it can go back under the car and hopefully that resonance is gone.
So that I did and when to a buddy that lives a hour away from me, so a nice long road test
Results:
* check brakes, maybe overhaul them
* have some resonance at the rear (heat shield or something like that)
* A/F of 16 when I'm cruising :o
* going to order some new shocks for the rear
So yesterday evening it was no to hot so I went to the hangar and do some work on my daily, when that was done I said to myself, lets see what that resonance is.
*Pictures following*
The heat shield around the muffler was touching the "rock" shield of the fuel tank, I gave it a push and it's back in its place, then a second problem I had is that the "rockj" shield was a little rusty on the bottom so I took it from under the car and cleaned it up after that i replaced 2 cm of metal.
Jup it was that rusty, not I need to coat it and then it can go back under the car and hopefully that resonance is gone.
Thread Starter
Senior Member
Joined: Aug 2008
Posts: 493
Likes: 0
From: Belgium (2800)
Damned forgot to post the pics
The heat shield bold that was tapping the other shield
So new pieces welded on

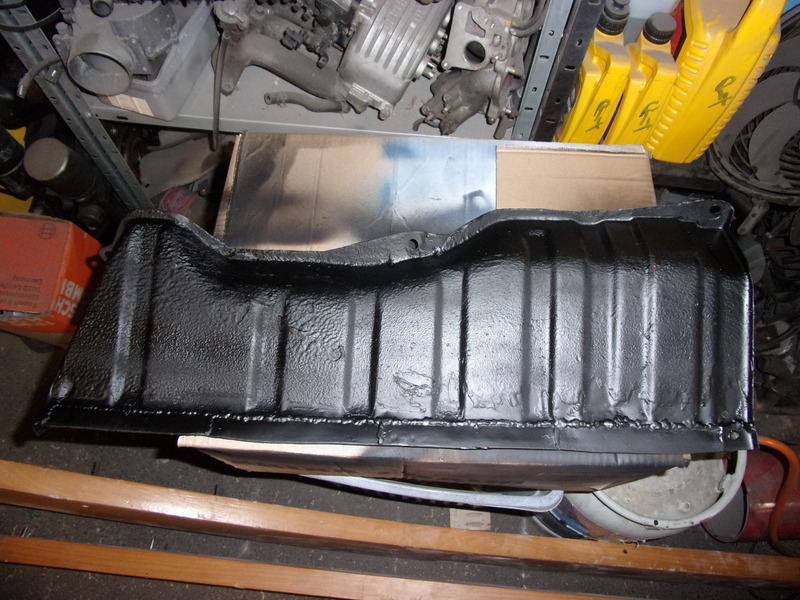
mmmh cooooated
Anybody know why the fuel tank is not straight on this side?

The heat shield bold that was tapping the other shield

So new pieces welded on


mmmh cooooated

Anybody know why the fuel tank is not straight on this side?

Thread Starter
Senior Member
Joined: Aug 2008
Posts: 493
Likes: 0
From: Belgium (2800)
So the shield is back under the car and bolted nice an tide to it and no more resonating. Ow and slicks on the street are fun when they are hot. I rely need to goto a track
Anyway today I ordered some parts:
* new master brake cylinder (hopefully the right one from rockauto)
* new shock kit for the front (rockauto)
* new shocks for the rear (rockauto)
* fuel pump (mister auto)
* Fuel and oil filters (mister auto)
I need to buy new fuel hoses to, they changed from 95/E5 octane to 95/E10 but that I can get locally
But now I'm trying to decide if I want to buy a gilmer drive kit, they are getting cheap.
Edit: owke that was weird. Was getting the car do drive around; went from the parking spot to home and suddenly warning lights came on (oil/alternator/1 more) and rpm meter went to Volt mode so went back to the parking spot and tried to fix it. Measured everything around the Voltage regulator but nothing weird (I got a main switch on the battery so I can quickly check if the alternator is still generating power) putted the cap back on the voltage regulator and suddenly it's fixed :?
I think I got a bad connection somewhere, but where
Last edited by damic; Jun 18, 2017 at 10:04 AM.