When you click on links to various merchants on this site and make a purchase, this can result in this site earning a commission. Affiliate programs and affiliations include, but are not limited to, the eBay Partner Network.
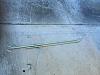
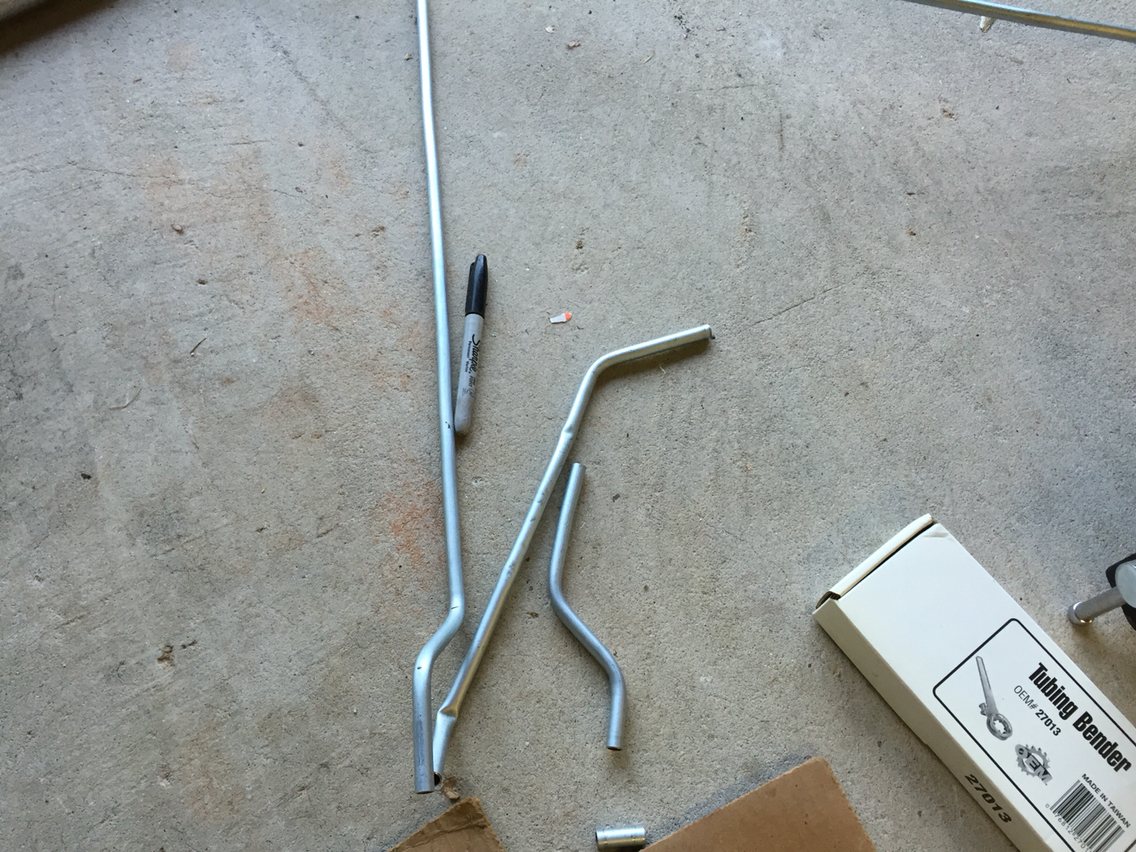
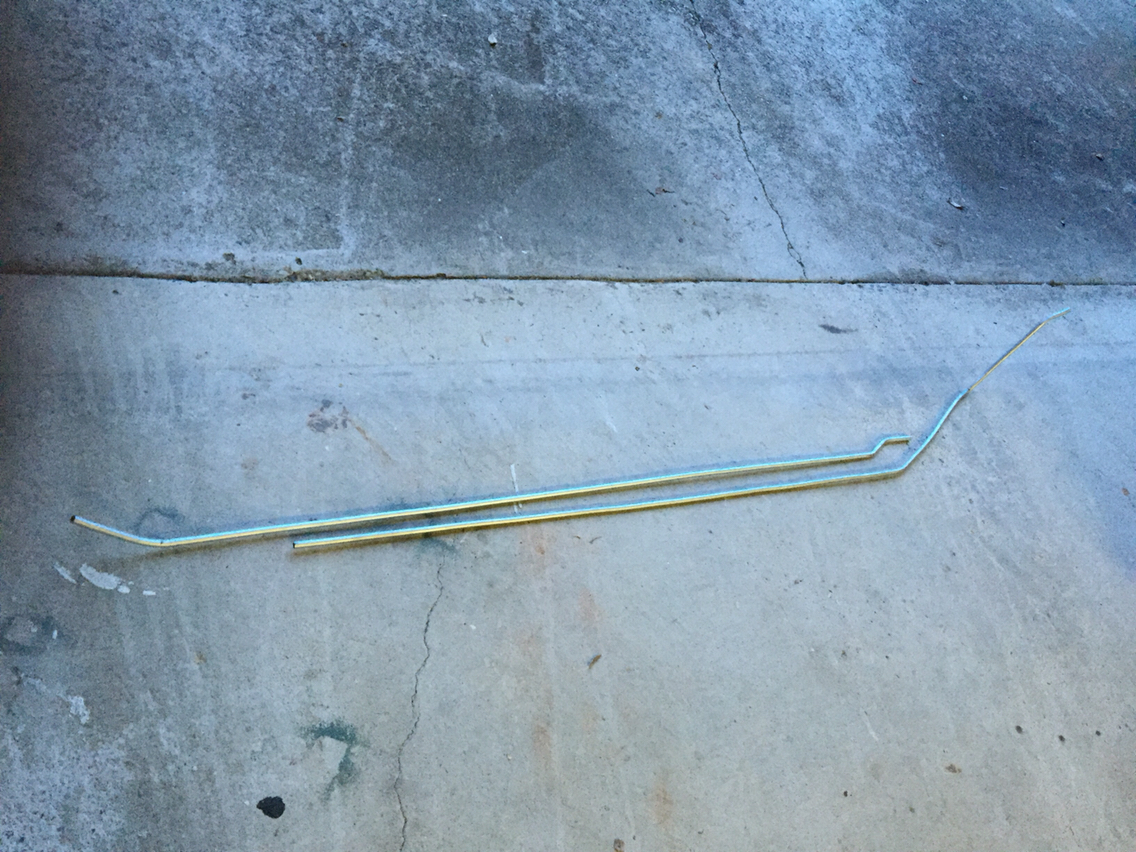
So I managed to create my new feed and return lines last night. Overall, not bad for being the first time attempting this. I "loaned" both tube benders Autozone had. I thought the bender with the larger diameter circle would have been the easier to use and less likely to kink the line but I was wrong. I wasted a 6 foot line because on a kink...should have tested the tools using a short piece first but fortunately i had enough tubing (25'). One of the hardest part was just getting the tubing uncoiled and straight so that took some time over a piece of 2x4.
So with the small tube bender, I found the easiest thing to do is to set it up where you want the bend and then use leverage. First I was using a vise to hold the tool but because it was on the floor (or even if I clamped it to my bench), the limited room made it hard to maneuver the line around. What I ended up doing is using the handle from the jack to extend the arms of the bender and it worked flawlessly.
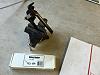
Here's how I had the tool setup initially. You can see the box for the other tool next to it.
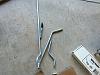
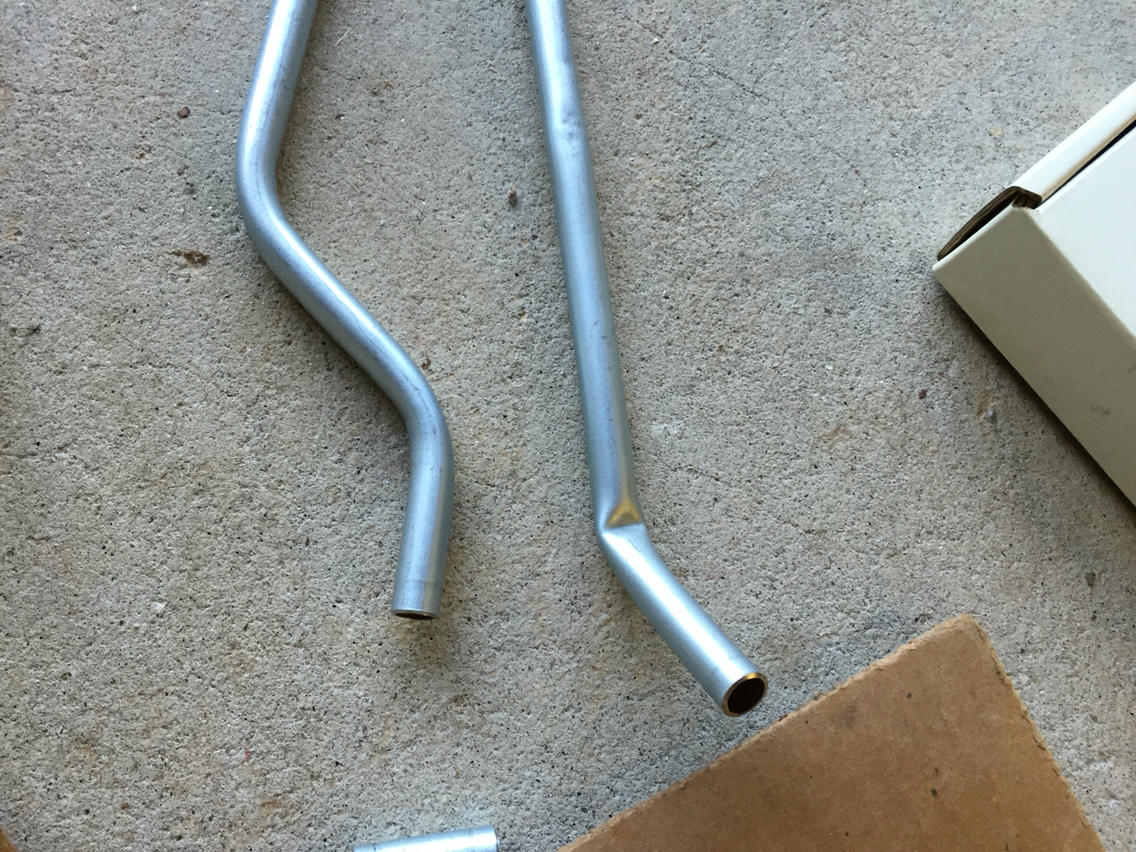
My wasted lines with the kinks and my practice bends afterwords.
Here you can see where I messed up one of my bends. Fortunately I am using steel lines and not aluminum so I was able to bend it back, although not perfectly, and correct my bend.
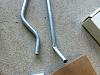
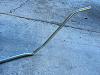
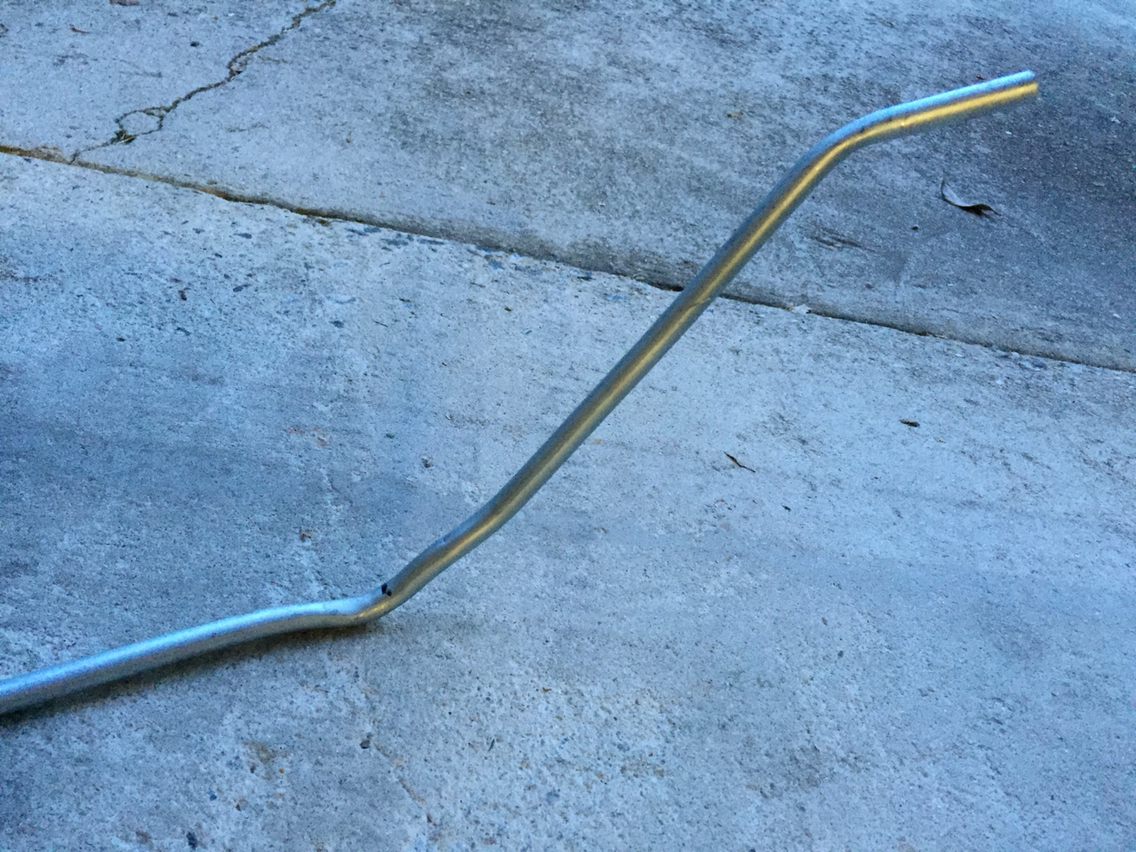
And finally a shot of my custom lines.
I still need to attach the fittings and flare them but the hard part is done.
Finally finished the pre pump filter, Bosch, post pump filter mounting. This attaches to the frame rail using existing holes. Forgot to take pics with it in place so will do so later. Just need to reinstall the tank. Haven't figured out what to use for the pre-screen in the tank yet though.
added the fender welt to the passenger side as well today. hopefully it protects the body enough from vibrations from the rear fenders. also changed out the rear glass for one without a wiper...looks much better. =)
changed the driver's side door seals (door seal, window seal, window trim). now the window motor needs some help and it also does not go all the way up (gap of about 1/4"). not sure if it's due to a weak motor or needs lubrication. i did squirt some lithium along the seal which helped a little but not much. could possibly be from the corners of the rubber seal as it feels tight in those areas. also tried adjusting the window a bit but no go.
You answered my question... We are in Woodstock and would love to come check out the build and get some ideas for our projects.... We have a 83 and 84 GS. Love the Thread sir.
Also what Paint and Body shop did you use sir? Were trying to find a good shop to fix the front on our 84 Minty Mint GS. Were trying to only do PERIOD CORRECT PERFORMANCE MODS on the 84 and go all out on the 83
You answered my question... We are in Woodstock and would love to come check out the build and get some ideas for our projects.... We have a 83 and 84 GS. Love the Thread sir.
Please, no "sir" required...lol
I had my painted by a guy who was trying to get back into the business. Not sure if he was successful or not though. I can try to find his contact but not sure if I would have it anymore but I'll look tomorrow for you.
I wonder if I'll have my efr turbo/nikki install done by the time yiu get this finished up? My black widebody would be pretty neat looking sitting next to a white twin. Yin/yang sort of thing.
I wonder if I'll have my efr turbo/nikki install done by the time yiu get this finished up? My black widebody would be pretty neat looking sitting next to a white twin. Yin/yang sort of thing.
My goal is to make it to DGRR 2017 so I got a few months.
Fuel tank is now installed so that's the end of fuel system work.
Next item I worked on today was to mount the electric fans. Due to the vmount and how close the radiator is to the sway bar, I ended up having to use 2-7in fans. I hope that'll be good enough, if not, no idea what to do. I can't fit a 3rd one as it would hit the sway bar. I should have taken some pics but I had put the car down onto the skates before thinking about that.
Then started working on the oil cooler ducting but couldn't finish as I have to borrow a rivet gun.
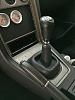
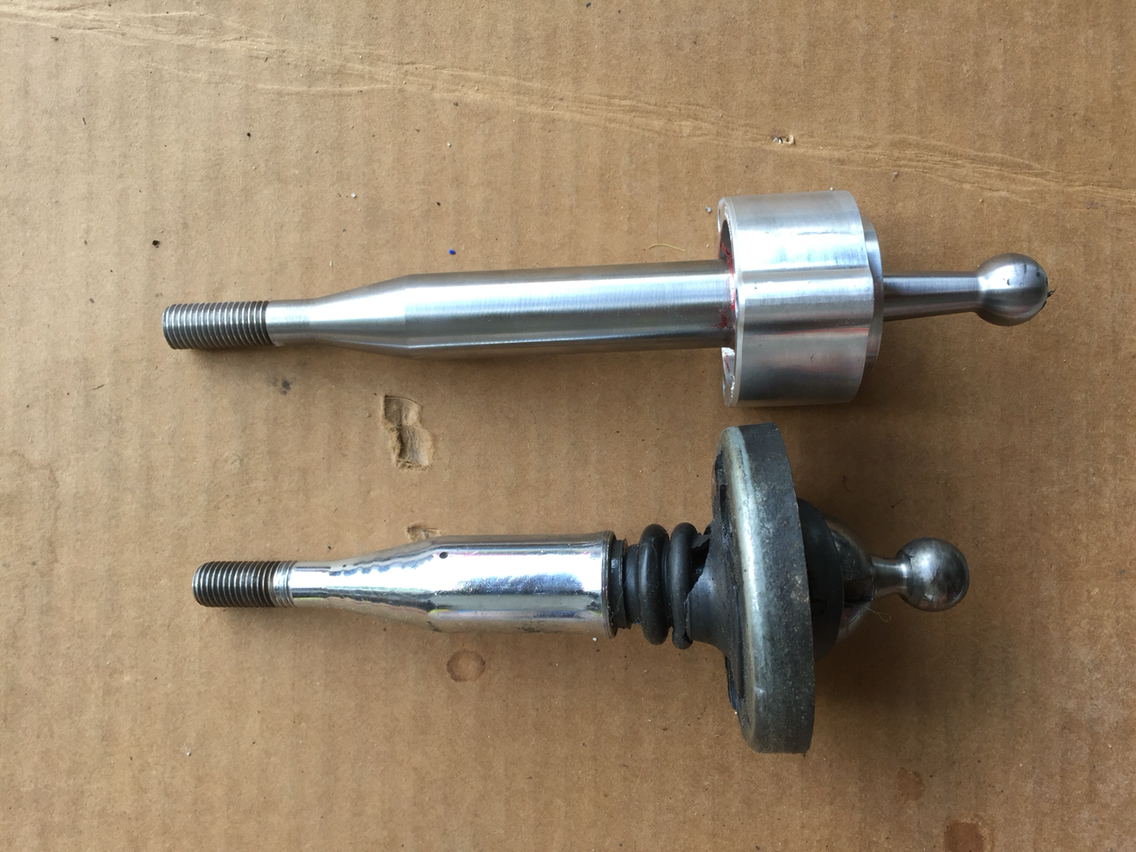
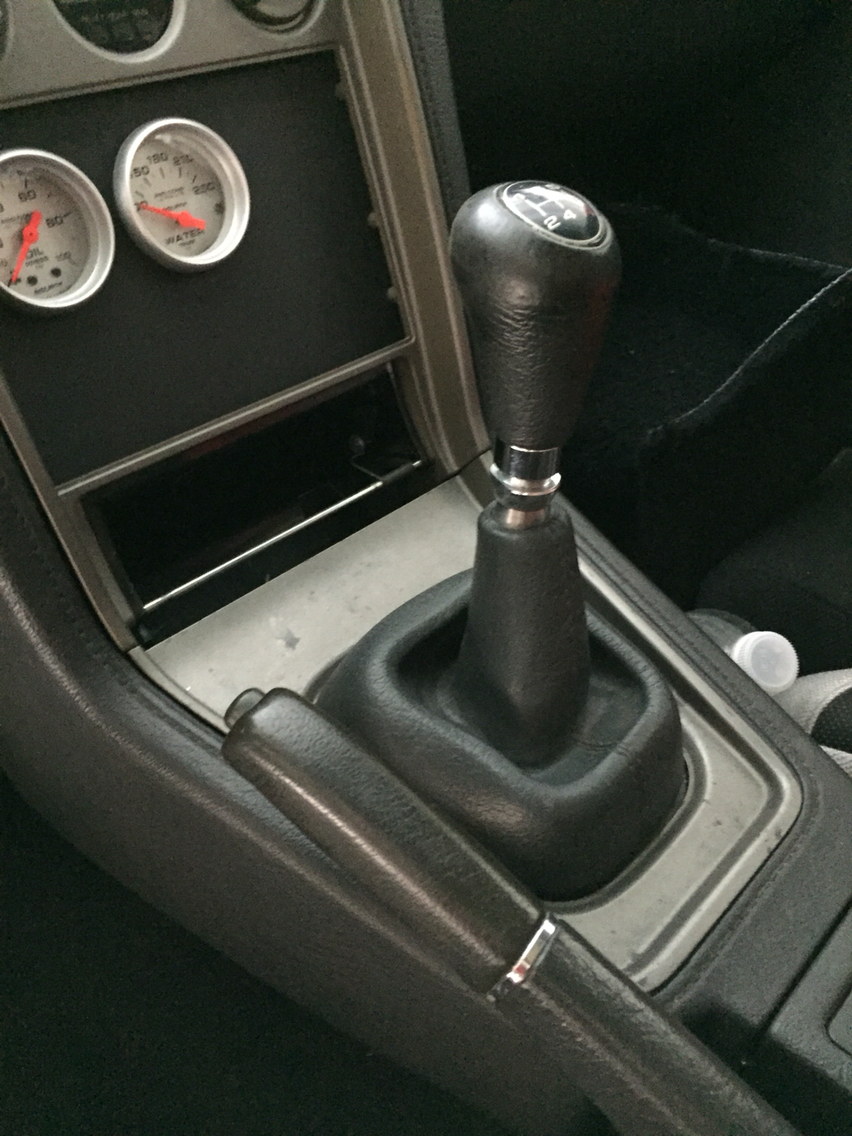
And then installed the short throw shifter from Erick. Man, this thing is short! It is a bit notchy but feels very nice and precise Anyway, on another thread, people were saying they wanted a short throw but with the same shifter length. Well, this one is actually a little longer than the stock GSL-SE shifter. Here's a pic of the two in comparison. I used the stock shifter **** with it but had to pull the boot down from original location because it was pulling up the shifter plate due to the additional height of the shifter.
And the last thing I did today was to install the metal battery tray back on the car. Can someone tell me, do you have a plastic battery tray that goes on between the battery and the metal tray. I have one but it's cracked on one side. Is there a replacement I can get somewhere?
I think it looks proper when your on the track you always need good access. Thats the Rotary Shack one right? You never want to have the shifter inside the boot were all to old for that ^_^ i have a Friend that had a Probe with a JDM MX6 Engine and Gear Box inside and he had cut his shifter down so low it looked like a Ball in the bottom of a shopping bag. HAHAHA..
Looks really great! Your getting close.... Cue "Eye of the Tiger"
Thanks, shifter is one erick31876 had a machinist make (who he met buying parts from). I was lucky enough to be one of the few who was able to buy it cause machinist had limited material left.
mounted the fuse box...originally i had it located on the strut tower but i wanted that area to be used for the ignitor/coil install. now it's where the original coils resided.
am going to track items that i need to do here...hopefully list will slowly dwindle as i work on things.
-fabricate oil cooler ducting
-fabricate manual boost controller bracket
-install manual boost controller/run vacuum lines (need fittings)
-fabricate bracket for coils/ignitors
-fabricate intake box/panel (optional)
-fabricate brake master cylinder brace (optional)
-mount front bumper
-install hood and check for clearance against intercooler piping
-install catch can (need fittings, small air filter, hose)
-mount MAP sensor and run vacuum line
-install boost gauge
-install battery (need plastic tray)
-replace tranny drain plug o-ring
-fill tranny/check for leaks
-install front seat
-WIRING <-this is the scary one (PFC, alternator, fans, fuel pump, MAP sensor, etc)
-tune PFC
thanks, how's ur build coming along? last i saw ur thread, u were working on the integra instead.
My buddy who's fabricating things to my spec (that's a process in itself, hahaha) just got married, so the car has been on hold for the last two months.
Integra has magically fixed itself for the time being. All Hondas do.
FB has new fuel tank, new FC oil cooler (and it already had a FB oil cooler), and pretty much every part but driveshaft and ECU is sitting in the shop, ready to roll. I also prepaid for a bunch of work, so I don't have to worry about it during school when I work less.
got some time this weekend to make 2 brackets, one to mount the trailing coils/ignitors and the other for the boost controller:
mounted the coils/ignitors on driver's tower:
updated list (adding and removing items as i complete or think of other things)
-fabricate oil cooler ducting
-install manual boost controller/run vacuum lines (need fittings)
-mount front bumper
-install hood and check for clearance against intercooler piping
-install catch can (need fittings, small air filter, hose)
-mount MAP sensor and run vacuum line
-install boost gauge
-install battery (need plastic tray)
-replace tranny drain plug o-ring
-fill tranny/check for leaks
-buy spark plug wires
-install front seat
-WIRING <-this is the scary one (PFC, alternator, fans, fuel pump, MAP sensor, etc)
-tune PFC
-fabricate intake box/panel (optional)
-fabricate brake master cylinder brace (optional)
took today off to work on the car and got some things done.
first is the ducting for the oil cooler. this took a few days to do cause of the odd shaped original plastic ducting which i wanted to utilize. several templates later and cutting/bending my aluminum sheet got me this. sorry about the terrible pics, iphone does not like extreme darks and lights. i also should have taken pics of the ducts outside the car but oh well.
i also mounted the catch can on the passenger side firewall and the boost controller went on the passenger side strut tower. need to buy vacuum hoses for each.
and lastly, i'm modifying the bracket that holds the trailing coils/ignitor so that i can also mount the leading coil/ignitor below it. still need to drill mounting holes and paint it but measuring/cutting/welding of metal is complete.
updated list (adding and removing items as i complete or think of other things)
-run vacuum lines to boost controller
-mount front bumper
-install hood and check for clearance against intercooler piping
-run hose for catch can
-mount MAP sensor and run vacuum line
-install boost gauge
-install battery (need plastic tray)
-replace tranny drain plug o-ring
-fill tranny/check for leaks
-buy spark plug wires
-install front seat
-WIRING <-this is the scary one (PFC, alternator, fans, fuel pump, MAP sensor, etc)
-tune PFC
-fabricate intake box/panel (optional)
-fabricate brake master cylinder brace (optional)
I like how you mounted your catch can,looks awesome. I just got one that i have to mount,but it didn't come with any mounting brackets,did yours come with one?. Also if you need any vacuum hose let me know ,i have a ton of it left over from my car. Ill send it to you if you want it
I like how you mounted your catch can,looks awesome. I just got one that i have to mount,but it didn't come with any mounting brackets,did yours come with one?. Also if you need any vacuum hose let me know ,i have a ton of it left over from my car. Ill send it to you if you want it
thanks, there was plenty of room there so though i'd take advantage of it. mine did come with a bracket which was nice. it's the sears version found here: Sears.com
i'll pm you on the vacuum hose in a little bit.
did a little more today...bumper is now back on. will need to touch up a bit where i plastidip-ed the center stripe as some came off during storage, where i was leaning it up against something.
also mounted the MAP sensor, above the catch can.
battery put back in the car. i think i'll eventually get an optima and move it to the inside of the car but for now, this is fine.
updated list (adding and removing items as i complete or think of other things)
-run vacuum lines to boost controller
-install hood and check for clearance against intercooler piping
-run hose for catch can
-run vacuum line for MAP sensor
-install boost gauge
-replace tranny drain plug o-ring
-fill tranny/check for leaks
-buy spark plug wires
-install front seat
-WIRING <-this is the scary one (PFC, alternator, fans, fuel pump, MAP sensor, etc)
-tune PFC
-fabricate intake box/panel (optional)
-fabricate brake master cylinder brace (optional)
 06-16-16, 07:50 AM


 I also prepaid for a bunch of work, so I don't have to worry about it during school when I work less.