Austin's FB TII Swap - Details and Pics Aplenty

 06-02-13, 12:43 AM
#127
Progress on the night:
Figured out how to route hose for pulsation dampener and that I have an S5 TII fuel primary and secondary rail and injector setup - can't complain


Engine wiring harness plugged in and routed correctly
UIM installed
TB installed
TB elbow bolted on


Test fit TMIC

Alternator re-installed
New vacuum caps on everything that needed to be capped since the emissions system was removed
Mounted pressure sensor and FPR/R
Mounted trailing coil, working on bracket for leading coil
Ran wiring that will be finished at a later date
ECU bolted down and test fit under kick panel

Finally finished the gas tank

Progress went well, ready for the thing to be running!
Next things on the list:
Screw FC TII fuel pump sending unit onto tank
Get replacement evaporative tank unit since the one I have has a busted fitting where the hose would go
Bolt tank into car
Finish up routing fuel pump and lines
Wire in the right side harness
Re-test everything and make sure it's good to run
Start her up!
Get custom driveshaft made at a local shop since the one I thought would work has fallen through
06-05-13, 09:52 PM
#129
Thanks! I got some stuff done but not too much.
Recent work, all wiring.
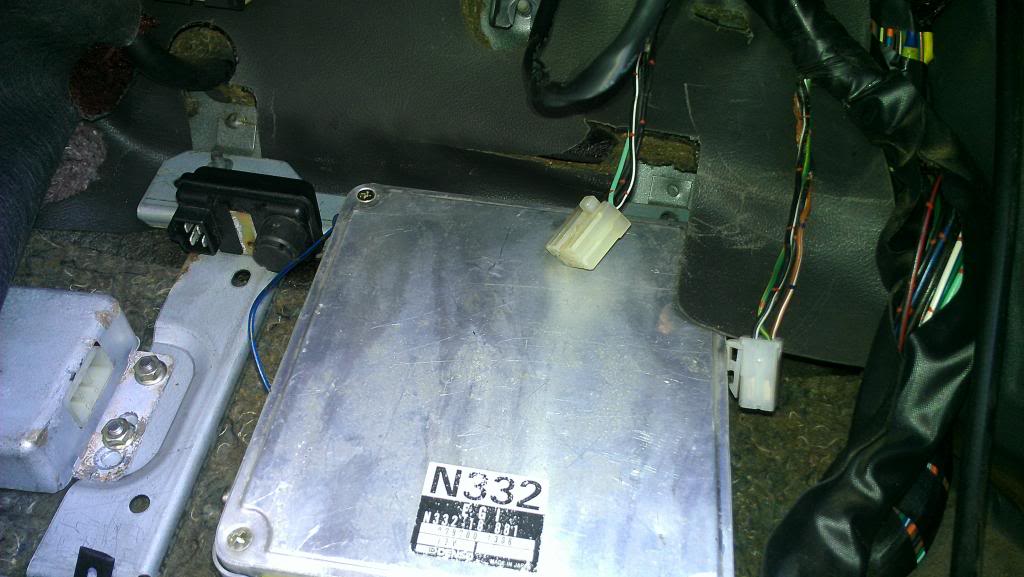
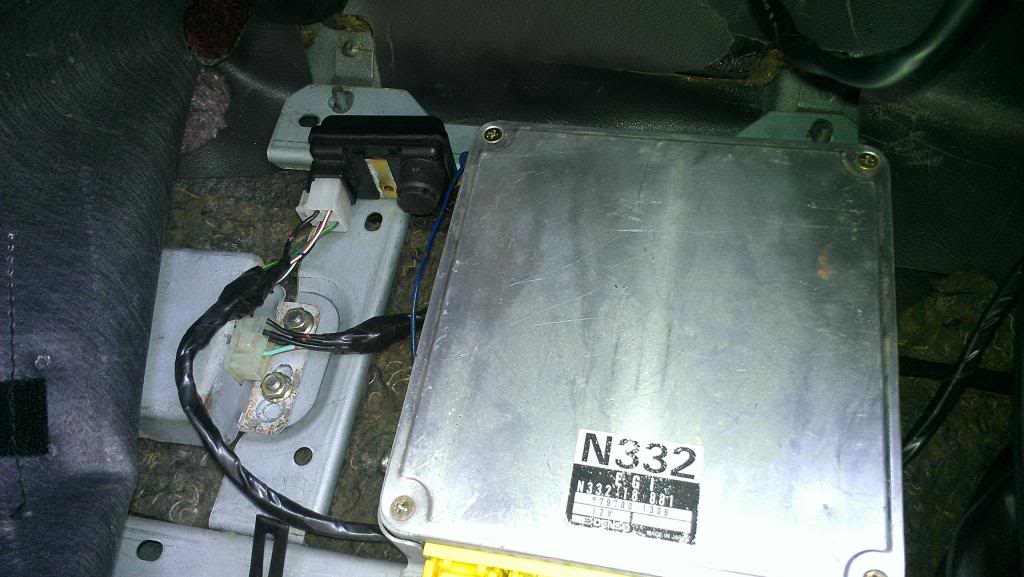
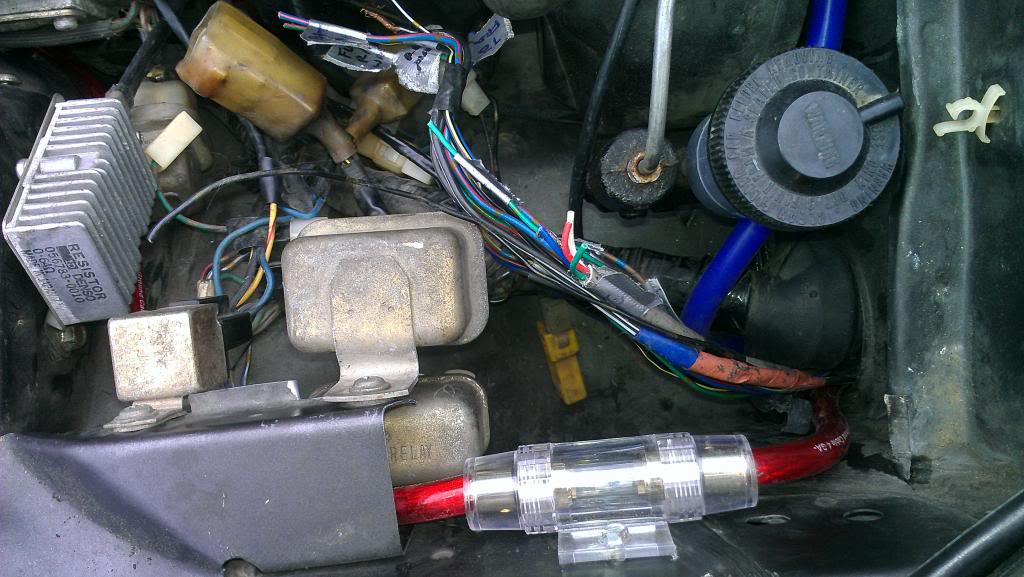
TII ECU mounted under kick panel
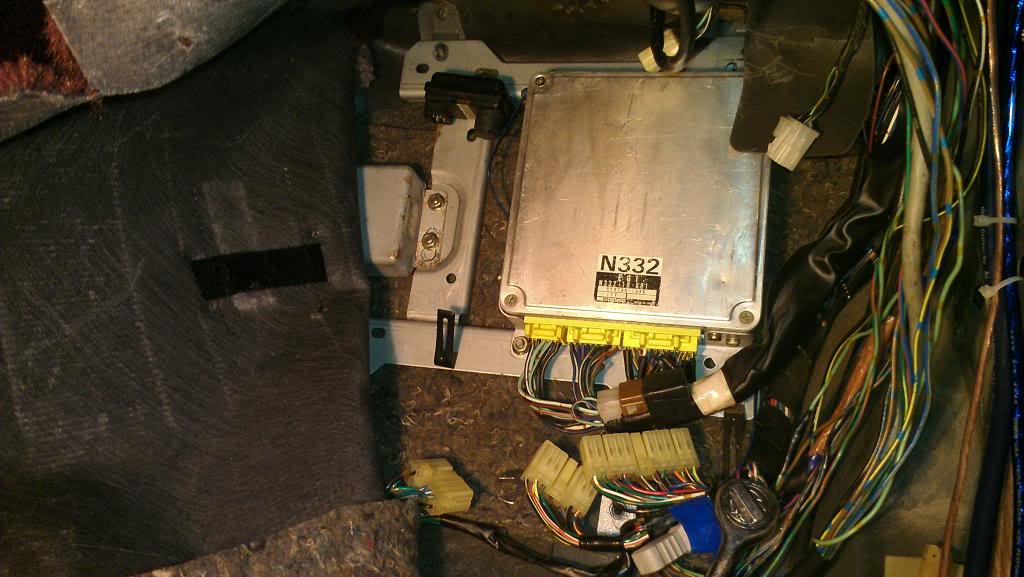
Pic of knock control unit and pressure sensor plugs that need to be extended
In the middle of extending plugs
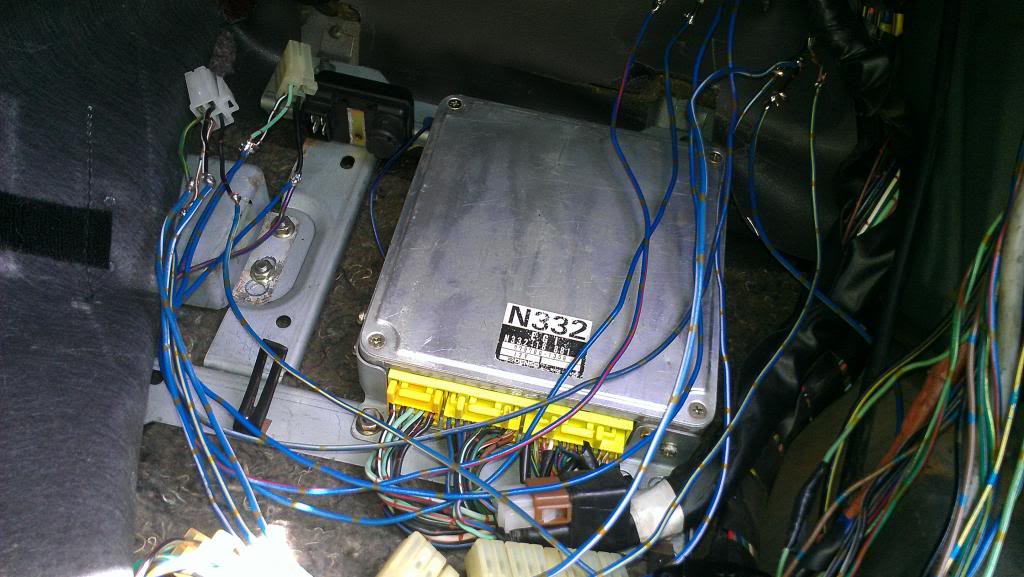
Extension of two plugs on harness finalized
Pressure sensor and knock control unit mounted
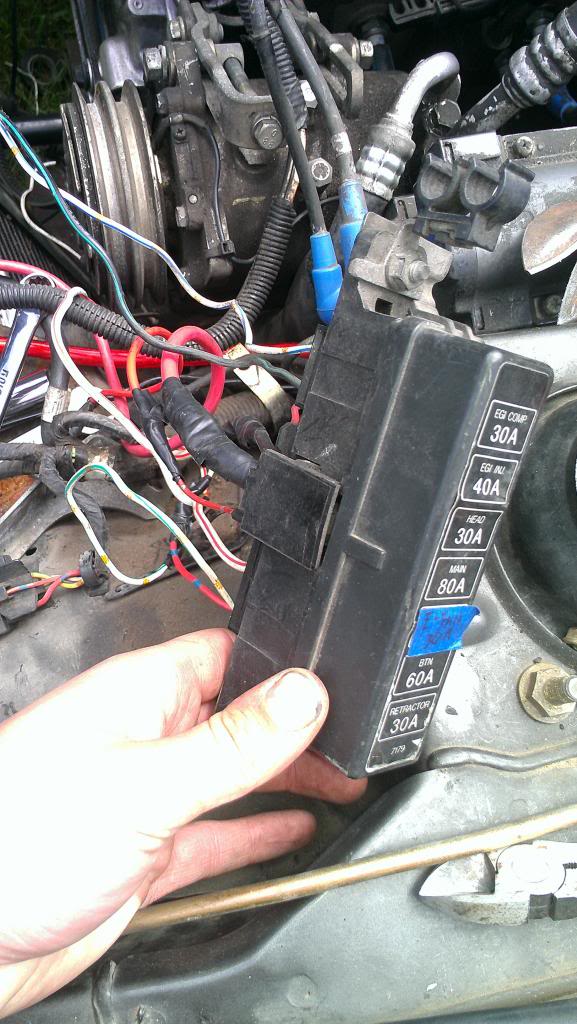
Fuse block mounted where stock FB fuseable links were
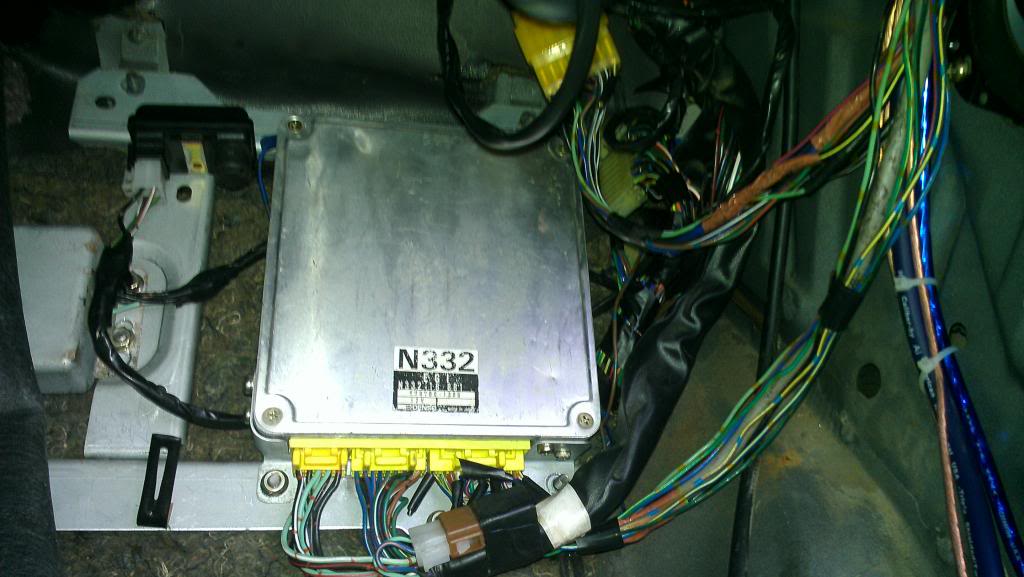
Final mounting of the ECU and components
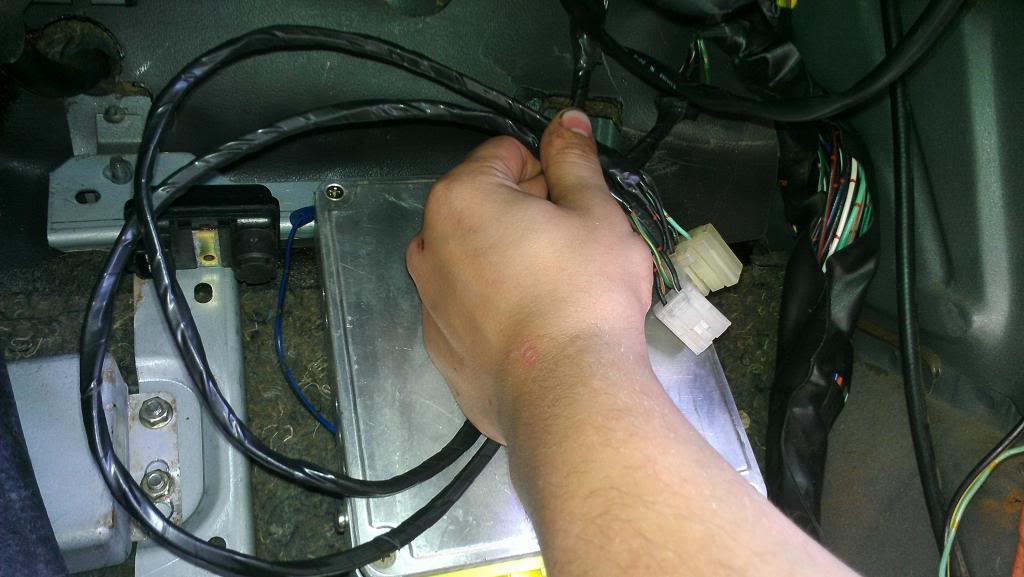
Through the firewall we go!
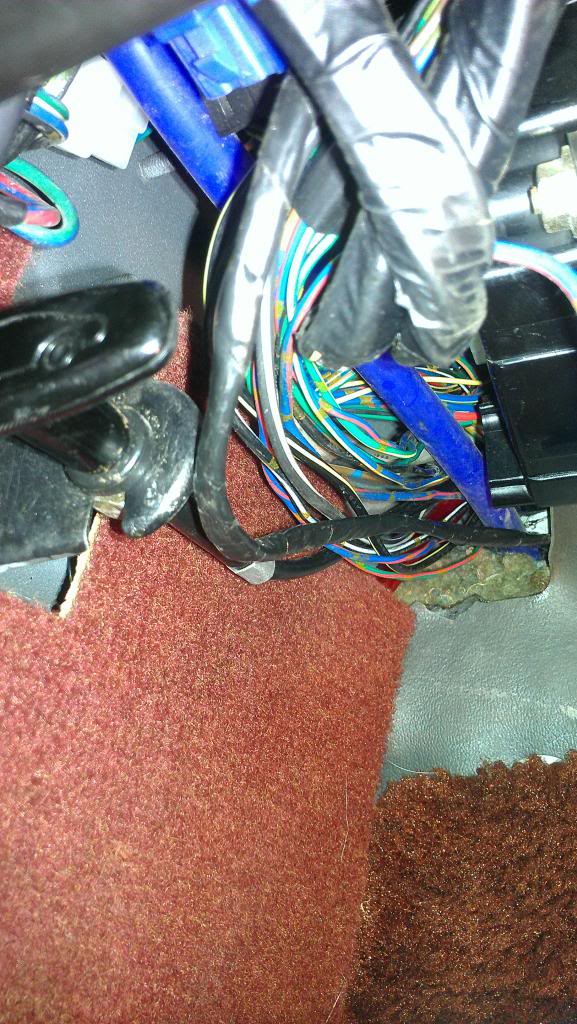
Other side of the wall
Hoping to get it really close to running, if not actually running, tomorrow night. Ready to hear it going!
Recent work, all wiring.
TII ECU mounted under kick panel
Pic of knock control unit and pressure sensor plugs that need to be extended

In the middle of extending plugs

Extension of two plugs on harness finalized

Pressure sensor and knock control unit mounted

Fuse block mounted where stock FB fuseable links were

Final mounting of the ECU and components

Through the firewall we go!

Other side of the wall

Hoping to get it really close to running, if not actually running, tomorrow night. Ready to hear it going!
06-11-13, 08:06 AM
#132
Good progress on the wiring. 
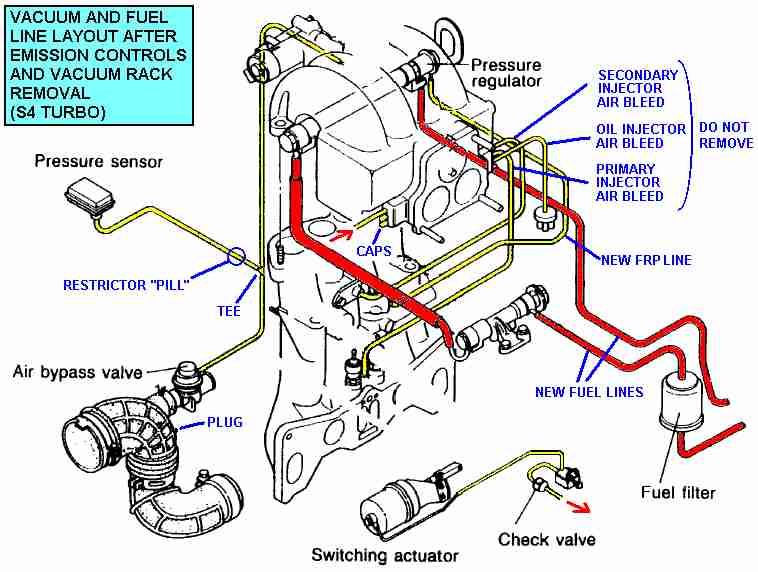
Few things though - Those are definitely not S5 fuel rails or injectors (S5 rails are steel and all one piece, S4's are aluminum and has removable fpr and pulsation dampner, S5 injectors have a more rounded plug, the S4's have the rectangle plug like yours), and something doesn't look right to me. Unless S4's are completely different than a S5 (I don't believe so) then the fuel pressure regulator (the one with the vaccum line going to it) should be the last thing the fuel sees before returning to the tank - which would be on the secondary rail...
I can see what looks to be the stock FRP on your secondary rail, and no where in your system is there a pulsation dampner (which arguably does nothing anyway, normally would be on the primary rail) Looks like somewhere along the line your primary rail has been modified or something. Not sure why there would be a FPR on there though.... Take a few mins to double and triple check your fuel routing against the FSM for that engine to be sure
Qingdao - the FC water pump/housing has a extra bolt that the alternator bracket mounts to.
06-11-13, 10:28 AM
#133
I bet you could get a Haltech down there, wouldn't be too much of a squeeze. When I go standalone I'll probably route it to the inside of the glove box with a small PC-style fan to cool it down. I never really use the thing anyways.
I want the 12a to be a running replacement just in case I dropped something down an intake and fried the TII so I left it stock. And if the TII runs well I'll end up selling it hopefully to dampen the price of the swap. If I had the room to keep it I would but I have no where to store it. Nice 12a with a maximum of 86,xxx miles on it and still runs like a charm.
Thanks!
Few things though - Those are definitely not S5 fuel rails or injectors (S5 rails are steel and all one piece, S4's are aluminum and has removable fpr and pulsation dampner, S5 injectors have a more rounded plug, the S4's have the rectangle plug like yours), and something doesn't look right to me. Unless S4's are completely different than a S5 (I don't believe so) then the fuel pressure regulator (the one with the vaccum line going to it) should be the last thing the fuel sees before returning to the tank - which would be on the secondary rail...
Here's one link to the best info I've found:
Whole Thread on The Topic
Actual Pics of Someone Else's System Like Mine
I can see what looks to be the stock FPR on your secondary rail, and no where in your system is there a pulsation dampner (which arguably does nothing anyway, normally would be on the primary rail) Looks like somewhere along the line your primary rail has been modified or something. Not sure why there would be a FPR on there though.... Take a few mins to double and triple check your fuel routing against the FSM for that engine to be sure
Normal fuel routing:
Fuel feed > Primary Rail (with Pulsation Damper) > End of Primary to Beginning of Secondary Rail > Secondary Rail (with Fuel Pressure Regulator) > Return Line
And reversed lines like that are on JDM cars..
Fuel feed > Secondary Rail (with Pulsation Damper) > End of Secondary to Beginning of Primary Rail > Primary Rail (with Fuel Pressure Regulator) > Return Line
This is all off of research and NO personal experience.

Well, I'm going to go out and try to switch my feed and return lines and see if that does the trick. JDM fuel lines run through the secondary, primary, then back to the tank. We will see if that is the issue.
Good news is that it ran on carb cleaner last night! So it kind of started in the FB so I'm getting really close
 06-11-13, 10:40 AM
#134
Don't believe everything you read about the JDM's... Both my S5's engines are JDM's and run "normal" that is - feed - primary rail/pulsation dampner - secondary rail/fpr - return to tank (like you described above)
Not sure where that whole JDM runs the fuel backwards thing came from honestly since I've never seen a setup that would actually indicate that. Then again my first hand experience is relatively limited I guess...
This pic from that thread you linked is a great reference and shows that the primary rail should not have a vaccum line going to it...
06-12-13, 01:54 AM
#135
It Liiiiivvesss!!
Don't believe everything you read about the JDM's... Both my S5's engines are JDM's and run "normal" that is - feed - primary rail/pulsation dampner - secondary rail/fpr - return to tank (like you described above)
Not sure where that whole JDM runs the fuel backwards thing came from honestly since I've never seen a setup that would actually indicate that. Then again my first hand experience is relatively limited I guess...
This pic from that thread you linked is a great reference and shows that the primary rail should not have a vaccum line going to it...
Not sure where that whole JDM runs the fuel backwards thing came from honestly since I've never seen a setup that would actually indicate that. Then again my first hand experience is relatively limited I guess...
This pic from that thread you linked is a great reference and shows that the primary rail should not have a vaccum line going to it...
I wonder if that's how the PO ran the system - backwards; because there's no other way it would have worked properly. Over and over again I tried to get it to go and it wouldn't start on it's own fuel for me. It would start on starter fluid or intake cleaner (woulda ran on fuel but didn't want to put gas in a small enough system to pour in the TB). I can't remember if he ran the feed to the top or the bottom for the life of me. I should have taken a picture of that or marked the lines better - ah well.
Here's a pic of me re-doing the fuel rails so the pulsation dampener is on the primary rail and the fuel pressure regulator is on the secondary rail of the S4 TII setup - as it should be. Puddle at the bottom is mostly fuel with some water to help the fumes settle down a bit and make it so I don't go boom.

Well, once I had that setup I had the fiance in the car turn it over and heard a suuuuper loud backfire and knew that it was probably going to work (whole UIM, TB, and intercooler weren't hooked up so it wouldn't have run right). Got it all hooked back up and BAM! - off she popped. Let it run for a bit and warm up, shut it down. Did it again, and once more. Then when we were going to leave I grabbed the GoPro and shot this:
I can now say I own a running TII swapped FB!
I can't say I own a running and driving one, but running does me good enough for the night - it will be driving soon Plans for the time it takes me to get a driveshaft made:
1st - clean up the huge mess I made of the yard and the car, it's been really bugging me having all that clutter and disorganization
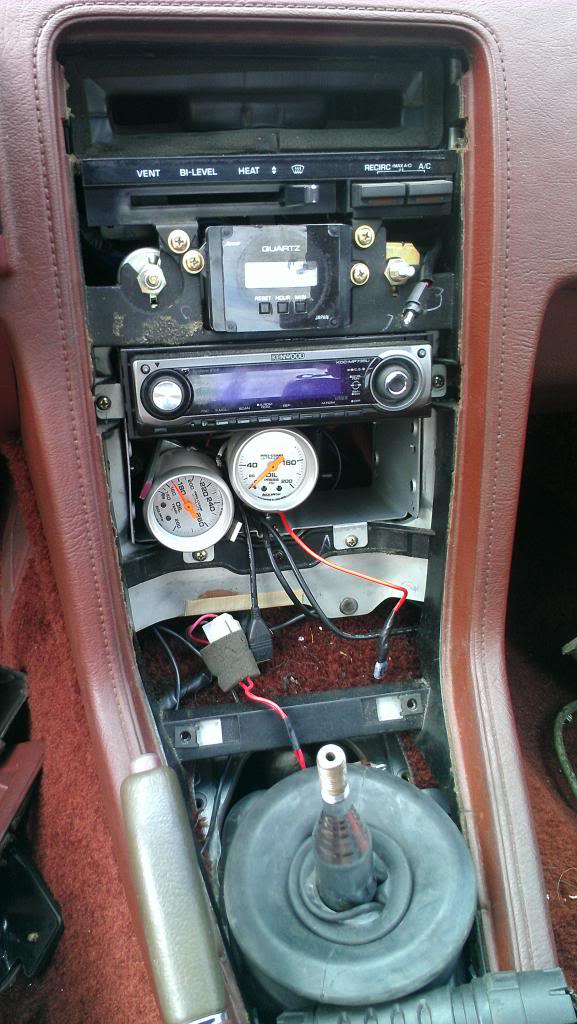
Wiring
Re-check each wiring connection and e-tape the crap out of the harness for protection
Rewire fuel pump to run on a switch to help in flooded and hot starts
Wire in all stock gauges to work on the TII engine even though I have everything I need in aftermarket gauges
Fuel
Run new, matching 3/8" fuel line at the final leg of the return system since I had to use the old stuff in a pinch
Double check that there's no leaks from either rail or any lines
Triple check the gas tank and make sure that nothing is coming out of anything back there that would bother me
Whole Car
Put interior and exterior of car back together to look mostly stock (sleeper
 )
)Figure out how to mount a hood scoop on the FB hood to draw air into the TMIC
Rear End
Full set of Energy Suspension Poly Red bushings for the rear end and remove sway bar
Tokico Blue's all the way around
Weld rear diff (possibly, not sure yet
Thank You's:
+Emotional, Physical, and Mental Strength - Also, thanks to the beautiful lady who "let" me buy the TII car in the first place [she thinks I wouldn't have bought it without her permission but I let her think she's the boss
]. Seriously, she's a great fiance and means a lot and I couldn't have done this swap this quickly or efficiently without her. Thanks babe.+Technical Support - Thank you Sean! You've been a great help and I know for a fact this thing wouldn't be running without your guidance. If you ever need anything, a kidney, firstborn, a running 12a, you just let me know
 Thanks though, I really do mean that. You helped a bunch and I appreciate it very much.
+General Help - Finally a big thank you to everybody who has been watching, helping, and anyone who looks at the thread and learns from it. I'll be posting lessons I've learned soon about the swap that will help others with wiring and some of the other common questions I wanted to ask and couldn't find until asking Sean. I appreciate all of you guys' support and help towards the final goal and hope I can continue to be of help and humor to you guys as you are to me.
06-12-13, 06:39 AM
#136
Hallelujah!
The clutter kinda happens slowly and when you finally notice, it's like a disaster area, for me anyway.
Don't weld your rear. If you have to run an open diff, use your right toe to control wheelspin. Part of being a better (smoother) driver. An LSD will come in time.
Enjoy!!!
The clutter kinda happens slowly and when you finally notice, it's like a disaster area, for me anyway.
Don't weld your rear. If you have to run an open diff, use your right toe to control wheelspin. Part of being a better (smoother) driver. An LSD will come in time.
Enjoy!!!
06-12-13, 07:43 AM
#138
You're welcome, twas nothing!
I've been meaning to do some How-to threads on the T2 swap since the information here tends to be very scattered/incomplete. Then again, searching for the info is half the fun I guess...
Glad you managed to get it running. Once you get that driveshaft in there expect to spend a bunch of timing working out all the bugs - again, it's part of the fun of building a swapped car.
My 2 cents, I wouldn't bother cutting a hole in the hood if you're planning to go front mount at some point soon and don't weld the diff - the open diff will be fine until you get a GSL rear. Like cookboy said - if you can learn to push the car hard with an open diff you'll be a better driver for it.
Again, congrats on getting it running!
06-12-13, 09:04 AM
#139
congratulations. I suppose this is a testament to the board, because you actually made it look easy. well, maybe my judgment is skewed because I've been here too long. I don't know which. either way, you did a great job.
now quit the sappy award-ceremony crap and get back to work. get it on the road.
now quit the sappy award-ceremony crap and get back to work. get it on the road.
 06-16-13, 10:35 PM
#142
Hallelujah!
The clutter kinda happens slowly and when you finally notice, it's like a disaster area, for me anyway.
Don't weld your rear. If you have to run an open diff, use your right toe to control wheelspin. Part of being a better (smoother) driver. An LSD will come in time.
Enjoy!!!
The clutter kinda happens slowly and when you finally notice, it's like a disaster area, for me anyway.
Don't weld your rear. If you have to run an open diff, use your right toe to control wheelspin. Part of being a better (smoother) driver. An LSD will come in time.
Enjoy!!!
I know about the LSD thing, I just really really want a dual wheel spin rear end and I have a contact who welds 240 diffs on the side and is highly recommended. A $50 true-locked rear end is super cheap and an easy fix compared to waiting for an 84-85 GSL rear end...ah...we will see.
 face like "Holy crap, I couldn't do that..."
You're welcome, twas nothing!
I've been meaning to do some How-to threads on the T2 swap since the information here tends to be very scattered/incomplete. Then again, searching for the info is half the fun I guess...
Glad you managed to get it running. Once you get that driveshaft in there expect to spend a bunch of timing working out all the bugs - again, it's part of the fun of building a swapped car.
My 2 cents, I wouldn't bother cutting a hole in the hood if you're planning to go front mount at some point soon and don't weld the diff - the open diff will be fine until you get a GSL rear. Like cookboy said - if you can learn to push the car hard with an open diff you'll be a better driver for it.
Again, congrats on getting it running!
I've been meaning to do some How-to threads on the T2 swap since the information here tends to be very scattered/incomplete. Then again, searching for the info is half the fun I guess...
Glad you managed to get it running. Once you get that driveshaft in there expect to spend a bunch of timing working out all the bugs - again, it's part of the fun of building a swapped car.
My 2 cents, I wouldn't bother cutting a hole in the hood if you're planning to go front mount at some point soon and don't weld the diff - the open diff will be fine until you get a GSL rear. Like cookboy said - if you can learn to push the car hard with an open diff you'll be a better driver for it.
Again, congrats on getting it running!
We need to collaborate on some TII swap write up stuff, I think we (by we, I mean mostly you) could help many people out with their swaps. And it's not like it's deep dark and secret stuff - just things most people don't think about.
As we have discussed about doing it in stages, I know I'll be working out bugs and tweaking things for years to come until it's an absolute monster
Still seriously considering that welded rear though....we will see.
congratulations. I suppose this is a testament to the board, because you actually made it look easy. well, maybe my judgment is skewed because I've been here too long. I don't know which. either way, you did a great job.
now quit the sappy award-ceremony crap and get back to work. get it on the road.
now quit the sappy award-ceremony crap and get back to work. get it on the road.
Now you're already showing the evil side of me, but you went TII first then REW? I'm liking where this train of thought is leading since I've been thinking about it constantly...
What I've been up to the last couple of days? Not much of nothing besides cleaning and making a gauge pod holder out of steel. Remembered that I did it once before and said I never would again - wish I would have recollected that thought before I started working on it.
06-21-13, 05:55 PM
#143
Some Progress
What I started looking at the other day:
Finished product. Not too bad, but would like to make it even better in the future.
The Band-Aid cure:
Fuel pump shutoff switch for S4 TII's which have the worst habit of flooding upong restarting after warming up. Tested working, up is fuel pump on and down is turning off the Ignition IGN 1 power source to the Circuit Opening Relay COR.
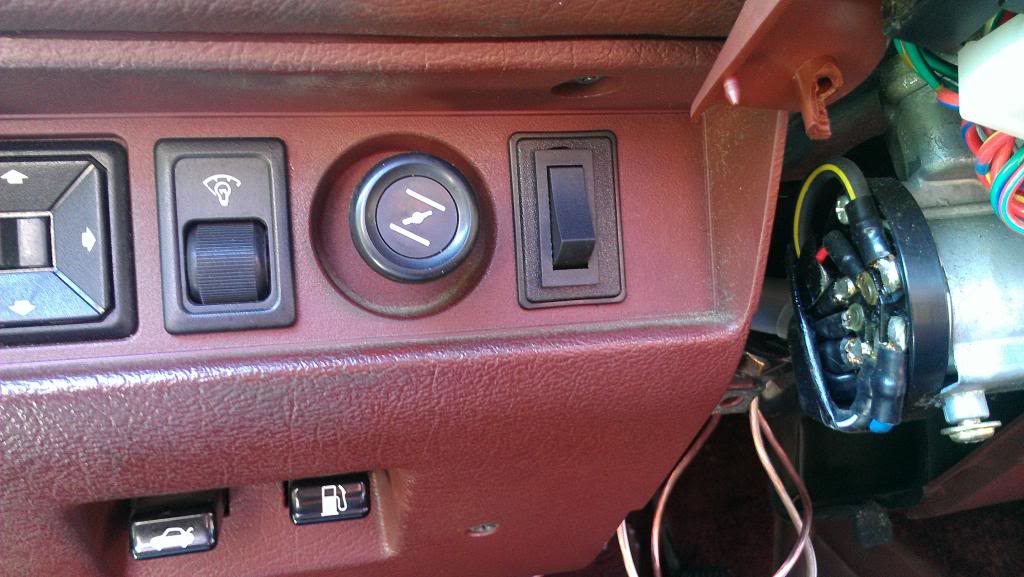
Turbo II coils mounted on the strut tower. Lower two bolts in the square tubing were put into pre-existing tapped holes in the tower.
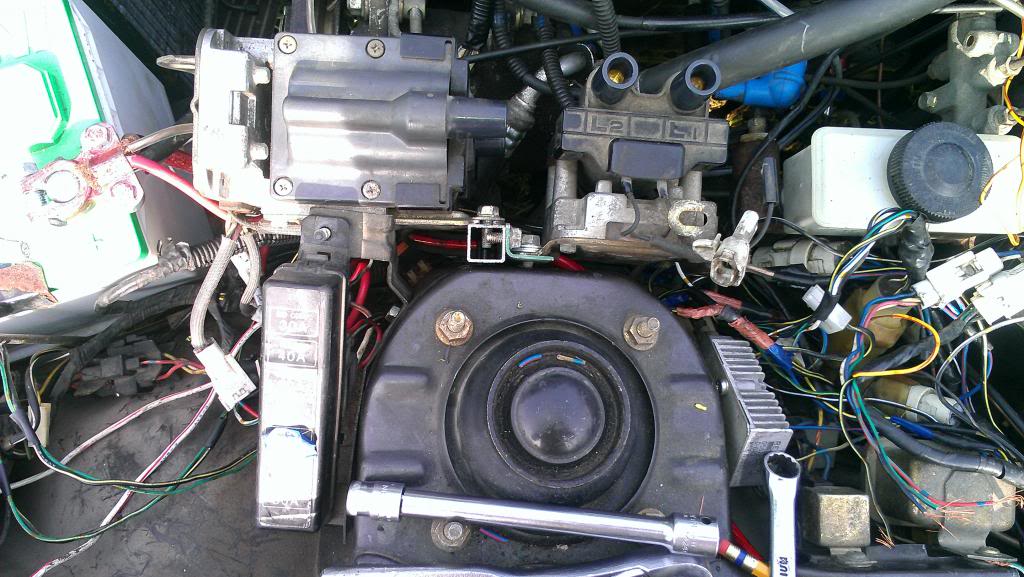
Closeup of the angle steel tapped and bolted to the square tubing.
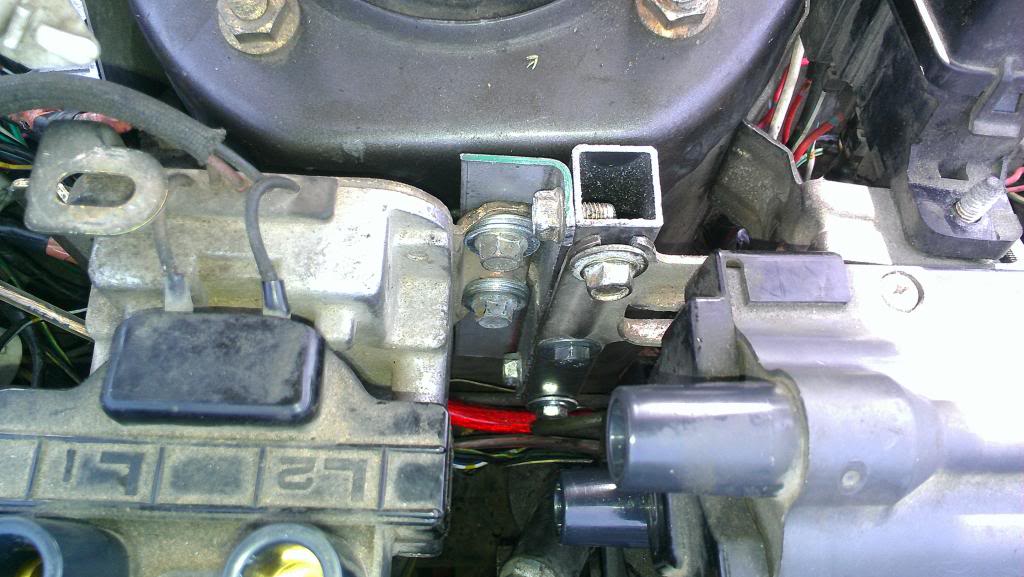
Showing how close it all is to the A/C system, but it'll be worth keeping in the end I think.
Also bought exhaust clamps for mounting TII FMOC to the front tube of the FB but didn't get around to it today. Slowly plunking along at it all, gotta keep at it and not let it overwhelm me.

Finished product. Not too bad, but would like to make it even better in the future.

The Band-Aid cure:
Fuel pump shutoff switch for S4 TII's which have the worst habit of flooding upong restarting after warming up. Tested working, up is fuel pump on and down is turning off the Ignition IGN 1 power source to the Circuit Opening Relay COR.

Turbo II coils mounted on the strut tower. Lower two bolts in the square tubing were put into pre-existing tapped holes in the tower.

Closeup of the angle steel tapped and bolted to the square tubing.

Showing how close it all is to the A/C system, but it'll be worth keeping in the end I think.

Also bought exhaust clamps for mounting TII FMOC to the front tube of the FB but didn't get around to it today. Slowly plunking along at it all, gotta keep at it and not let it overwhelm me.
06-21-13, 10:23 PM
#145
Haha we will see, and thanks for the vote of confidence!
Forgot to post this earlier, but I have a large coolant leak from the turbo. I believe that it is from the crush washer that is bolted to the turbo via a banjo bolt on the passenger's side of the turbo housing. All I know is that when I started the car up, let it idle and warm up, then spooled it to boost - as soon as I released the throttle a huge cloud of white smoke appeared from the downpipe and the turbo itself. It smelled of coolant and the smoke was white which indicated coolant as well. I have to find that leak here really soon in order to get the car on the road - kinda sucks but it shouldn't be too big of a deal.
Well huge update here - think I found the shop that will be making my driveshaft!
Proven Force in Maple Grove, MN
Their website is linked here and they seem to have a grip on what I need done. Their site is the only one I can find that actually mentions making full custom driveshafts and they even have an inventory of new Mazda RX-7 driveshafts for every year and tranny ever made! Super happy about finding their site while searching for somewhere to get a shaft made. I know I'll be able to drive on down there and talk to a guy who know's what's up and make me the driveshaft I need. I'm tempted to even go all out and get an aluminum one but we will see the price difference.
Goal here is to get the car on the road, driving under its own turbo power by about July 10th
06-23-13, 10:57 AM
#146
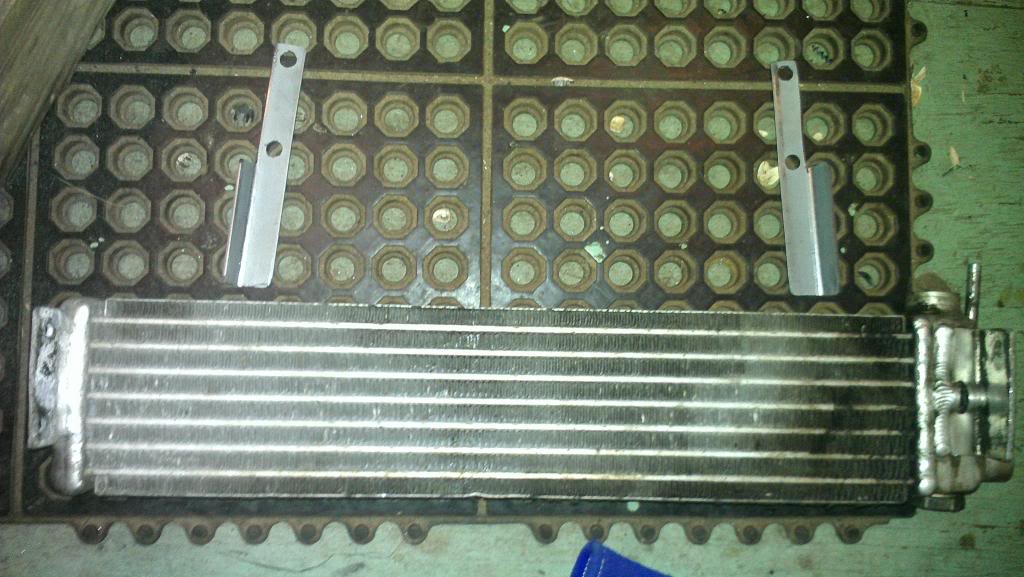
Brackets I made out of angle steel
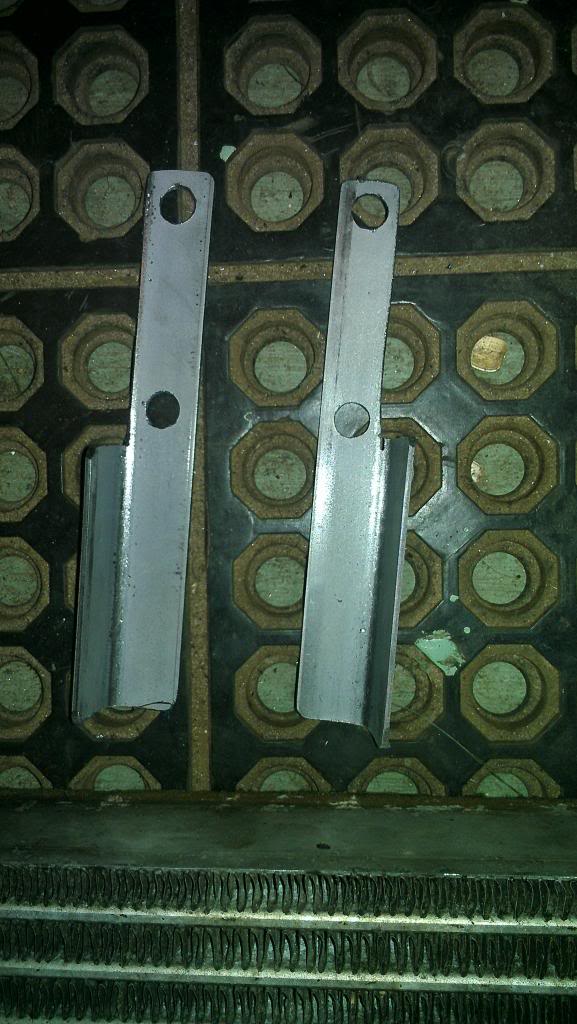
Sides that they're mounted on, but turned 180deg
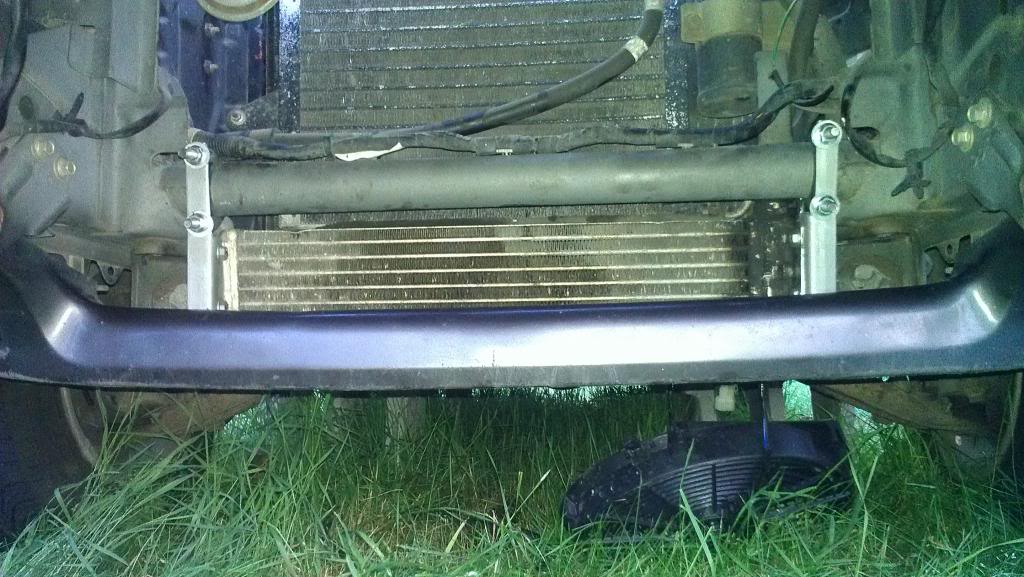
From the front of the car
Underneath, where the lines run
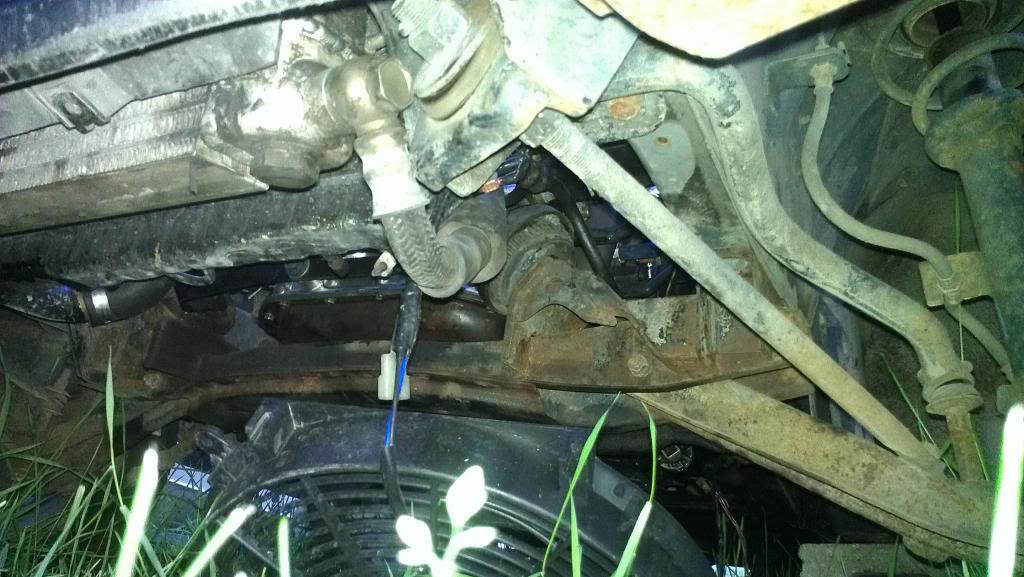
Closeup of the lines
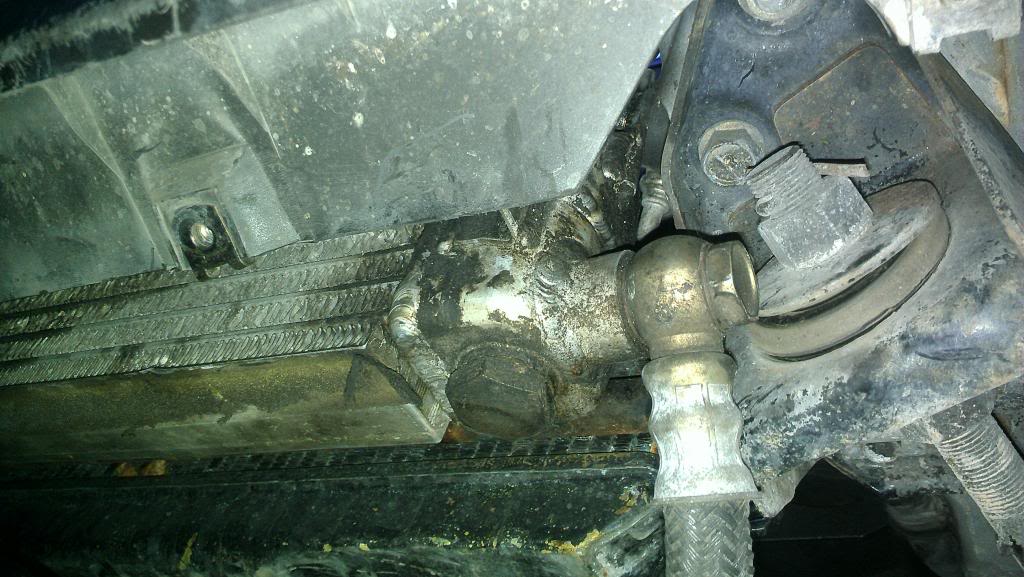
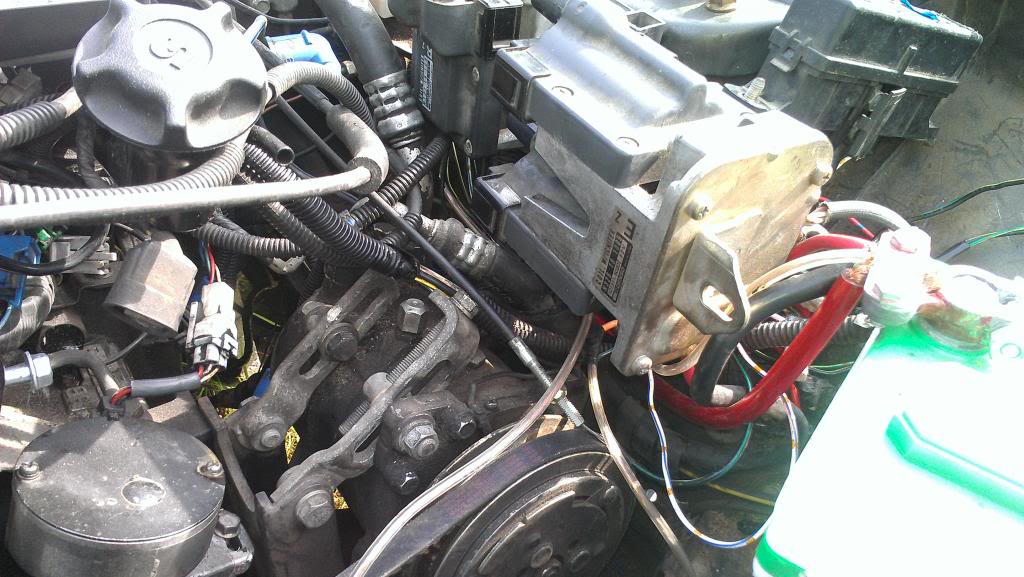
Slowly poking away it it. I have to fix a coolant leak from the thermostat gasket and another from the lower intake manifold that feeds coolant to the turbo. Not sure if I used too much RTV or what. Getting close to having the engine bay done, getting really happy about that.
Also just ordered the A/C drier and new o-ring kit, as well as that thermostat gasket from RockAuto. Finished ordering that coolant outlet gasket from Atkins as well. Should be here this week sometime. While those are on their way I'll be getting more small things done and getting closer and closer to being done

Sides that they're mounted on, but turned 180deg

From the front of the car

Underneath, where the lines run

Closeup of the lines

Slowly poking away it it. I have to fix a coolant leak from the thermostat gasket and another from the lower intake manifold that feeds coolant to the turbo. Not sure if I used too much RTV or what. Getting close to having the engine bay done, getting really happy about that.
Also just ordered the A/C drier and new o-ring kit, as well as that thermostat gasket from RockAuto. Finished ordering that coolant outlet gasket from Atkins as well. Should be here this week sometime. While those are on their way I'll be getting more small things done and getting closer and closer to being done
 [/URL]
 i'll show myself out now. carry on.
06-23-13, 01:36 PM
i'll show myself out now. carry on.
06-23-13, 01:36 PM
#148
Currently doing wiring completion of where they all come through the firewall and wiring in the stock gauges. Maybe get the engine bay done today then I'm thinking about putting the Tokico Blues on the front and taking the rear end off to do the full Poly Bushing swap - we will see
