85' Stripped Corner Carver
 06-16-13, 02:38 PM
#26
Full Member
Thread Starter

Join Date: Apr 2012
Location: Louisiana
Posts: 201
Likes: 0
Received 0 Likes
on
0 Posts
I think that port needs to be connected to something, I just don't know what.
Re-reading the carb stripping tutorial, at the end the carb looked like this:
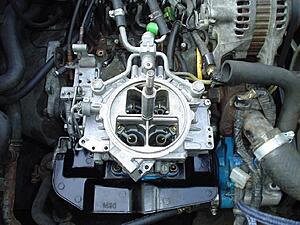
Both fuel inputs are hooked to something (though one may be blocked off, I don't know... The smaller one on my carb goes to nothing) and the port I am trying to figure out goes to something as well.
Also, the air vent solenoid isn't powered and is still in the carb, do I need to supply it with 12v source?
I also need to figure out what these two things are on the dist. They aren't capped.

The throttle pedal looks to have a bolt stop so I can just adjust that so I don't twist the throttle shafts at all.
Re-reading the carb stripping tutorial, at the end the carb looked like this:

Both fuel inputs are hooked to something (though one may be blocked off, I don't know... The smaller one on my carb goes to nothing) and the port I am trying to figure out goes to something as well.
Also, the air vent solenoid isn't powered and is still in the carb, do I need to supply it with 12v source?
I also need to figure out what these two things are on the dist. They aren't capped.
The throttle pedal looks to have a bolt stop so I can just adjust that so I don't twist the throttle shafts at all.
Last edited by Shrimp; 06-16-13 at 02:49 PM.
 06-16-13, 04:23 PM
#28
Full Member
Thread Starter
Join Date: Apr 2012
Location: Louisiana
Posts: 201
Likes: 0
Received 0 Likes
on
0 Posts
And another discovery... The line that is blocked is the fuel return line. Not sure if I need to use it or not yet.
I have a Holley Red fuel pump upgrade and a Holley regulator. I have no idea if it is bypass style or not because the numbers on the regulator don't match anything I can identify from Holley so I guess the return line will stay blocked for now.
The number on it is 264 5-2.
I have a Holley Red fuel pump upgrade and a Holley regulator. I have no idea if it is bypass style or not because the numbers on the regulator don't match anything I can identify from Holley so I guess the return line will stay blocked for now.
The number on it is 264 5-2.
06-16-13, 04:51 PM
#30
Full Member
Thread Starter
Join Date: Apr 2012
Location: Louisiana
Posts: 201
Likes: 0
Received 0 Likes
on
0 Posts
06-16-13, 05:58 PM
#31
Full Member
Thread Starter
Join Date: Apr 2012
Location: Louisiana
Posts: 201
Likes: 0
Received 0 Likes
on
0 Posts
I think that open port pictured above needs to stay open. In pics seen in the carb stripping manual it appears to be hooked to the rats nest. I dont have a rats nest.
06-16-13, 10:06 PM
#32
Rotary Learner
Join Date: May 2012
Location: missouri, east of kc
Posts: 175
Likes: 0
Received 0 Likes
on
0 Posts
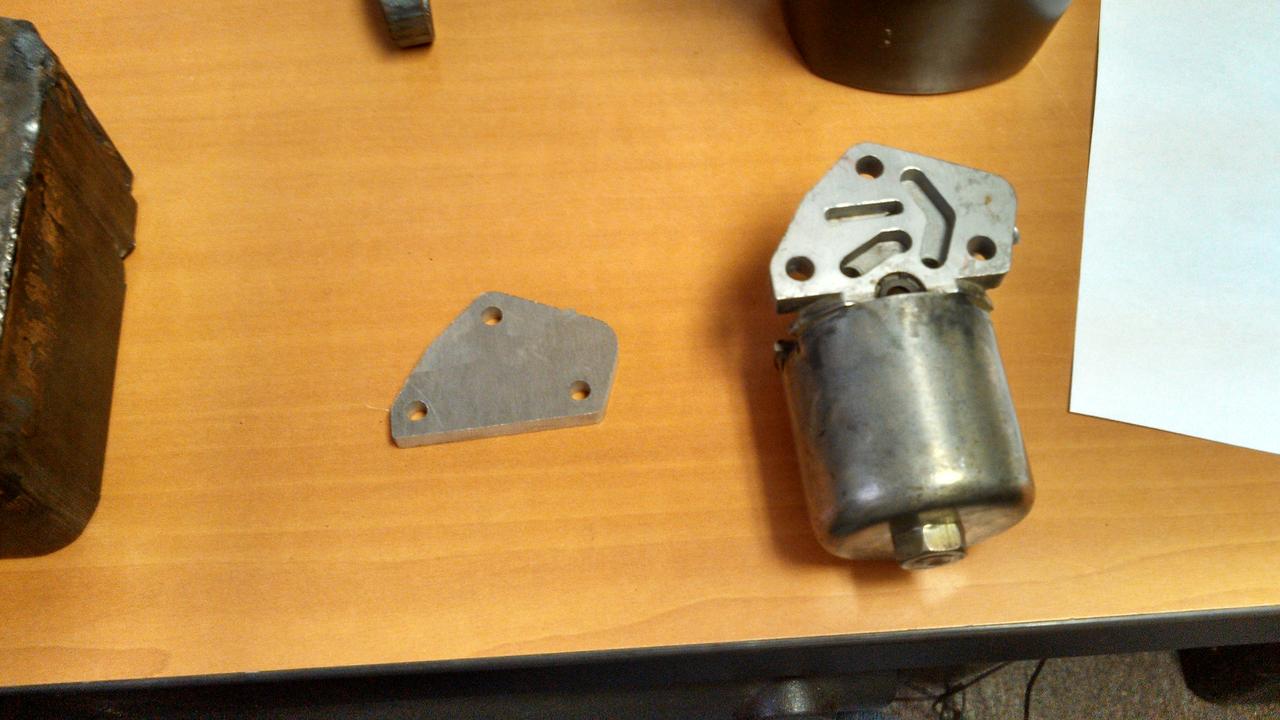
First you need your return line hooked up. Second put a cap on that port. Third make a cover plate for your altitude. Compensator (the triangle area next to the passenger fender with all the holes), what ever number this one is take a piece of hose from the spliter on your advance and hook it onto the second hole from the left on the carb spacer. Also the jet that is plugged up replace it. That should get you started.
06-16-13, 10:16 PM
#33
Full Member
Thread Starter
Join Date: Apr 2012
Location: Louisiana
Posts: 201
Likes: 0
Received 0 Likes
on
0 Posts
First you need your return line hooked up. Second put a cap on that port. Third make a cover plate for your altitude. Compensator (the triangle area next to the passenger fender with all the holes), what ever number this one is take a piece of hose from the spliter on your advance and hook it onto the second hole from the left on the carb spacer. Also the jet that is plugged up replace it. That should get you started.
I was thinking about hooking the vac advance back up as it seems to help on gas and not be that much of a drag on power for most people (just based on reactions from people on the forums).
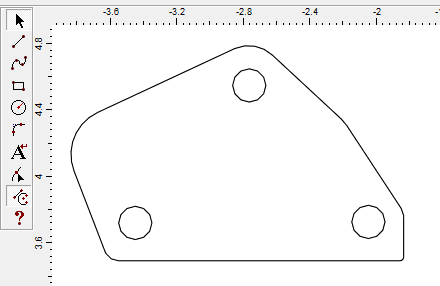
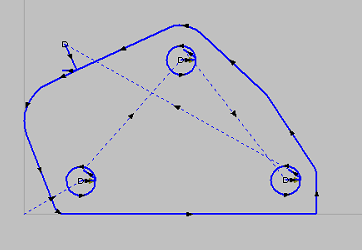
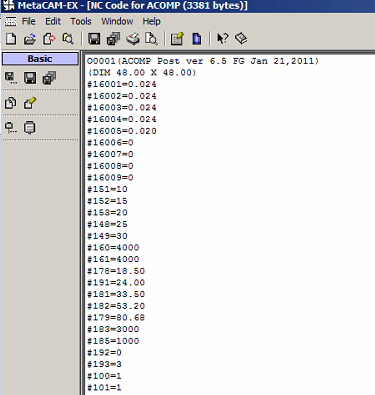
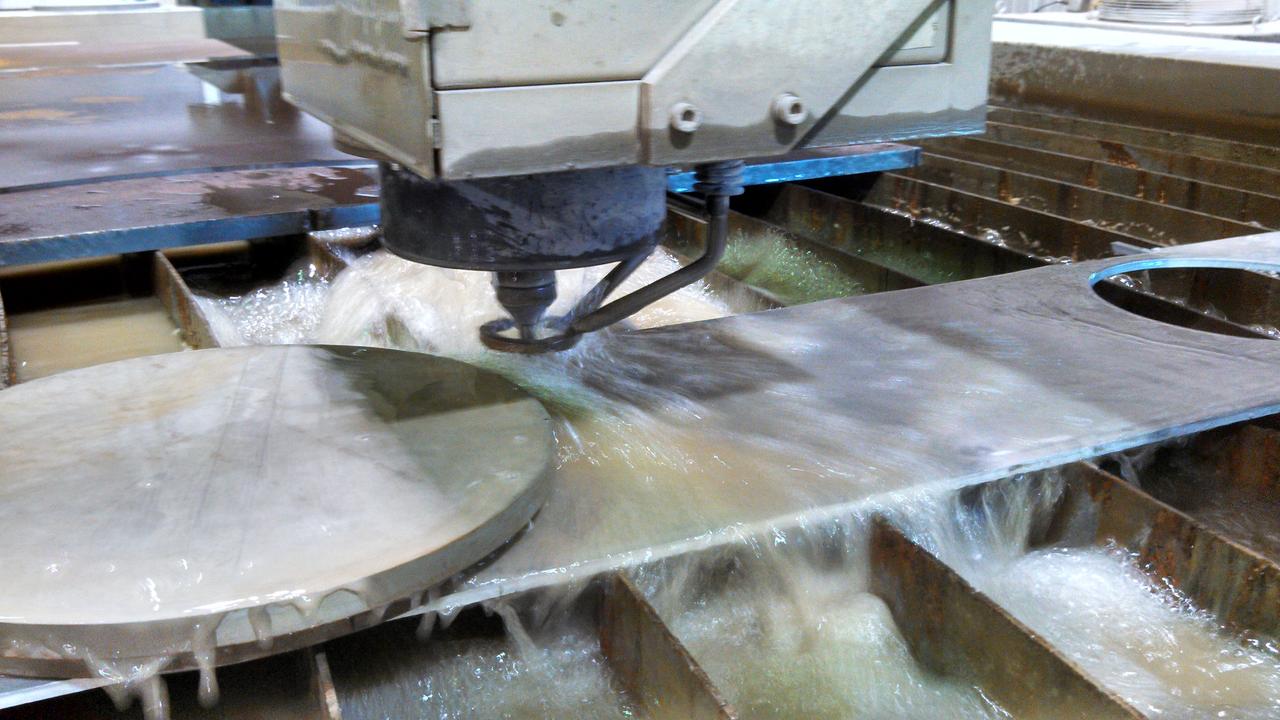
I am going to remove the ACOMP, I just haven't had a sec to take measurements to make a plate (gonna waterjet it). The pic above was taken out a guide I saw on the forums. My carb still has the ACOMP on it with a gasket and it's hooked up so it shouldn't be a problem. I am still going to remove it though.
Before I hook up the return don't I need a bypass style regulator? Or do I just hook up the return from the carb straight to the fuel tank?
I still haven't figured out what the open port next to the fuel input is (right to the left of the air vent solenoid valve). It's open to the atmosphere but I will cap it as you suggest. I had the car running yesterday (it was warmed up) and every time I blocked that port off the car died.
Same with the air vent solenoid, it has a single wire going to it with a molex connector on the other end. Thinking I need to supply it with 12v as per suggestions on this forum. Thoughts?
I appreciate all the help you guys are giving me.
Last edited by Shrimp; 06-16-13 at 10:20 PM.
06-16-13, 10:18 PM
#34
Let me know how the Nikki runs lol
06-16-13, 10:42 PM
#35
Full Member
Thread Starter
Join Date: Apr 2012
Location: Louisiana
Posts: 201
Likes: 0
Received 0 Likes
on
0 Posts
Because you can tune and change the entire carb. You can change all the jetting and chokes and the Nikki carb will only flow so much and the chokes cannot be changed. If you want to drive to the grocery store, keep the Nikki. If you want all around performance get an IDA carb. Hands down best carb for a rotary and I have tried them all.
Let me know how the Nikki runs lol
Let me know how the Nikki runs lol
Last edited by Shrimp; 06-16-13 at 10:49 PM.
06-17-13, 11:02 AM
#36
Rotary Learner
Join Date: May 2012
Location: missouri, east of kc
Posts: 175
Likes: 0
Received 0 Likes
on
0 Posts
Is the sensor under your fuel inlet and outlet plugged in? If not then you have to cut out the plunger to get it to run right. For the fuel return just put a new 1foot piece of fuel hose there. It looks like someone goofed up and tried to put a filter there. And hooking up your advance will help you drive smoother and faster unless you go forced induction.
06-17-13, 11:06 AM
#37
Full Member
Thread Starter
Join Date: Apr 2012
Location: Louisiana
Posts: 201
Likes: 0
Received 0 Likes
on
0 Posts
Is the sensor under your fuel inlet and outlet plugged in? If not then you have to cut out the plunger to get it to run right. For the fuel return just put a new 1foot piece of fuel hose there. It looks like someone goofed up and tried to put a filter there. And hooking up your advance will help you drive smoother and faster unless you go forced induction.
06-17-13, 11:16 AM
#39
Full Member
Thread Starter
Join Date: Apr 2012
Location: Louisiana
Posts: 201
Likes: 0
Received 0 Likes
on
0 Posts
There is still the original wire with the molex connector on the end of it so I will just snip the connector off and solder/shrink a lead to the ignition. Just picked up some 20mm freeze plugs and I am taking measurements for the ACOMP plate right now.
 06-17-13, 07:53 PM
#42
Full Member
Thread Starter
Join Date: Apr 2012
Location: Louisiana
Posts: 201
Likes: 0
Received 0 Likes
on
0 Posts
Messed around with it a bunch. I had the gasket between the throttle body and the rest of the carb flipped so I corrected that. It still doesn't start. It wants to. It turns over for a split second like it's going to start but doesn't. I had this thing running yesterday (with the gasket in the right way), even after all the mods I did to the internals, before making the changes to the acomp, fuel return, dizzy vacs, AVS, and the open port. I broke it down yesterday evening when I noticed the secondary butterflys weren't seating properly. Didn't change anything but that and the linkage on the secondaries.
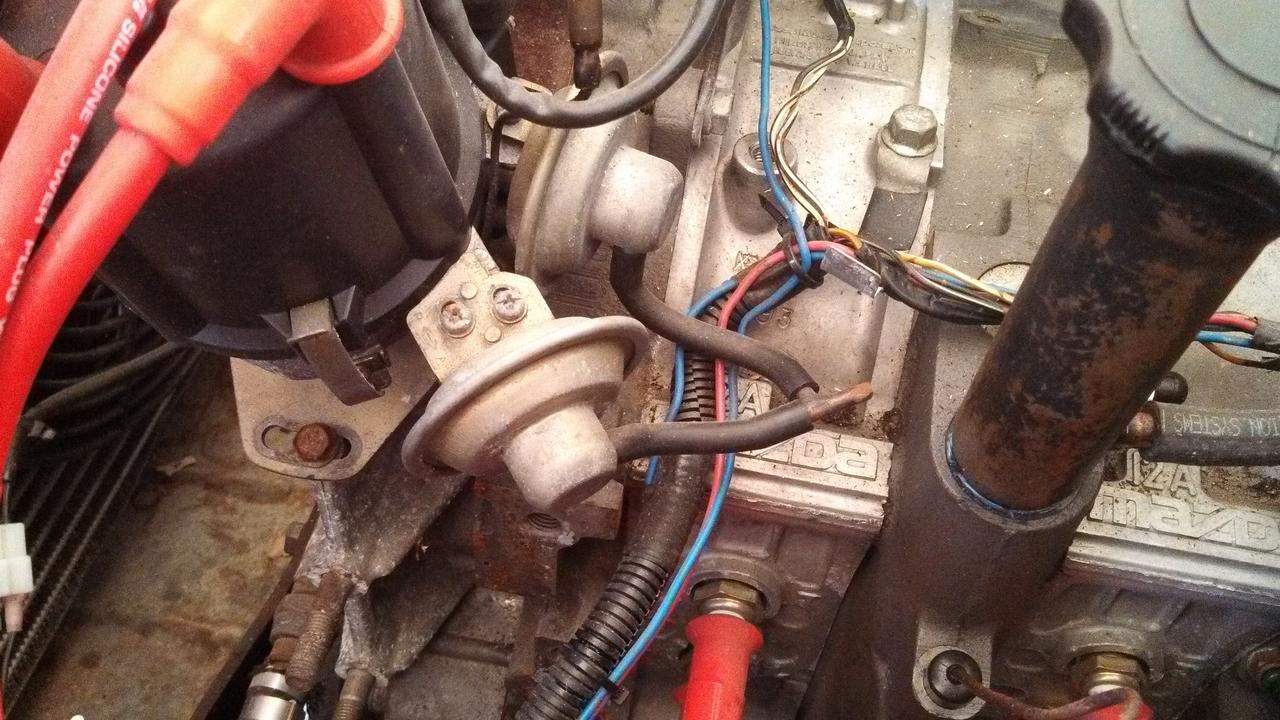
The motor would kill when I would plug the open port to the left of the air vent solenoid
The motor would kill when I would plug the open port to the left of the air vent solenoid
Last edited by Shrimp; 06-17-13 at 07:56 PM.
06-18-13, 12:08 AM
#43
Full Member
Thread Starter
Join Date: Apr 2012
Location: Louisiana
Posts: 201
Likes: 0
Received 0 Likes
on
0 Posts
Hrmm... So I broke down the carb again, had to take it off to put my freeze plugs in.
Everything appeared to be put together correctly.
I was getting gas to the carb for sure because the accelerator pump was squirting fuel with each pump of the throttle (I may have it set a little too long) and the return line had fuel coming out when I removed the hose. I am running 3 lbs of fuel from the regulator.
I am not sure where my idle speed needs to be set to start out. Do the primary butterflies need to be open at all to make the engine idle?
The port that I have been trying to figure out goes to the same chamber as the air vent solenoid and I am guessing was performing that function while the air vent solenoid was without power, hence why the engine would die when I plugged it with my finger so that solves that mystery, now I just need to wire up the solenoid with 12v from my military switch (single wire input, grounds through the engine) and plug the port.
After all this I installed the freeze plugs then carefully and very slowly put the 3 parts of the carb back together.
I also took some vacuum pot off the intake manifold that was plugged up. I forget what it's called but the carb stripping manual said it was OK to take off. I will make a blocking plate tomorrow to seal it.
06-18-13, 08:40 AM
#45
Full Member
Thread Starter
Join Date: Apr 2012
Location: Louisiana
Posts: 201
Likes: 0
Received 0 Likes
on
0 Posts
06-18-13, 09:50 AM
#46
Full Member
Thread Starter
Join Date: Apr 2012
Location: Louisiana
Posts: 201
Likes: 0
Received 0 Likes
on
0 Posts
This thing:

That's BEEN blocked off. Was blocked off since I bought the car. The nikki was fairly stripped but the guy who owned it before me had to leave certain things on for spec rx-7 racing.
06-18-13, 10:13 AM
#47
Moderator
iTrader: (3)
Join Date: Mar 2001
Location: https://www2.mazda.com/en/100th/
Posts: 30,841
Received 2,604 Likes
on
1,847 Posts
06-18-13, 10:22 AM
#48
Full Member
Thread Starter
Join Date: Apr 2012
Location: Louisiana
Posts: 201
Likes: 0
Received 0 Likes
on
0 Posts
If I had a jet kit. I don't have ANY parts for the mikuni. It's actually a VERY simple carb and was terribly easy to break down and put back together. God does it sounds good at high RPM and wot. I think last time I looked for a jet kit I couldn't find any for sale. I did get a gasket kit and I replaced the old gaskets so other than the jets it's reasonably freshly rebuilt (last year or so).


Had it running as well
Had it running as well
Last edited by Shrimp; 06-18-13 at 10:34 AM.
06-18-13, 01:22 PM
#49
The ACV port(s) allows heated exhaust gasses to pulse into the intake manifold, thus heating it up. It's an emissions thing and so must always be blocked off whenever you do freeze plugs in the rotor housings. You see, the coolant actually keeps the manifold from getting too hot. Interesting, isn't it. 
06-18-13, 01:24 PM
#50
Full Member
Thread Starter
Join Date: Apr 2012
Location: Louisiana
Posts: 201
Likes: 0
Received 0 Likes
on
0 Posts
The ACV port(s) allows heated exhaust gasses to pulse into the intake manifold, thus heating it up. It's an emissions thing and so must always be blocked off whenever you do freeze plugs in the rotor housings. You see, the coolant actually keeps the manifold from getting too hot. Interesting, isn't it.
Looking around for parts for the Mikuni. I think I can get some jets from Wolf Creek Racing... Not sure where to even start though and their are 20 or so different sizes...