ZoomZoom's CYM- Imported from Canada; a Journey Begins... Again.

 01-11-16, 09:02 AM
#153
Well he took all the rear hatch plastics and they came back looking like this.
Take a close look at how they left. They had sound deadening, heat shield that seemed to be ceramic. It was hard as a rock and had been over sprayed on the plastics when they did it. Also you can see the scratches and other issues on the one you see on top.
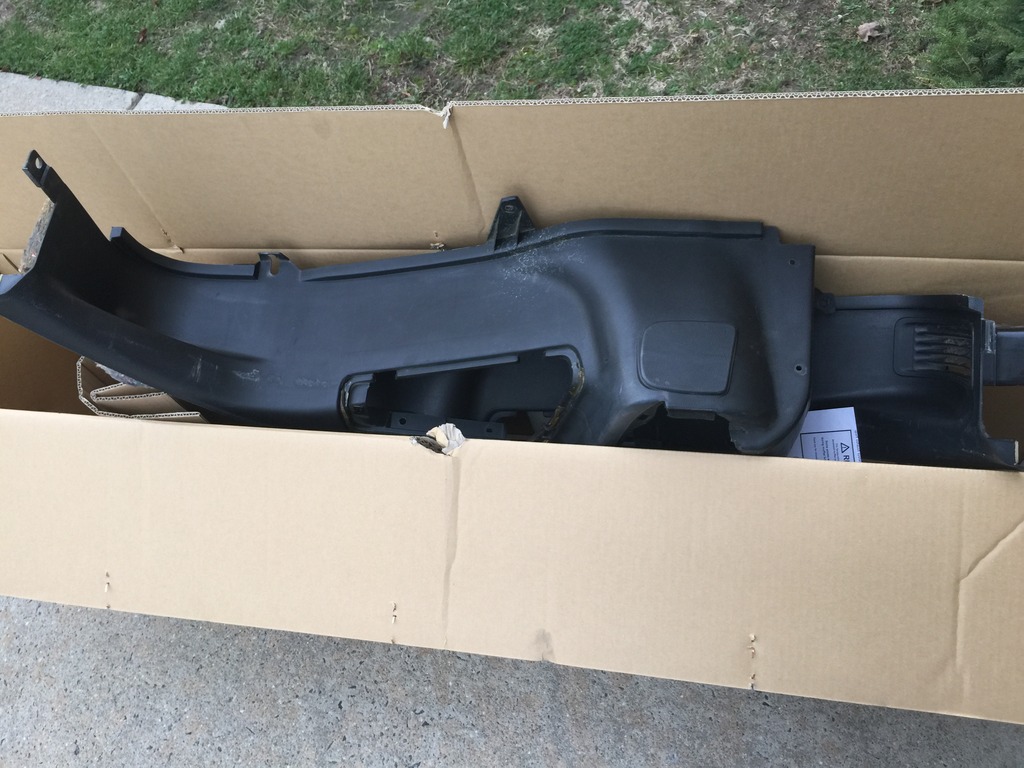
I asked him if he could show me the process but he said it's not something I can do myself due to the equipment he uses. I even mentioned I would be willing to buy some hobby type equipment like an air brush and he said it wouldn't last like what he does. I didn't push him any further on it. I know he sanded the panels but I'm not sure how he turned them into basically brand new plastics. They are very impressive in person.
Maybe see if he is interested in doing this on the side for the community. If someone is interested maybe see if he can accommodate and refinish something small for you so you can see the durability of the finish and if it's some thing you want to have done.
He told me I can give out his contact info and he can discuss your project.
He doesn't do entire cars and he can be more flexible if you can drop off your parts or car to him in Southern New Jersey and pick it back up. His business during the day is around the area mostly at high end car dealerships. He does this stuff on the side as his schedule permits.
I will say that he is true to his word and sticks to his promises time tables. He is honest and personable. He has been doing this for 25 years. I highly recommend him. His work was superb and I'm very picky.
PM me for his info. Because he is good he is busy. But he sticks to his word. Can't argue with that.

 01-12-16, 03:58 PM
#157
You don't want this car! They put the steering gear on the wrong side 
Thank you for the post. Honestly; although it's my 3rd RX-7 I haven't had so many people seriously try to buy the car from me in 25 years of owning cars as I have with this particular one.
And I've only had it for 4 or 5 months!
It looks very nice in person. It still impresses me when I go thru it. Sometimes it's hard to enjoy when you see every flaw regardless of how small but I will improve the car and do my best to enjoy it without too much Fuss.
01-12-16, 04:31 PM
#158
Original Gangster/Rotary!

iTrader: (213)
The Lambo yellow color just really *pops* in the sunlight..... makes the standard CYM look a little ho-hum, and that's not easily done.
CYM------------------------>
Mike's Lambo Yeller------->

CYM------------------------>
Mike's Lambo Yeller------->
01-13-16, 01:02 PM
#159
Hey look; a new thing...
It's from Niche Motoring. They have a thread going in the Product development section of this forum. Some cool ideas in that thread besides this item. You buy it here.
RX7 ? Niche Motoring
I saw this USB pass thru that looked like a nice clean fitment for an out of the way USB phone charger and I thought it may also work for tuning the Power FC with the Datalogit.
Anyone that has had to access the passenger kick panel to get to the ECU knows you have to pull the kick plate in the door jam and then remove the plastics in the passenger footwell.
I am going to see if this is a viable solution so I can avoid that process when logging data and tuning the car.
I plan to wire up the wideband and the Datalogit, run any wires under the carpet and stealth install it all permanently inside the car hooked up to the Power FC. If not with this item I will look for another solution but this is the plan. It shipped and should be here this Friday.
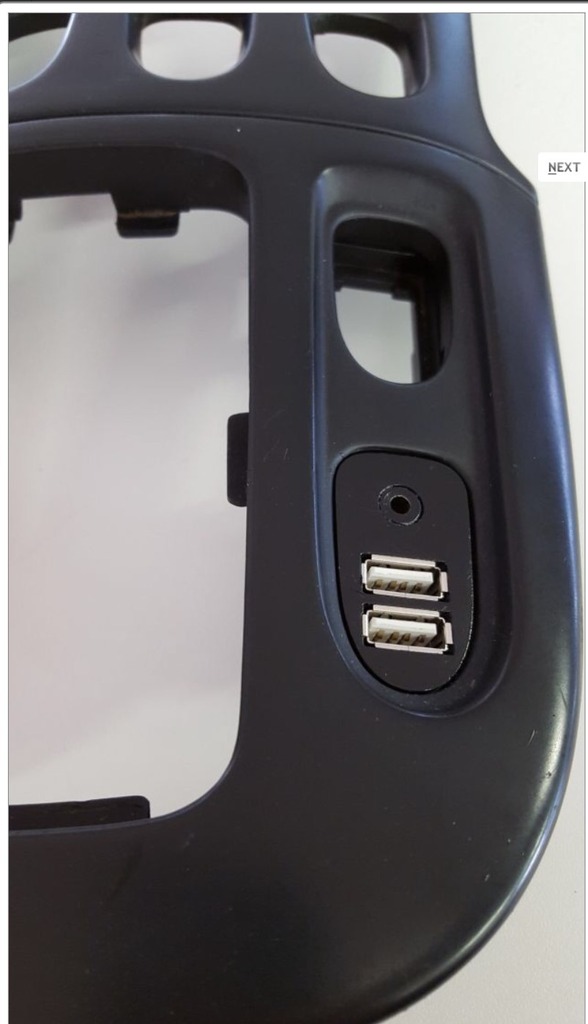
I guess I will lose the ability to monitor with the commander as the Datalogit and PFC Commander use the same connection port. If I am logging the data on a laptop it's not really that critical unless you rely on it for watching coolant temps or knock or something.
Last edited by ZoomZoom; 01-13-16 at 01:09 PM.
01-13-16, 06:46 PM
#160

^ thats neat.
Not sure how it is on a power fc but for my Adaptronic Ecu, i leave the usb connected and run the cord under the floor mat, then under the passengar seat and feed it between the seat and trans tunnel. Not ideal but better than removing the kick panel and installing the usb when you need it.
Not sure how it is on a power fc but for my Adaptronic Ecu, i leave the usb connected and run the cord under the floor mat, then under the passengar seat and feed it between the seat and trans tunnel. Not ideal but better than removing the kick panel and installing the usb when you need it.
02-06-16, 08:28 PM
#161
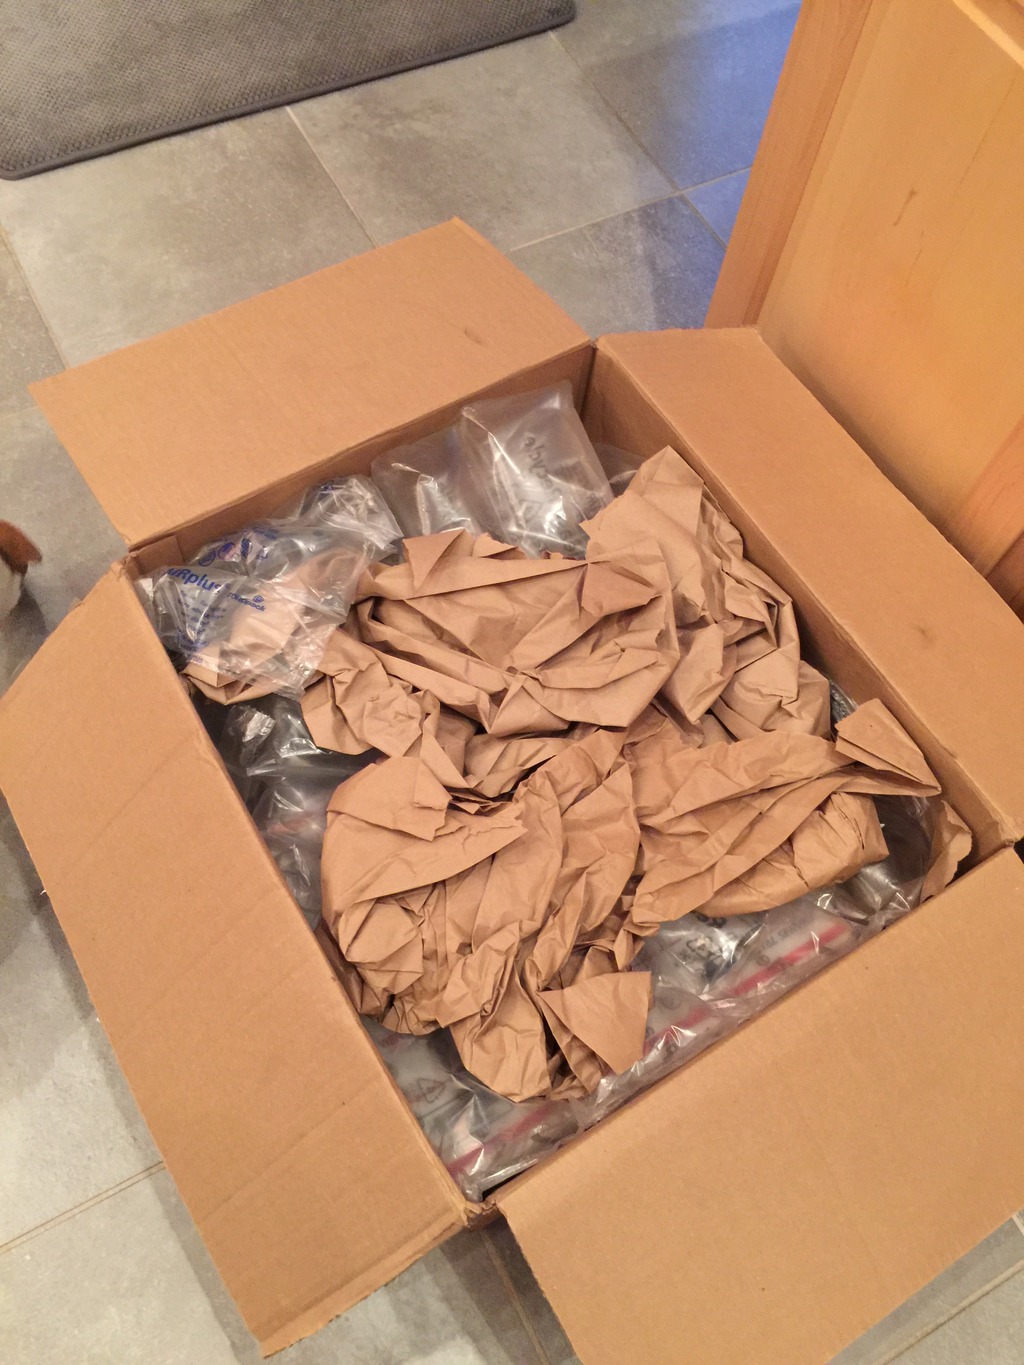
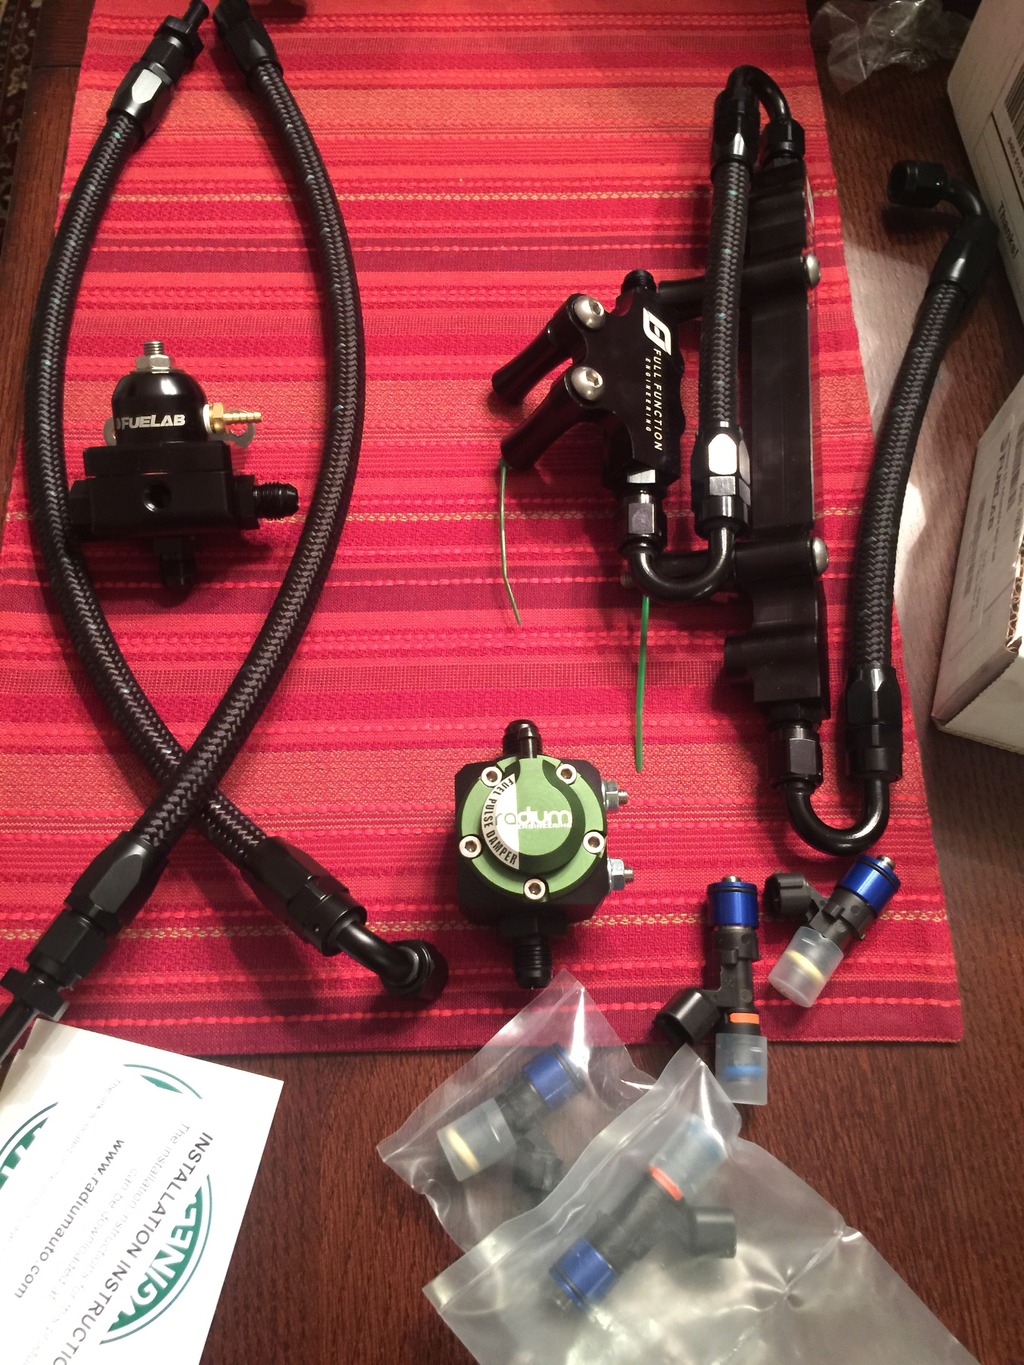
A nicely packaged Pile of parts arrived from IR Performance! Thanks Ihor!
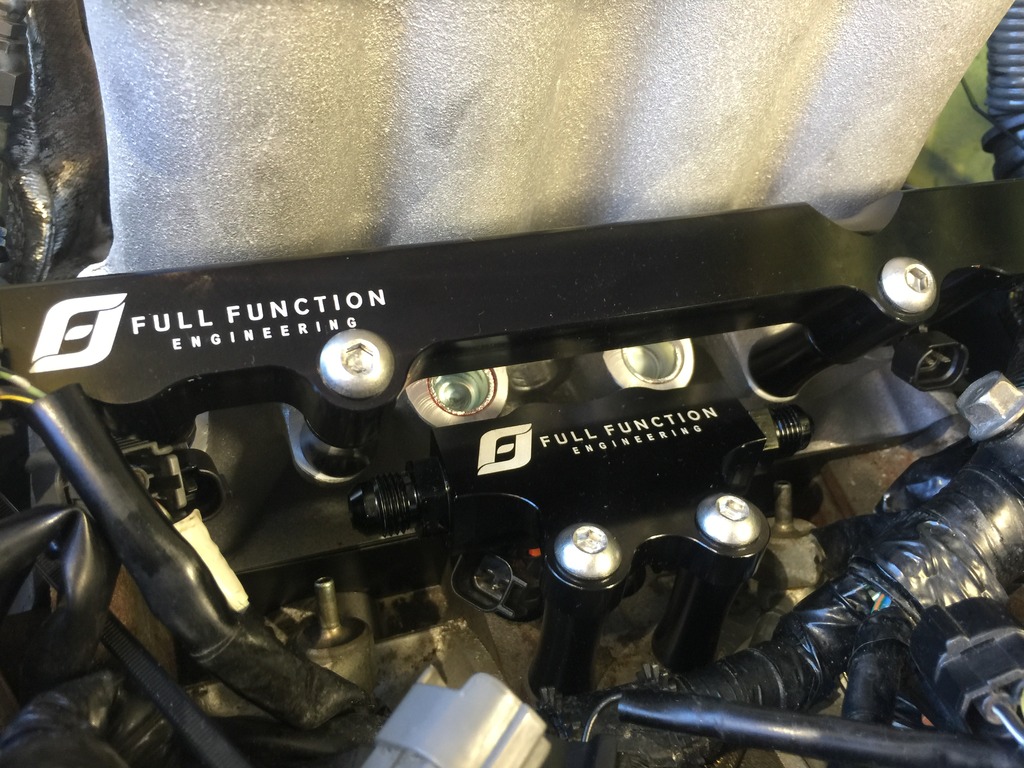
The Full Function Engineering fuel rails, fuel lab fuel pressure regulator, (2) 725cc and (2) 2000cc injectors. -6an lines and fittings.
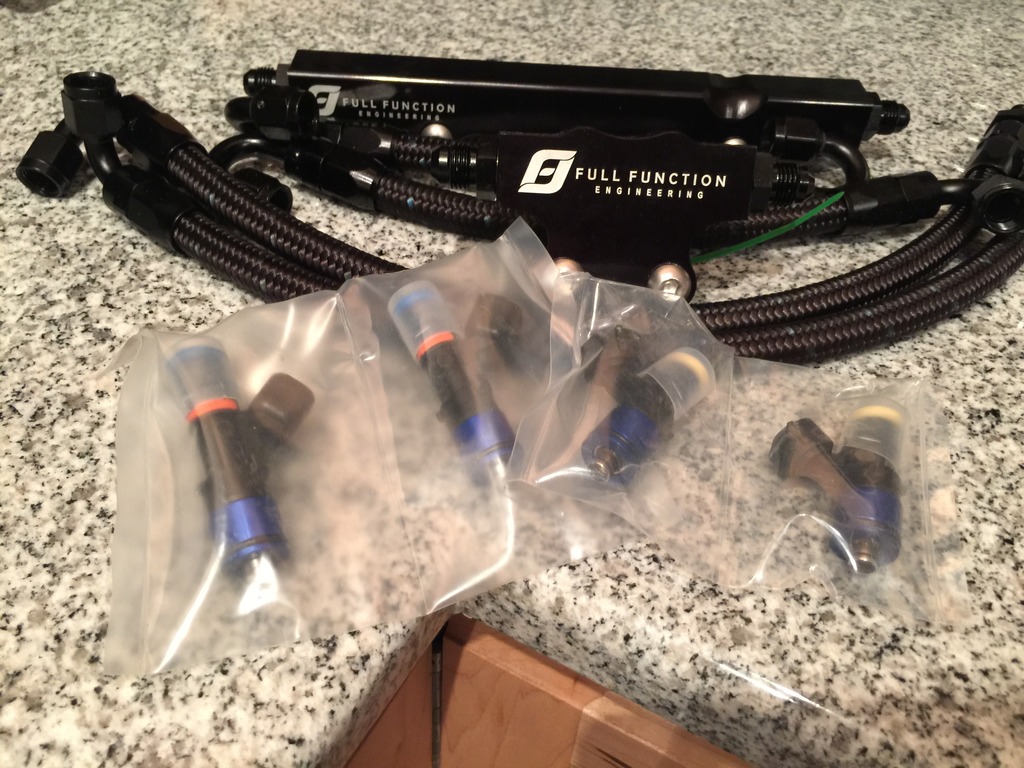
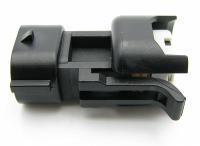
I currently have an upgraded fuel system. The old style Bosch 1680cc secondary injectors and the stock 550cc primaries. It works and many people are using it but I wanted to upgrade to the newest, latest and greatest for my build. My tuner John Renna also said it will make it easier to tune. As critical as tuning is and the extra fuel will allow me to up the ante a bit in the future with this in place. Because of the old style Bosch secondaries I needed Denso connectors for the ID injectors. The Primamry stockers are Denso so the harness is already plug and play with the ID injectors.
Here are new Denso injectors clips to put back on the harness for the secondary ID injectors.
If you are switching from Bosch secondaries to ID injectors don't forget to remove the resistors if you were using those due to the difference between voltage requirements for low and high impedance injectors.
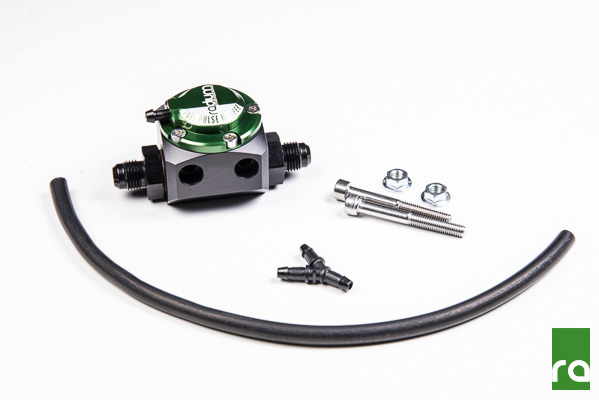
I decided late that I needed a fuel pulsation dampener in the system. There are threads about this in the single turbo section. If OEM's use them it's probably a good idea. I picked up a rather expensive one by Radium but they shipped it the same day and it arrived the next. This is an in-line unit meant for base static fuel pressure of 40-45psi.
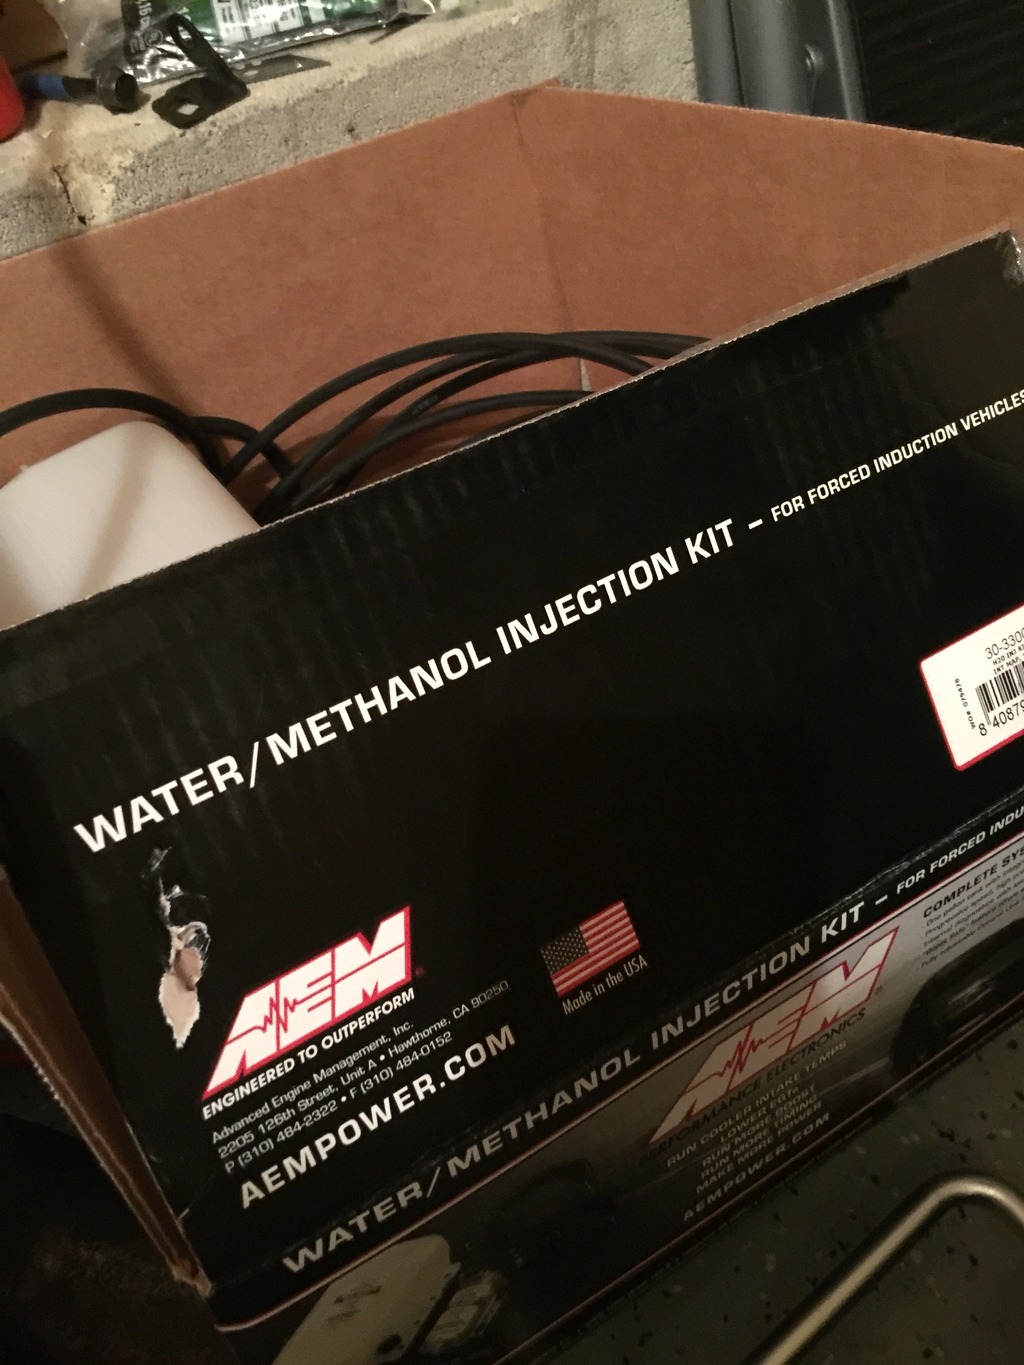
I also got an AEM Water/Meth injection and a Ground Zero equal length lower intake manifold.
My plan is to get everything installed next weekend.

The Full Function Engineering fuel rails, fuel lab fuel pressure regulator, (2) 725cc and (2) 2000cc injectors. -6an lines and fittings.

I currently have an upgraded fuel system. The old style Bosch 1680cc secondary injectors and the stock 550cc primaries. It works and many people are using it but I wanted to upgrade to the newest, latest and greatest for my build. My tuner John Renna also said it will make it easier to tune. As critical as tuning is and the extra fuel will allow me to up the ante a bit in the future with this in place. Because of the old style Bosch secondaries I needed Denso connectors for the ID injectors. The Primamry stockers are Denso so the harness is already plug and play with the ID injectors.
Here are new Denso injectors clips to put back on the harness for the secondary ID injectors.
If you are switching from Bosch secondaries to ID injectors don't forget to remove the resistors if you were using those due to the difference between voltage requirements for low and high impedance injectors.

I decided late that I needed a fuel pulsation dampener in the system. There are threads about this in the single turbo section. If OEM's use them it's probably a good idea. I picked up a rather expensive one by Radium but they shipped it the same day and it arrived the next. This is an in-line unit meant for base static fuel pressure of 40-45psi.

I also got an AEM Water/Meth injection and a Ground Zero equal length lower intake manifold.
My plan is to get everything installed next weekend.
02-19-16, 06:32 PM
#164
Update
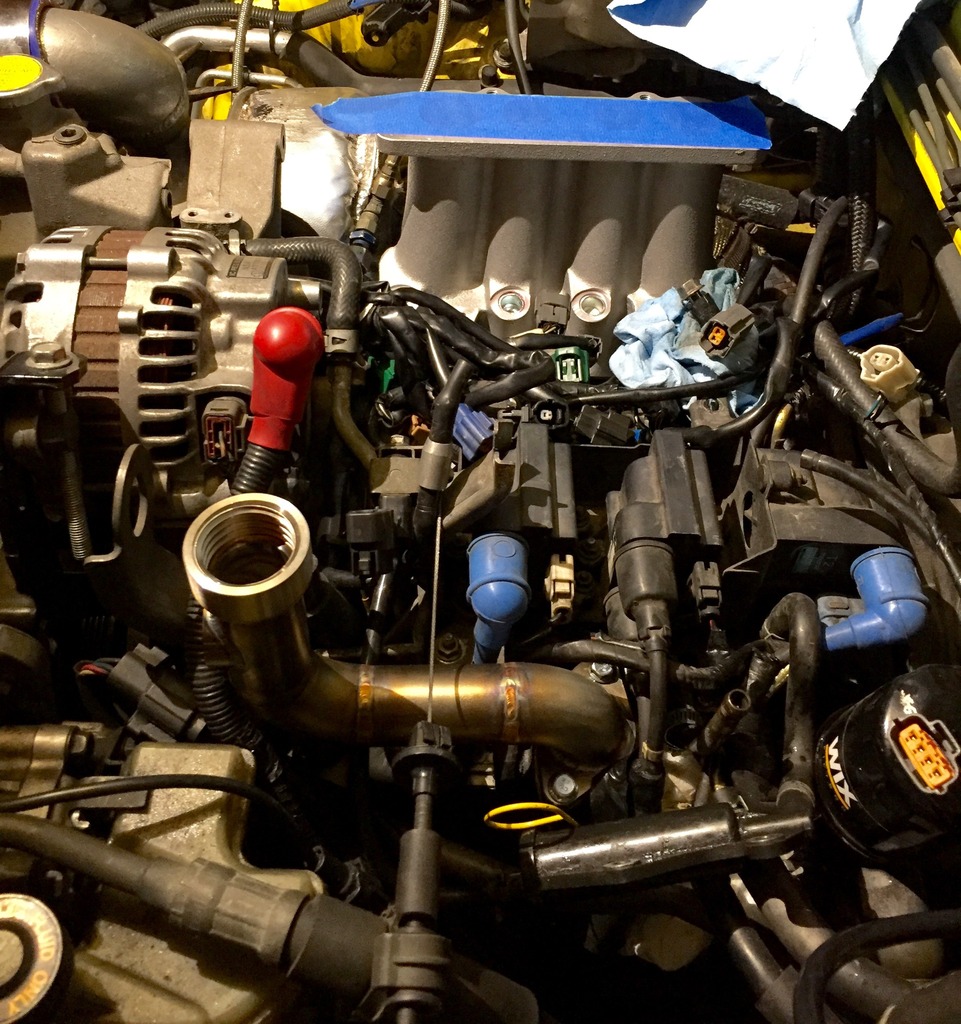
Pulled the stock manifolds and fuel system. Bought a pile of parts and am half way into installing the manifold and fuel system. I am currently waiting on AN fitting to complete the install. My fuel system wasn't designed for the Radium Fuel Pulseation Dampener so I am buying something that should allow me to easily add it. More on that later.
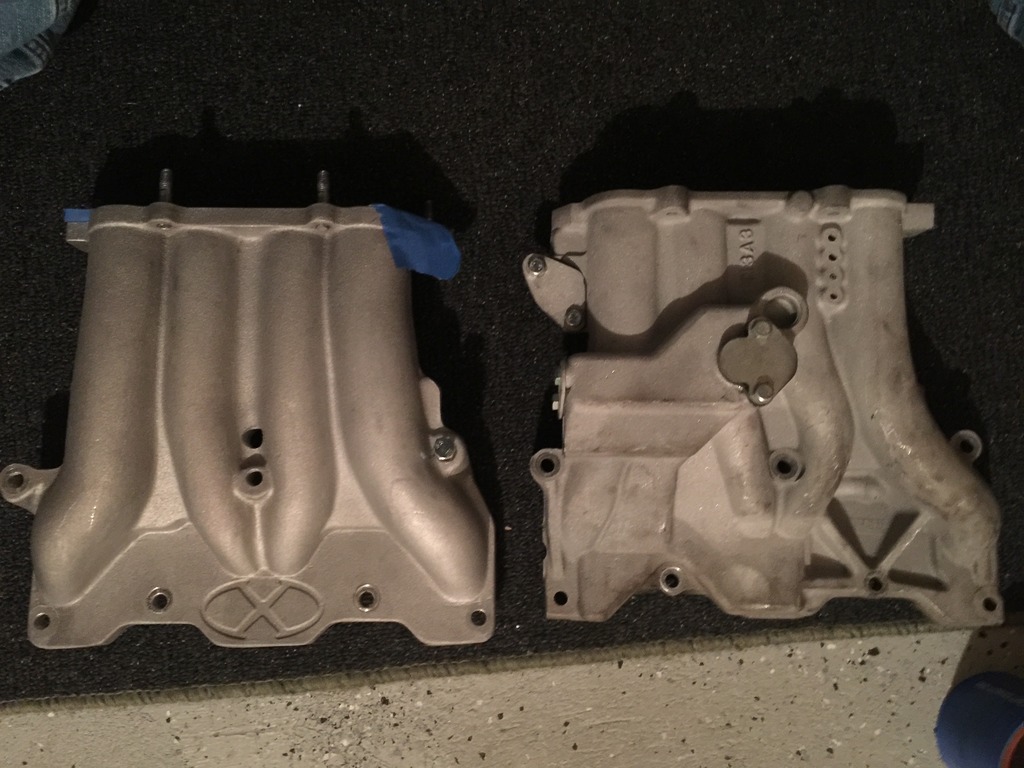
So the equal length lower intake manifold from Xcessive. Used to be known as the Ground Zero manifold. Basically it allows the front and rear rotor to get equal air velocity for the air fuel to be more equal between rotors. Compromises were made by Mazda due to what I believe we're emissions considerations. This is important because we tune these cars based off a wideband O2 sensor in the downpipe or tailpipe. This ends up being a combination air fuel ratio of both rotors and it's possible the rear can be lean and the front rich giving you a false sense that you have a well tuned engine.
This manifold ends up moving the top end of the motor further from the firewall and requires modification of the oil filler neck. There are tricks to doing this with the stock plastic neck but IR Performance makes a nice stainless steel unit that specifically for this application.
To prepare for swapping out the fuel system you need to open the gas cap! I forgot to do this and woke up with fuel on the floor of the garage and vapor in the house. NOT GOOD!
Don't forgot to relieve the pressure in the tank.
Also remove the plastic diffusers. I had a nice secondary rail from rx7.com in the car with old style Bosch EV1's also known as 1600's or 1680's.
They are low impedance injectors so they had resistors inline that need to be removed. The ID injectors are just like the stock injectors as they are both high impedance. No need for resistors.
I was running stock 550cc primaries and replacing them with ID725's and replacing the 1680's with ID2000's
Ihor at IR Performance put together the system for me based off my needs and by request of my tuner. The lines are all braided -6AN
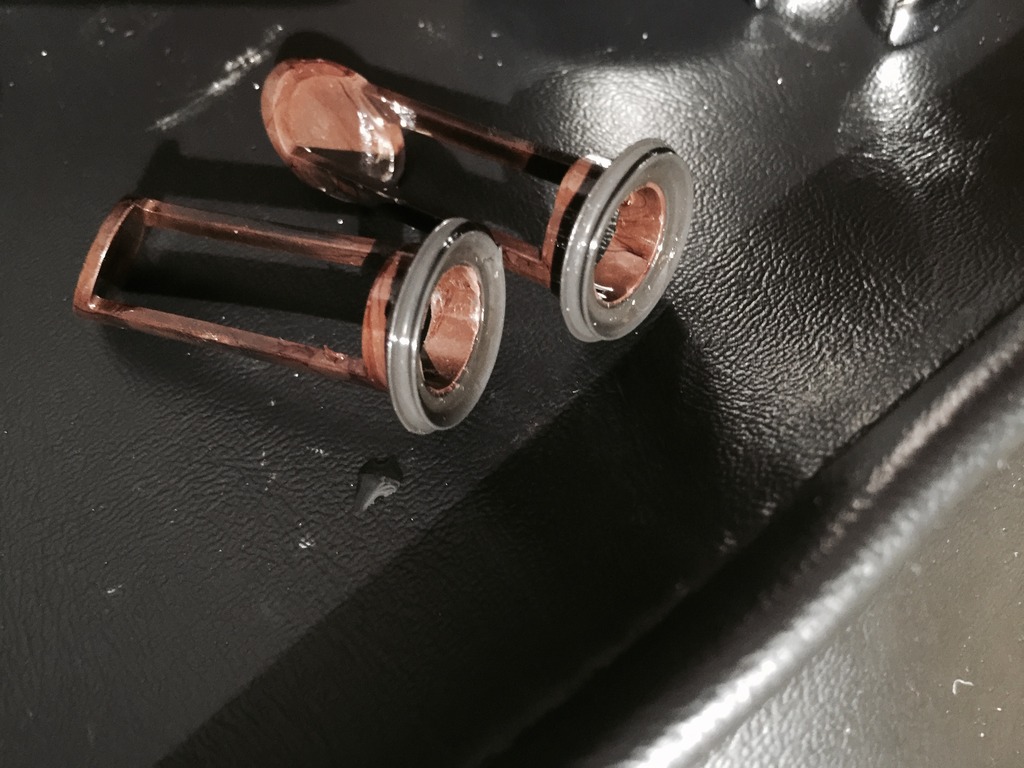
So here is an IMPORTANT point. You need to remove the plastic diffusers inside the housing under the primaries. DO NOT TRY TO REMOVE THESE WITH THE LOWER INTAKE MANIFOLD ON. if they break and drop inside the motor you are screwed. They will break and are in TIGHT!
I used some WD-40 sprayed in on top and came in from under them thru the port and pushed and wiggled them out. They come out with a big pop and take a significant amount of coaxing. Don't think you will don't think about doing this differently or you will likely regret it. I'm glad I listened to Goodfellasfd3s on this.
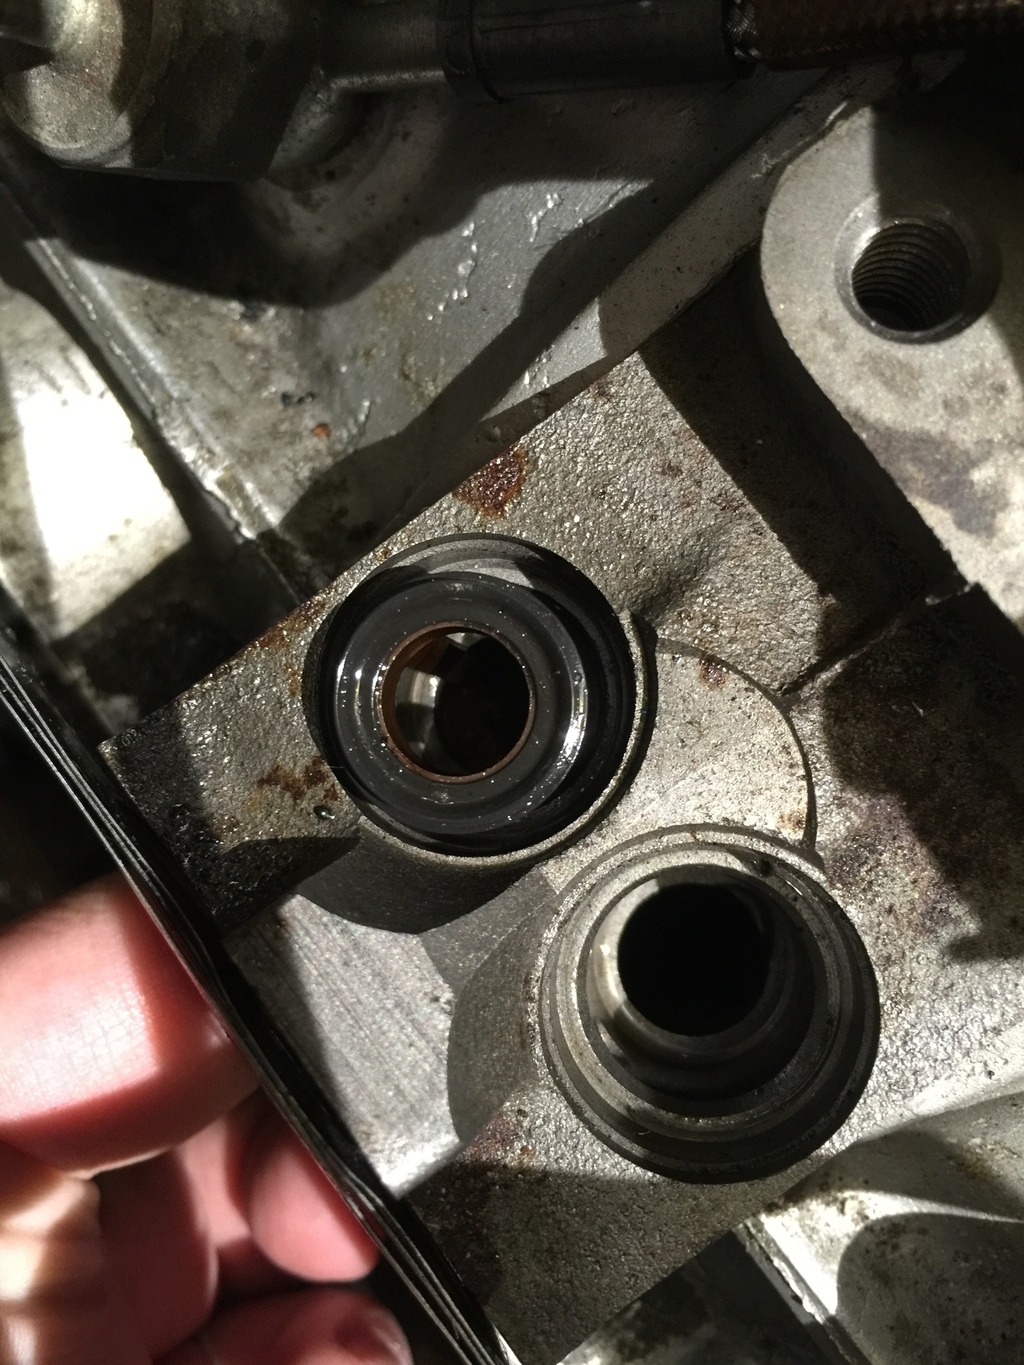
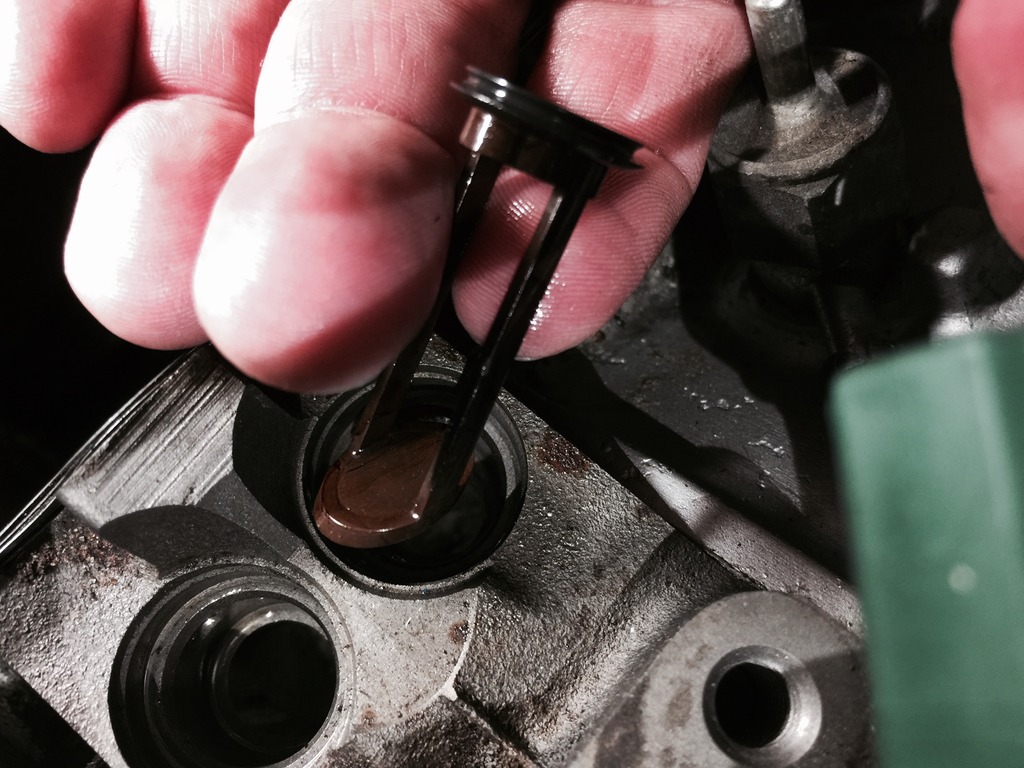
Out in one piece like a champ
Pulled the stock manifolds and fuel system. Bought a pile of parts and am half way into installing the manifold and fuel system. I am currently waiting on AN fitting to complete the install. My fuel system wasn't designed for the Radium Fuel Pulseation Dampener so I am buying something that should allow me to easily add it. More on that later.
So the equal length lower intake manifold from Xcessive. Used to be known as the Ground Zero manifold. Basically it allows the front and rear rotor to get equal air velocity for the air fuel to be more equal between rotors. Compromises were made by Mazda due to what I believe we're emissions considerations. This is important because we tune these cars based off a wideband O2 sensor in the downpipe or tailpipe. This ends up being a combination air fuel ratio of both rotors and it's possible the rear can be lean and the front rich giving you a false sense that you have a well tuned engine.

This manifold ends up moving the top end of the motor further from the firewall and requires modification of the oil filler neck. There are tricks to doing this with the stock plastic neck but IR Performance makes a nice stainless steel unit that specifically for this application.

To prepare for swapping out the fuel system you need to open the gas cap! I forgot to do this and woke up with fuel on the floor of the garage and vapor in the house. NOT GOOD!
Don't forgot to relieve the pressure in the tank.
Also remove the plastic diffusers. I had a nice secondary rail from rx7.com in the car with old style Bosch EV1's also known as 1600's or 1680's.
They are low impedance injectors so they had resistors inline that need to be removed. The ID injectors are just like the stock injectors as they are both high impedance. No need for resistors.
I was running stock 550cc primaries and replacing them with ID725's and replacing the 1680's with ID2000's
Ihor at IR Performance put together the system for me based off my needs and by request of my tuner. The lines are all braided -6AN

So here is an IMPORTANT point. You need to remove the plastic diffusers inside the housing under the primaries. DO NOT TRY TO REMOVE THESE WITH THE LOWER INTAKE MANIFOLD ON. if they break and drop inside the motor you are screwed. They will break and are in TIGHT!
I used some WD-40 sprayed in on top and came in from under them thru the port and pushed and wiggled them out. They come out with a big pop and take a significant amount of coaxing. Don't think you will don't think about doing this differently or you will likely regret it. I'm glad I listened to Goodfellasfd3s on this.


Out in one piece like a champ
 02-19-16, 07:01 PM
#166
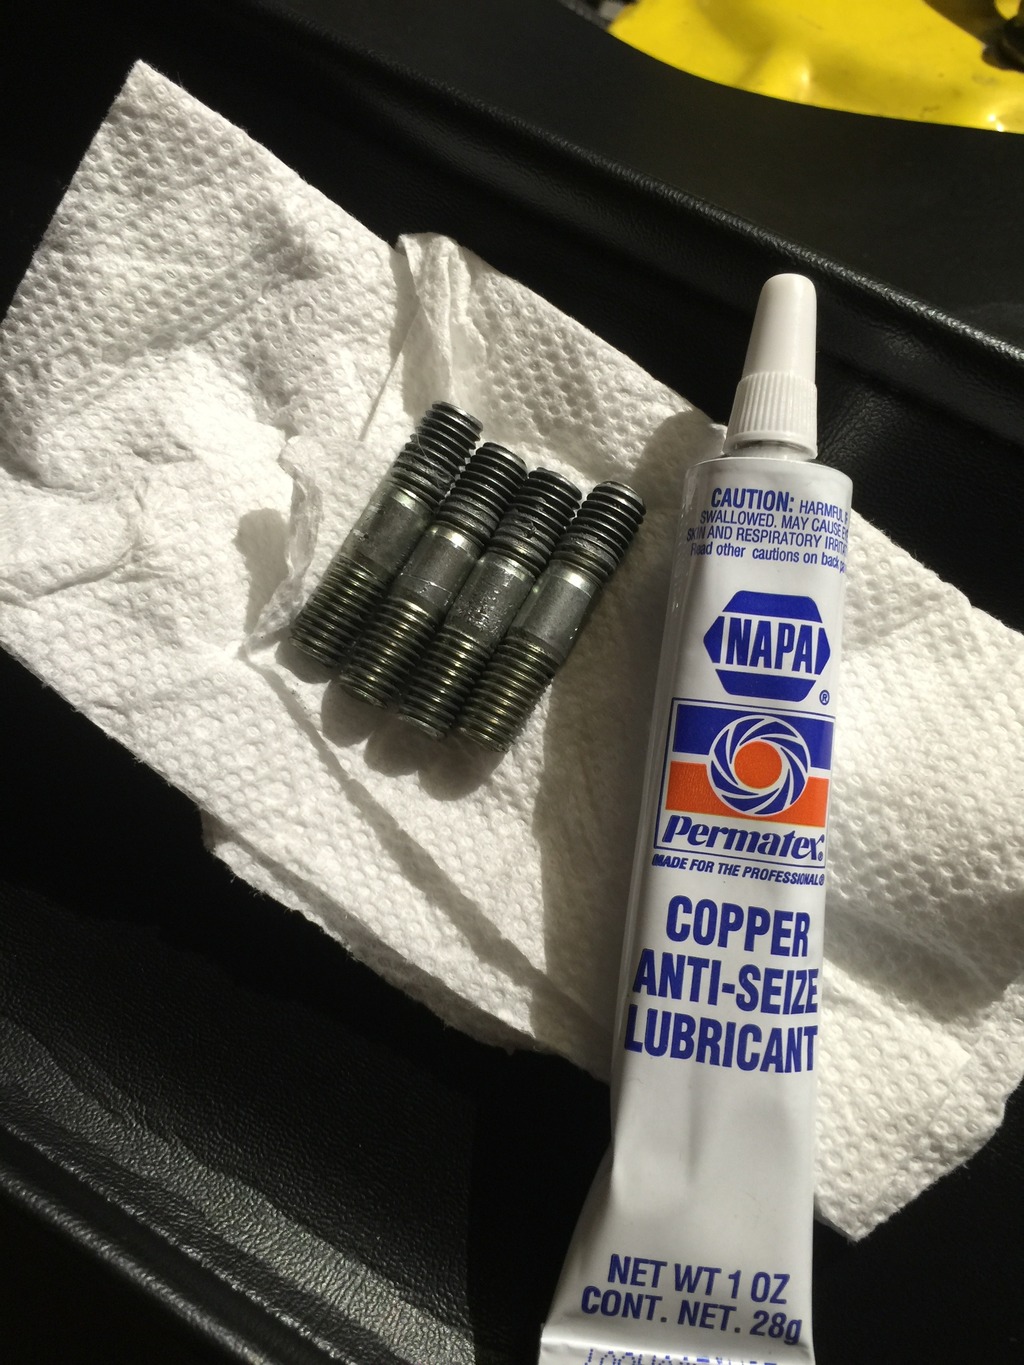
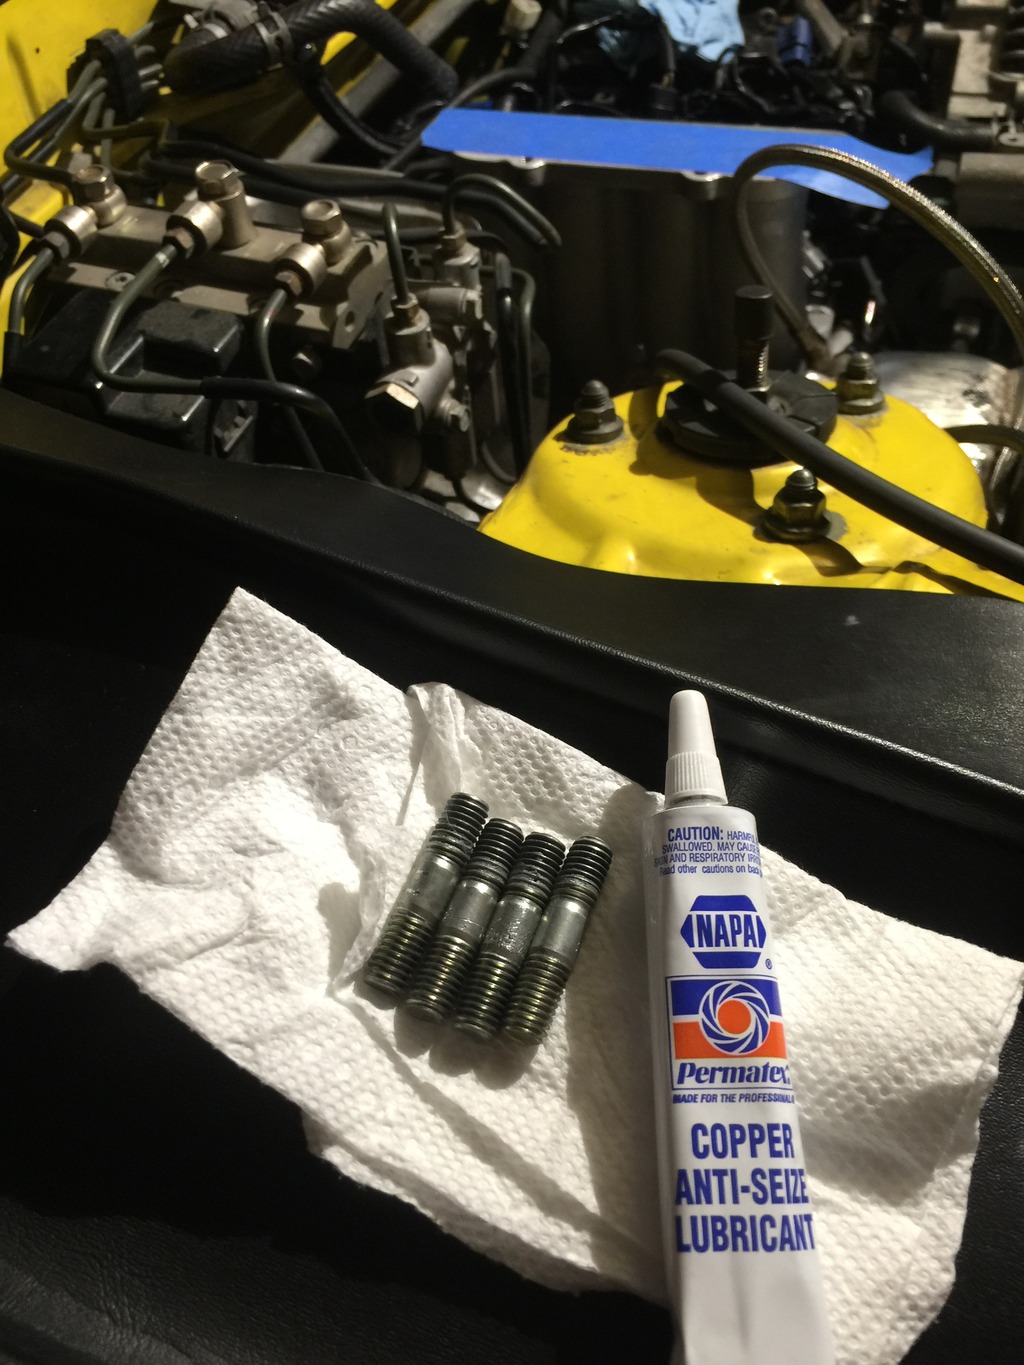
When you install the new manifold you will need to remove the studs from your stock lower and install them into the Xcessive manifold. Use some needle nose vise grips or any set of vise grips that don't touch the threads. Use some anti seize on the threads before reinstalling. I grabbed the copper because it's what they had at NAPA.

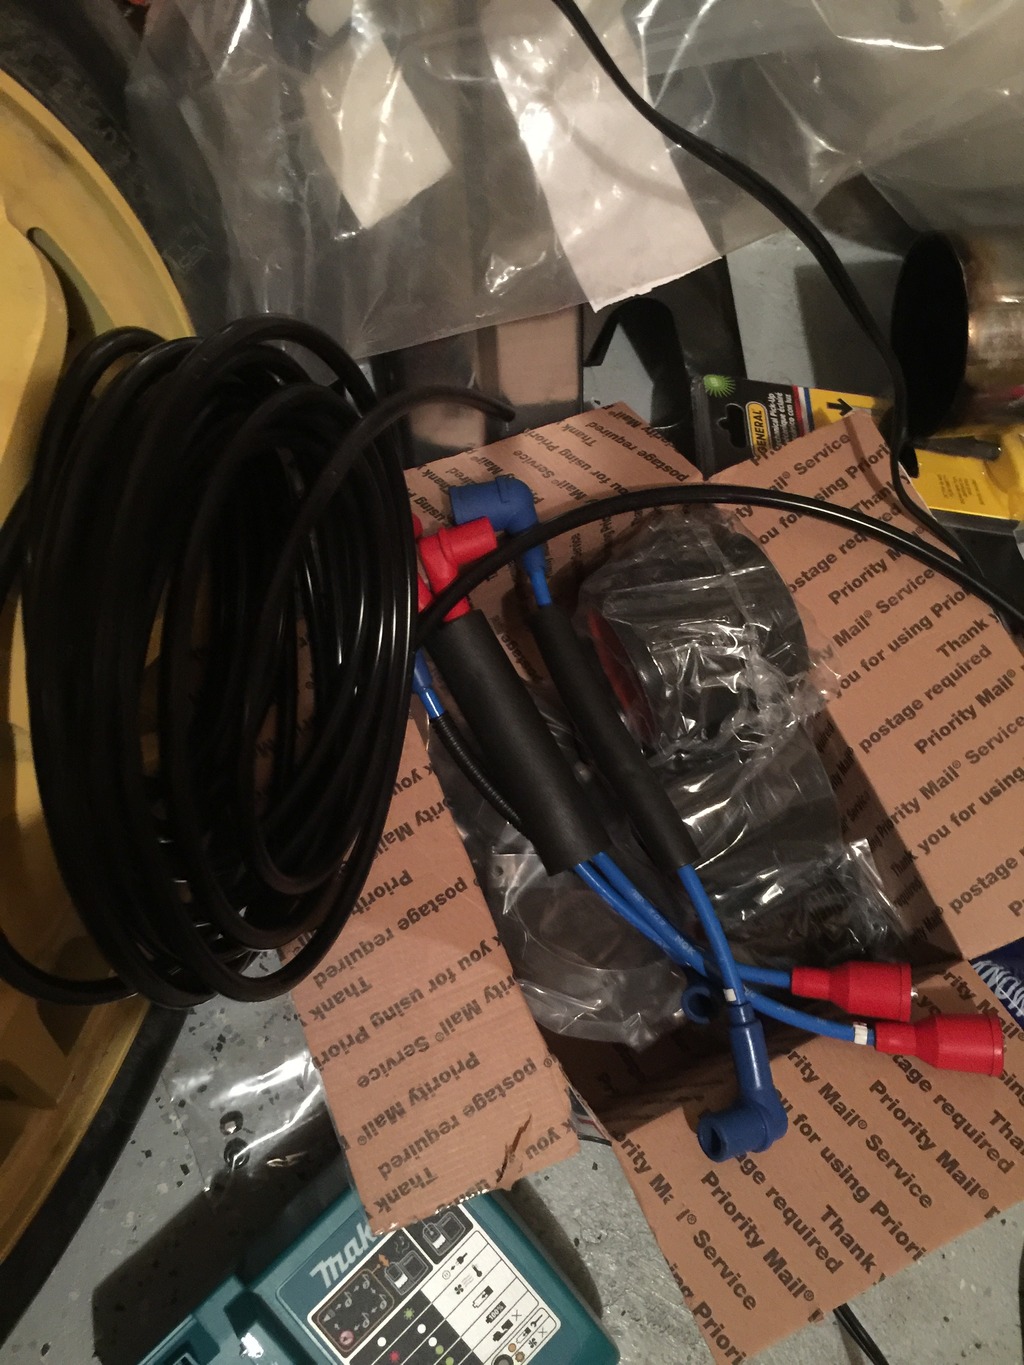
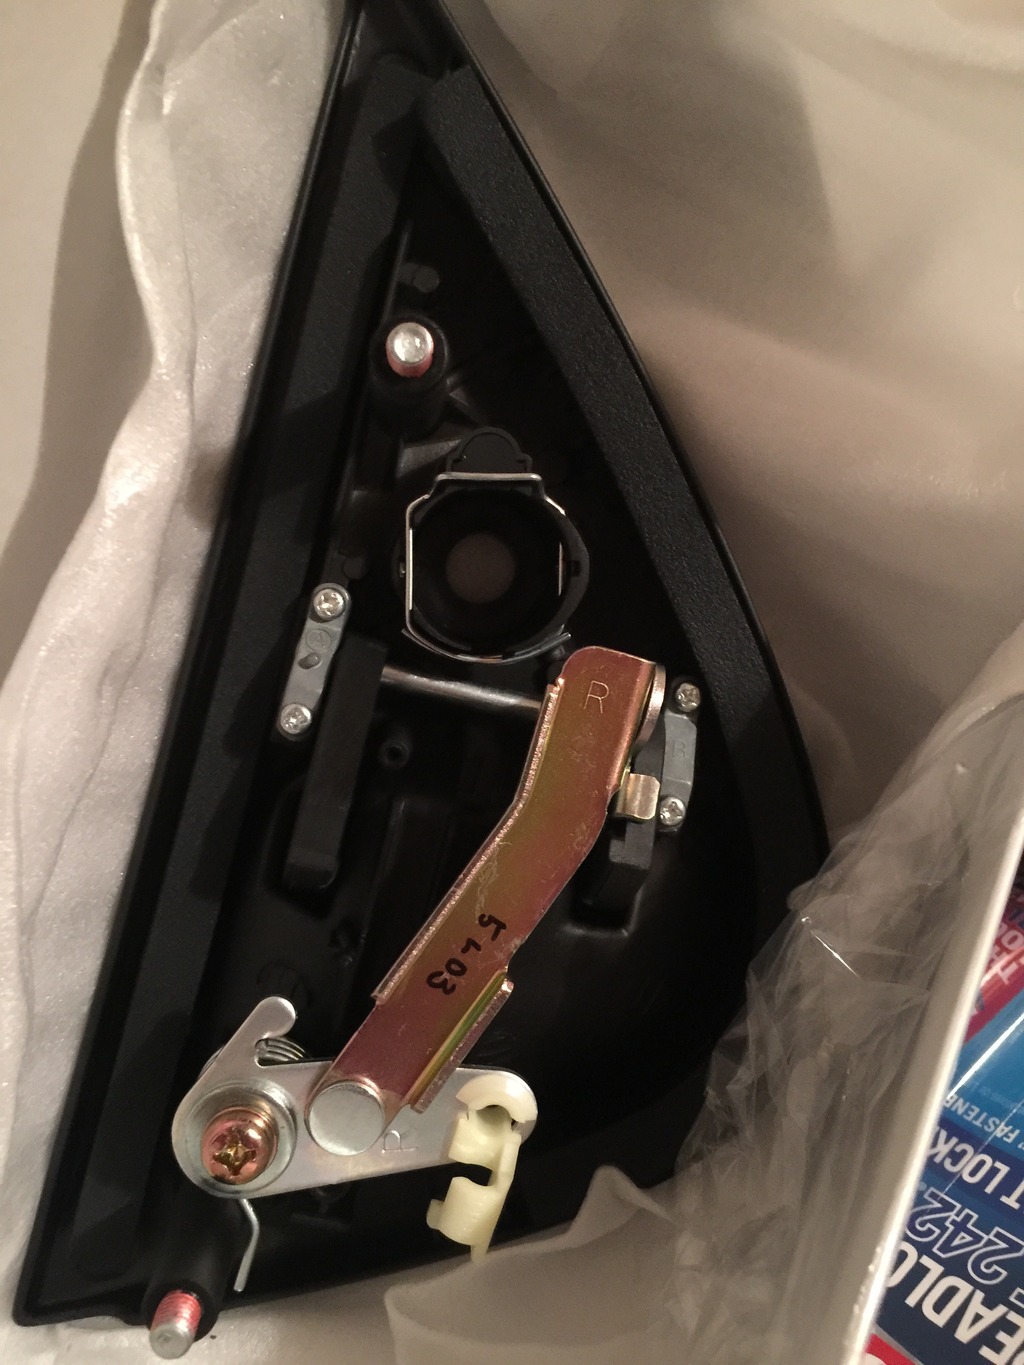
Goodfellasfd3s sent me some new door handles, some sweet 10mm spark plug wires, new Gredy elbow already tapped for my Water Meth Nozzle and some other goodies. Here are some pics.
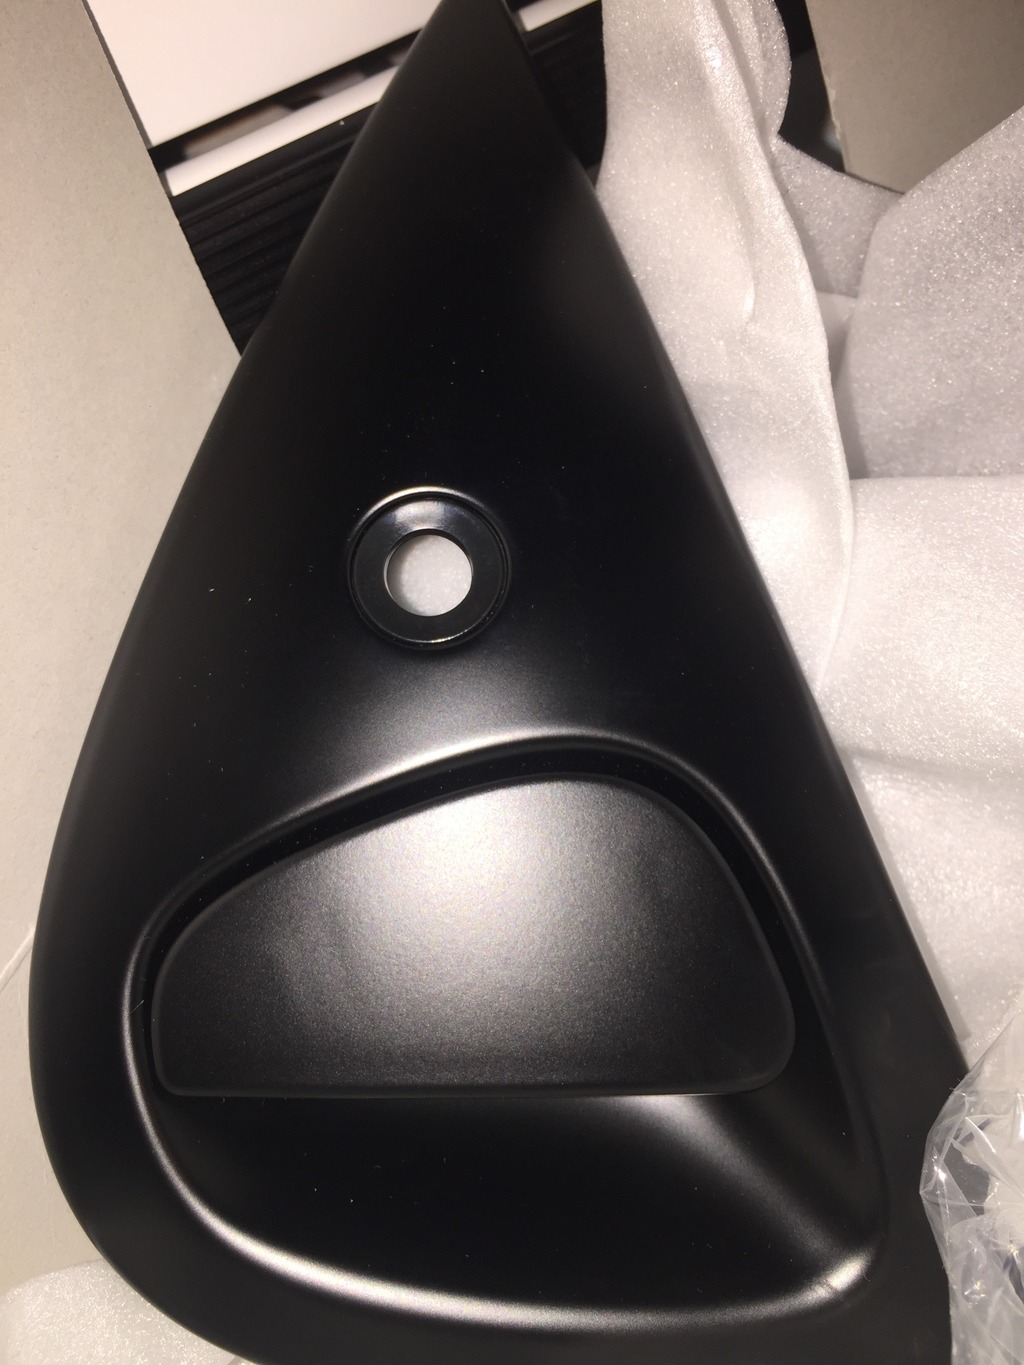
I had this laying around from another build. It's a new defroster grill for the drivers side. Just so happens this car needs that vent replaced. Winning!


Goodfellasfd3s sent me some new door handles, some sweet 10mm spark plug wires, new Gredy elbow already tapped for my Water Meth Nozzle and some other goodies. Here are some pics.


I had this laying around from another build. It's a new defroster grill for the drivers side. Just so happens this car needs that vent replaced. Winning!
 02-19-16, 07:14 PM
#167
AEM Water Meth kit from IR Performance. Ihor sends the kit with the tank even if you don't require a tank and plan to use the stock washer tank. This is because it comes with the level sensor that you will use in your washer tank. I bought a new tank. You will be surprised how nice the new one is compared to the aged original one in the car.
Replace your washer tank so it's free of scaling and crud that can mess up your nozzle and increase the chance of your water meth kit failing on you.
Replace your washer tank so it's free of scaling and crud that can mess up your nozzle and increase the chance of your water meth kit failing on you.

Last edited by ZoomZoom; 02-19-16 at 07:19 PM.
02-19-16, 07:17 PM
#168
Original Gangster/Rotary!
iTrader: (213)
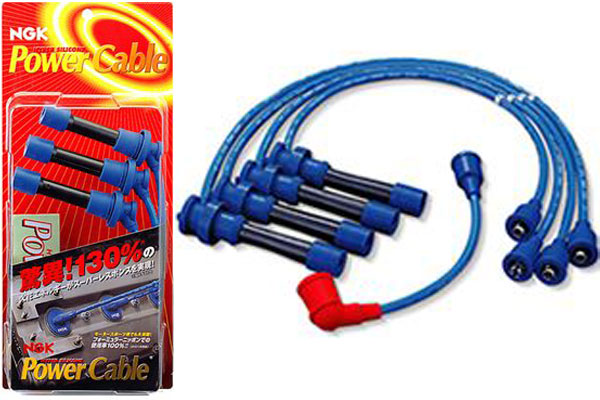
NGK Power Cables are the BombDiggedyDogg
I only removed those from my BB '95 car because I installed the SBG IGN Coil setup. I hope they serve you well Mike
Door Handles are beyond mint just like I told you right?

I only removed those from my BB '95 car because I installed the SBG IGN Coil setup. I hope they serve you well Mike
Door Handles are beyond mint just like I told you right
?
02-19-16, 07:49 PM
#169
All the parts I've purchased from GoodfellasFD3S have been of the highest quality and always as described. He has given a lot of his personal time since the start of this as well.
02-20-16, 09:43 PM
#170
More progress
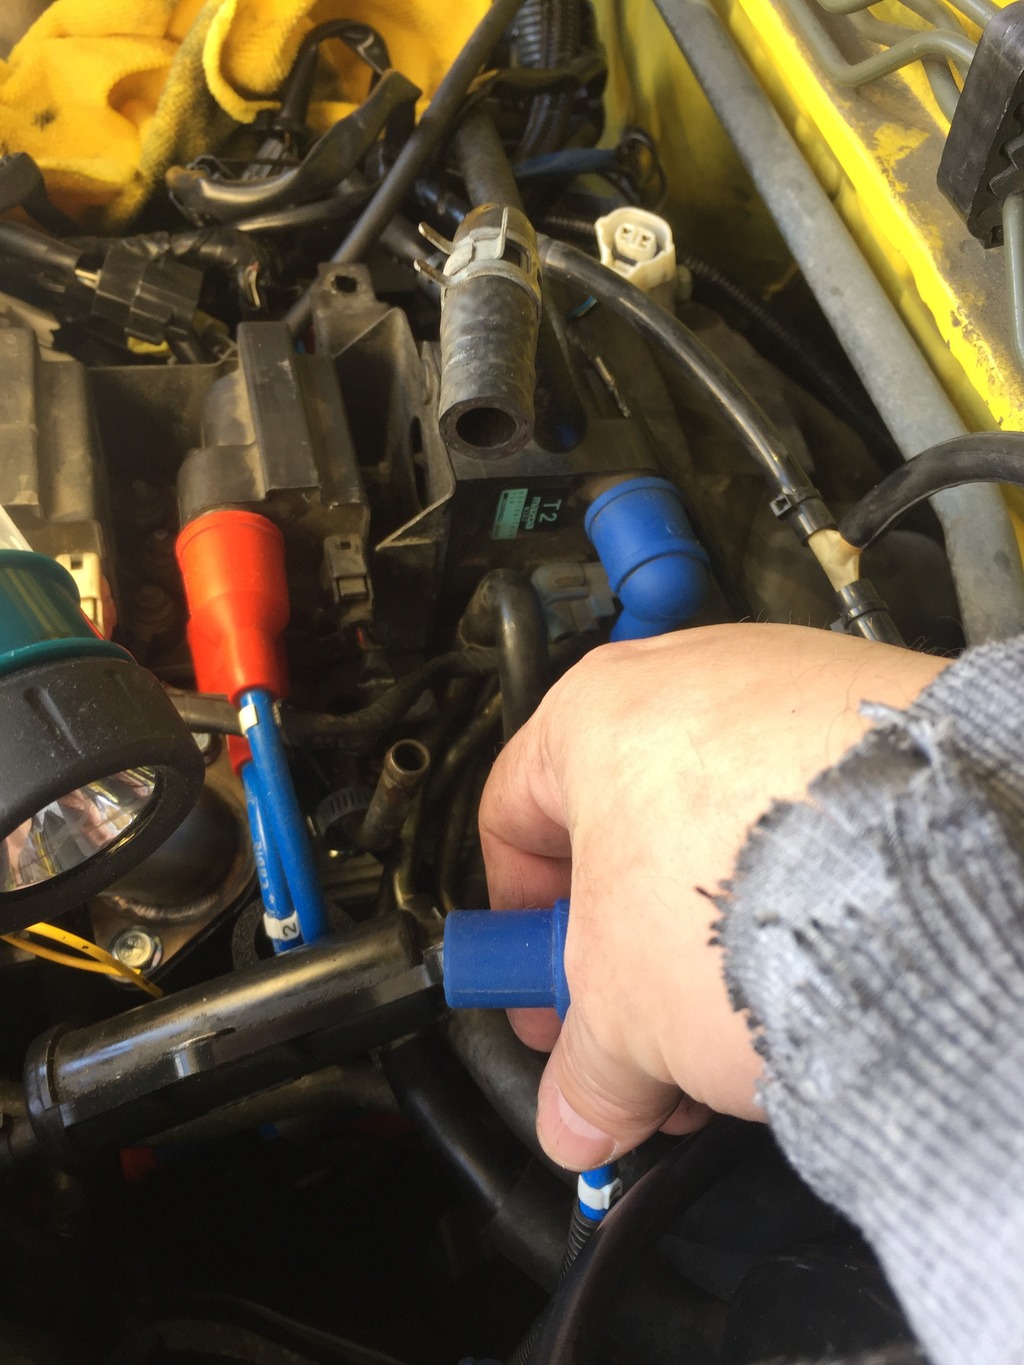
Changed out the plug wires today while plenum is off as it's much easier than later
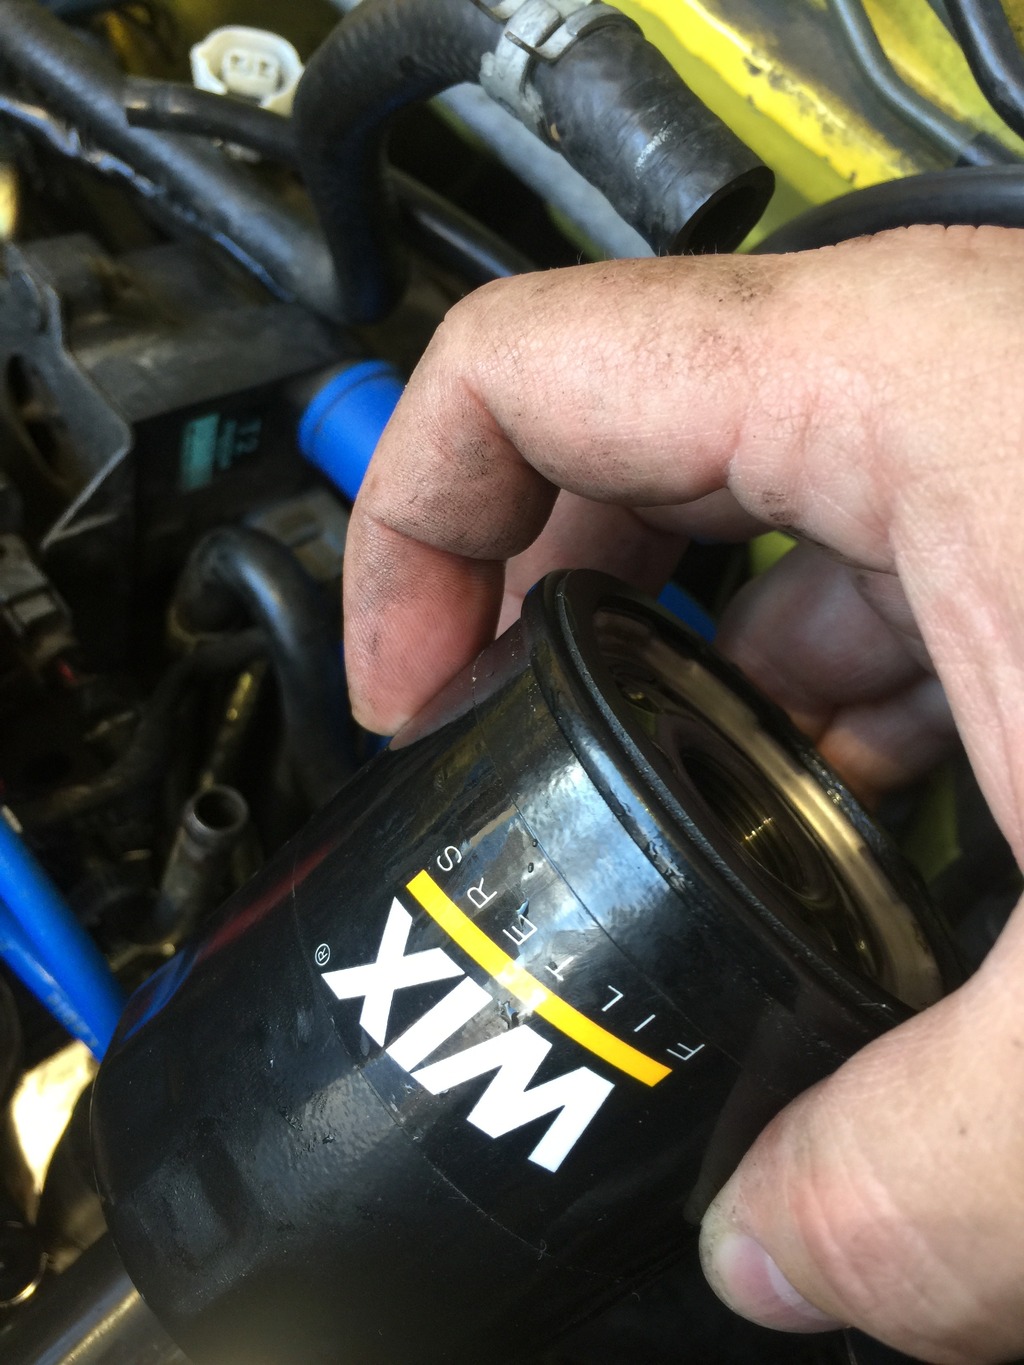
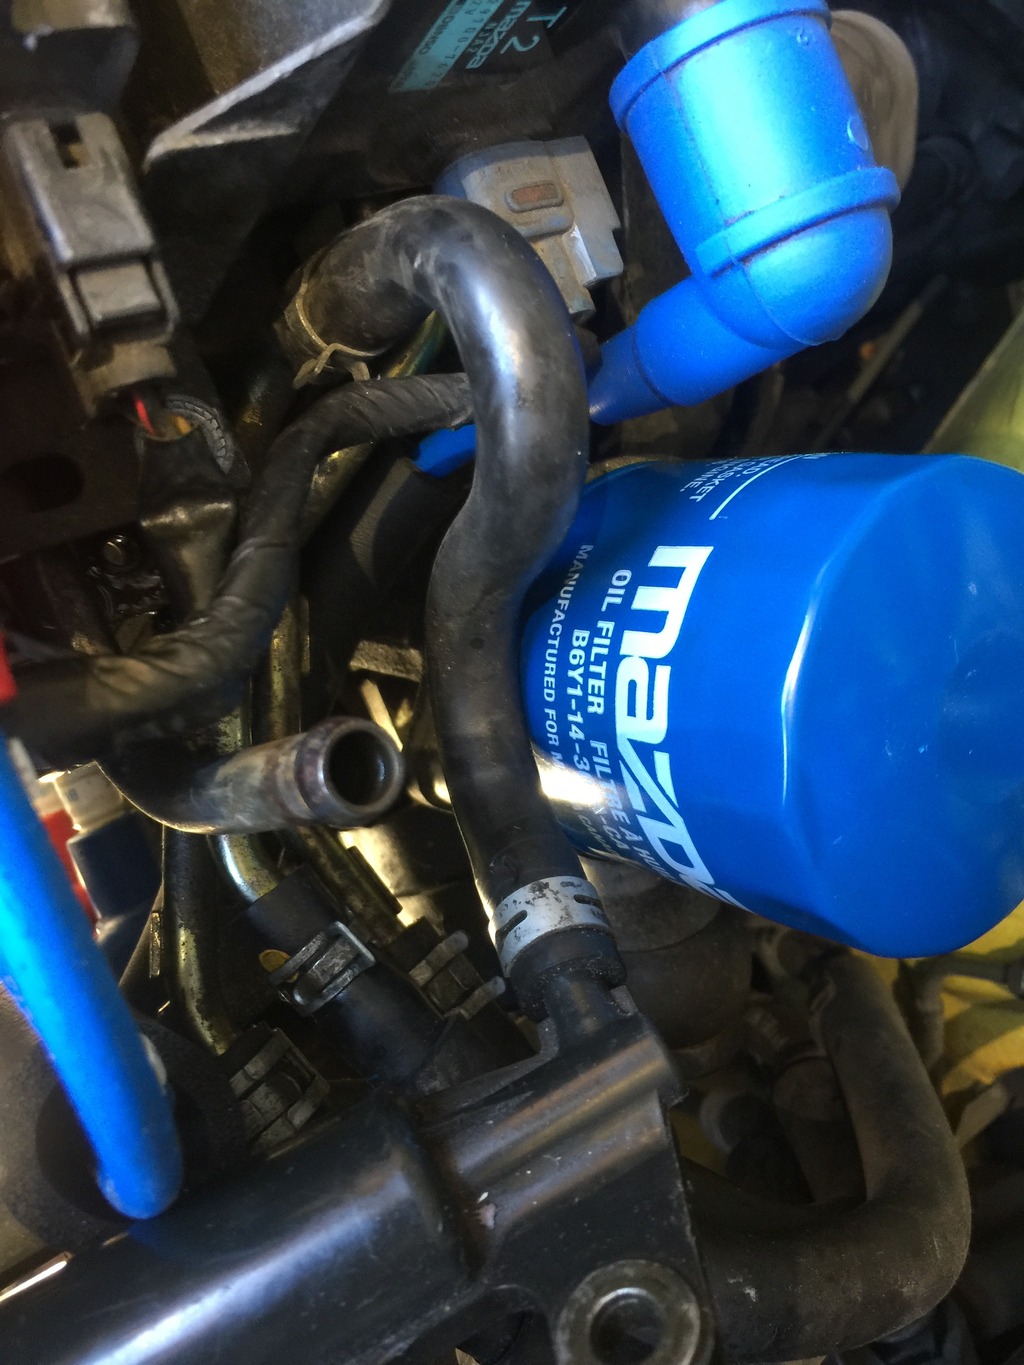
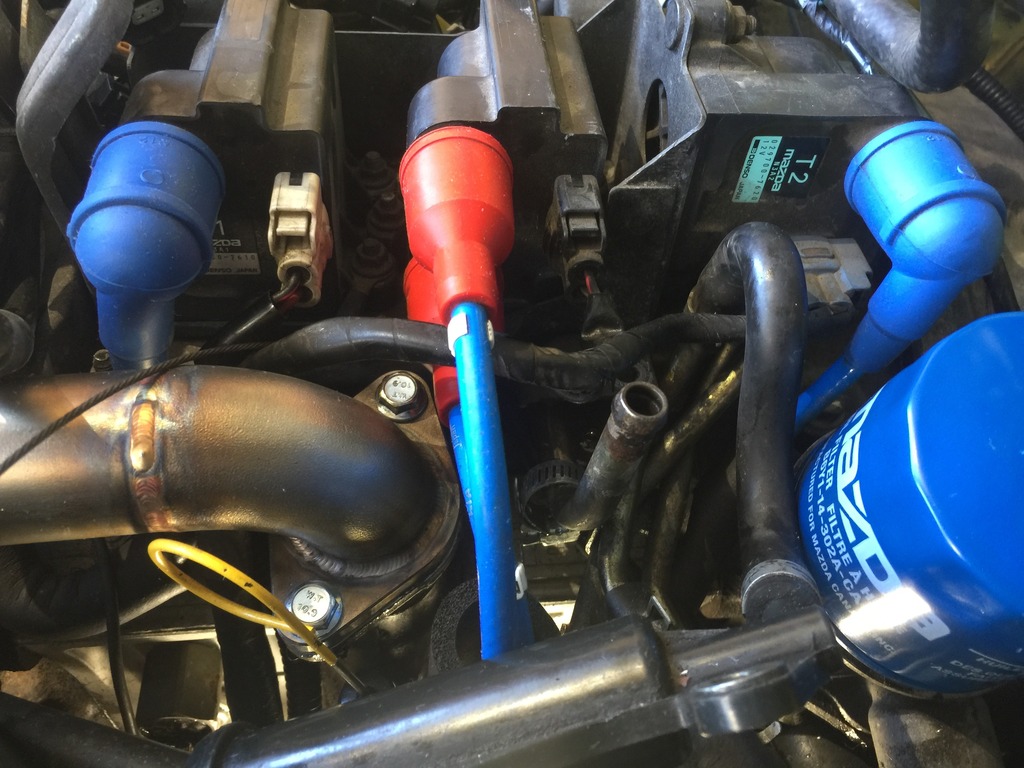
May as well change out the oil filter and change the oil before I start it again.
Rails going in

I decided not to de-pin the stock harness/connectors for the ID725 injector connectors. They have a slightly different connector. I have the connectors but I've decided to use an adapter. It also assures I don't screw it up and there is less of a chance of issues with my soldering.
I ordered the adapter connectors from Banzai racing.
This is what you will need for the primary injectors for a plug and play connector.
USCAR to Sumitomo Connector Adapter
One end plugs directly into any fuel injector that has a USCAR connector. The other end plugs directly into any vehicle's Sumitomo/Denso wiring harness. No soldering required.
$15 each
Installed my drivers side door handle. I think I may get the metal door handles to modify these. The plastic tends to break over time and I like the feel of the metal handle.
I also ordered a set of (4) Denso Iridium racing plugs with a heat range of 10. I hear they are fine for the street and for the potential power I will be making I feel it's the right way to go. I got them from sparkplugs.com. $28 each. Rock auto has them for $25 each also.
The Denso plug # is the 5720 or Denso IRE0131
Those numbers get you the heat range of 10.
Changed out the plug wires today while plenum is off as it's much easier than later

May as well change out the oil filter and change the oil before I start it again.


Rails going in


I decided not to de-pin the stock harness/connectors for the ID725 injector connectors. They have a slightly different connector. I have the connectors but I've decided to use an adapter. It also assures I don't screw it up and there is less of a chance of issues with my soldering.
I ordered the adapter connectors from Banzai racing.
This is what you will need for the primary injectors for a plug and play connector.
USCAR to Sumitomo Connector Adapter
One end plugs directly into any fuel injector that has a USCAR connector. The other end plugs directly into any vehicle's Sumitomo/Denso wiring harness. No soldering required.
$15 each

Installed my drivers side door handle. I think I may get the metal door handles to modify these. The plastic tends to break over time and I like the feel of the metal handle.
I also ordered a set of (4) Denso Iridium racing plugs with a heat range of 10. I hear they are fine for the street and for the potential power I will be making I feel it's the right way to go. I got them from sparkplugs.com. $28 each. Rock auto has them for $25 each also.
The Denso plug # is the 5720 or Denso IRE0131
Those numbers get you the heat range of 10.
 03-12-16, 02:39 PM
#175
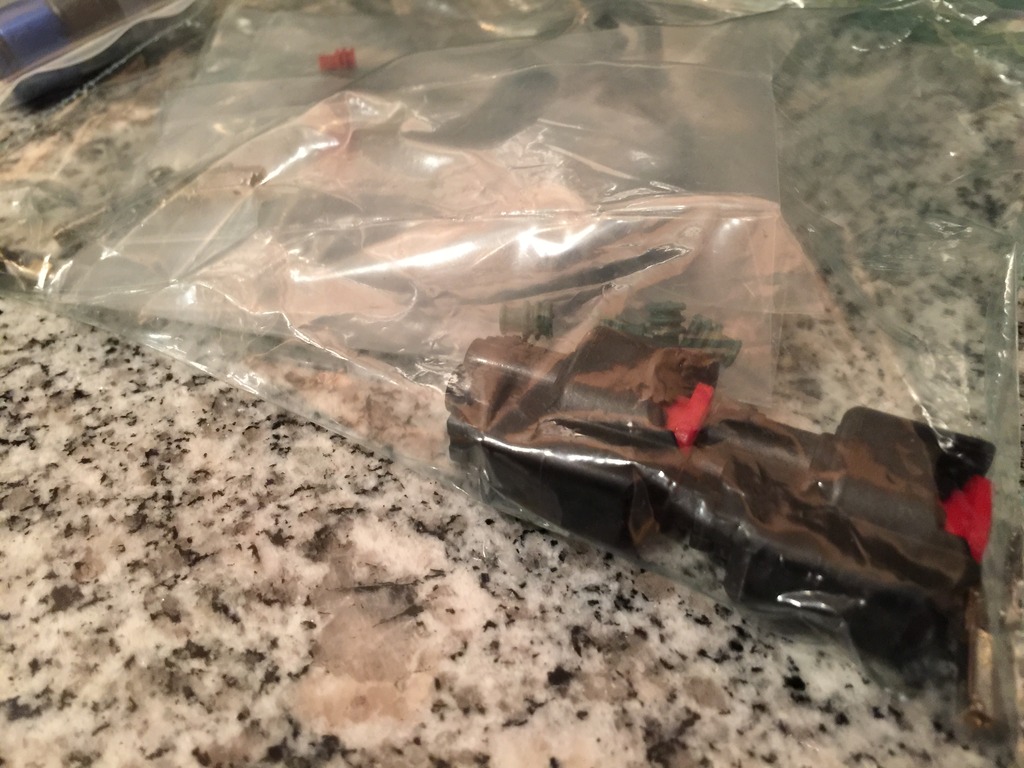
Back with some updates. I was holding myself up from completing the fuel system as the dampener wasn't part of the original plan. I added it later and now a few of the lines IR Performance made for me won't work. Ihor drop shipped me what I would need to finish under the hood and the box came Friday.
I sold my Denso Supra TT fuel pump in the car and the one I had on a shelf to forum members. I am going to install the Walboro 450lph E85 compatible pump. I'm not planning to run E85 as its not available nearby. It will flow a ton of fuel so that's what I'm doing.
The bad news is my fuel hat looks like it came off a Russian Submarine.
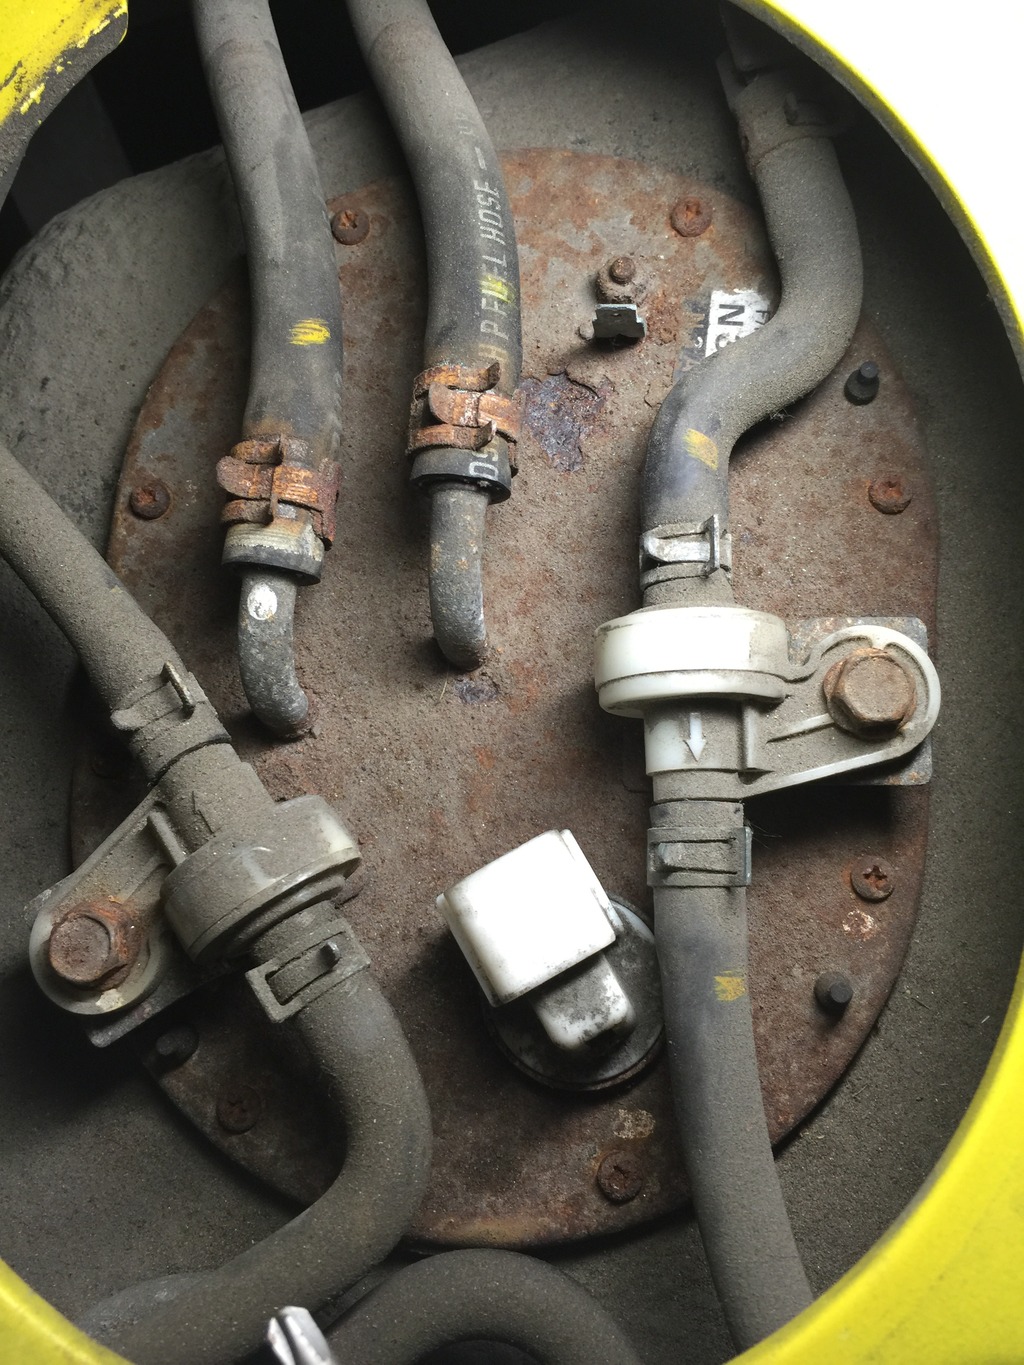
Oh and how lucky am I to see this? Rounded off rusty screws. If I wasn't such a bad *** I would have been worried.
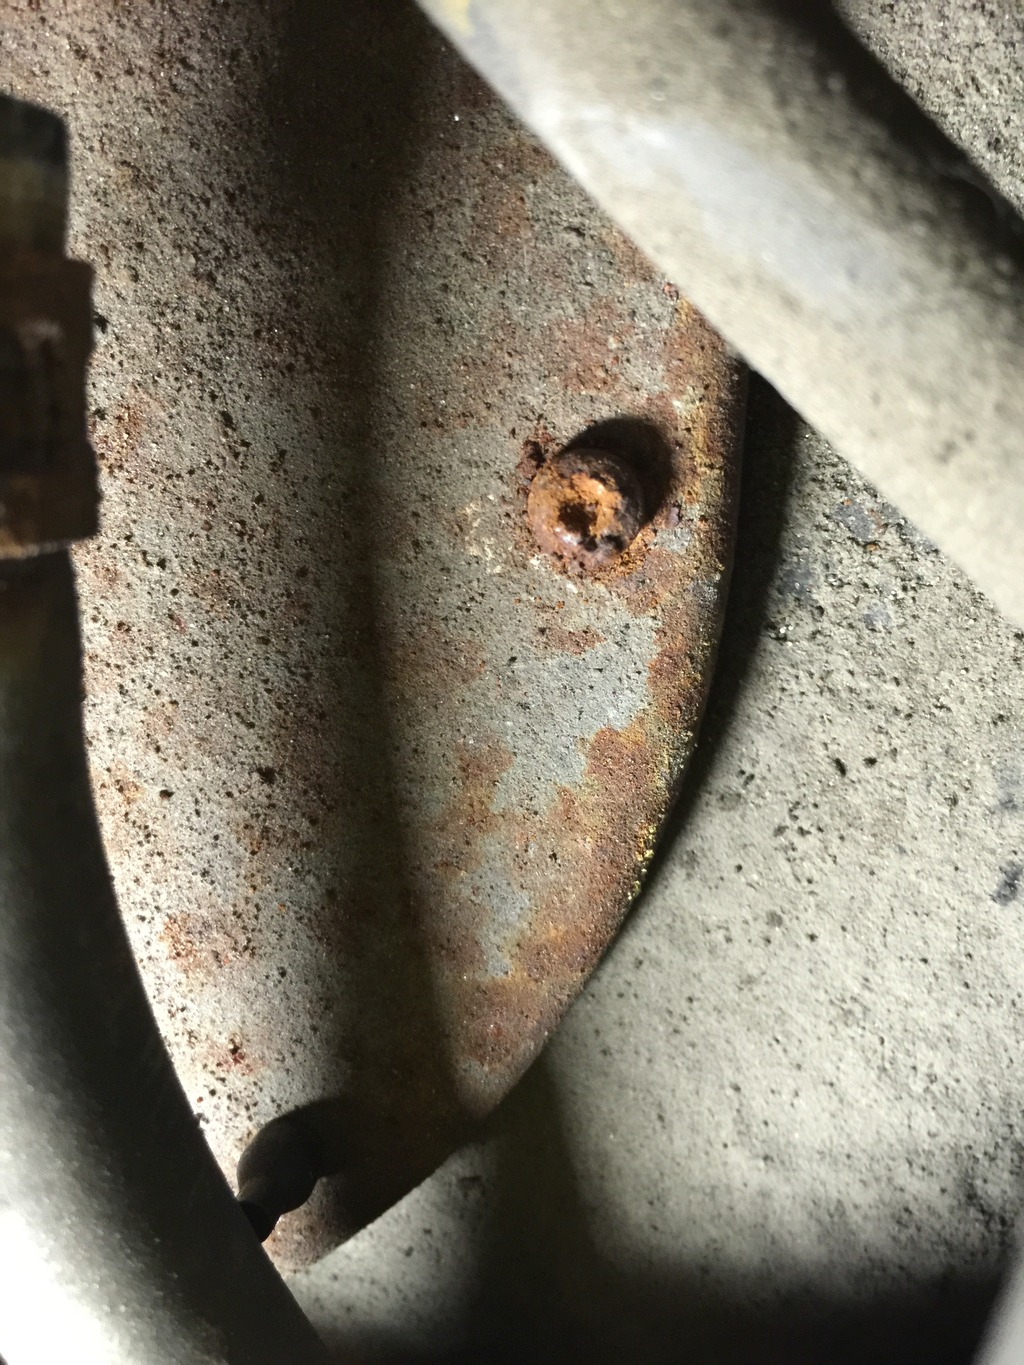
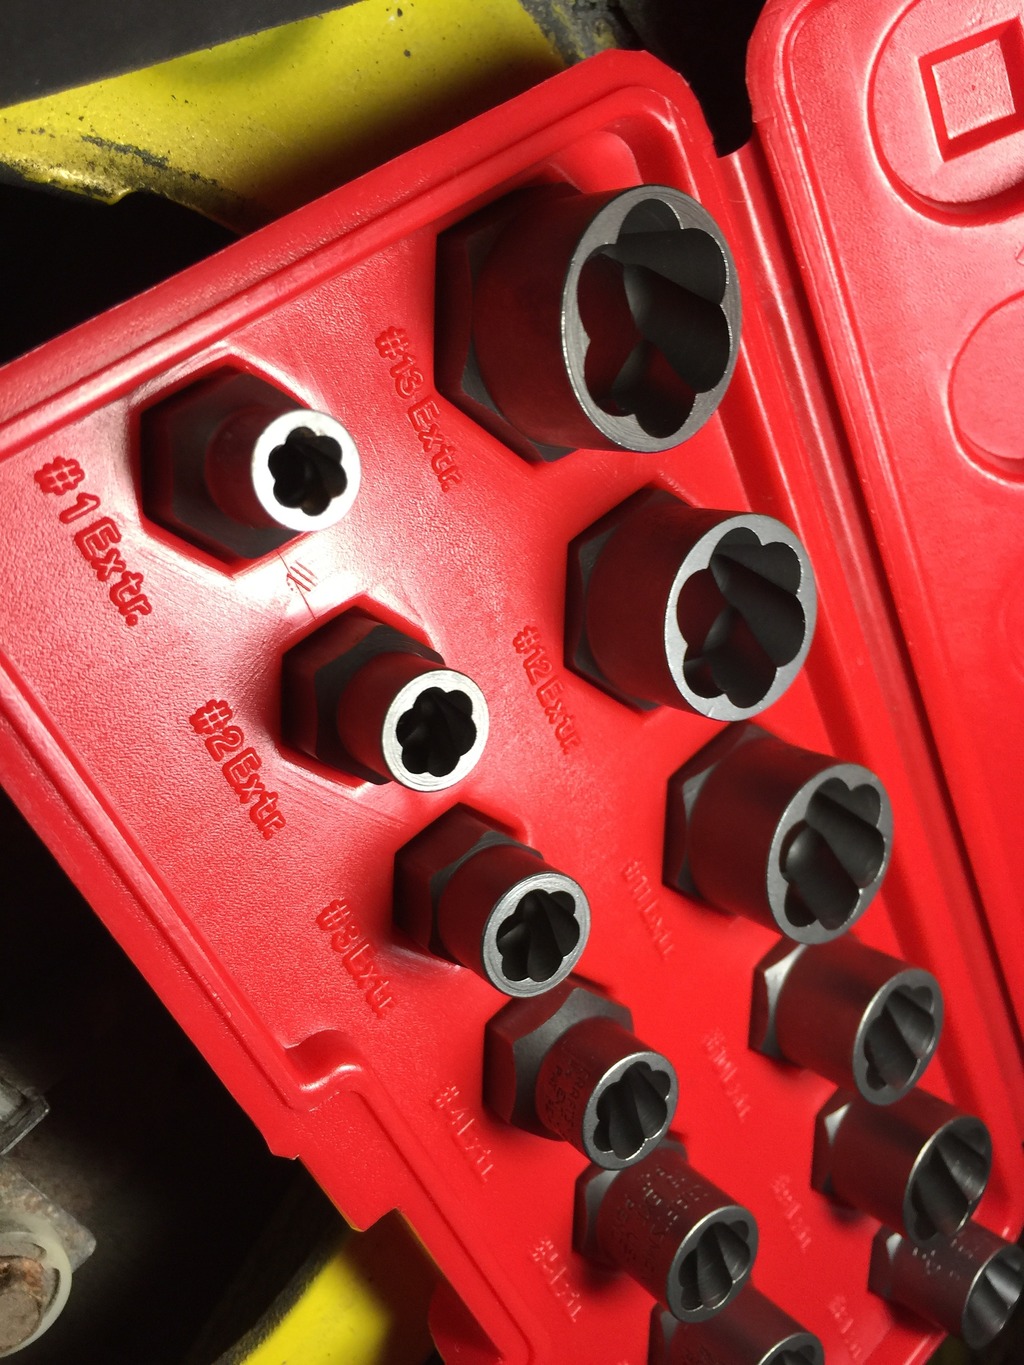
You can be a BAD *** TOO. Just get yourself a set of "Bolt outs" from Sears. I've had these a while. They don't get used often as I usually work on nice stuff. This is when they are invaluable.
DONT EVEN THINK ABOUT DRILLING THESE OUT. You don't want that crap ending up in the tank.
I'm a goin to GIT you ya nasty screw..
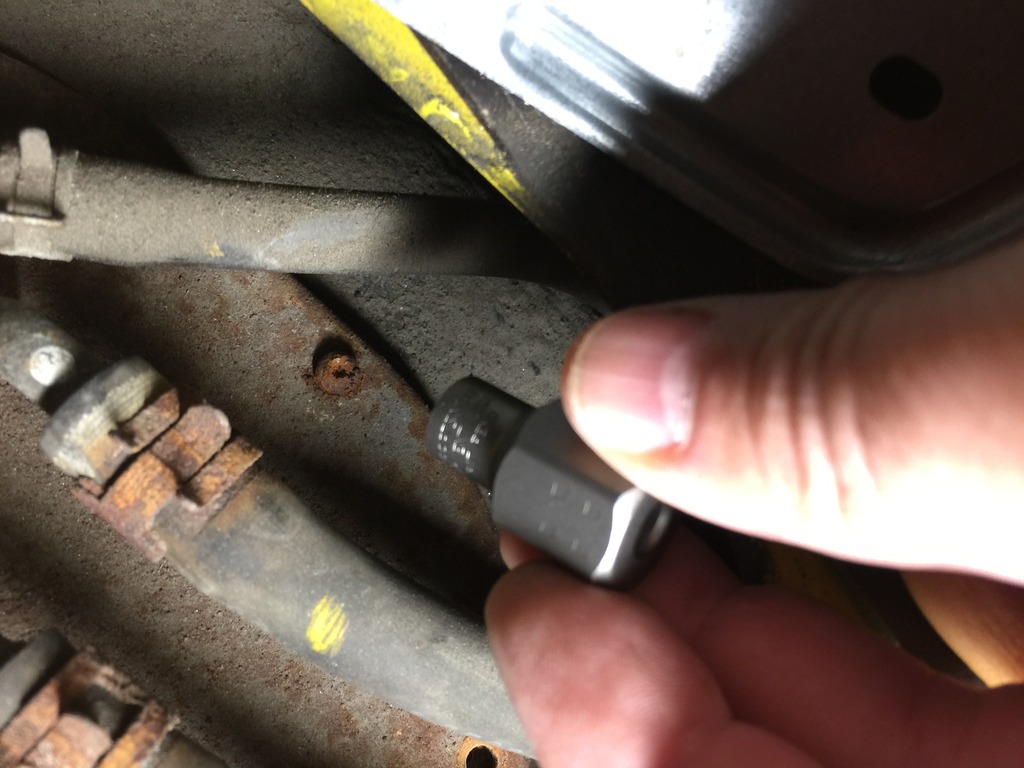
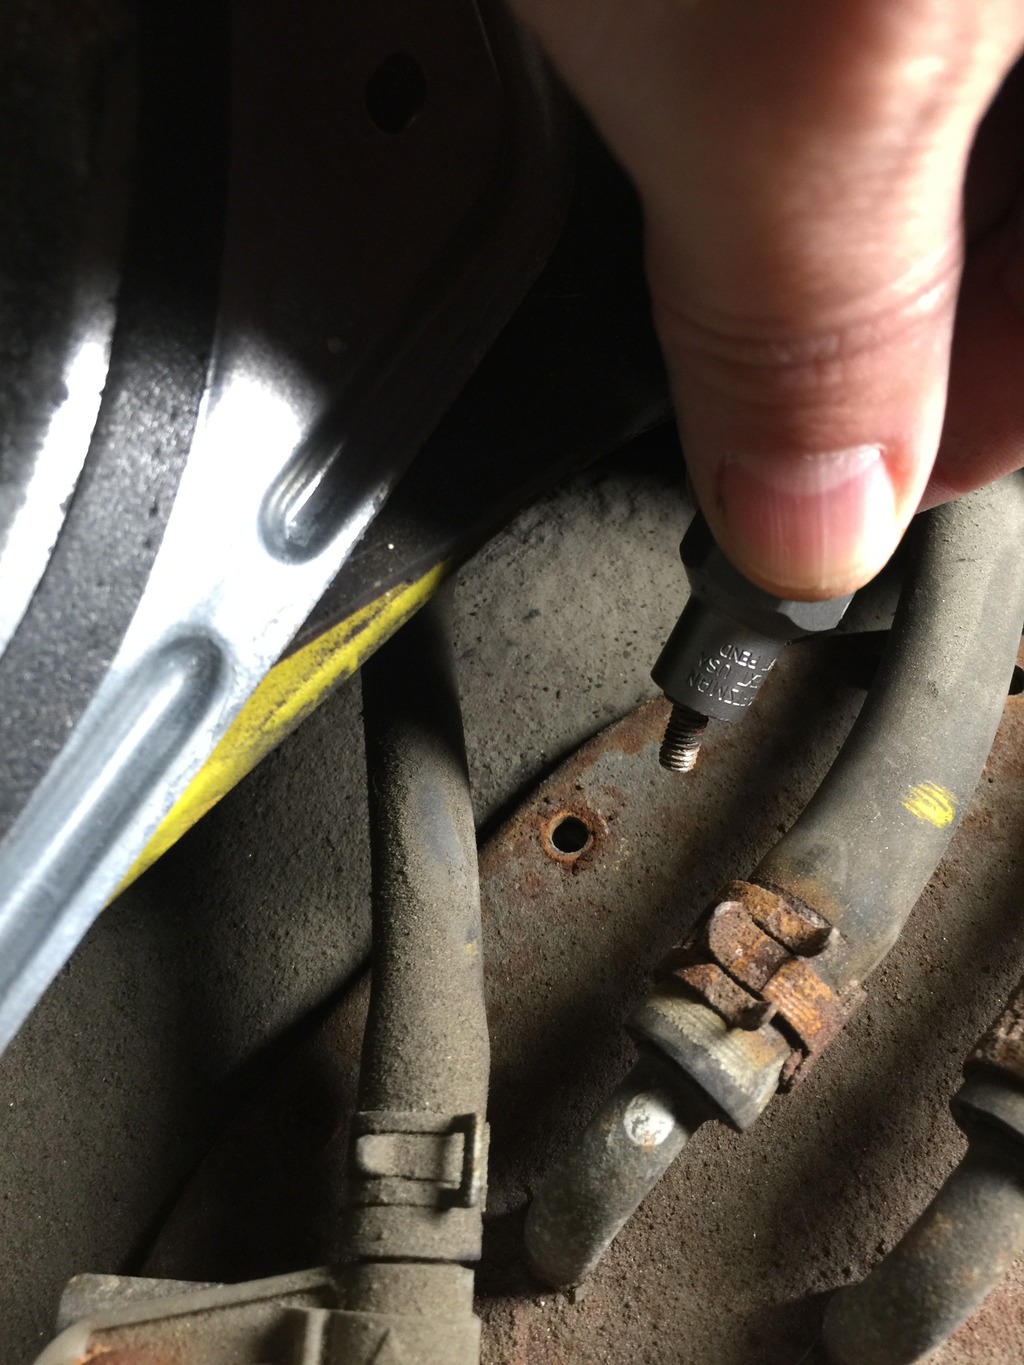
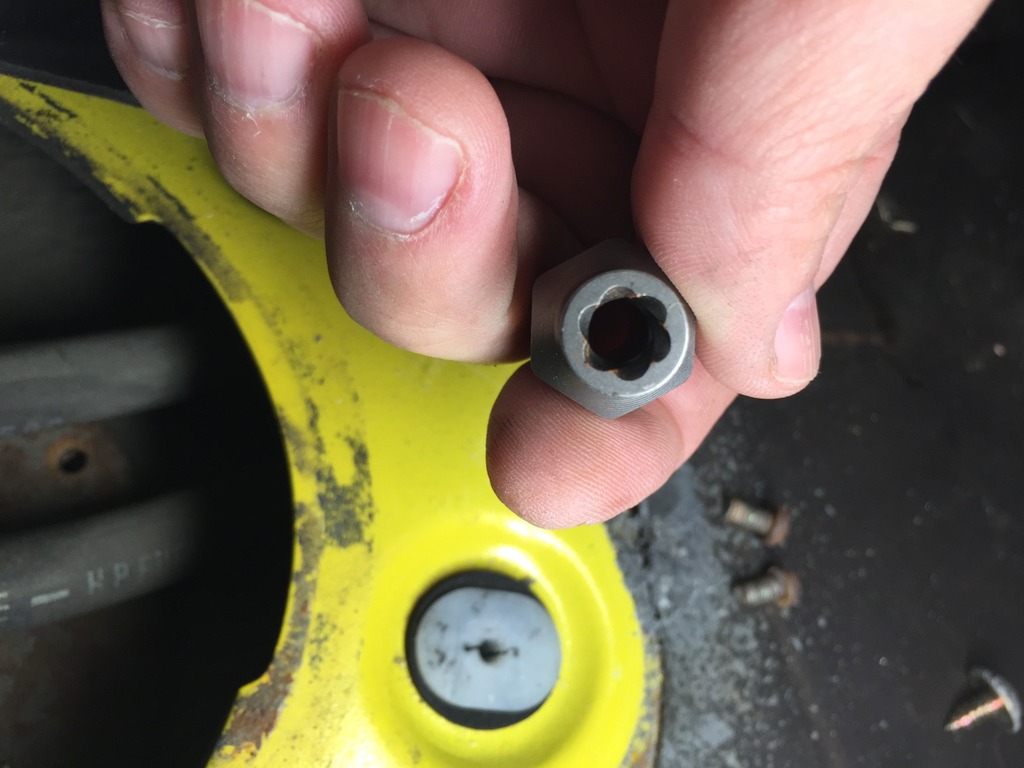
They came out so easy this way I felt I had to share so you guys could win along with me.
Even screws that are rounded off come out with these. An EZ out will also work. I used the Bolt-out and it worked fine. I used the smallest one I had in the kit. The #1.
They make those screws out of butter. They round off easy even when they aren't rusty.
I sold my Denso Supra TT fuel pump in the car and the one I had on a shelf to forum members. I am going to install the Walboro 450lph E85 compatible pump. I'm not planning to run E85 as its not available nearby. It will flow a ton of fuel so that's what I'm doing.
The bad news is my fuel hat looks like it came off a Russian Submarine.

Oh and how lucky am I to see this? Rounded off rusty screws. If I wasn't such a bad *** I would have been worried.

You can be a BAD *** TOO. Just get yourself a set of "Bolt outs" from Sears. I've had these a while. They don't get used often as I usually work on nice stuff. This is when they are invaluable.
DONT EVEN THINK ABOUT DRILLING THESE OUT. You don't want that crap ending up in the tank.


I'm a goin to GIT you ya nasty screw..


They came out so easy this way I felt I had to share so you guys could win along with me.
Even screws that are rounded off come out with these. An EZ out will also work. I used the Bolt-out and it worked fine. I used the smallest one I had in the kit. The #1.
They make those screws out of butter. They round off easy even when they aren't rusty.