When you click on links to various merchants on this site and make a purchase, this can result in this site earning a commission. Affiliate programs and affiliations include, but are not limited to, the eBay Partner Network.
Ok so, some of this will be in order and some wont be.. I took many photo's along the way..and have only just now decided to make a build thread now that im pretty much finished. It may be a bit disjointed, I guess ill do it more in sections rather then in order..
Iv had my car going on 7-8 years now and happily drove it with its sequential twin setup for many years. The car was very fun and reliable.
At the end of last year I decided I wanted to go single and started collecting parts for the conversion.
With most of the parts acquired, I took my car off the road and started my conversion on the night of May 30th this year.
I will say that im no mechanic. Iv just had my car for a considerable amount of time and am not afraid to get my hands dirty...so everything may not be world class rotary mechanic spec..but im proud of what iv done, and that literally no one has helped me with this..other than this forum, and a good friend who helped me with the welding.
So here we go;
here is my car, pre-conversion is its high-tech garage space
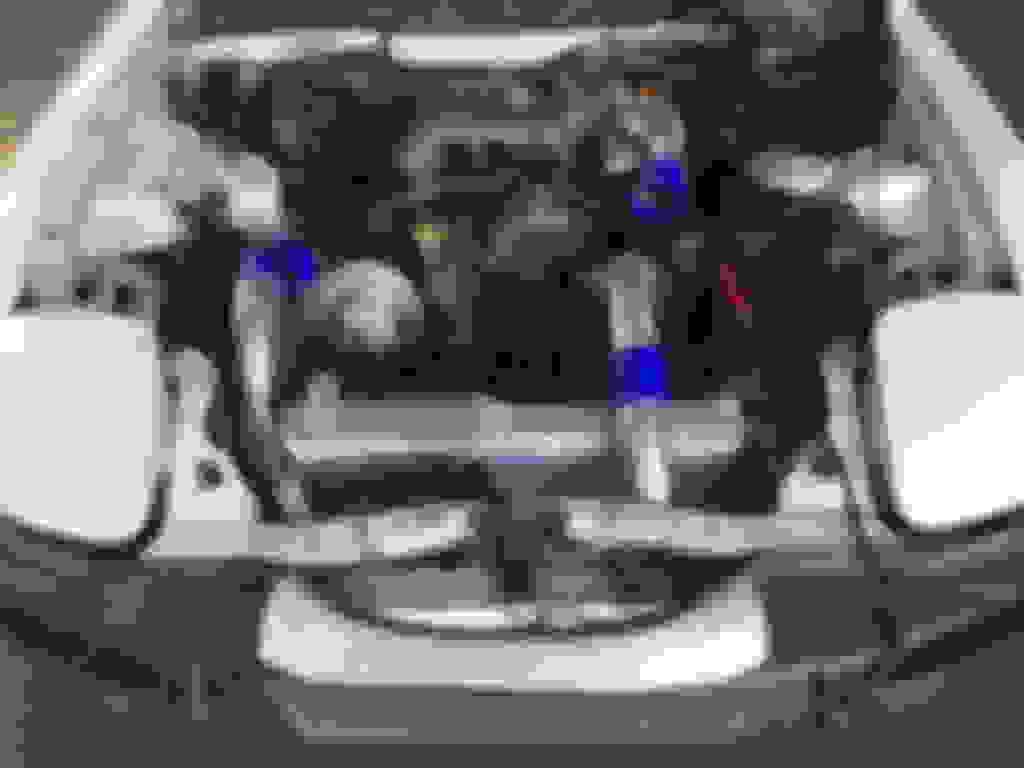
And here is(was) my mostly stock engine bay. Car was mostly stock, other than rebuild with 3mm apex seals, apexi intake, exhaust, coilovers..
Removing stuff;
Turbos out;
Made and installed a rear turbo oil drain block-off plate.. I may revisit this in the future and weld a fitting on there for oil catch can return..will see how I go/how much of a mess I make.
installed turbo oil feed banjo to AN-4 fitting;
The holes on the turbo oil drain fitting I had didnt fit properly so had to drill them out;
I drilled & tapped the stock IAT sensor hole to take a delphi fast acting IAT sensor & soldered on plug to suit.
I installed new (us made) GM 3 bar MAP sensor & soldered new plug on..
New plug on;
Installed front mount intercooler;
Yea now im having second thoughts about that stock radiator, lol
Got a new radiator...(PS, how the hell is one supposed to fill this thing when mounted in an upright position, lol). The turbo/manifold is not yet finished / bolted in properly in this image. Its just there for mock up purposes.
The fans also fit like crap so had to do some cutting, hammering and filing to make them fit properly..
I also needed to extend the fan wiring with the new radiator position;
I decided to delete my AST, only problem was I have the late model one piece filler neck..
So I drilled & tapped the filler neck and installed a nipple..
AST hole drilled / tapped; (its a 1/4" BSPT fitting by the way)
nipple installed / AST delete completed
Installed pineapple racing big turbo idler pulley kit. Good kit, one of the few parts that really does just bolt on.
Kit as it comes;
Finished. Again I want to say the pineapple kit is very good and fits perfectly..just what we like to see.
Ok so we are going to be in need of a new fuel pump. So I installed a Walbro 400lph pump, wired in with a 60a relay..
heres the stock pump when I removed it;
Heres the new walbro 400lph pump installed;
New fuel pump needs more power so I wired in a 60a relay & blade fuse holder etc.
Wiring in progress;
Relay installed into rear where the factory tool kit would usually be;
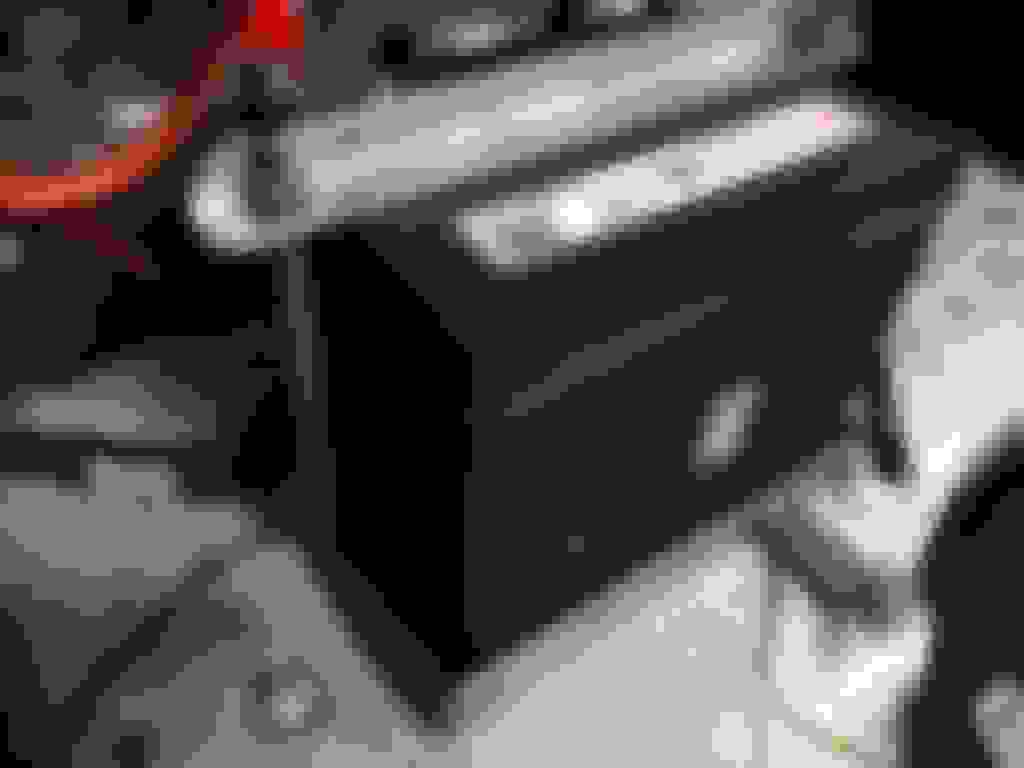
OK so obviously we are going to need heaps of fuel..so in goes a full function secondary rail & ID2000 injectors with fuelab mini fuel pressure reg.
I bought the "FD step-up kit". Its a good kit. The FFE parts are one of the only other things that fit 100% perfect, just like the pineapple kit, id reccomend the FFE parts to anyone.
Heres a box with the FFE "step up kit" and other misc things ill need for the install (hydraulic sealant)
FFE rail & fuelab FPR
ID2000 injectors;
cutting them up to fit the FFE lower inserts;
o-rings installed on the injectors as required for the FFE lower inserts;
Rail installed;
I also deleted the FPD and installed a 90deg hose tail on the start of the primary rail..
Installed various block-off plates;
I decided to remove the double throttle. The hole is about 8mm in diameter, perfect for a 1/4" BSPT or 1/4" NPT plug...so I tapped it for 1/4" BSPT and installed a plug. Much better than some of the rough bolt jobs iv seen or a block off plate. Could also install a nipple in that same hole if one wanted to.
Turbo is still just there for mock up purposes.
The damn heater hard line is in an annoying place..
so i cut it up (so it was easy to remove lol) and ran a new hose in the opposite direction
I dont have photo's but its protected (by hose over the outside of the hose) anywhere that it may rub;
Next up is relocating the battery to the boot / trunk. (my car has rear seats) I used 260a welding cable because I can get it for cheap from my work. I learnt after id already done it that I should have run it to the starter motor. Oh well, works fine, turns over strong. I think the cable is big enough that it dosnt matter.
I ran it through the firewall, then under the carpet to the trunk;
still looking pretty ugly, but here's the engine bay with the new cable in there
And here's my battery & holder located in the trunk. Note it bolts to existing threaded holes in the trunk. IMO, very nice. My friend made that for me. It grounds out on another already existing threaded hole
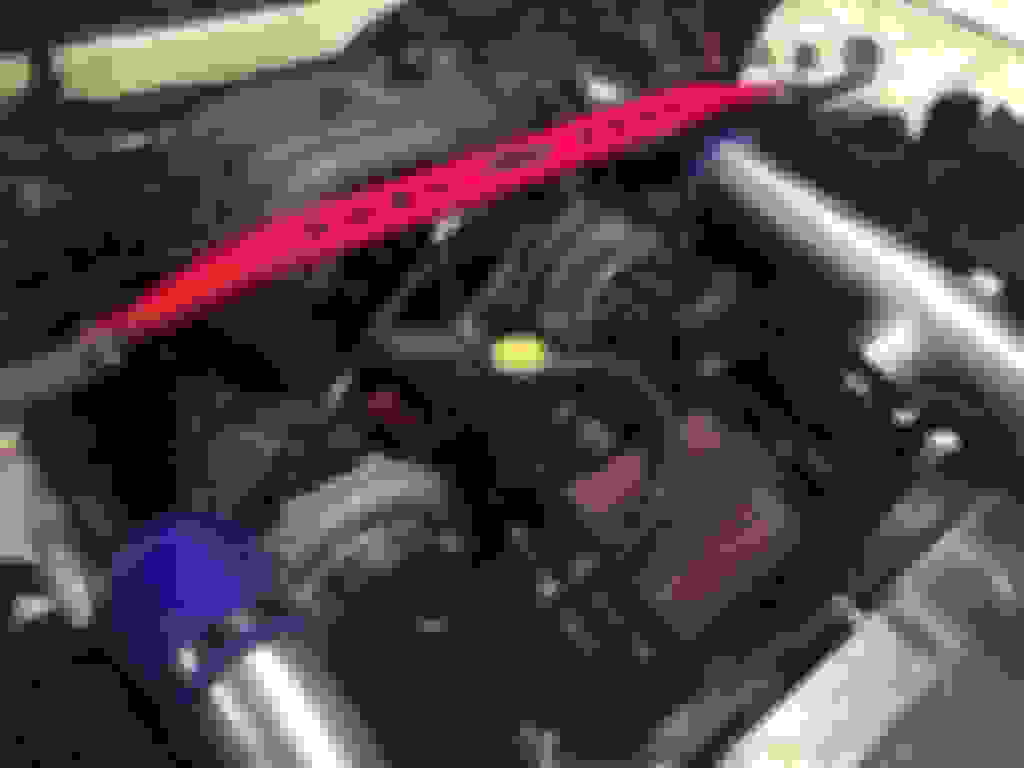
Installed one onto the turbo compressor housing for the wastegates, and installed a second one on the greddy elbow for the fuel injector atomization. Being a late model car my car dosnt have unused nipples everywhere for me to use.
Alrighty now we are getting to the nitty gritty.
Here is my manifold that didn't fit. This caused me many delays and head aches...enough said.
So here are some photo's, not necessarily in order of the building and changes to the manifold that we went through before we got it right...there was a bit of back and fourth involved with this one.
Modified manifold MK1. Did not work.
testing modified manifold MK1. Does not work, rear gate interferes with engine mount;
manifold MK1 on the bench;
and heres the final manifold etc in the making;
manifold/downpipe/gates on the bench
another angle showing gate setup etc;
manifold finished on the bench after welding;
It fits! now we getting somewhere..
fitment between downpipe and wastegates is perfect;
So after we got the manifold sorted and the bulk of the downpipe finished, my friend came over with his welder to finish up a couple of things that needed to be welded / tacked while in place.
(basically where the downpipe joins up with the rest of the exhaust)
I am forever thankful to my friend Chris who helped me with the welding. He is the MAN. A true craftsman and the best welder I have ever seen. Having to come over and weld things in the dark, underneath my car, on jack stands with no room didn't faze him one bit.
Last of the downpipe getting tacked;
Heres the finished down pipe. The darker coloured welds have not been cleaned with acid, are the ones he did at my house, at night, in the dark.
So at this point, we have the fuel system complete, new sensors installed, nipples for everything, pulleys, manifold/wastegate/downpipe setup complete. Pretty much everything is done except for the aluminium welding.
So we towed the car to my mates workshop where he could weld the aluminium as he couldnt bring that setup to my house.
A photo of the car after we towed it to the workshop;
intercooler piping in progress;
intercooler piping - more progress. Its all tacked;
Heres the intercooler piping all welded up. Also, note the fitting we put in the top of the radiator so its not a pain to fill! You can also see the -AN10 oil return we made. That just bolts onto the stock location then you can connect your -AN10 turbo drain to it.
intercooler piping etc finished and installed;
next we started to make a cooling plate. A, to stop air going over the top of the radiator. and B, because it looks bad-***
After that, the car sat at the workshop for a couple of days untill we could tow it back home.
Car got towed home. Not much left for me to do at this point. The intercooler plate makes for a really great tool holder though!;
Next up was the easy job of cutting the bumper to make it fit with the front mount IC;
drilled the rest of the holes where the bumper will bolt on;
bling bling
sorted out the air filter. Its a K&N filter..
I got the Link G4+ ECU
I installed that, and went through the pre-start configuration steps to try get her running;
After that I tried to start her and she started straight up! No coughing, no long cranking, nothing. Came straight to life.
Fixed a few small coolant leaks and all appears to be good.
I couldn't get my head around the timing adjustment, so I don't think that's correct at the moment. (manifold started to glow red at idle).
Car is booked in to be tuned of the 1st October!!! excited.
So the car is due to be trucked to the tuner in a couple of days..things are getting real, and im getting nervous!
Does anyone have any tips on getting the car ready for the dyno for the first time after conversion? Anything I should check and double check that I may not have thought of?
ECU is fully untuned and only has a "start" base map.
I can only start the car and let it idle for a minute untill the manifold starts to get red hot which makes really testing things a bit difficult.
I have been starting the car, letting it idle for a minute then shutting it down and checking for leaks..
Any other suggestions on what I can do to get her "dyno ready"? Its been a long road and I want the car to be as ready as possible to avoid problems and frustrations.
Hopefully this time next week the car will be tuned and on the road
Car goes to the tuners today to be tuned tomorrow.
Was a weird feeling packing up my tools for the last time, after so much work, before its trucked away...lots of staring at the engine bay trying to convince myself iv done everything I need to do...followed by a sleepless night going over everything in my mind.
and away she went, hopefully next time she leaves that driveway it will be under her own power ;
Its looking like it wont be till monday/tuesday that ill get her back. I followed the tow truck there and spoke with the tuner, and went over the engine bay with him and everything looked sweet so that's good..no immediate issues
No update as yet. The shop was a couple of days behind when I got it there so was told it will probably be Monday/tuesday until its finished. (its Friday arvo here now)
I was starting to think one needed to have a v-mount in order to get a comment in their build thread
Awesome awesome progress so far
Maybe I missed it, but what BW turbo are you running?
Thanks
Turbo is a plane jane Borg Warner S360SX3 with .91ar turbine housing. Aka s360 aka S300, aka 8375, BW part#177272 (the smallest of the borg warner S360's).
I have 16psi wastegate springs in there and no boost controller hooked up. So im guessing ill make somewhere between 375-450rwhp depending on how everything goes, hopefully with decent spool and a good torque curve.
^thanks
Just got the call, she's ready for pickup ! Am off to the shop soon, should have a dyno graph and initial driving impressions within a couple hours !
Just got back (to work) from picking up the car!
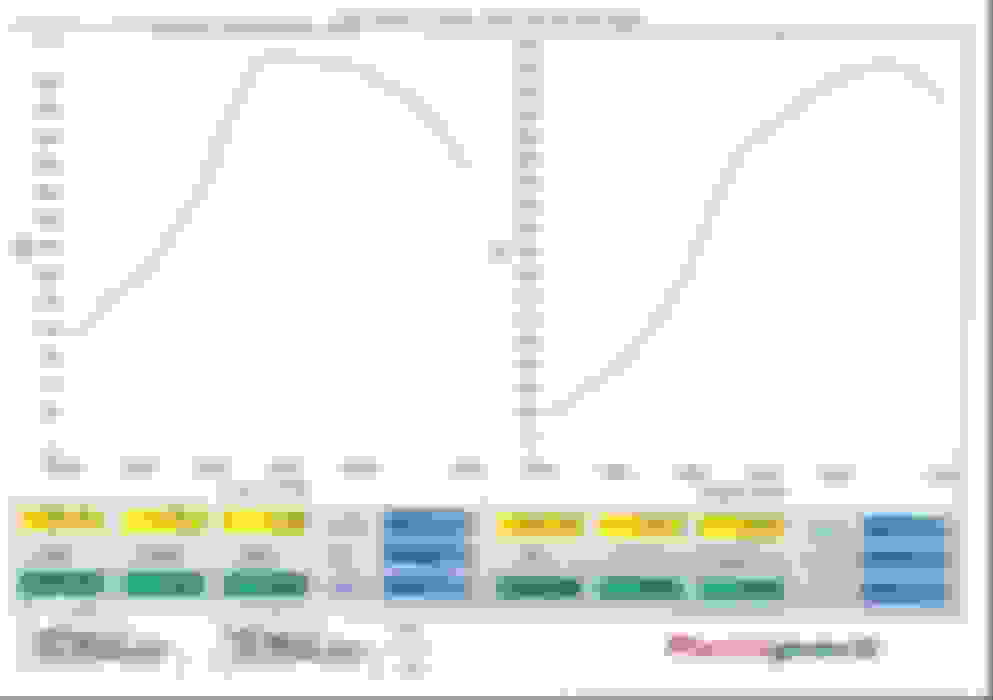
She runs like a beast! They had no problems doing the dyno etc so that's good. My hard work paid off
Car made 350hp ATW, on about 12.3lb of boost. (straight off the wastegates)
Torque comes on quick, and strong. With boost pretty much straight away with over 300ft/lb torque at 4.7k rpm. IMO really sweet for a road car! There's lots more left in it with either some heavier springs or a boost controller.
I think iv achieved what I set out to do, and that is to have a good responsive street car (i.e not just a top end beast)
I admire the build and your car m8. I really like what you've done!! What are your plans>??
I was looking for a good tap and die set, what are you using personally??
Why thank you good sir
I work for an engineering supply company so I just get the required drills & taps that I need for the job at staff discount. I don't have a full set as such, just a few common taps, die nuts & the appropriate drill bits for my uses.
I use Sutton brand drills and taps though which are industrial quality A full set of those would be really pricey.
My current plans are to clean up the exterior a little bit. Perhaps paint the car, or maybe just the front bumper (its a different white from the rest of the car).
After that I may look at installing a boost controller and upping the boost.(changing the springs is too much of a mission, lol). there is obviously a bit of pressure drop going on between where the waste gate gets its pressure source (compressor housing) and the MAP sensor. I guess to be expected with a large intercooler and the pipe length required for FMIC. I spose I could also change the pressure source to the elbow for an instant boost. But Nah.
Not really too worried about more power at the moment. Its just a number. Its pretty vicious as is. Car is making some serious torque early in the rpm range
Oil is spewing out the front of the engine somewhere. It looks to be coming from under the waterpump housing then is running down onto the crank and spraying everywhere. Its a substantial leak..like a flow..not a drip...ugh
Im guessing its either the front cover or the OMP lines... I cant quite see exactly where its coming from but looks to be underneath the waterpump housing almost in line with above the crank. There is an OMP line that runs right along there but I cant quite see if its damaged as its covered by the waterpump.
Any ideas? front cover or something else?
My biggest worry is tearing into it and getting it to a state where I cant start it, so cant confirm exactly where its leaking from, then fix the wrong thing.
Have been reading a little bit about changing the front cover gasket....that sounds like a whole heap of fun.
Omp gasket/ lines? Give her a degrease, start her up and view where it comes from.
Yep iv done that a couple times. Iv narrowed it down to about a 1" square area where its coming from but I cant see properly if its coming from an OMP line or if its coming through the front cover.
Not my pic, but it looks like its coming from under about where the arrow is pointing. And the dotted line represents an OMP line that runs right down there. So an OMP line does run directly through where its leaking but I cant tell if its broken/has a hole or not.
Would you know if a front cover leak would leak in that area? Or do you think its sounding like an OMP problem? I know im going to need to tear into it (and will probably start tonight), just trying to narrow it down as much as I can.
I doubt an OMP line would produce the amount of oil leaking that youre describing. The lines are tiny. Why not disconnect the OMP and see if it continues to leak....Most likely the front cover gasket or something.