
Reactor's 500R Build Thread

Nice work...givin Rich (the official "baller" status FD) a run for his money 
+1 on Howard's suggestion to pre-mix, I'm running Amsoil Interceptor 2 stroke and have been for years
Also good choice on the HKS iridium plugs (rebadged Denso's), I love mine....just don't try to gap them!
+1 on Howard's suggestion to pre-mix, I'm running Amsoil Interceptor 2 stroke and have been for years
Also good choice on the HKS iridium plugs (rebadged Denso's), I love mine....just don't try to gap them!
BTW I just found out how to mutli-quote and will be doing so in the future.


Excellent build & choice on turbo 
I will agree with others on a few things.
AI - It just makes sense with a high HP rotary. It keeps things safe & clean. Howard has an awesome thread on it called "Stating the case for the rotary"... Read it, and enjoy the great info. I like AEM's setup and will likely go that direction. It is a quality unit with some nice features such as tank level sensor & interior warning light.
Solid mounts - Unless it's a pure track car, I wouldn't suggest them at all. Bonzai Racing makes a very nice Poly mount. I would recommend these.
OMP - Ditch that bitch!... As others have said, it's function and reliability is not up to par with your build. Premix is the way to go. Mazda made a nice band-aid for an issue of mass producing a car. We enthusiasts know the truth.
Wideband - I didn't see one on the list, but I'm sure you know that you need one. PLX makes a quality, proven unit. I recommend them.
Vmount - HKS vmount is baller status! Props for making the purchase. As your research will find, Vmounts love vented hoods. I too am going Vmount with my 35R build. Get a vented hood and proper ducting and your engine will love you.
Oil cooler - Very essential! If your car is a base or touring, the single cooler just doesn't cut it. You can find a R1 duel setup in the parts section or if you want to continue your baller trend Sakebomb Garage makes an awesome kit for around $800. Oil cooling accounts for a fair amount cooling in a rotary.
Heat is your enemy!!!
Overall, great work! I look forward to seeing some numbers with the 500R. I have heard great things about them.

Hey man just wanted to stop by and say we are doing the exact same build! Good luck with the build and I'll be sure to follow your progress. Check out my build thread in the same forum.
As the person above said, heat is really the enemy of these cars so try to do as much as you can to really eliminate as much as you can, turbo blankets, cermaic coating, water/meth injection, etc etc.
As the person above said, heat is really the enemy of these cars so try to do as much as you can to really eliminate as much as you can, turbo blankets, cermaic coating, water/meth injection, etc etc.


Sheesh.
-Jim
I think I decided on a AI system. I'll be running water/meth.
http://www.rx7store.net/Coolingmist_...0injection.htm
Anyone use this system yet?
http://www.rx7store.net/Coolingmist_...0injection.htm
Anyone use this system yet?
Alright well now that all the holidays are over and tax money is in my bank, I figured its time for an update.
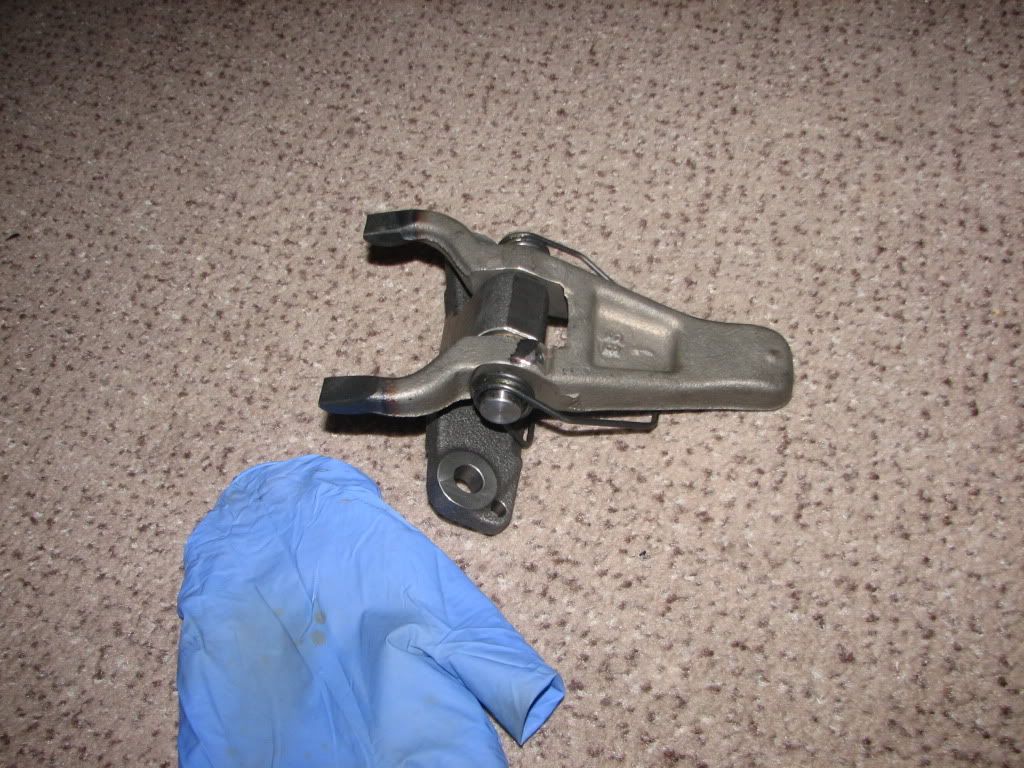
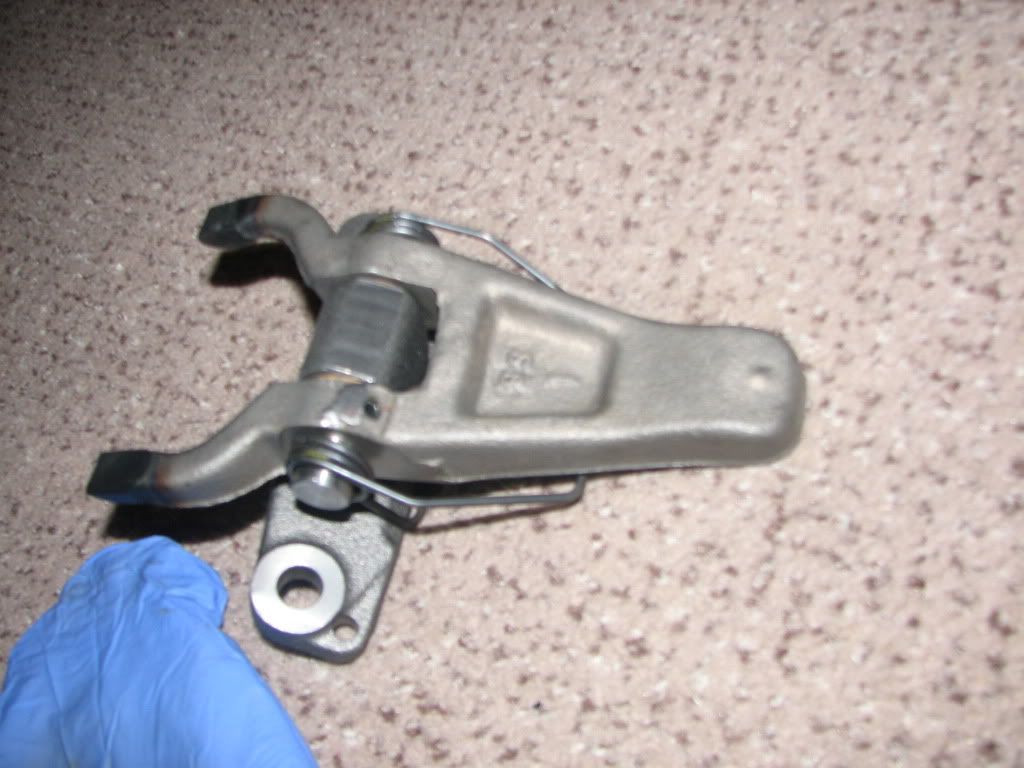
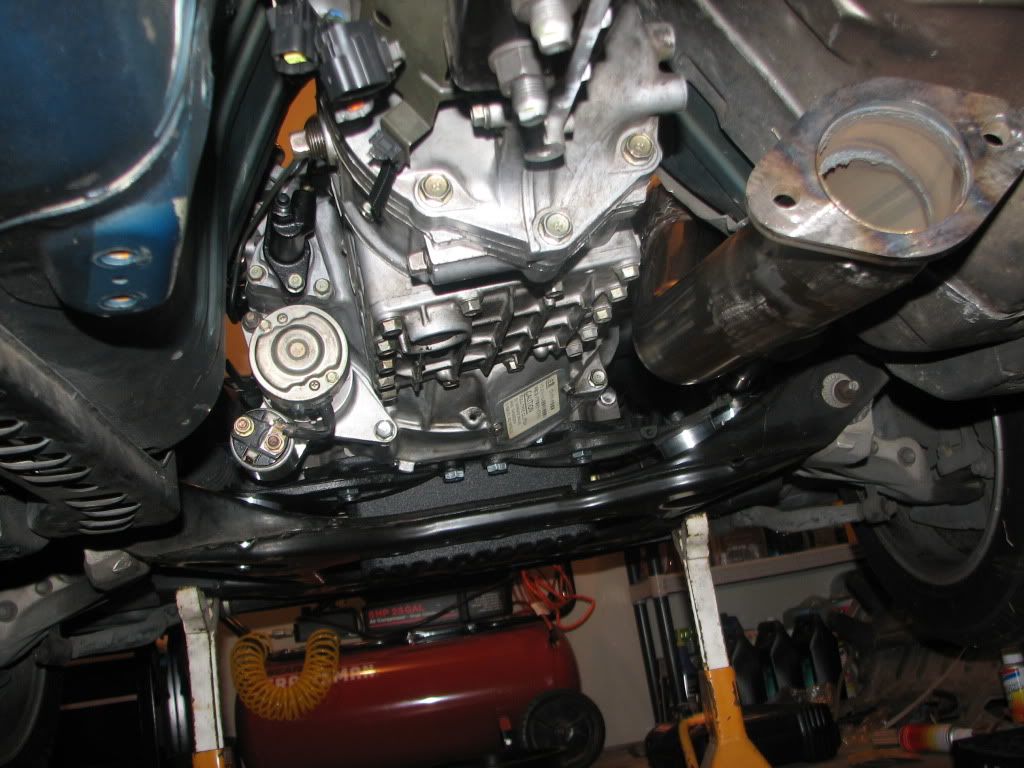
To install the HKS GD Pro Clutch, you have to slightly modify the clutch fork assembly. So I went down to Mazda and grabbed a brand new unit and went to town on it with my dremel, trying to match what I THINK the instructions were saying to do (Japanese instructions). This is what it looked like when done. Of course before I started on the new one I practiced on my old one to see how fast the material was removed and what shape I wanted to accomplish.

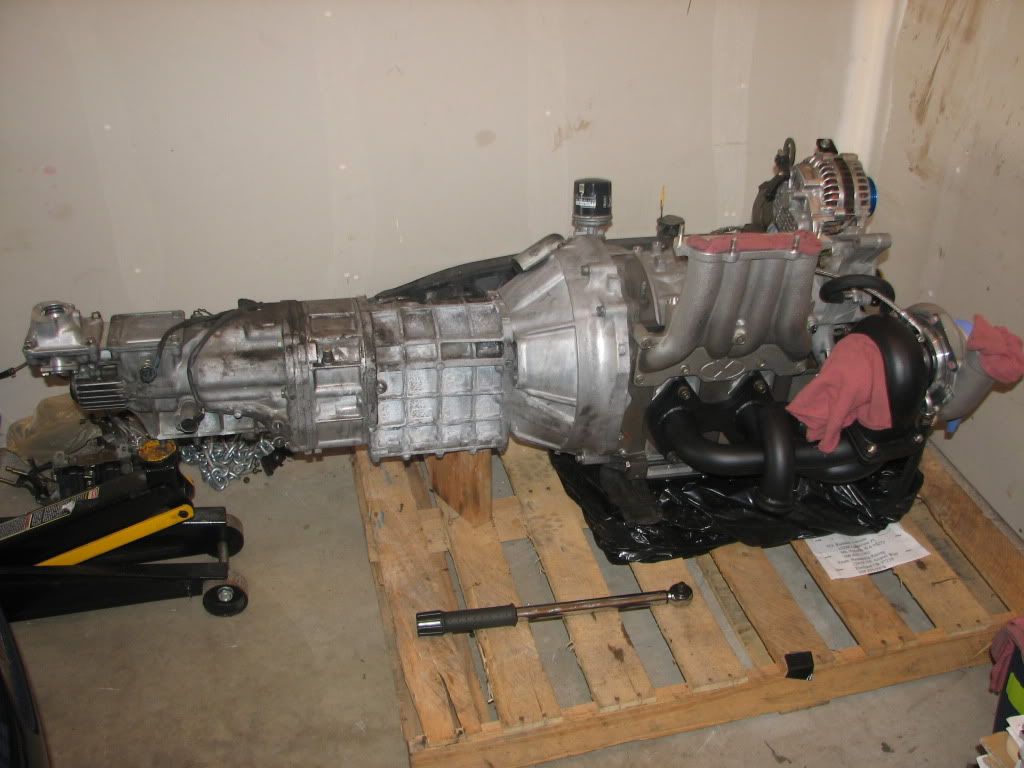
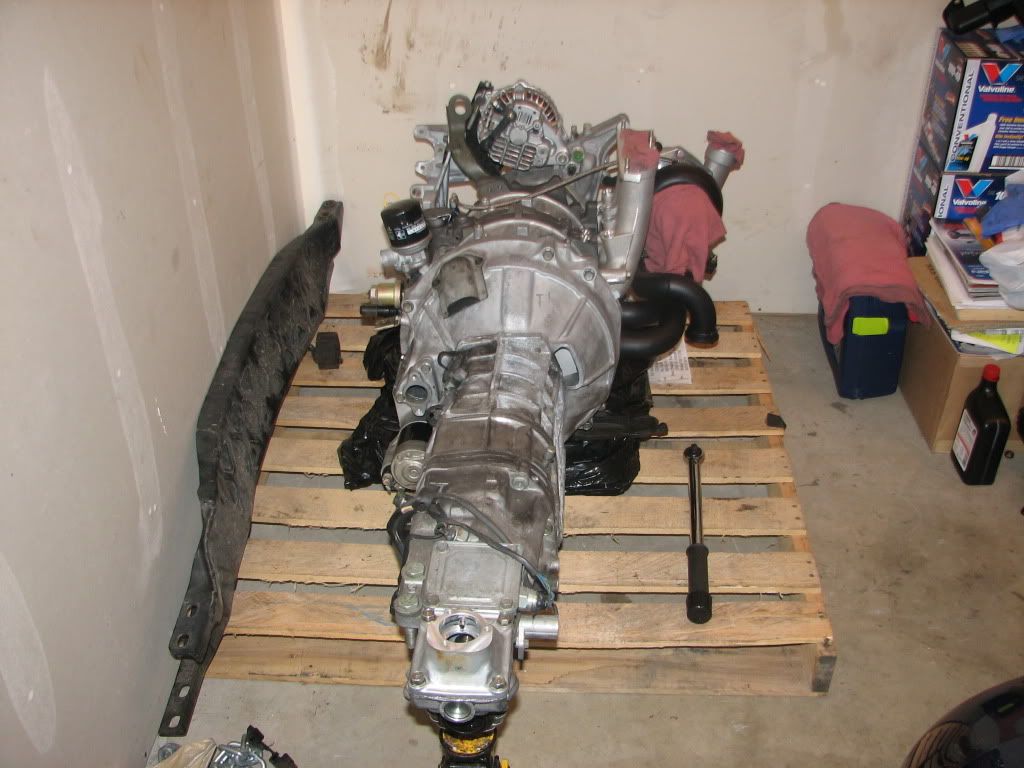
Last night I bolted up the transmission and starter to the engine. Here is how it sits now.
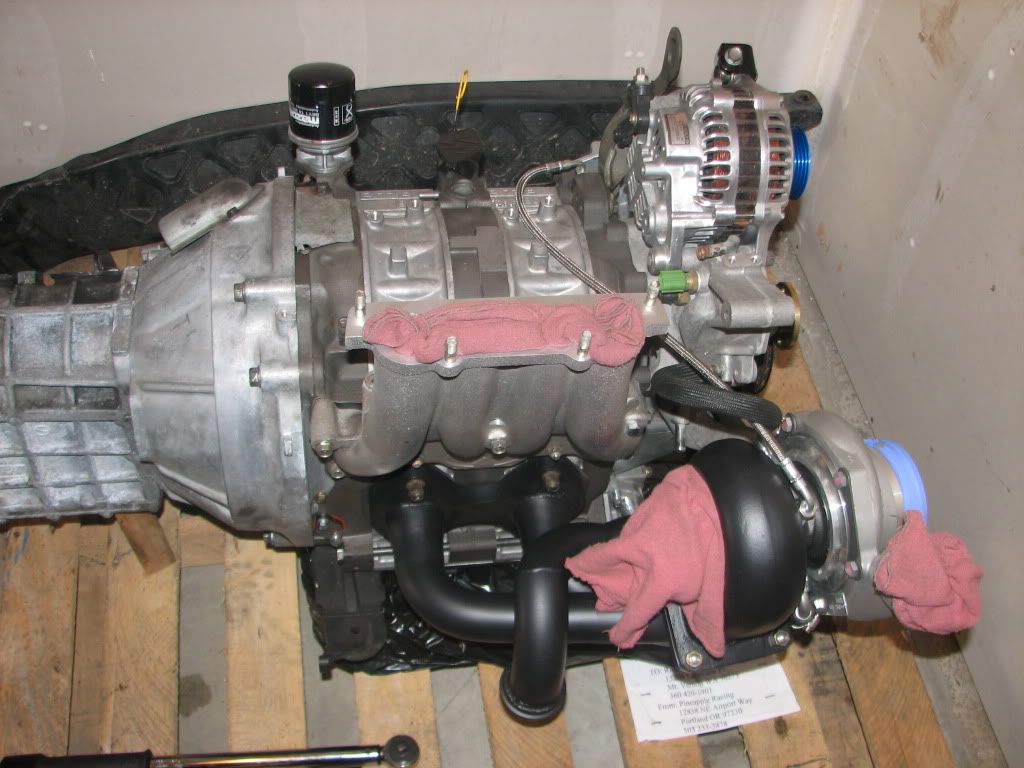
BTW does anyone have a spare NEW hex head bolt for the 500R to connect the CHRA and exhaust housing. I was shorted a bolt and am having a difficult time getting a CORRECT bolt for this application. Let me know!
Next move within a week or two is to get it bolted into the engine bay so I have more room in the garage! Once its in I'll start getting the downpipe, intercooler, and radiator mocked up.
To install the HKS GD Pro Clutch, you have to slightly modify the clutch fork assembly. So I went down to Mazda and grabbed a brand new unit and went to town on it with my dremel, trying to match what I THINK the instructions were saying to do (Japanese instructions). This is what it looked like when done. Of course before I started on the new one I practiced on my old one to see how fast the material was removed and what shape I wanted to accomplish.
Last night I bolted up the transmission and starter to the engine. Here is how it sits now.
BTW does anyone have a spare NEW hex head bolt for the 500R to connect the CHRA and exhaust housing. I was shorted a bolt and am having a difficult time getting a CORRECT bolt for this application. Let me know!
Next move within a week or two is to get it bolted into the engine bay so I have more room in the garage! Once its in I'll start getting the downpipe, intercooler, and radiator mocked up.
Looking good man, I'm doing the same thing with my 500R setup.
Do you think it's easiest to pull the motor and tranny together? I'm having trouble trying to reach the top two bolts on the bell housing to release it from the motor. If it's this hard trying to get to these bolts now, I just wonder how hard it'll be to put it back in!
Do you think it's easiest to pull the motor and tranny together? I'm having trouble trying to reach the top two bolts on the bell housing to release it from the motor. If it's this hard trying to get to these bolts now, I just wonder how hard it'll be to put it back in!
Also putting the trans back on out of the car is SUPER EASY!!! Literally took me 2 minutes (not an exageration) from the time I picked up the trans to the time I had EVERY bolt installed. What I did was put the tail end of the trans on a jack. Jack up the end to even with the clutch centerline. Now have the bolts sitting next to you. Grab with both hands around the bellhousing, match it up to the engine and twist it to get in the splines. Now match up the bolts holes and push towards the engine. Do not put any bolts in until you are 100% all the way on the dowels and against the engine. Now grab the bolts and you're done!
Now with all that said I find working on cars really easy, which maybe due to the fact that I'm an ASE L1 Master Tech.

Haha you make it sound so easy This is the first time I actually have touched the FD as far as maintenance and I guess I started with not an easy task (pulling the motor) but I've learned a lot about the car through this experience.
How do I go about pulling the engine with the tranny in it? Where under the car do I disconnect the tranny. I feel it's be a lot easier doing it this way since you have a lot more space outside of the car obviously and more room. Do I have to do anything on the inside of the car if I pull the tranny with the engine?
This is the first time I actually have touched the FD as far as maintenance and I guess I started with not an easy task (pulling the motor) but I've learned a lot about the car through this experience.How do I go about pulling the engine with the tranny in it? Where under the car do I disconnect the tranny. I feel it's be a lot easier doing it this way since you have a lot more space outside of the car obviously and more room. Do I have to do anything on the inside of the car if I pull the tranny with the engine?
First you have to drain the trans fluid unless you have a plug for the tailshaft. You've got to pull the center console cover, and unbolt the shifter. Disconnect the eletrical connectors to the trans and starter. Unbolt the slave cylinder from the trans and let it sit there dangling. Unbolt the driveshaft from the diff (make sure to make a match mark on the shaft and pinion flange for reassembly). Now unbolt the braces first and then the PPF.
Seems like a lot of work, but its all easy stuff. Everyone has their own opinion on pulling the trans during an engine pull. If I were at work and working flat rate, I would pull just the engine, but on my own car I'll take the extra time and care.
Seems like a lot of work, but its all easy stuff. Everyone has their own opinion on pulling the trans during an engine pull. If I were at work and working flat rate, I would pull just the engine, but on my own car I'll take the extra time and care.
Alright peeps. Got an update. Unfortunately for me none of my friends had an engine hoist, the one that did had it buried behind stuff, and the hoist at work is a broke POS! So I went and got myself a cheap OReilly special lift.
Went from this
Working in this
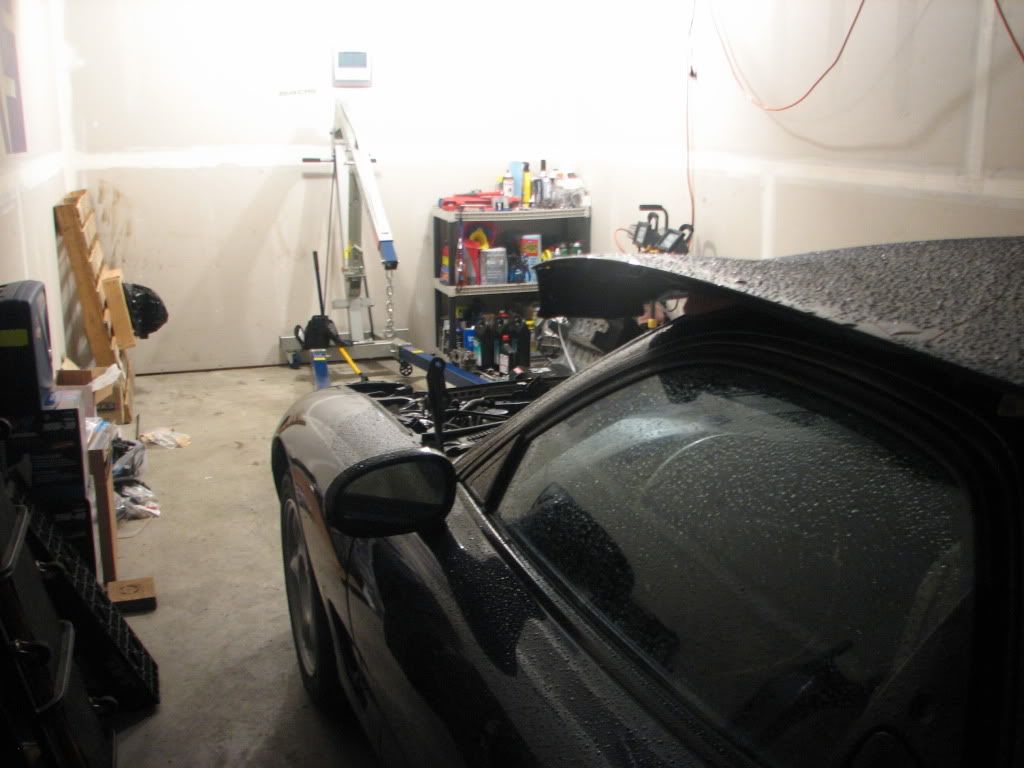
To this
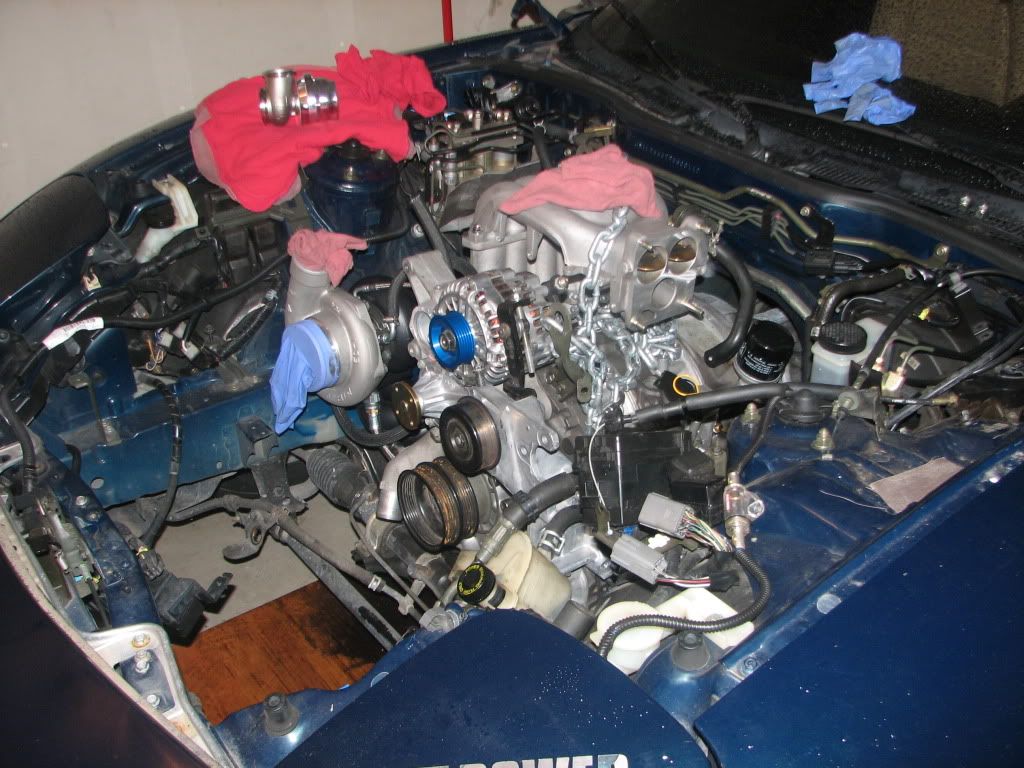
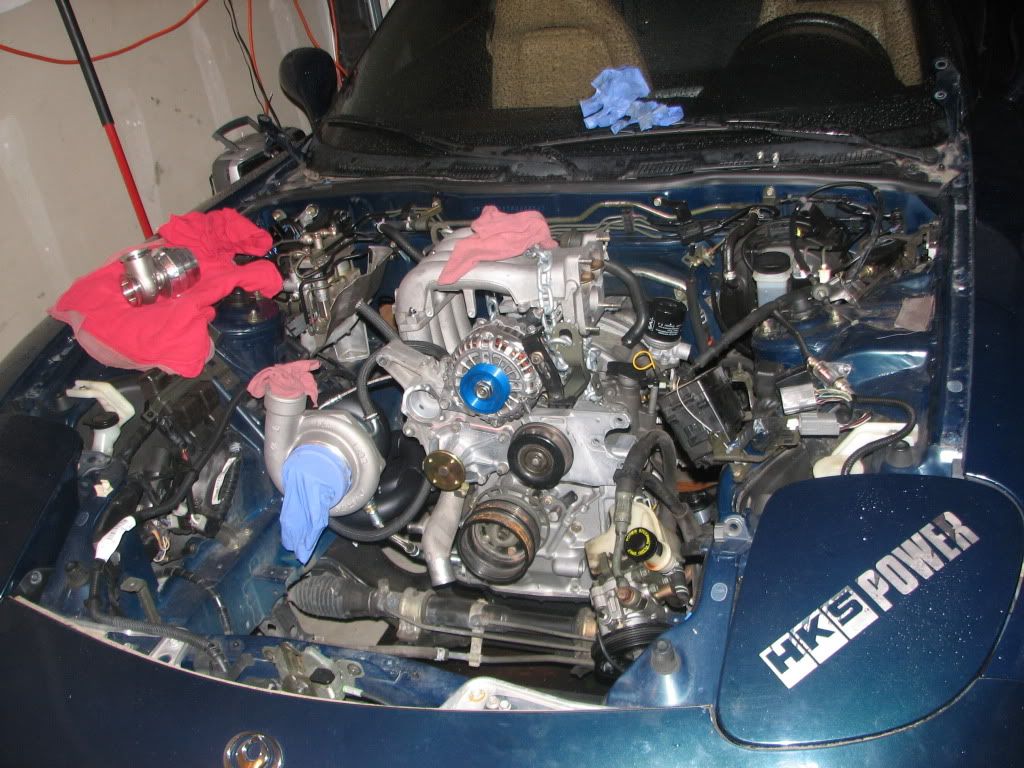
The engine is now sitting in the engine bay instead of on a pallet. It is sitting in the chassis on the FEED solid aluminum mounts!
Now I need to sort out all the coolant and fuel plumbing, as well as do the engine harness.
Went from this
Working in this
To this
The engine is now sitting in the engine bay instead of on a pallet. It is sitting in the chassis on the FEED solid aluminum mounts!
Now I need to sort out all the coolant and fuel plumbing, as well as do the engine harness.
Looking good man, I'm still trying to pull the engine. Hopefully I have some time this weekend to pickup an engine hoist. All I need to do (I think) is release the tranny from the engine and then pull it!
Got some more things done.
First I found out that my clutch slave cylinder was seized. So ordered up a brand new OEM unit and a braided steel clutch line. Installed the slave with line and bled it out. Verified the operation of the clutch. All good.
After finding out I was missing 1 PPF nut and 1 driveshaft bolt washer, called the dealership and ordered them (PPF nut $8 and DS washer $2). Bolted up the PPF and driveshaft.

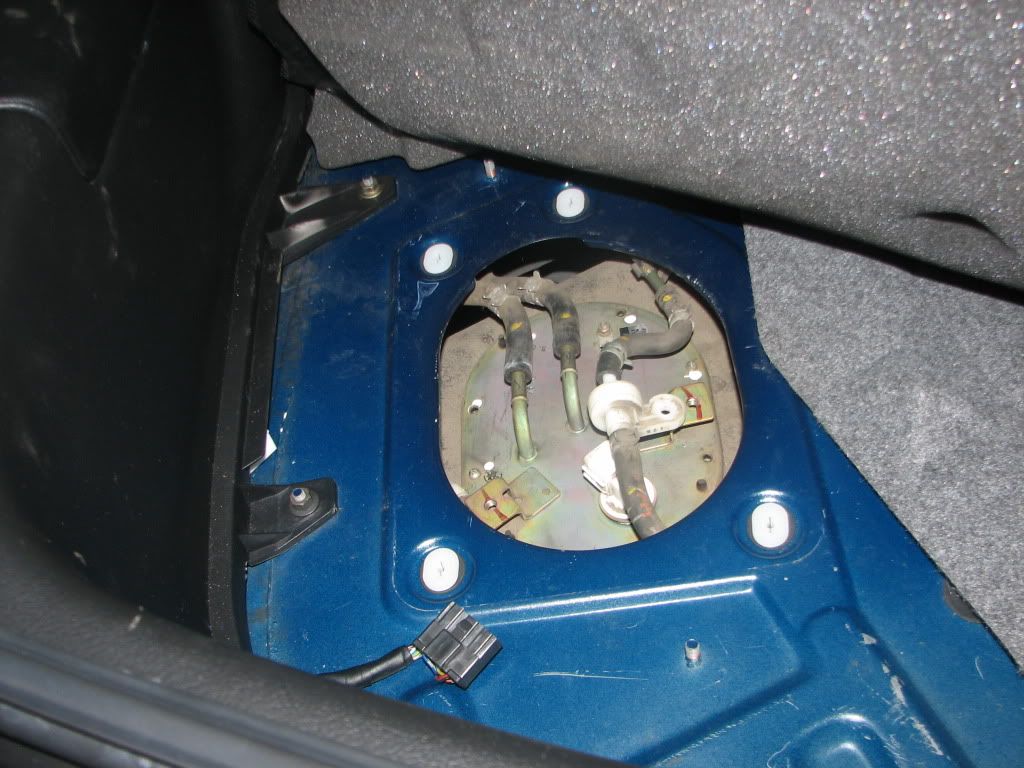
Next, because I let the car sit for 5 years, I went ahead and removed the fuel pump assembly so that I could see what the inside of the tank looked like. I was prepared for the worst, but ended up with a pleasant suprise! No RUST and no GELLED FUEL (its been garaged so that might have helped)!!! Luckily the car broke down when there was barely any gas in the tank. All I need to do is drain out the remaining gas, and then flush the tank in the car with some fresh gas.
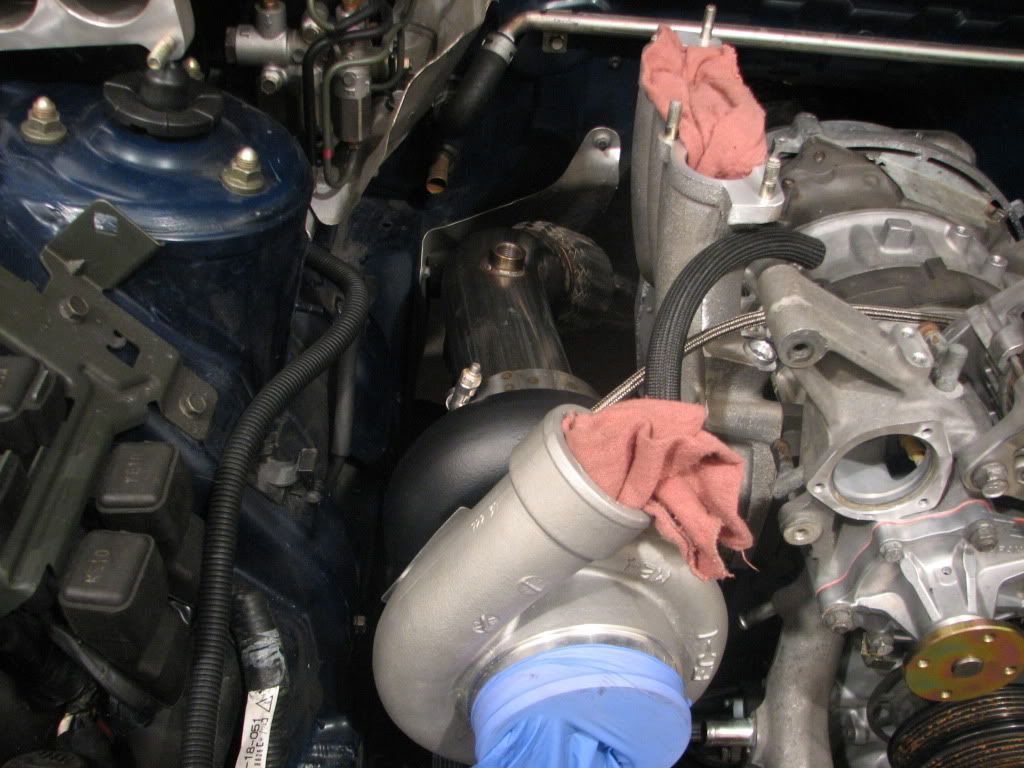
Also went ahead and installed the wastegate and downpipe.
Things are starting to move along quite nicely.
Got a question though for peeps with aftermarket injectors (top feed). I'm running 800CC primaries and 1600CC secondaries, Sard Fuel Rail, and Xcessive LIM. Do you guys still use the OEM injector diffusers?
First I found out that my clutch slave cylinder was seized. So ordered up a brand new OEM unit and a braided steel clutch line. Installed the slave with line and bled it out. Verified the operation of the clutch. All good.
After finding out I was missing 1 PPF nut and 1 driveshaft bolt washer, called the dealership and ordered them (PPF nut $8 and DS washer $2). Bolted up the PPF and driveshaft.
Next, because I let the car sit for 5 years, I went ahead and removed the fuel pump assembly so that I could see what the inside of the tank looked like. I was prepared for the worst, but ended up with a pleasant suprise! No RUST and no GELLED FUEL (its been garaged so that might have helped)!!! Luckily the car broke down when there was barely any gas in the tank. All I need to do is drain out the remaining gas, and then flush the tank in the car with some fresh gas.
Also went ahead and installed the wastegate and downpipe.
Things are starting to move along quite nicely.
Got a question though for peeps with aftermarket injectors (top feed). I'm running 800CC primaries and 1600CC secondaries, Sard Fuel Rail, and Xcessive LIM. Do you guys still use the OEM injector diffusers?
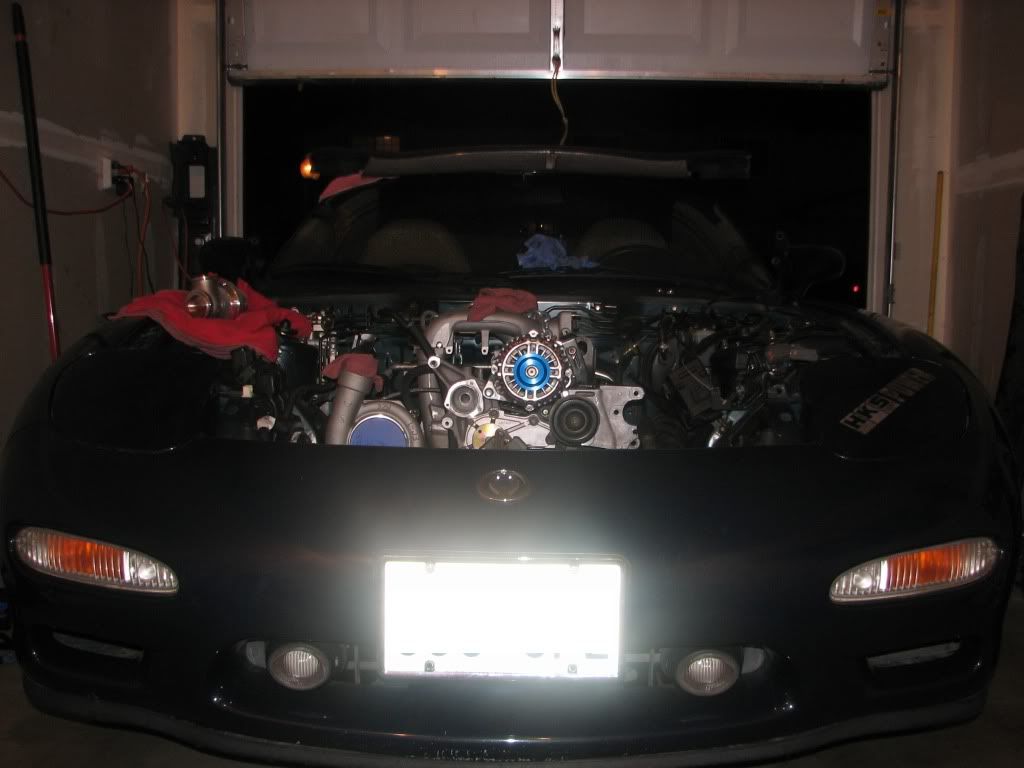
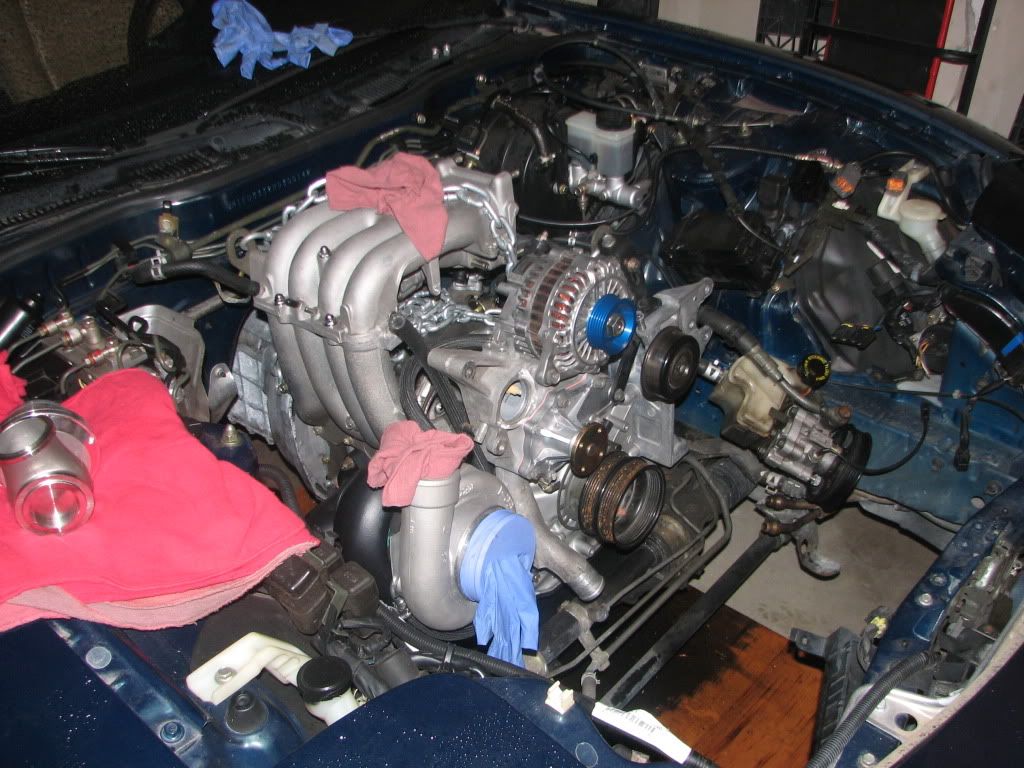
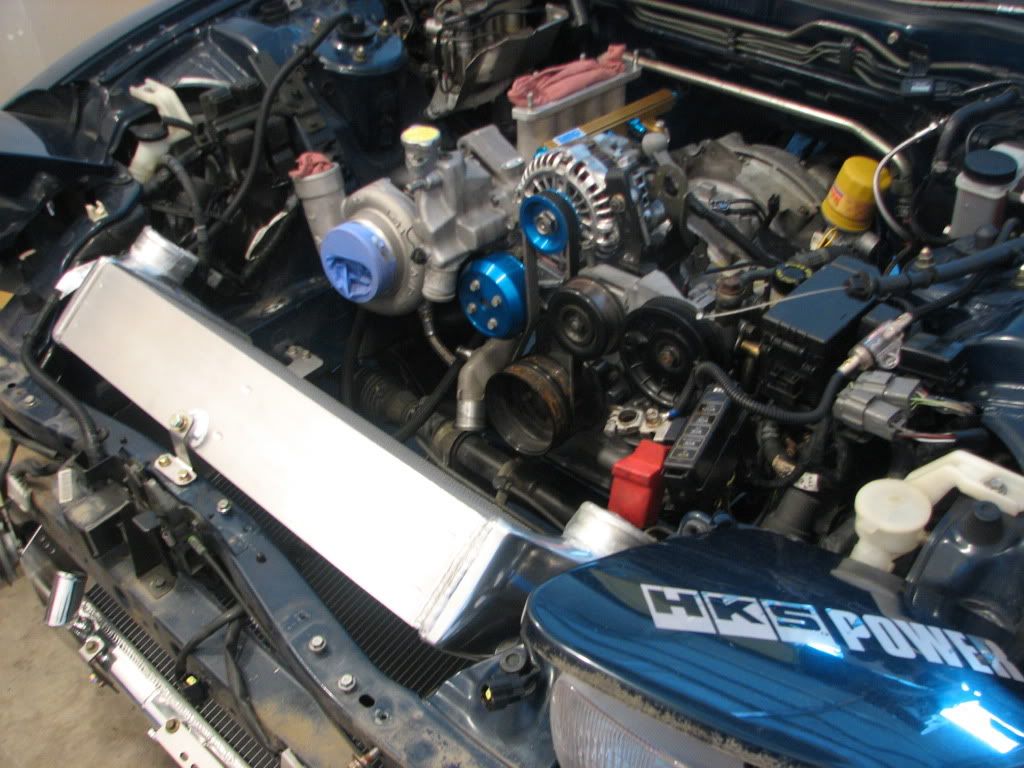
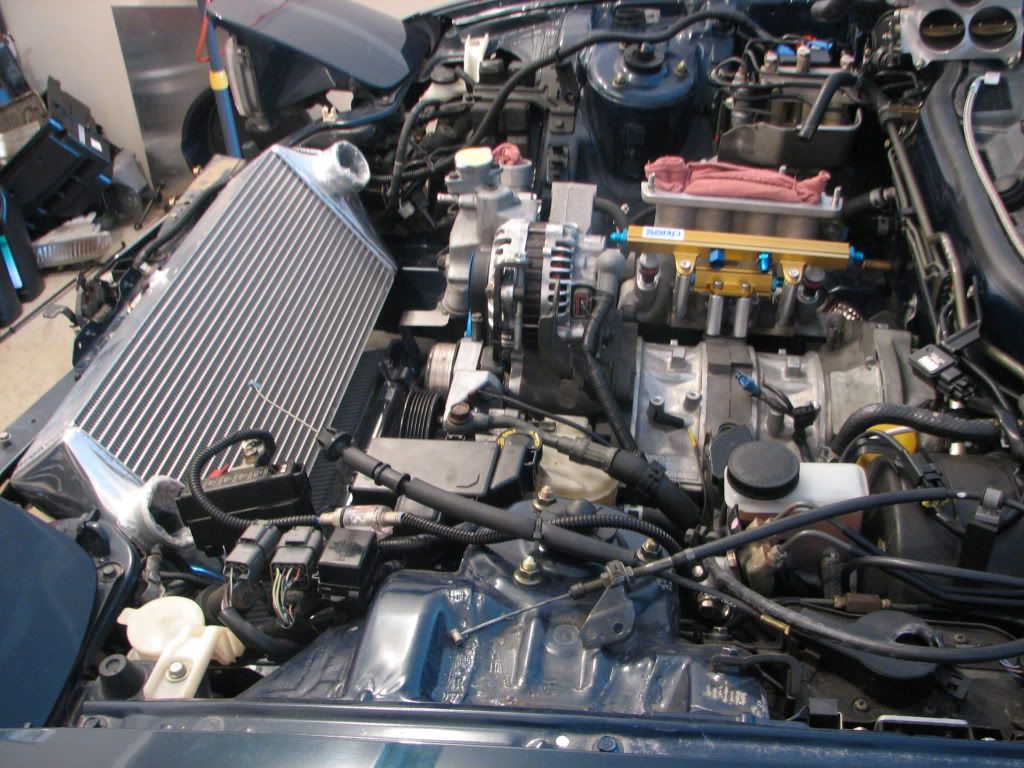
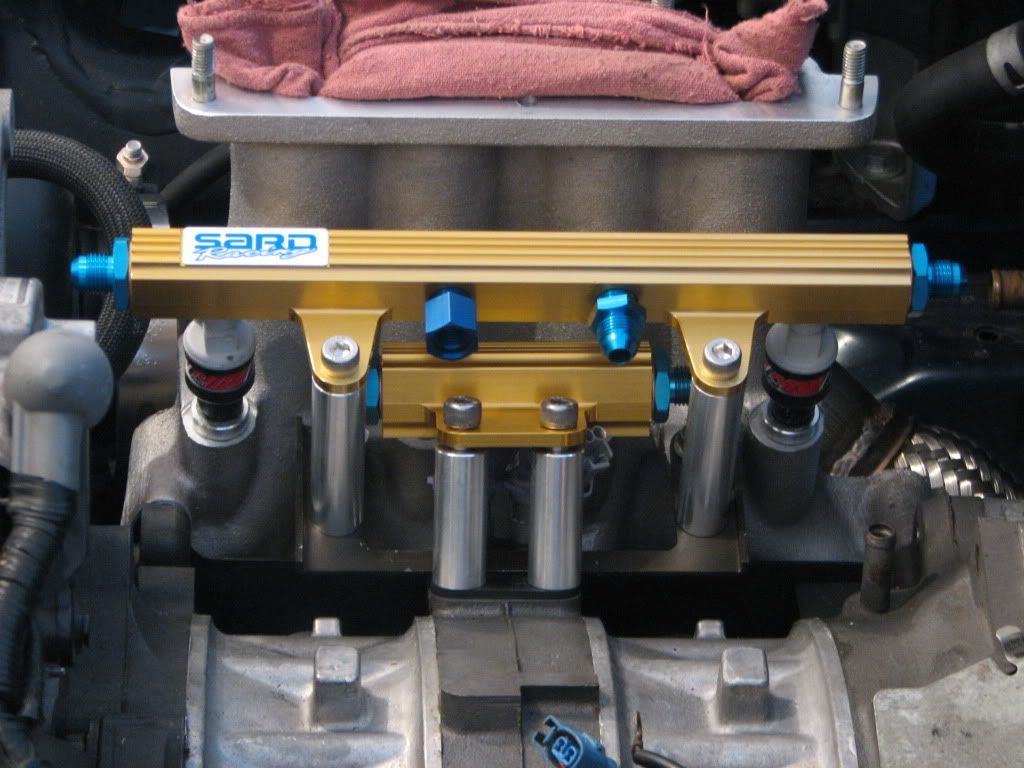
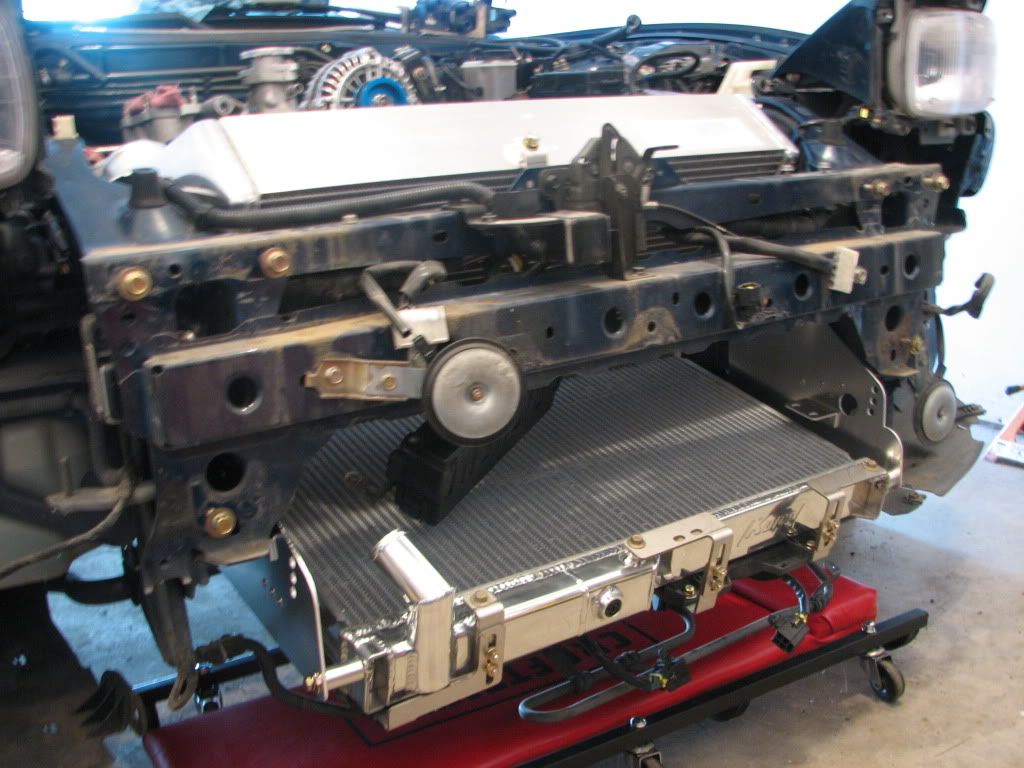
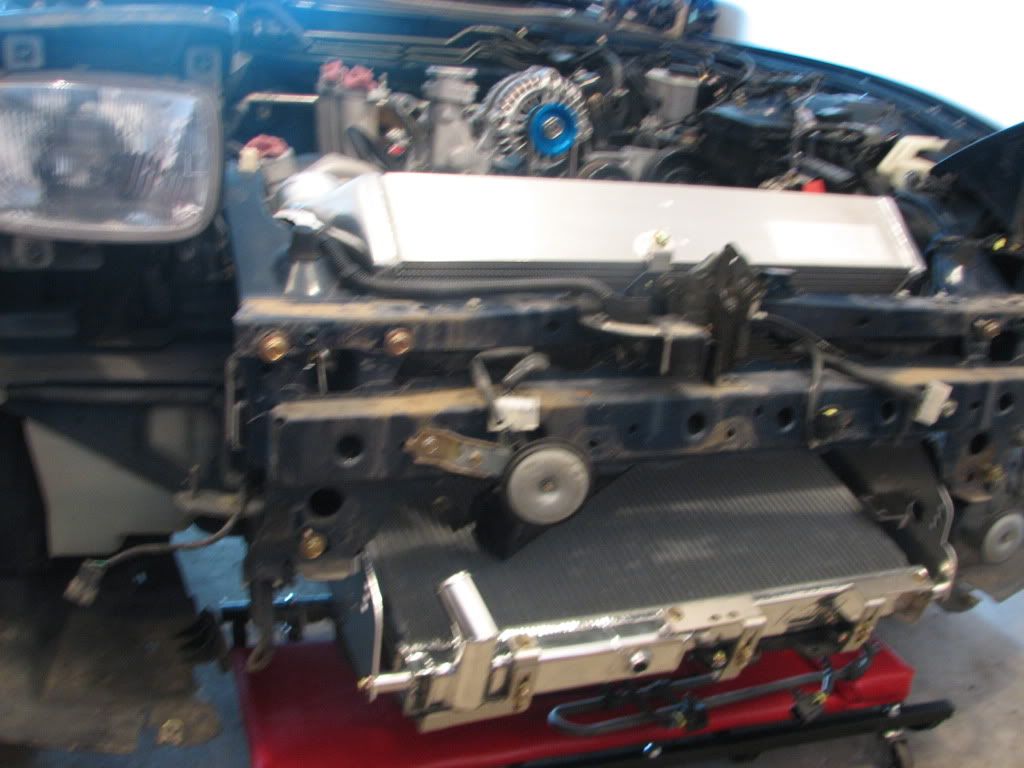
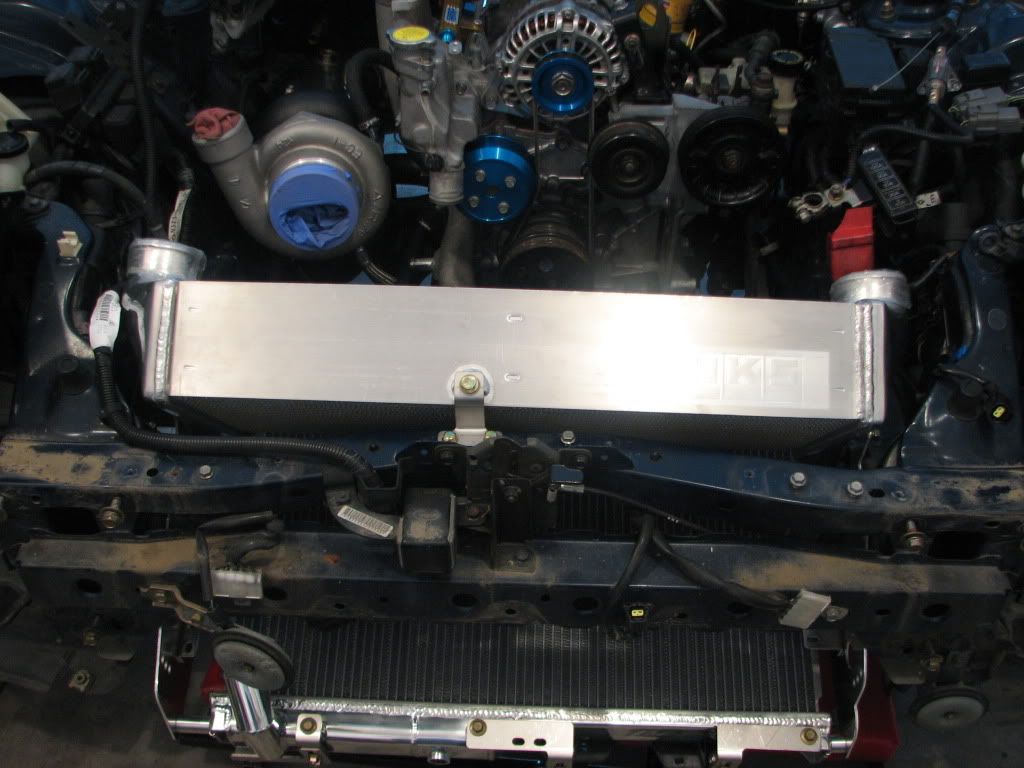
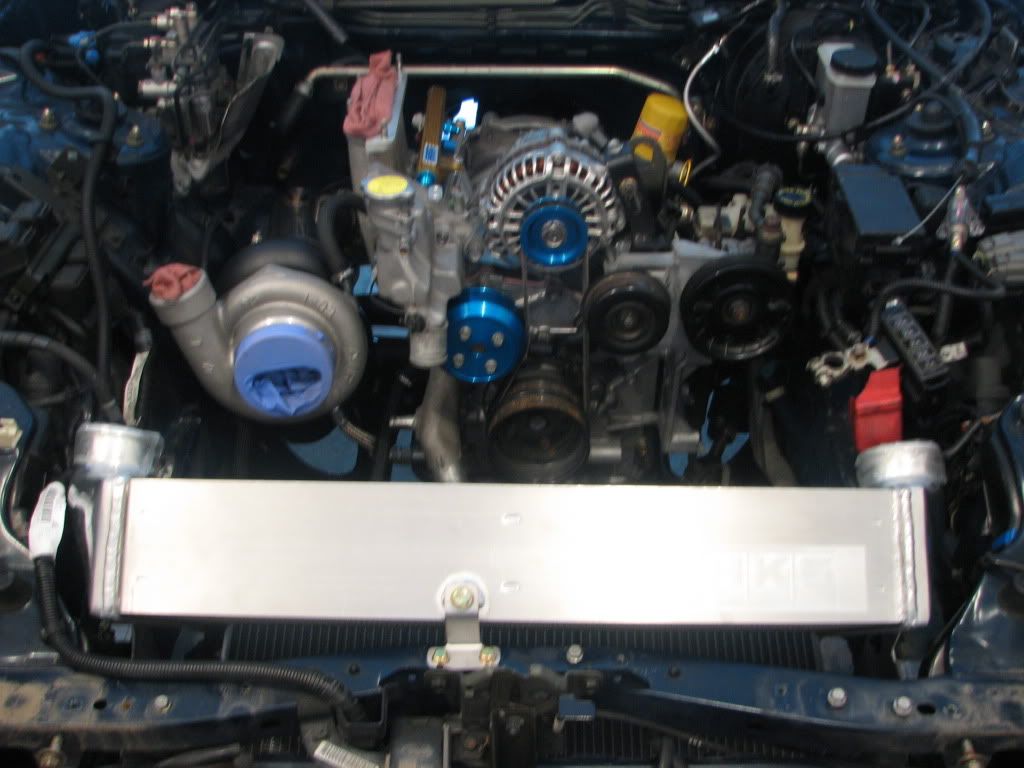
More updates!!! I went ahead and mocked up the HKS V-Mount kit, fit like a glove. Also went ahead and installed the injectors/rails to prepare to order the fuel lines I will need. Going to go with nylon braided lines to avoid the chaffing issues associated with stainless lines.
Had a couple of pitfalls though, the Sard fuel rails were made with the intention of using the stock LIM so I have to position the primary injectors just right to get the connectors on, and I will have to trim the connectors a bit. The oil feed line that came with the 500R kit isn't designed to be routed the best way, so I will be getting nylon braided lines and routing it completely different for a cleaner look.
Also waiting on the Sakebomb oil cooler kit, which will hopefull be here within the next couple weeks.
Anyways, here's some pics of the work.
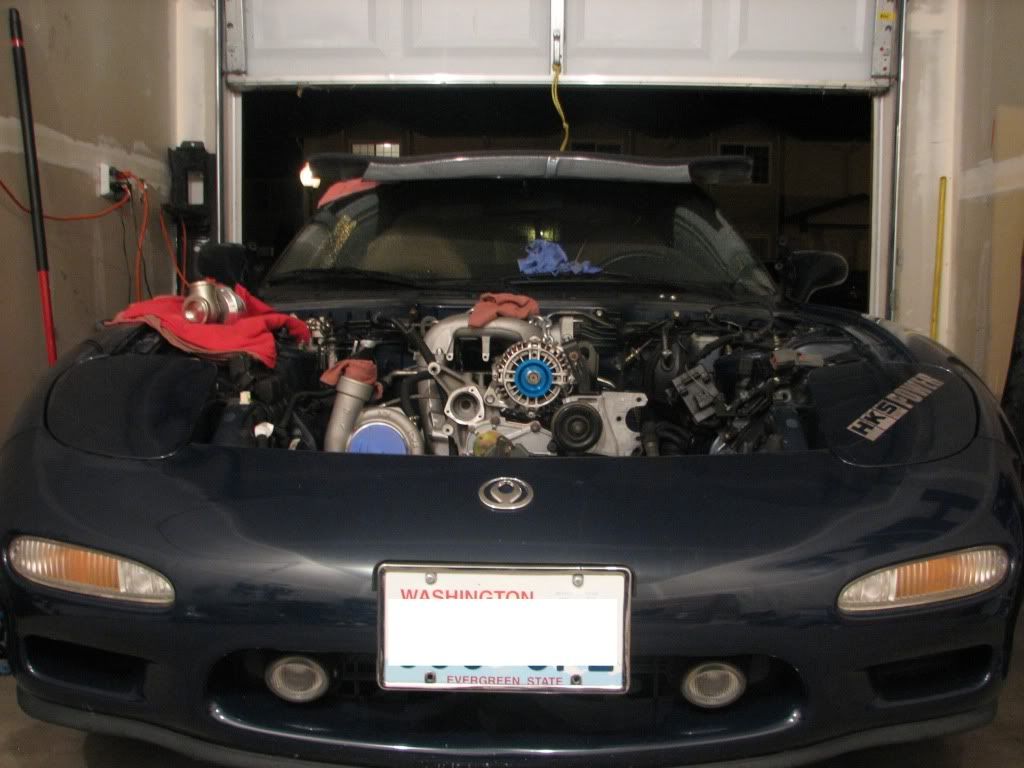
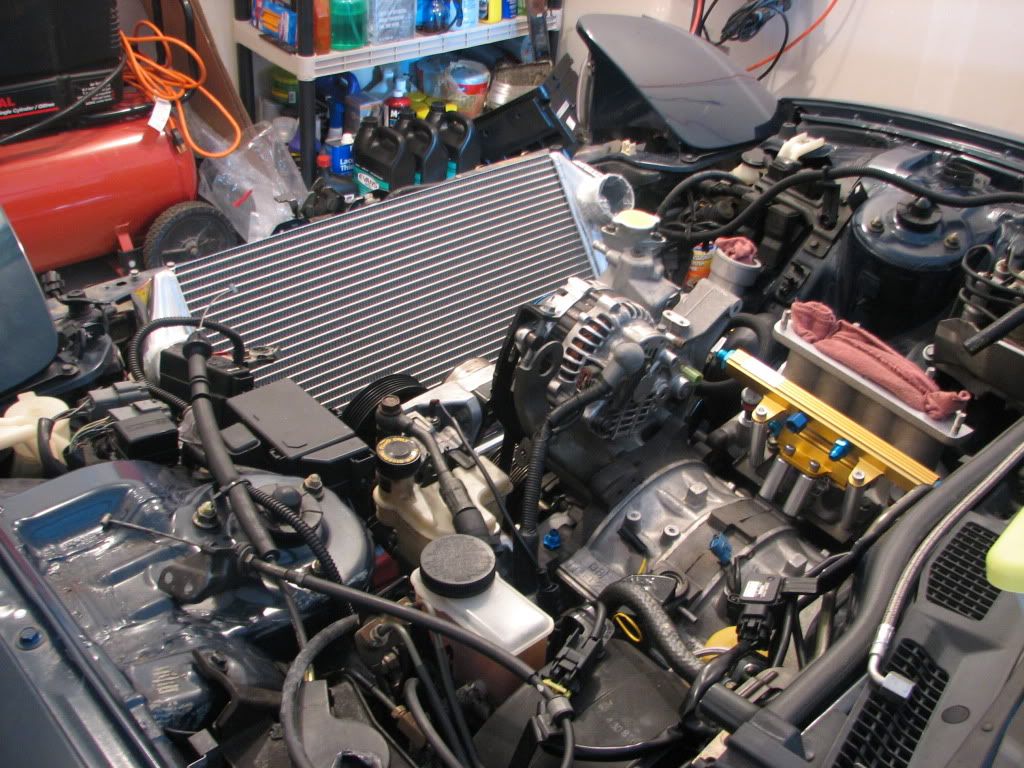
no, that intercooler is E N O R M O U S !
sure that's all gonna fit with the piping? and maybe tilting it more, bringing the top forward and the bottom up a bit? (maybe its just the angle of the photo)
sure that's all gonna fit with the piping? and maybe tilting it more, bringing the top forward and the bottom up a bit? (maybe its just the angle of the photo)
The angle of the intercooler and radiator are preset, but there is an air diversion panel that goes between the two that is adjustable (I didn't install it because I knew everything was coming back out when the oil cooler kit gets here). But I test fit the piping and its not going to be a problem at all.
And yes the Sard fuel rail is sexy!
And yes the Sard fuel rail is sexy!
Joined: Mar 2001
Posts: 30,814
Likes: 655
From: FL-->NJ/NYC again!
(I havent read your entire thread, so forgive me if I'm asking questions you've already answered)
You didn't leave the fuel diffusers in, did you? Also, if running a Power FC I'd recommend against the resistors in the injector wiring and instead installing an FJO injector driver.
Also, make sure you heat sleeve the ABS line that runs near the DP. You can unplug it in the back rear corner of the engine bay (under the ABS unit) and slide some nice DEI fire sleeve over it. It's a great idea to heat sleeve as much as you can on that side of the bay, actually.
Looking good
