
My first venture into Japanese cars..OEM+ 93 RX7 restoration/cleanup thread


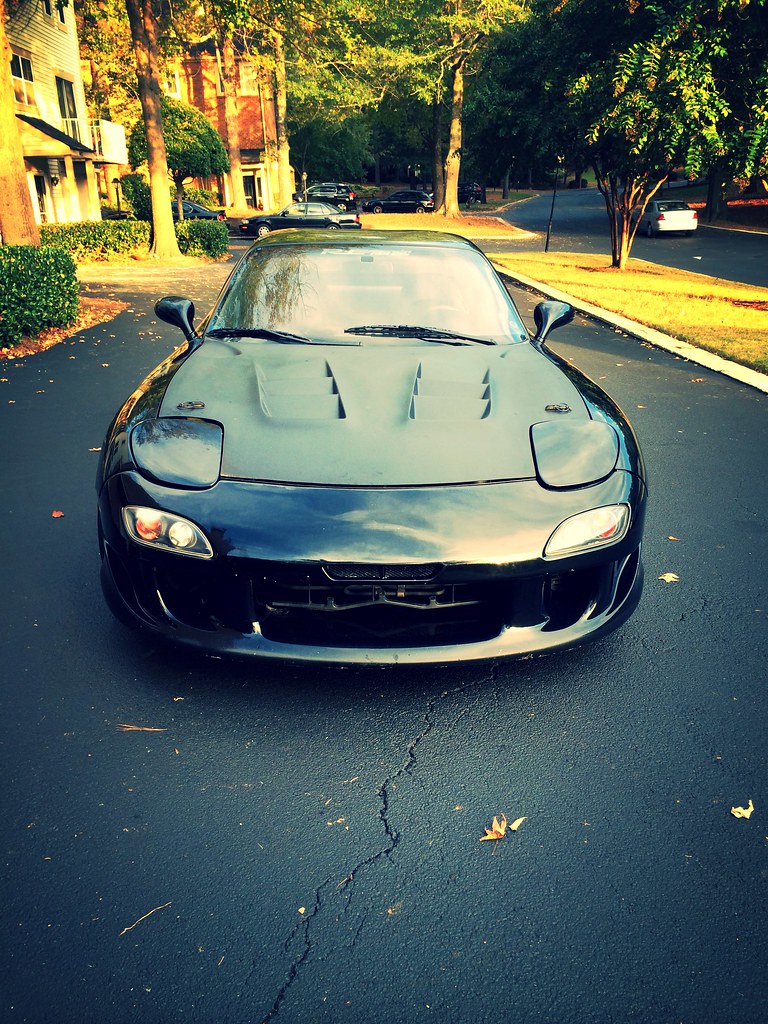
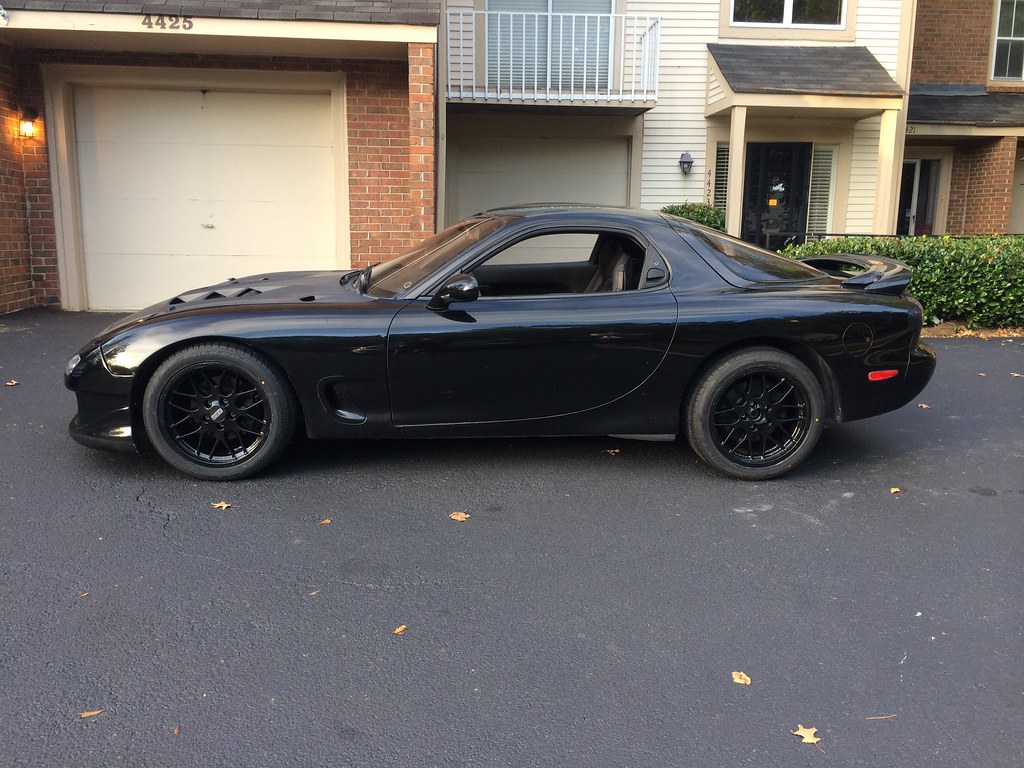
Hi everyone! Just picked up my FD this weekend & wanted to start a little build thread here to document my car's progress and what not..
I've always loved 3rd gen RX7s- who could resist their sleek, lovely styling and unique powerplants. After digging further into them, I was really intrigued by some of the intricate engineering and even the complex twin-turbo system.
This is my first 'JDM' car, up until this point I've only owned VWs & Audis, however so far I am loving the experience. I think cool/interesting/fast cars are all worth-owning regardless of make (especially turbocharged models ).
).
Anyways, I'm sorry in advance for how boring and un-crazy this thread most likely will be compared to all the amazing build threads already on here :P. Hopefully it will be a little interesting to some haha.
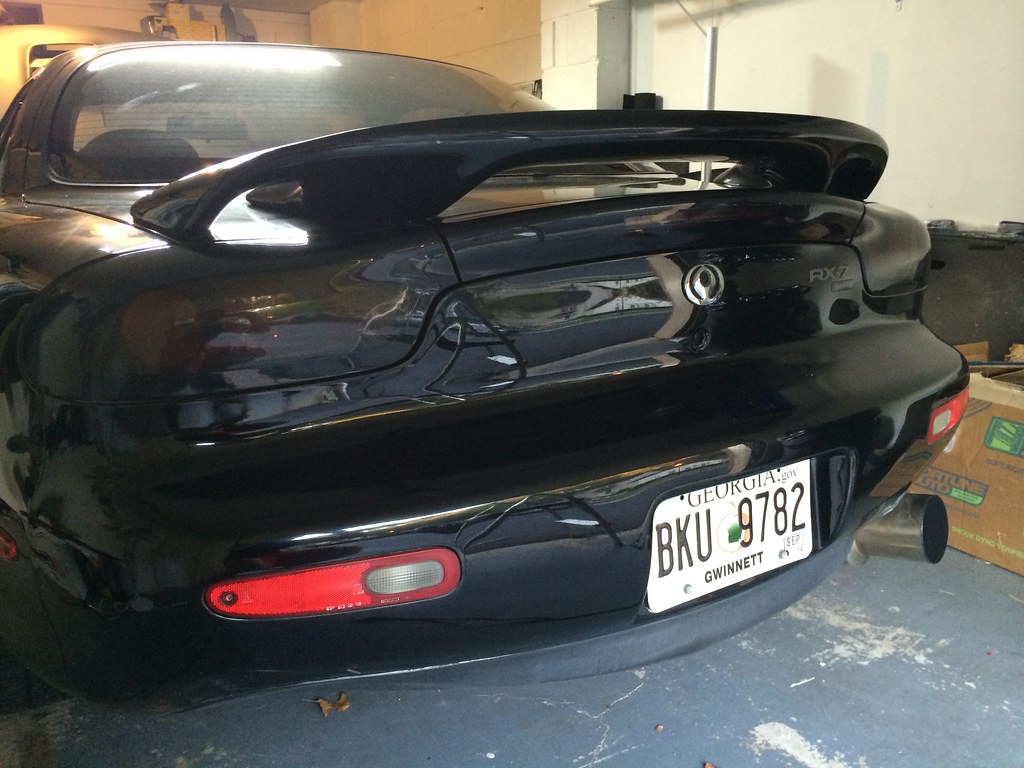
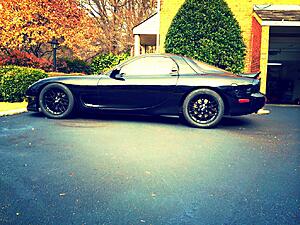
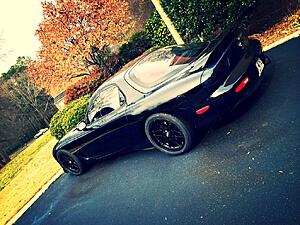
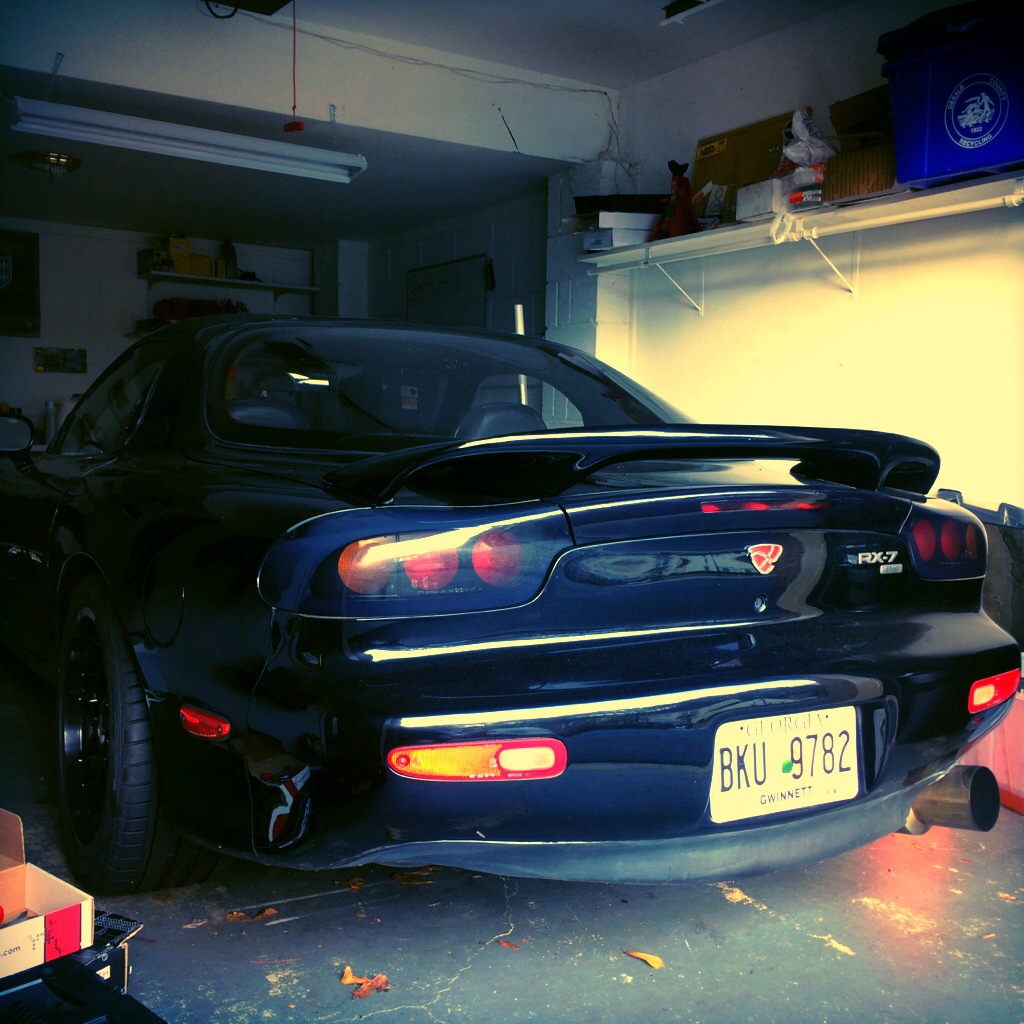
To start off, here is a few of the PO's pics prior to me purchasing the car:
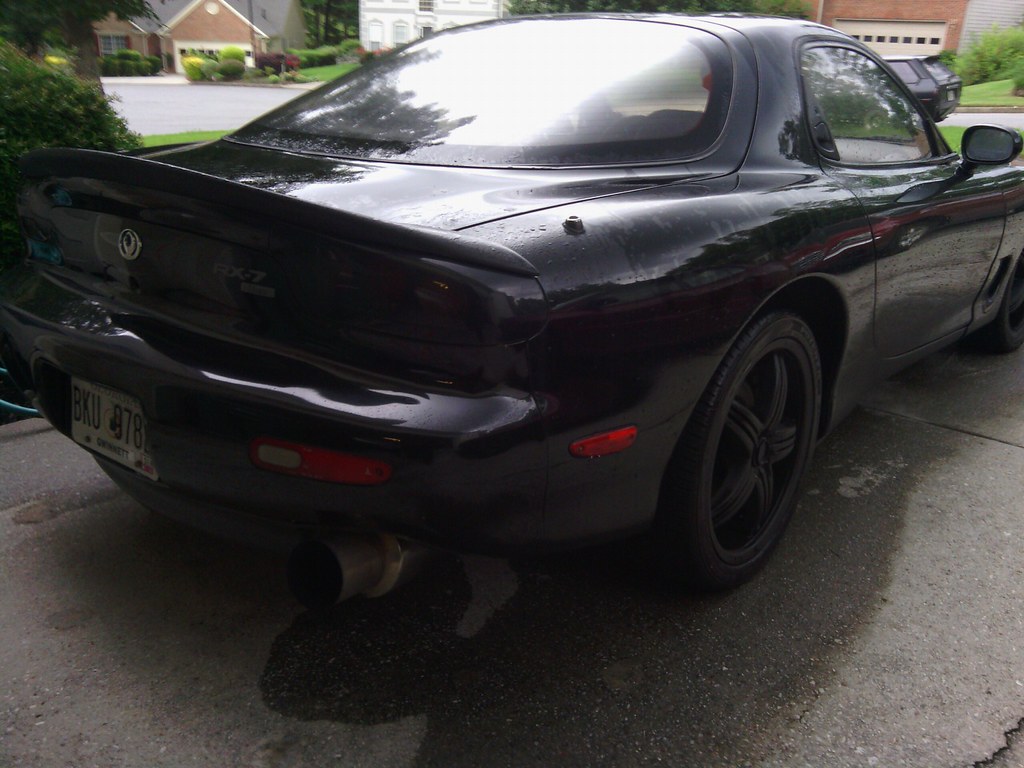
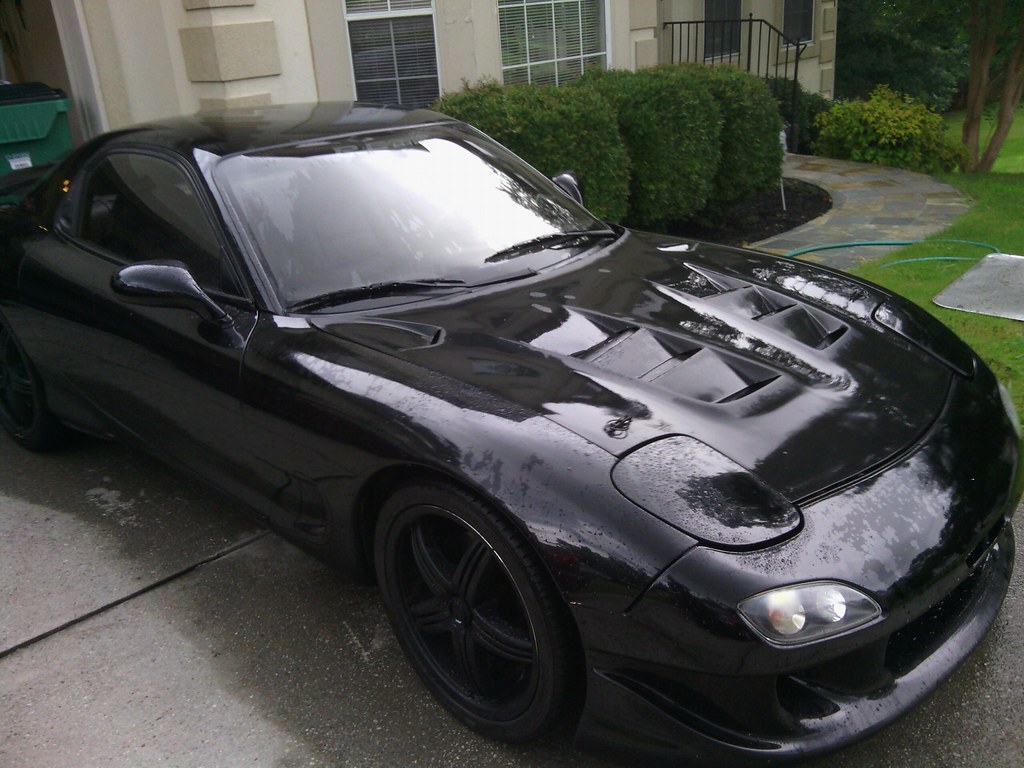
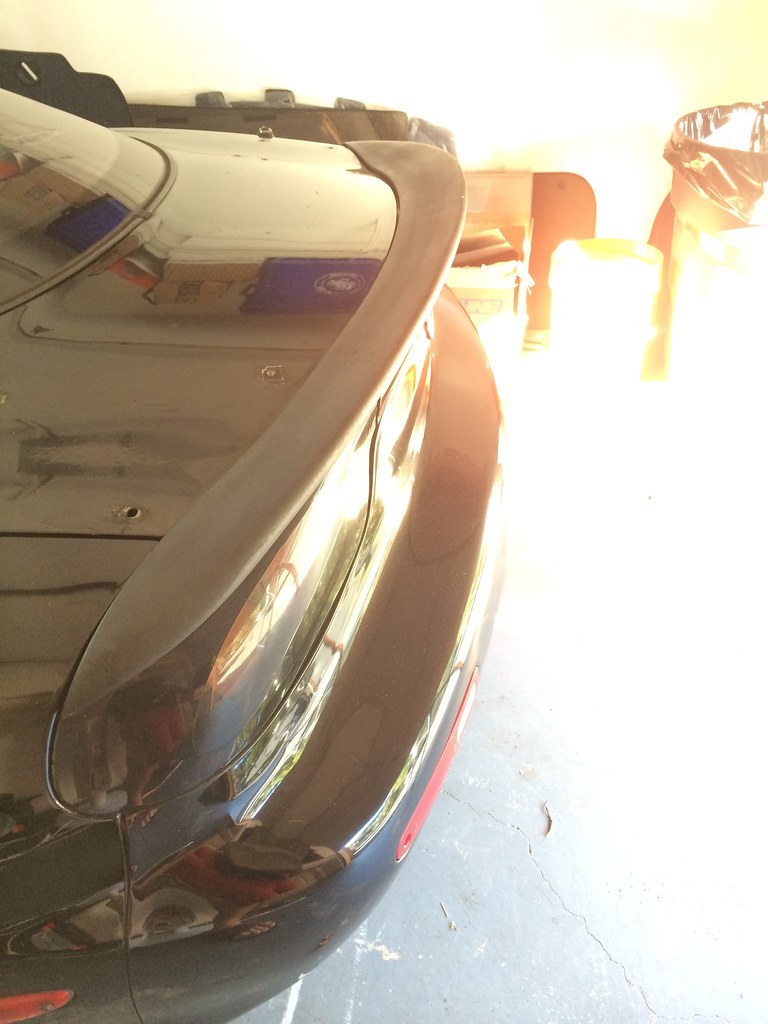
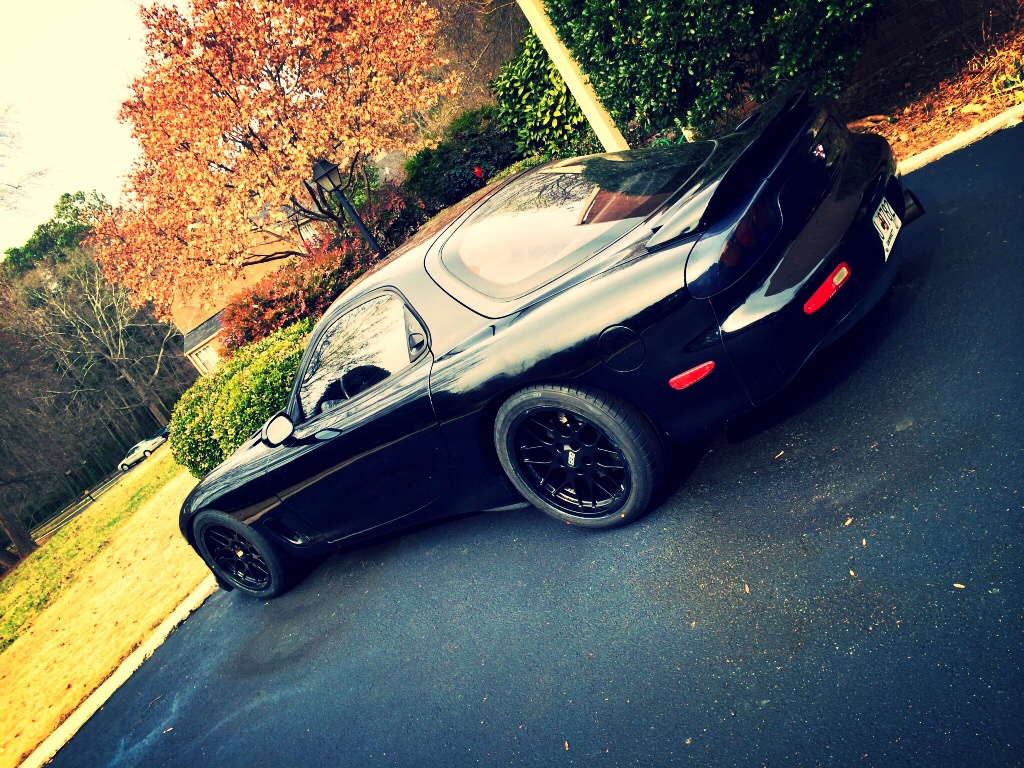
The car had pretty nice exterior mods to it, as you can see. RE-A hood & bumper, lip spoiler, etc. However the wheels were AWFUL (lol) and the hood & lip needed paint.
Under the hood was pretty much bone stock besides a BOV, downpipe, and catback.
I saw it as a decent platform to begin a project, but as you all know, I needed to know the shape of the motor/turbos before pulling the trigger. First things first, I did a compression test- 90+psi on both rotors- I was extremely impressed and obviously happy to see those results. The car is on a Mazda reman I believe and has about 30k miles on it.
However, during the test drives, I knew something was wrong from the get-go. I could hear the turbo(s) spooling, but the boost gauge was barely showing 1-2 pounds, and it sounded like there was a leak as far as I could tell. The biggest issue for me was that I had never driven another RX7 before, so it was harder for me to tell how the motor should behave, how quick the car should feel, etc etc.
It didn't help that the PO himself did not know or realize that the turbos were not operating correctly. That really surprised me. However, I used it as a bargaining chip. This was the first car I've ever bought on potential alone. I knew it could be a fun car, but I was taking a chance knowing that the TT system had an issue (or alot of issues, lol). Anyways, I was willing to take the chance and pulled the trigger.
Bringing her home:
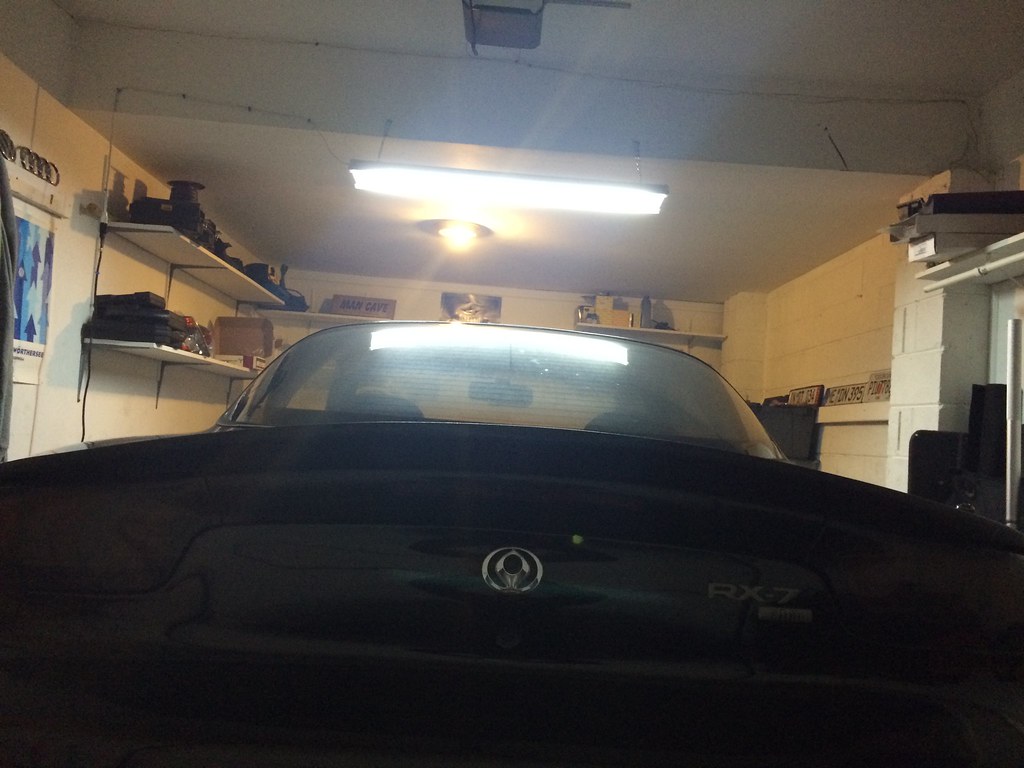
Right when I got into my garage, I was already so excited and anxious to dig into everything. It was pretty late but I popped the hood and wanted to find out what was going on because I was so curious.
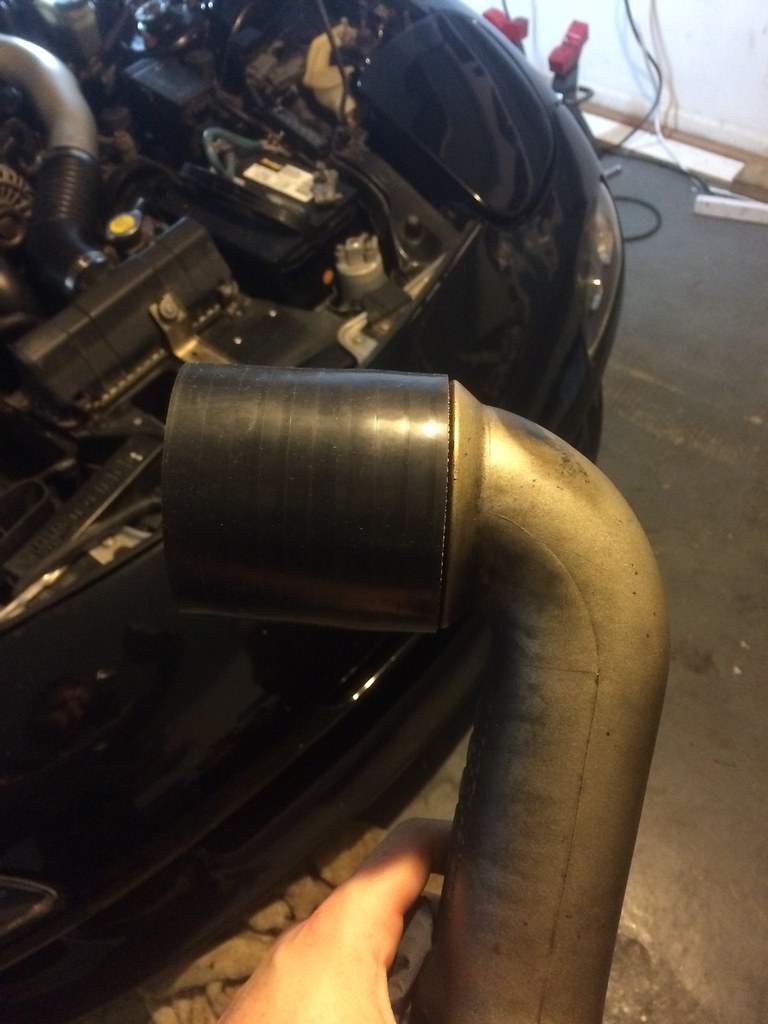
Pulled the airbox and what not:
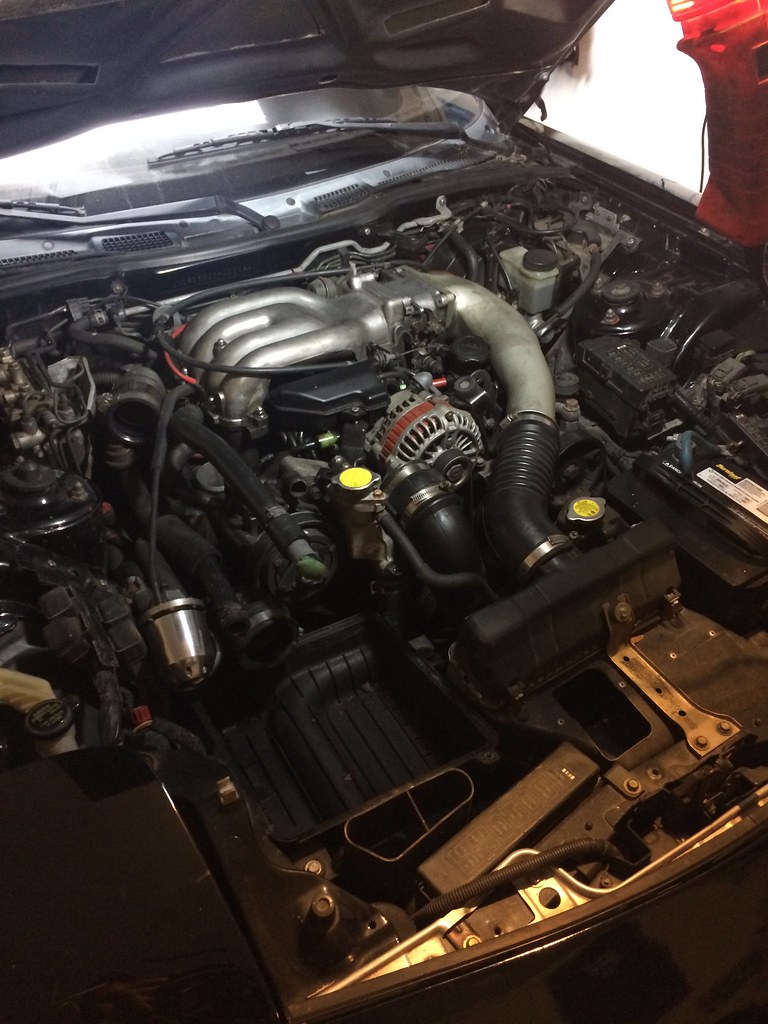
Well well well, what do we see here? Torn coupler on the y-pipe.. Hmm maybe that is why there was no boost :P.
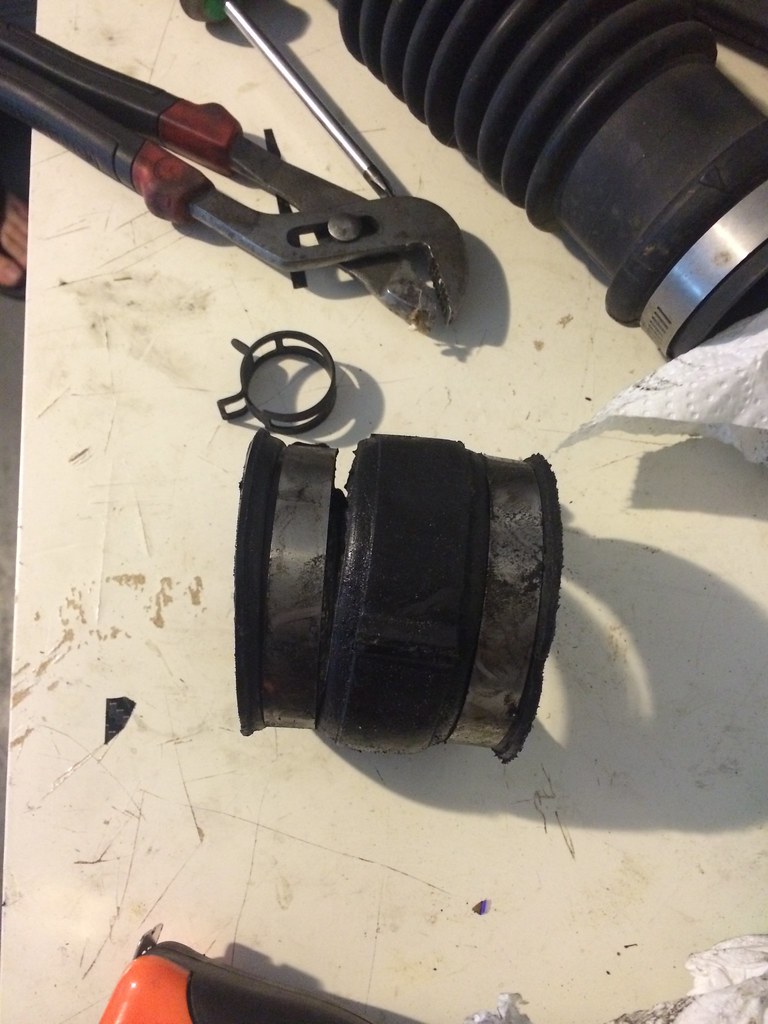
I got a silicon coupler, and stuffed it all back in. I was really hopeful that this fixed ALL my issues (how naive right? lol).
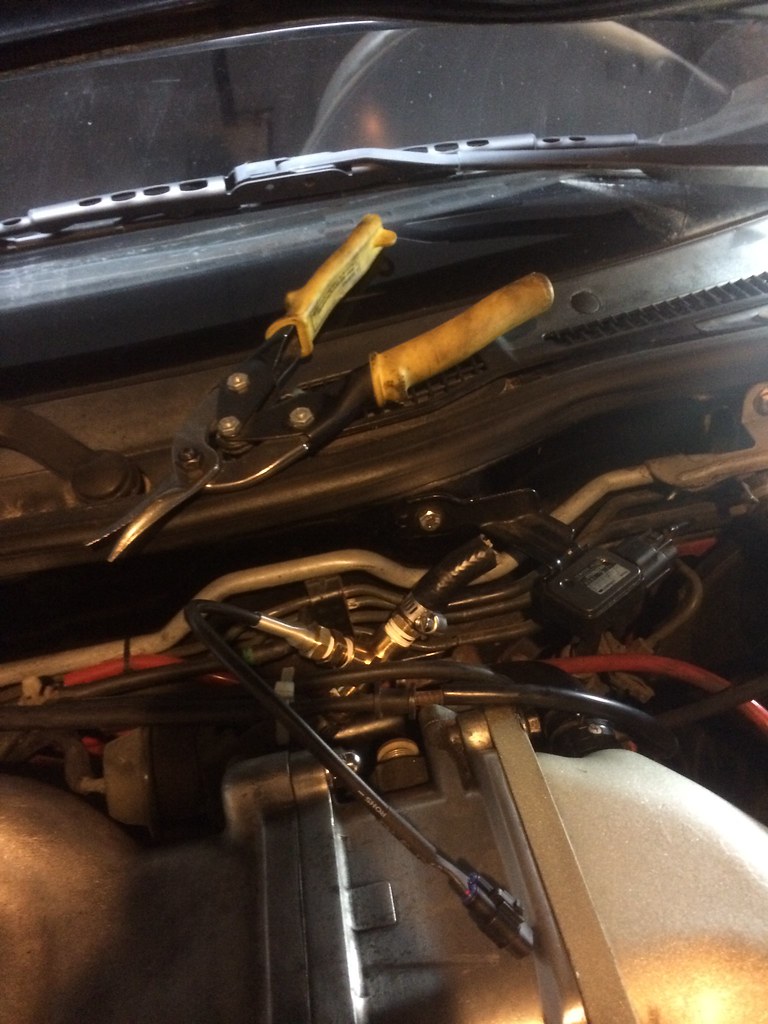
While under the hood, I also took some time out to add a water/coolant temp sensor. I tapped the coolant line near the TB:
I thought it a nice first night of work, and was looking forward to doing more stuff over the weekend. Continued onto next post (12 image limit! ahh!)..
Joe
I've always loved 3rd gen RX7s- who could resist their sleek, lovely styling and unique powerplants. After digging further into them, I was really intrigued by some of the intricate engineering and even the complex twin-turbo system.
This is my first 'JDM' car, up until this point I've only owned VWs & Audis, however so far I am loving the experience. I think cool/interesting/fast cars are all worth-owning regardless of make (especially turbocharged models
).Anyways, I'm sorry in advance for how boring and un-crazy this thread most likely will be compared to all the amazing build threads already on here :P. Hopefully it will be a little interesting to some haha.
To start off, here is a few of the PO's pics prior to me purchasing the car:
The car had pretty nice exterior mods to it, as you can see. RE-A hood & bumper, lip spoiler, etc. However the wheels were AWFUL (lol) and the hood & lip needed paint.
Under the hood was pretty much bone stock besides a BOV, downpipe, and catback.
I saw it as a decent platform to begin a project, but as you all know, I needed to know the shape of the motor/turbos before pulling the trigger. First things first, I did a compression test- 90+psi on both rotors- I was extremely impressed and obviously happy to see those results. The car is on a Mazda reman I believe and has about 30k miles on it.
However, during the test drives, I knew something was wrong from the get-go. I could hear the turbo(s) spooling, but the boost gauge was barely showing 1-2 pounds, and it sounded like there was a leak as far as I could tell. The biggest issue for me was that I had never driven another RX7 before, so it was harder for me to tell how the motor should behave, how quick the car should feel, etc etc.
It didn't help that the PO himself did not know or realize that the turbos were not operating correctly. That really surprised me. However, I used it as a bargaining chip. This was the first car I've ever bought on potential alone. I knew it could be a fun car, but I was taking a chance knowing that the TT system had an issue (or alot of issues, lol). Anyways, I was willing to take the chance and pulled the trigger.
Bringing her home:
Right when I got into my garage, I was already so excited and anxious to dig into everything. It was pretty late but I popped the hood and wanted to find out what was going on because I was so curious.
Pulled the airbox and what not:
Well well well, what do we see here? Torn coupler on the y-pipe.. Hmm maybe that is why there was no boost :P.
I got a silicon coupler, and stuffed it all back in. I was really hopeful that this fixed ALL my issues (how naive right? lol).
While under the hood, I also took some time out to add a water/coolant temp sensor. I tapped the coolant line near the TB:
I thought it a nice first night of work, and was looking forward to doing more stuff over the weekend. Continued onto next post (12 image limit! ahh!)..
Joe
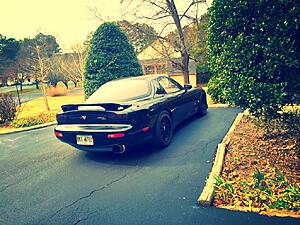
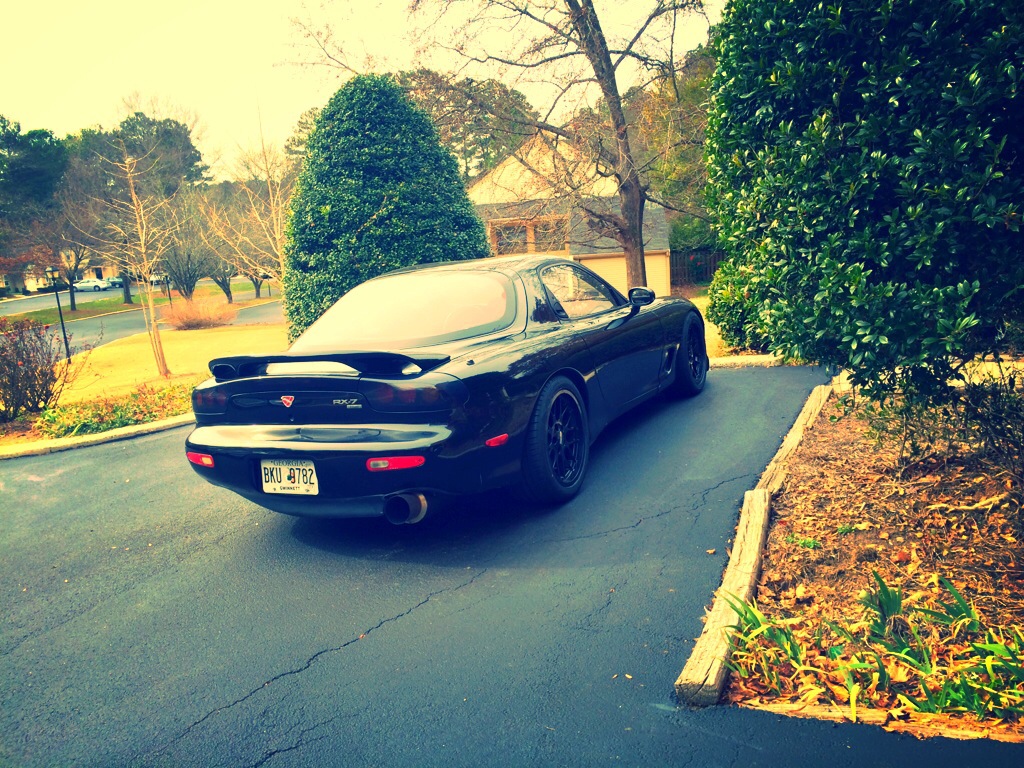
...Next, I really like the lip spoiler, but the holes in the trunk and the flat-black/satin look were bothering me:
Until I get the trunklid filled/lip painted, I decided to put on the dolphin tail spoiler (at least I think that is what it is referred to, lol. Still lots to learn :P):
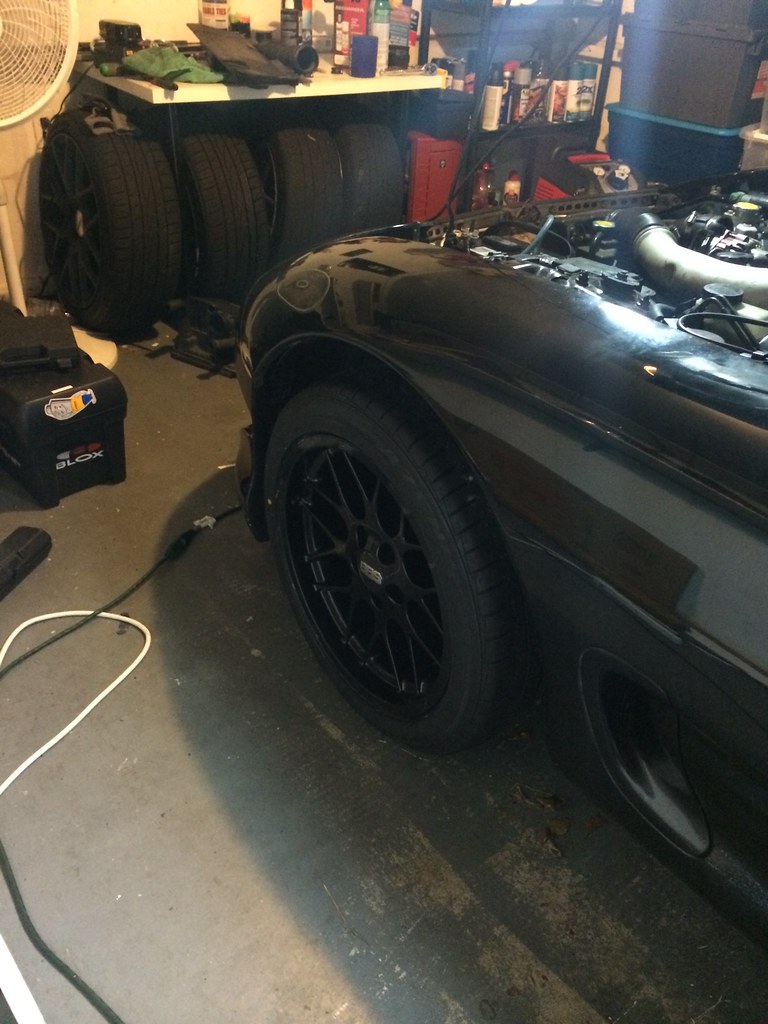
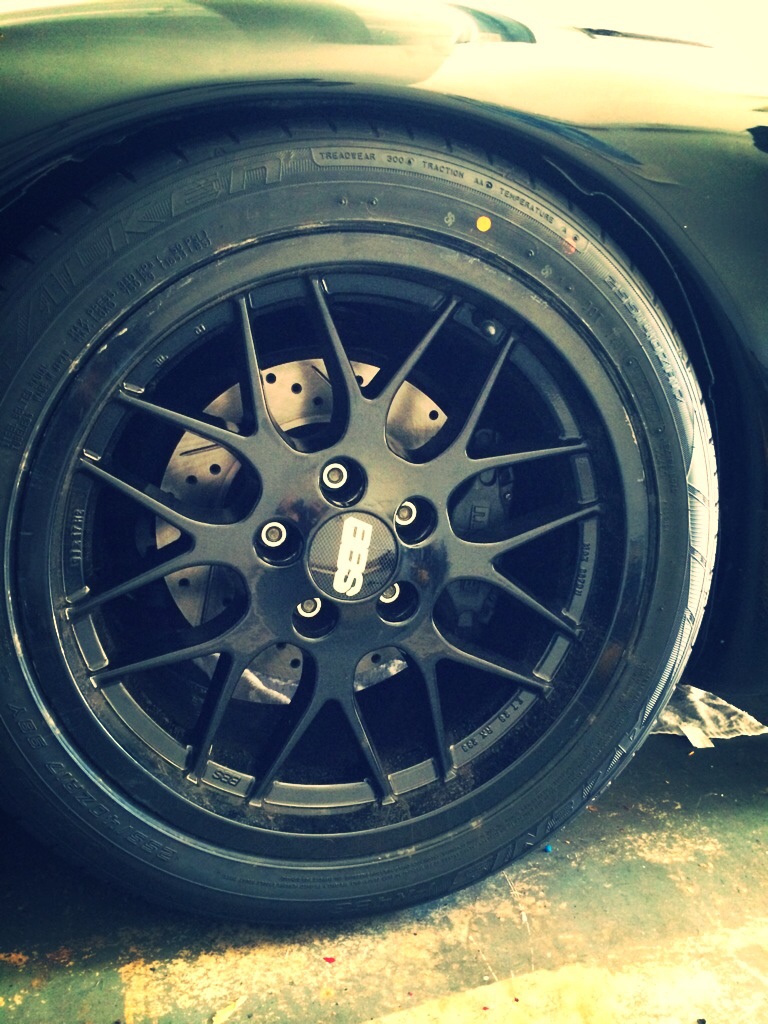
Next, I just had to tackle those ugly azz wheels, lol. Not sure why they ever made there way on here- but I guess everyone has different tastes so I can't hate!
Lucky for me, my brother had a set of BBS RX233s that he had gotten for his Evo that did not quite fit right....So they found their way onto my car! Test fit:
By the way, I hope you enjoy the 4x4 status . Need some coilovers pronto
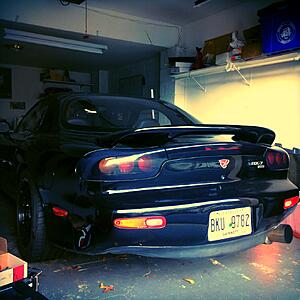
While this was all happening, my dog had to sniff around the car and get accustomed to it. Needless to say, I think he likes it & finds it comfortable I suppose:
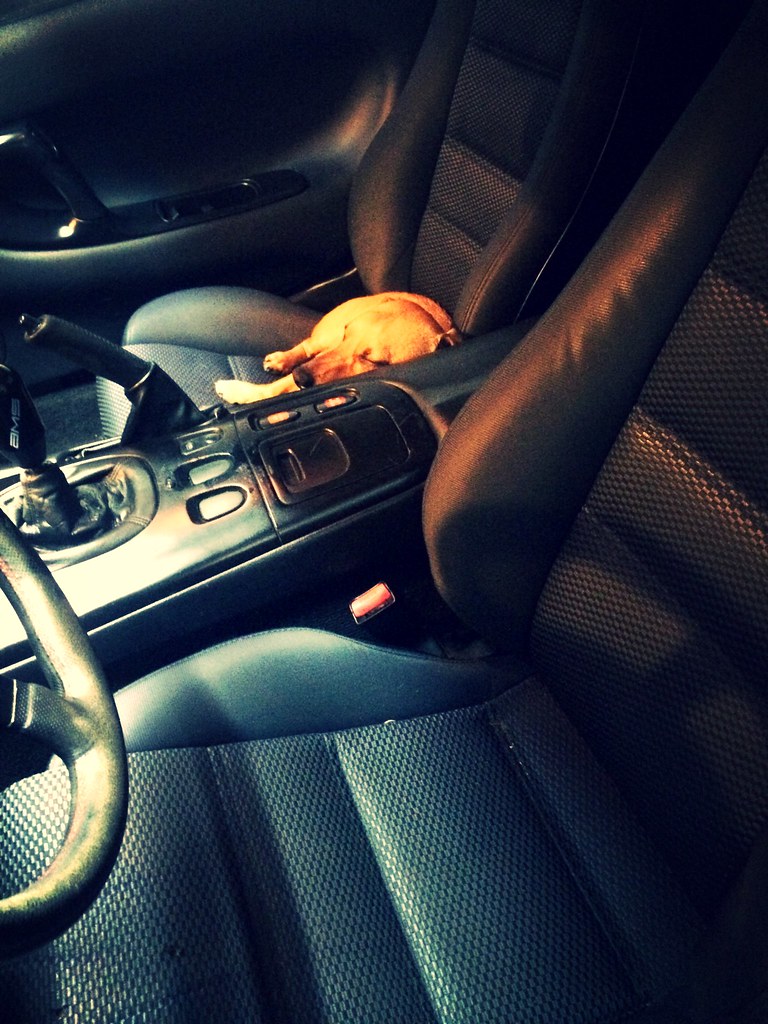
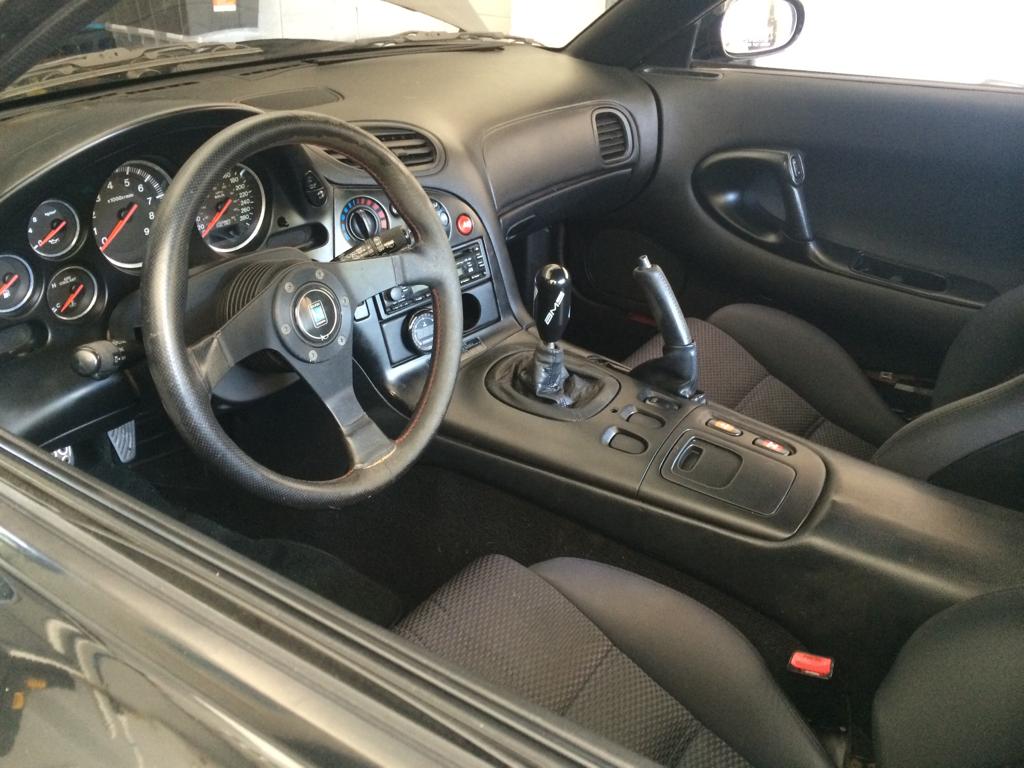
Another interior shot:
Nardi wheel, cloth seats, & temporary AMS **** since the one it came with was falling apart, haha. Need to find a nice new ****! Any suggestions?
Now onto some nicer pics outside. I finished mounting the wheels and went outside for some pics, sorry for the poor cellphone quality snaps .
.


Hope you enjoyed the pics so far. Future plans:
-First and foremost, coolant flush, oil change, check fuel filters/injectors
-Metal AST
-Get boost working 100% (will make a new post in this thread with my results after fixing the torn y-pipe coupler)
-Suspension (suggestions?)
-Perhaps some spacers in the rear
-Cooling system upgrades
Thanks for looking!
Joe
Until I get the trunklid filled/lip painted, I decided to put on the dolphin tail spoiler (at least I think that is what it is referred to, lol. Still lots to learn :P):
Next, I just had to tackle those ugly azz wheels, lol. Not sure why they ever made there way on here- but I guess everyone has different tastes so I can't hate!
Lucky for me, my brother had a set of BBS RX233s that he had gotten for his Evo that did not quite fit right....So they found their way onto my car! Test fit:
By the way, I hope you enjoy the 4x4 status
. Need some coilovers prontoWhile this was all happening, my dog had to sniff around the car and get accustomed to it. Needless to say, I think he likes it & finds it comfortable I suppose:
Another interior shot:
Nardi wheel, cloth seats, & temporary AMS **** since the one it came with was falling apart, haha. Need to find a nice new ****! Any suggestions?
Now onto some nicer pics outside. I finished mounting the wheels and went outside for some pics, sorry for the poor cellphone quality snaps
.Hope you enjoyed the pics so far. Future plans:
-First and foremost, coolant flush, oil change, check fuel filters/injectors
-Metal AST
-Get boost working 100% (will make a new post in this thread with my results after fixing the torn y-pipe coupler)
-Suspension (suggestions?)
-Perhaps some spacers in the rear
-Cooling system upgrades
Thanks for looking!
Joe


Senior Member
Joined: May 2005
Posts: 646
Likes: 0
From: Pensacola
Very nice start. Looking good. I'm a big fan of the tien and stance coilovers...reasonable price and very good for road and track. Can't wait to upgrade mine. Also u can just delete the AST (up to u on that one).
Trending Topics

A small update..

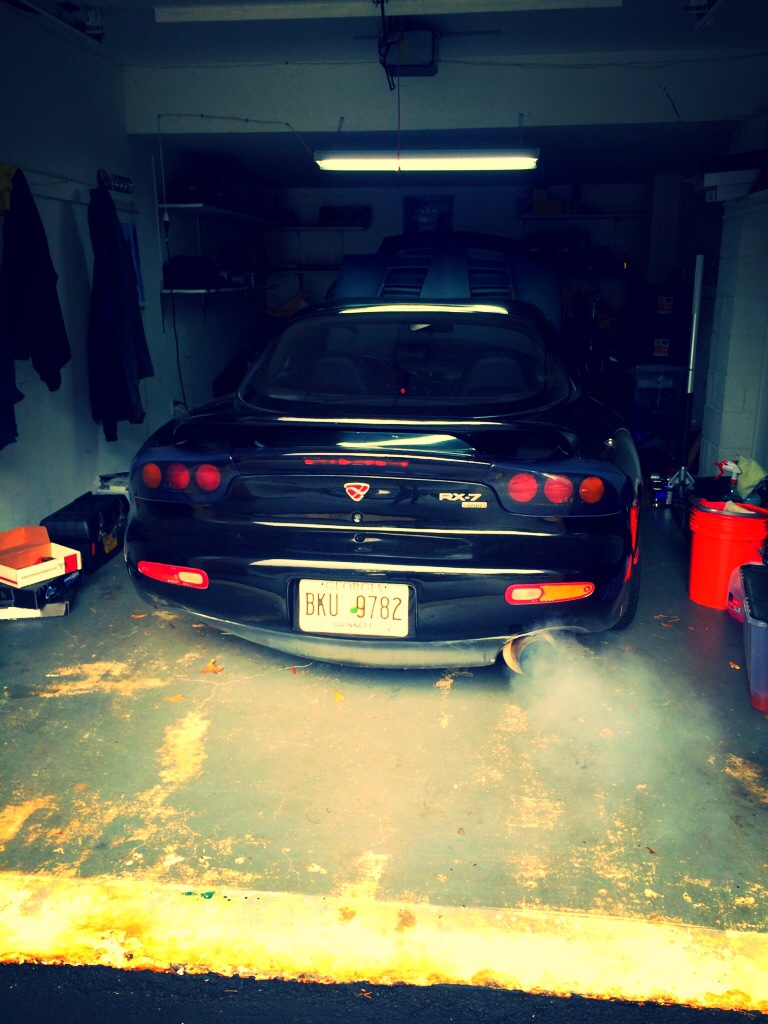
A few couplers, piping and k&n filters for the intake/intercooling tracts, as well as a Rotorsports AST.
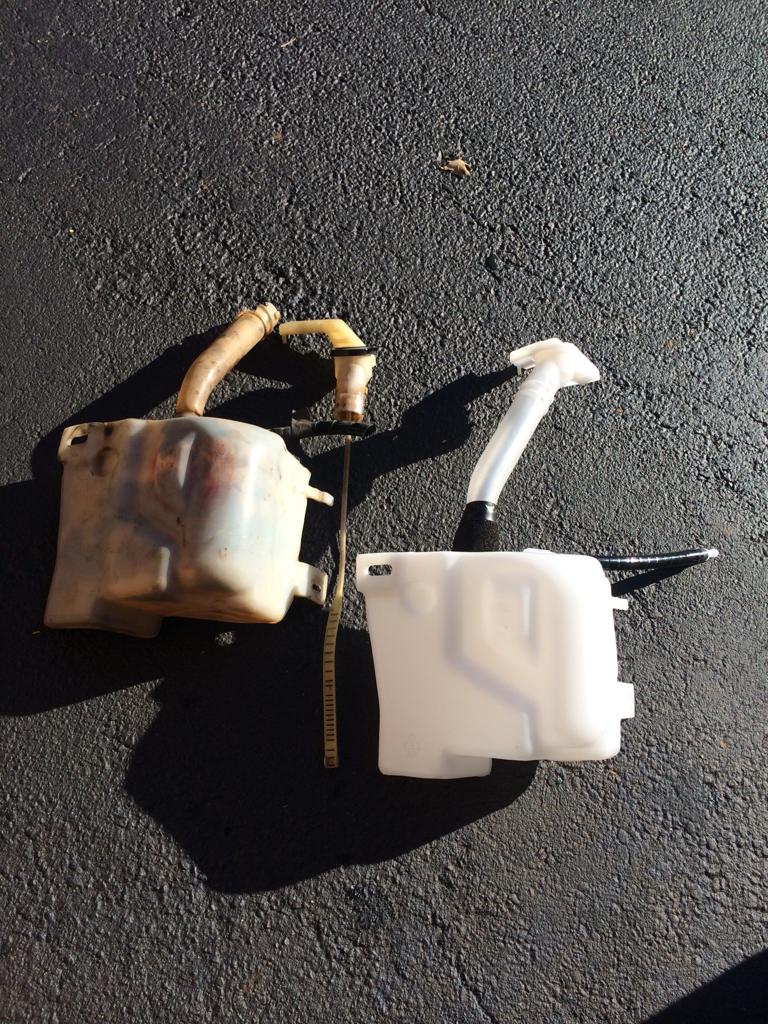
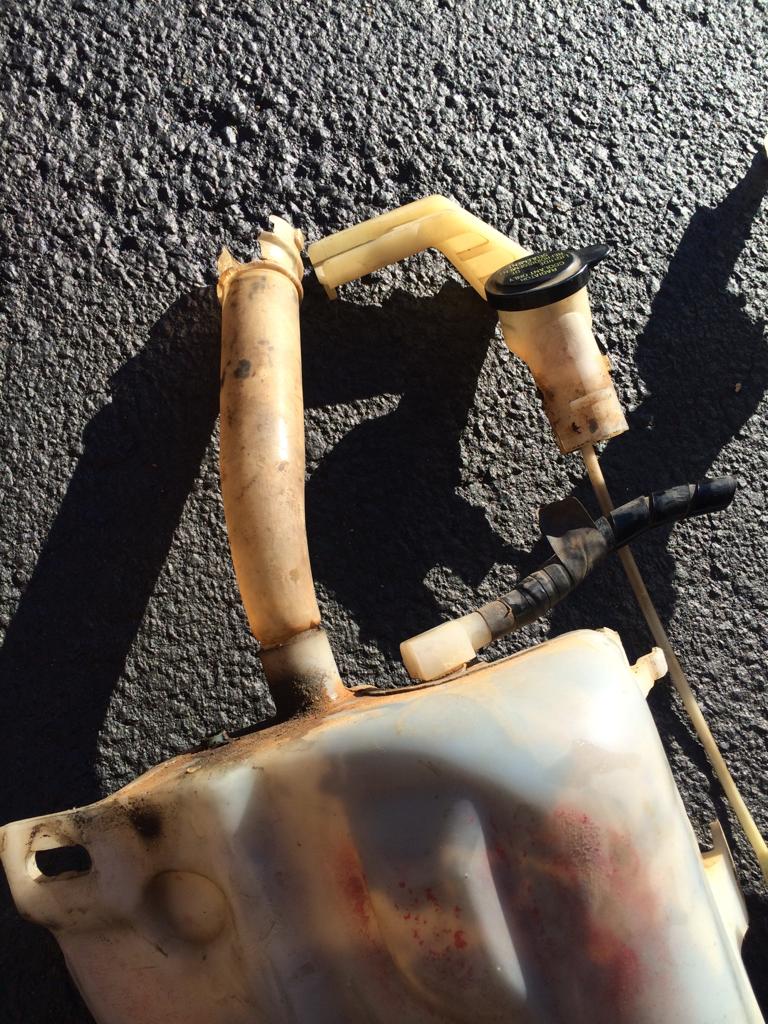
Also picked up a new coolant overflow. Check out how old, nasty & brittle the one in the car was!! There was a slow leak coming from the overflow tank as well as the stock AST and a line going to the AST. Replaced the tank, AST, and one coolant line and I haven't seen any more coolant puddles, *knocks on wood*.
Been up like this most of my ownership thus far
: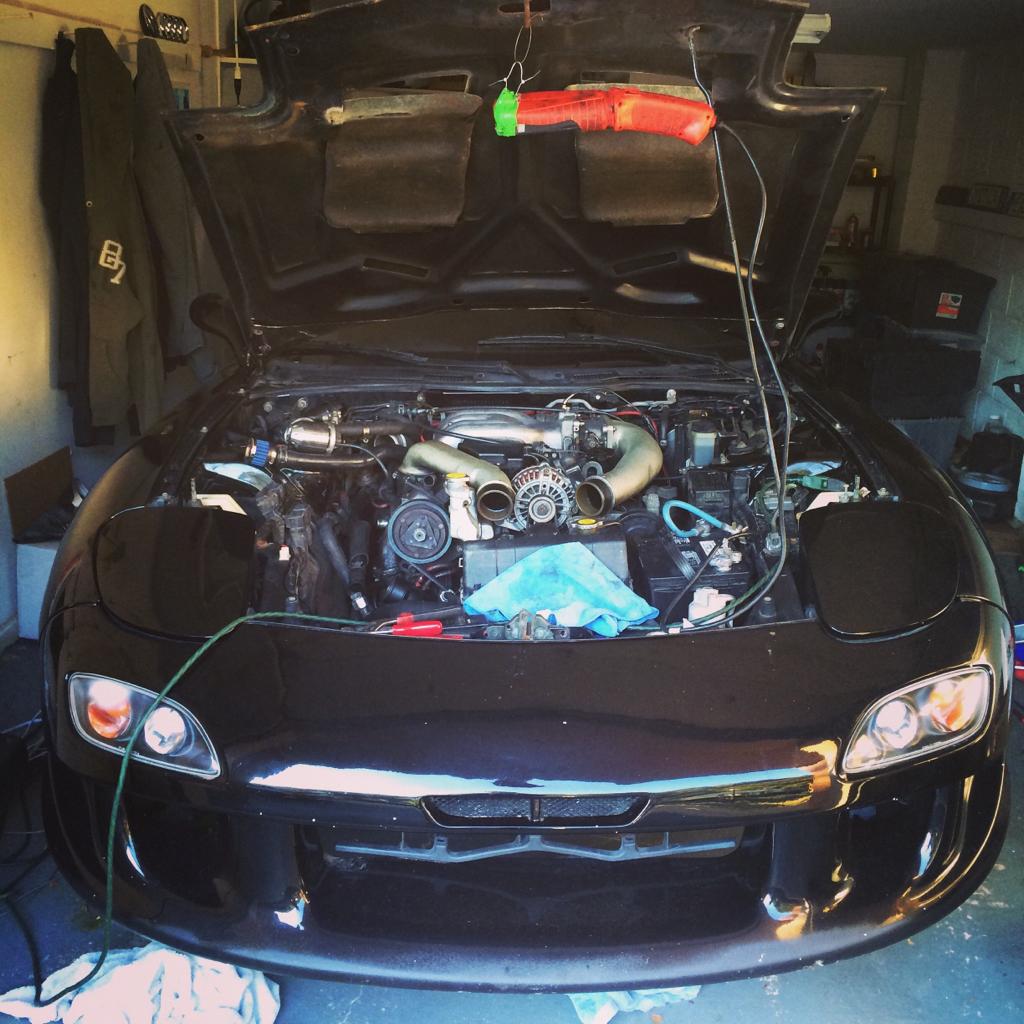
Most of the parts installed, just need to paint/powdercoat the pipes and match all the coupler colors hah:
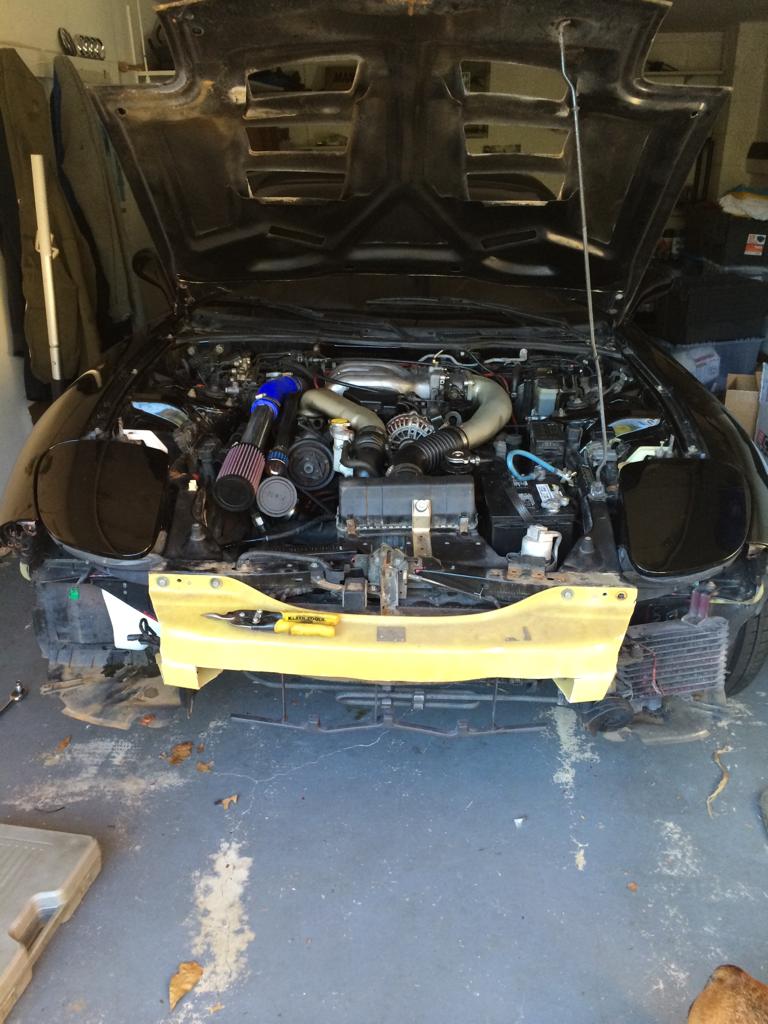
I must say, replacing the stock intake piping made a huge huge difference. I think perhaps the stock primary turbo hose was collapsing, as now boost seems to come on faster and smoother.
A little off-topic, a few pics with my other twin-turbo car:
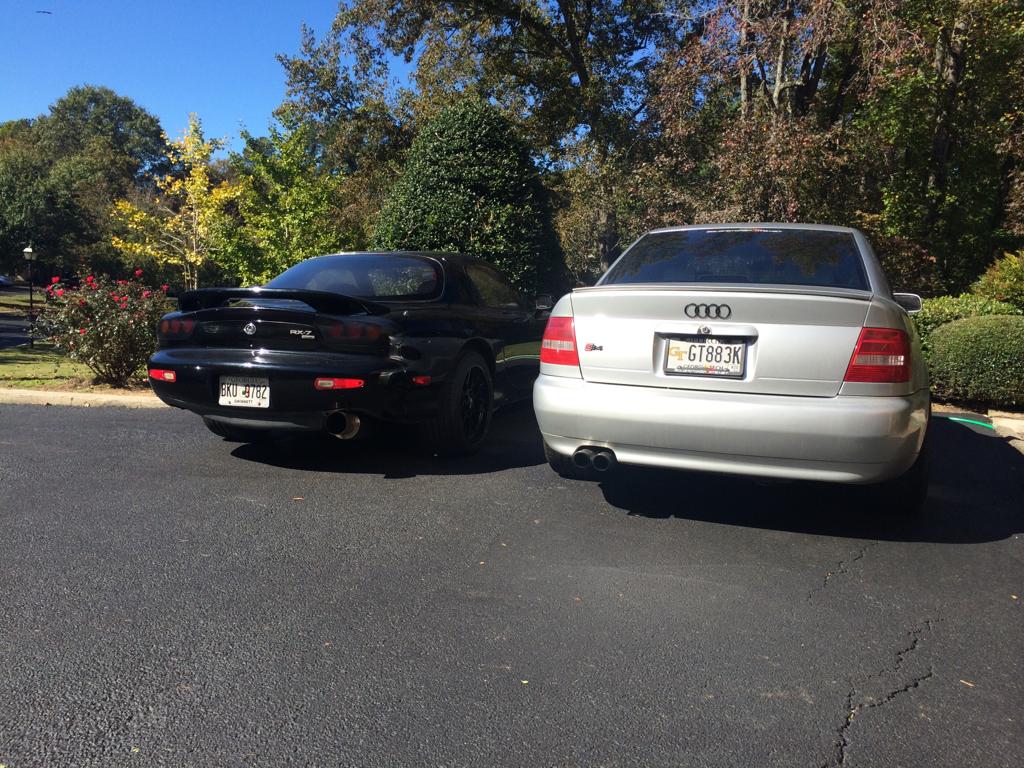
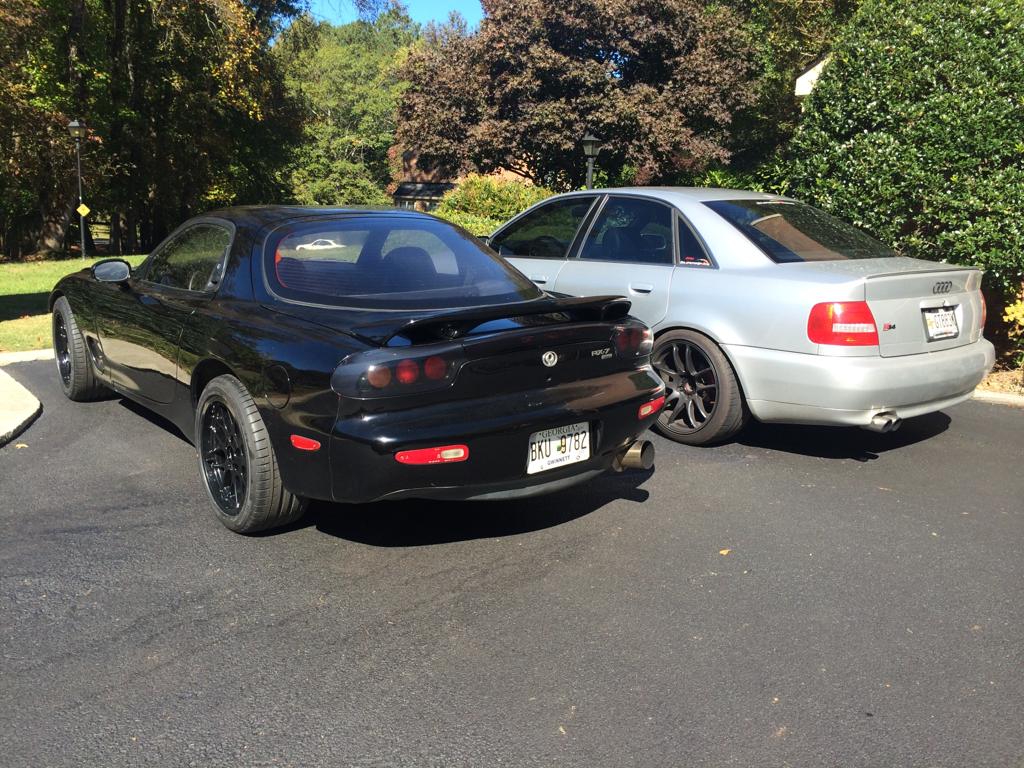
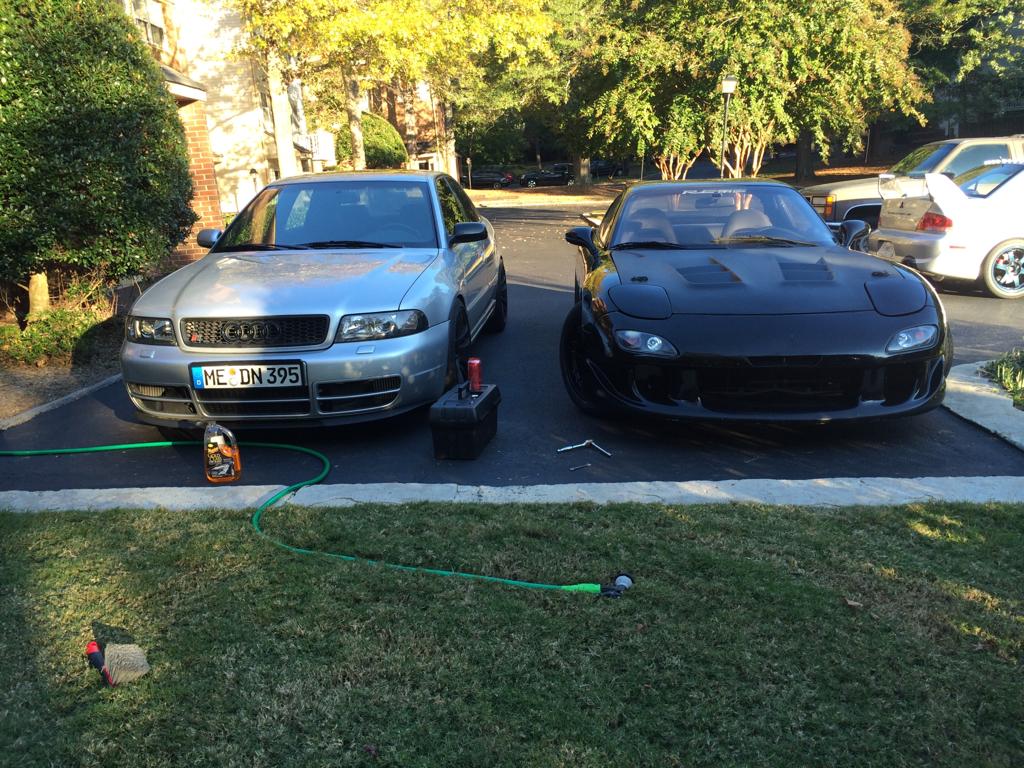
These two are keeping me busy haha. Both are quite complex/can be a PITA to work on. I love the raw speed of the B5 S4 but the 7 is much nimbler and fun to drive so far.
Onto some of the issues I'm hoping to get some guidance on:
1) I noticed the PO disconnected the electrical connector to the air pump (I assumed because it was gonezo). Since my idle is a bit erratic and seems to be rich, I plugged the air pump back in to confirm if it was working or not. Anyways, when I started the car up it made a very loud squealing/whining noise. Is that a confirmation that the pump is indeed dead?
2) I have two CELs, one for the IAT sensor and one for the MAP sensor (codes 11 & 13 iirc). I swapped in a known working MAP sensor, cleared the codes, and went for another drive. However, both codes came back. Does this mean I have a wiring issue somewhere in between the ECU and sensors? I'll do the tests outlined in the service manual but I wasn't sure if there were any other suggestions besides checking for shorts and what not.
Thanks again guys

If you have a stock ECU, unplugging the air pump will cause a crappy idle and rough on/off idle driving. The ECU is looking for that air pump air to "fool" the O2 sensor and compensates for it. Without the air, it compensates the wrong way.
Short term, I'd get a good air pump - they're a dime a dozen. Long term, a PowerFC will let you run with no airpump and the car won't run crappy. If you do remove the airpump, get the Pineapple Racing pulley so you have good water pump belt contact.
Also, the offset of those wheels is out there a good ways - I'd be worried about that. You can easily catch and pull fender lips, cracking paint, and chewing up tires.
Keep up the good work, wait until you drive that car with full boost, WOW.
Dale
Short term, I'd get a good air pump - they're a dime a dozen. Long term, a PowerFC will let you run with no airpump and the car won't run crappy. If you do remove the airpump, get the Pineapple Racing pulley so you have good water pump belt contact.
Also, the offset of those wheels is out there a good ways - I'd be worried about that. You can easily catch and pull fender lips, cracking paint, and chewing up tires.
Keep up the good work, wait until you drive that car with full boost, WOW
.Dale
Looking great so far.
As far as the MAP code, I remember reading about a red one someone found in a field with the same code and the wiring harness that runs inside the fender over the drivers front wheel was damaged. Might be worth checking that out.
Vince
As far as the MAP code, I remember reading about a red one someone found in a field with the same code and the wiring harness that runs inside the fender over the drivers front wheel was damaged. Might be worth checking that out.
Vince
If you have a stock ECU, unplugging the air pump will cause a crappy idle and rough on/off idle driving. The ECU is looking for that air pump air to "fool" the O2 sensor and compensates for it. Without the air, it compensates the wrong way.
Short term, I'd get a good air pump - they're a dime a dozen. Long term, a PowerFC will let you run with no airpump and the car won't run crappy. If you do remove the airpump, get the Pineapple Racing pulley so you have good water pump belt contact.
Also, the offset of those wheels is out there a good ways - I'd be worried about that. You can easily catch and pull fender lips, cracking paint, and chewing up tires.
Keep up the good work, wait until you drive that car with full boost, WOW.
Dale
Short term, I'd get a good air pump - they're a dime a dozen. Long term, a PowerFC will let you run with no airpump and the car won't run crappy. If you do remove the airpump, get the Pineapple Racing pulley so you have good water pump belt contact.
Also, the offset of those wheels is out there a good ways - I'd be worried about that. You can easily catch and pull fender lips, cracking paint, and chewing up tires.
Keep up the good work, wait until you drive that car with full boost, WOW
.Dale
Got a low mileage airpump from a friend of mine on here (thanks again Seth)- swapped it in and so far the car seems to be running much better! It idles much nicer and it isn't as pig rich as it was before. Also it seems to drive smoother and isn't as rough at part throttle.
After I took out my old air pump and while waiting for the new one to arrive, I decided to clean up a few of the interior bits since I had some downtime. A lot of the console/plastic pieces were pretty worn/scratched/gross looking. I sanded the pieces down a bit and gave them a few coats of Plastidip. I was a little hesitant about how it would look, but I think they came out pretty well! I'm curious to see how well/long the coating will last though.
Before:

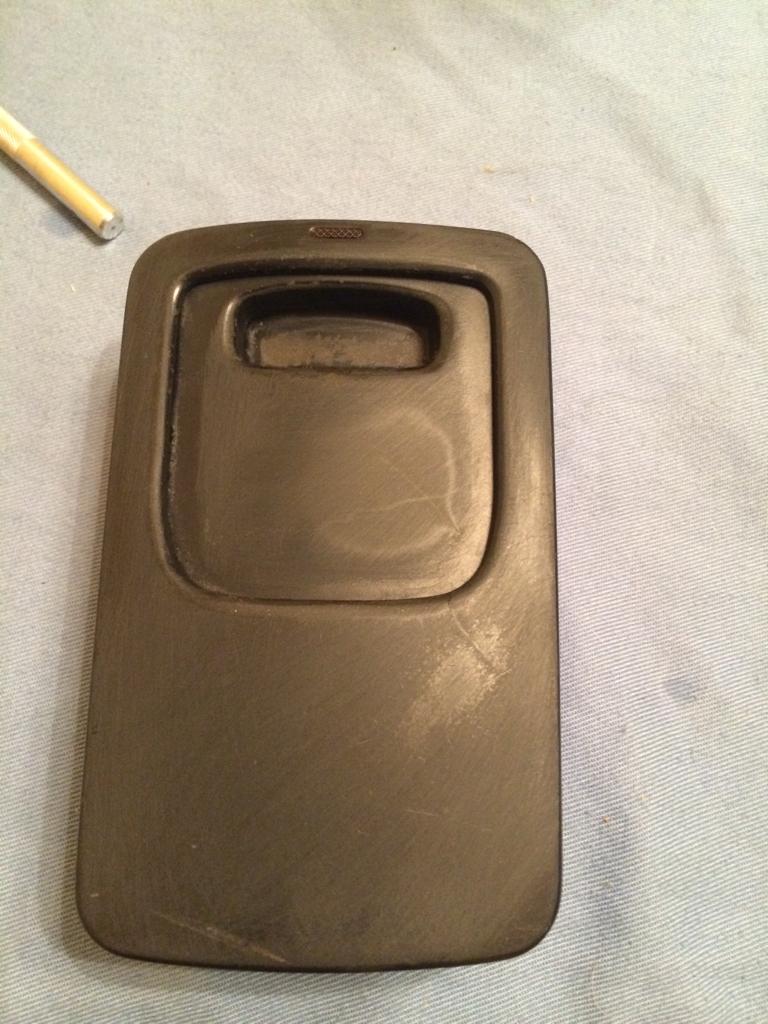
After:
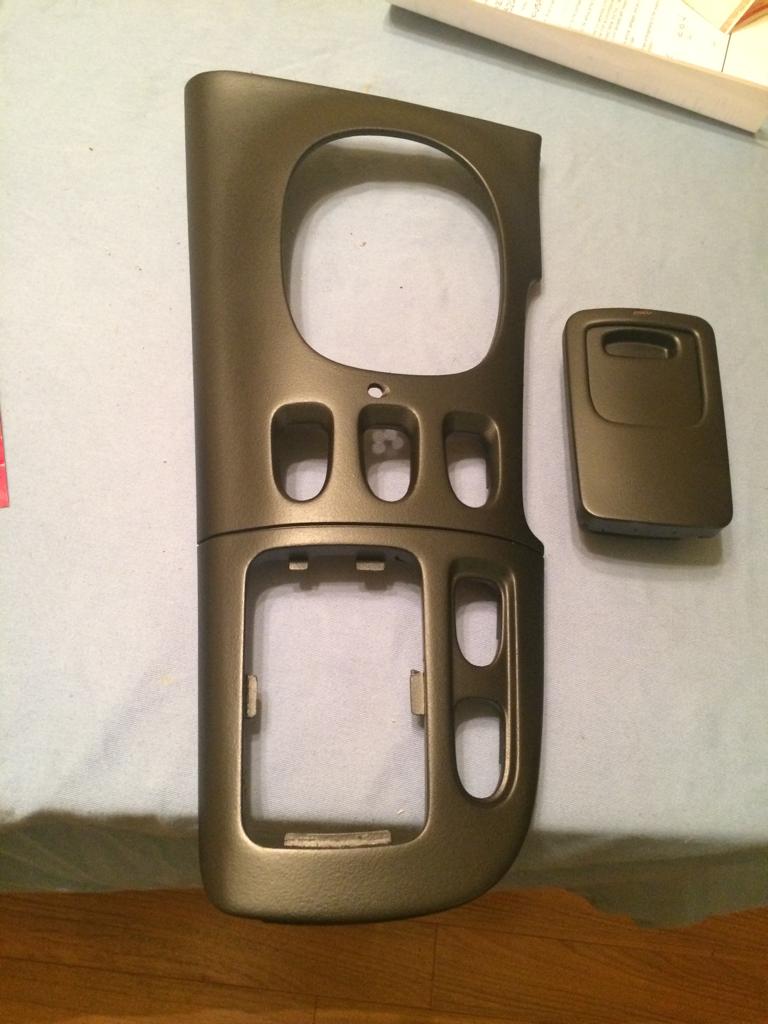
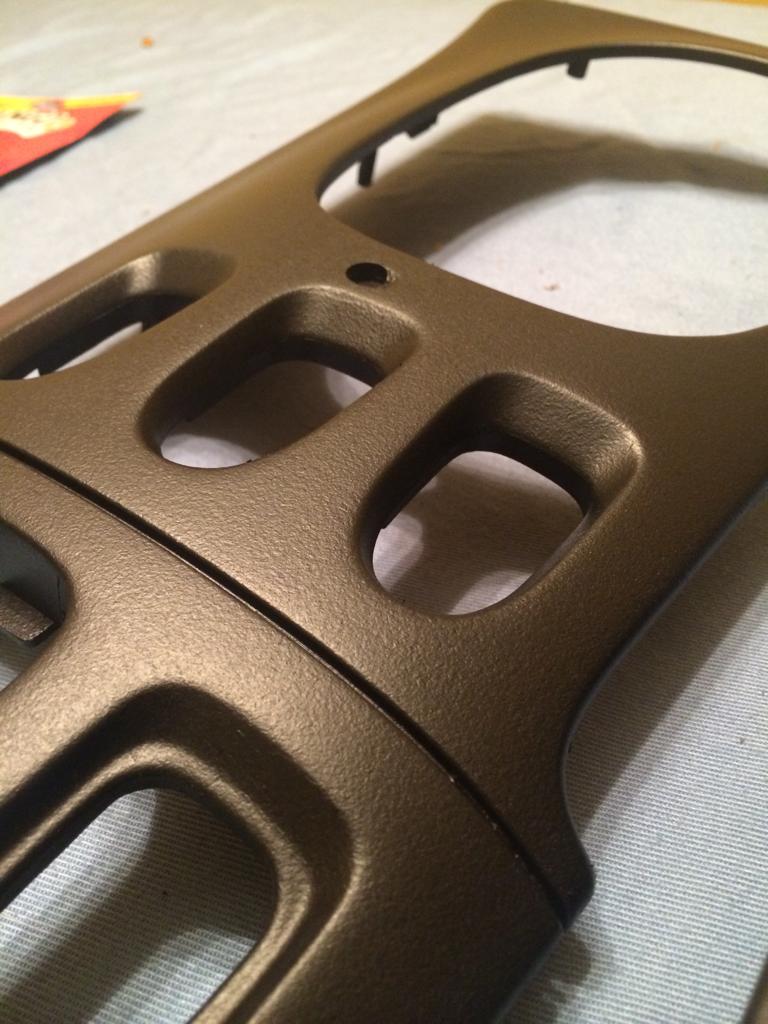
Still have to do a few more pieces
.Next things to do:
-Coilovers:
Was looking at just getting a set of Apexi EXVs. Would love a really nice handling set of coilovers but I'm not sure if I can plop down more than 1500 for a well-regarded set. The Apexis seem to have decent reviews so I may just go with them.
-Debug the MAP sensor and IAT sensor codes. Hoping they are relatively easy to figure out..
-Install wideband & get hood painted
Another issue I noticed that I forgot to post earlier: It seems like I'm getting boost 75% of time- sometimes if I do one pull, then go to do another pull soon after, I will get no boost.
I'm thinking this has to do with either the pressure and/or vacuum tanks. After a pull when pressure is released from the system via the relief valves, the turbo control solenoids use those tanks to operate if there is a lack of pressure/vac in the system. Is my train of thought correct in thinking if those tanks were leaky/broken this could cause this issue?
I will try a spare known-working BOV on the car as well just to eliminate that from the equation as well.

If i were you I would look into the reliability mods. I.e Power FC with a proper tune, a proper exhaust, boost controller. If your looking into keeping your car mostly stock but running the best I would definitely look into those. Car looks great otherwise seems like you have your head on right!
If i were you I would look into the reliability mods. I.e Power FC with a proper tune, a proper exhaust, boost controller. If your looking into keeping your car mostly stock but running the best I would definitely look into those. Car looks great otherwise seems like you have your head on right!
A little bit on the MAP sensor debugging (code 13):
1) First things first, MAP sensor is getting 5V w/ ignition on
2) With the connector plugged in & ignition on (car off), the output of the MAP sensor (G/Y wire) is approx. 2.64V. I believe that would correspond to close to 0 kPa which is what I would expect. However, I measured the corresponding pin @ the ECU connector (MAP 1O), and I wasn't getting a reading (0v).
3) I then checked continuity as referenced in the FSM from the B/LG wire from the MAP sensor to the BR/B pin at the ECU connector (terminal 4D) and got a reading of .6 ohms, which I believe should be OK.
4) I also checked the continuity from the MAP sensor output (G/Y) to ECU connector terminal 1O and I got an infinite reading (open).
From the zero voltage readout at 1O and open continuity reading is it safe to say somewhere between the MAP sensor and the ECU that one G/Y wire got frayed/disconnected or something? Looks like I will have to try and find out some common culprits besides the driver fender well (anyone have a wire routing diagram or something of that sort? I'll check and see if I find anything in the FSM).
Fun times...
A few small updates since my last post:
-So about the MAP sensor code- the best I could do was find out the last point where I could see voltage coming off the sensor line in the wiring harness bundle. I tracked it down to near the back of the passenger side fender lining. At this point I was seeing voltage coming from the MAP sensor. However, somewhere in between that point and at the ECU terminal there must have been an open because I was not seeing any voltage at the ECU terminal. I spliced in a new wire because I couldn't quite track down where the open was unless I tore out the dash and looked thru the firewall and what not. I added in a short section of wire and my code went away.
-I replaced my HKS bov (I believe it is a knock-off..) with a DV from my Audi. I think it should work okay- it is a Bosch 710N for anyone that's curious. Should hold up fine for the stock twins
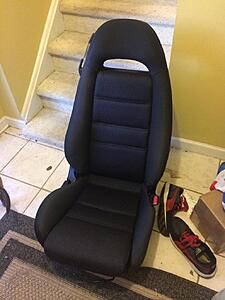
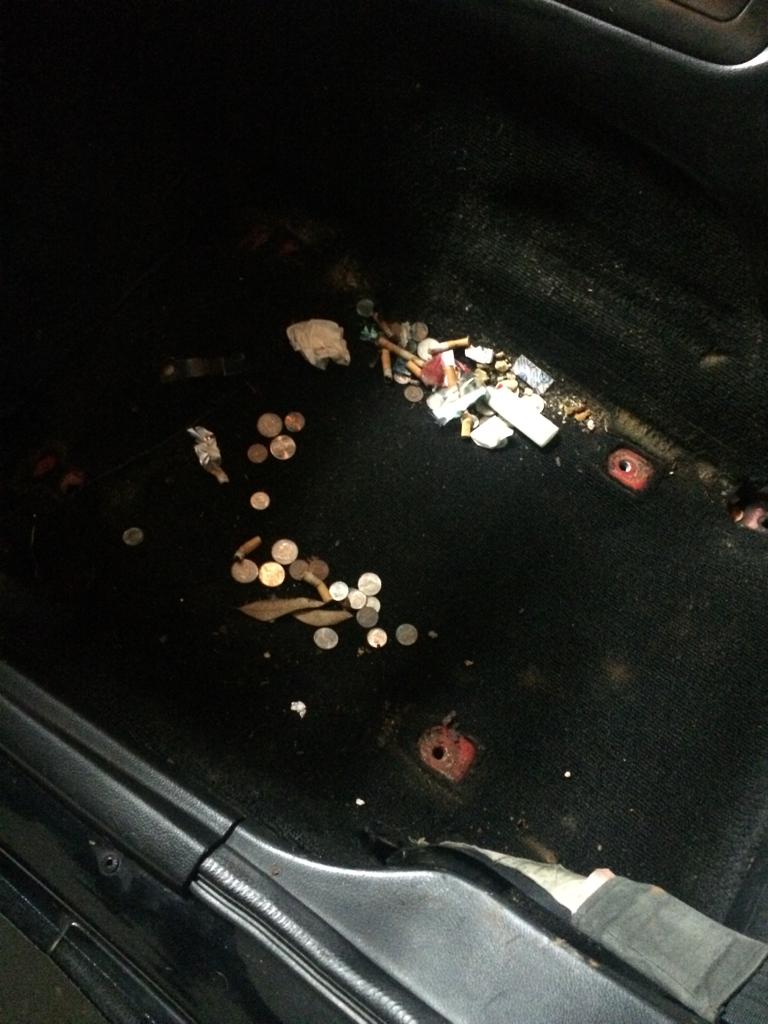
....After all the wire harness debug & squeezing in the passenger footwell near the ECU for hours on end, I needed a break and decided to clean up my seats and carpets.
I pulled the seats and this is what I found on both sides:
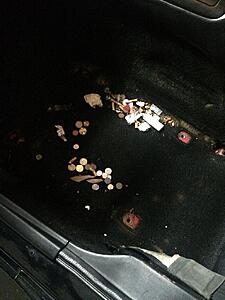
Super gross and it's no wonder why my cabin was kind of stinky  .
.
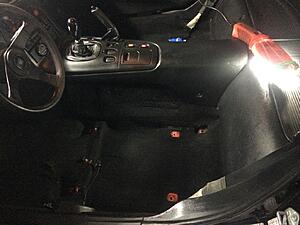
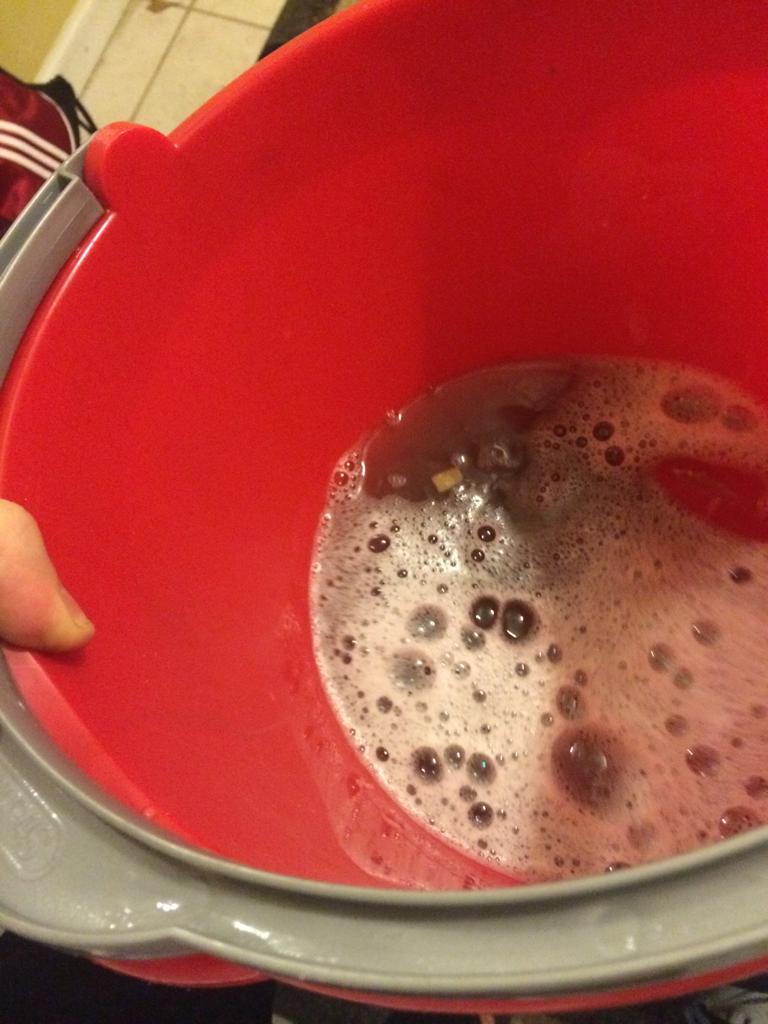
Between the seats and the carpets I pulled off a lot of nasty grime and what not:

After:
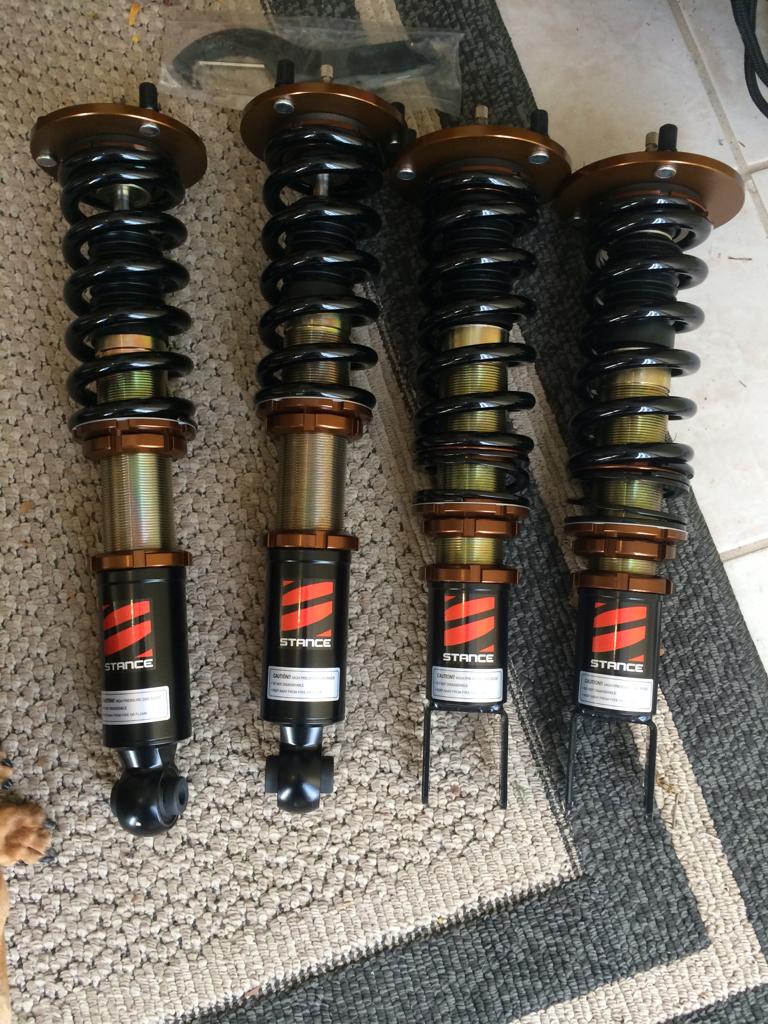
After surfing the classis for a while and not really finding any coilovers that interested me, I decided to just order a new set of Stance + coilovers (12kg f/r w/ rear helper springs):

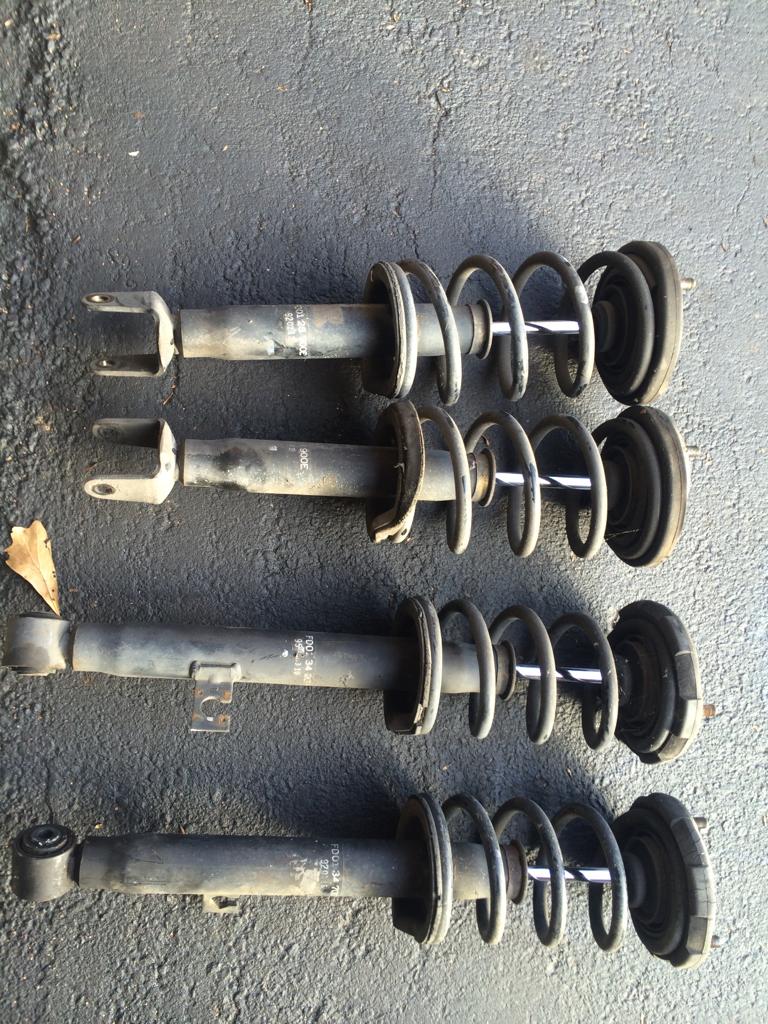
The stockers were quite easy to remove:
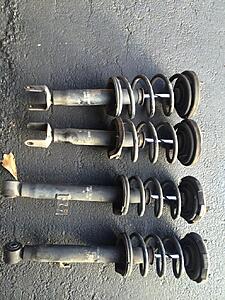
If anyone is looking for a stock set LMK.
Overall the install was pretty painless except for one corner..The front passenger strut was kind of jammed into the lower knuckle..In the end I ended up removing the sway bar link and it finally came out.
I just need to bring the front up and lower the rear some and I will then take some nicer pics. I will also have to writeup some impressions of how they ride.
-After the coilover install I wanted to track down my IAT sensor code. This was a fun one..
I reached under the UIM and found that the IAT sensor was disconnected! I was like WTF?! PO must have taken off the UIM at one point and forgot to plug the connector back into the sensor. Just looking from the back I couldn't see any connectors laying around or anything- so I had the joy of pulling off the UIM for the first time haha.
Overall it wasn't too bad pulling off everything, nothing too crazy or difficult. However, after looking for hours thru the rat's nest and around there I just could NOT find any unused connectors..At this point I was getting frustrated.
Right before I was about to call it quits, low and behold I see an out-of-place looking spliced wire...I followed it and found that it came out near the tb elbow.. Then I took a second look at my elbow and found a second IAT sensor. I felt really dumb that it took me so long to realize that the PO relocated the IAT sensor to the TB elbow.. If I had only paid more attention to the elbow I would have seen the sensor on it.. Oh well, at least I got some experience with the UIM. I cleaned up the wiring & connector to the IAT sensor, and voila! No more code..
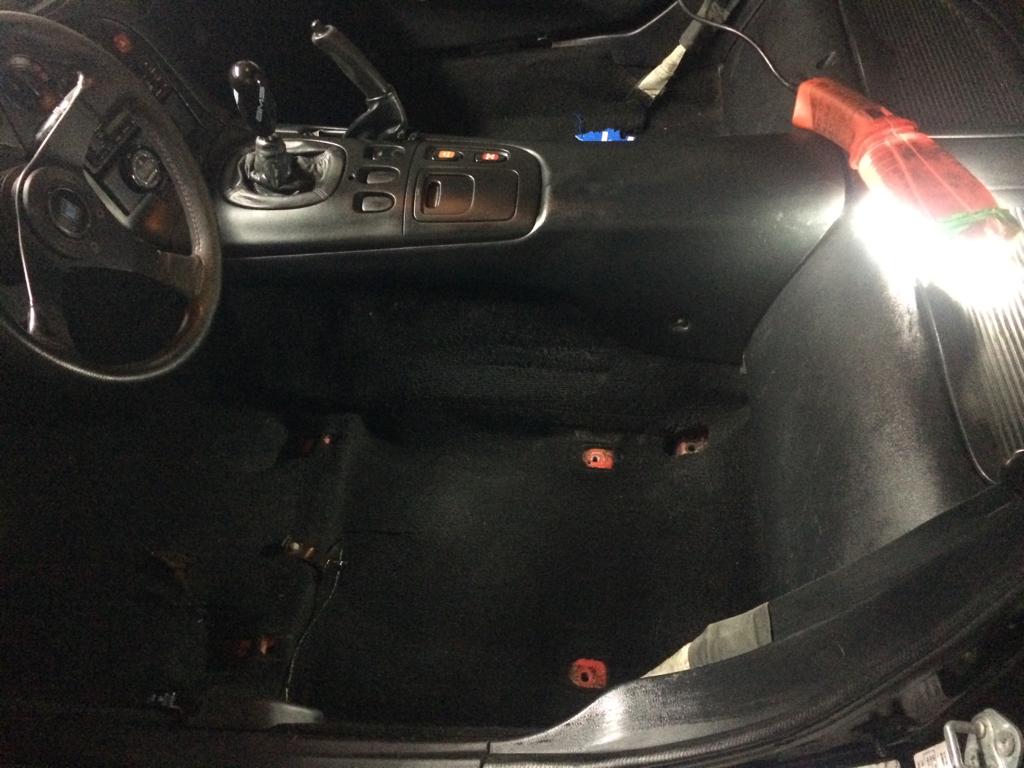
On a side note, while underneath the UIM I did see ONE unused connector (obviously not the IAT one however). Anyone know what this is for? I am thinking for EGR switch maybe?

...Alas..the car is finally code free! I hope it stays that way after I adjust the suspension and finally drive it lol.
Future plans:
-Thinking about plastidipping my wheels and painting them BBS gold. Not sure if I'm completely sold on black-on-black
-Adjust coils and finally drive the car!
-Take some good pics haha
-So about the MAP sensor code- the best I could do was find out the last point where I could see voltage coming off the sensor line in the wiring harness bundle. I tracked it down to near the back of the passenger side fender lining. At this point I was seeing voltage coming from the MAP sensor. However, somewhere in between that point and at the ECU terminal there must have been an open because I was not seeing any voltage at the ECU terminal. I spliced in a new wire because I couldn't quite track down where the open was unless I tore out the dash and looked thru the firewall and what not. I added in a short section of wire and my code went away.
-I replaced my HKS bov (I believe it is a knock-off..) with a DV from my Audi
. I think it should work okay- it is a Bosch 710N for anyone that's curious. Should hold up fine for the stock twins....After all the wire harness debug & squeezing in the passenger footwell near the ECU for hours on end, I needed a break and decided to clean up my seats and carpets.
I pulled the seats and this is what I found on both sides:
 Super gross and it's no wonder why my cabin was kind of stinky
 Between the seats and the carpets I pulled off a lot of nasty grime and what not:
After:

After surfing the classis for a while and not really finding any coilovers that interested me, I decided to just order a new set of Stance + coilovers (12kg f/r w/ rear helper springs):
The stockers were quite easy to remove:
If anyone is looking for a stock set LMK.
Overall the install was pretty painless except for one corner..The front passenger strut was kind of jammed into the lower knuckle..In the end I ended up removing the sway bar link and it finally came out.

I just need to bring the front up and lower the rear some and I will then take some nicer pics. I will also have to writeup some impressions of how they ride.
-After the coilover install I wanted to track down my IAT sensor code. This was a fun one..
I reached under the UIM and found that the IAT sensor was disconnected! I was like WTF?! PO must have taken off the UIM at one point and forgot to plug the connector back into the sensor. Just looking from the back I couldn't see any connectors laying around or anything- so I had the joy of pulling off the UIM for the first time haha.
Overall it wasn't too bad pulling off everything, nothing too crazy or difficult. However, after looking for hours thru the rat's nest and around there I just could NOT find any unused connectors..At this point I was getting frustrated.
Right before I was about to call it quits, low and behold I see an out-of-place looking spliced wire...I followed it and found that it came out near the tb elbow.. Then I took a second look at my elbow and found a second IAT sensor
. I felt really dumb that it took me so long to realize that the PO relocated the IAT sensor to the TB elbow.. If I had only paid more attention to the elbow I would have seen the sensor on it.. Oh well, at least I got some experience with the UIM. I cleaned up the wiring & connector to the IAT sensor, and voila! No more code..On a side note, while underneath the UIM I did see ONE unused connector (obviously not the IAT one however). Anyone know what this is for? I am thinking for EGR switch maybe?
...Alas..the car is finally code free! I hope it stays that way after I adjust the suspension and finally drive it lol.
Future plans:
-Thinking about plastidipping my wheels and painting them BBS gold. Not sure if I'm completely sold on black-on-black
-Adjust coils and finally drive the car!
-Take some good pics haha


Senior Member
Joined: May 2005
Posts: 646
Likes: 0
From: Pensacola
Let me know how you like the stance. So far I have heard nothing but good things about them. Glad your able to straighten out the little problems. Love your stock seats also. That style has always been my favorite.
 .
.
Wow, it's been a long time since I've updated this thread. Not much to report, but I figured I'd at least say hi haha.
I believe we left off with the Stance coilover install. I failed to post some 'after' photos in a timely manner, but here are some now :P.
Here's a closeup of the newly installed Stoptech Drilled/Slotted rotors:

I need to paint the calipers red or something. And yes, I'm rubbing over everything, lol. Need to raise the fronts : (.
I'm also in the process of getting the hood painted.
As a present to myself over winter break, I decided to treat myself to a tune. My good friend Seth/'Skeese' was swapping out his PFC for Adaptronic in anticipation for his single turbo build. I decided I'd buy his as he also had a solid tune on it for the stock twins @ 12lbs. When I got back home from winter break after visiting some family, I had Seth ship it out to me. Needless to say, it was anything but a smooth process.
*** Begin Rant ***
I had never had big issues with USPS before, besides items getting delivered a little past their expected delivery date. However, this time was different. I literally can't remember a time where I've had to deal with such an incompetent group of people. After waiting over a week for an item that was shipped 2 day priority, I hadn't received any updates or responses back to my inquiries. When I finally saw tracking updates, it looked like the package was being shuffled around Atlanta lol. Literally, it hit every usps center around the perimeter haha.
When they finally attempted delivery, of course I wasn't home so they left a slip. I filled out the slip & the online forms to have them leave it at my front door, yet it still wasn't delivered for the next two days. Feeling frustrated, I talked to my mailman and he told me he had no idea where the package was. Didn't really care either so w/e. To shorten the story, after a few heated phone calls I finally got the package after nearly a month (mind you I had to go pick it up, boy was it fun seeing the person on the phone in person ). Sorry for the rant
*** End Rant ***
So after nearly 2 months of sitting, I wanted to get everything in order for my PFC install. Of course, that was not as easy as I had thought, being a FD and all, lol. Needless to say, I learned my lesson and will never do short trips/let her sit for long periods again : (.
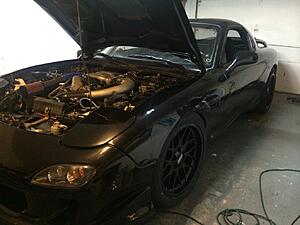
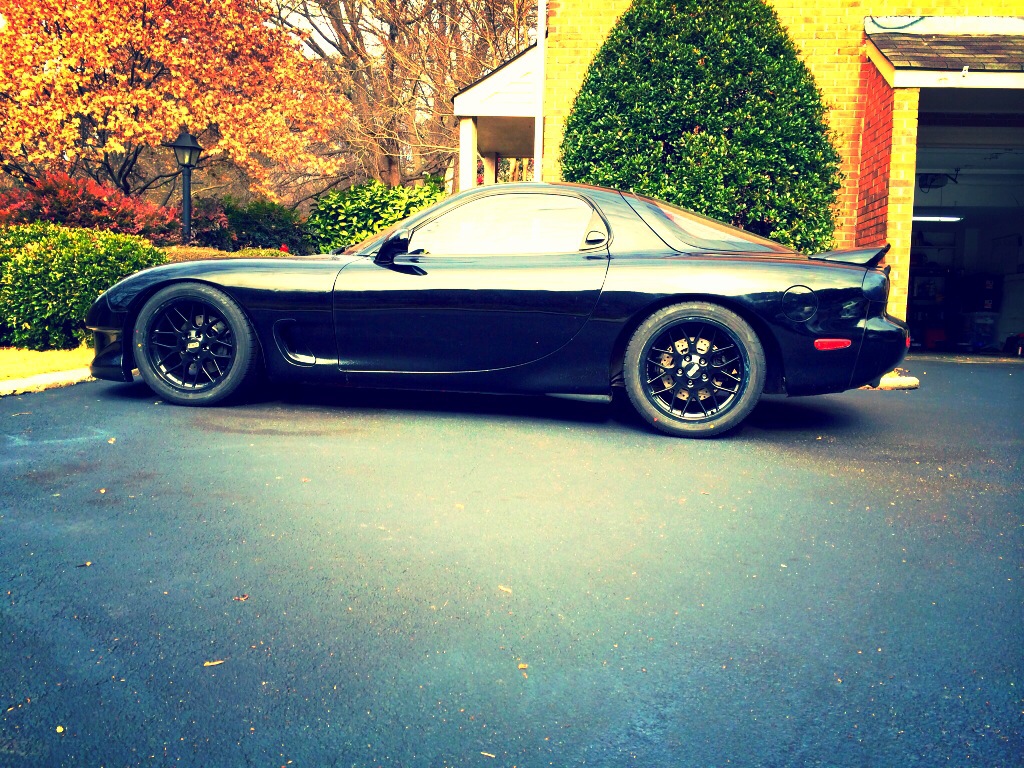
Back up and purring!

I love dat azz:
She was mad for me letting her sit for so long. Look how dirty : (

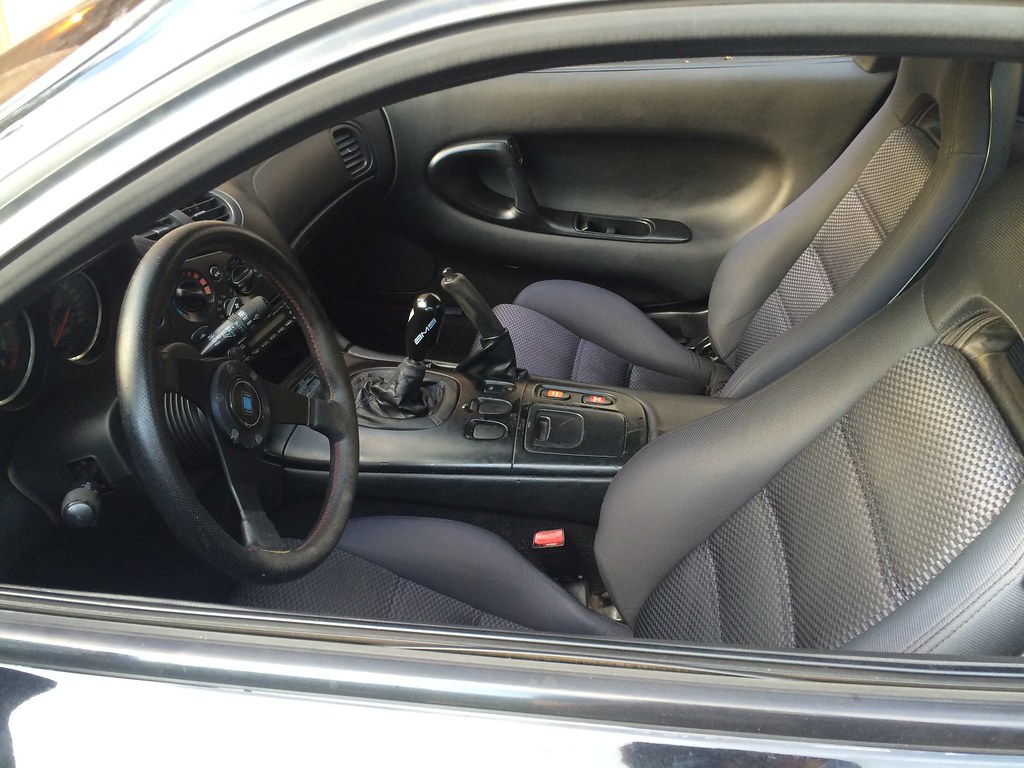
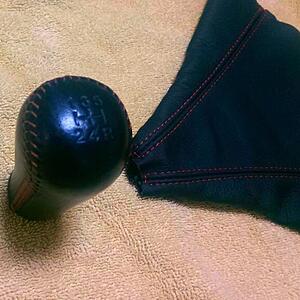
As a sorry present, I decided to get her a new shift **** and boot to replace the ugly AMS **** and stock worn boot (thanks laujesse)
Now that the car is running nicely again on the stock ecu, I'm planning to finish the PFC swap soon and then go put the car on a dyno and see what she's putting down.
I'm also looking forward to finally having all my body parts painted : ). I am also most likely going to have my wheels painted gold. I'm not sure if I'm feeling the black on black anymore. Pics to come!
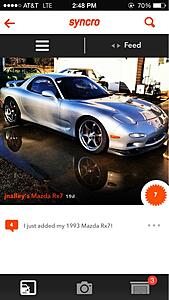
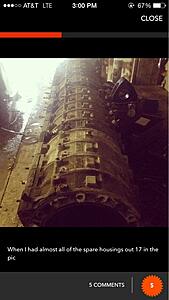
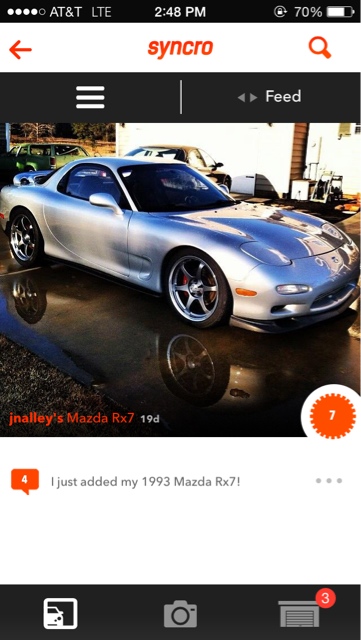
On a side note, a few friends and I have been working on a free iOS app catering to car enthusiasts. Almost like IG but for car builds and what not. Anyways, not to deter anyone from the forum, but I would love to see some more 7's on there (app name in sig). One of my fave cars on there atm:
And one more pic from another Rotary fanatic:
Thanks for looking and hope to have some nice updates soon!
I believe we left off with the Stance coilover install. I failed to post some 'after' photos in a timely manner, but here are some now :P.
Here's a closeup of the newly installed Stoptech Drilled/Slotted rotors:
I need to paint the calipers red or something. And yes, I'm rubbing over everything, lol. Need to raise the fronts : (.
I'm also in the process of getting the hood painted.
As a present to myself over winter break, I decided to treat myself to a tune. My good friend Seth/'Skeese' was swapping out his PFC for Adaptronic in anticipation for his single turbo build. I decided I'd buy his as he also had a solid tune on it for the stock twins @ 12lbs. When I got back home from winter break after visiting some family, I had Seth ship it out to me. Needless to say, it was anything but a smooth process.
*** Begin Rant ***
I had never had big issues with USPS before, besides items getting delivered a little past their expected delivery date. However, this time was different. I literally can't remember a time where I've had to deal with such an incompetent group of people. After waiting over a week for an item that was shipped 2 day priority, I hadn't received any updates or responses back to my inquiries. When I finally saw tracking updates, it looked like the package was being shuffled around Atlanta lol. Literally, it hit every usps center around the perimeter haha.
When they finally attempted delivery, of course I wasn't home so they left a slip. I filled out the slip & the online forms to have them leave it at my front door, yet it still wasn't delivered for the next two days. Feeling frustrated, I talked to my mailman and he told me he had no idea where the package was. Didn't really care either so w/e. To shorten the story, after a few heated phone calls I finally got the package after nearly a month (mind you I had to go pick it up, boy was it fun seeing the person on the phone in person
). Sorry for the rant*** End Rant ***
So after nearly 2 months of sitting, I wanted to get everything in order for my PFC install. Of course, that was not as easy as I had thought, being a FD and all, lol. Needless to say, I learned my lesson and will never do short trips/let her sit for long periods again : (.
Back up and purring!
I love dat azz:
She was mad for me letting her sit for so long. Look how dirty : (
As a sorry present, I decided to get her a new shift **** and boot to replace the ugly AMS **** and stock worn boot (thanks laujesse)

Now that the car is running nicely again on the stock ecu, I'm planning to finish the PFC swap soon and then go put the car on a dyno and see what she's putting down.
I'm also looking forward to finally having all my body parts painted : ). I am also most likely going to have my wheels painted gold. I'm not sure if I'm feeling the black on black anymore. Pics to come!
On a side note, a few friends and I have been working on a free iOS app catering to car enthusiasts. Almost like IG but for car builds and what not. Anyways, not to deter anyone from the forum, but I would love to see some more 7's on there (app name in sig). One of my fave cars on there atm:
And one more pic from another Rotary fanatic:

Thanks for looking and hope to have some nice updates soon!
Looks way better now that you ditched the 4wd stance! I think once you get that shine low profile lip on and the rims painted gold it's going to look awesome. And I agree the USPS fiasco was a clusterF from the very beginning. I sent it 2 day priority with $700 of insurance and they play hot potato with it around ATL for 2+ weeks.
When I was running on that power fc as it is set up now, it gave me the 12-10-12 boost pattern and near perfect but safe afr's across the boost region with the boost setting to .85kg/cm2 which is 12.1 PSI and the wg at 56% on the primary and 64% on the secondary.
I wouldn't go through the idle learn procedure as it will reset the power fc and cause you to loose the map data that is stored in it unless you can get your hands on a datalogit to back up the maps. As your mods are similar to mine you should be able to get a smooth idle by just adjusting the idle bleed screw on the TB I'd think.