
kartdude's TAC build - Japan to UK


Thread Starter
Junior Member
Joined: Mar 2012
Posts: 32
Likes: 0
From: UK
kartdude's TAC build - Japan to UK
Hi everyone,
I've been a long-time lurker of the forum since I bought my first FD in 2009. I'm currently living in Japan, and since living here have had the pleasure/curse of owning four FD's.
I've found out that I'll be moving to the UK this summer, so I've decided to transform my current car to track only duty, and will be trying to become competitive in the UK Time Attack series.
So I've got a lot going on and updates may be sporadic, but here goes:
Current goals:
Get the damn thing running
Current Status:
Old engine still installed
And so commences the penultimate track-car build, by a poor Airman, on a budget, or well as much of one as you can have and still properly work on a still-rotary-powered FD.
I bought this chassis mostly stock w/ a cat-back after I returned from my first deployment, after finding out that my red '93 had been tweaked when it ended up in a ditch.
The Build
Basic rundown of parts acquired and of things to come:
Engine:
13B-REW Large streetport (may go PP if I pop this engine)
MFR drysump - *ON BACKORDER FOR 3 #$%^ MONTHS UNTIL JUNE*
Solid motormounts...of sorts
Air/Fuel:
Aeromotive 340lph in-tank pump (cell will be on the menu for the UK)
1.9L Surge-tank supplying an Aeromotive A1000
Injector Dynamics ID725 & ID2000 injectors on a single Full-Function fuel rail
Xcessive Manufacturing LIM/stock UIM with smoothed runners
Turbo/Exhaust:
Turblown fabricated 321SS fully-divorced single-turbo manifold - bunged for dual EGT thermocouples
Borg Warner S366 T4 flange inlet/v-band outlet - 66mm Inducer diam/.91 A/R turbine housing
Dual Tial MV-S wastegates dumped to atmo
3-1/2" full-exhaust
Ign/ECU:
NGK 10.5 heat plugs
GM LS9 coils x4 in C-N-P configuration
MegaSquirt MS3-X ECU - load:%baro w/real-time ambient baro correction- Internal mods for dual knock sensors and EGT logging and over-temp integration
Suspension:
Aftermarket rear links with spherical bearings
Delrin bushings for all control arms
Custom-valved Fortune Auto 510 shocks w/ Swift springs
Drivetrain/Brakes:
Exedy twin-plate metalic clutch
PAR dog-mesh gear-set
Mazdatrix shifter
Kaaz 1.5-way diff
Transmission/Diff chassis tie-ins
Delrin diff bushings
Type Spirit-R/RZ 314mm factory components with Dixcel cryo'd rotors
ABS-delete kit with bias adjuster (until I get pissed and go multi-MC)
Mazda 929 MC
Misc:
Bride Zeta III Sport-C seats
Takata harnesses
Evans NPG+C waterless coolant
Rotary-works V-mount intercooler/rad setup with a couple mods
Toyo R888's in the 275-ish range on all fours
For the remainder of my time in Japan, things will be simple When I get to the UK, the chassis will be getting stripped for the undercarriage and electrical work, as well as having the rollcage fabricated, and stitch-welding.
Happy to hear all criticisms, both for and against my plans.
Thread Starter
Junior Member
Joined: Mar 2012
Posts: 32
Likes: 0
From: UK
Pics
PICS
The car when I first drove it home

Constructing the ECU


Adding on the dual-channel EGT amplifiers


Dual-ch EGT logging and dual-ch knock inputs

Twin MAP sensors for full-time barometric correction

ID725 & ID2000 from Turbosource, great guys to work with!

Fab work in progress pics from Turblown


A little size comparison once I received the turbo setup

That's it for now!
The car when I first drove it home
Constructing the ECU
Adding on the dual-channel EGT amplifiers
Dual-ch EGT logging and dual-ch knock inputs
Twin MAP sensors for full-time barometric correction
ID725 & ID2000 from Turbosource, great guys to work with!
Fab work in progress pics from Turblown
A little size comparison once I received the turbo setup
That's it for now!
Last edited by kartdude; Feb 22, 2013 at 08:55 AM.


Looking good!


 hello from Huddersfield.
Trending Topics

Thread Starter
Junior Member
Joined: Mar 2012
Posts: 32
Likes: 0
From: UK
Thanks mate! I wont be there until sometime in July though.
Yes there are, and none of them have low mileage, a fresh engine, and electronics that aren't cobbled together!
Half the fun of building a racecar is diving into a corner at 100mph+ knowing that you have touched every single bolt on the car and trust it entirely.
Half the fun of building a racecar is diving into a corner at 100mph+ knowing that you have touched every single bolt on the car and trust it entirely.

Thread Starter
Junior Member
Joined: Mar 2012
Posts: 32
Likes: 0
From: UK
ALRIGHT! Long time no update so here we go.
Been grinding on the car for the whole month of April. Then had to work for a week, now back to the goodies!
Up front I'd like to give a shout-out to Elliot at Turblown Engineering and Nick of Turbosource, who've been a huge help in getting the project spun up to speed so I can get the car shipped off to England!
I finally began stripping the car down, it's a lot easier when you know how little of the factory equipment you plan to use...


Received my seats and rails, direct from Bride here in Japan.

NGK Racing 10.5's 7420s

Aeromotive A1000 and a Stealth 340lph as a lift pump

A package from Pineapple came in with my new engine stand adapter. Getting taped up for cleaning, then re-taped for painting. Which is a pain in the butt compared to painting PRIOR to assembly, I'm sure.

Hung on the hoist, taped up for painting the housings

B&M Cooler and Braille CF AGM battery, w/ the fuel pump for size comparison. That battery weighs only 5.5kgs or about 11 lbs!

Here she is, with everything cleaned up. Not too sure how long the paint will hold up, but looks better than oxidation IMO.

OUT WITH THE OLD!!


Been grinding on the car for the whole month of April. Then had to work for a week, now back to the goodies!
Up front I'd like to give a shout-out to Elliot at Turblown Engineering and Nick of Turbosource, who've been a huge help in getting the project spun up to speed so I can get the car shipped off to England!
I finally began stripping the car down, it's a lot easier when you know how little of the factory equipment you plan to use...
Received my seats and rails, direct from Bride here in Japan.
NGK Racing 10.5's 7420s
Aeromotive A1000 and a Stealth 340lph as a lift pump
A package from Pineapple came in with my new engine stand adapter. Getting taped up for cleaning, then re-taped for painting. Which is a pain in the butt compared to painting PRIOR to assembly, I'm sure.
Hung on the hoist, taped up for painting the housings
B&M Cooler and Braille CF AGM battery, w/ the fuel pump for size comparison. That battery weighs only 5.5kgs or about 11 lbs!
Here she is, with everything cleaned up. Not too sure how long the paint will hold up, but looks better than oxidation IMO.
OUT WITH THE OLD!!
Thread Starter
Junior Member
Joined: Mar 2012
Posts: 32
Likes: 0
From: UK
Back on the stand. Finally received my 60-2 trigger kit from FFE. Fitment is BEAUTIFUL! I highly recommend any of their kits. You can also see the OMP block-off from FFE, which even included SS hardware, just add dimes and sealant. Primary injector block-off kit from Xtreme Rotaries in Australia. SS full engine fastener kit from Himni Racing, as well as copper exhaust nuts from Pineapple, and all new gaskets from Mazda.

Here is my only grief so far; FFE sent me the wrong fuel rail kit, (48mm v. the 60mm kit I ordered) and wouldn't ship me the right ones. I don't have time to hassle them anymore, so I'll make due with some spacers and longer hardware locally. They also stiffed me on the orb fittings for the rail, which I paid for. I must say though that I can pretty easily let that go because their work is very detailed and accurate. All the parts that I've ordered from them so far (trigger kit, fuel rail and OMP b/o plate) are perfect! Also, they were busy at the time getting ready for DGRR, and having issues with their website, but it is back up and running now.

Picked up my exhaust parts from the PO today! Sent them all back to Elliot for full ceramic coating and he talked me into their Inconel heat shielding, and I'm glad he did. After doing a little research on various laminate Inconel sheeting and studies on reduction in radiant heat transfer, I think it will help underhood temps significantly. I know Elliot doesn't waste his time with things that don't work!

Paint came out pretty well, new knock sensors as well.

My buddy Tim has never been around a modded turbo car before, so he was in shock of the size of the 366.

Working on mock-up a bit, making sure everything still fit. Spent a few hours getting the #1 rotor waste-gate dump to fit after getting the manifold shielded.

Sorry the pics are pretty crappy, I don't wanna waste garage time by getting out my real camera but here's a pic after putting the clutch on.

Got the trans all cleaned up, clutch parts greased up, new pilot & throw-out bearings etc. etc.

Part of stripping the car out was cleaning the dash beam and hitting it with some Rustoleum.

Here it is back in the car. I must say that getting the majority of the insulation and tar out with dry ice was a cinch, using an air chisel. The tar used on the trans tunnel in the rear seat area and the tar in the back end of the car seems to be a different material and didn't clean out as well/easily as the front. When I get to England, I hope to get the chassis properly media-blasted, if not dipped, to clean everything off the right way.

Here is my only grief so far; FFE sent me the wrong fuel rail kit, (48mm v. the 60mm kit I ordered) and wouldn't ship me the right ones. I don't have time to hassle them anymore, so I'll make due with some spacers and longer hardware locally. They also stiffed me on the orb fittings for the rail, which I paid for. I must say though that I can pretty easily let that go because their work is very detailed and accurate. All the parts that I've ordered from them so far (trigger kit, fuel rail and OMP b/o plate) are perfect! Also, they were busy at the time getting ready for DGRR, and having issues with their website, but it is back up and running now.
Picked up my exhaust parts from the PO today! Sent them all back to Elliot for full ceramic coating and he talked me into their Inconel heat shielding, and I'm glad he did. After doing a little research on various laminate Inconel sheeting and studies on reduction in radiant heat transfer, I think it will help underhood temps significantly. I know Elliot doesn't waste his time with things that don't work!
Paint came out pretty well, new knock sensors as well.
My buddy Tim has never been around a modded turbo car before, so he was in shock of the size of the 366.
Working on mock-up a bit, making sure everything still fit. Spent a few hours getting the #1 rotor waste-gate dump to fit after getting the manifold shielded.
Sorry the pics are pretty crappy, I don't wanna waste garage time by getting out my real camera but here's a pic after putting the clutch on.
Got the trans all cleaned up, clutch parts greased up, new pilot & throw-out bearings etc. etc.
Part of stripping the car out was cleaning the dash beam and hitting it with some Rustoleum.
Here it is back in the car. I must say that getting the majority of the insulation and tar out with dry ice was a cinch, using an air chisel. The tar used on the trans tunnel in the rear seat area and the tar in the back end of the car seems to be a different material and didn't clean out as well/easily as the front. When I get to England, I hope to get the chassis properly media-blasted, if not dipped, to clean everything off the right way.
Thread Starter
Junior Member
Joined: Mar 2012
Posts: 32
Likes: 0
From: UK
BTW, I ordered every -4AN fitting Summit had ever stocked...I put MYSELF on backorder for a few things. "16 of the 20 -4AN hose ends you've ordered are in stock, we will notify you when the remainder become available..."


My order was also TOO BIG to process through Summit's online ordering system. I have ordered a lot of stuff before but never received this message before! BE IMPRESSED, you should be!

And my suspension goodness came in from Fortune Auto, but it won't be going on the car for shipment. And new hardware from Mazdatrix

Finally satisfied with fitment of the WG dumps and some of the other goodies. Awaiting implantation!

Mated and ready to go.

One-man job without all the REW baggage hanging off the right side of the engine!

In like Flynt.

Had to chase the 1/8" NPT threads on the aftermarket temp sensor, and also had to modify the new pedestal adapter to fit a -10 fitting. Using the proper 1/8"BST/NPT adapter for the pressure sensor FTW!

Now the challenging part of getting the car together. Mocking up EVERYTHING else! I'm using the v-mount kit from Rotary Works, but modifying how everything is mounted and plumbed quite a bit.

Sawsall time as I shift the intercooler over to make room for the airbox.

My order was also TOO BIG to process through Summit's online ordering system. I have ordered a lot of stuff before but never received this message before! BE IMPRESSED, you should be!
And my suspension goodness came in from Fortune Auto, but it won't be going on the car for shipment. And new hardware from Mazdatrix
Finally satisfied with fitment of the WG dumps and some of the other goodies. Awaiting implantation!
Mated and ready to go.
One-man job without all the REW baggage hanging off the right side of the engine!
In like Flynt.
Had to chase the 1/8" NPT threads on the aftermarket temp sensor, and also had to modify the new pedestal adapter to fit a -10 fitting. Using the proper 1/8"BST/NPT adapter for the pressure sensor FTW!
Now the challenging part of getting the car together. Mocking up EVERYTHING else! I'm using the v-mount kit from Rotary Works, but modifying how everything is mounted and plumbed quite a bit.
Sawsall time as I shift the intercooler over to make room for the airbox.
Thread Starter
Junior Member
Joined: Mar 2012
Posts: 32
Likes: 0
From: UK
A few gussets were harmed in the making of this fitment...

I really wish my bumper was here from Uras so I could drop the front edge of the radiator as low as possible, but I can always change/fix that later.

That bellmouth will become part of the airbox, I have it fitted on the compressor just as a visual reference for the time being. Another cool fact: I'm running the air filter from a McLaren F1...

Here's a couple pics of my WP housing all cleaned up with my fittings tapped and welded. Air pump mounting cut of and smoothed out as well.


My '99-spec UIM/extension manifold prepped up for use on this engine, welded the IACV area shut, not sure now if I would do that again, but I have another if I need it. I also pulled out all the hose nipples and welded -4AN bungs for feeding the signal everywhere it needs to go. I like everything to look clean, which to me means no random hoses. Everything underhood I want to keep all -AN as much as possible.

Here's the FFE fuel rail in with the ID 725 and 2000 injectors, also note the spacer I had to have for it!

Checking fitment with the Tweak-It idler pulley. Measured the new belt length with a piece of lamp cord, and it looks like a perfect fit so far.

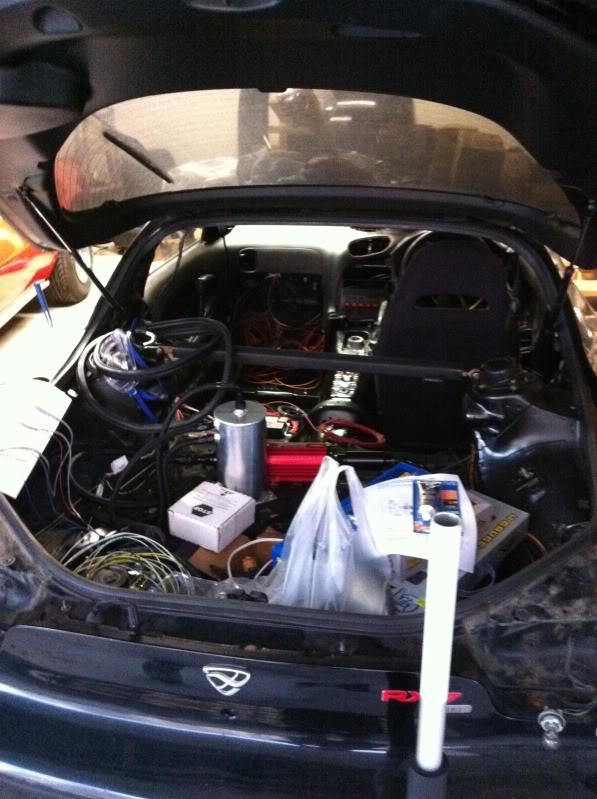
Working on mocking up the remaining plumbing, and until I have the chassis apart in the UK and these go where the ABS is currently, they'll find a home here. HAHA

The goal is to have the car running in a week, maybe this weekend, we'll see. Stay Tuned!
And I'd love some feedback and healthy criticism, but keep in mind, at this point, our only focus is to get the car running/drive-able!
I really wish my bumper was here from Uras so I could drop the front edge of the radiator as low as possible, but I can always change/fix that later.
That bellmouth will become part of the airbox, I have it fitted on the compressor just as a visual reference for the time being. Another cool fact: I'm running the air filter from a McLaren F1...
Here's a couple pics of my WP housing all cleaned up with my fittings tapped and welded. Air pump mounting cut of and smoothed out as well.
My '99-spec UIM/extension manifold prepped up for use on this engine, welded the IACV area shut, not sure now if I would do that again, but I have another if I need it. I also pulled out all the hose nipples and welded -4AN bungs for feeding the signal everywhere it needs to go. I like everything to look clean, which to me means no random hoses. Everything underhood I want to keep all -AN as much as possible.
Here's the FFE fuel rail in with the ID 725 and 2000 injectors, also note the spacer I had to have for it!
Checking fitment with the Tweak-It idler pulley. Measured the new belt length with a piece of lamp cord, and it looks like a perfect fit so far.
Working on mocking up the remaining plumbing, and until I have the chassis apart in the UK and these go where the ABS is currently, they'll find a home here. HAHA
The goal is to have the car running in a week, maybe this weekend, we'll see. Stay Tuned!
And I'd love some feedback and healthy criticism, but keep in mind, at this point, our only focus is to get the car running/drive-able!
Last edited by kartdude; May 13, 2013 at 04:29 AM.
Thread Starter
Junior Member
Joined: Mar 2012
Posts: 32
Likes: 0
From: UK
Thread Starter
Junior Member
Joined: Mar 2012
Posts: 32
Likes: 0
From: UK
First crank over was tonight. MegaSquirt3/MS3X with an entire car wired from scratch, I was anticipating an issue or two, but so far all checks are good. Took a lot longer to build oil pressure than I had imagined, about 6-7 10 second cranks. Otherwise, all sensor inputs, crank signal, wiring looks good, and I go for fire in the morning!
Thread Starter
Junior Member
Joined: Mar 2012
Posts: 32
Likes: 0
From: UK
 haters
Thread Starter
Junior Member
Joined: Mar 2012
Posts: 32
Likes: 0
From: UK
Well, with my wonderfully feeble attempt at posting a vid from Facebook, I am now in the UK.
I've had the car here for a couple months, and have it free-revving nicely. At this point I'm waiting to hear back from a local fab shop about when they can take her in for the cage work, and in the meantime, I've started modeling the car so that I can do some CFD (computational fluid dynamics) work (i.e. aerodynamics)
Hope to have this pig on the rollers in January!!!

Thread
Thread Starter
Forum
Replies
Last Post
[For Sale] Scratch & Dent, Used, and Open-Box Sale!
SakeBomb Garage
Vendor Classifieds
5
Aug 9, 2018 05:54 PM