Howard's Build Thread
 09-18-13, 05:45 PM
#1
Howard's Build Thread
I thought now would be a good time to start a build thread as I’ve decided to do a lengthy overhaul of my rx7, and I'm sure I will need help along the way.
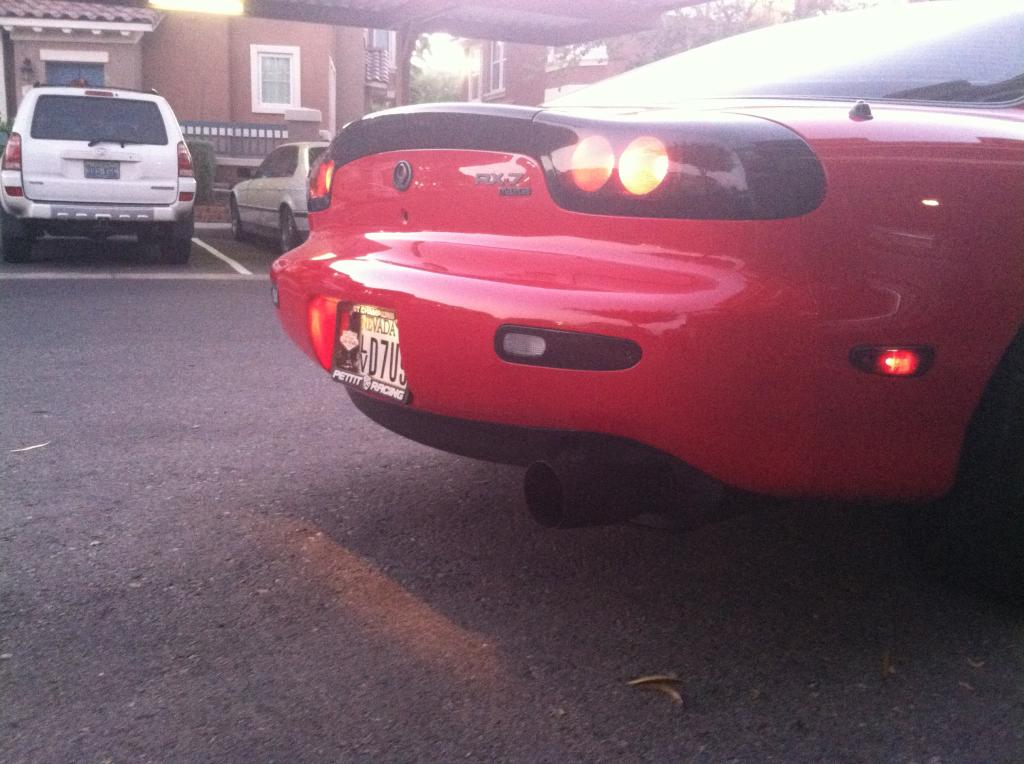
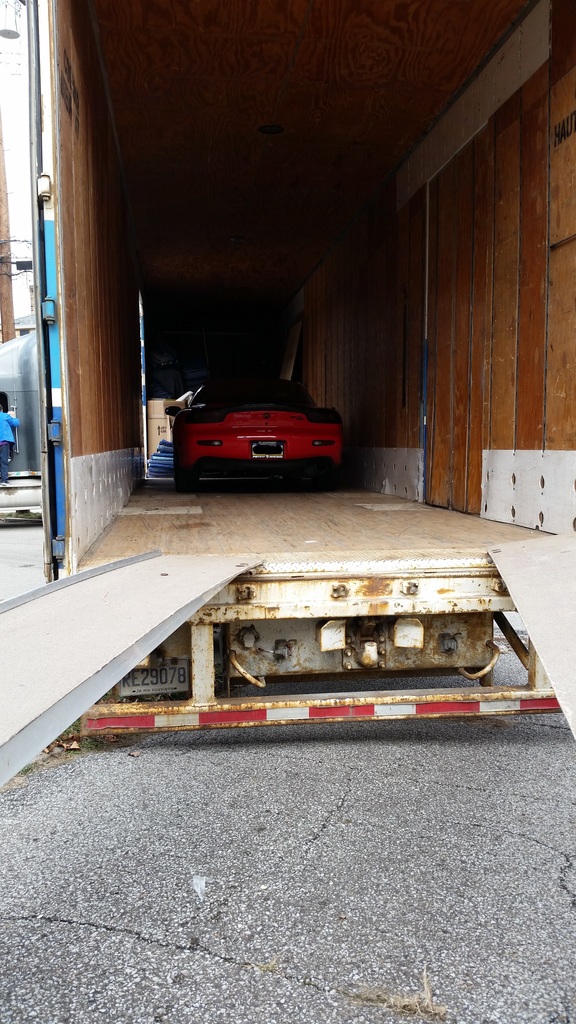
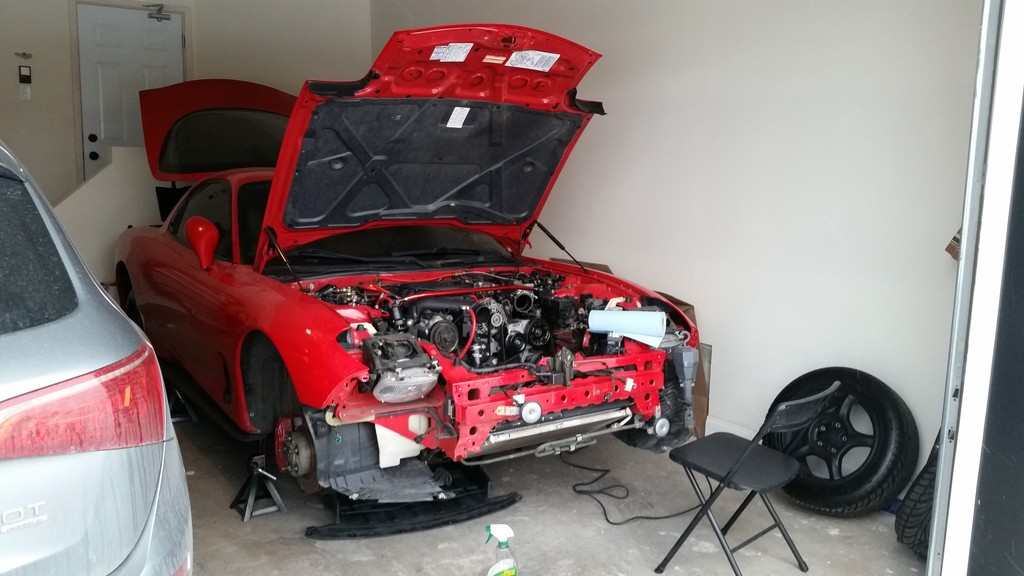
This is my rx7 “Howard”. He’s a ’93 VR Base model with Tan Leather interior. The name Howard is in tribute to the original owner who was a family friend who truly loved the FD. Sadly he passed away several years ago, but it’s also how the 7 came to be in my life. This is how he looked when I picked him up with 34k miles:
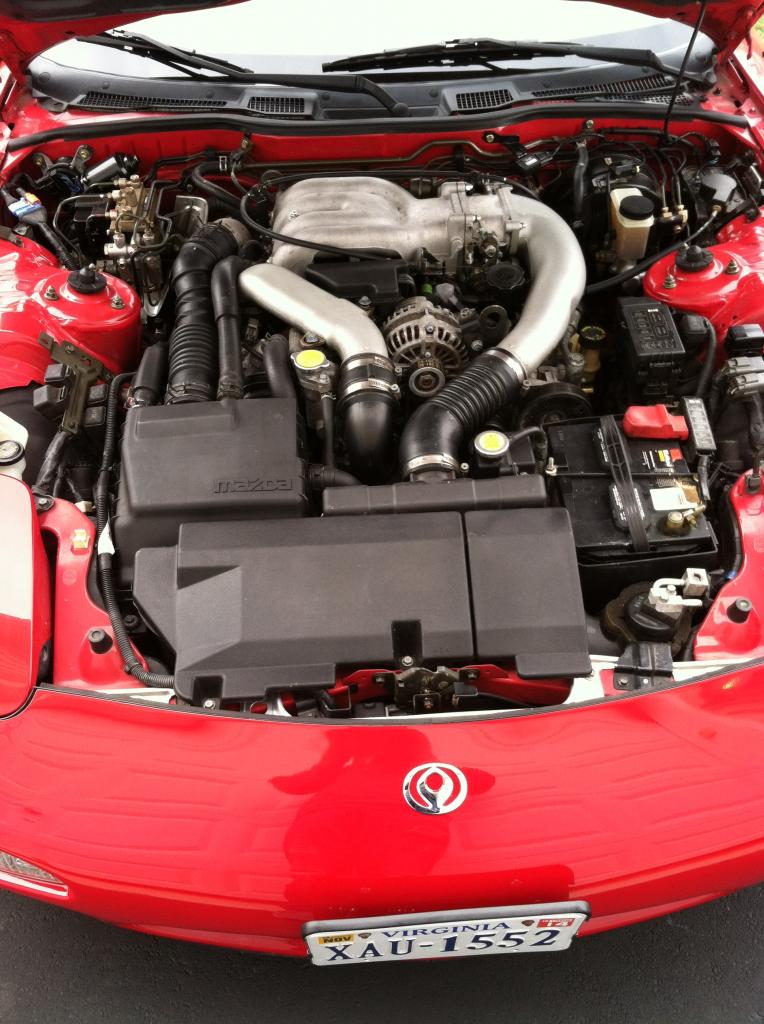
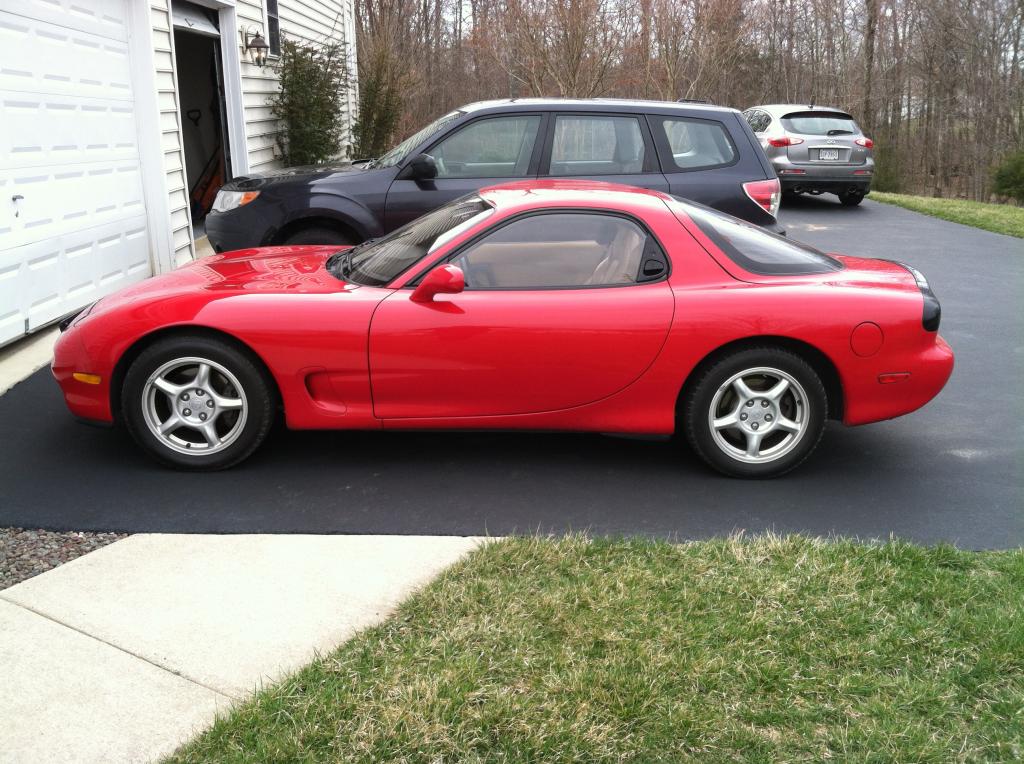
This is how he sat before I started the tear down:

http://i1023.photobucket.com/albums/...ps55950ad4.jpg
The reason behind this build is like many before me. Put it up on jacks to fix something little, an exhaust leak, and got carried away. So the current mods in the car are as follows:
• Power FC w/ commander (The latest)
• Tanabe Front Strut Tower Bar
• Pettit Black “Street” Diff Mounts
• Bonez 3” Downpipe (ceramic coated)
• K&N drop in filter
• Silicone Hose Job (Hi-Performance Store Hose)
• Autometer mechanical boost and water temp gauges
• Autometer dual a-pillar gauge pod (Warped, Thanks Vegas heat)
• Rx7store short shifter
• Optima yellow top battery
• Silicone Radiator Hoses
• Shine Auto FEED replica side skirts
• R1 Lip
• e-Bay smoked front lights
• 99 converted tail lights
• Smoked Turn indicators
I’ve slowly been collecting parts since I got the car to give it a good overhaul once I was sure of the route I was going to take.
My goal for the car is to get as much reliable power out of the sequential twins as possible while improving the short falls of Mazda. Shooting for 300+ whp for now. Aesthetically I plan to keep the car very close to stock while accenting the features I really love about the car. I’ve never raced at a track, drag or otherwise, and I don’t have any current plans to with this car. So with that in mind, I wanted power without sacrificing creature comforts like a/c and not smelling my exhaust. Although not in the immediate plans the suspension will be upgraded while keeping it streetable.
The list of intended mods:
• High Flow Cat
• Cat-back
• Greddy Profec B Boost Controller
• Apexi Spec II BOV (I have a little ricer in me)
• Koyo N-Flow Radiator
• AST delete
• Apexi Power Intakes
• Hard intake pipes
• Efini y-Pipe
• Dual Oil Coolers with braided lines
• AWS and double throttle delete (Block-off Plates)
• Dedicated Fuel Pump Power Supply
• Fast Acting IAT sensor
And after getting my downpipe ceramic coated I’ve been thinking of anything and everything I can get coated.
Down the line I plan on putting in a FMIC, water/meth injection, and suspension upgrades. Along with some body and interior upgrade/changes, but those I’ll keep to myself for now.
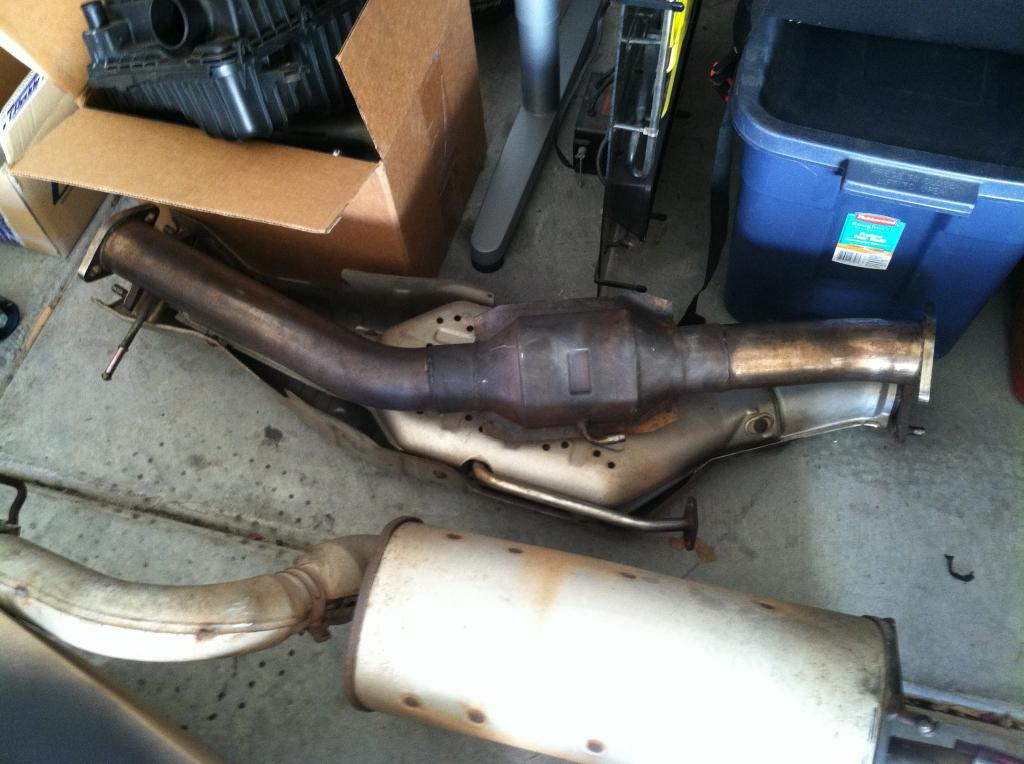
So I started working the old exhaust off and ran into one of my less than admirable decisions. When I installed the down pipe I never test fit it against all the flanges. I had it all mounted up to the exhaust manifold before I tried to bolt up the main cat. Then when I went to fit it up the holes, they weren’t even close. The hole spacing on the down pipe was a full stud diameter too tight; the studs on the main cat were flared out. A few hours later with a round file I had opened up the holes just enough to slide studs to the edge and get a nut started. I then worked the nuts down as much as I could until I felt I had a tight seal. Well surprise, that is exactly where I had my exhaust leak. So I got my breaker bar and started working the nuts back off. At first it wasn’t too bad, but it quickly got harder. Towards the end I was using my full force to turn the breaker bar until “SNAP!” I had sheared the bolt off right at the down pipe flange. The same thing happened on the driver side nut. But hey, at least they were off.
I picked up an Efini y-pipe off the forum to swap out the kinked oem piece. I'll be taking it to get ceramic coated along with a few other things later this week. So I got to work tearing it down and sanding out the inside tracts so there would be smooth air flow. I wanted all the major veins and impressions gone before it got blasted for coating. By the time I was done I looked like the tin man.

Right now the exhaust is all unbolted and the air intake, piping, and oem y-pipe are all removed. That's where I left it last night. Tonight I'll get the exhaust out from under the car and start the extensive cleaning the engine bay needs.
This is my rx7 “Howard”. He’s a ’93 VR Base model with Tan Leather interior. The name Howard is in tribute to the original owner who was a family friend who truly loved the FD. Sadly he passed away several years ago, but it’s also how the 7 came to be in my life. This is how he looked when I picked him up with 34k miles:
This is how he sat before I started the tear down:
http://i1023.photobucket.com/albums/...ps55950ad4.jpg
The reason behind this build is like many before me. Put it up on jacks to fix something little, an exhaust leak, and got carried away. So the current mods in the car are as follows:
• Power FC w/ commander (The latest)
• Tanabe Front Strut Tower Bar
• Pettit Black “Street” Diff Mounts
• Bonez 3” Downpipe (ceramic coated)
• K&N drop in filter
• Silicone Hose Job (Hi-Performance Store Hose)
• Autometer mechanical boost and water temp gauges
• Autometer dual a-pillar gauge pod (Warped, Thanks Vegas heat)
• Rx7store short shifter
• Optima yellow top battery
• Silicone Radiator Hoses
• Shine Auto FEED replica side skirts
• R1 Lip
• e-Bay smoked front lights
• 99 converted tail lights
• Smoked Turn indicators
I’ve slowly been collecting parts since I got the car to give it a good overhaul once I was sure of the route I was going to take.
My goal for the car is to get as much reliable power out of the sequential twins as possible while improving the short falls of Mazda. Shooting for 300+ whp for now. Aesthetically I plan to keep the car very close to stock while accenting the features I really love about the car. I’ve never raced at a track, drag or otherwise, and I don’t have any current plans to with this car. So with that in mind, I wanted power without sacrificing creature comforts like a/c and not smelling my exhaust. Although not in the immediate plans the suspension will be upgraded while keeping it streetable.
The list of intended mods:
• High Flow Cat
• Cat-back
• Greddy Profec B Boost Controller
• Apexi Spec II BOV (I have a little ricer in me)
• Koyo N-Flow Radiator
• AST delete
• Apexi Power Intakes
• Hard intake pipes
• Efini y-Pipe
• Dual Oil Coolers with braided lines
• AWS and double throttle delete (Block-off Plates)
• Dedicated Fuel Pump Power Supply
• Fast Acting IAT sensor
And after getting my downpipe ceramic coated I’ve been thinking of anything and everything I can get coated.
Down the line I plan on putting in a FMIC, water/meth injection, and suspension upgrades. Along with some body and interior upgrade/changes, but those I’ll keep to myself for now.
So I started working the old exhaust off and ran into one of my less than admirable decisions. When I installed the down pipe I never test fit it against all the flanges. I had it all mounted up to the exhaust manifold before I tried to bolt up the main cat. Then when I went to fit it up the holes, they weren’t even close. The hole spacing on the down pipe was a full stud diameter too tight; the studs on the main cat were flared out. A few hours later with a round file I had opened up the holes just enough to slide studs to the edge and get a nut started. I then worked the nuts down as much as I could until I felt I had a tight seal. Well surprise, that is exactly where I had my exhaust leak. So I got my breaker bar and started working the nuts back off. At first it wasn’t too bad, but it quickly got harder. Towards the end I was using my full force to turn the breaker bar until “SNAP!” I had sheared the bolt off right at the down pipe flange. The same thing happened on the driver side nut. But hey, at least they were off.
I picked up an Efini y-pipe off the forum to swap out the kinked oem piece. I'll be taking it to get ceramic coated along with a few other things later this week. So I got to work tearing it down and sanding out the inside tracts so there would be smooth air flow. I wanted all the major veins and impressions gone before it got blasted for coating. By the time I was done I looked like the tin man.
Right now the exhaust is all unbolted and the air intake, piping, and oem y-pipe are all removed. That's where I left it last night. Tonight I'll get the exhaust out from under the car and start the extensive cleaning the engine bay needs.

 09-18-13, 06:47 PM
#3
Full Member
iTrader: (8)

Join Date: Sep 2012
Location: CA
Posts: 176
Likes: 0
Received 0 Likes
on
0 Posts
How do you like the Pettit Black Street Diff Mounts? Been thinking about getting those but don't really know if I want to deal with the increased noise or go with polyurethane diff bushing.
09-18-13, 07:00 PM
#4
As far as road noise, yeah it gets a "little" louder. But unless you drive on glass with pillows for tires these cars give a good bit of road noise in the cab to begin with. If you like a stiffer more responsive car you have to sacrifice somewhere. But if you're like me, a little extra grumble from the back is worth it.
 09-23-13, 09:55 AM
#6
Made some progress this Sunday. Working 6 days a week doesn't leave me much time to get to work.
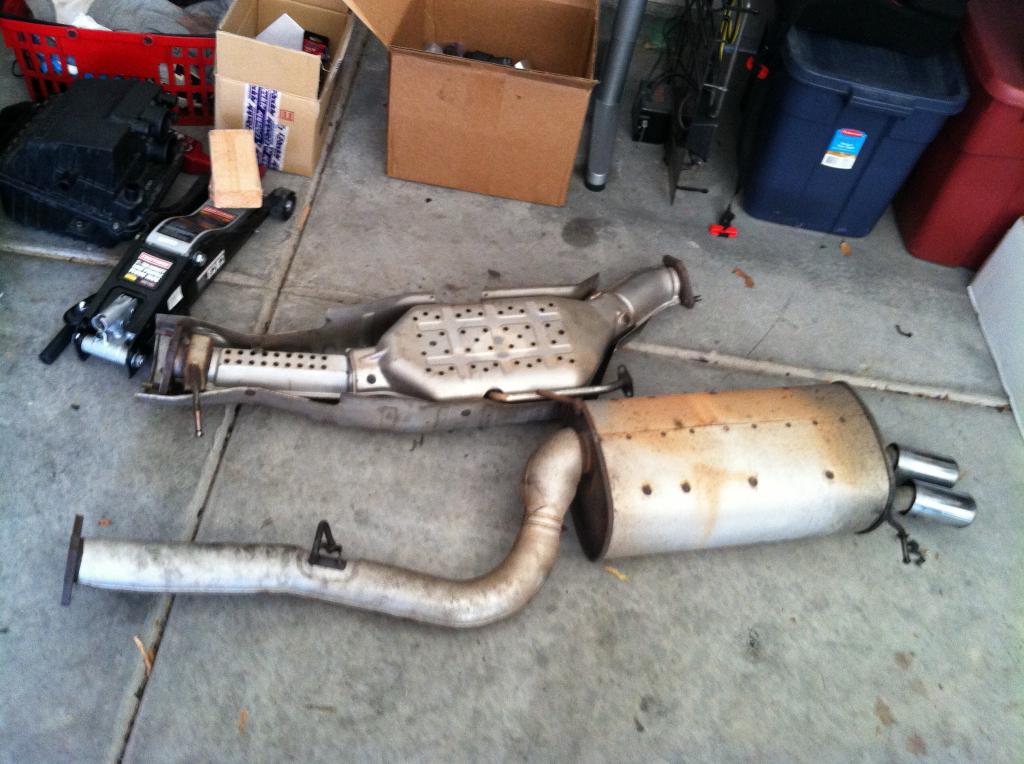
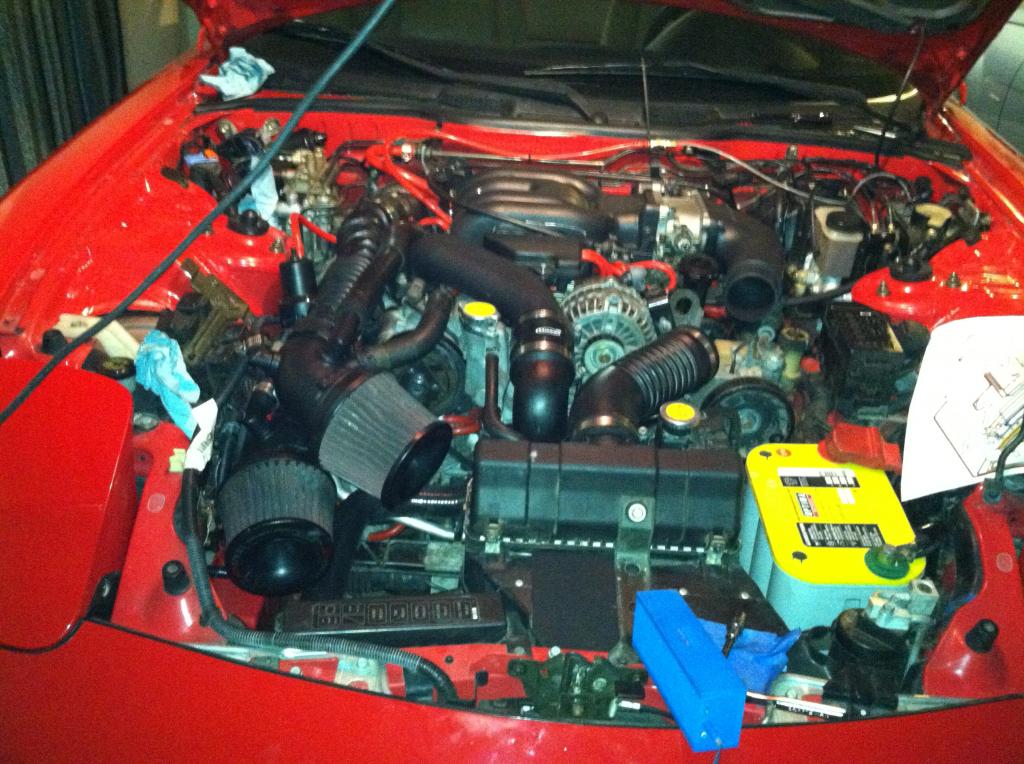
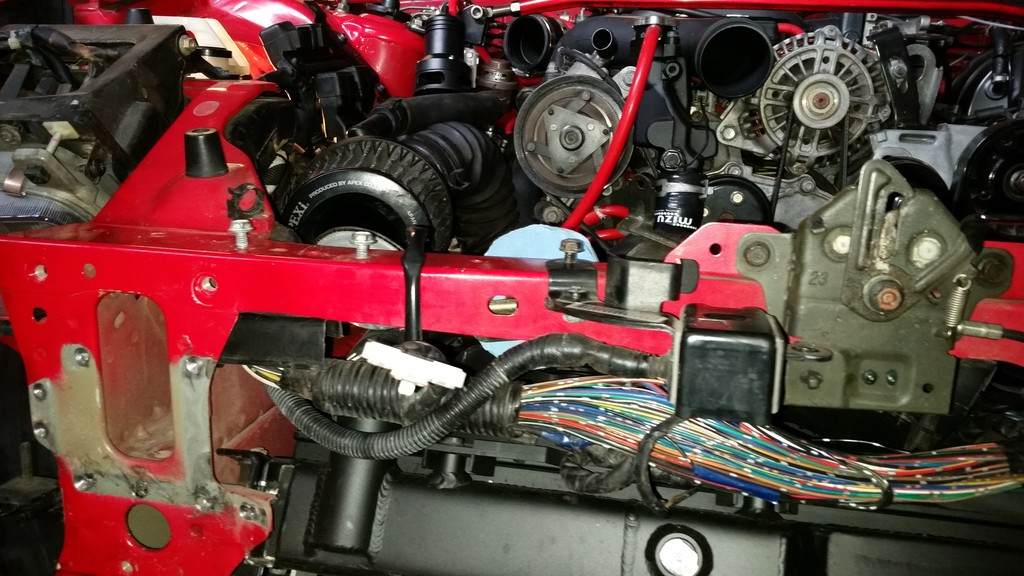
Got the exhaust out from under car. Main cat was in pretty good shape. From the looks of the gaskets and flanges, looks like I had a leak at both connections though.
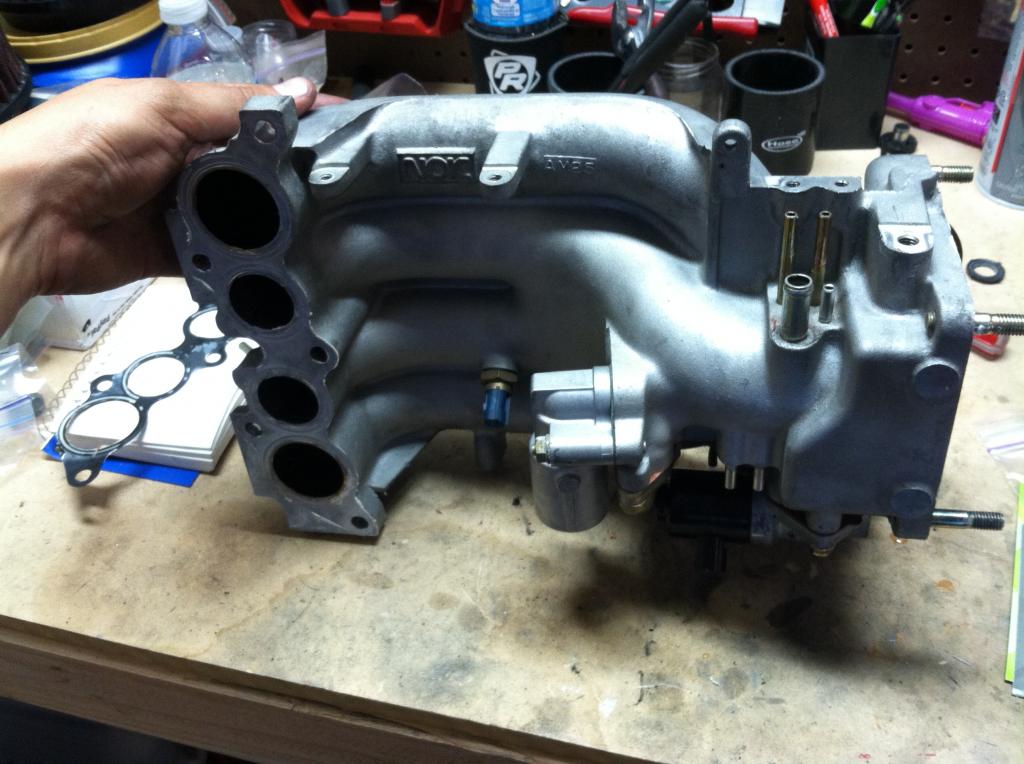
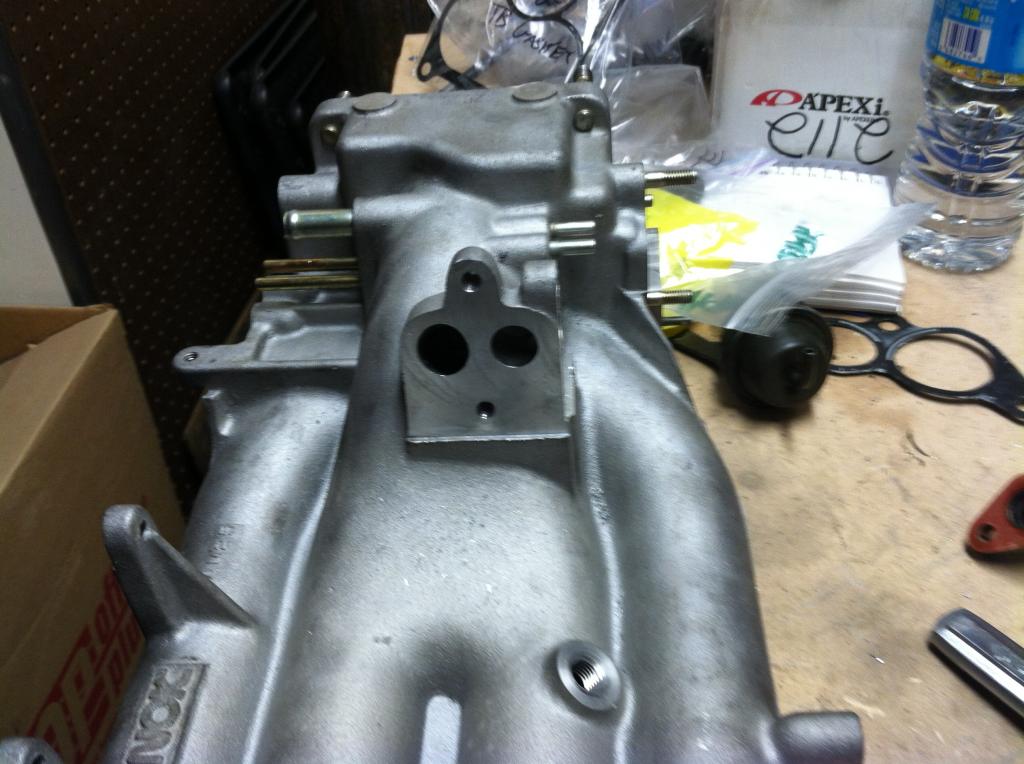
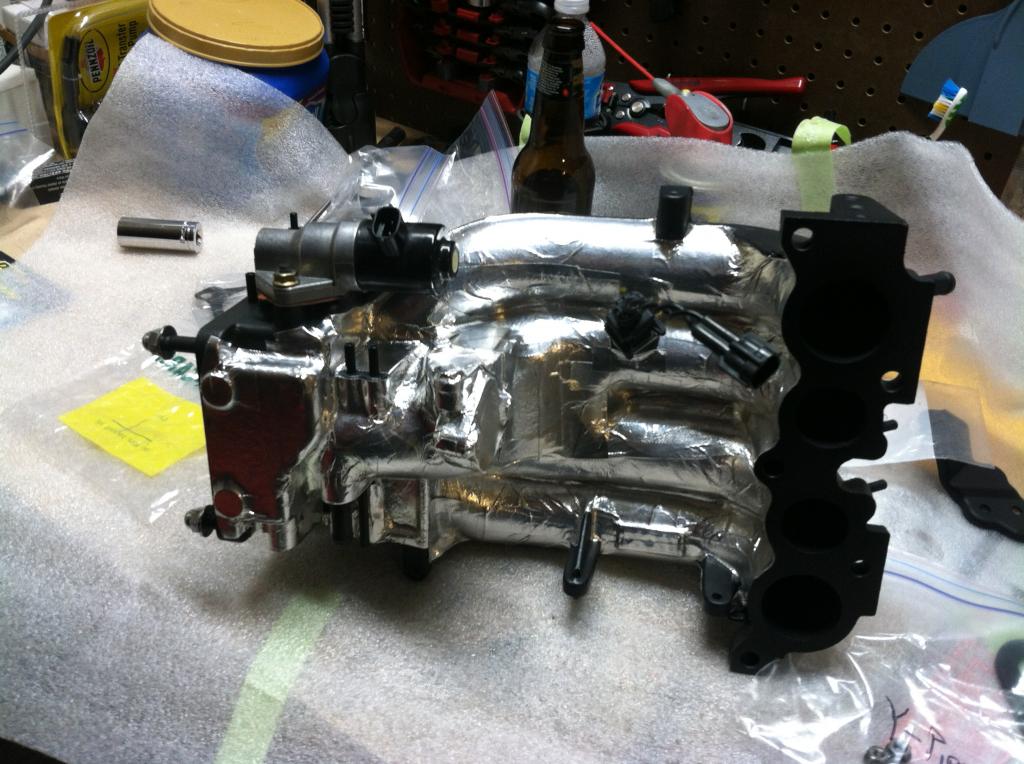
Got the UIM removed.
Removed the double throttle butterflies and actuator, along with the AWS solenoid and tube. I ordered a Triumph AIT faster acting sensor and the Wannaspeed adapter so I removed the OEM sensor. I'll be keeping the ISC because I don't plan to remove the A/C. All other studs were removed. Now with everything off, it's ready to be coated.
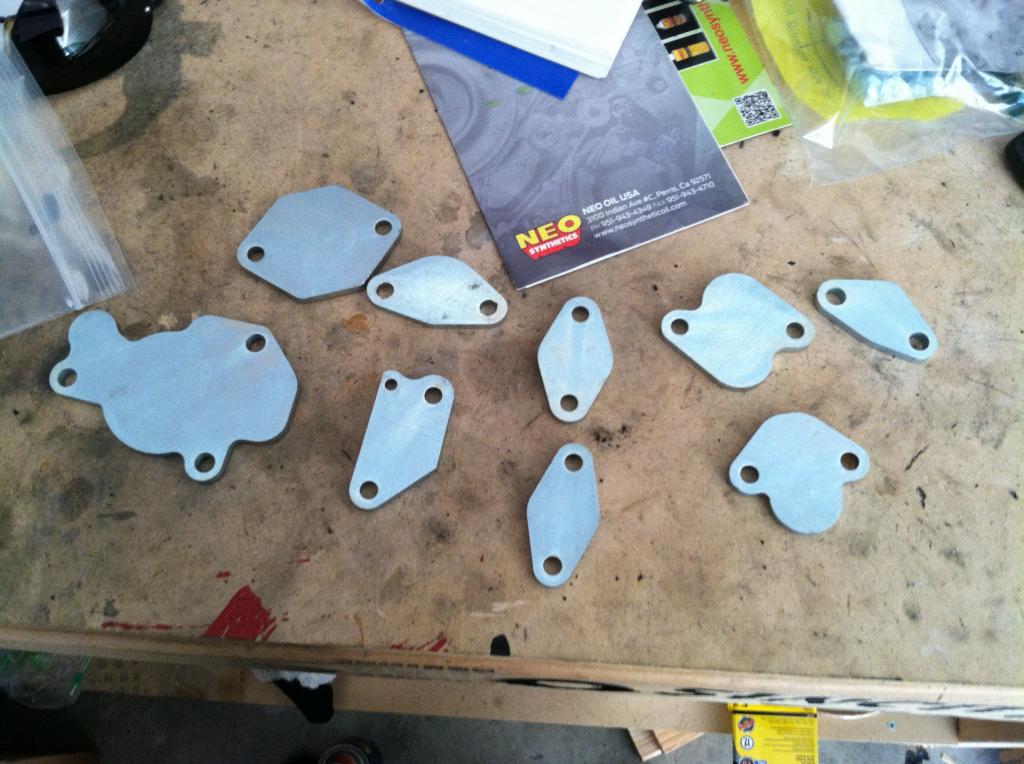
Block-off plates from Banzai Racing arrived. These will get coated as well. Can't be having shiny silver plates on an otherwise black engine.
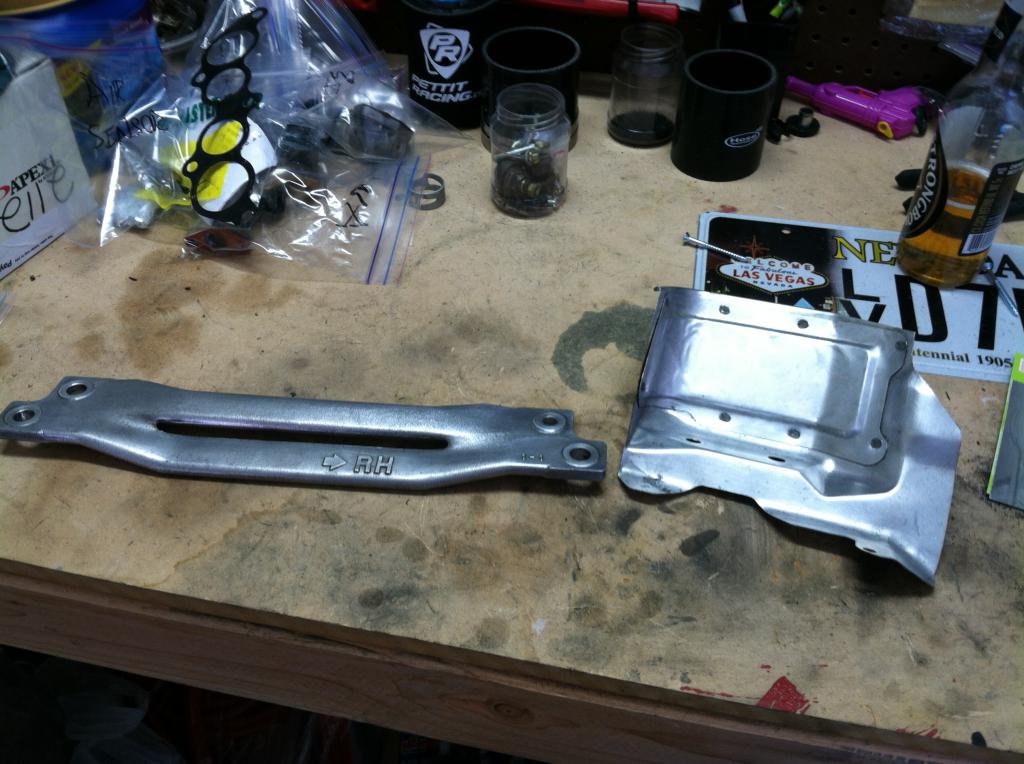
Started cleaning some miscellaneous parts before putting them back on. (Frame brace at Cat and ABS heat shield)
Before:
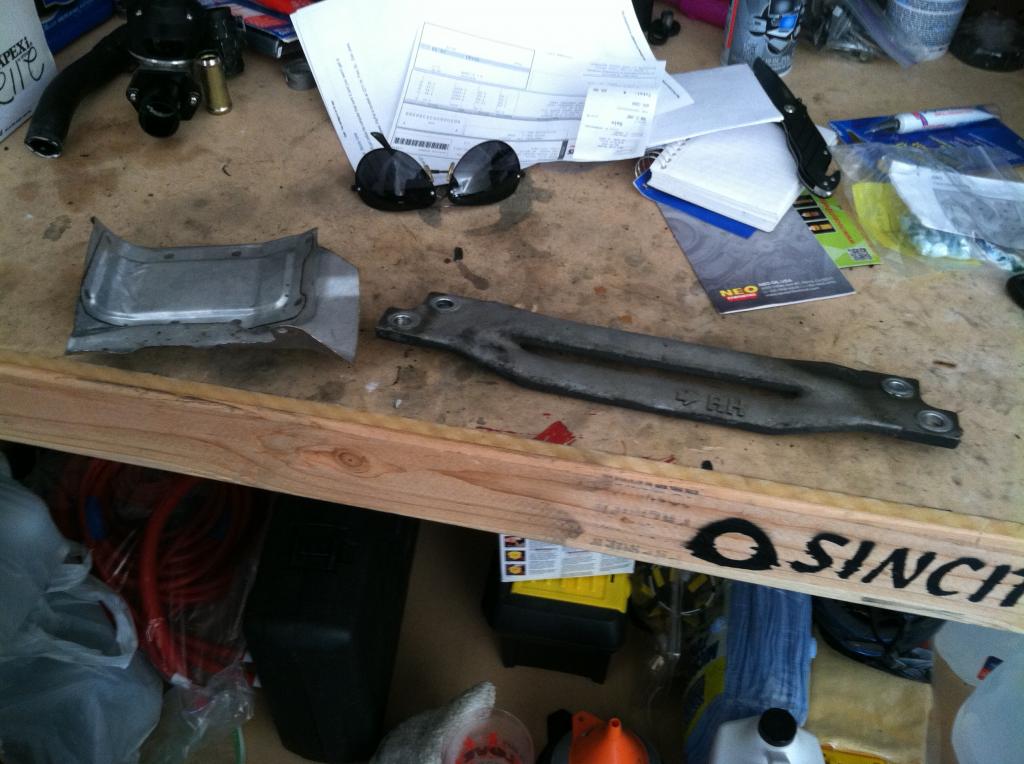
After:
I also got the throttle body off and started prepping that to get painted. Testing out a few different high temp paints to get the color I want. I bought some sheet metal squares from home depot to give me an idea of what they'll look like.
Got the exhaust out from under car. Main cat was in pretty good shape. From the looks of the gaskets and flanges, looks like I had a leak at both connections though.
Got the UIM removed.
Removed the double throttle butterflies and actuator, along with the AWS solenoid and tube. I ordered a Triumph AIT faster acting sensor and the Wannaspeed adapter so I removed the OEM sensor. I'll be keeping the ISC because I don't plan to remove the A/C. All other studs were removed. Now with everything off, it's ready to be coated.
Block-off plates from Banzai Racing arrived. These will get coated as well. Can't be having shiny silver plates on an otherwise black engine.
Started cleaning some miscellaneous parts before putting them back on. (Frame brace at Cat and ABS heat shield)
Before:
After:
I also got the throttle body off and started prepping that to get painted. Testing out a few different high temp paints to get the color I want. I bought some sheet metal squares from home depot to give me an idea of what they'll look like.

Trending Topics
09-26-13, 05:25 PM
#8
Spent some time cleaning up the engine bay the last couple of days. Got the first batch of parts back from being coated.
And gathered up the next batch to be coated.
99aff993-d784-41bd-beb7-6ab414b53e83_zps8cacdd03.jpg?t=1380234133
Heading back home to Pittsburgh for a few days, but looking forward to tackling this project and getting Howard back on the road once I'm back.
And gathered up the next batch to be coated.
99aff993-d784-41bd-beb7-6ab414b53e83_zps8cacdd03.jpg?t=1380234133
Heading back home to Pittsburgh for a few days, but looking forward to tackling this project and getting Howard back on the road once I'm back.
09-26-13, 11:54 PM
#10
My dp has held up pretty well. But matte black with red lines and accents was the plan for under the hood. I'm still doing some research for what intercooler I'm going to run. I like the fitment of the ETS. I want a front mount, love the look and has the capacity for when I eventually go single. I'll probably limit the boost to 11 psi till I upgrade.
10-07-13, 10:52 AM
#11
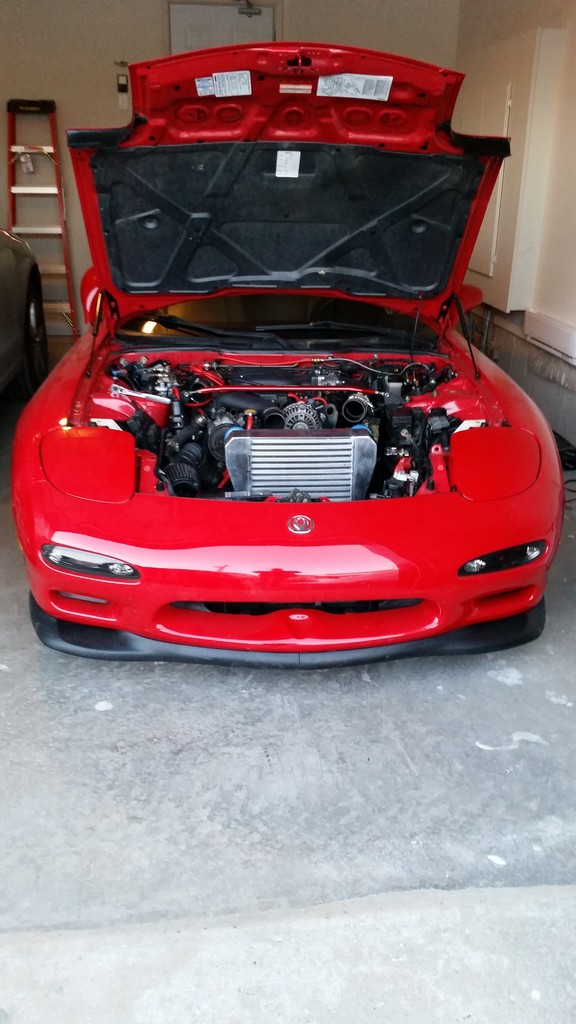
Finally have some updates! I've been working 6 days a week and running around like a mad man on my one day off, but I finally took a Sunday to myself to get the car together again. I was hoping to tackle a few other projects during this partial tear down, but with this busy work schedule I can't justify prolonging the time off the streets. So I made the push to get it all back together.
Got all my parts back from different batches of coating.
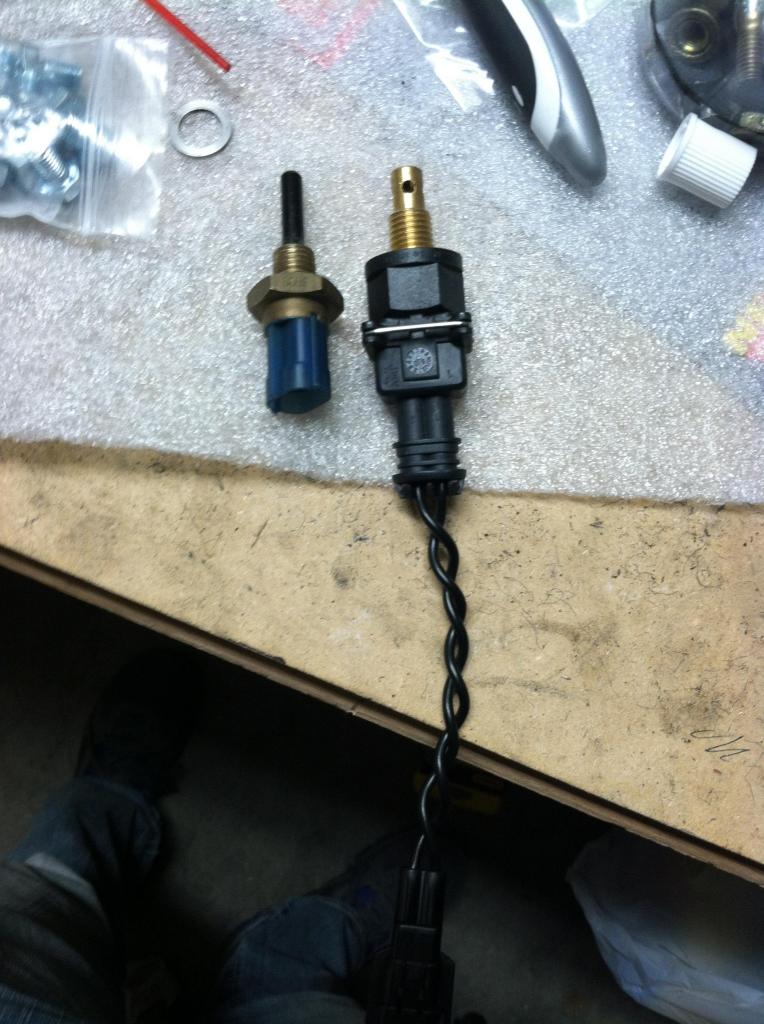
Got in a few new (or to me) parts. Fast-acting IAT with Wannaspeed adapter and Bonez High Flow CAT.
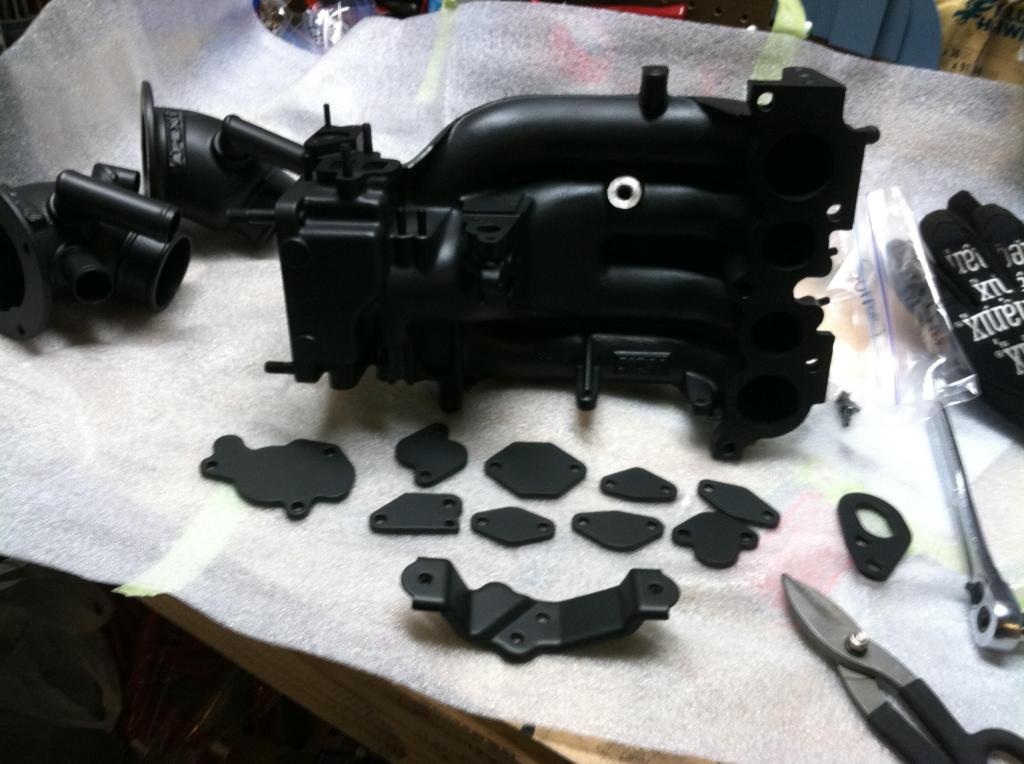
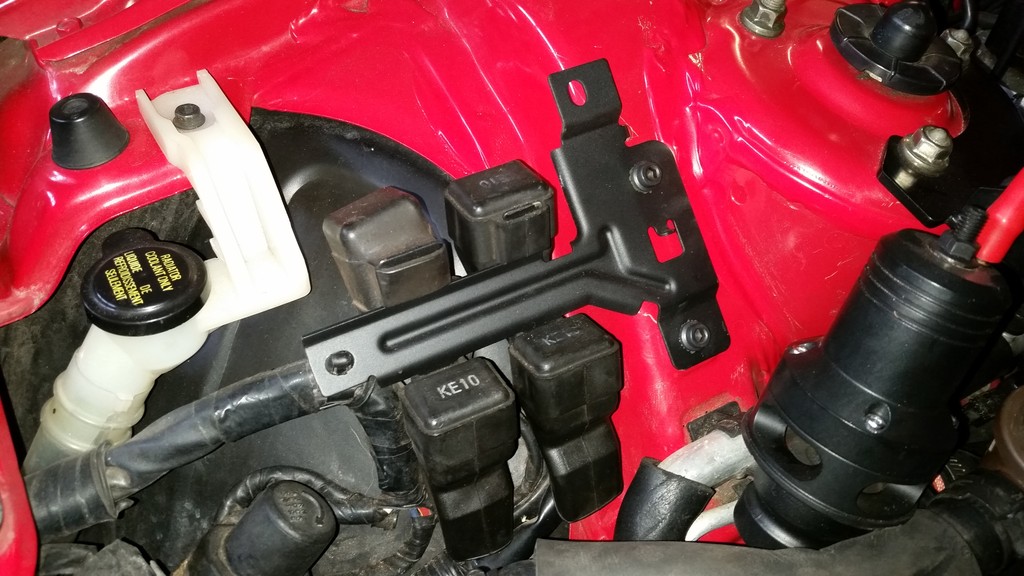
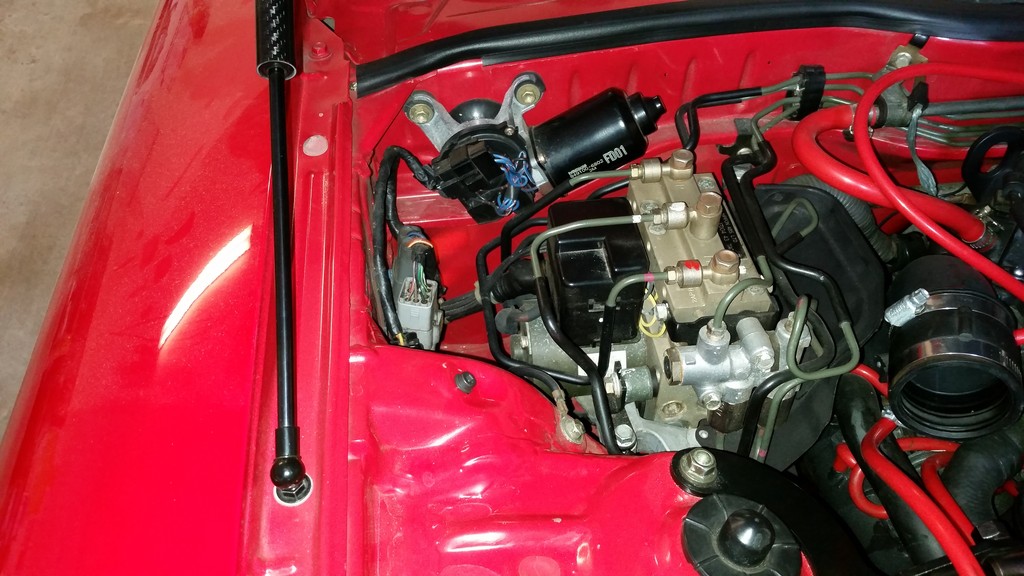
Installed the block off plates for the double throttle and the AWS, and installed the IAT on the UIM.

Then started the slow process of cool-taping the UIM. That was a much more labor intensive project than I had thought it'd be.
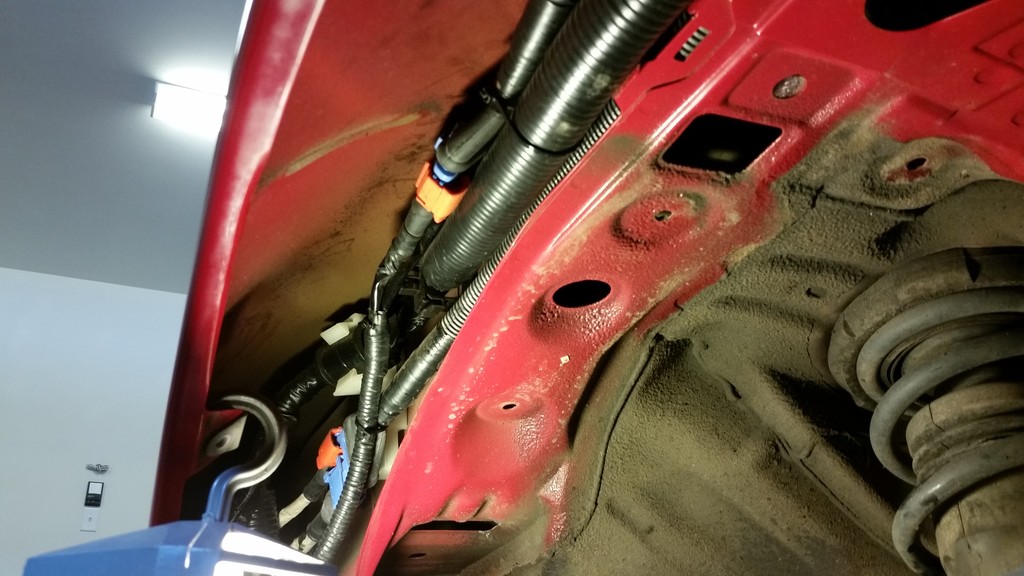
On the plus side of this tear down I located my aggravating coolant leak. I kept getting air in the system and slowly would lose coolant. All cleaned up fresh silicone and tape and I made sure to clamp it down to really get the barbs threaded on tight.

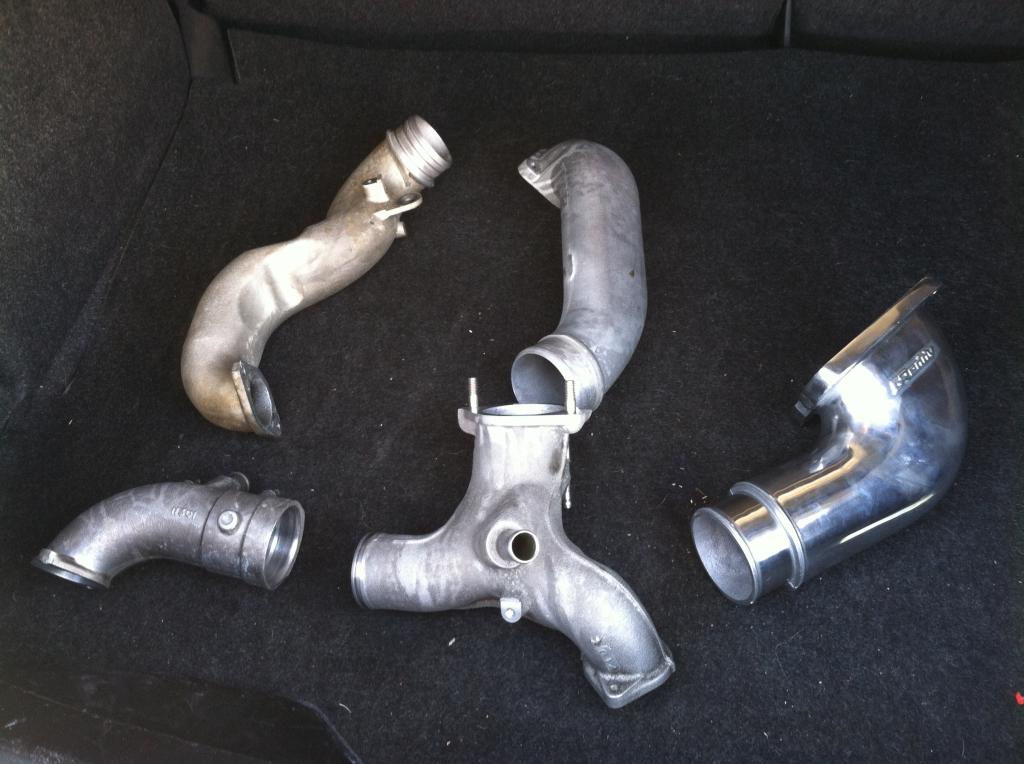
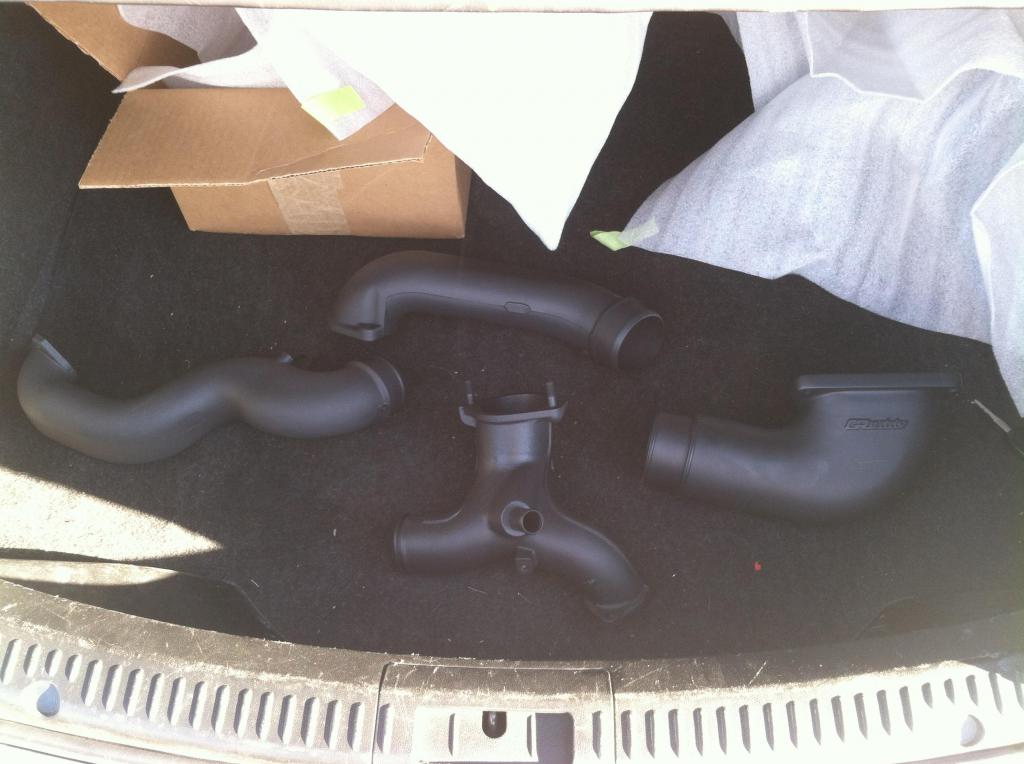
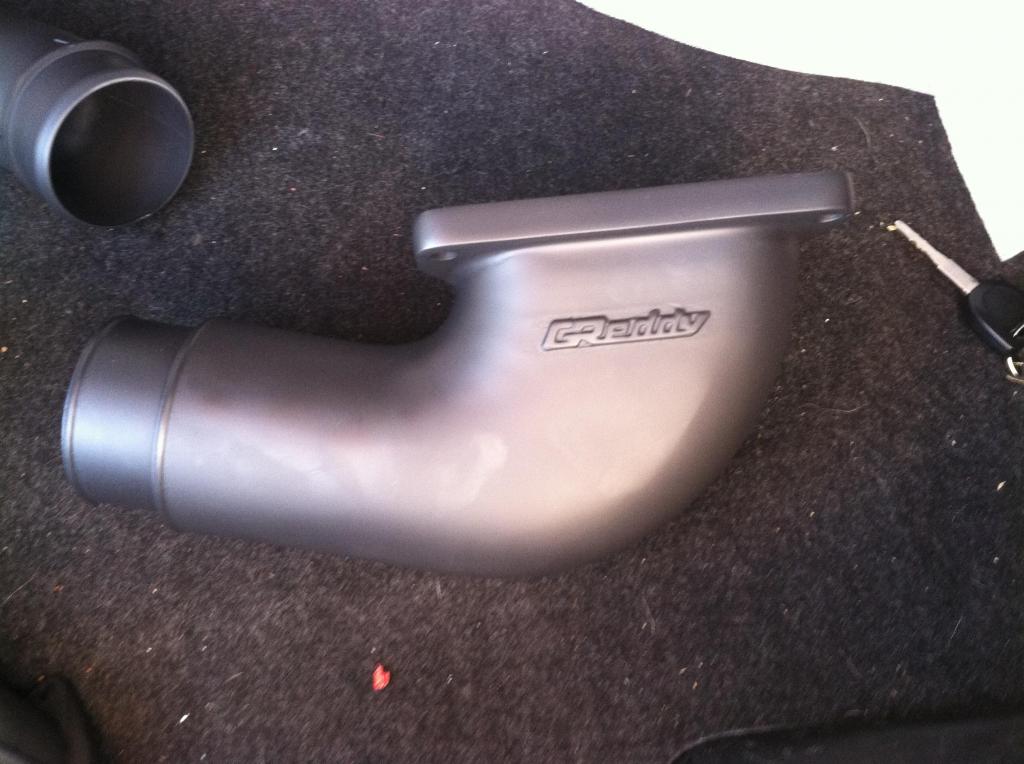
Got my ceramic coated y-pipe and charge pipe all bolted up. If any one plans on doing this soon, a little advice. Remove the air pump or the air pipes that run along side the LIM. The OEM y-pipe isn't as bulky as the efini model and slips out with a little finesse. But when you try to thread the efini model in you'll be cussing up a storm, unless you make some extra room.
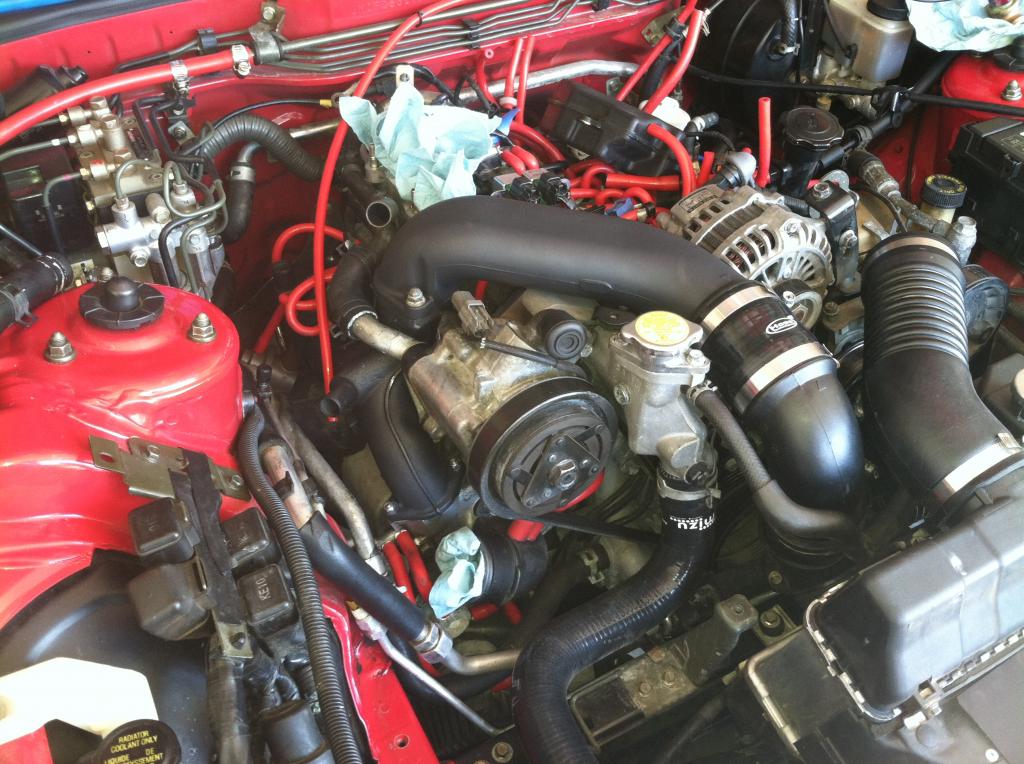
Installed the Apexi filters I picked up off the forum and the new Apexi SpecII BOV, I'm really excited to hear how it sounds. Came with a monster of a flange though. I had to pick up a 1.25" to 0.75" silicone reducer to make it work in the stock location.
Got the UIM, throttle body, and Greddy elbow all piped in and bolted up. (Sorry for the blurry pic)
I need to pick up a section of pipe to get the Greddy elbow to meet up with the OEM intercooler for the time being. I also need to pick up a section of 1/2" fuel line to plumb in the air pump to the high flow cat. I assume this is good enough but if any one knows better please let me know. I'm not a welder so I'd like to just use a section of hose.
I'll be taking a wire wheel to the cat to get it all shiny again so I can get some high temp paint on it to keep it from rusting. Not really an issue here, but I move around a lot for work and never know what kind of environment I'll be in. So I want to get the added rust protection. Not to mention keep some of that heat from radiating out to the tunnel.
Another question for those taking the time to read. Is there any benefit from keeping the front plastic that fed the oem air box? I can't see any. But I'm not sure if it somehow helps the radiator or direct airflow under the hood.
With any amount of luck, work will slow down enough for me to take a day and run out for Seven Stock.
Got all my parts back from different batches of coating.
Got in a few new (or to me) parts. Fast-acting IAT with Wannaspeed adapter and Bonez High Flow CAT.
Installed the block off plates for the double throttle and the AWS, and installed the IAT on the UIM.
Then started the slow process of cool-taping the UIM. That was a much more labor intensive project than I had thought it'd be.
On the plus side of this tear down I located my aggravating coolant leak. I kept getting air in the system and slowly would lose coolant. All cleaned up fresh silicone and tape and I made sure to clamp it down to really get the barbs threaded on tight.
Got my ceramic coated y-pipe and charge pipe all bolted up. If any one plans on doing this soon, a little advice. Remove the air pump or the air pipes that run along side the LIM. The OEM y-pipe isn't as bulky as the efini model and slips out with a little finesse. But when you try to thread the efini model in you'll be cussing up a storm, unless you make some extra room.
Installed the Apexi filters I picked up off the forum and the new Apexi SpecII BOV, I'm really excited to hear how it sounds. Came with a monster of a flange though. I had to pick up a 1.25" to 0.75" silicone reducer to make it work in the stock location.
Got the UIM, throttle body, and Greddy elbow all piped in and bolted up. (Sorry for the blurry pic)
I need to pick up a section of pipe to get the Greddy elbow to meet up with the OEM intercooler for the time being. I also need to pick up a section of 1/2" fuel line to plumb in the air pump to the high flow cat. I assume this is good enough but if any one knows better please let me know. I'm not a welder so I'd like to just use a section of hose.
I'll be taking a wire wheel to the cat to get it all shiny again so I can get some high temp paint on it to keep it from rusting. Not really an issue here, but I move around a lot for work and never know what kind of environment I'll be in. So I want to get the added rust protection. Not to mention keep some of that heat from radiating out to the tunnel.
Another question for those taking the time to read. Is there any benefit from keeping the front plastic that fed the oem air box? I can't see any. But I'm not sure if it somehow helps the radiator or direct airflow under the hood.
With any amount of luck, work will slow down enough for me to take a day and run out for Seven Stock.
10-09-13, 08:48 AM
#12
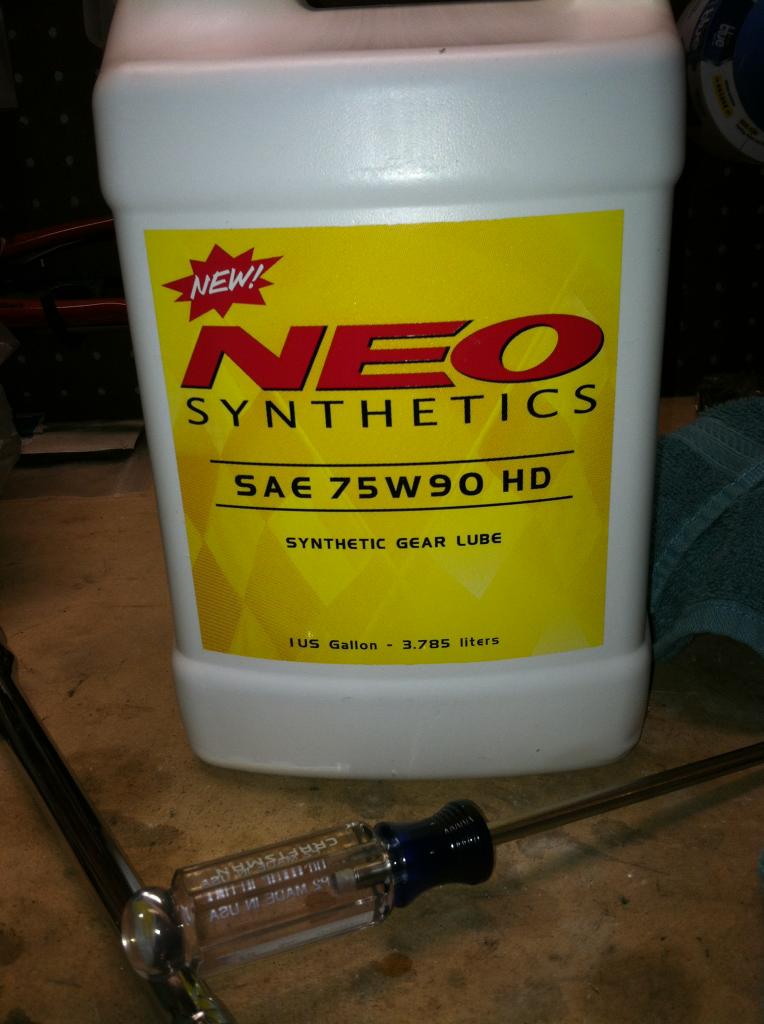
Threw a few more hours at Howard last night. Did a bit of general maintenance and swapped out the diff and tranny fluid.
Got the bonez cat all cleaned up and painted it with high temp paint

Picked up a pipe for the intercooler. I'll be taking that and the check valve for the split air pipe into work to get them cut. I should have everything all back together later tonight. Just waiting on my catback now.
Got the bonez cat all cleaned up and painted it with high temp paint
Picked up a pipe for the intercooler. I'll be taking that and the check valve for the split air pipe into work to get them cut. I should have everything all back together later tonight. Just waiting on my catback now.
10-09-13, 02:38 PM
#13
RX-7 Bad Ass
iTrader: (55)
BTW, that high temp paint on the cat will probably last 15 minutes. Cats get SUPER hot. Ceramic coating MAY hold up on a cat.
Everything looks really nice!
Dale
Everything looks really nice!
Dale
10-09-13, 04:21 PM
#14
I kind of figured the paint won't last but couldn't justify throwing a rusty part on my car, considering that it was only like $5 to strip and paint it. Hopefully it'll last a bit on the heat shields to slow the rust down. They were a little rough.
10-18-13, 03:53 PM
#16
I've been meaning to update but I've been busy enjoying having Howard back on the road.
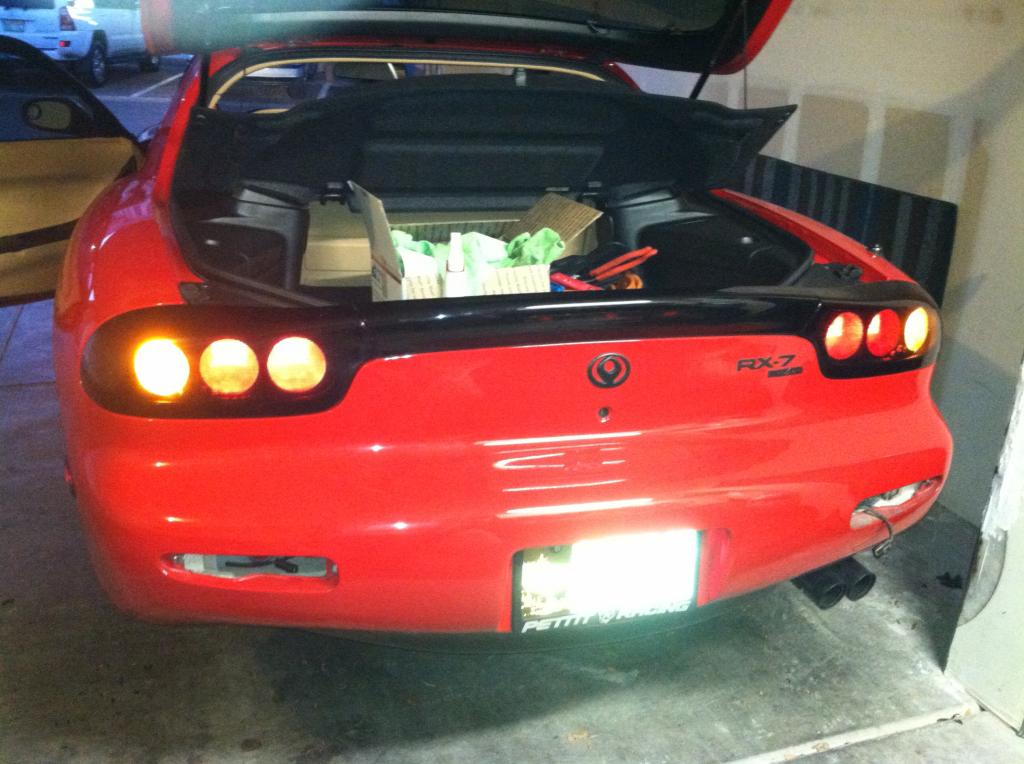
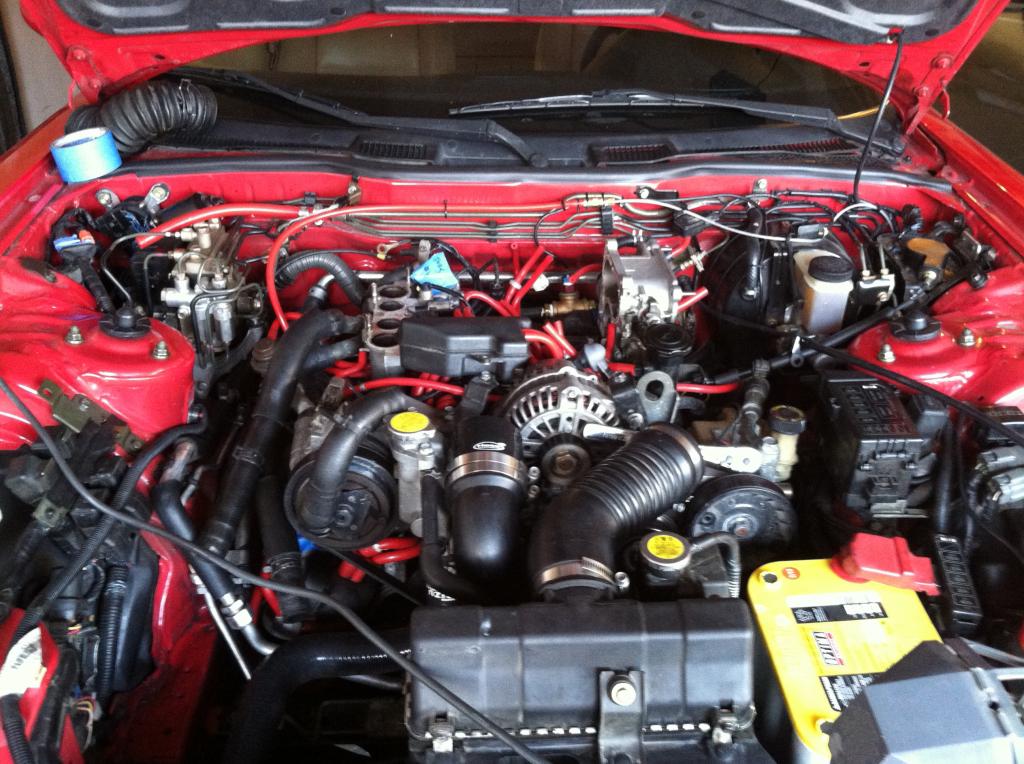
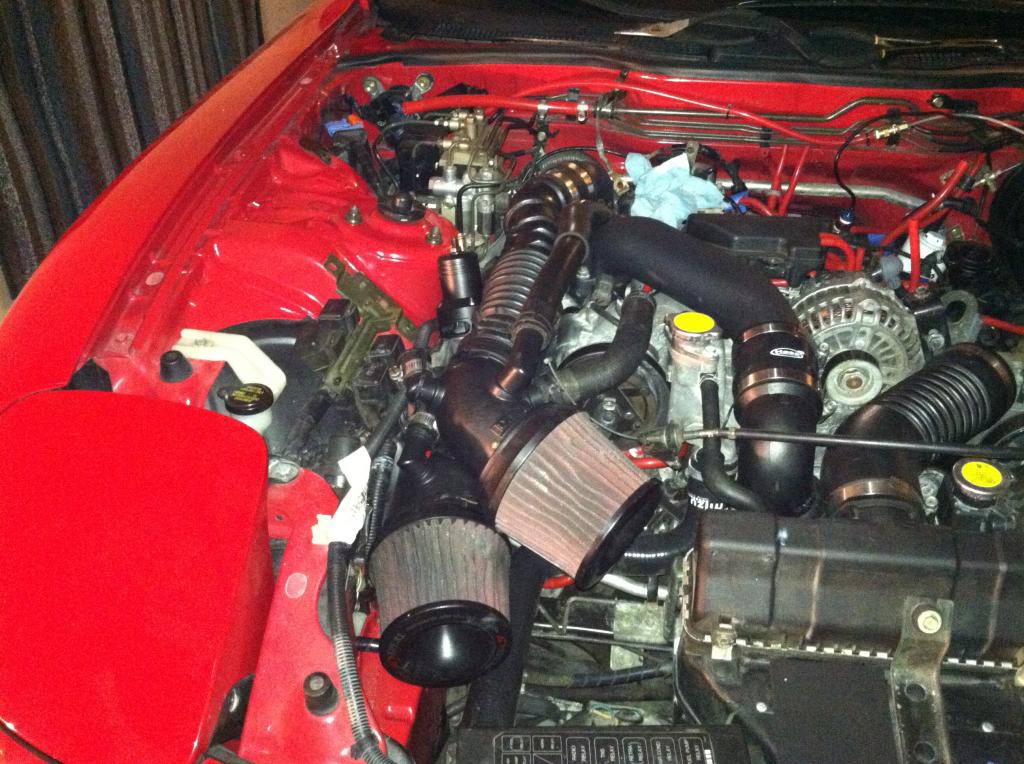
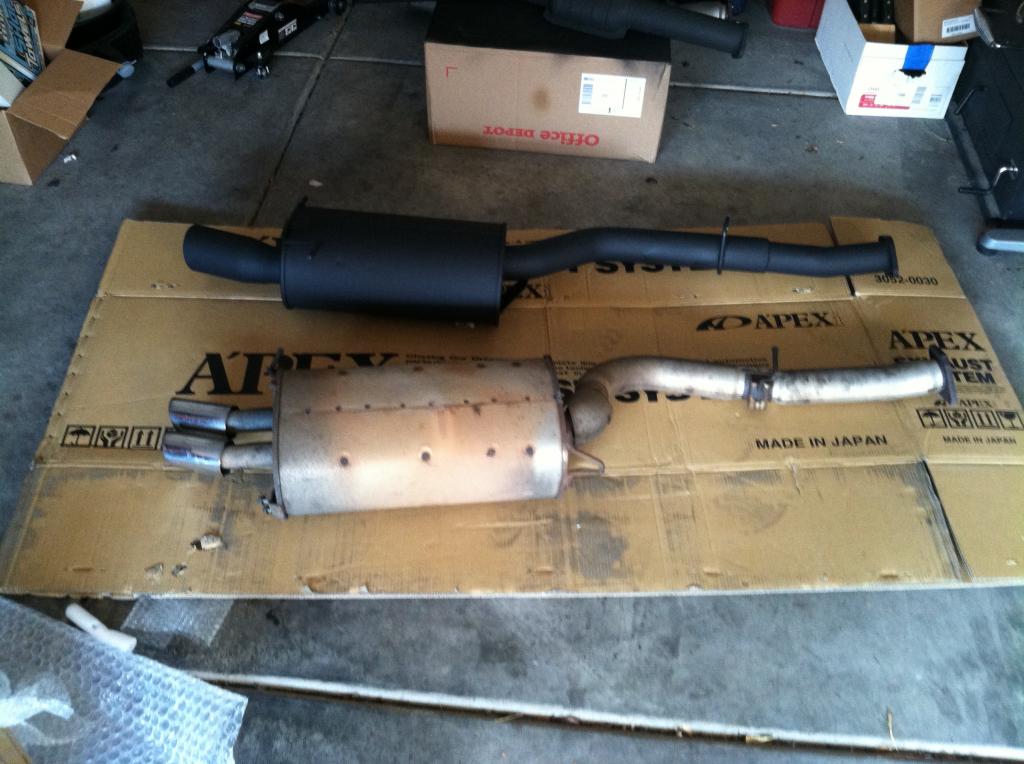
Got my cat-back in. Went with the Apex'i Noir. I really like the look. The piping feels much lighter over OEM but the muffler and tip have some meat on them, so I don't think it is significantly lighter than stock. Maybe a couple pounds. Sorry for the terrible picture of it on the car but I was in a rush. Finally have a few hours tonight to get him all washed up so I'll post some better pictures later from a real camera. The exhaust note is nice and deep without being loud. My air pump is starting to go so it's hard to give it a good listen at light throttle. But at idle it's deep and at WOT it sounds nice and mean. It's definitely louder than OEM but I can still hear myself think. I have a friend with the N1 which I know is a completely different system but I was still a little skeptical of Apex'i because of how loud it was. The overall goal for this car is still to have a fun and responsive Sunday driver that I can open up and let loose from time to time. Especially on those windy CA roads.
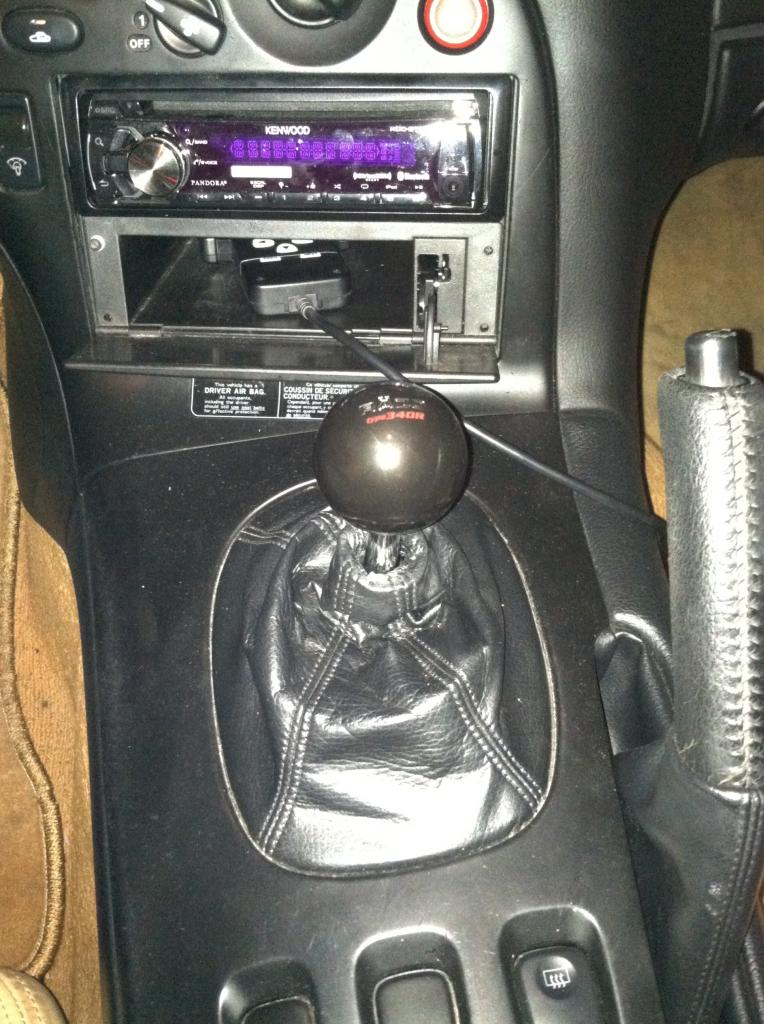
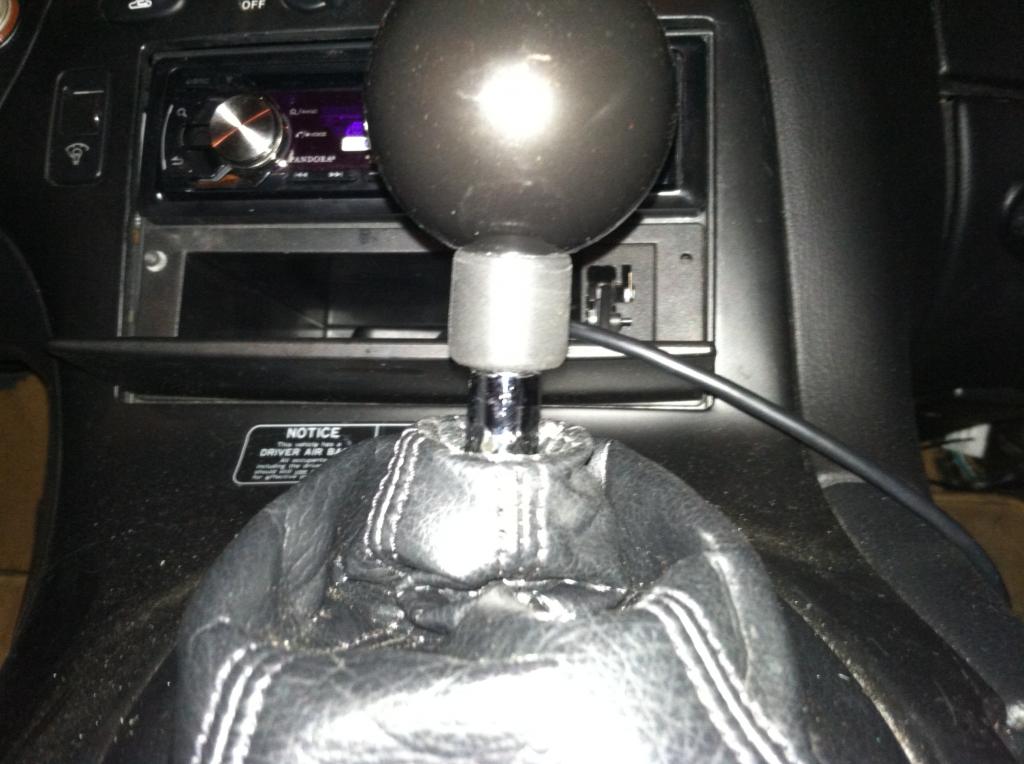
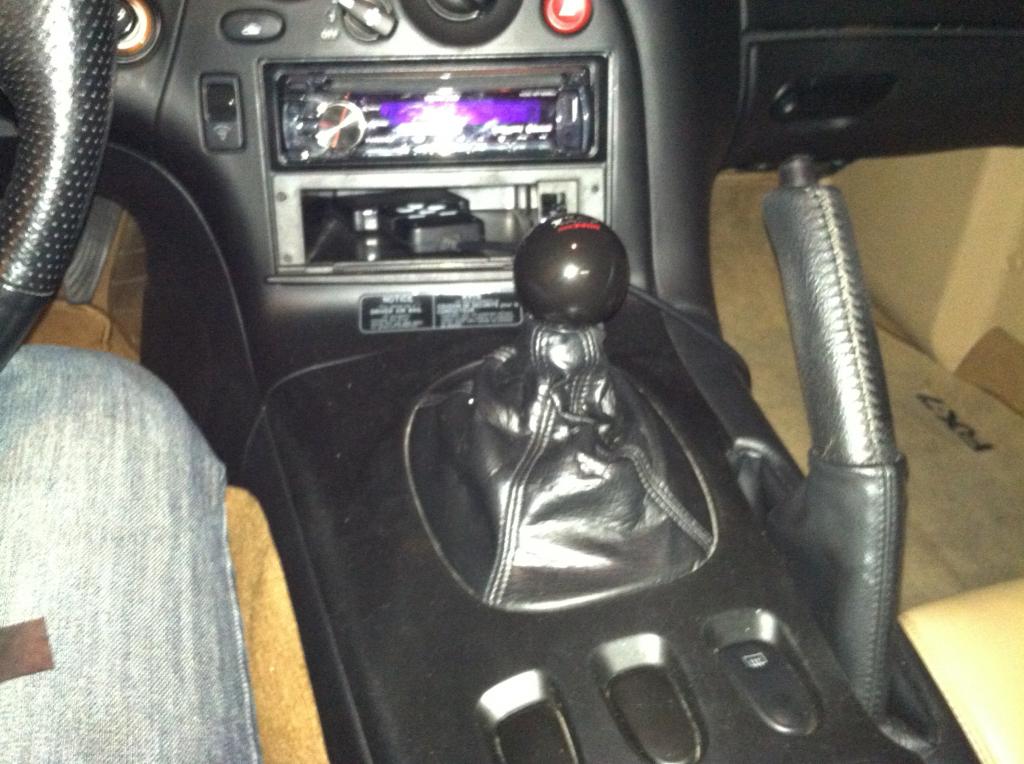
I know I'll regret this once the car sees another 110+ degree day but I was never really a fan of how the stock shift **** felt. I liked how heavy it was so I wanted to try and get something with some weight to it. And since the only manuals I've driven before the 7 were dump trucks I like the feel of a more old school ball style shift ****. Lol
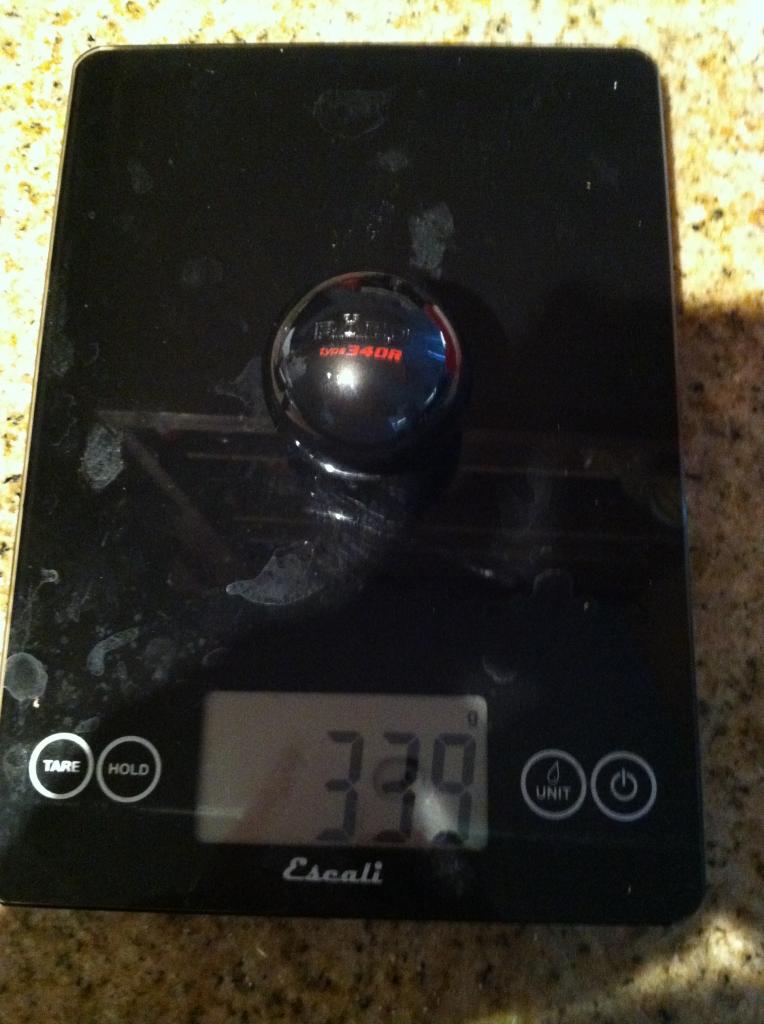
So I picked up a RAZO 340R Aluminum shift ****. Weighted and nice and cheap off of Amazon.
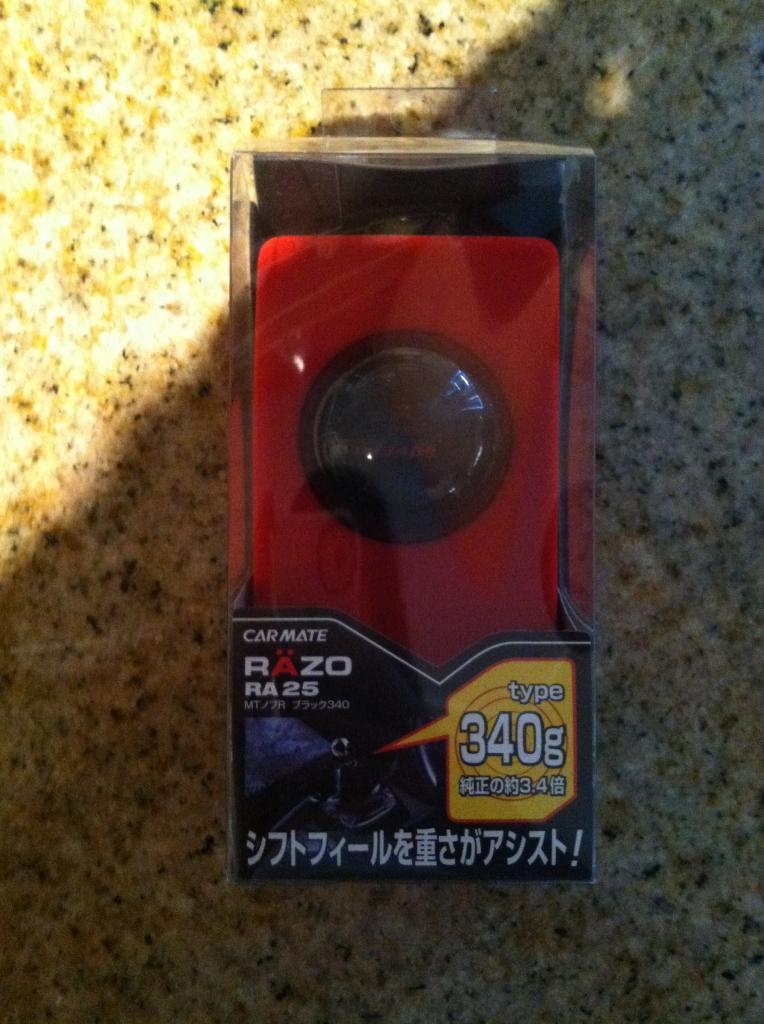
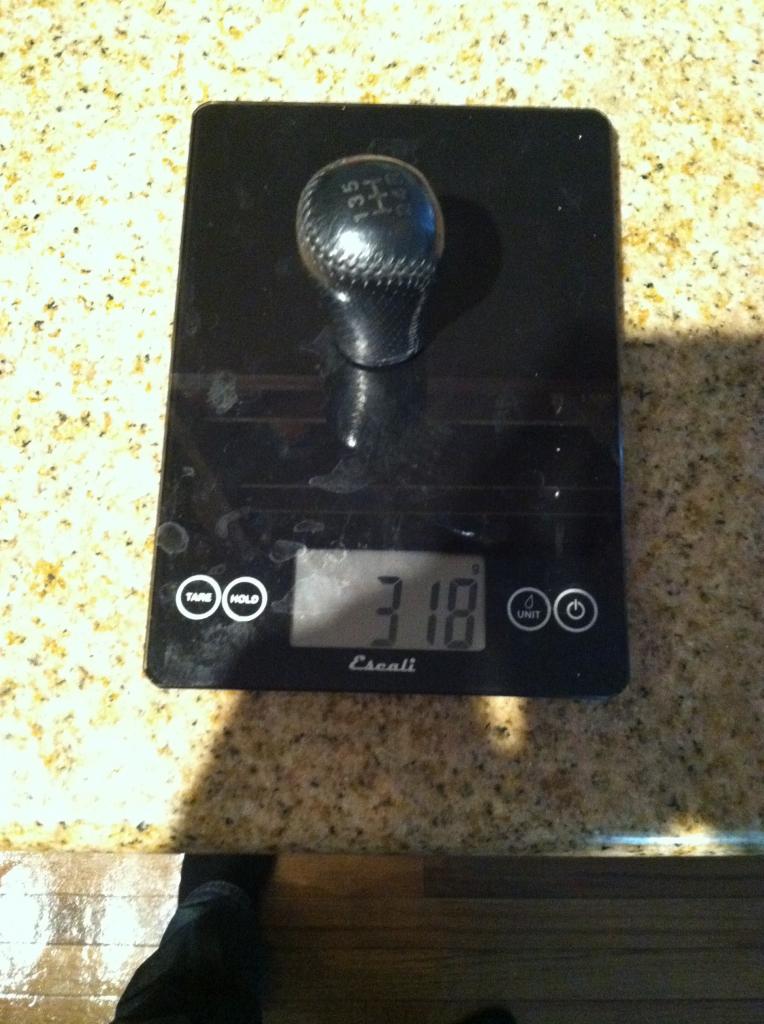
Weighs just a touch more than the stock **** but not enough to feel a change when shifting. But the "feel" is a lot better IMHO. But I know that aluminum will be nice and comfy after a few hours in the sun. After a quick electrical tape mod, I think it looks pretty darn good. The short shifter bunched the boot up and this stretched it right back out.
Got my cat-back in. Went with the Apex'i Noir. I really like the look. The piping feels much lighter over OEM but the muffler and tip have some meat on them, so I don't think it is significantly lighter than stock. Maybe a couple pounds. Sorry for the terrible picture of it on the car but I was in a rush. Finally have a few hours tonight to get him all washed up so I'll post some better pictures later from a real camera. The exhaust note is nice and deep without being loud. My air pump is starting to go so it's hard to give it a good listen at light throttle. But at idle it's deep and at WOT it sounds nice and mean. It's definitely louder than OEM but I can still hear myself think. I have a friend with the N1 which I know is a completely different system but I was still a little skeptical of Apex'i because of how loud it was. The overall goal for this car is still to have a fun and responsive Sunday driver that I can open up and let loose from time to time. Especially on those windy CA roads.
I know I'll regret this once the car sees another 110+ degree day but I was never really a fan of how the stock shift **** felt. I liked how heavy it was so I wanted to try and get something with some weight to it. And since the only manuals I've driven before the 7 were dump trucks I like the feel of a more old school ball style shift ****. Lol
So I picked up a RAZO 340R Aluminum shift ****. Weighted and nice and cheap off of Amazon.
Weighs just a touch more than the stock **** but not enough to feel a change when shifting. But the "feel" is a lot better IMHO. But I know that aluminum will be nice and comfy after a few hours in the sun. After a quick electrical tape mod, I think it looks pretty darn good. The short shifter bunched the boot up and this stretched it right back out.
03-22-15, 01:52 PM
#17
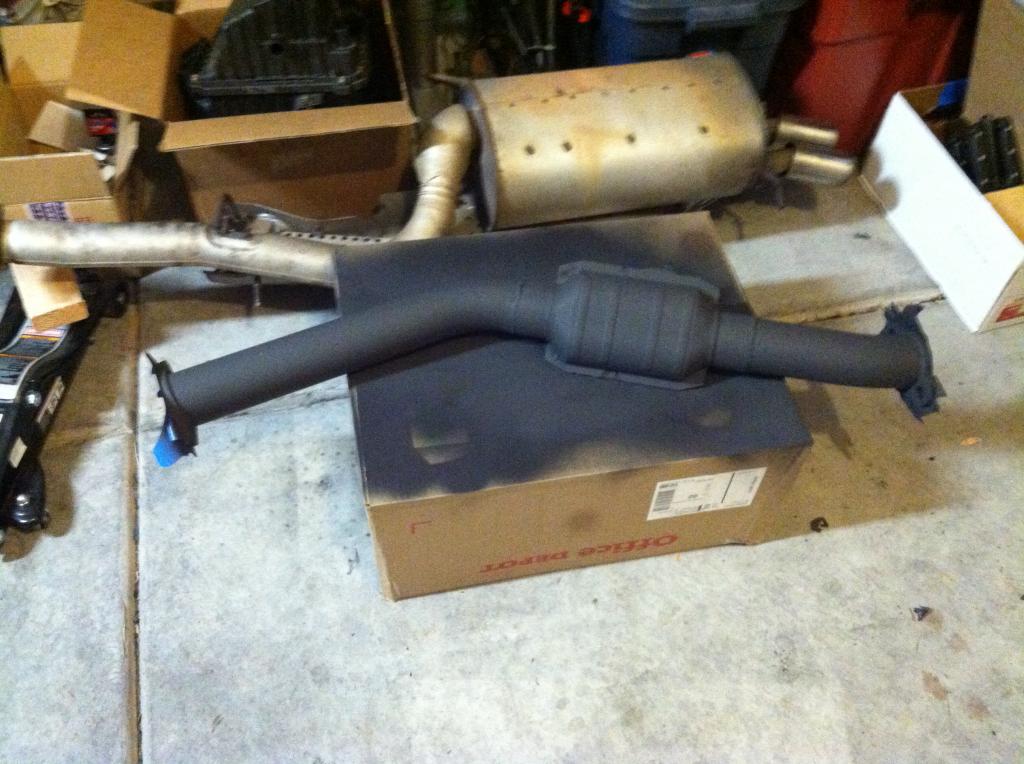
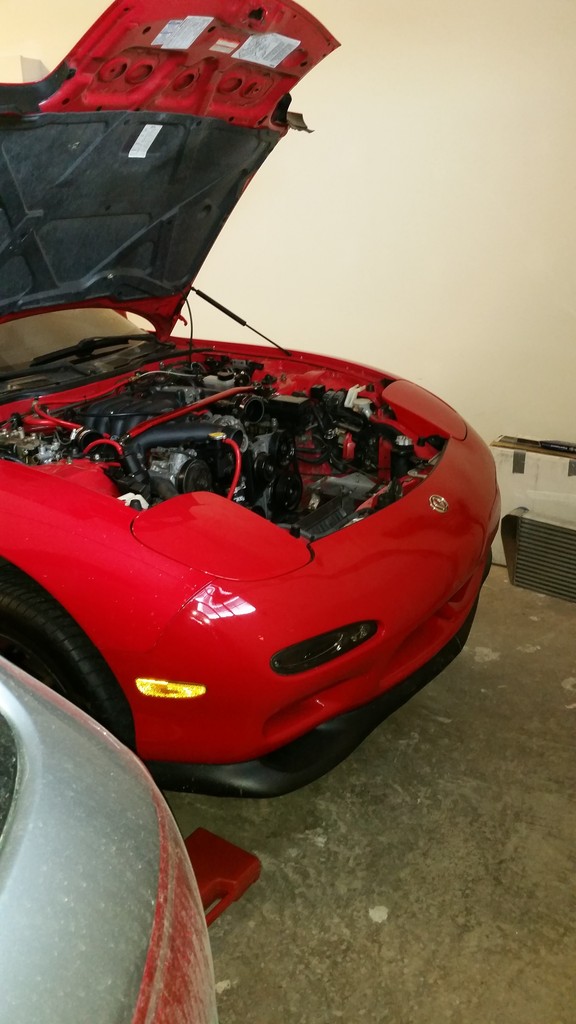
Long time without an update, but finally tearing into things properly.
Since the last update, we moved and then moved again.
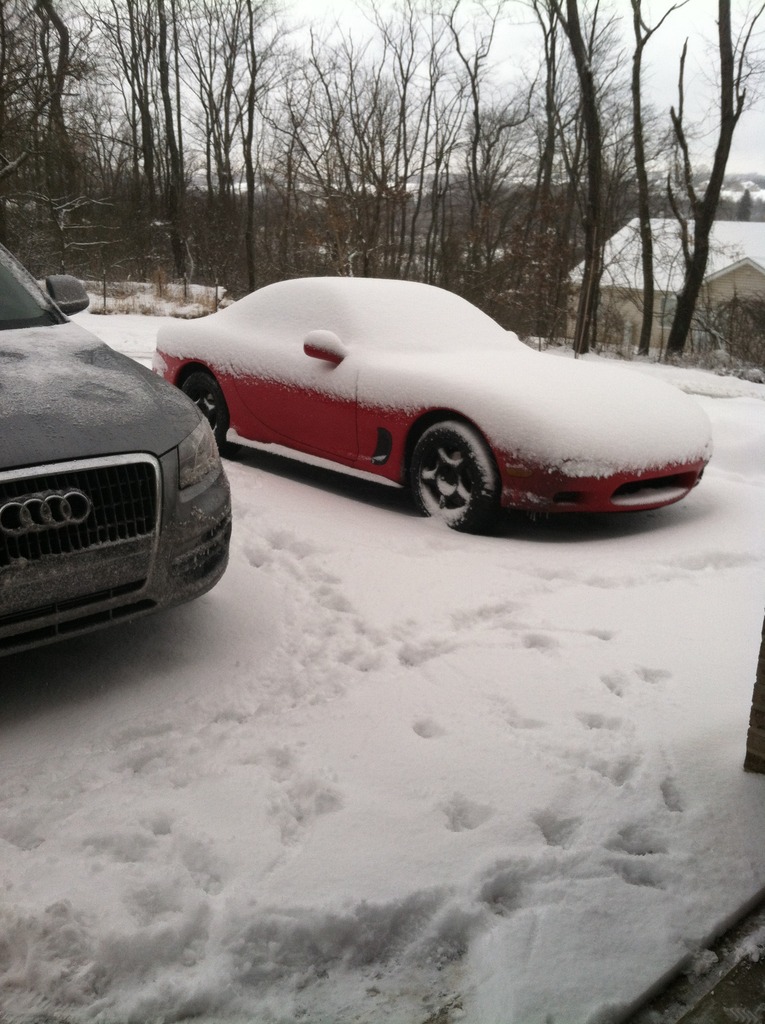
Currently living in Canada and taking advantage of the bad weather, by tearing Howard back down for some improvements.
First got out to Pennsylvania and the RX7 saw its first winter.
While I was still in the States, didn't do a whole lot of work.
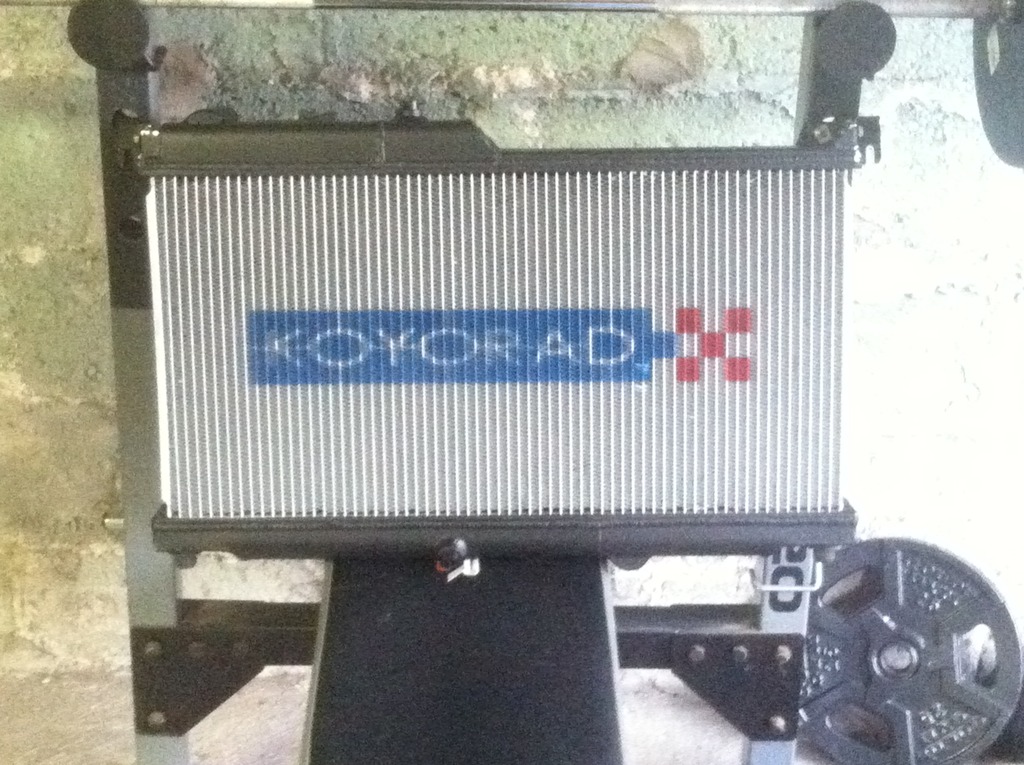
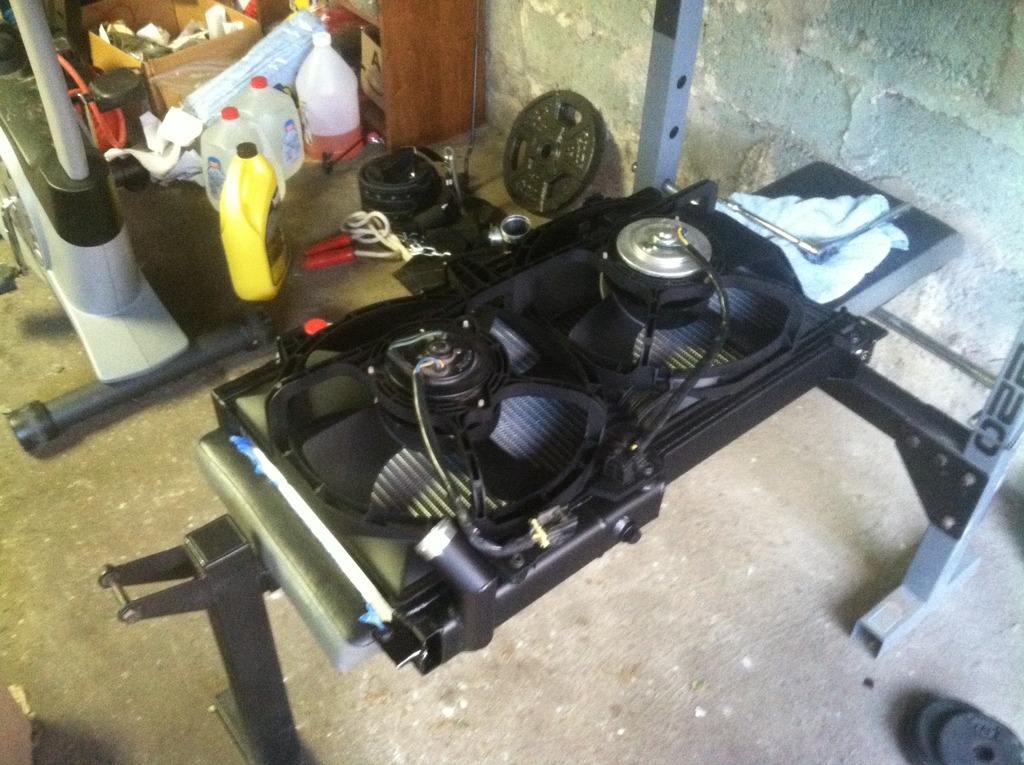
Finally installed the N-Flow Radiator.
Old one out:
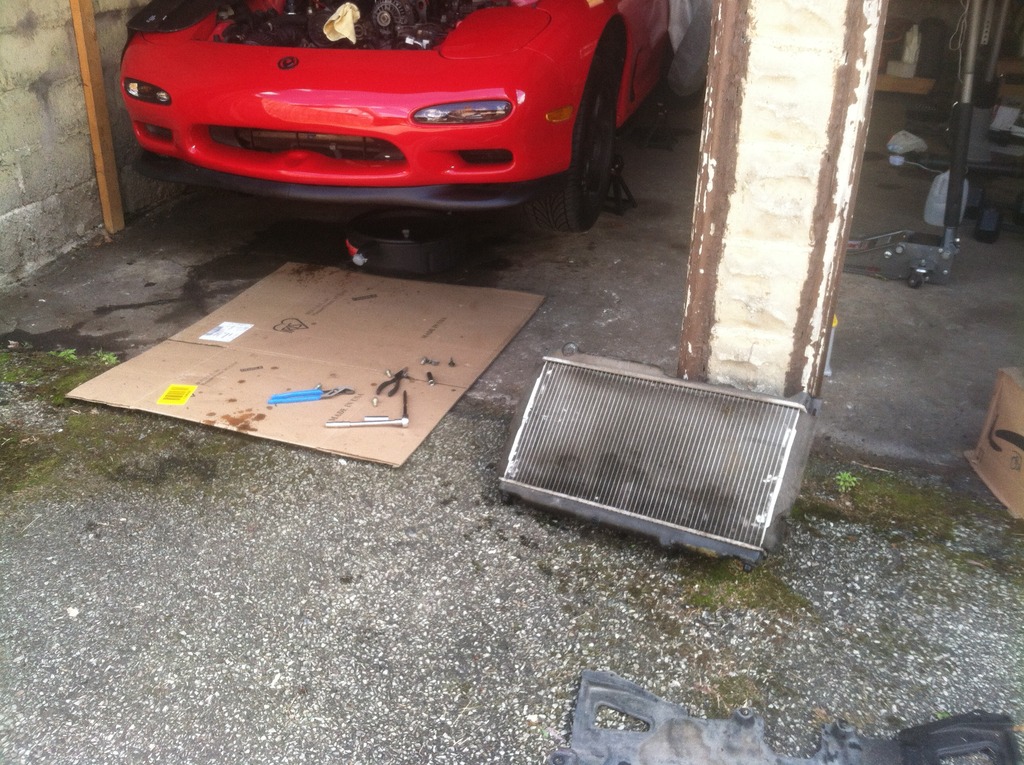
The new radiator all painted up:
Deleted the AST while I was at it:
http://i1023.photobucket.com/albums/...psuw6hw8xp.jpg
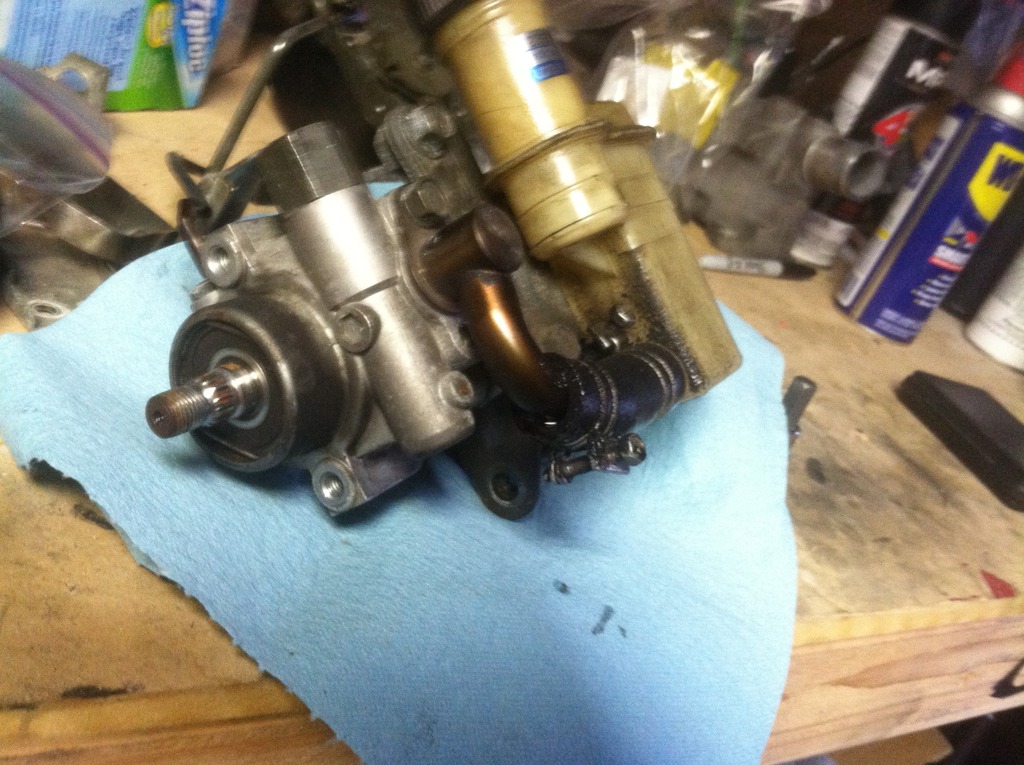
Had to rebuild the PS pump:
Painted a bunch of brackets:
Then packed everything up and headed North again.
I was back in a proper garage so I decided to take on another project during the winter.
First thoughts were an upgraded SMIC:
But... I changed my mind.
So the tear down began:

More updates to follow!
Since the last update, we moved and then moved again.
Currently living in Canada and taking advantage of the bad weather, by tearing Howard back down for some improvements.
First got out to Pennsylvania and the RX7 saw its first winter.
While I was still in the States, didn't do a whole lot of work.
Finally installed the N-Flow Radiator.
Old one out:
The new radiator all painted up:
Deleted the AST while I was at it:
http://i1023.photobucket.com/albums/...psuw6hw8xp.jpg
Had to rebuild the PS pump:
Painted a bunch of brackets:
Then packed everything up and headed North again.
I was back in a proper garage so I decided to take on another project during the winter.
First thoughts were an upgraded SMIC:
But... I changed my mind.
So the tear down began:
More updates to follow!
Last edited by FDHoward93; 03-22-15 at 02:03 PM.

 03-22-15, 04:29 PM
#20
No real "plan" for this car. I just love driving it and changing things up to my preference.
I don't have a HP goal and I haven't tracked it yet, but that might change this summer.
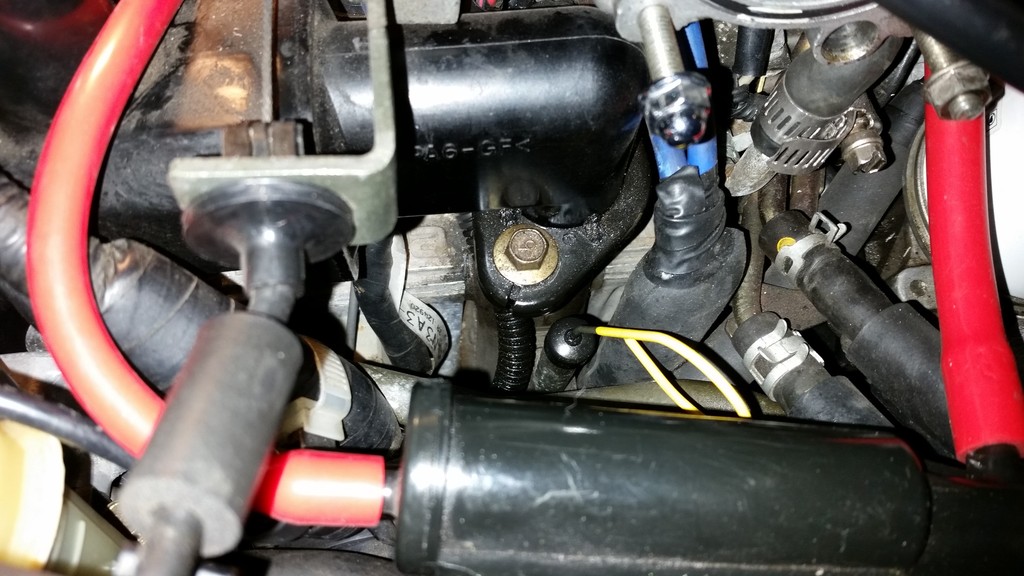
Decided to tuck the air bag sensor wire. That plastic wrap just looks ugly to me.
While I was doing that I remembered another change from PA. Greddy Hood Dampers
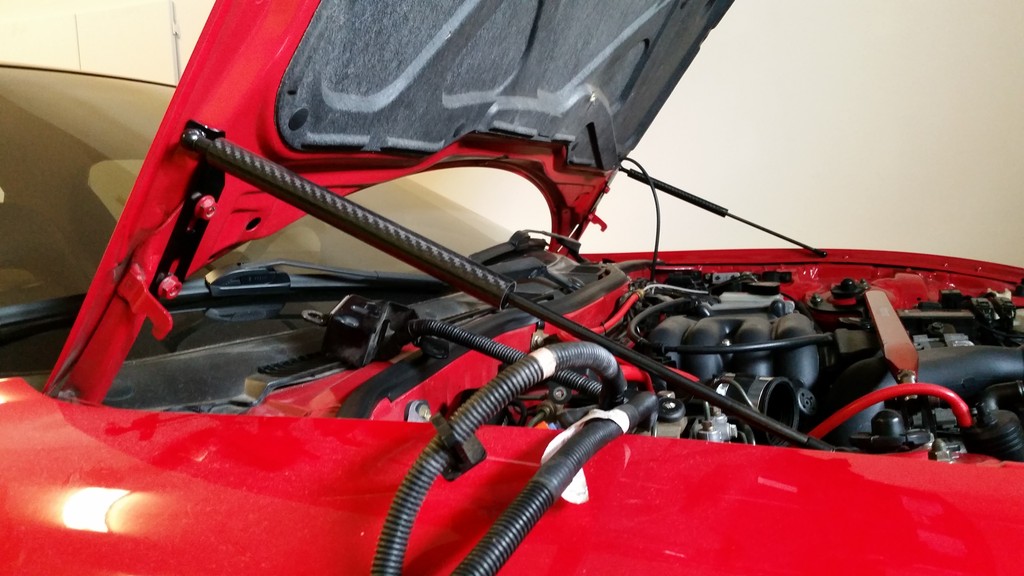
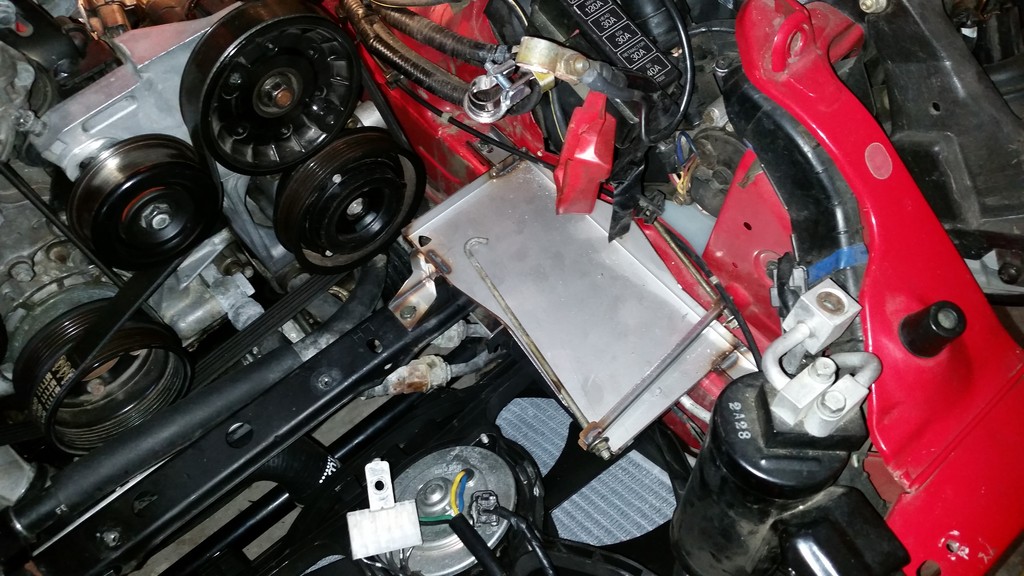
Test fit the Turbo Jeff battery tray. Just needs some powder coating.
I don't have a HP goal and I haven't tracked it yet, but that might change this summer.
Decided to tuck the air bag sensor wire. That plastic wrap just looks ugly to me.
While I was doing that I remembered another change from PA. Greddy Hood Dampers
Test fit the Turbo Jeff battery tray. Just needs some powder coating.
03-29-15, 02:40 PM
#22
The intercooler I ordered is still being fabbed up so I'll keep it a secret for now.
Since I'm currently waiting for parts to be delivered I don't have many updates.
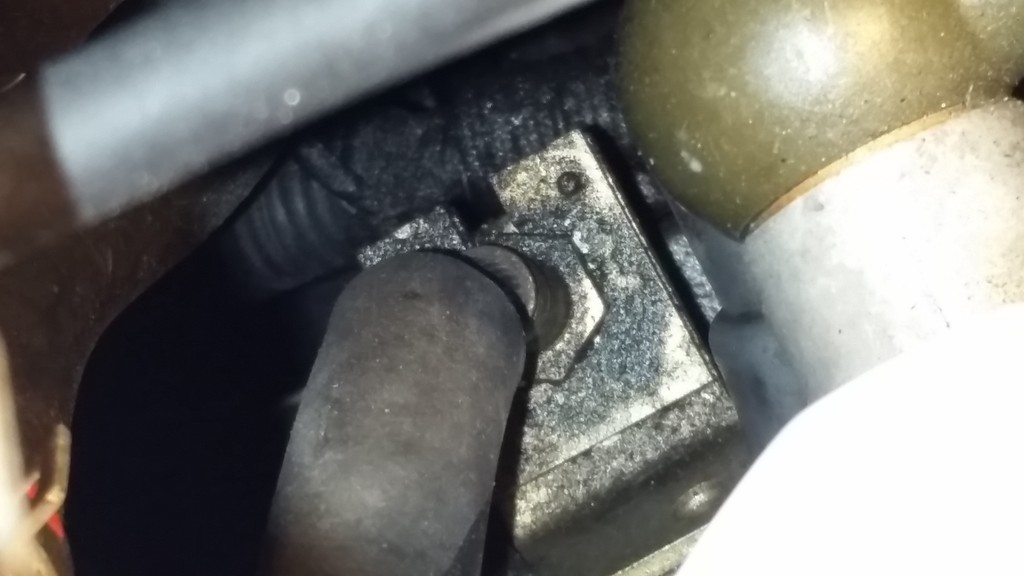
Started working on capping the lines for an oil catch can.
Found a nice little leak at my oil fill neck.
So if anyone has a metal oil fill neck for sale let me know! I can take delivery in the US or Canada.
With all the free time I have. (JK, I'm always at work.) I chased down the source of a few more leaks that need to be cleaned up.
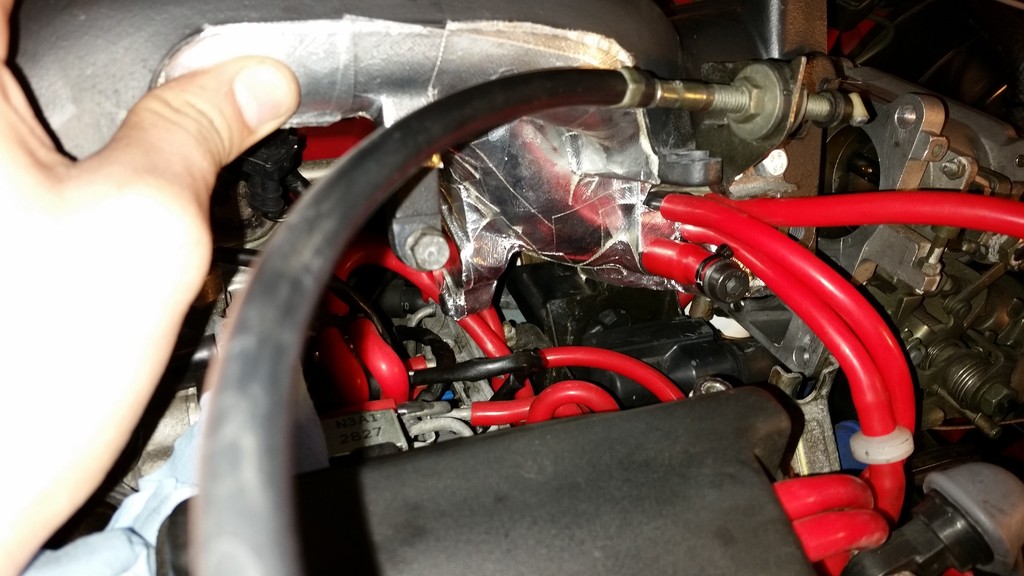
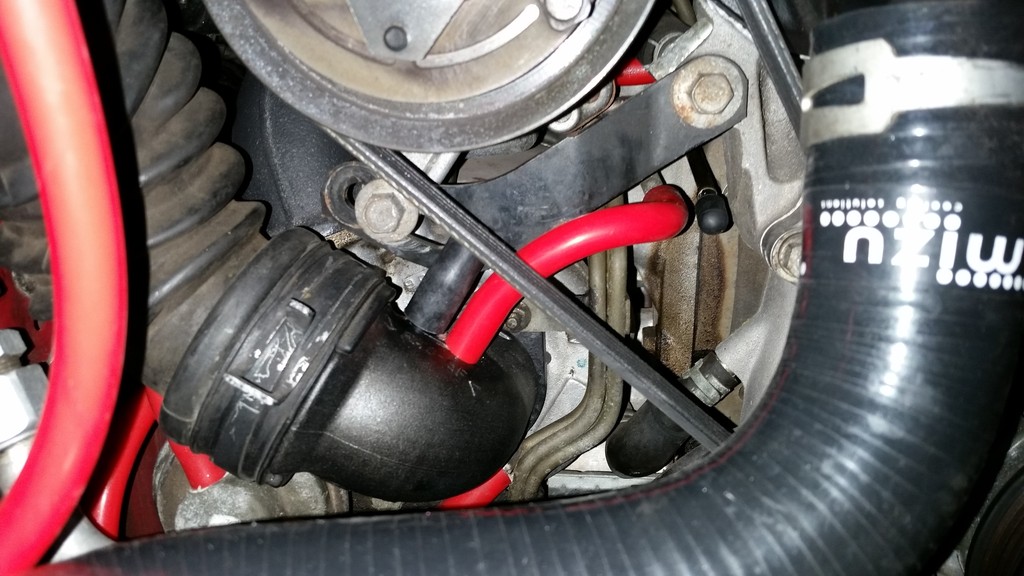
Oil cooler line into the iron:
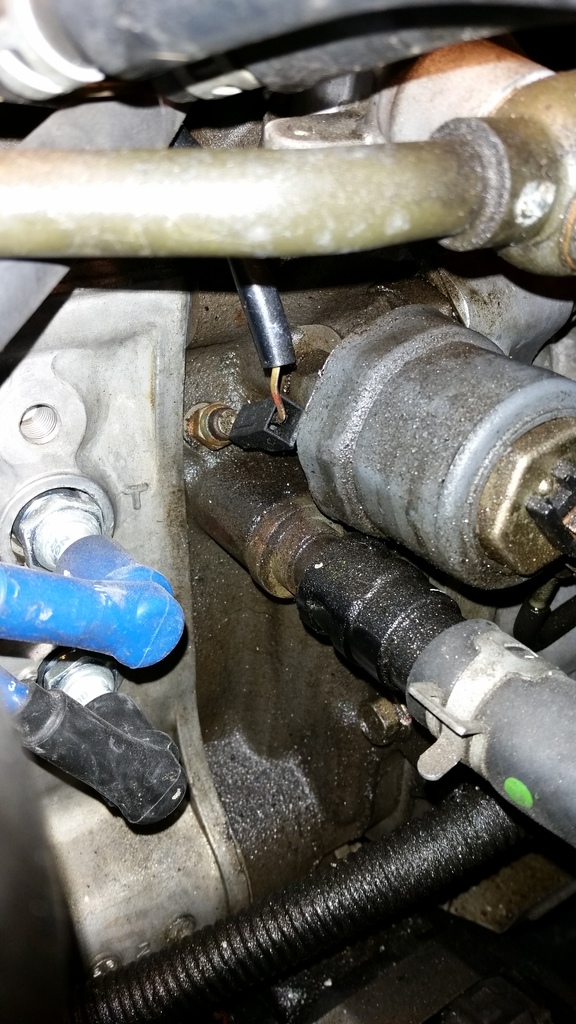
Clutch side of the rubber clutch line:
 03-29-15, 03:14 PM
#24
I'll take that off and clean it up with the oil change. I need to switch back to 10w30 anyways since I now live in what my Fiance calls a "Winter Wonderland".