When you click on links to various merchants on this site and make a purchase, this can result in this site earning a commission. Affiliate programs and affiliations include, but are not limited to, the eBay Partner Network.
Looking really good! I can't wait to add some CF goodies like the skirts later on too!
Originally Posted by Snipe G
NICE! Looks awesome! You have to be happy with that. Jason
Thank you guys appreciate that. I think the best part is I've stopped checking the coolant levels every time I drive the car lol. First few months having her back I was paranoid about everything but I'm learning to trust my own work.
The first thing I did on this project was change the leaking brake master cylinder but It's been easily over a decade since the rotors/pads have been changed out so I thought I should get this done next. She had some aggressive Project Mu pads and they were real noisy until they get heated up but were very effective. I'm looking for something a bit more subdued in the noise and dust department without sacrificing too much of the performance (but better than stock) so I went with a centric/stoptech setup.
Pretty EZmode install. Only issue I ran into was the front left rotor didn't want to come off, which isn't a big surprise seeing as its sat for a long time. Couple sturdy whacks with the rubber mallet and it came loose. I steal bristle brushed the corrosion off the hub seats and smeared on some anti-seize.
The new brakes are working out great! Straight line stopping is strong and predictable. Now that I have the suspension, tires, alignment, and brakes all dialed in the car inspires some serious confidence.
Next project will be my Nardi Deep Corn with red stitching to get that full go-cart driving experience.
Appreciate the comments and happy to be back for an update. Hope everyone's having a good holiday. I just bought my first home in Idaho so I'm pretty excited about changing a 650sqft garage into my new lair/workshop. Life in Southern California has been fun but it's time for a change. A pay raise, lower cost of living and being closer to the outdoors is a good equation for my future success and sanity. Between work and responsibilities I've gotten to spend some quality time with the FD over the last year. The last thing remaining on my Phase 1 list was to install a different steering wheel because my stock wheel is crusty from exposure and frankly looks like dog ****. I wasn't too keen on keeping the almost 30 year old air bag system so I went with the Nardi Deep Corn 350mm that I procured from a fellow member. (Thanks AHarada)
I ended up going with the Daikei hub to compliment the Nardi Wheel. Best price I could find at the time was from miataroadster.com. I got the S-601 but it came with the wrong horn connector. Talked to the owner Bill, super nice guy, took care of it immediately.
There are a ton of threads on how to remove your airbag/steering wheel safely so I wont go into that but I will share my experience with the basic setup of the adapter and wheel. It's pretty much plug and play so it's hard to **** up but there was some ambiguousness with the horn part. After connecting the airbag resistor and feeding the horn wire through the hole in the hub, I connected said horn wire to one of the horn button inlets. The way I understand it is voltage is constantly running through the circuit, so in order to activate, it needs to be grounded. I connected another short wire (this is a ground and not included in kit) to the remaining horn inlet and the other end to the side of the horn cup (just needs to touch metal). Pressing the horn will have the top plate inside the horn button touch the inner plate that houses the two connections and close the circuit. And I get horn!
When that's all worked out I made sure my clock spring arrow was pointing straight up and slid the wheel with the hub connected over the steering column spline. Took a couple tries to get it perfectly centered on the spline. Everything was working great mechanically when I took it for a drive but was hearing some noise inside the hub sleeve when turning. The resistor and wires stuffed between the hub and sleeve where scraping against the inner plastic so I took it back out and lined the inside of the sleeve with a thin wetsuit like material so no more little sounds coming from inside the hub.
Upcoming Phase 2 Projects to be Documented:
Door handles refresh with rivet mod
Clutch downgrade from ACT 6 puck and dual diaphragm pressure plate to Exedy stock plate and disk
Swapping out the FD stock differential for a RX-8 4.44 differential
New Exhaust and resonated midpipe setup install
Complete dash, HVAC, shifter panel, and stick shift assembly refresh
Double DIN stereo install with Bluetooth Power FC feature
Fixing the gauges and coolant level sensor with new capacitors and connectors (this was the biggest pain in my *** so far)
Custom dual oil cooler vent covers for front bumper
Door panel refresh
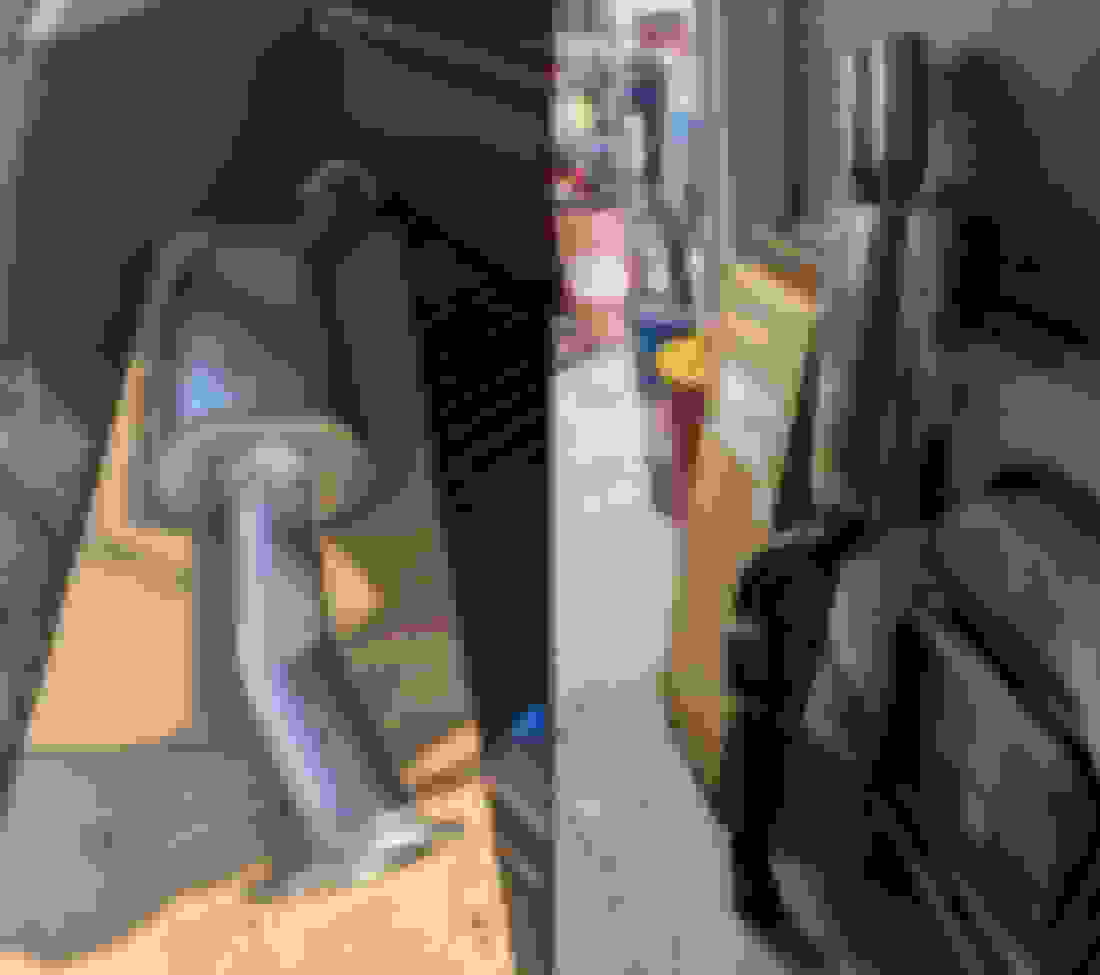
While I was packing for my move, I found a photo box of when I first bought my FD in 1998. I was living at my moms place, that's 21 year old me (45 now), and I'm storing it there now until I go back to Cali and get it on a trailer to my new home next week. Thought I would take this pic so IF I live another 25 years I can do it again.
I was inspired to do these modifications by driving a friend's RX-7 and realizing that my own drivetrain has some slop that needed to be addressed. It�s been so long since I�ve driven another FD so I must have forgotten what a tight drivetrain feels like. The only thing left on the drivetrain that hasn't been replaced at this point is the differential. It has started to accumulate some wet spots around the cover in the last year. Over the years I�ve heard good things about the RX-8 4.44 gears, so after reading through Dale�s info thread on the RX-8 diff gearing and compatibility, I came across a low mileage RX-8 differential off of a 2006 for peanuts and decided to pull the trigger.
List of Parts
OEM Rear Axles (#447-59184)
OEM Axle Seals (#P043-27-238A)
Wix Fuel Filter (#33309)
OEM Clutch Kit Exedy (#KMZ01)
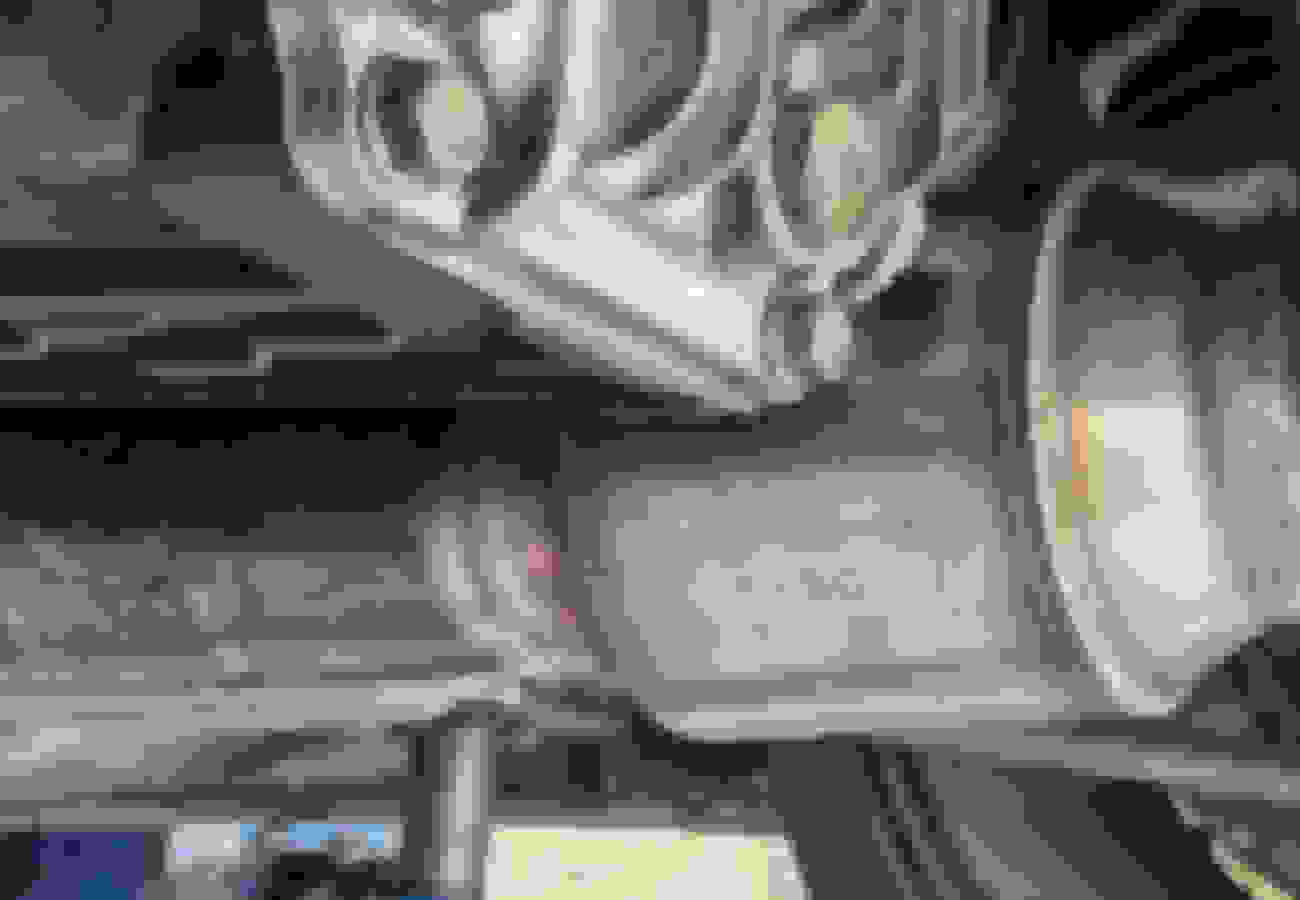
I got some lift time down at my buddies shop and removed my diff. As I was pulling off the PPF I noticed a small crack. I don't think it was bad enough for any flex but reinforced the weld regardless. I drove up to DNA Garage in Santa Ana with both pumpkins to have the internals swapped and assembled to spec. I chose DNA because they had the least amount of horror stories and diff shops wanted way too much to do the job. Louie was easy to deal with and took care of business with no issues. Cool shop with a lot of nice rotaries being built.
While that was being done I decided to downgrade from an ACT clutch setup, back to the OEM clutch disk and pressure plate. Not that I was feeling any slippage, but was just tired of engaging that heavy 6 puck disk and dual diaphragm plate in traffic. I think years ago I thought I'd be eventually making enough power to warrant the clutch, but those ideas have transitioned into keeping the car reliable and fun to drive.
With the diff out I figured it was best practice to change out the fuel filter as well. I considered relocating it to an easier access point, but my new philosophy of keeping vital components in their factory location won out. I picked up the rebuilt diff from DNA (with RX8 cover) and put the trans, driveshaft, diff, and new axles back in along with a realigned PPF and filled the diff with 75W90.
First off, I was really happy I decided to change the clutch back to stock. The clutch pedal feels buttery smooth going through gears with little effort. My left calf muscle is really thankful haha. The slop in the drivetrain is noticeably better. The new gearing however, I had mixed feelings on initially. The acceleration is insane. 40 to 115 you really notice how much faster you go through the gears. For maybe having only 300HP this thing was flying! The problem was getting used to cruising on highways. Your initial instinct is to want to shift into a higher gear when you�re cruising in 5th at 80mph and hitting around 3750RPMs. It�s just something you have to get used to because the difference is dramatic in my opinion. I�ve had this setup for almost a year and it feels totally natural now. I think the mod is well worth the top speed you lose in a street car.
I was due for a door handle refresh but wanted to take care of more immediate needs on the FD. Then the driver's side handle started to get really tough to operate and sure enough…snap. I'd like to avoid having to enter the car from the passenger side or leave the window down so, priority upgraded!
Tools & Parts
10mm socket
Philips and flathead screwdrivers
Aluminum Door Handles (ebay)
SEM Black Trim Paint (#39143)
2000-3000 Sand Paper
5/32 Drill Bit
5/32 (4mm) Pop Rivet
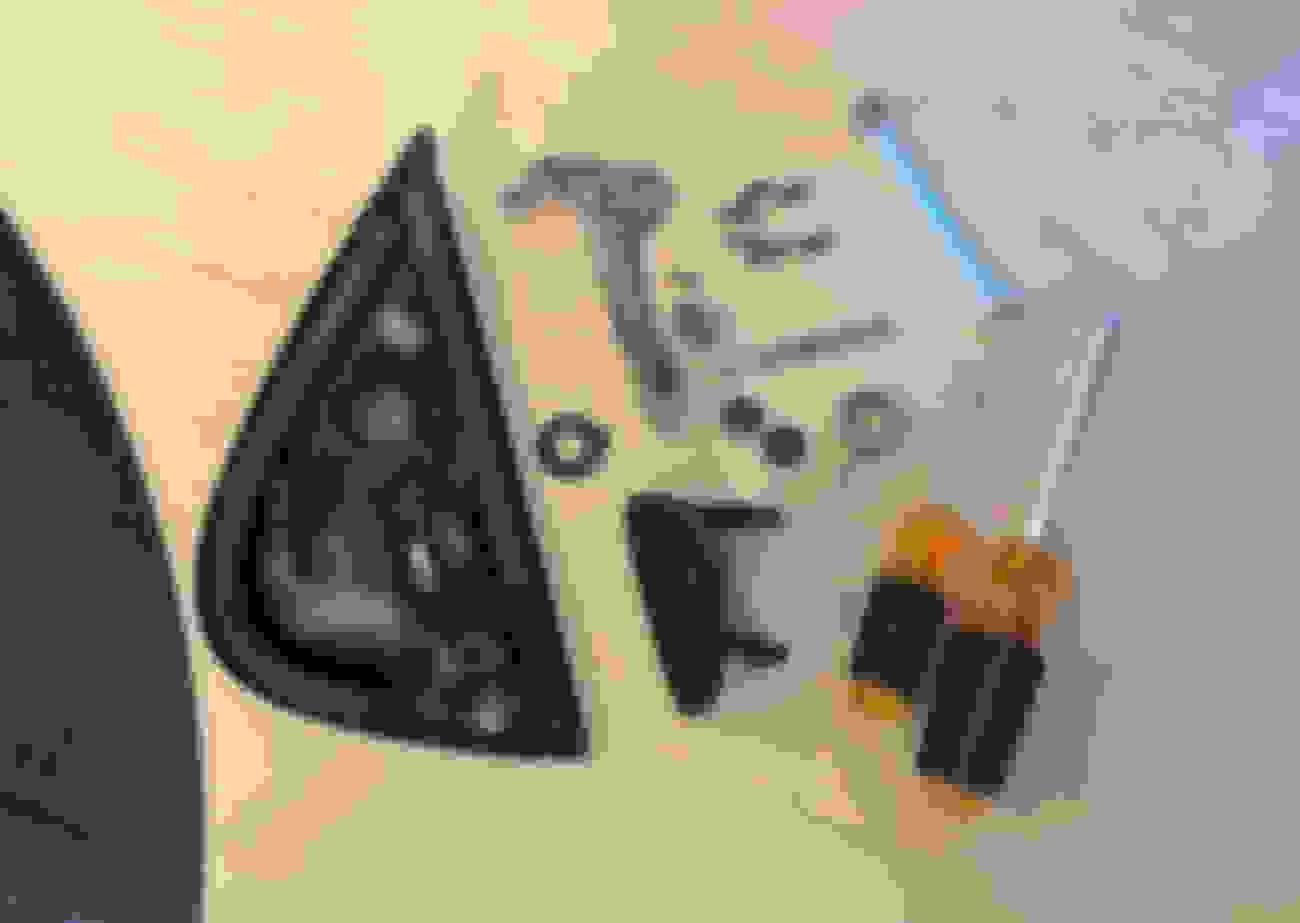
The rotating mechanism that holds the rods coming from the door have worn to the point where it’s slipping through the intended stop point and making the lever difficult to pull up. You can bend the rods and fiddle with the handle to get it right again but it’s very temporary. The best solution I thought was this thread although I did alter the location of where my stop was drilled but it served the same purpose.
After tearing them apart and doing a bit of cleanup I took the mechanism arm (for lack of a better word) and drilled a hole using a 5/32 bit and used a pop rivet of the same size for the stopper. I sanded down the faces with some low grit paper and got them nice and soft for paint. I’ve been using the SEM Trim Black for awhile on many cars, the stuff is awesome. Three coats of that and it looks brand new. I shot the outer keyhole rings red to add a little contrast accent.
I assembled everything back together and the door opens great with little effort and it feels factory solid. Gotta love the forums for this kind of stuff. I’m no engineer but I can damn sure follow directions lol.
Last edited by level7; May 19, 2023 at 11:06 PM.
Reason: Added Link
Now that I have all the supporting mods, I felt that I could safely update my exhaust system. The Greddy PE 90�s exhaust had seen better days and isn't exactly inconspicuous for living in California at the time. The canister had developed some damage due to how low the car used to be and how big this exhaust is. Maybe it will have a second life somewhere as a coconut cannon, but it was time to retire this beast for something a bit milder and closer to the stock look.
I purchased a slightly used RB dual tip from a forum member back in 2017 when I was gathering parts for my restoration project. I stored it down at my friend's shop because I didn't have a garage to store it in at the time. I would periodically check on it to make sure it was there and one day it went missing. My friend hired his daughter�s boyfriend to help out around the shop because he really needed work. He told us a story about how he accidentally put it with other old exhausts for the scrap truck that periodically comes by. It sounded shady, an almost new looking exhaust, nowhere near the old scrapped ones gets tossed into the heap for raw material prices.
Being the stand-up guy my friend is, he offered to pay what I purchased for it (which was only $300 back then) but I had to decline. I�ve always felt very fortunate to be able to have a place I can throw my car on a rack and have access to guys with 30+ years of automotive knowledge for free. Plus I need to take some accountability for leaving my **** at his shop for years because I refuse to store it myself lol. Well�come to find out the guy ended up selling the exhaust online but we didn�t find out until way after the fact and he had already split town.
Once I got my car back up and running in 2020, RB Duals were on backorder and it was hard to find a decently conditioned one for a good price. About a year ago I came across a forum member who was selling but there was a catch�it had a new high flow catalytic converter welded in. My original intention was to replace my stock main cat with a high flow one, but this opportunity changed my mind. With the intention of moving out of California soon, I ended up getting a resonated midpipe from Banzai and the RB Duals with the catalytic converter integration.
Parts for Project
Racing Beat Dual Tip Exhaust (#16427)
Vibrant Performance GESI Ultra High Output 7830 Catalytic Converter (#VPE-7830)
Banzai SS Resonated Midpipe (#CSRX-7MSS)
High Temp Exhaust Gasket 3� x2 (#120-07610-0002)
I wanted to leave in some type of cat for 2 reasons: Decrease the smell and to prevent boost creep. I put her up on the rack and swapped everything over with new exhaust gaskets. Midpipe fits nice and snug in the tunnel and the high-flow cat just clears the rear differential enough where it can�t swing over and collide.
At idle, it sounds awesome. The Greddy PE with a stock cat had a very deep, consistent tone while the new setup is more throughty and has a nice, steady gurgle. As far as decibel levels, I was surprised to find that it was very similar at idle. I was expecting it to be louder but the resonated midpipe is clearly doing a fine job. Cruising speeds sound great with minimal to zero drone. Once you get on the throttle hard it sounds absolutely amazing after the transition to redline. I have experienced just a little bit of boost creep in colder temperatures. Nothing too alarming, but I�ll eventually have to tune it out with the PFC.
Finally taking the time to catch up on documenting my progression. It's been a great year in my new place and work/life balance has gotten way better to the point where I've been able to spend a substantial amount of time with the FD. This update is a big one interior-wise and will be broken up into 2 posts, this one being the shifter rebuild, center console refresh and double-din touch-screen. I'll admit, I highly underestimated how bad my shifter was and wish I would have done this much sooner in the build. The feel of a rebuilt shifter is something special and I highly recommend it to anyone getting into these old machines.
My center console was already out, salvaged for spare parts and junked. There are plenty of great threads here showcasing step by step instructions on how to play Operation with your center console. My lever groove and shifter bushings were absolutely destroyed to the point of plastic pebbles. No wonder the thing looked like a bobblehead doll when driving! Just remember to grease the inside and outside of the shift seat and the shift lever ball joint. Reference page J-62 in the FSM for all the details. I used about 3 1/4 ounces of 75w-90 gear oil in the turret which should be close to the recommended 80-95cc.
It took a bit of time to gather all the center console parts because I'm a bit of a bargain hunter but it was well worth it as the large savings go to...more car stuff! I reused components like the toggles/indicators and ashtray cup but everything else is new from Ray or eBay JDM vendors. My biggest obstacle was procuring the e-brake boot frame which is no longer available and vendors making 3D generated versions want more than it's worth. So I ended up just creating a simple aluminum bracket that the boot can sit in and be attached to the console frame, secure from 2 points. I purchased a ton of various factory style fittings and fasteners to help with this project and others down the line. I added a bit of sound deadening material and raised the metal support frame to prevent the back of the console from sinking when you put your elbow on it. The goal was to make the new parts factory tight so when you do that, you're not treated to a symphony of pops and clicks, which I was able to achieve!
Center Console Parts
93-95 Rx7 Black Center Console (FD01-64-420E-02)
1993 Rx7 Shifter Panel (FD01-64-471D-00)
86-95 Rx7 Interior Panel Trim Spring Clip x5 (B092-55-257)
93-95 Rx7 Black Ash Tray (FD01-64-610A-00)
93-01 Red Stitching Real Leather Gear Handbrake Boot MAZDA RX-7 (eBay)
Doing the double-din head unit was just another reminder it's hard to trust anyone but myself to get quality work done. As I was pulling out the old stereo I had a shop install shortly after purchase, I saw that I paid good money for a **** job. The wiring was questionable and the parts used were of low quality, even for 1999 standards. He even left a cassette tape of Bone Thugs N Harmony stuffed behind the unit frame lol. At this point in my life I know my way around basic electronics so I was happy to take on the challenge of installing a newer unit with a working back-up camera. It was pretty simple to get the harnesses all sorted out once I returned the prior job to factory spec. All wires were replaced except the main power line coming from the battery. I purchased the ATOTO A6PF because it had everything I needed and for a great price. This was primarily purchased to replace my old Power FC Commander but having music, GPS, and an Android OS is a big bonus. The Bluetooth app that member ds2qwd put together makes the whole setup worth every penny as now I have all the Commander functions and displays on a touchscreen double-din in real-time. One of my favorite mods ever and will go into more details in my next couple updates.
Only issues I ran into were the unit frame(sleeve) that came with the A6PF didn't fit adequately and it's tough to find a face bezel that fits properly. The Pioneer kit seemed like it was made specifically for this car in both cases. Very worth the extra cost. In the pics you can see it sticks out a bit from the HVAC console face but I did that on purpose, it will go all the way back if you want the bezel flush.
Double-din Unit & Supporting Parts
ATOTO A6PF Android Double-DIN Car Stereo 7" Touchscreen, GPS Tracker, WiFi/BT/USB A6G2A7PF (Amazon)
ATOTO AC-HD02LR 720P Rearview Camera with Live Rearview (Amazon)
Pioneer ADT-VA133 2 Din Install Kit (eBay)
Metra 70-7901 Radio Wiring Harness Mazda 90-01 4-Speaker (Amazon)
I fed the backup camera and wires down through the passenger side rail and through the rear hatch area covered by the plastic trim, all the way to the rear of the spare tire well. This is where I spliced into the reverse lights. I tucked the wires under the plastic trim and fed the camera wire through the rubber grommet in the back of the spare tire well. Then out through the rear bumper plate light holes. This was one of those "while I'm in there I may as well..." projects and I'm happy I did because it's nice being able to see clear backing in and out of spaces at car meets. I can also activate the camera while driving if I want to see behind me without using reverse.
I will close with something shocking and even more unexpected than finding that Bone Thugs cassette tape, and that is everything worked when I put it back together! The rotary gods were shining down on me that day I can tell you.
Yo dude! Nice update! I was the one who sold you the racing beat with the cat. I wish I had kept it but I gotta unload all these extra parts I have eventually.
How is the smell with the cat? Does it appear to be doing its job? I never even tested it.
Beautiful work in the interior as well man. Keep it up!
How is the smell with the cat? Does it appear to be doing its job?
Hey what's up man thank you! The exhaust turned out perfect. It indeed reduced the smell and helps make the whole system relatively quiet until you open it up. The placement of the cannister is just far enough away from the diff to not swing and make contact.
Love the update. All items I'm planning down the road. I'm dying for some carplay with a double din since there isn't a good solution for a phone holder in our cars.
The second part of my big interior update includes a 52mm dual gauge pod to replace the center speaker and new door cards. I previously had my boost gauge on the a-pillar but never really liked the location and the pod warped in the sun a bit over time while it was being stored. I'm not a big fan of having a bunch of gauges but I think it's important to be able to clearly monitor boost and AFRs on the fly. I really liked the offset faces and factory look of the pod Shane Drake makes so I picked one up from his online shop.
Parts for Pod Install
FD3S Double Gauge pod 52mm (draklore.com)
Black Edge Finishing Trim
3M Black Super Weather-strip Adhesive
Out of the box, the pod is a really nice piece with a fairly accurate interior texture. Problem was, as you can see in the first image, it didn't fit well into the center speaker housing. There were noticeable gaps and the insert tabs didn't hold well. Initially I thought maybe my dash was warped or I was missing a piece but the center speaker still fit perfectly before I removed it. Instead of risking returning it for the same issue, I thought of a way to eliminate the gaps and create enough compression between pod and dash so it's solid in place. I had some black rubber edge trim left over from a previous project so I wrapped it around the outer edge of the pod lip with the aid of some weather-stripping adhesive, and let it sit overnight to bond. Overall I like how it turned out and the rounded edge looks pretty good. Now I just need to upgrade to a wideband and update the faces to black to complete the OEM look and feel.
My door cards have seen better days and is now the eyesore of the interior. The map pocket, door cups and passenger handle have all gone bye-bye and need to be replaced. The plan is to refurbish the OEM cards but it's going to take awhile to gather everything I need and execute the work. In the meantime I thought I would dress up some LRB Speed cards to match the new interior bits I put together.
Parts for Door Cards
LRB Speed Door Cards (lrbspeed.com)
ROSEROSA Peel and Stick PVC Leather Self-Adhesive Wallpaper (Amazon)
VViViD XPO Black Carbon Fiber
Red Vinyl Pinstriping Tape, 1/8 inch (Amazon)
Nilight Nylon Bumper Rivet Clips (Ford N807389S)
I was able to dress and hang both cards in about 3 hours total. I did a horizontal split between the carbon and this awesome wallpaper wrap I found on amazon. It looks very similar to the 1993 interior texture and the surface is cleanable. I split the two sections with a red line to match the floor mats and painted any exposed sheet metal black. The kit only comes with enough rivet clips for one application and yes they can be reused when taken off, but I cant manage it without beating them up a bit so I just bought a bag of them for cheap on amazon as I had to rehang the cards a couple times to make adjustments. Definitely more road noise in the cabin but they sure do look pretty cool and will do for now.
Once I get the OEM cards back on and a wideband, the only interior parts I have left to restore/replace are the seats! Almost there.
I've been wanting to get a premium set of wheels for what seems like forever now because my frugalness tends to block me from making big purchases without intense thought and scrutiny. I typically don't buy things unless I know I'm getting a good deal, a blessing and a curse let me tell you haha. When I got my FD back up running I made myself a promise that if the wheels I wanted hit a certain price I would pull the trigger. It took three years of periodically checking, but when estevan62274 posted his new wheels a few months back, it inspired me to shop around again and sure enough, FastModz of all places presented a fortuitous deal that I clearly couldn't say no to. I also picked up some hub ring adapters to match the FD centerbore of 67.1mm. I don't think it's completely necessary as they should thread into place regardless but I thought, what the hell why not. Couldn't believe how light they were when I pulled them out of the box. I love the concave look, especially in the rear but I may coat them satin black to create more contrast at some point. Lost a ton of unsprung weight, steering is noticeably more nimble and the car looks gorgeous, so big wins all around.
Wheel Specs
18x10.5 Squared | +25 | R Face | Dark Gunmetal
Tire Specs
Front 285/30ZR18 | Rear 285/35/ZR18
I went with a 30 sidewall up front to keep the full lock steering characteristics intact.
Bro!! she looks awesome!! Love to wheels and fitment is spot on!
That's a really interesting tire size combo, though not many tire options available in it. I've long held that you need a bigger diameter tire in the rear, as while the front wheel wells are small, the rears are really large. That's a tall tire, I run 275/35, and it looks great. Post some direct profile pics!
Not quite full side profile but that's as close as I have at the moment. First image is when I initially put on the wheels with 285/30 squared. You can see some considerable gap between fender and tire and that's as low as I'm willing to go with where the chassis sits from the ground. I'm fine with the gap up front, but I wanted to fill the space in back and a 285/35 is a little over an inch higher in diameter which was perfect. As far as the front, 24.75 to 24.95 diameter is my sweet spot until I lose full lock steering and rub something which I'm not willing to compromise. The 275/35 comes in around 25.58 diameter so too big for me with my offset otherwise I'd agree that's a good size to run. There are some lower width fitments that would work but one, I don't want to stretch tires and two, I want to keep the characteristics from front to back as close as possible. Couldn't be happier with how the car performs right now.