Esser's LS3 FD RX-7 R1 **Warning V8 content**


Esser's LS3 FD RX-7 R1 **Warning V8 content**
I figured I would post up what I have been working on over the past year. I have owned several import cars in the past including a couple 350Z's and a few 240sx's and recently started diving into the LS world with a C5 corvette. The vette is a fantastic driving car and makes great power very little money, and unmatched reliability. However, there was always a lack of interest for me in the body and interior side of things, as well as the community in general. The 90's era imports have a special place in my heart, and the ability to create a car with the monster V8 power and reliability in a lightweight chassis peaked my interest. Enter the FD RX-7.
For the longest time I have wanted to pursue a project with an FD and it wasn't until recently that i was able to jump on a deal for a roller chassis from Texas that I found on this forum. I had my mind made up before I even bought the car, that an LS would find it's home in the chassis. It was a perfect candidate: R1 model with low miles, fresh paint, and all the rotary shenanigans had already been pulled out. I do love a nice rotary, but for me this project is about making my dream car, which is an LS FD. All the benefits of the reliable torque from a V8 and the elegant, agile chassis of the rx-7 combined into one. After a trip down to Texas (a 12 hr drive) I had the project strapped on a trailer and on its way home. :2f2f:
The R1 model was a must for me, at 6'1" I was unable to fit a helmet on in a sunroof FD. Not to mention the roof line without the sunroof has a slight dip that adds to the unique curvy look of the FD. The roller I found was extremely complete, with all interior items included as well. I am thankful I was able to find such a clean slate to start with.

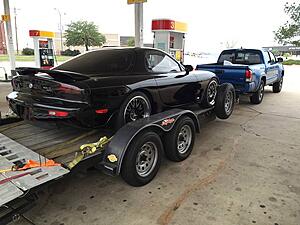
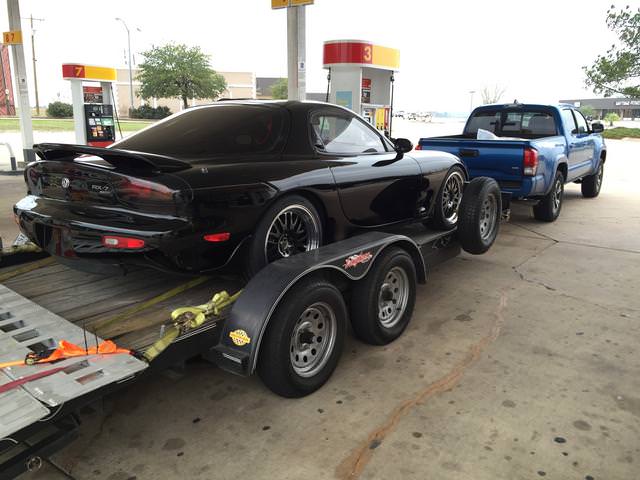
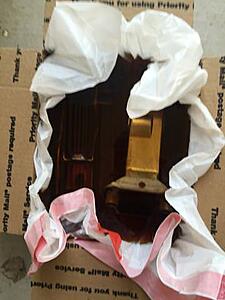
Here is my Tacoma making the long haul from Texas back up to Indiana with my precious cargo. It was a great feeling looking back into the rear view mirror to see that FD back there!
 [/B][/B]
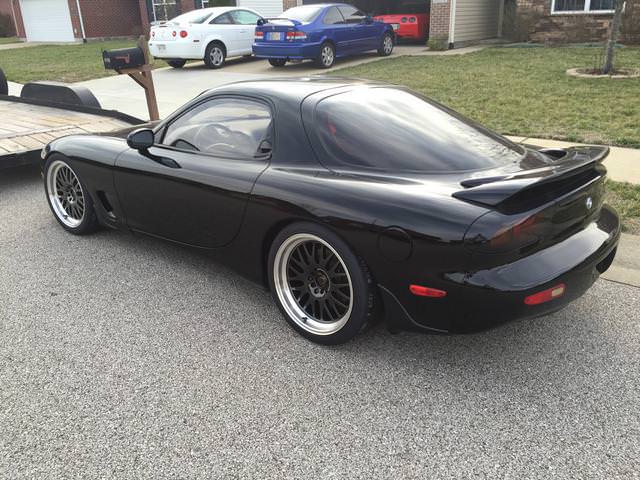
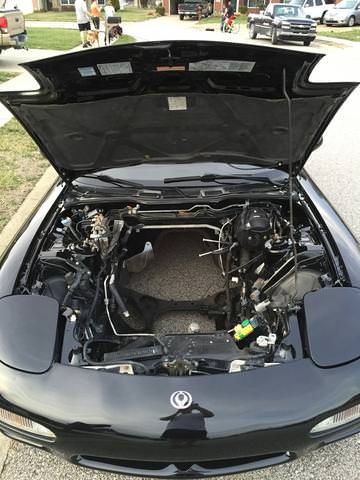
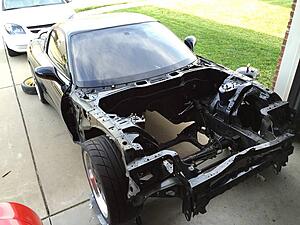
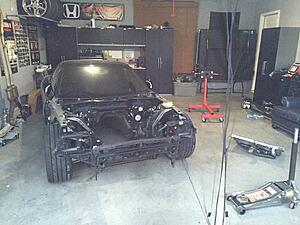
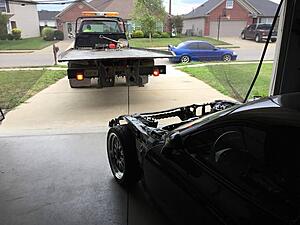
Fresh off the trailer after a second 12 hour trip and resting in front of my house:


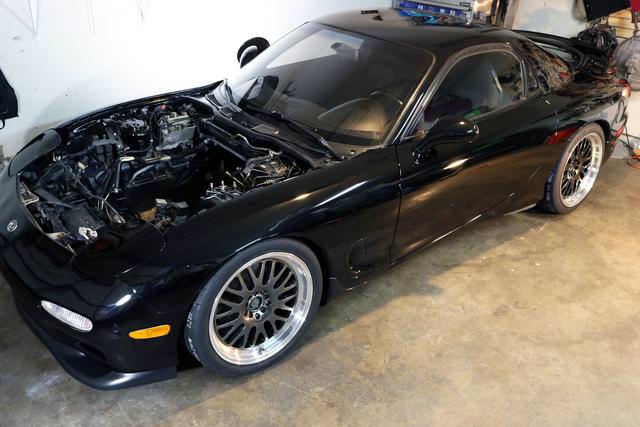
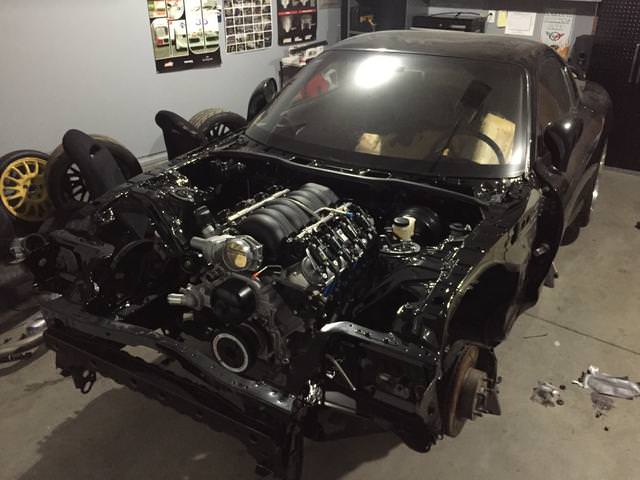
I was able to start looking through the engine bay and seeing what all else had to be done, and the hours of research had begun to prepare myself to install an LS3 into the chassis. My overall plans for the build are to do it once and do it right, my OCD will help keep my cleanliness of the build in line. Ideal setup will be for a road course, but would like to keep it as streetable as possible.
For the longest time I have wanted to pursue a project with an FD and it wasn't until recently that i was able to jump on a deal for a roller chassis from Texas that I found on this forum. I had my mind made up before I even bought the car, that an LS would find it's home in the chassis. It was a perfect candidate: R1 model with low miles, fresh paint, and all the rotary shenanigans had already been pulled out. I do love a nice rotary, but for me this project is about making my dream car, which is an LS FD. All the benefits of the reliable torque from a V8 and the elegant, agile chassis of the rx-7 combined into one. After a trip down to Texas (a 12 hr drive) I had the project strapped on a trailer and on its way home. :2f2f:


The R1 model was a must for me, at 6'1" I was unable to fit a helmet on in a sunroof FD. Not to mention the roof line without the sunroof has a slight dip that adds to the unique curvy look of the FD. The roller I found was extremely complete, with all interior items included as well. I am thankful I was able to find such a clean slate to start with.
Here is my Tacoma making the long haul from Texas back up to Indiana with my precious cargo. It was a great feeling looking back into the rear view mirror to see that FD back there!
 [/B][/B]
Fresh off the trailer after a second 12 hour trip and resting in front of my house:
I was able to start looking through the engine bay and seeing what all else had to be done, and the hours of research had begun to prepare myself to install an LS3 into the chassis. My overall plans for the build are to do it once and do it right, my OCD will help keep my cleanliness of the build in line. Ideal setup will be for a road course, but would like to keep it as streetable as possible.
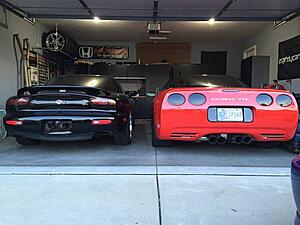
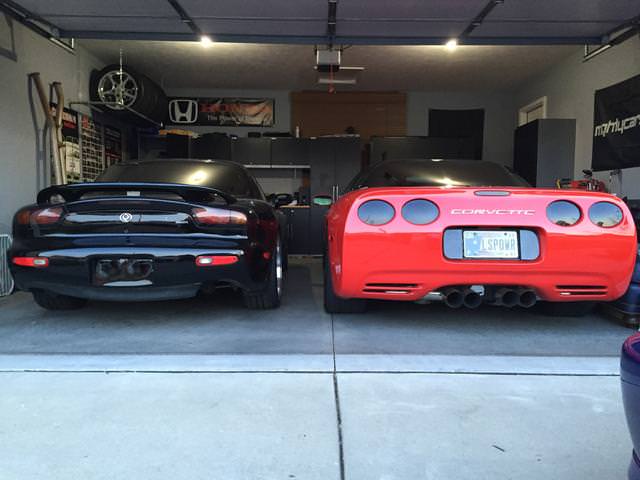
Here is a good size comparison next to a C5 corvette, for those curious. It is indeed much smaller in length and width!
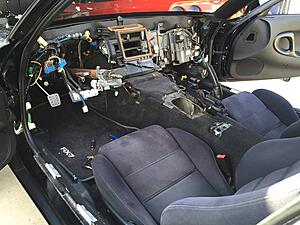
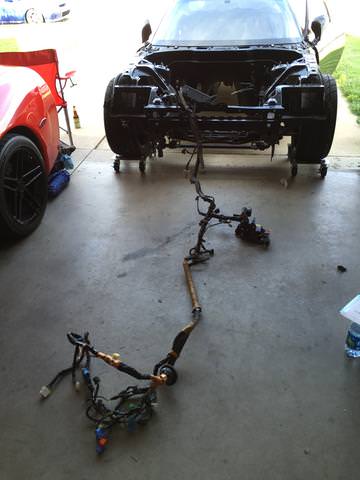
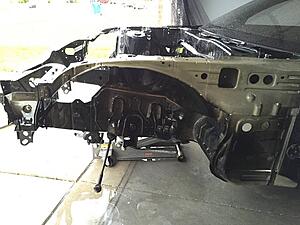
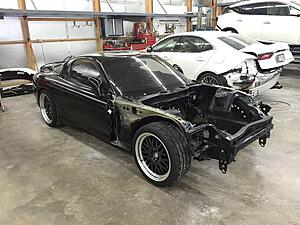
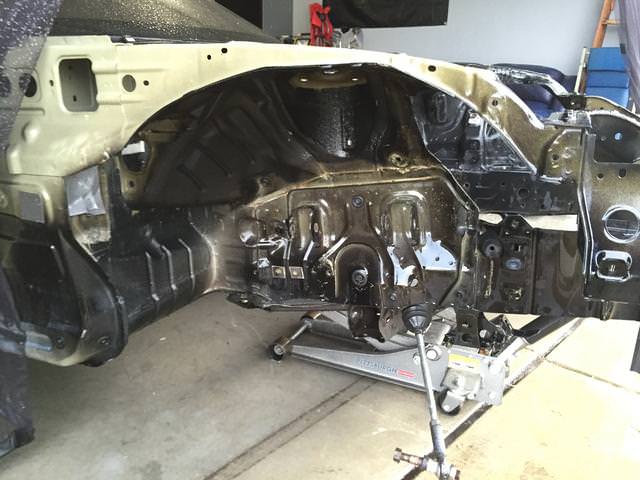
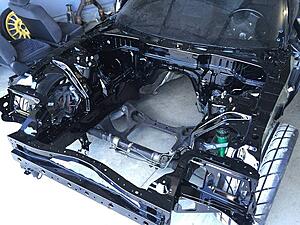
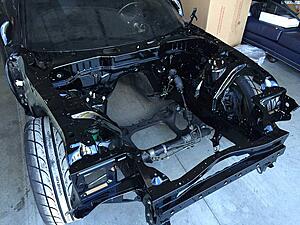
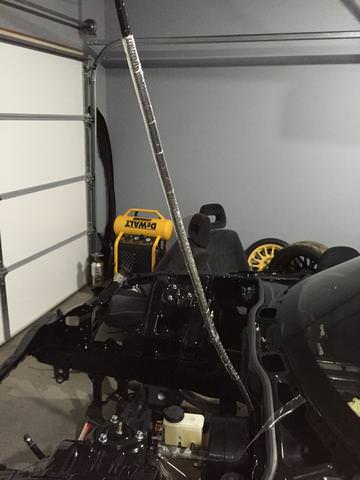
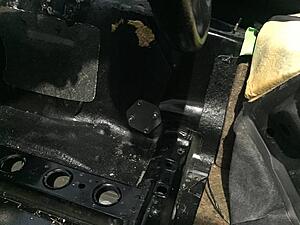
My first plan of attack was to strip out the chassis and remove everything in the bay to prepare for paint. This involved pulling that horse show front harness out (huge pain) and taking out all the factory brake lines. this engine bay has been painted previously, but it was done when the engine was in the car so it is somewhat of a patchy mess ha.
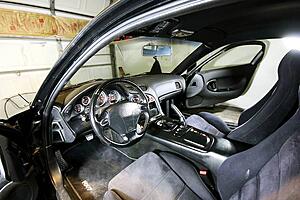
Rolled it out and removed the dash to get to some of the wire harnesses a little easier. The dash removal alone took a couple hours

HVAC system removed:
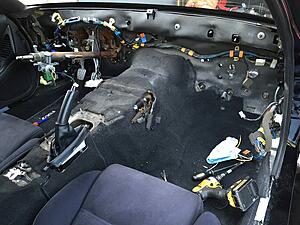
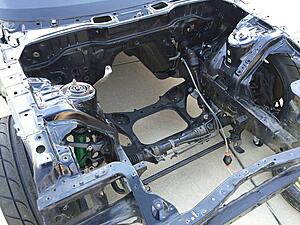
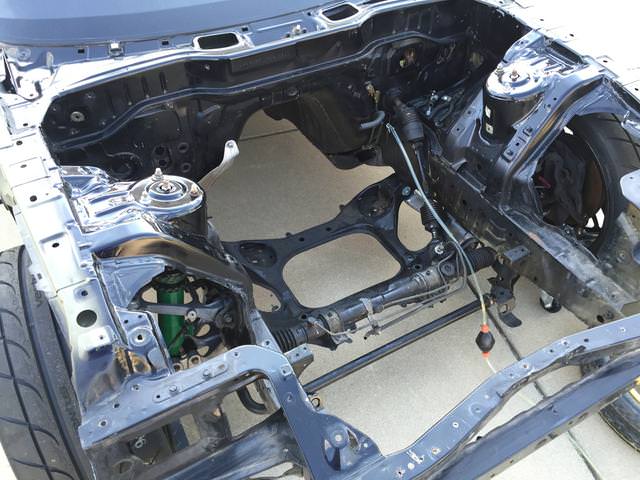
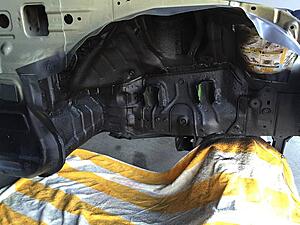
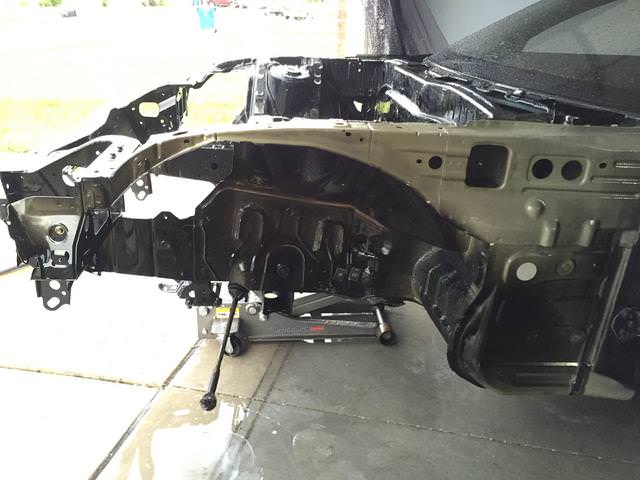
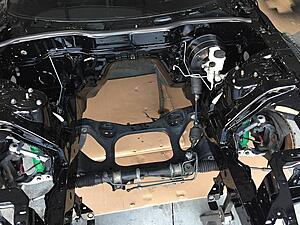
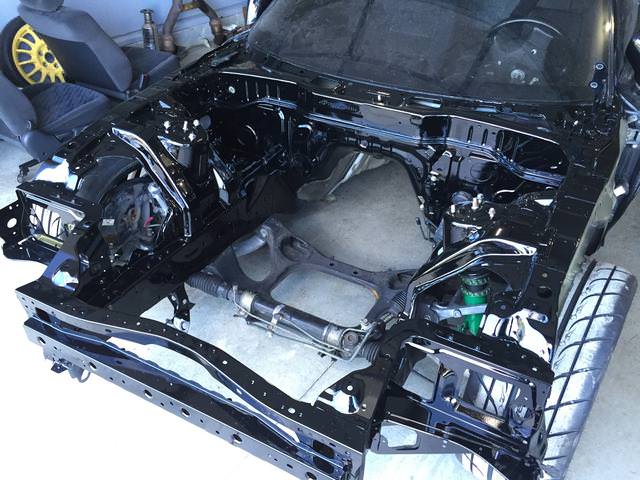
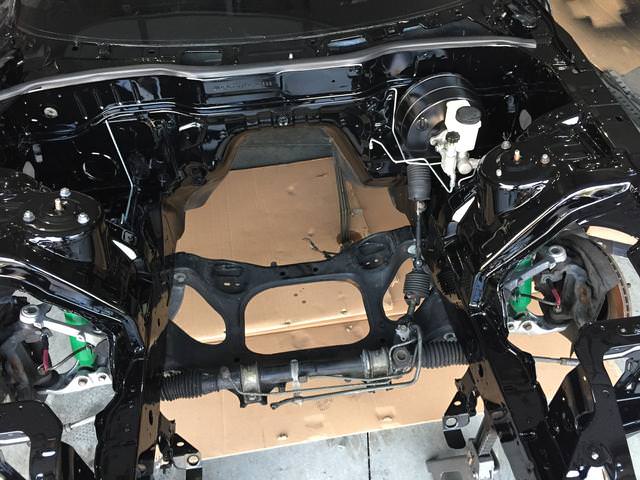
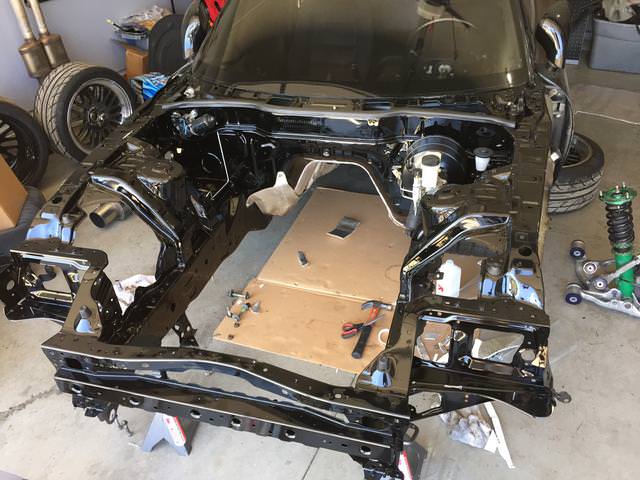
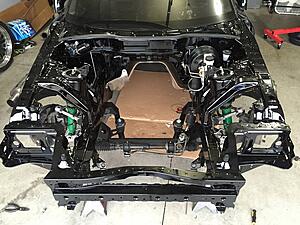
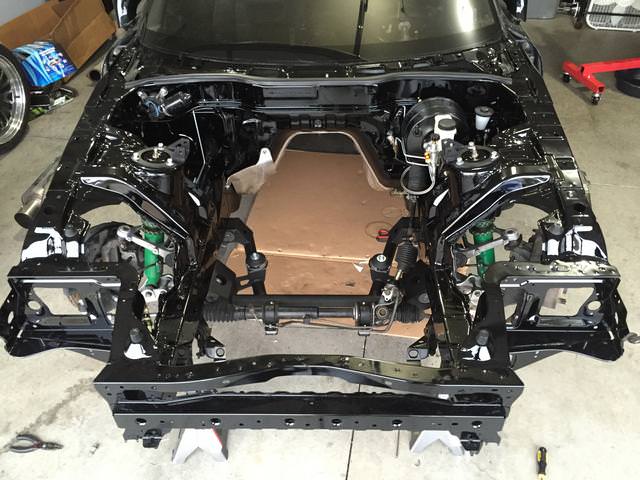
Got the front down to bare chassis, in an attempt to start to fill in some holes and do a slight shave of the bay. I don't plan to completely smooth everything out, just a slight clean up.
My first plan of attack was to strip out the chassis and remove everything in the bay to prepare for paint. This involved pulling that horse show front harness out (huge pain) and taking out all the factory brake lines. this engine bay has been painted previously, but it was done when the engine was in the car so it is somewhat of a patchy mess ha.
Rolled it out and removed the dash to get to some of the wire harnesses a little easier. The dash removal alone took a couple hours

HVAC system removed:

Got the front down to bare chassis, in an attempt to start to fill in some holes and do a slight shave of the bay. I don't plan to completely smooth everything out, just a slight clean up.

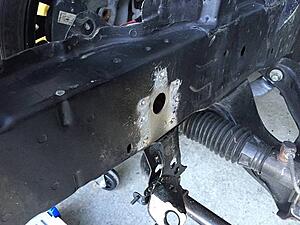
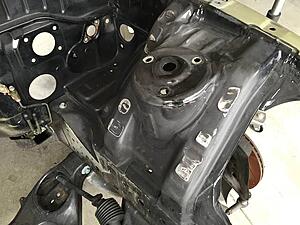
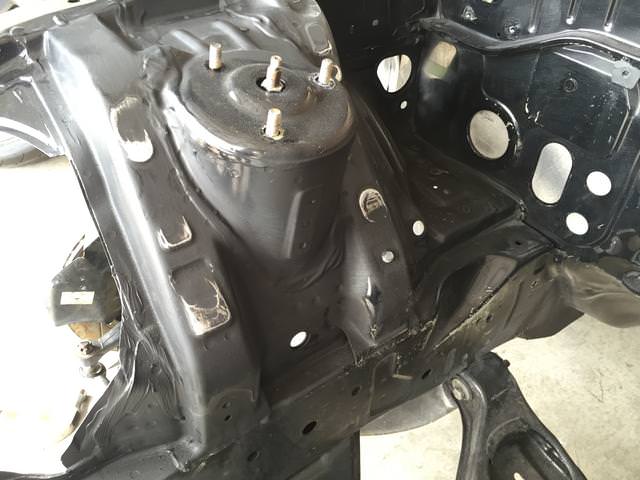
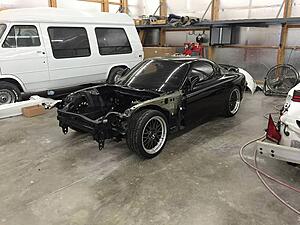
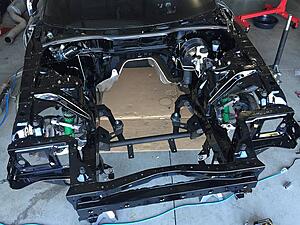
With everything removed from the engine bay, I was able to give it a good cleaning and started removing some of the unnecessary brackets and holes.


I also siphoned out all of the old gas that was sitting in the tank for who knows how long.
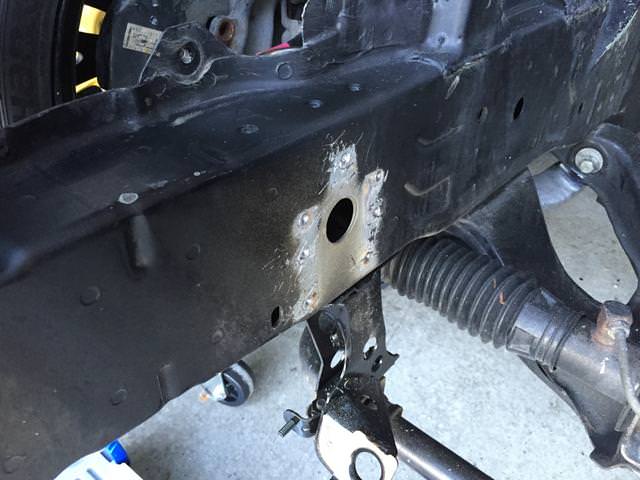
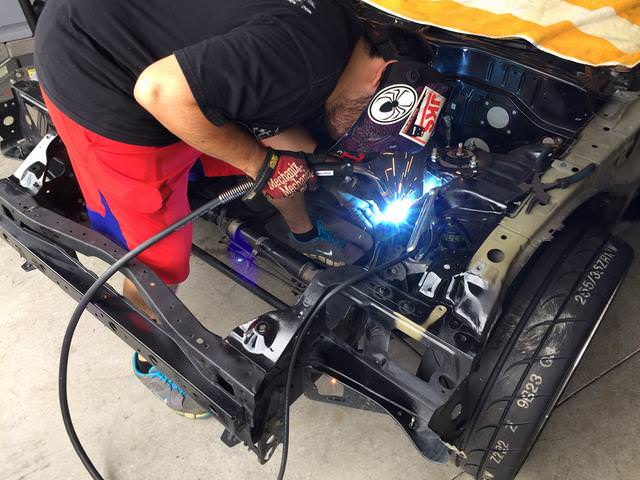
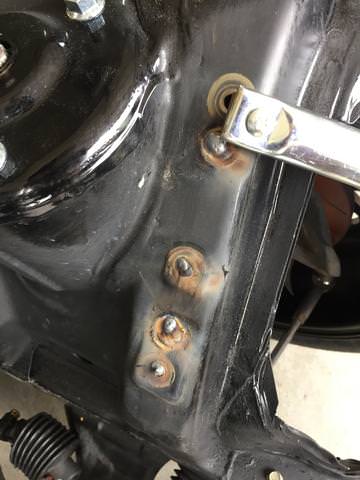
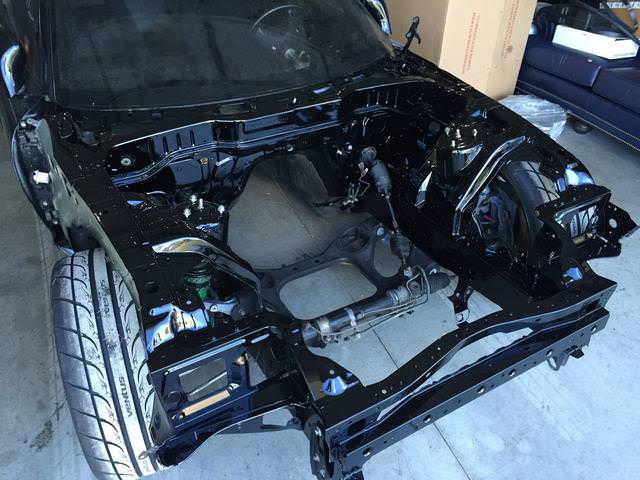
With some help from a buddy, we welded up a lot of the future un-used holes for a bit of a shaved look:
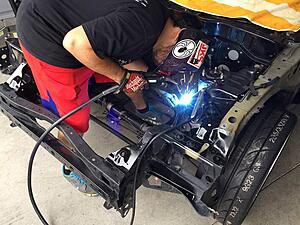


Again, not going for the completely shaved look, just removed the un-used holes so the engine bay is simplified. I grinded everything down and hit it with a coat of rust reformer to keep everything minty until the painter can get ahold of it.
I also siphoned out all of the old gas that was sitting in the tank for who knows how long.
With some help from a buddy, we welded up a lot of the future un-used holes for a bit of a shaved look:


Again, not going for the completely shaved look, just removed the un-used holes so the engine bay is simplified. I grinded everything down and hit it with a coat of rust reformer to keep everything minty until the painter can get ahold of it.
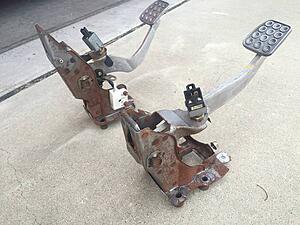
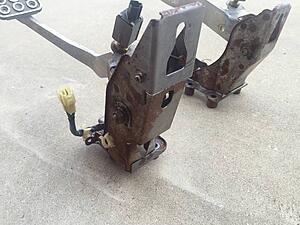
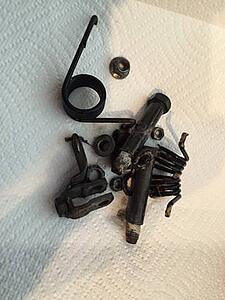
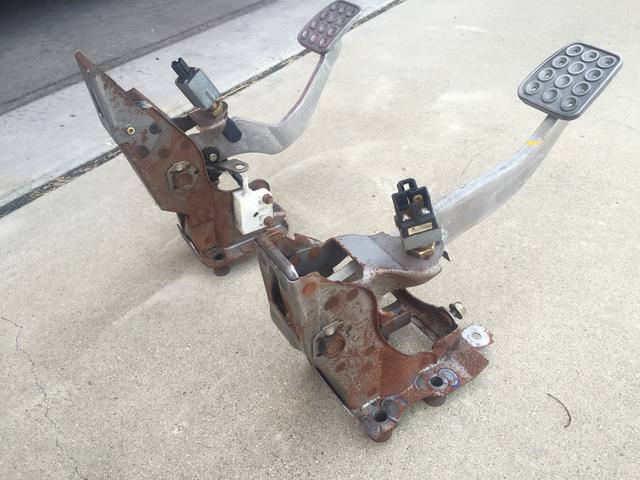
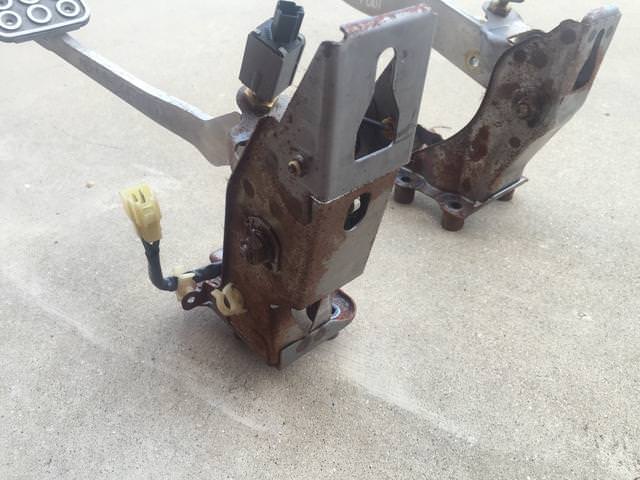
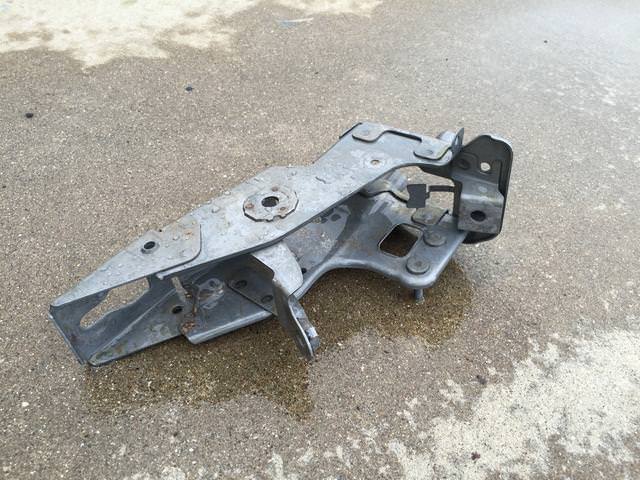
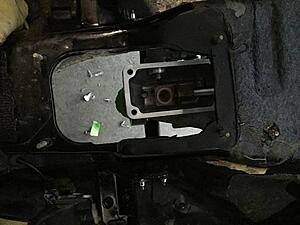
I removed the pedal assemblies and tore them down to rebuild them. It's obvious they used mild steel on these, and a light coat of rust had formed on the surfaces. I ended up soaking everything in apple cider vinegar to remove the rust, which worked amazingly well. I let them soak overnight in about a gallon of it, and they came out looking super fresh! I dried them off and before it could start rusting again I hit them with a coat of rust reformer.
All the parts going into the apple cider vinegar:
Comes out looking like new:
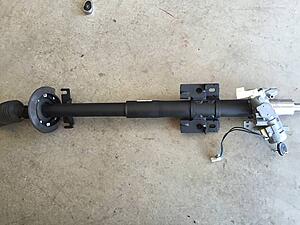
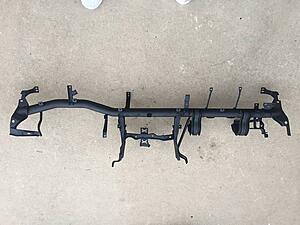
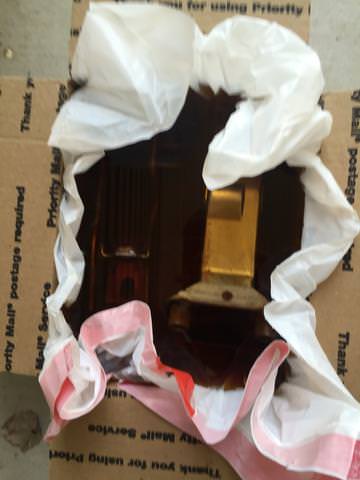
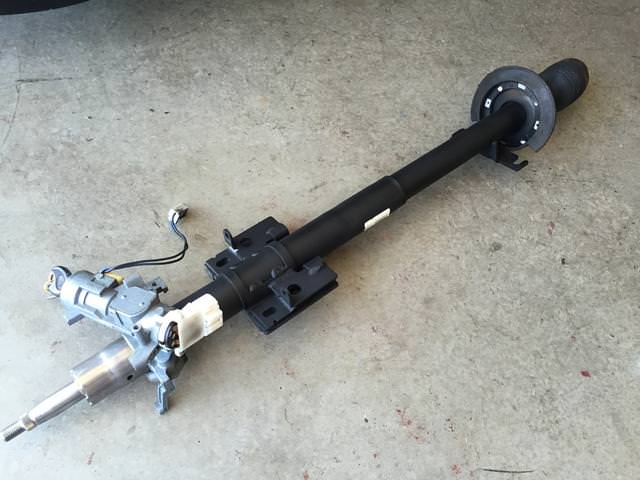
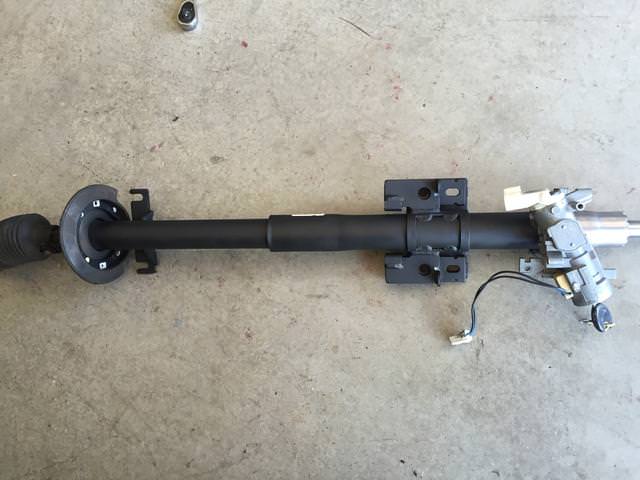
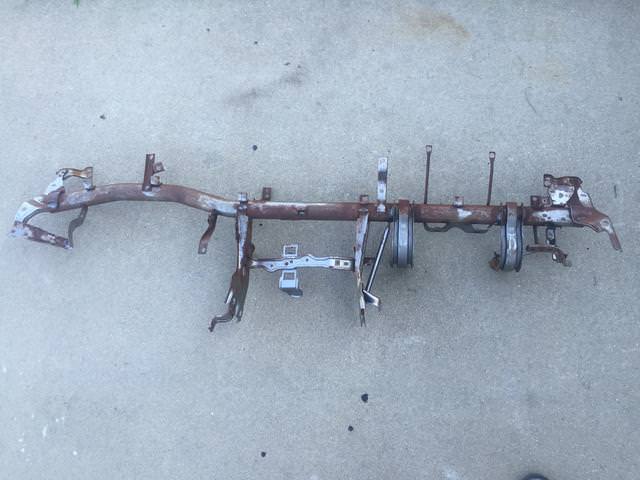
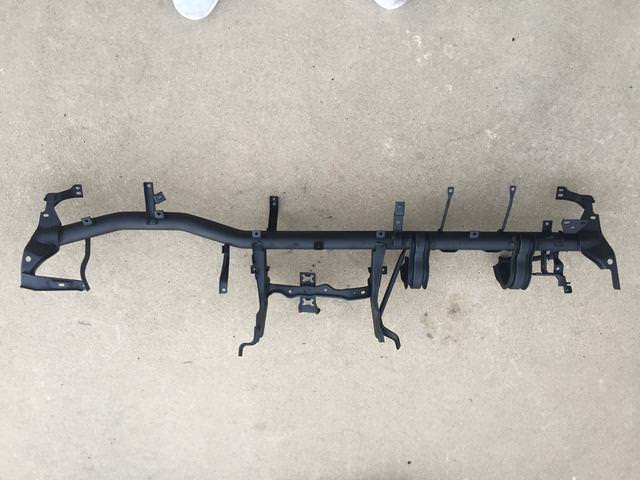
Gave the steering column and the dash bar the same treatment:


All the parts going into the apple cider vinegar:

Comes out looking like new:

Gave the steering column and the dash bar the same treatment:
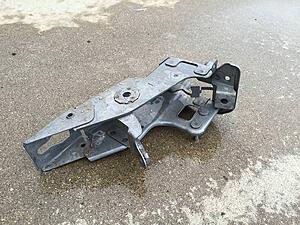
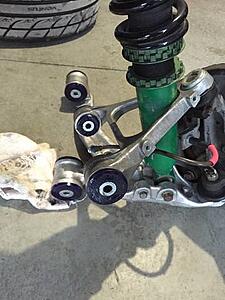
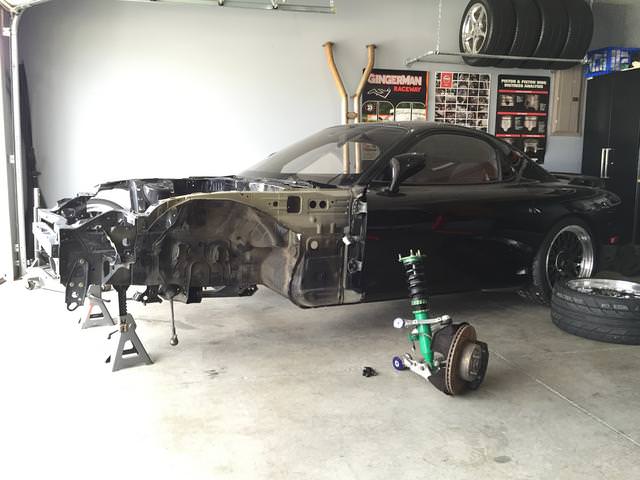
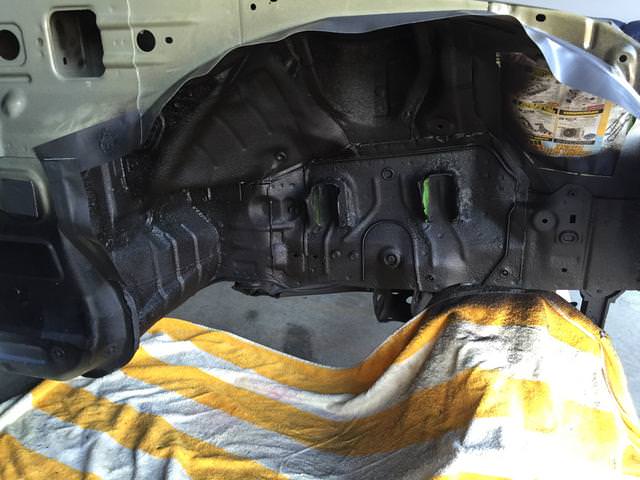
I figured I would go ahead and freshen up the suspension components in front and undercoat the wheel well areas before the car goes off for bay paint. I removed the front a-arm/brake assemblies and gave them a good cleaning. Everything up front is super pro bushings, and Tein flex coilovers. Debating on if I should do a brake upgrade now or down the road.
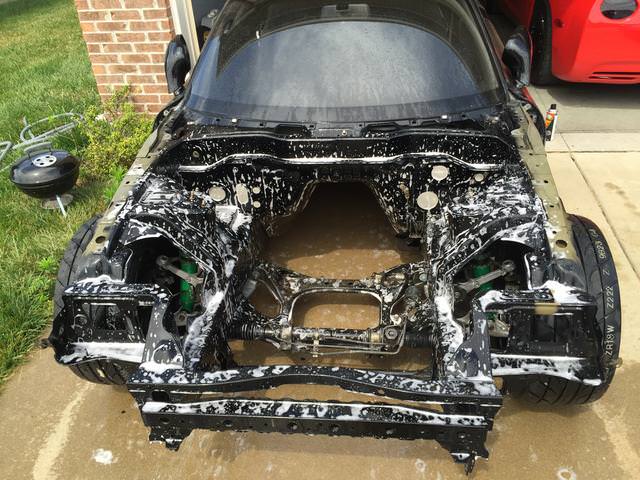
Had to pressure wash and scrub the crap out of these wheel wells to get all the crap out:

I used 3M professional rubberized undercoating and layed down a few coats. Love that stuff.
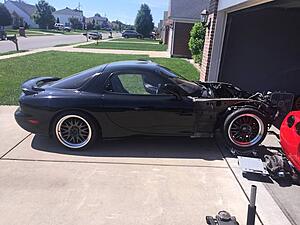
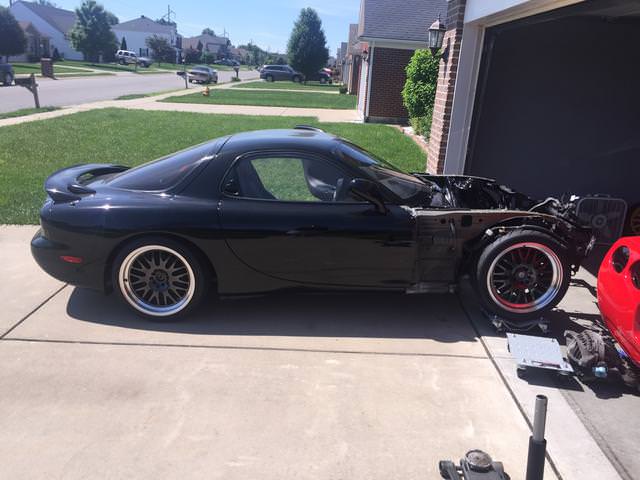
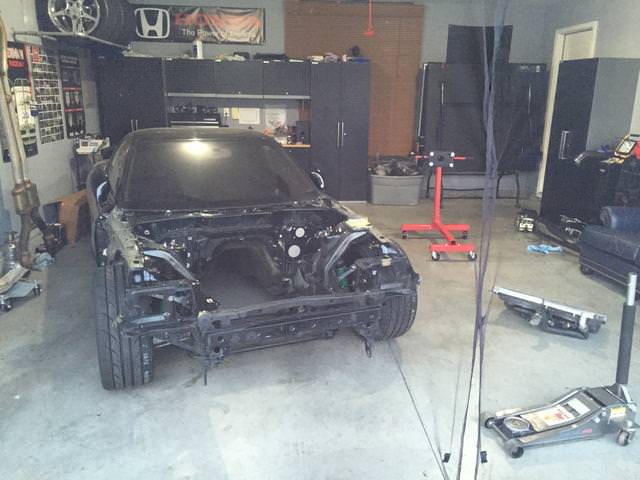
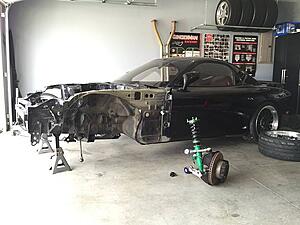
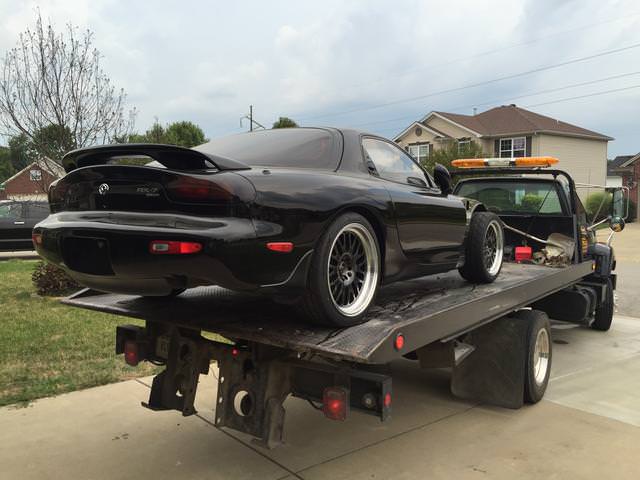
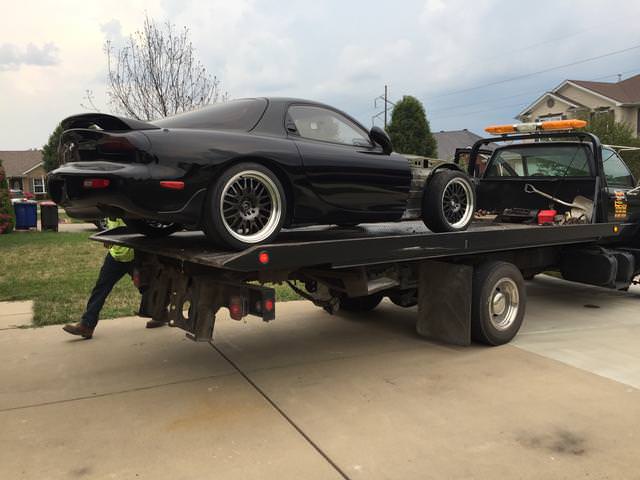
Re-assembled everything and the tow truck came to take her away to the paint shop:
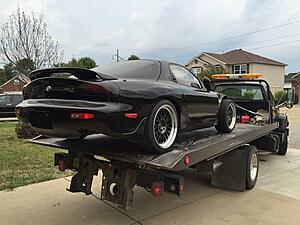
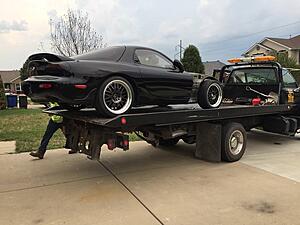
At this point it had been about 4 months since the car had seen daylight, it was nice seeing it out in the open air again!
Body shop planned to knock it out in a week

Had to pressure wash and scrub the crap out of these wheel wells to get all the crap out:
I used 3M professional rubberized undercoating and layed down a few coats. Love that stuff.
Re-assembled everything and the tow truck came to take her away to the paint shop:
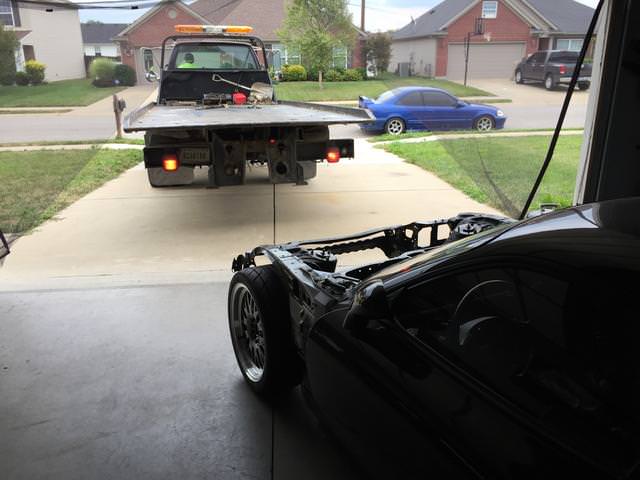
At this point it had been about 4 months since the car had seen daylight, it was nice seeing it out in the open air again!
Body shop planned to knock it out in a week

Trending Topics
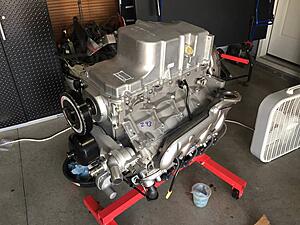
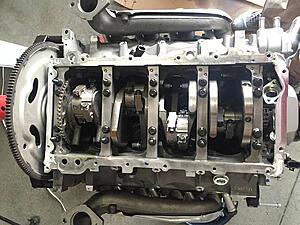
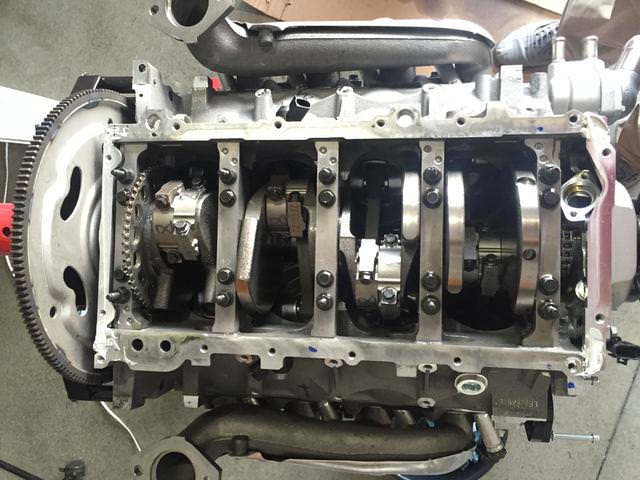
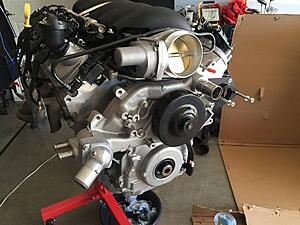
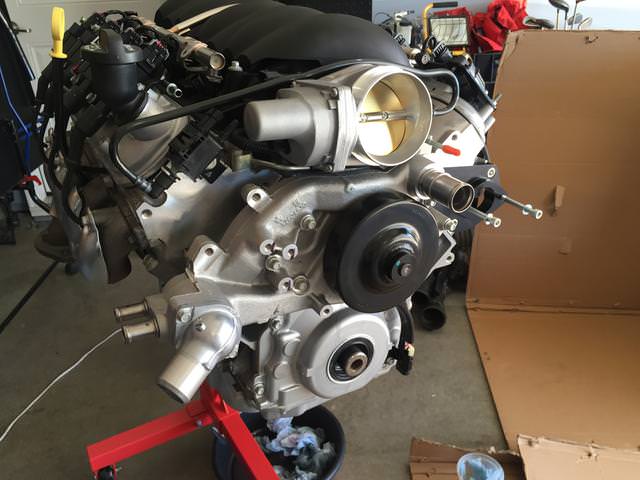
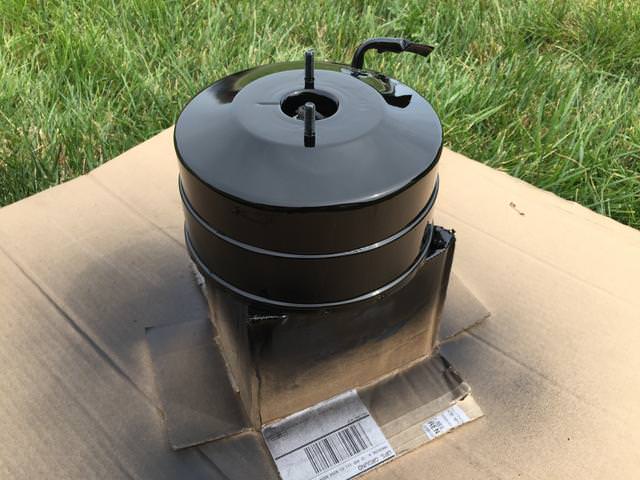
So unboxing the crate LS3, such a nice looking motor! I thought about buying a used for the longest time, and some deals fell through on some engine/trans combos. I eventually settled about ordered a brand new crate engine, it was not much more money than what used LS3's go for, and of course still has the GM warranty on it.

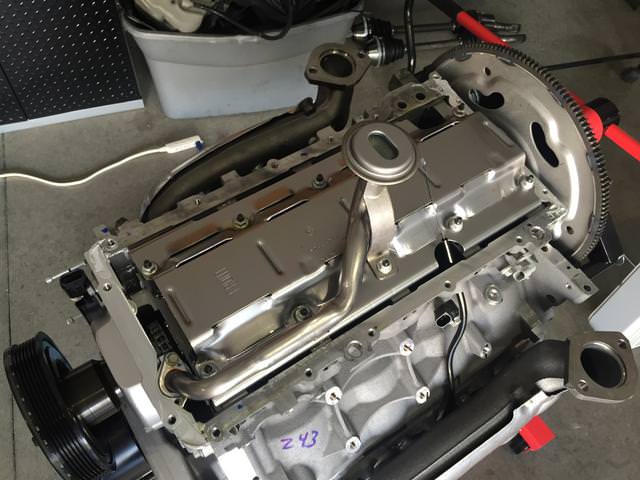
Got it up on the stand and started taking about the brand new engine to do the oil pan swap

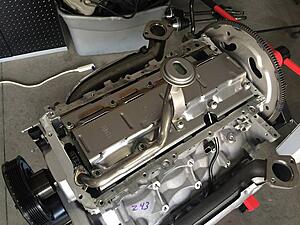
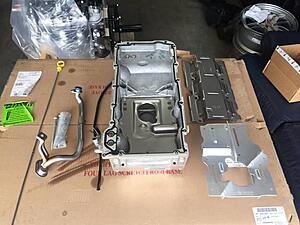
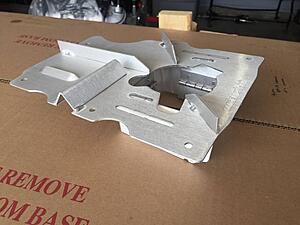
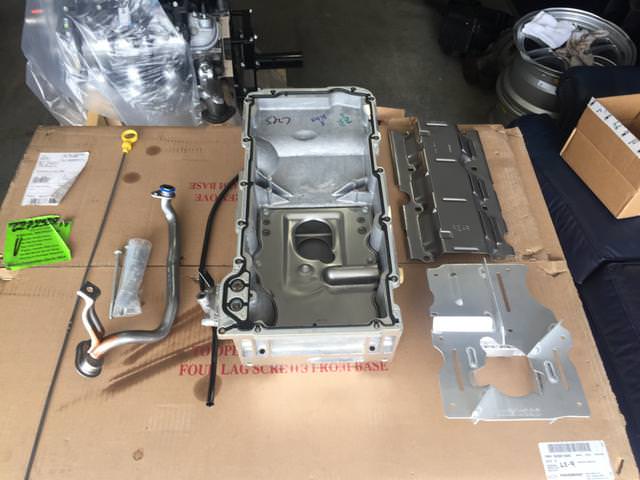
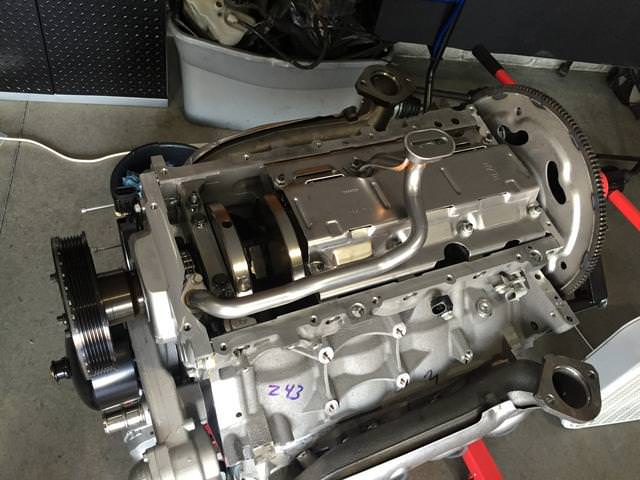
I will need to be using an f-body oil pan for the steering rack clearance. I went ahead and also bought the Improved Racing oil pan baffle for the added insurance during some hot laps.
New stuff goin on:
It's on!

Got it up on the stand and started taking about the brand new engine to do the oil pan swap


I will need to be using an f-body oil pan for the steering rack clearance. I went ahead and also bought the Improved Racing oil pan baffle for the added insurance during some hot laps.
New stuff goin on:

It's on!
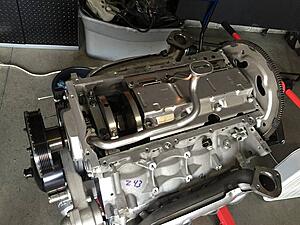
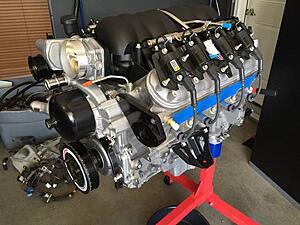
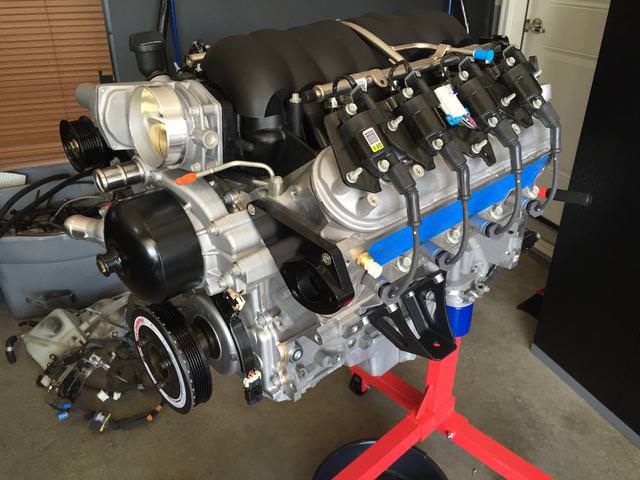
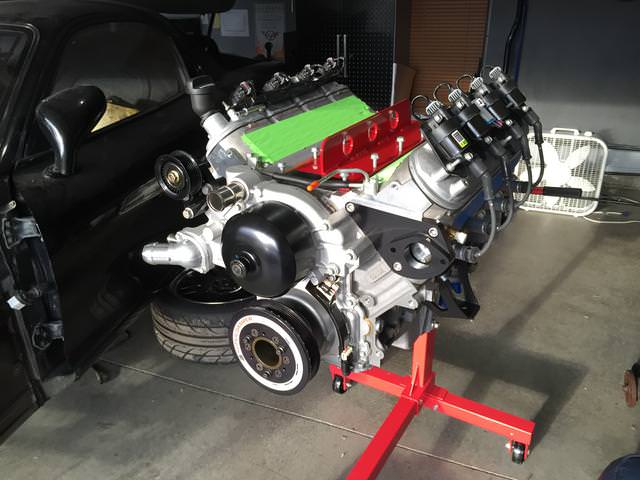
Something that I put on my last LS engine was an ATI dampener, it saves some weight and has a 10% under-drive on it. Will be a great piece to obtain that "quick rev" action i'm going for.
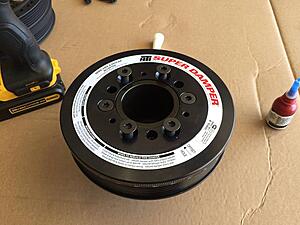
Pulling the stock on off with a puller:
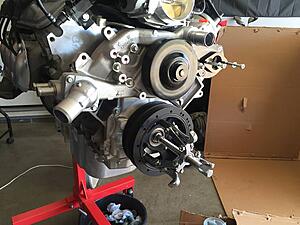
New one is on! The new balancer weighs about 4 lbs where the stock one was about 10lbs. I went ahead and removed the stock manifolds as well since I wont be using them. I decided to go with the Samberg/Ronin subframe assembly, so I installed their fabricated engine mounts. They look really well constructed!
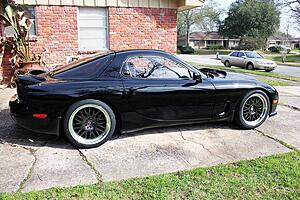
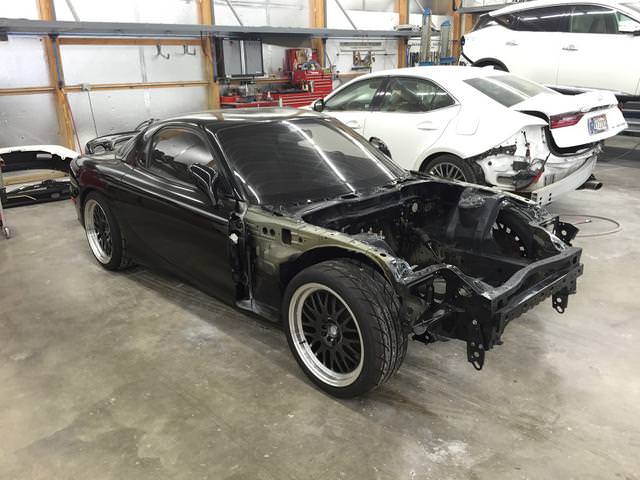
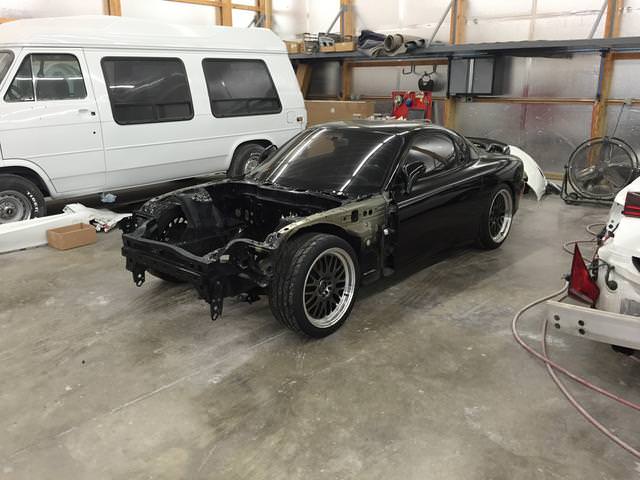
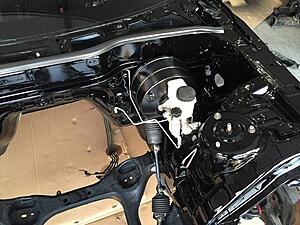
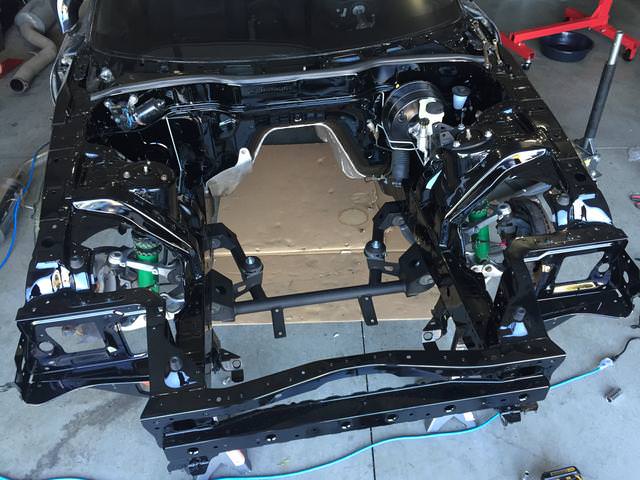
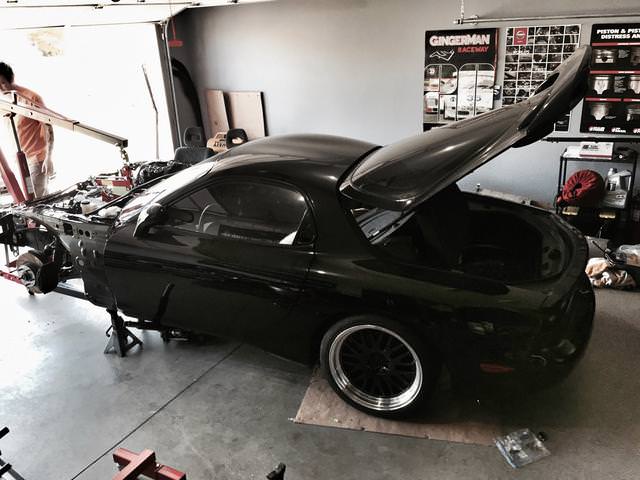
Car came back from the painter looking amazing, the pictures don't do it justice. I started installing all of the brake components when I got it back.
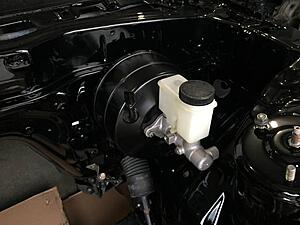
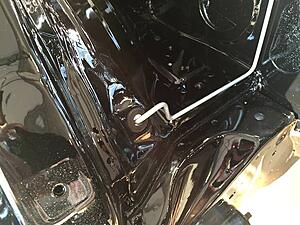
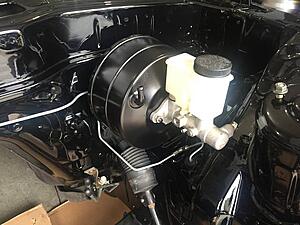
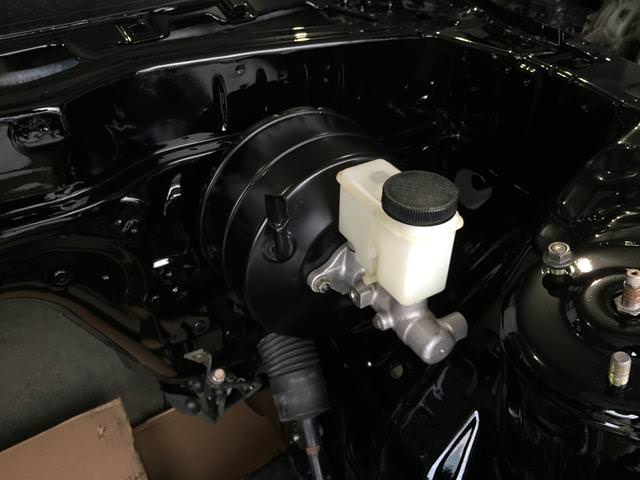
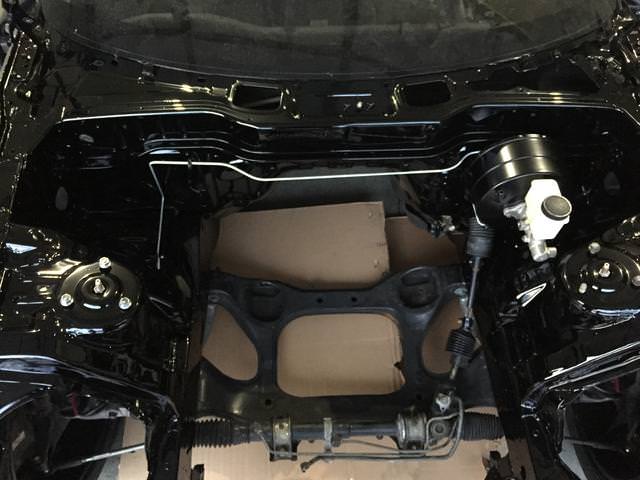
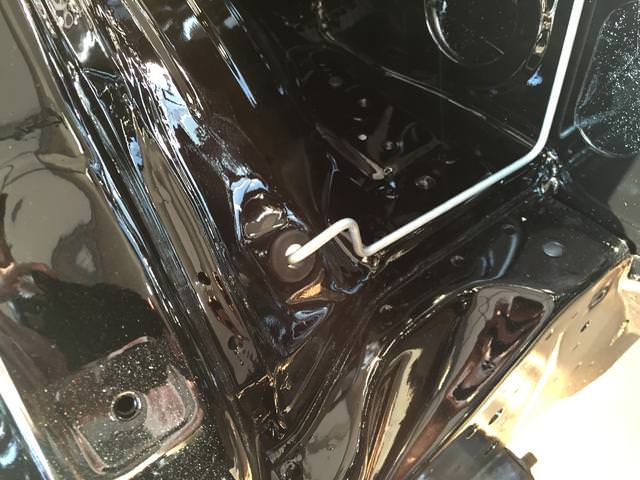
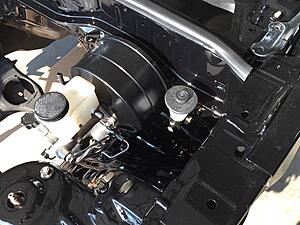
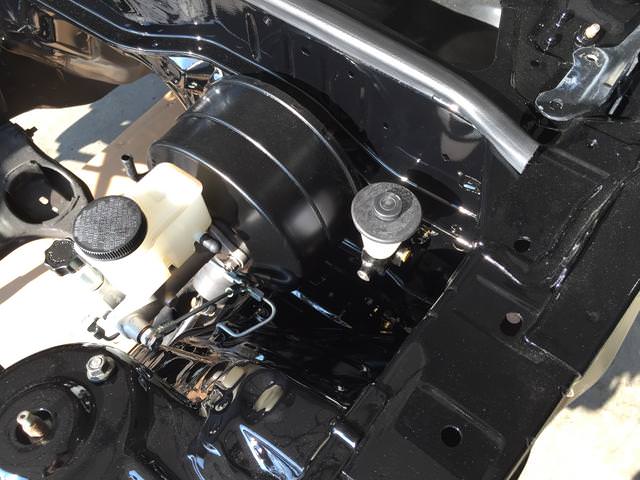
I went ahead and deleted the ABS system, for weight savings and the appearance factor. Not to mention I didn't have any of the sensors and I didn't want to put money into getting the system working. I chose to do the Rotary Shack's hard line abs delete kit, it took some manipulating but ended up fitting great. Installed a new gasket on the Booster and got it fitted up.

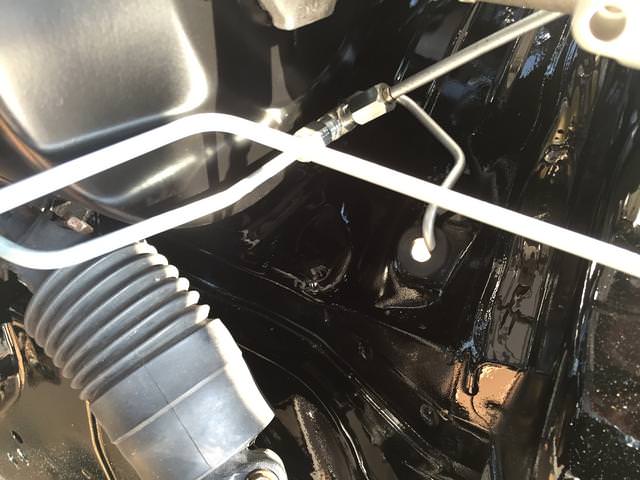
Found some nice sized rubber grommets to fit into the holes for the passenger line.
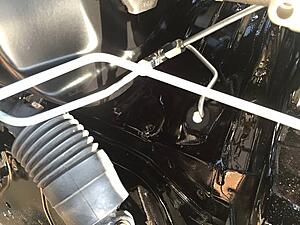
The kit included a Wilwood proportioning valve to control fron to rear bias:
I went ahead and deleted the ABS system, for weight savings and the appearance factor. Not to mention I didn't have any of the sensors and I didn't want to put money into getting the system working. I chose to do the Rotary Shack's hard line abs delete kit, it took some manipulating but ended up fitting great. Installed a new gasket on the Booster and got it fitted up.
Found some nice sized rubber grommets to fit into the holes for the passenger line.

The kit included a Wilwood proportioning valve to control fron to rear bias:
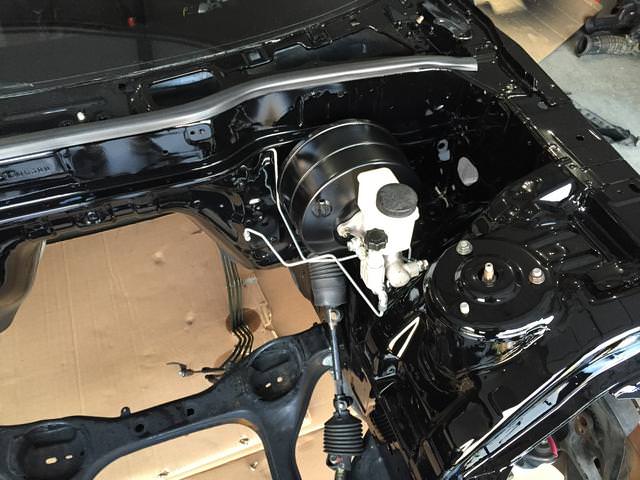


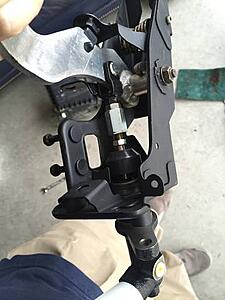
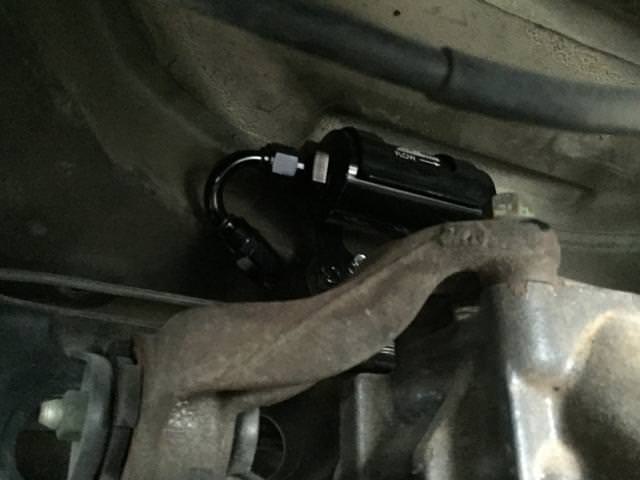
I went with the Toyota Landcruiser master clutch cylinder. It took minor modification to fit, and I did not end up doing any welding. I used the male to male thread pitch adapter and everything looks like it's going to work. The master cylinder itself is cast iron, should be pretty stout if the seals hold up over time.
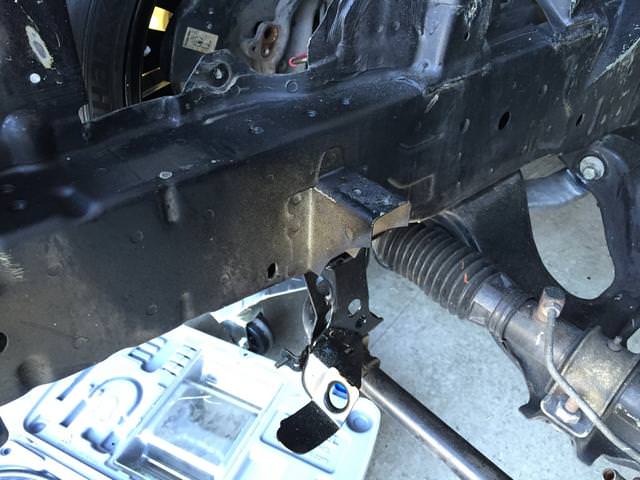
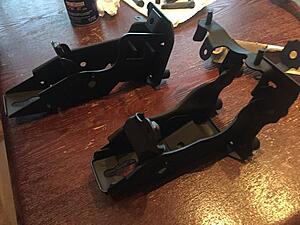
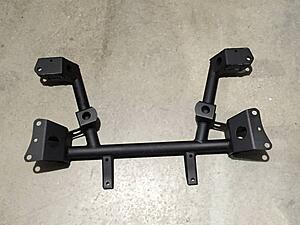
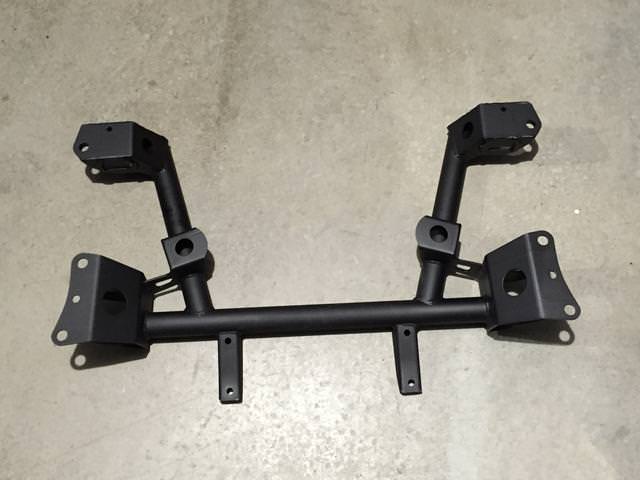
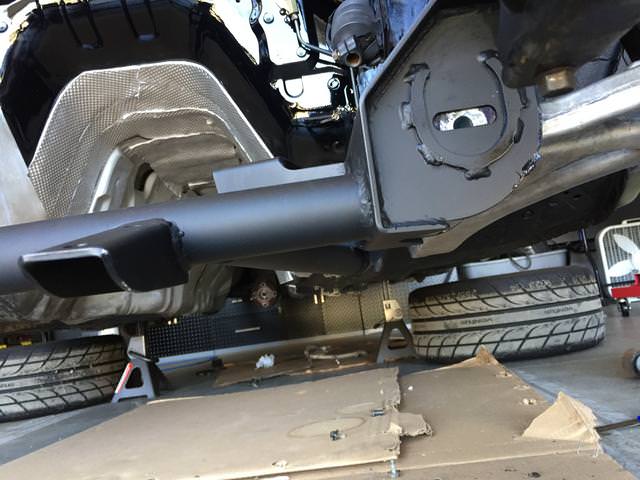
I installed the lines, and started working on the subframe. I went with a setup from Ronin, and had the subframe powdercoated from them. Install went okay, I did end up having to grind down some welds on the top of the subframe so that it would sit flush to the chassis rails. I used my grinder and took off the bumps of the welds and all is good!
Raised welds here:
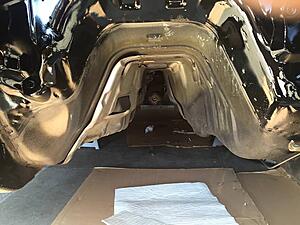
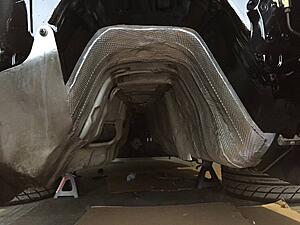
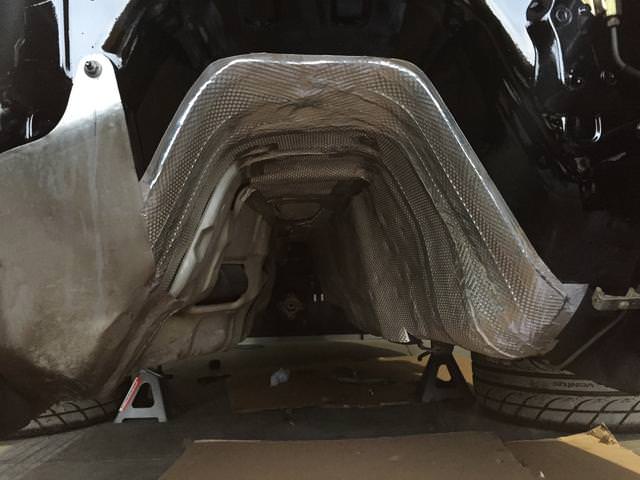
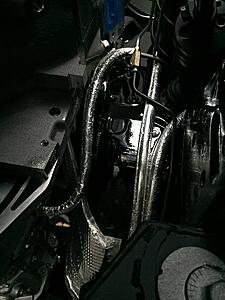
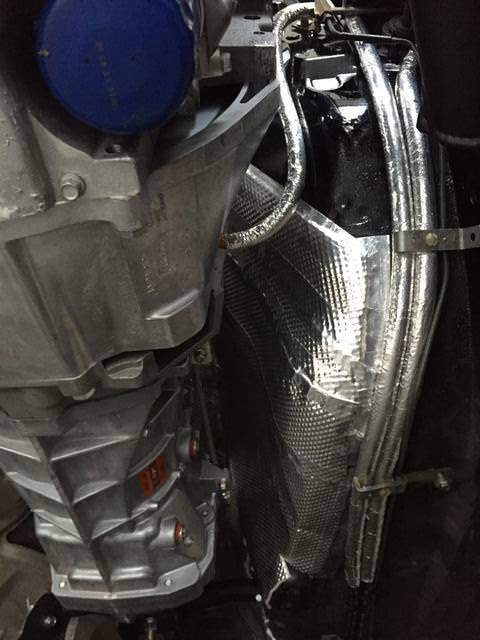
Old subframe out and some heat shield installed:

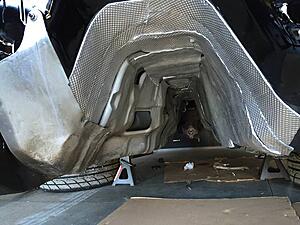
Used some metallic tape to clean up the edges:

I installed the lines, and started working on the subframe. I went with a setup from Ronin, and had the subframe powdercoated from them. Install went okay, I did end up having to grind down some welds on the top of the subframe so that it would sit flush to the chassis rails. I used my grinder and took off the bumps of the welds and all is good!
Raised welds here:

Old subframe out and some heat shield installed:

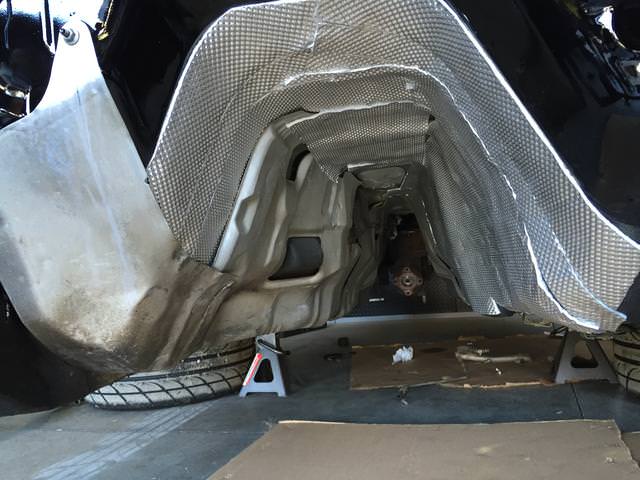
Used some metallic tape to clean up the edges:
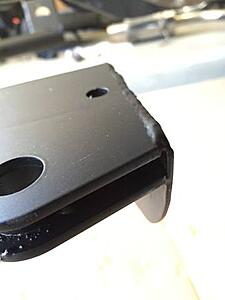
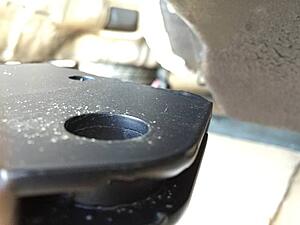
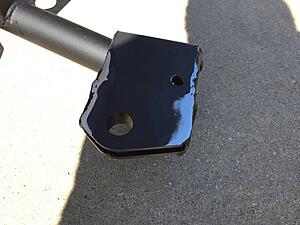
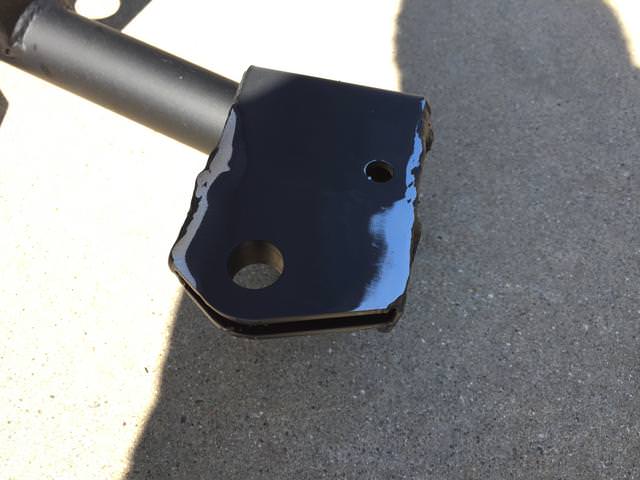
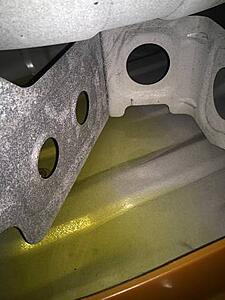
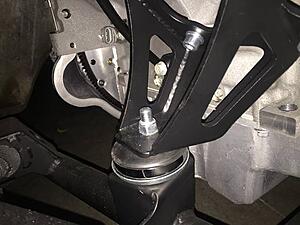
I had seen some reported failures of the samberg subframe camber rings breaking off. This was mainly due to other root causes such as the front camber bolts loosening up and allowing movement. I requested that Ronin beef up mine with some extra welds (Thanks Ronin!) and they provided. They put some extra beads around the perimeter of the ring.
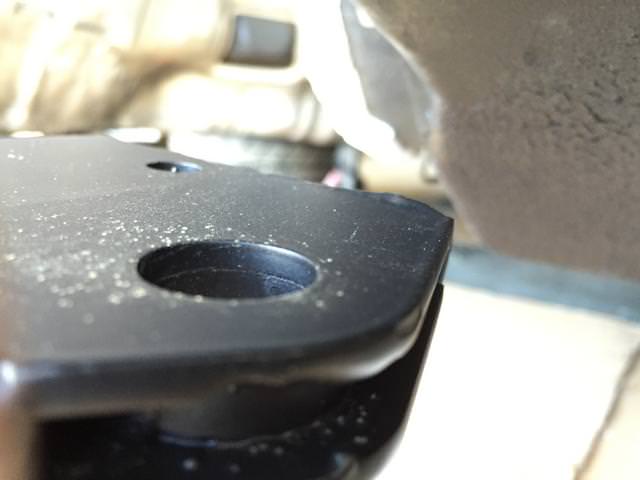
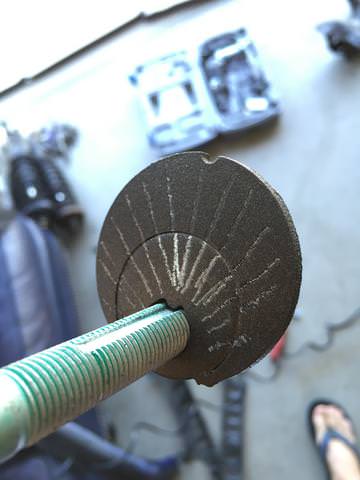
In addition, I etched in some lines on the back faces of the bolt face to help "grab" the metal on the subframe. When this gets tightened down it should help hold the alignment during hard driving/bumps.
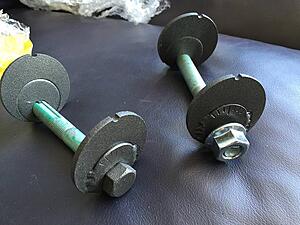
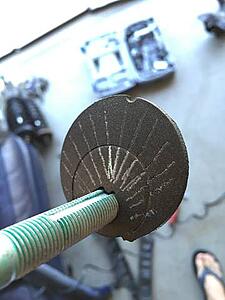
In addition, I etched in some lines on the back faces of the bolt face to help "grab" the metal on the subframe. When this gets tightened down it should help hold the alignment during hard driving/bumps.

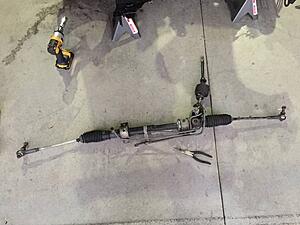
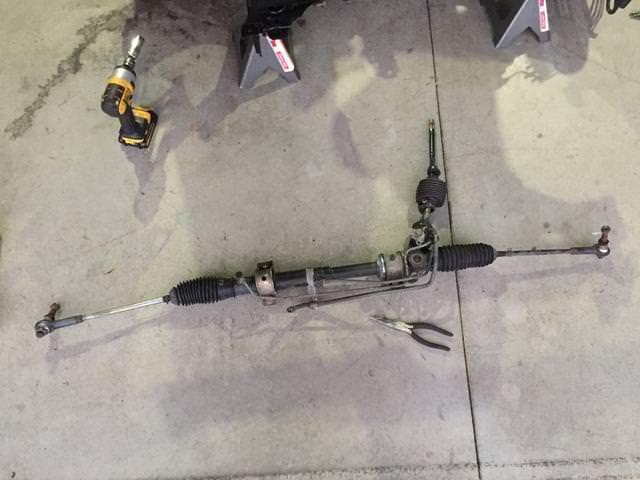
Steering rack freshened up and installed:
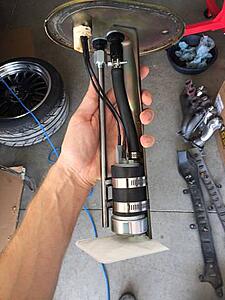
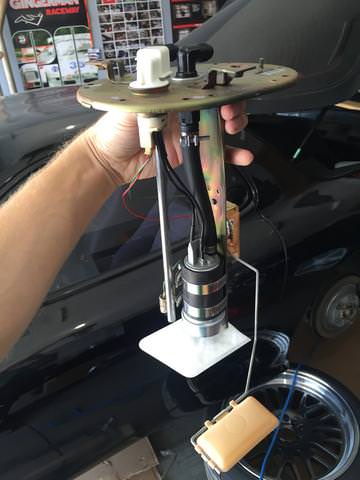
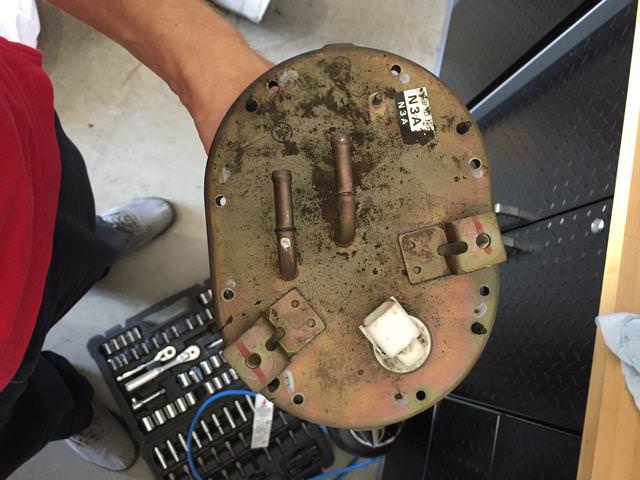
I started working on the fuel system. I had previously emptied the tank, and had no clue of the condition inside. Being a metal tank, the possibility of rust was there, but once I pulled the stock pump I saw that everything was minty fresh!
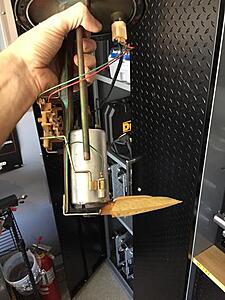
I installed my new fuel pump: a Walbro 400 lph. Should provide plenty for the LS3 even when I do some bolt-ons and cam and such.

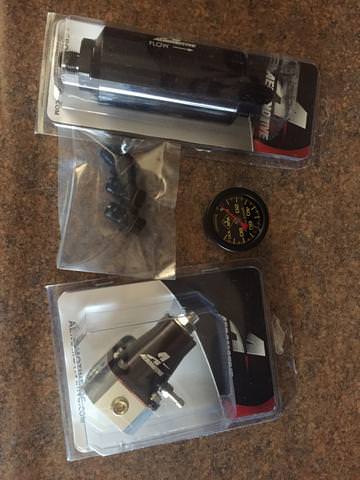
I did decide to go ahead and use all new fuel line instead of re-using the factory mazda hard lines. I got a big box of all my aeromotive items:

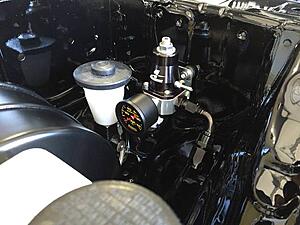
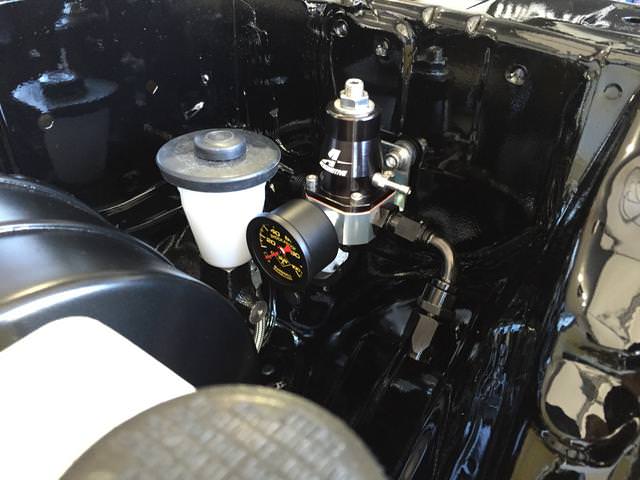
I went 6an for everything and put the fpr up front return style. Mounted it right by the master cylinder.
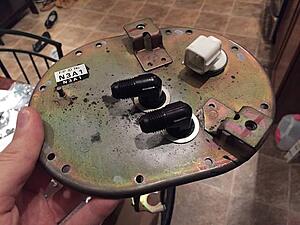
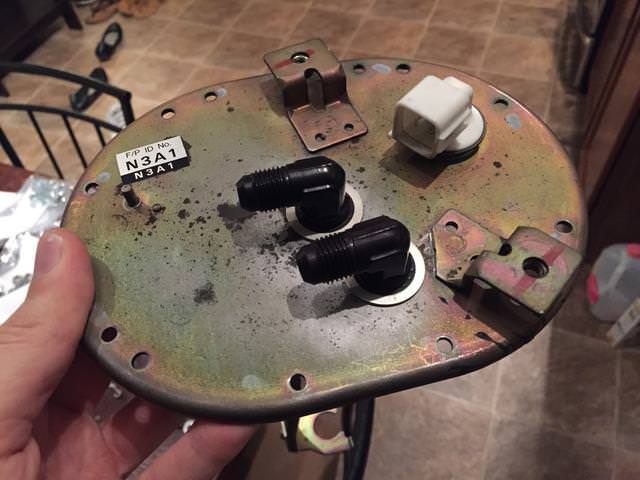
Removed the tiny fuel outlet/inlets on the factory tank cover and replaced with 6an bulkheads:

Wrapped most my fuel lines near the bay in some adhesive backed heat sheild:

I started working on the fuel system. I had previously emptied the tank, and had no clue of the condition inside. Being a metal tank, the possibility of rust was there, but once I pulled the stock pump I saw that everything was minty fresh!


I installed my new fuel pump: a Walbro 400 lph. Should provide plenty for the LS3 even when I do some bolt-ons and cam and such.

I did decide to go ahead and use all new fuel line instead of re-using the factory mazda hard lines. I got a big box of all my aeromotive items:
I went 6an for everything and put the fpr up front return style. Mounted it right by the master cylinder.
Removed the tiny fuel outlet/inlets on the factory tank cover and replaced with 6an bulkheads:
Wrapped most my fuel lines near the bay in some adhesive backed heat sheild:
Evap canister vented:

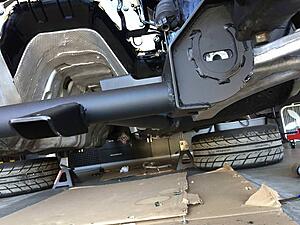
It was difficult to find a place to mount the huge aeromotive fuel filter, this thing is like the size of a soda can. Should flow excellent. Only spot that would really fit it was the factory filter location above the diff:

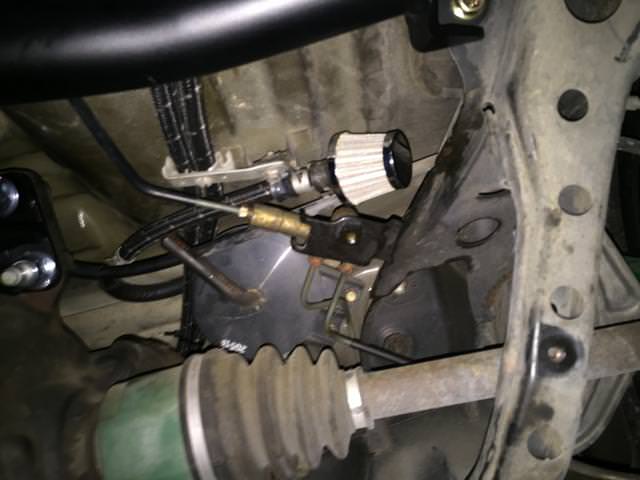
It was difficult to find a place to mount the huge aeromotive fuel filter, this thing is like the size of a soda can. Should flow excellent. Only spot that would really fit it was the factory filter location above the diff:
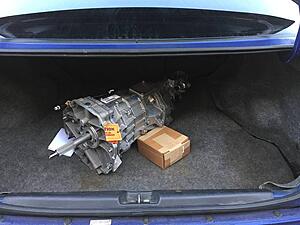
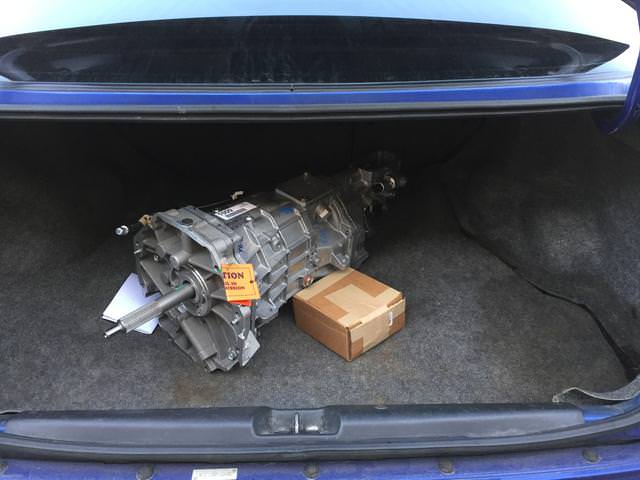
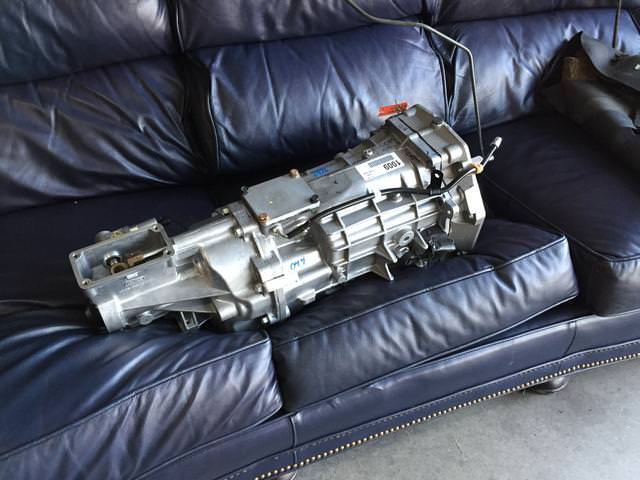
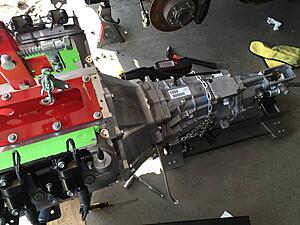
Trans has arrived! I went with a Stage 4 T56 Magnum. It is a new unit that has been torn down down and had carbon blocker rings installed and bronze fork pads installed. It's rated for 900rwtq! This one also has a Fbody tailhousing installed for ease of install into the FD chassis.

It fit in the trunk of my civic just fine ha!

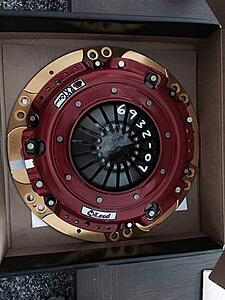
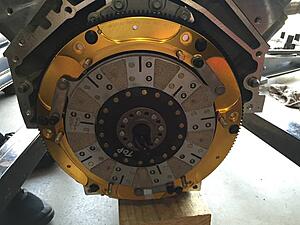
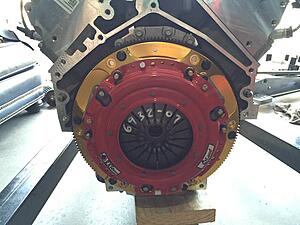
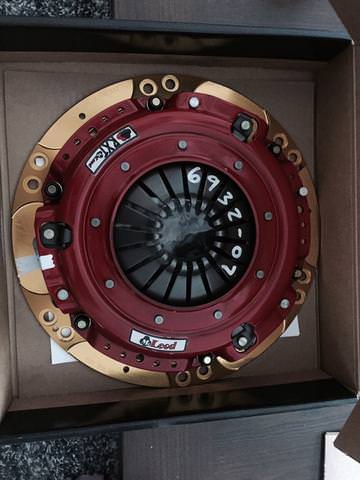
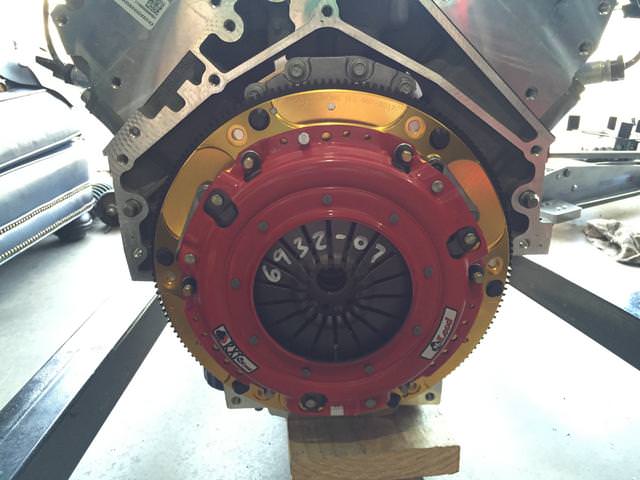
Clutch also arrived, so I installed it onto the engine. I went with a Mcleod RXT twin disk clutch. It's supposed to hold 1000rwhp and drive like stock. It sure does look pretty tho.
I went with a Fidanza lightweight flywheel. I am eager to see how fast I can get this engine to rev!

It fit in the trunk of my civic just fine ha!
Clutch also arrived, so I installed it onto the engine. I went with a Mcleod RXT twin disk clutch. It's supposed to hold 1000rwhp and drive like stock. It sure does look pretty tho.
I went with a Fidanza lightweight flywheel. I am eager to see how fast I can get this engine to rev!

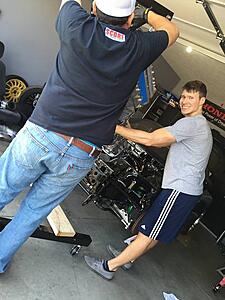
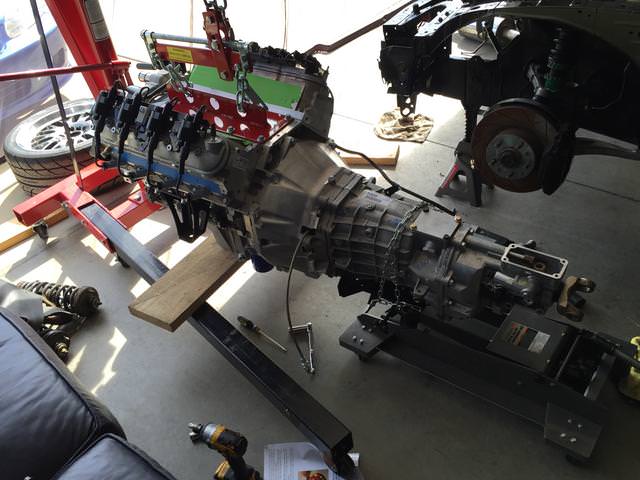
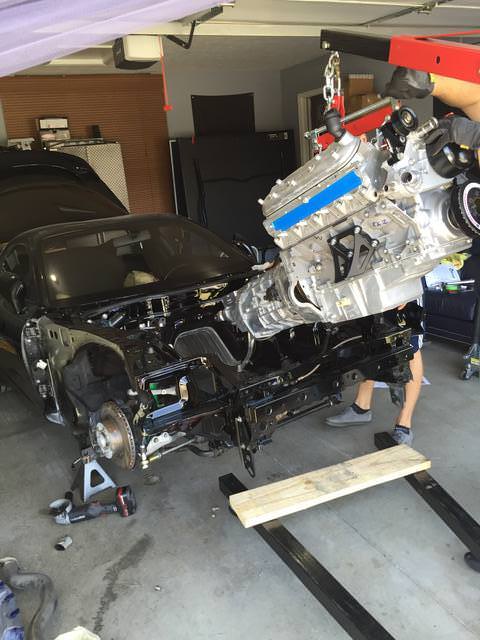
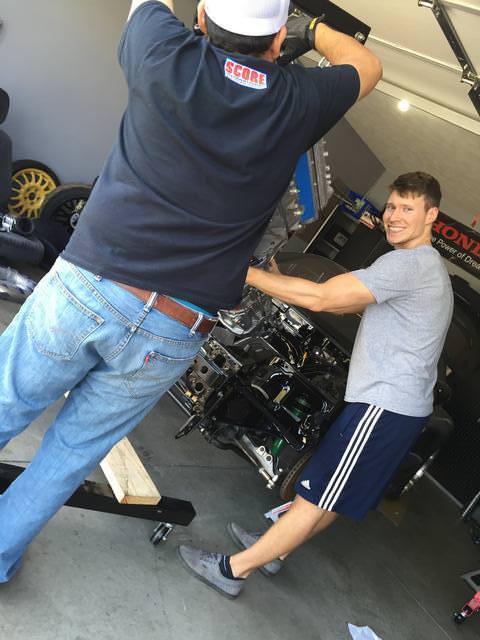
Mounted the lifting bracket to the valley, and started mating the engine to the trans. This took a little bit longer than anticipated, but after some will force I made the two go together.

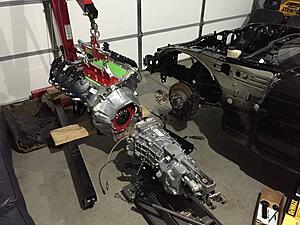

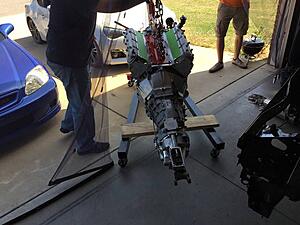
Had some buddies come over to assist


Big grin on my face! this was a happy moment!
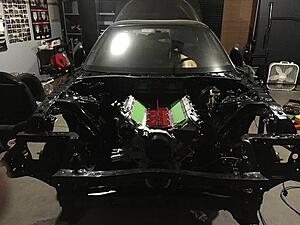
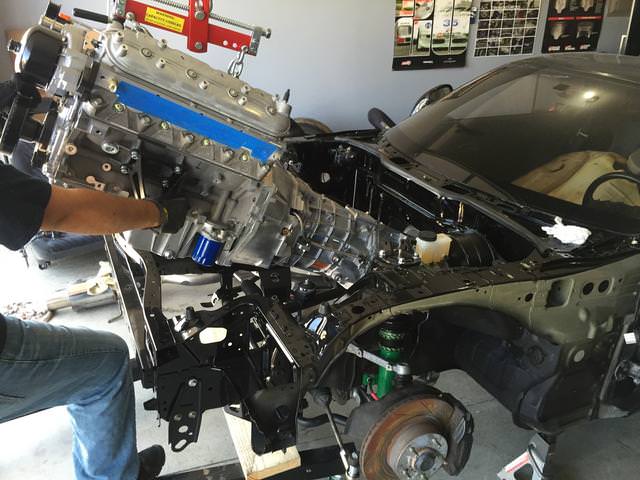
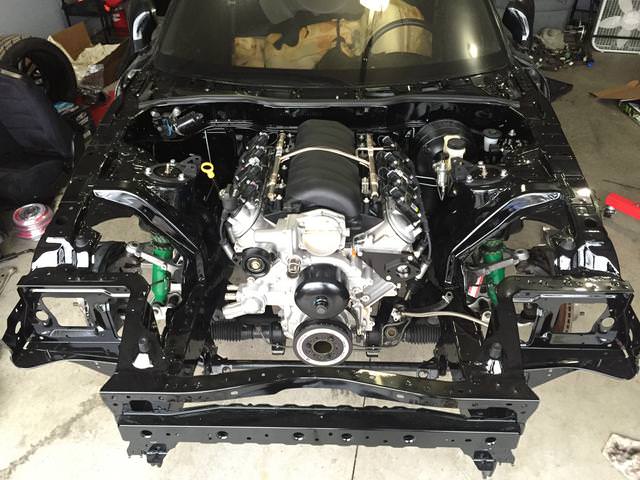
It's in!!!
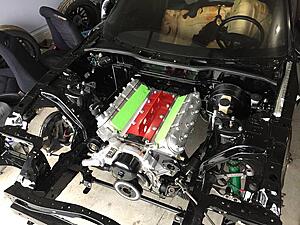

Badass pic I took:


Had some buddies come over to assist
Big grin on my face! this was a happy moment!
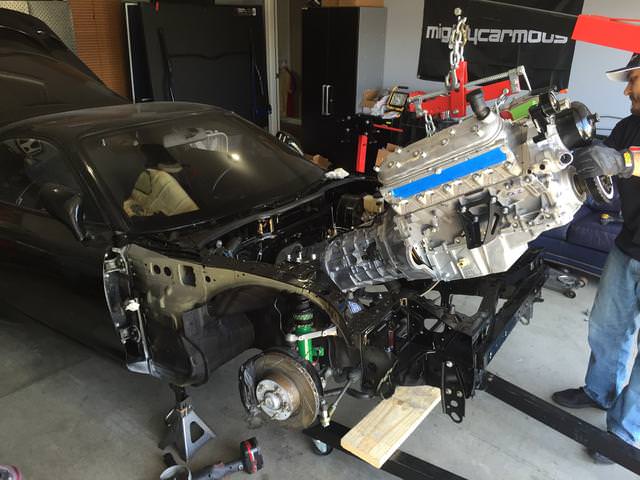
It's in!!!

Badass pic I took:
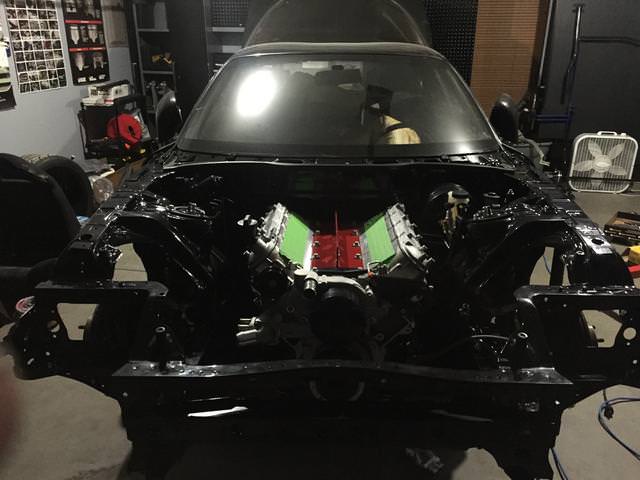
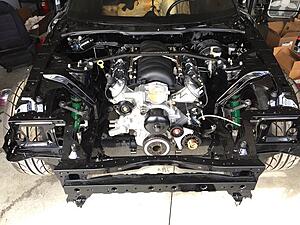
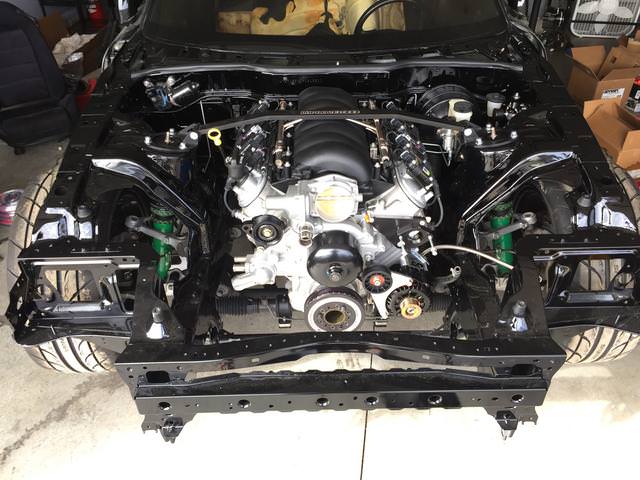
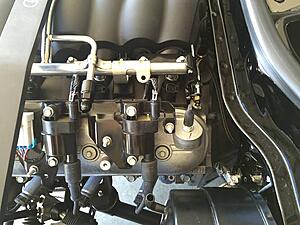
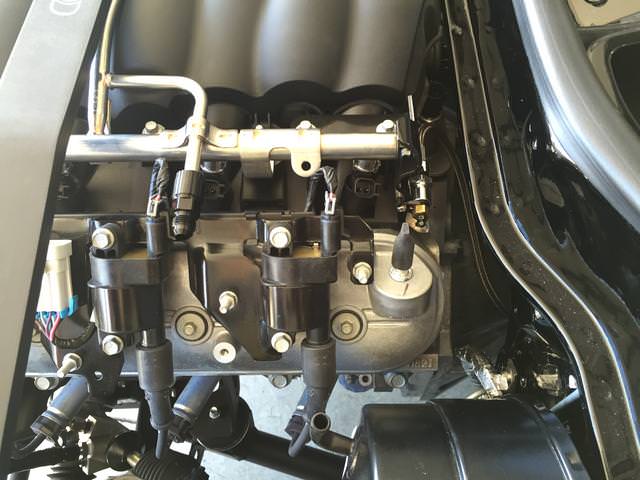
intake installed:
Large amount of heat wrap on the fuel lines and clutch lines:


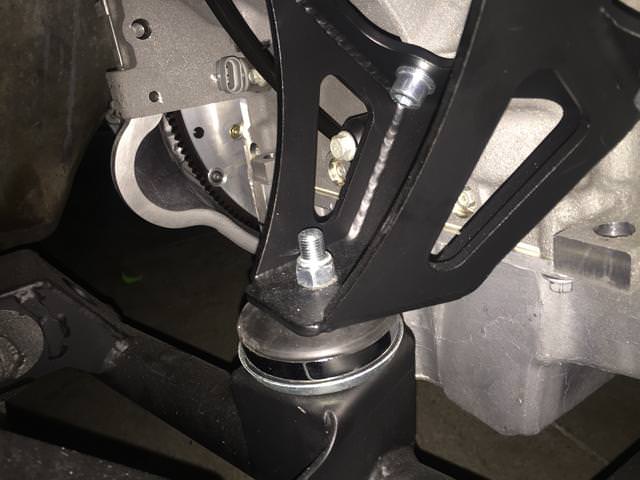
Trans mount fitted up:
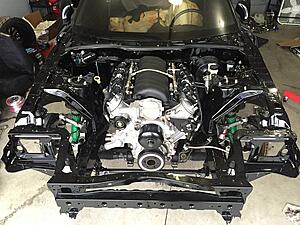
Motor mount look really nice, tightened down the biscuits to get the engine height correct.
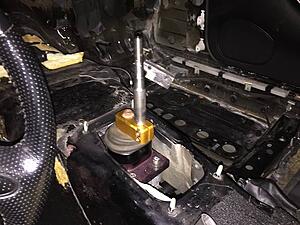
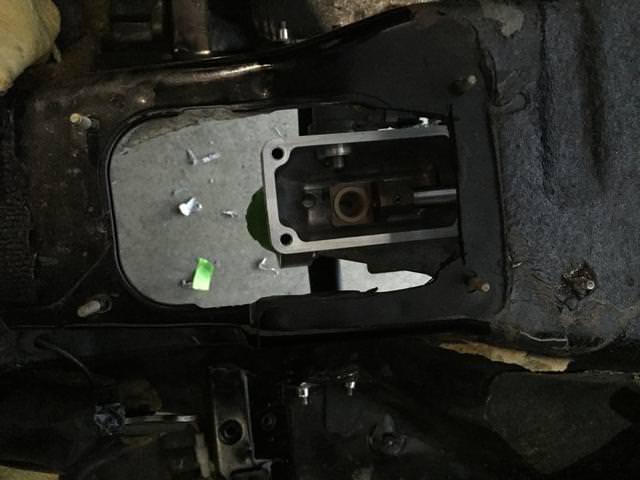
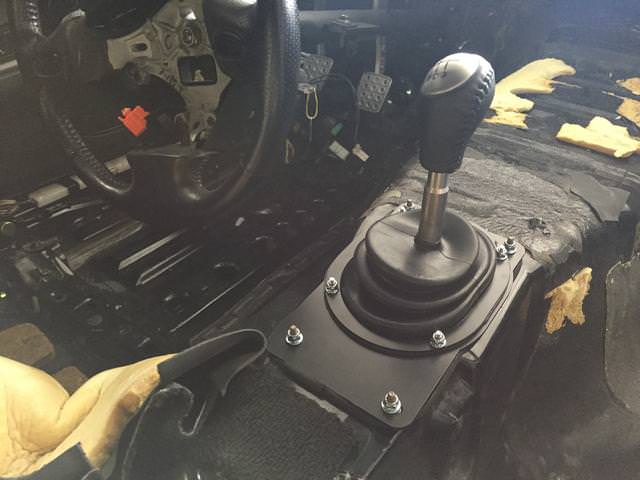
Shifter alignment, needed to cut the trans tunnel a bit. Went with MGW
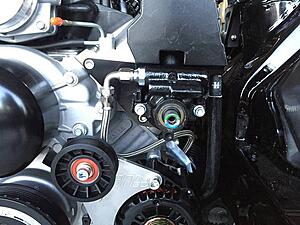
Also started installing some accessories, picked up an alternator bracket and a nice power steering mount. I will be running Fbody accessories on the LS3. My improved racing strut bar fits with the LS3 in there, a couple mm's to spare ha.
Large amount of heat wrap on the fuel lines and clutch lines:

Trans mount fitted up:
Motor mount look really nice, tightened down the biscuits to get the engine height correct.
Shifter alignment, needed to cut the trans tunnel a bit. Went with MGW

Also started installing some accessories, picked up an alternator bracket and a nice power steering mount. I will be running Fbody accessories on the LS3. My improved racing strut bar fits with the LS3 in there, a couple mm's to spare ha.
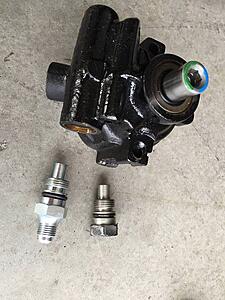
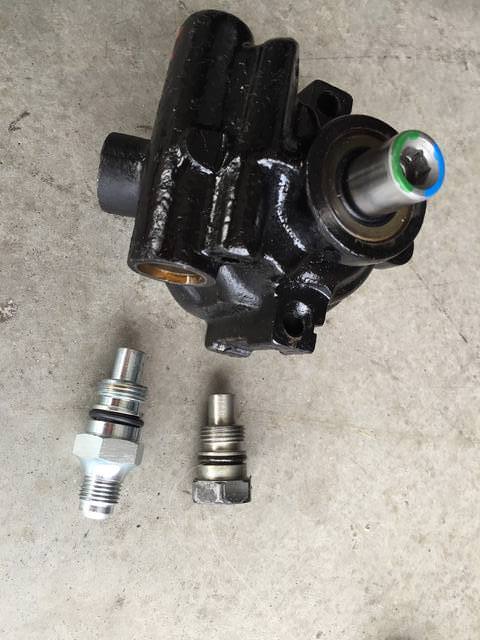
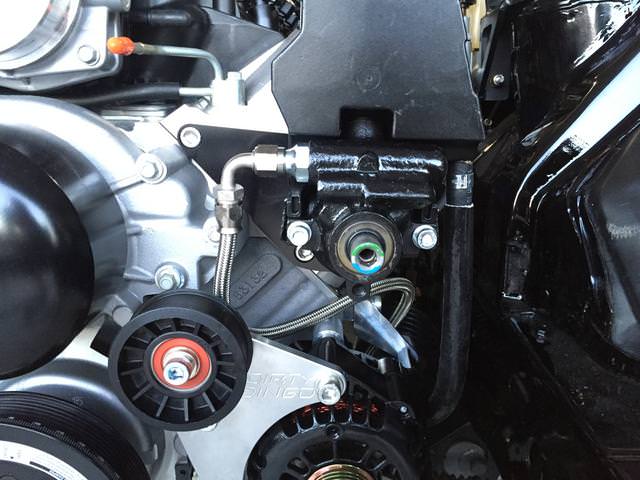
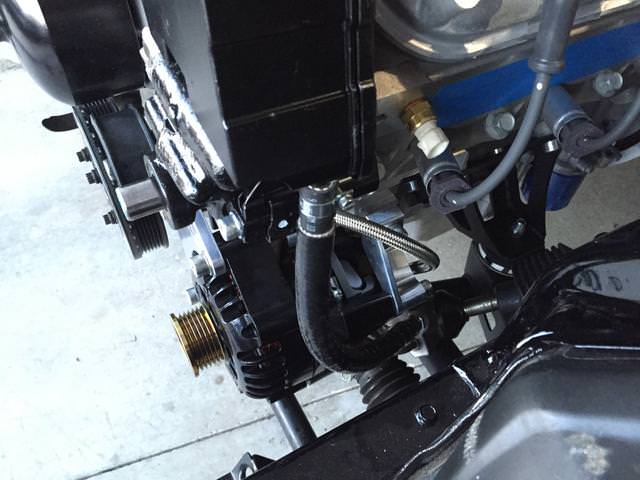
Starting fitting up the power steering pump. Since the Fbody power steering pump will over power the factory Mazda steering rack, I bought a Turnone pump reducer to try to get the flow to a more "light" feeling level.
Installed and lines ran:


I also mounted the extended clutch bleed line and mounted it to a bracket on the intake.
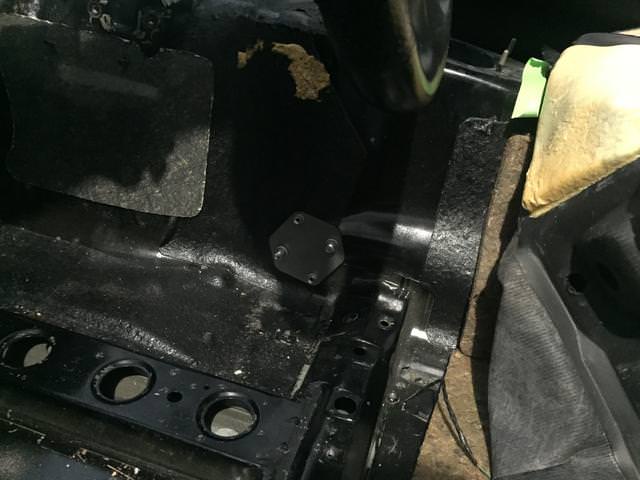
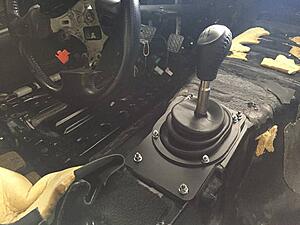
Shifter hole block-off black installed and **** fitted. Went with a C6 shift ****, should look factory-like!
Installed and lines ran:
I also mounted the extended clutch bleed line and mounted it to a bracket on the intake.
Shifter hole block-off black installed and **** fitted. Went with a C6 shift ****, should look factory-like!
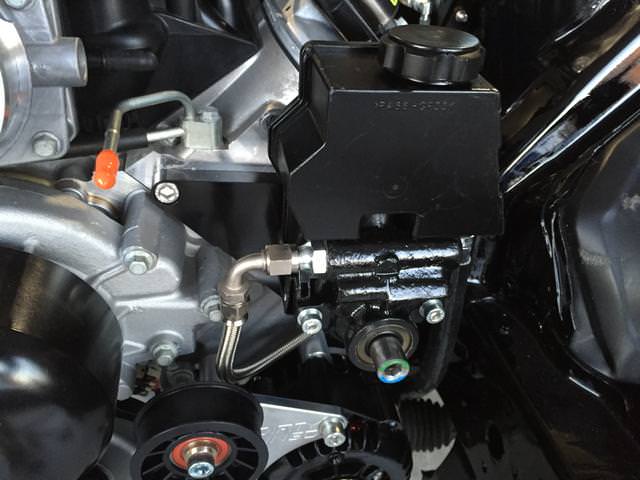
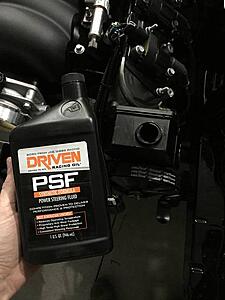
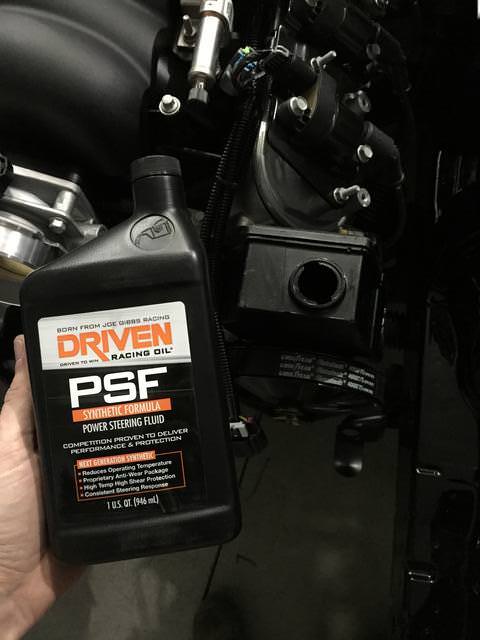
Filled the power steering system with Driven oils power steering Fluid:
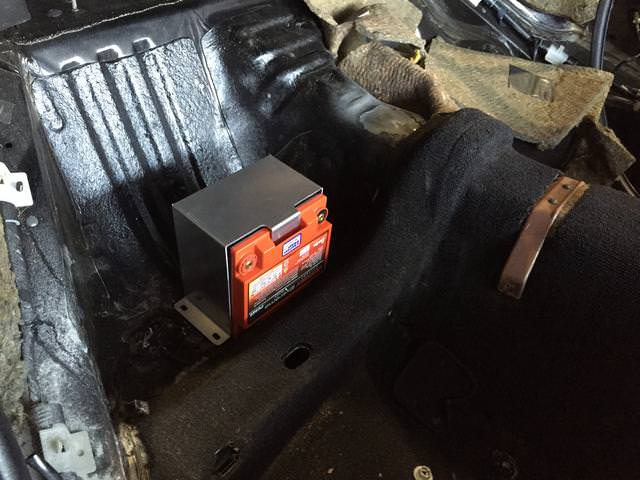
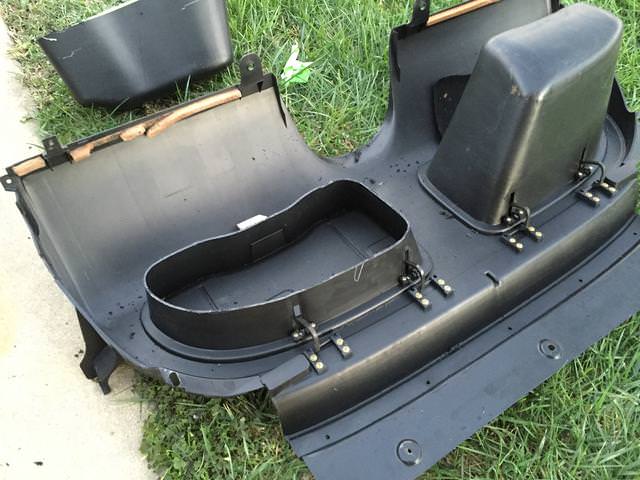
Will be using an Odyssey PC925 battery, and fitting it under the bin behind the passenger seat.
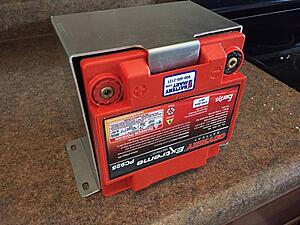


Will be using an Odyssey PC925 battery, and fitting it under the bin behind the passenger seat.