Build Threads The place to discuss complete builds

Deesan's slammed BP20B Street Weapon

Thread Tools
 
Search this Thread
 
Old Jan 13, 2016 | 10:14 AM
  #51  
cbjrrx-7's Avatar
Junior Member
Tenured Member 10 Years
iTrader: (5)
 
Joined: Apr 2011
Posts: 28
Likes: 0
From: SPACE COAST,FL
Thanks a lot,after seeing this I think I just got the itch again,time to start looking for another fd.lol Good stuff,definitely going to be keeping an eye on this build
Reply
Old Jan 13, 2016 | 10:32 AM
  #52  
wickedywick's Avatar
Full Member
Tenured Member 15 Years
iTrader: (3)
 
Joined: Jun 2006
Posts: 244
Likes: 2
From: RVA
Reply
Old Jan 14, 2016 | 04:01 PM
  #53  
4g63rotary's Avatar
That one guy
Tenured Member 05 Years
iTrader: (5)
 
Joined: Feb 2012
Posts: 203
Likes: 0
From: SoCal
I'm sure I missed this a dozen posts ago....Did you have your wheels powder coated? They look awesome IMO.
Reply
Old Jan 23, 2016 | 11:22 AM
  #54  
DeeSan's Avatar
Thread Starter
Sexy Boo
Tenured Member: 15 Years
Liked
Loved
iTrader: (2)
 
Joined: Apr 2008
Posts: 606
Likes: 107
Originally Posted by cbjrrx-7
Thanks a lot,after seeing this I think I just got the itch again,time to start looking for another fd.lol Good stuff,definitely going to be keeping an eye on this build
You know too well you're already screwed!

Originally Posted by kota2240
Just getting warmed up : )

Originally Posted by 4g63rotary
I'm sure I missed this a dozen posts ago....Did you have your wheels powder coated? They look awesome IMO.
Probably said it somewhere, but yes faces were powder coated in graphite and lips/barrels have the regular polished finish with double dark tint (DDT) on top. The wheels look gunmetal in person and the faces have a bit of metal flakes them.


Alright I'm a week late but I think it's never too late to drop the heat!

My kit idea is getting closer to reality every day now

Phase 1

Name:  12449364_10207861961162484_1950058087_o_zps9zvoqppb.jpg
Views: 4018
Size:  87.0 KB


Phase 2

Big improvement over phase 1!Shaved down material to get smooth curves on the front lip, also mocked up of the center extension to match the bumper's nose. Oil cooler vents ended up sharper and more squarish after we cut and modified the bumper's length in phase 1, so we fixed that and went back to a shape that looks more like the original shape of the FEED bumper (see vent on your right side, pic 3).

Name:  20160118_160302_zpsdc1xuumr.jpg
Views: 4030
Size:  306.7 KB

Name:  20160118_161654_zpsiozvvcmi.jpg
Views: 4177
Size:  291.4 KB

Name:  20160118_202330_001_zpszrx5rud0.jpg
Views: 3973
Size:  193.6 KB

magic happened and we entered phase 3......

Phase 3

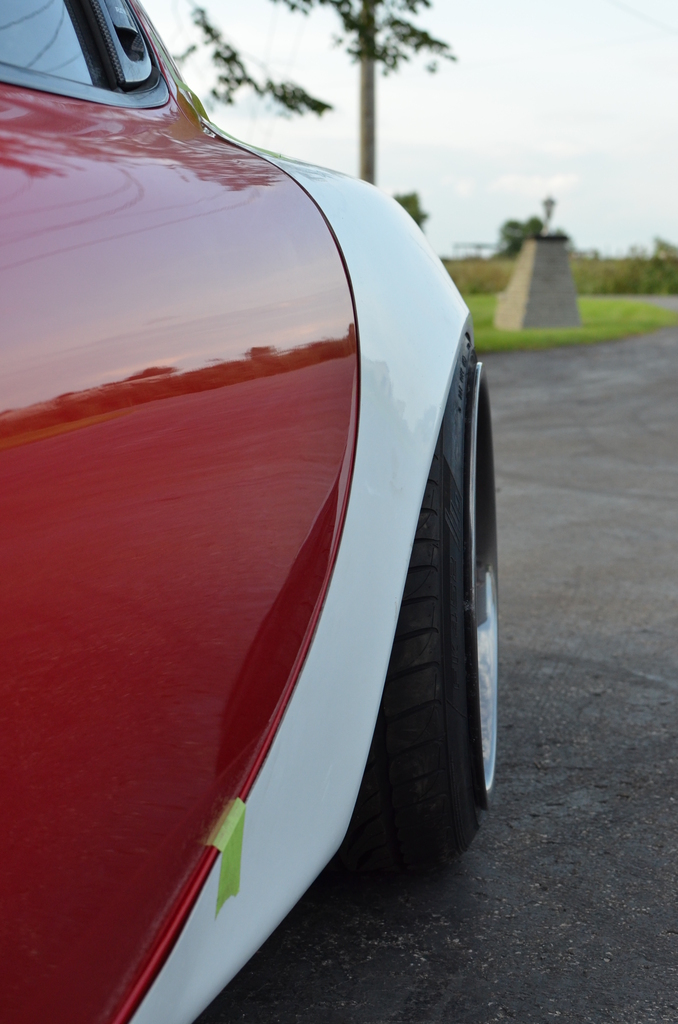
Now this is how I had envisioned the bumper from the moment I got the idea of doing this over 3 years ago. Let me tell you it looks good in pictures, but you cannot grasp the character it gives the car and how impressive it looks in person, pictures simply don't do justice to the magnificence of this new bumper. It flows perfectly with the subtle yet incredible body lines of the legendary RX-7. Definitely gives it an updated look with an exotic touch. The side line that starts where bumper and fender meet was altered to go inward from top to bottom of the bumper and roll under in order to match the original tapered shape of the car.
The bumper oil cooler openings were extended and re-shaped to go all the way back, acting as proper ducts, letting absolutely no air escape for maximum cooling efficiency. The green tape you see is there because we still need to make minor adjustments to this specific zone, it needs to be a little bit thicker in that area then gradually fading going toward the sides, the main goal is to eliminate the line going across the center opening given by the the slope going up to match the radiator.

Next up we're going to fix all the gaps around the car.

Name:  DSC_9666_zpscbu4vava.jpg
Views: 4033
Size:  444.6 KB

Name:  20160122_184016_zpssn4bnotp.jpg
Views: 3995
Size:  250.9 KB

Name:  20160122_184034_zpswfj0qcih.jpg
Views: 4195
Size:  268.8 KB

Here you can see my side diffusers idea... it's from the FRS rocket bunny V1 kit, we are going to adapt the design to the FD, but we still need to make side skirts to extend/lower the car's body to match the front bumper and front lip. (Btw I'm sure most of you have seen the famous
Name:  20160122_183820_zpsxp7swfi6.jpg
Views: 4175
Size:  264.3 KB

Last edited by DeeSan; Jan 23, 2016 at 11:24 AM.
Reply
Old Jan 23, 2016 | 12:03 PM
  #55  
DeeSan's Avatar
Thread Starter
Sexy Boo
Tenured Member: 15 Years
Liked
Loved
iTrader: (2)
 
Joined: Apr 2008
Posts: 606
Likes: 107
Not done yet for today!

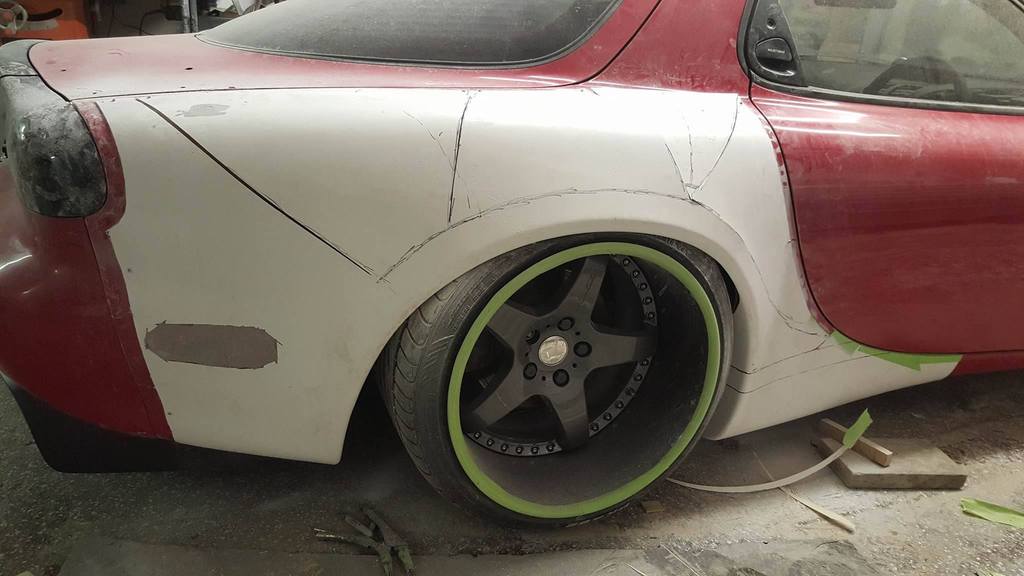
here you can see another picture of the beautiful +50mm Chargespeed rear over-fenders, they fit super good out of the box.

Name:  DSC_7062_zpsfzz9s4sg.jpg
Views: 4090
Size:  410.0 KB

but.......... since I wanted to run 0 camber in the rear and go super low, they were simply not going to cut it and I knew I had to make them wider... A couple cuts later and a bit of fiberglass work I now have fenders around 90-100mm wide and the best part is they make the car look WIDE AS F*** but they also blend so good with the body and lines of the car that once molded and painted, I bet it will look as if the car came out like this from factory!

Name:  12459070_10207862939466941_27757142_o_zpsjkhhwvg5.jpg
Views: 4003
Size:  64.8 KB

Name:  20160118_155430_zpskoiodkyh.jpg
Views: 4077
Size:  227.8 KB

Name:  20160118_155345_001_zpsyc7koaet.jpg
Views: 3996
Size:  413.2 KB

Name:  DSC_9671_zpsiuxiqp09.jpg
Views: 4006
Size:  454.4 KB

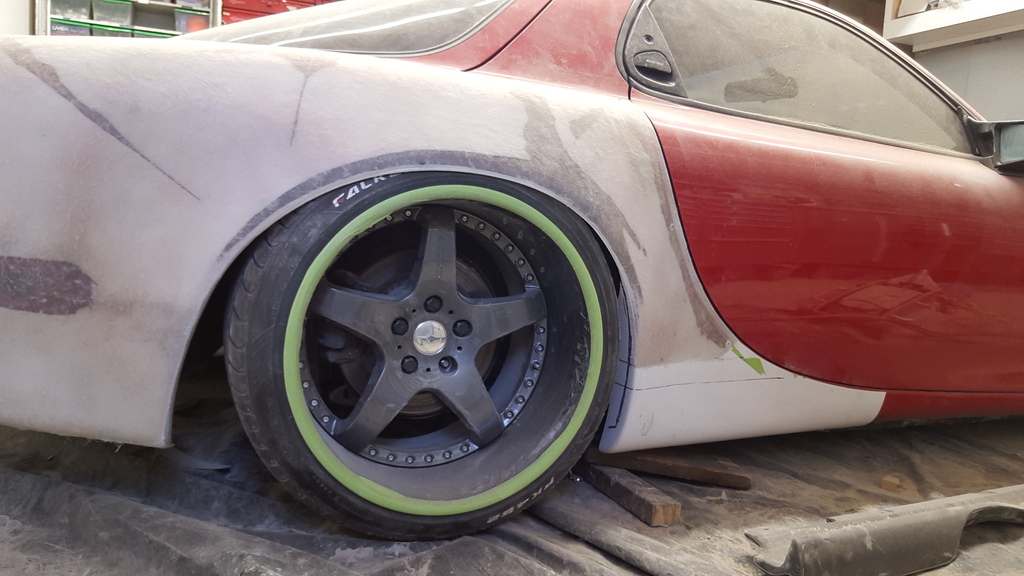
Bonus pic with the latest version of my diffuser! Nvm the exhaust prototype at this point...definitely staying with this idea though!

Reply
Old Jan 23, 2016 | 04:42 PM
  #56  
rollcoal's Avatar
Senior Member
iTrader: (5)
 
Joined: Jul 2014
Posts: 274
Likes: 0
From: Ontario, Canada
looks mean! I love it
Reply
Old Jan 24, 2016 | 03:31 AM
  #57  
MILOS7's Avatar
Rotary Enthusiast
iTrader: (3)
 
Joined: Oct 2008
Posts: 762
Likes: 22
From: los angeles
Amazing!
Reply
Old Jan 24, 2016 | 01:43 PM
  #58  
Deacon_Frost's Avatar
Junior Member
Tenured Member 15 Years
iTrader: (3)
 
Joined: Jul 2005
Posts: 21
Likes: 0
From: Ohio, Cincinnati
Diffuser looks awesome!
Reply
Old Jan 25, 2016 | 11:24 AM
  #59  
04G35S's Avatar
Rotary Enthusiast
Tenured Member 05 Years
iTrader: (10)
 
Joined: Jan 2013
Posts: 1,053
Likes: 4
From: Madison, WI
Okay I HATE wide body kits... but this looks so clean! I love that the flare is the entire quarter and not some stuck on looking flare. Great job!!!
Reply
Old Jan 26, 2016 | 02:38 PM
  #60  
Len-Len's Avatar
Lenny
Tenured Member 05 Years
iTrader: (9)
 
Joined: Mar 2010
Posts: 472
Likes: 2
From: Albuquerque
This is next level stuff. I absolutely love it.
Reply
Old Jan 26, 2016 | 04:40 PM
  #61  
LO7's Avatar
LO7
Senior Member
Tenured Member: 10 Years
Veteran: Army
Loved
Community Favorite
iTrader: (2)
 
Joined: Aug 2012
Posts: 281
Likes: 68
From: Quantum Superposition ▲▼
Did you end up getting more than an inch of lift/drop with the Platinum air cups?
Reply
Old Jan 26, 2016 | 05:37 PM
  #62  
FASTMETABOLISM's Avatar
Junior Member
Tenured Member 10 Years
 
Joined: Jan 2012
Posts: 48
Likes: 0
From: So Cal
Originally Posted by Len-Len
This is next level stuff. I absolutely love it.
What he said ^^^
Reply
Old Jan 27, 2016 | 02:19 PM
  #63  
Jose A.'s Avatar
Rexxy
Tenured Member 15 Years
iTrader: (40)
 
Joined: Mar 2009
Posts: 1,247
Likes: 8
From: Glendale, AZ
lol
Reply
Old Jan 28, 2016 | 01:47 AM
  #64  
RuffRx7's Avatar
Senior Member
Tenured Member 05 Years
 
Joined: May 2013
Posts: 301
Likes: 0
From: Johannesburg, South Africa
Dude, amazing!!!
Reply
Old Jan 28, 2016 | 07:08 AM
  #65  
HARD2B's Avatar
Full Member
Tenured Member 10 Years
iTrader: (1)
 
Joined: Jan 2008
Posts: 191
Likes: 0
From: Australia/Sydney
Not bad at all!!
While you at it for the rear fender,
you should have make it abit more wider and not letting the wheel tyre seating inside under the fender too much. That just my thought
Because I'm not a big fan of seeing tyre rubber hiding under the fender.
Reply
Old Jan 28, 2016 | 08:42 PM
  #66  
Jose A.'s Avatar
Rexxy
Tenured Member 15 Years
iTrader: (40)
 
Joined: Mar 2009
Posts: 1,247
Likes: 8
From: Glendale, AZ
Oooh.... lol
Reply
Old Jan 29, 2016 | 08:37 AM
  #67  
04G35S's Avatar
Rotary Enthusiast
Tenured Member 05 Years
iTrader: (10)
 
Joined: Jan 2013
Posts: 1,053
Likes: 4
From: Madison, WI
Originally Posted by HARD2B
Not bad at all!!
While you at it for the rear fender,
you should have make it abit more wider and not letting the wheel tyre seating inside under the fender too much. That just my thought
Because I'm not a big fan of seeing tyre rubber hiding under the fender.
I agree with this. If your making a wide body make it wide enough for proper tires. Pulled tires make no sense if your putting all this work into it. JMO.
Reply
Old Jan 29, 2016 | 11:34 AM
  #68  
LO7's Avatar
LO7
Senior Member
Tenured Member: 10 Years
Veteran: Army
Loved
Community Favorite
iTrader: (2)
 
Joined: Aug 2012
Posts: 281
Likes: 68
From: Quantum Superposition ▲▼
Originally Posted by 04G35S
I agree with this. If your making a wide body make it wide enough for proper tires. Pulled tires make no sense if your putting all this work into it. JMO.
Stretches tires is a legit style, and makes plenty of sense because it's a personal preference. To get the rim lip right next to the fender lip is the goal, for the optimal look.

We would be riding around in square functional boxes, with square tires if not for style.
Reply
Old Feb 3, 2016 | 04:17 PM
  #69  
Islander's Avatar
Rotary Enthusiast
Tenured Member 15 Years
iTrader: (6)
 
Joined: Aug 2002
Posts: 814
Likes: 7
From: Charlotte NC
What motor mount or subframe kit did you go with to mount yours. I have a 20b and im using the t56 tranny with it...
stock subframe with a custom pan..
Reply
Old Feb 26, 2016 | 01:47 PM
  #70  
stevexk's Avatar
Full Member
Tenured Member 05 Years
 
Joined: Nov 2009
Posts: 138
Likes: 2
From: Gainesville, FL
Bruh, quit with these weekly instagram teasers and give us something!
Reply
Old Feb 26, 2016 | 04:54 PM
  #71  
Jose A.'s Avatar
Rexxy
Tenured Member 15 Years
iTrader: (40)
 
Joined: Mar 2009
Posts: 1,247
Likes: 8
From: Glendale, AZ
Lol not gonna happen.
Reply
Old Feb 26, 2016 | 05:20 PM
  #72  
RA8225's Avatar
Banned
iTrader: (6)
 
Joined: Jul 2003
Posts: 7,141
Likes: 46
Originally Posted by Jose A.
Lol not gonna happen.
Why?
Reply
Old Feb 26, 2016 | 05:26 PM
  #73  
Jose A.'s Avatar
Rexxy
Tenured Member 15 Years
iTrader: (40)
 
Joined: Mar 2009
Posts: 1,247
Likes: 8
From: Glendale, AZ
Cause he is a tease just like his cousin
Reply
Old Mar 1, 2016 | 09:37 PM
  #74  
zilvinas007's Avatar
Full Member
Tenured Member 15 Years
iTrader: (1)
 
Joined: Feb 2008
Posts: 95
Likes: 0
From: chicago
Nice
Reply
Old Mar 13, 2016 | 05:44 PM
  #75  
DeeSan's Avatar
Thread Starter
Sexy Boo
Tenured Member: 15 Years
Liked
Loved
iTrader: (2)
 
Joined: Apr 2008
Posts: 606
Likes: 107
Originally Posted by rollcoal
looks mean! I love it
Originally Posted by MILOS7
Amazing!
Originally Posted by Deacon_Frost
Diffuser looks awesome!
Originally Posted by 04G35S
Okay I HATE wide body kits... but this looks so clean! I love that the flare is the entire quarter and not some stuck on looking flare. Great job!!!
Originally Posted by Len-Len
This is next level stuff. I absolutely love it.
Originally Posted by FASTMETABOLISM
What he said ^^^
Originally Posted by RuffRx7
Dude, amazing!!!
Originally Posted by zilvinas007
Nice
Thanks a whole lot guys! I'm sure as you can tell... I'm going all with this project and I'm honored to receive so many good comments and pms about the car/kit.

Originally Posted by LO7
Did you end up getting more than an inch of lift/drop with the Platinum air cups?
I'll be honest, cups don't work the way I expected them to. Since I run crazy stiff and short springs, I had to cheat in order to get anything at all out of them from aired out to aired all the way up. Basically, if you want to get a good range of motion you need long and soft springs, the range you get is determined by how much the suspension squats from the car's weight.

Originally Posted by HARD2B
Not bad at all!!
While you at it for the rear fender,
you should have make it abit more wider and not letting the wheel tyre seating inside under the fender too much. That just my thought
Because I'm not a big fan of seeing tyre rubber hiding under the fender.
Originally Posted by 04G35S
I agree with this. If your making a wide body make it wide enough for proper tires. Pulled tires make no sense if your putting all this work into it. JMO.
Originally Posted by LO7
Stretches tires is a legit style, and makes plenty of sense because it's a personal preference. To get the rim lip right next to the fender lip is the goal, for the optimal look.

We would be riding around in square functional boxes, with square tires if not for style.
Exactly, tire stretching is a style just like any other styles out there. I'm doing it this way for now simply because this is how I wanted the car to sit when I first envisioned it. I will eventually move back to a square functional setup with the car sitting just on top of the tires. I already have plans for this, I will most likely go with 285/30 and 295/30 or 315/30 R-compound tires.

Originally Posted by Islander
What motor mount or subframe kit did you go with to mount yours. I have a 20b and im using the t56 tranny with it...
stock subframe with a custom pan..
I run an extended/modified REC subframe with custom solid mounts.
REC Services | 20B FD Conversions

Originally Posted by stevexk
Bruh, quit with these weekly instagram teasers and give us something!
Terribly sorry buddy! I try to post on here only when I have enough good content to keep my posts interesting for y'all.

However, time has come for a little update

Let's start it with a little before and after rear shot.

Name:  Post_2_zpsdbe6tbxp.png
Views: 4210
Size:  1.43 MB


Higher shot, you can kinda get an idea of how wide the car actually is (about 200mm wider from side to side).

Name:  Post_5_zpspt7cwysp.png
Views: 4167
Size:  1.05 MB


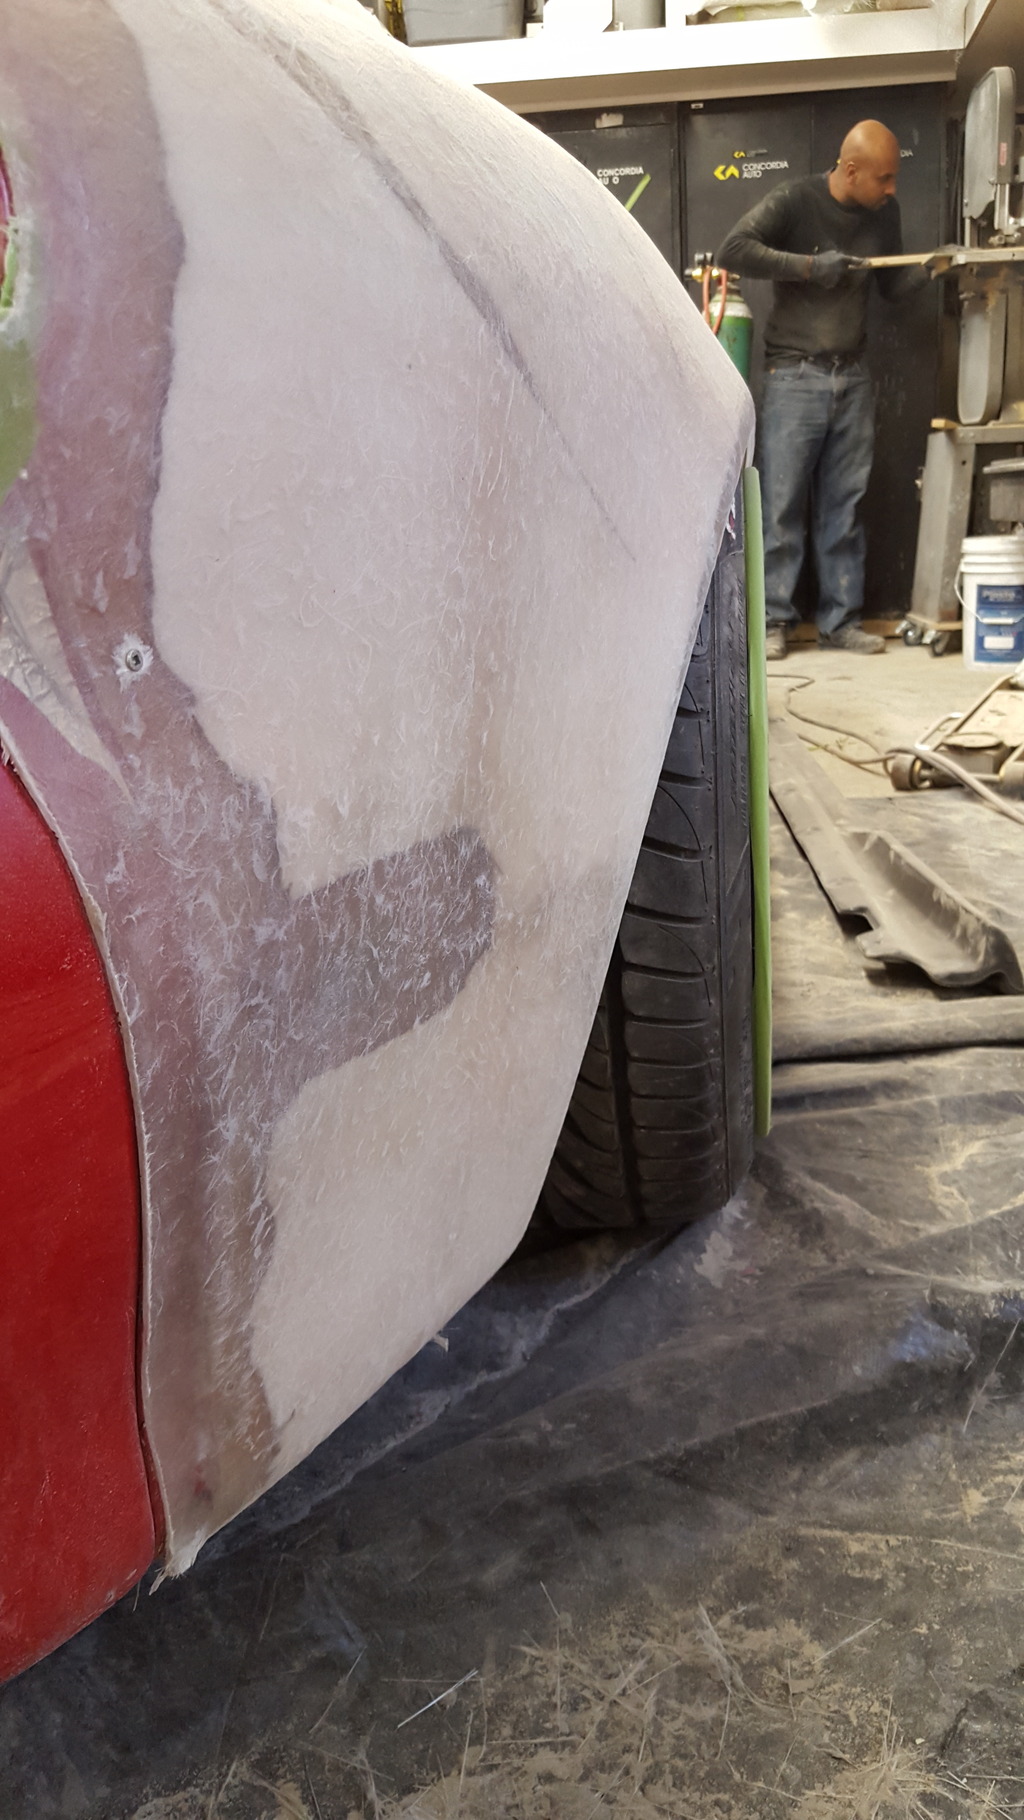
All gaps around the car are now even. One stupidly long job, but I'm one of those who believe that beauty lies in the details!

Name:  Post_7_zpssevagtwy.png
Views: 4107
Size:  898.7 KB


Bumper, front lip, fenders (F/R) and rear diffuser are done. Now working on the skirts and side diffuser to complete the kit. Today I'm showing you phase 1, I should have pics of adapted and finished skirts + side diffusers later this week!

Let me tell you the car might look amazing in pictures, but this beast is on a totally different level in person! I'm not saying this because it's my car and vision but I truly believe that the kit stays true to the original idea and lines of the FD3S while making it a meaner, more exotic-like updated version of the timeless car the RX-7 is.

In any case, you guys can see for yourselves. Here's my car in its latest state, enjoy!


Name:  Post_3_zps4kde0niu.png
Views: 4116
Size:  632.0 KB

Name:  Post_1_zpsxuod4sox.png
Views: 4222
Size:  891.5 KB

Name:  Post_4_zpso16vtgrw.png
Views: 4272
Size:  892.7 KB

Name:  Post_6_zpsenoshvx4.png
Views: 4085
Size:  905.9 KB
Reply


All times are GMT -5. The time now is 06:51 PM.