
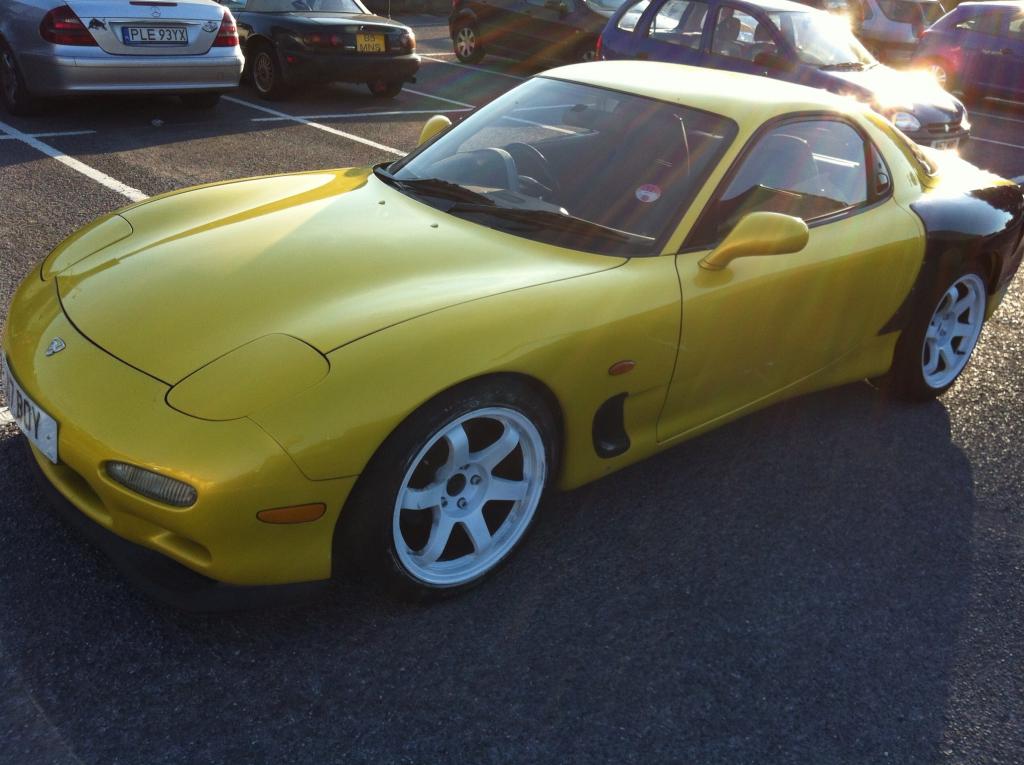
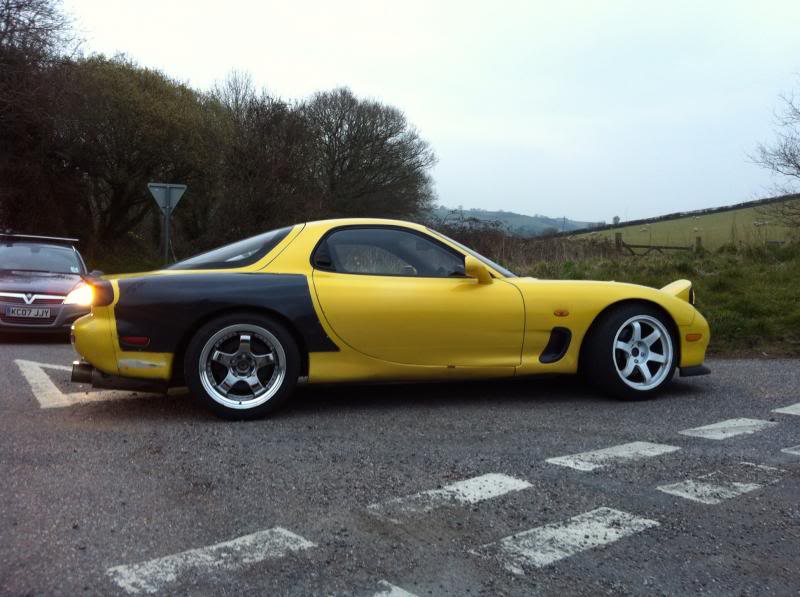
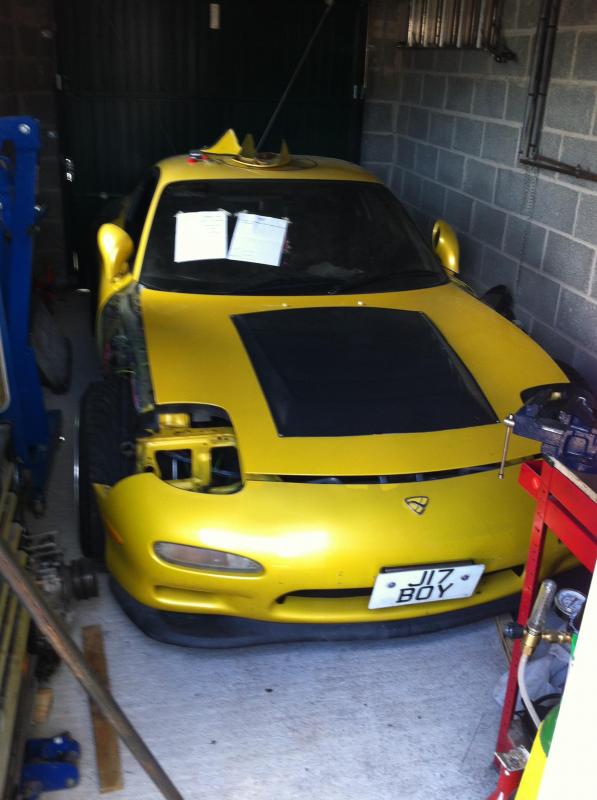
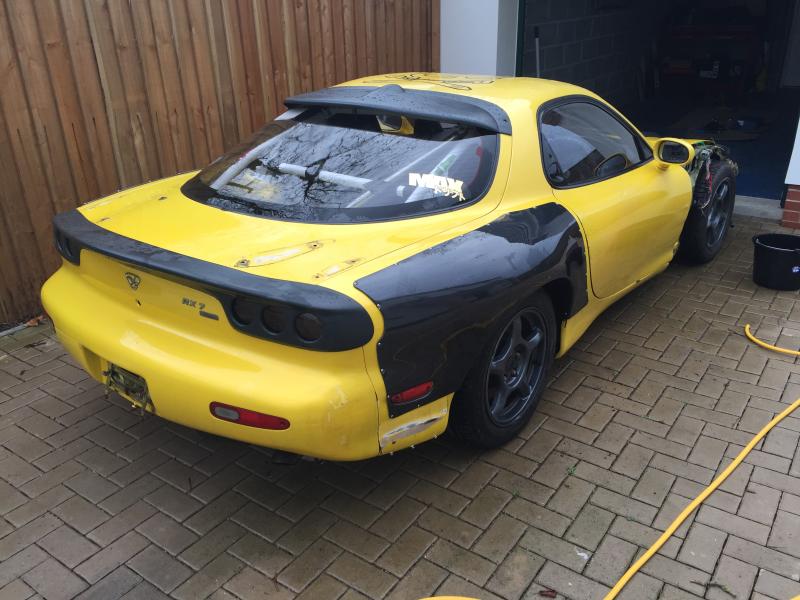
Bright yellow daily drifter from the UK


Thread Starter
Junior Member
Joined: Jan 2015
Posts: 15
Likes: 0
From: Devon, England
Bright yellow daily drifter from the UK
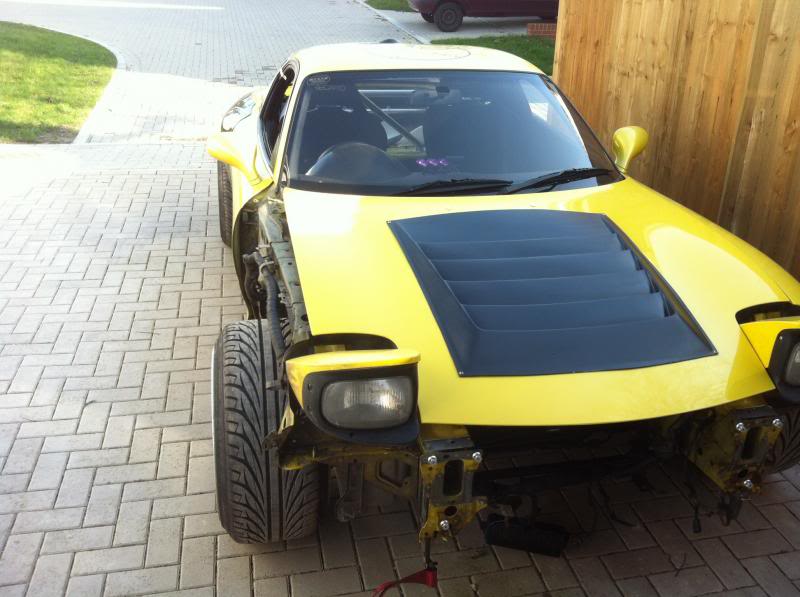
Hay guys, i have owned this fd for the last two years and have been doing a build thread since, so get ready for some cut and paste. 
I have had a few rwd cars over the last couple of years including s13, ps13, another FD, the difference between my current car and those ones is that I plan to keep this one on the road rather than trying to do overly complicated engine conversions and eventually selling them off for parts.
If you do not like bright yellow cars, pic whoring or spelling mistakes this is not the thread for you!
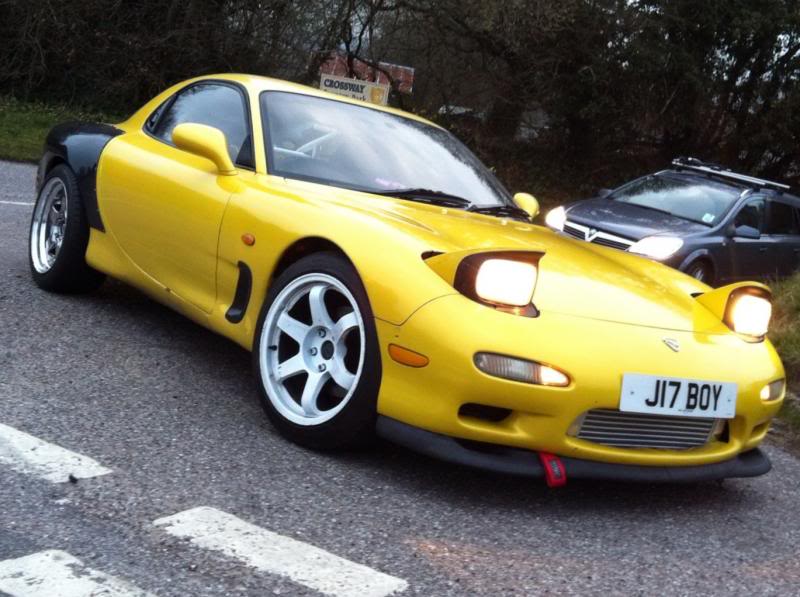
How I brought it.
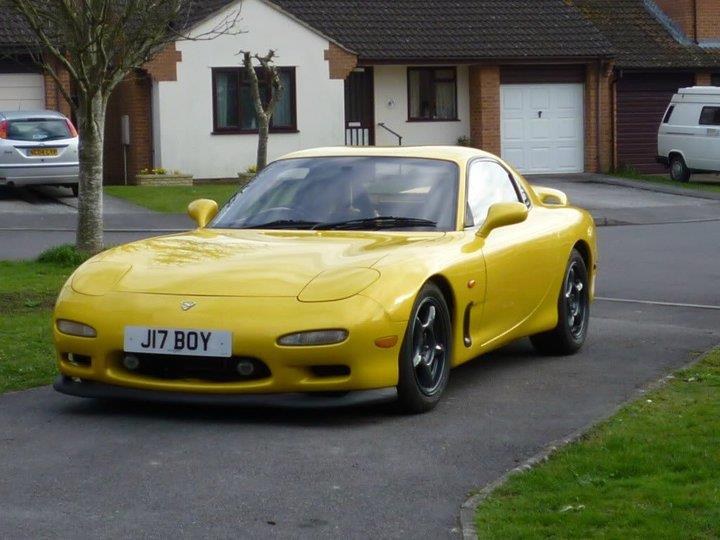
it came pretty standard apart from a decat, stainless exhaust, apexi air filters, updated springs and an apexi power fc. The car was originally an auto so is running an auto diff.
I have done a few mods to it over the last couple of months including
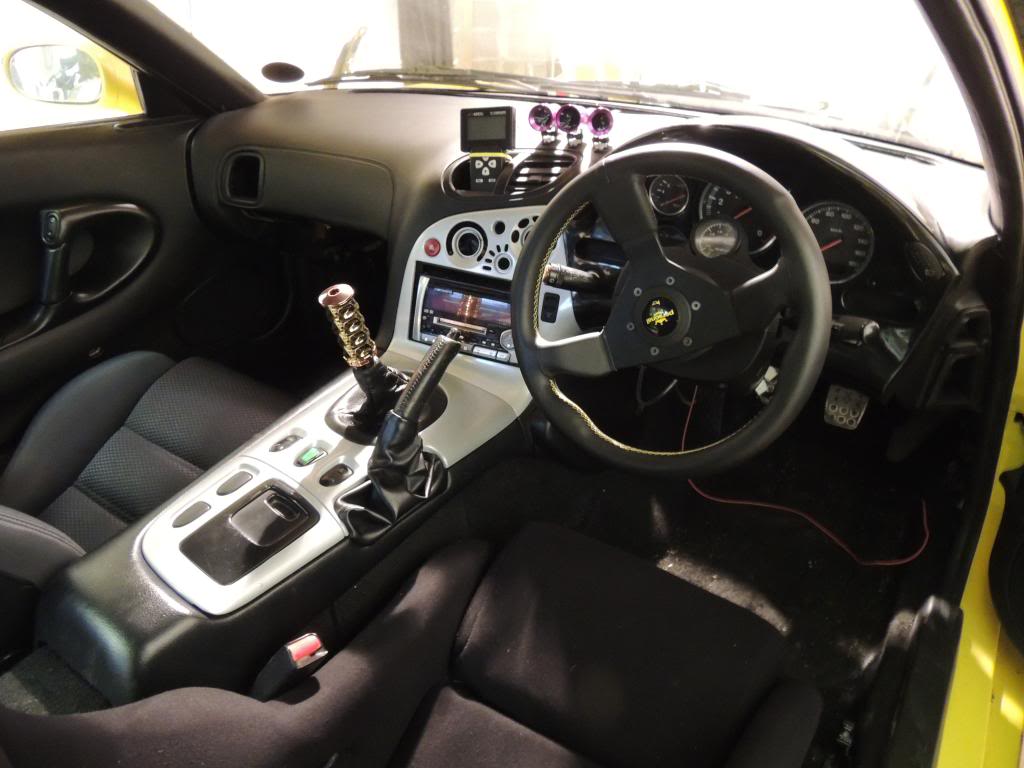
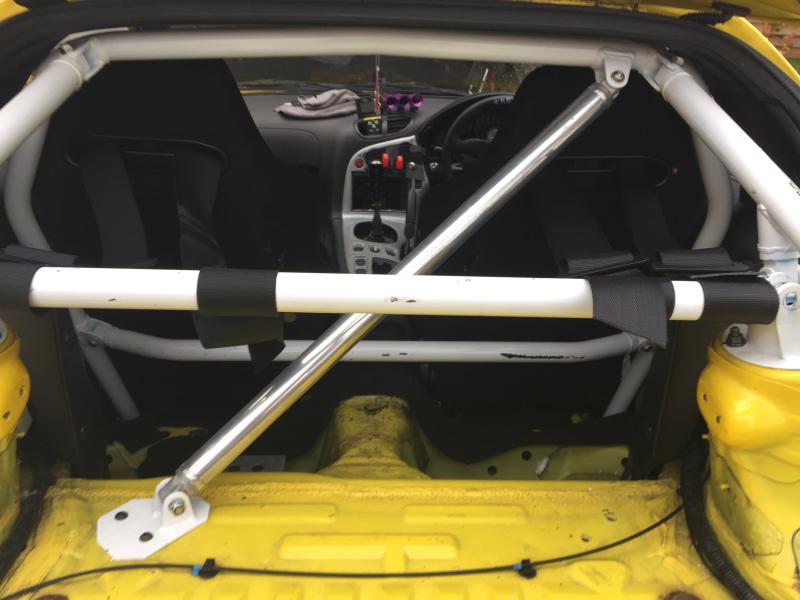
-Half roll cage
-Recaro driver�s seat
-Rota Grids
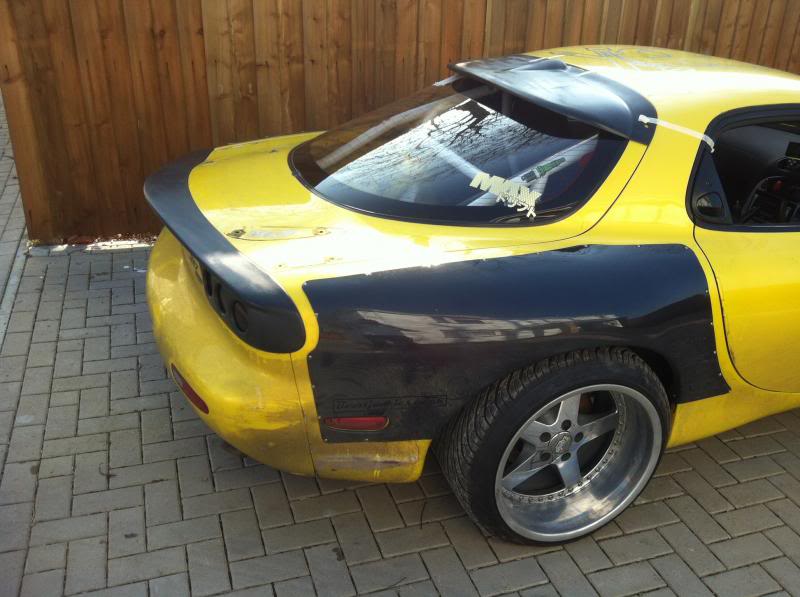
-over fenders on the rear
-de-spoilerd
-RE rear light cover
-RE boost gauge
-Personal steering wheel

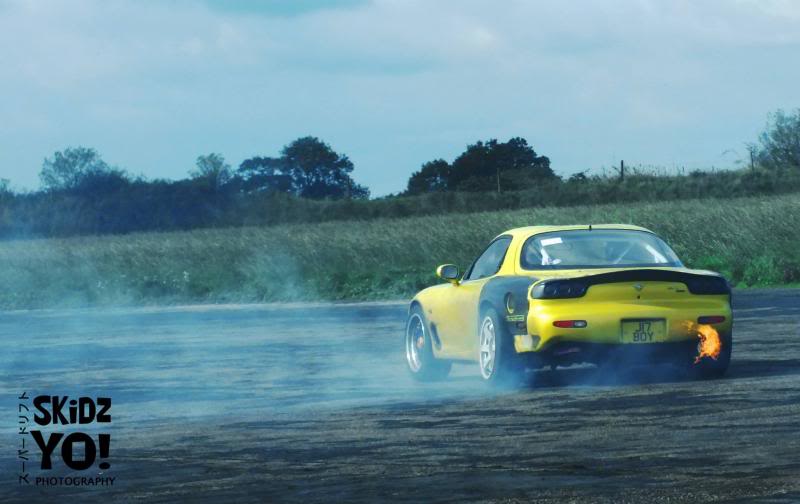
I also managed to get down to a local drift day, but as it was the first time drifting this car (or at all in the last two and a half years) I started with the basics in the play pen then the fig of 8 and eventually on to the main track, unlike my S13 I found this really hard to initiate the second gear drift and keep it round the bigger corners, could this be due to too much side movement from the shocks and springs? It felt stiff.

I think I will be updating the cooling system next with a front mount and new rad, and then coilovers.
To anyone who drifts an FD's is it essential to get the front hubs modded for extra lock? or at the level I�m at just leave them as they are? Will it make it easier to learn?
Thanks for taking the time to read and i apreciate any feed back as long as its constructive
------------------------------------------------------------
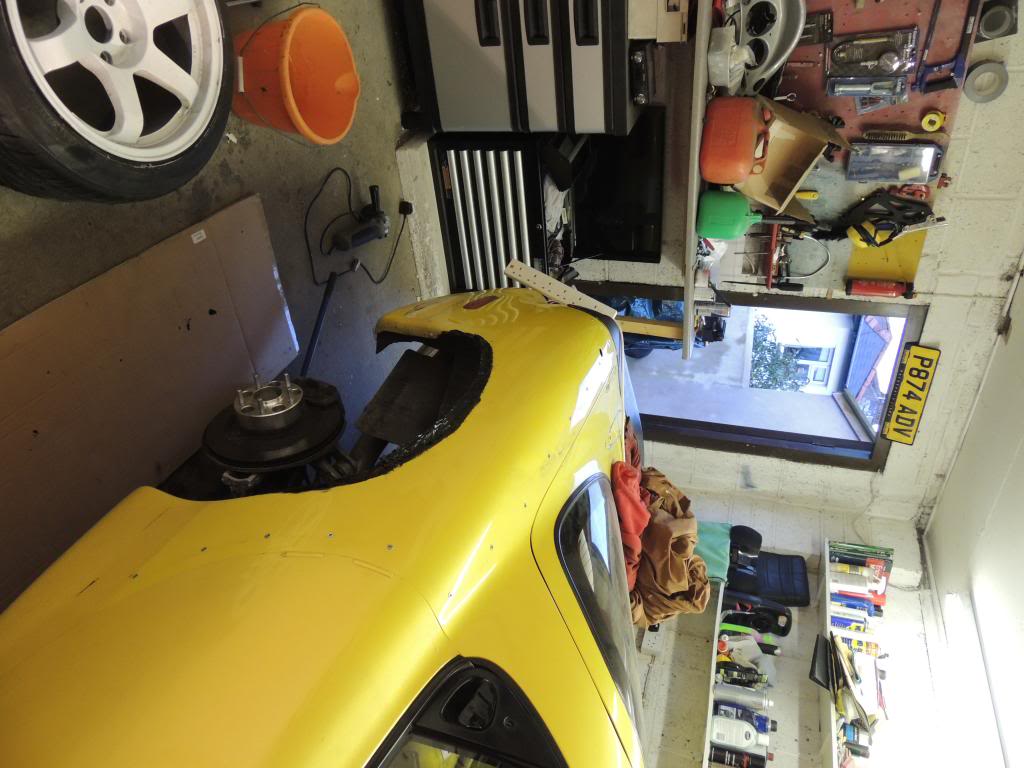
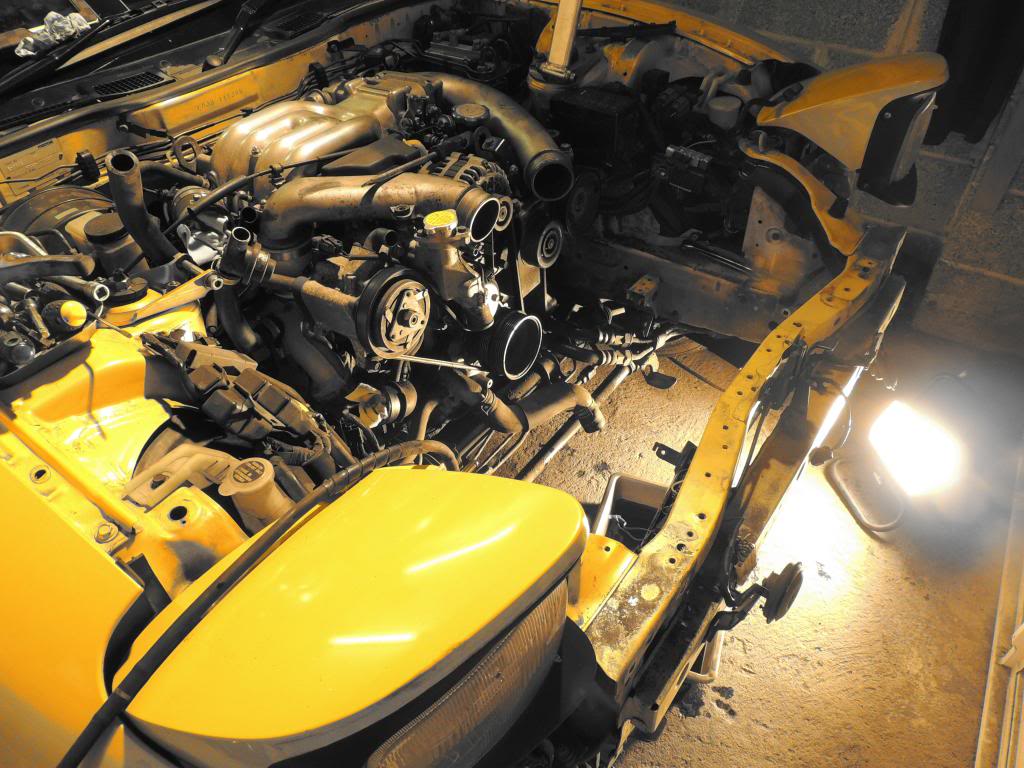
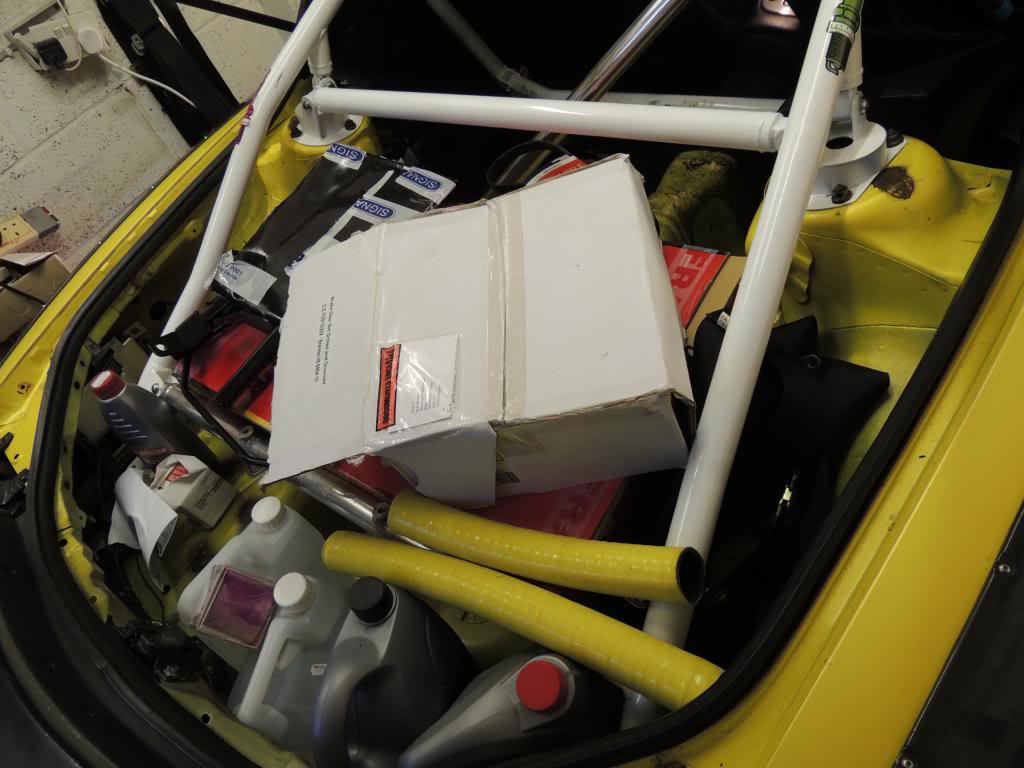
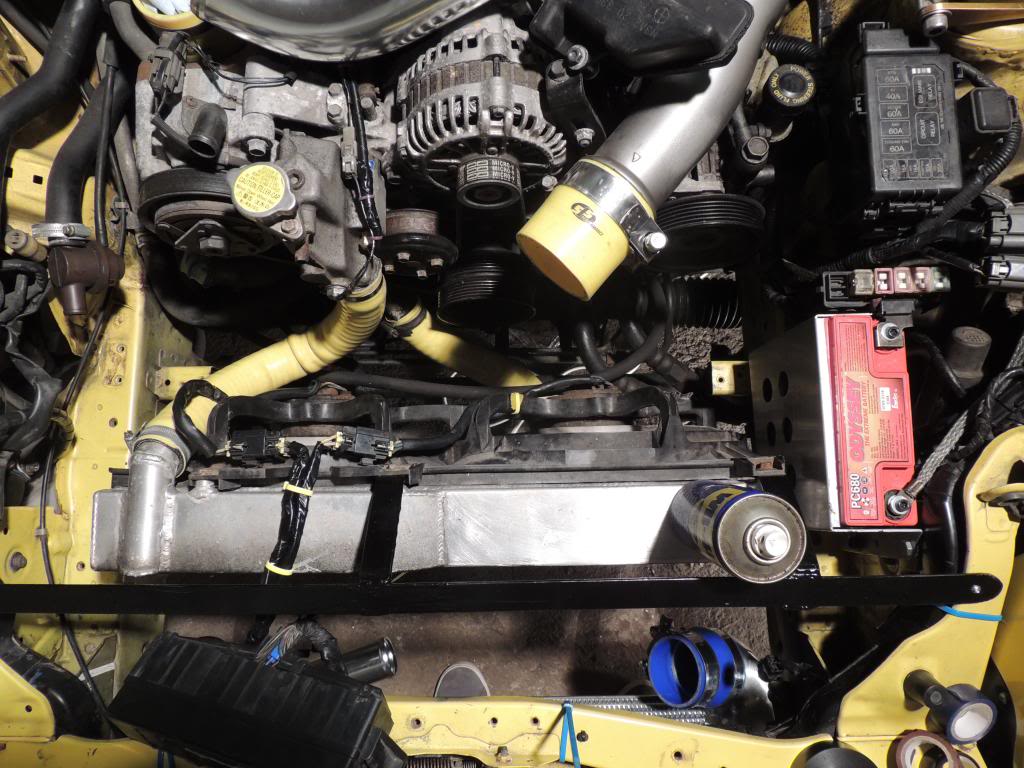
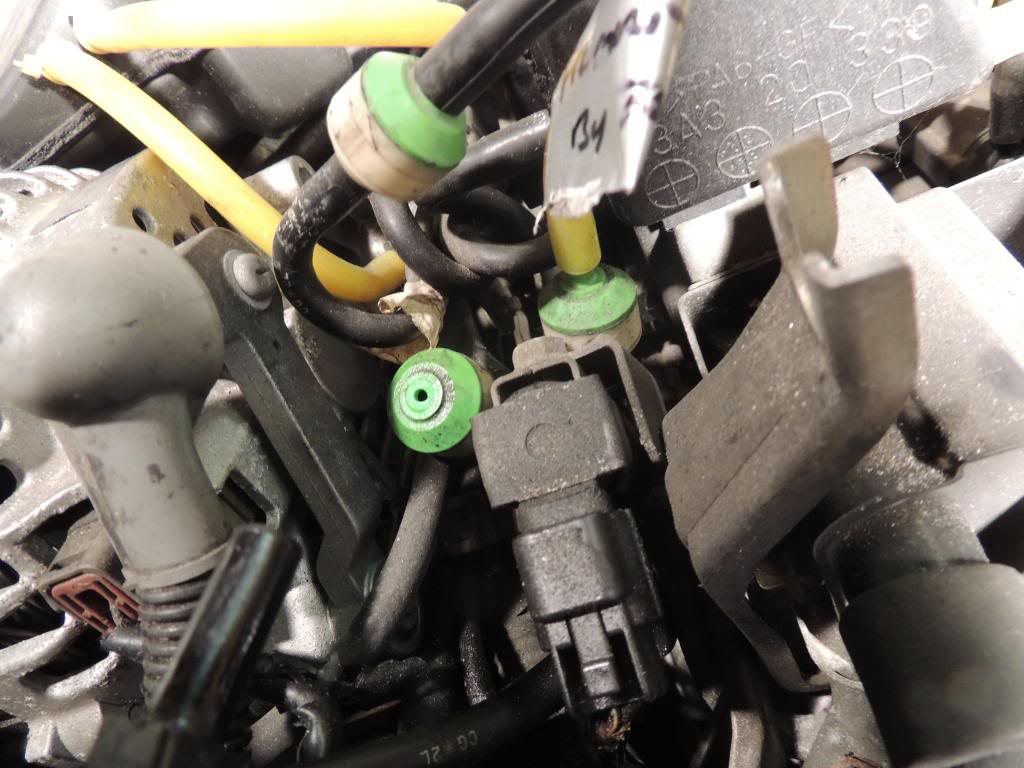
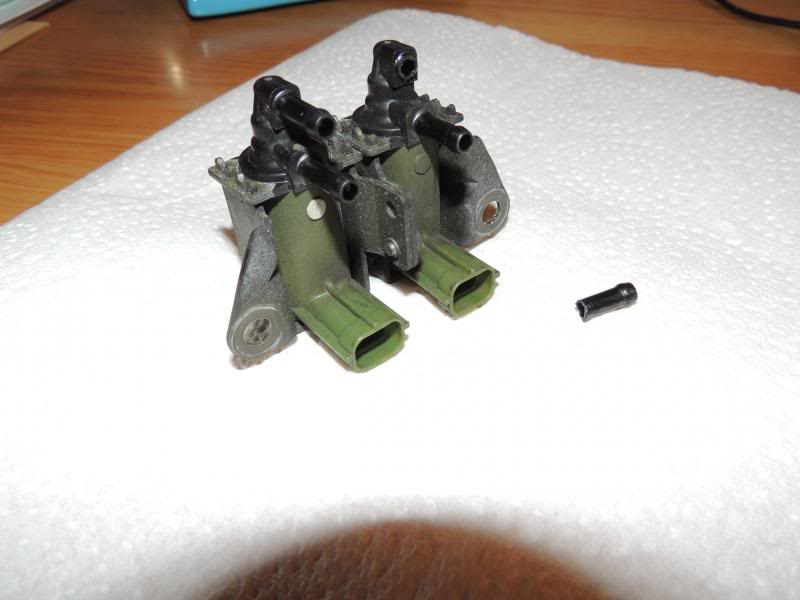
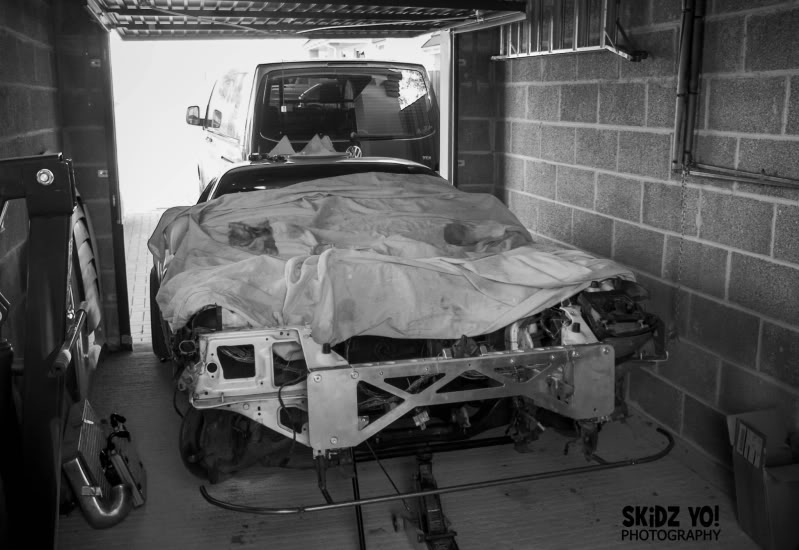
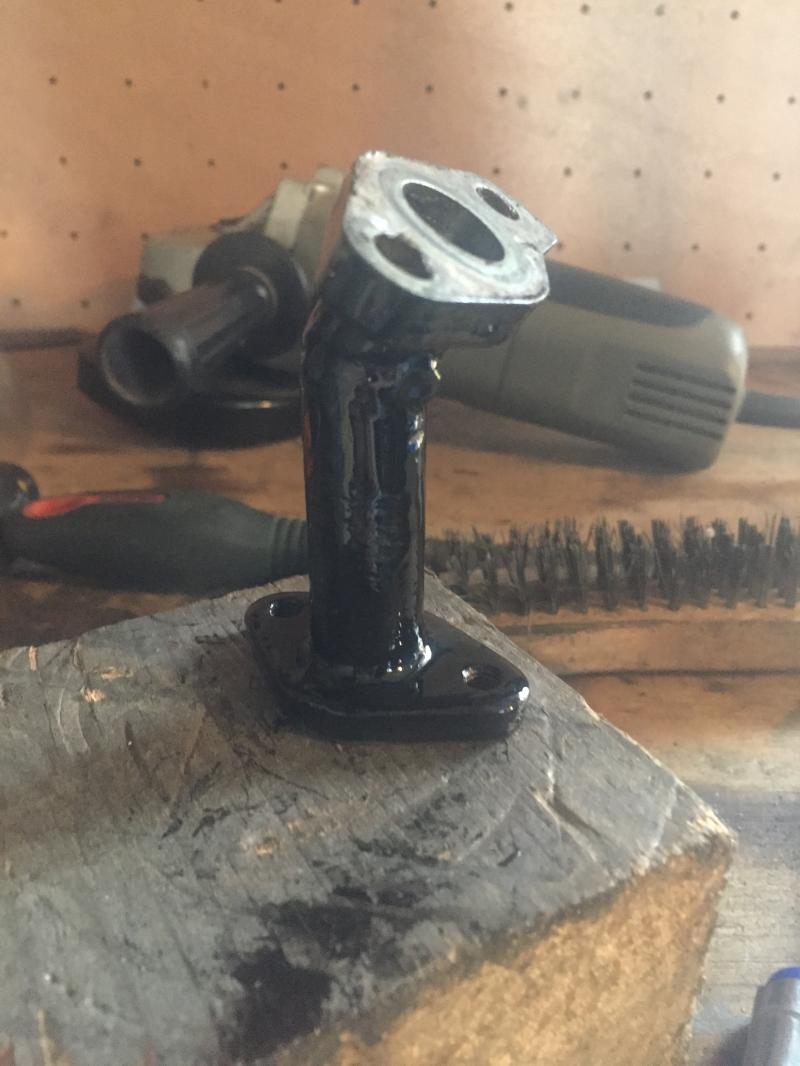
So tonight i have started fitting the front mount and have come across a few other things i can do while the bay is stripped out, mainly the A/C as all the heaters are striped out of the car (was done before i got it) whilst i was removing the ac pump i noticed that the pipes leading from the o/s oil cooler lead to the gear box direction (i was under the impression that both oil coolers were for engine oil) i followed the pipe back and it was looped by the gear box (i assume this is because the car used to be a auto) so i have taken the pipe work out.
QUESTION: can i use the o/s oil cooler to cool the power steering fluid? as last time i was drifting it boiled over!
QUESTION: i have a decat and an Power FC can i do away with the air pump?
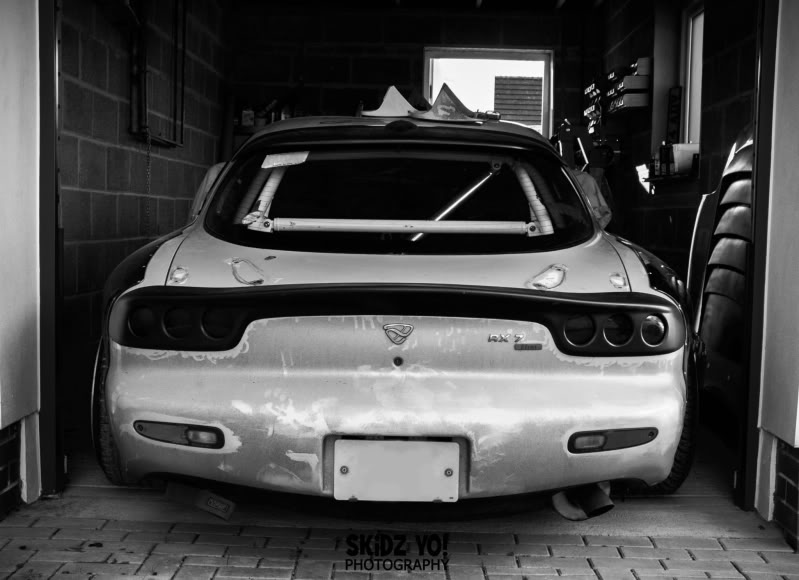
More pic whoring, and i had a play with the camera settings.
----------------------------------------------------------------------
I have had a few rwd cars over the last couple of years including s13, ps13, another FD, the difference between my current car and those ones is that I plan to keep this one on the road rather than trying to do overly complicated engine conversions and eventually selling them off for parts.
If you do not like bright yellow cars, pic whoring or spelling mistakes this is not the thread for you!
How I brought it.
it came pretty standard apart from a decat, stainless exhaust, apexi air filters, updated springs and an apexi power fc. The car was originally an auto so is running an auto diff.
I have done a few mods to it over the last couple of months including
-Half roll cage
-Recaro driver�s seat
-Rota Grids
-over fenders on the rear
-de-spoilerd
-RE rear light cover
-RE boost gauge
-Personal steering wheel
I also managed to get down to a local drift day, but as it was the first time drifting this car (or at all in the last two and a half years) I started with the basics in the play pen then the fig of 8 and eventually on to the main track, unlike my S13 I found this really hard to initiate the second gear drift and keep it round the bigger corners, could this be due to too much side movement from the shocks and springs? It felt stiff.
I think I will be updating the cooling system next with a front mount and new rad, and then coilovers.
To anyone who drifts an FD's is it essential to get the front hubs modded for extra lock? or at the level I�m at just leave them as they are? Will it make it easier to learn?
Thanks for taking the time to read and i apreciate any feed back as long as its constructive
------------------------------------------------------------
So tonight i have started fitting the front mount and have come across a few other things i can do while the bay is stripped out, mainly the A/C as all the heaters are striped out of the car (was done before i got it) whilst i was removing the ac pump i noticed that the pipes leading from the o/s oil cooler lead to the gear box direction (i was under the impression that both oil coolers were for engine oil) i followed the pipe back and it was looped by the gear box (i assume this is because the car used to be a auto) so i have taken the pipe work out.
QUESTION: can i use the o/s oil cooler to cool the power steering fluid? as last time i was drifting it boiled over!
QUESTION: i have a decat and an Power FC can i do away with the air pump?
More pic whoring, and i had a play with the camera settings.
----------------------------------------------------------------------
Thread Starter
Junior Member
Joined: Jan 2015
Posts: 15
Likes: 0
From: Devon, England
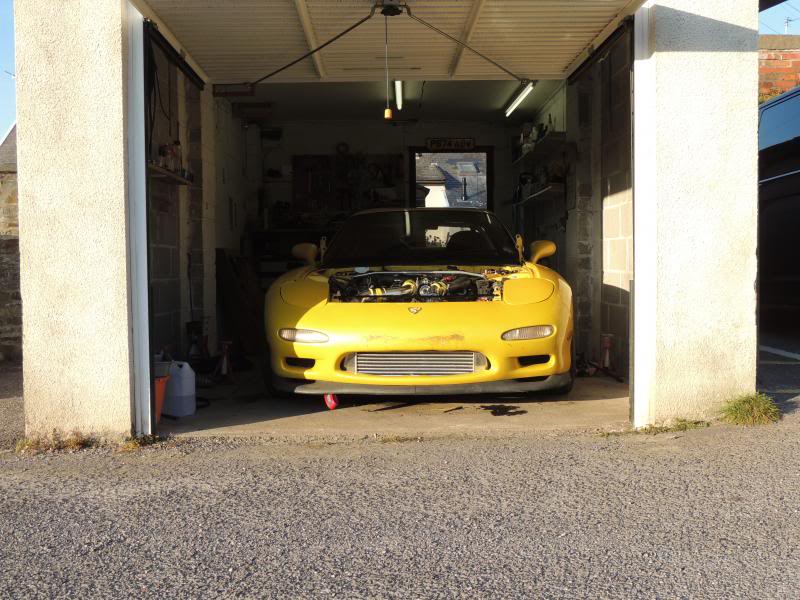
Couple of updates, the car is off the road for a month or so while i fit the front mount, coilovers and loads of other stuff, the front mount is a Foux Greddy ebay jobbie, (iv never had problems with cheep intercoolers) its a good kit but no instructions and is only ment to fit if everything else on the car is standerd.
I have had to make up a few bits to get it to fit.
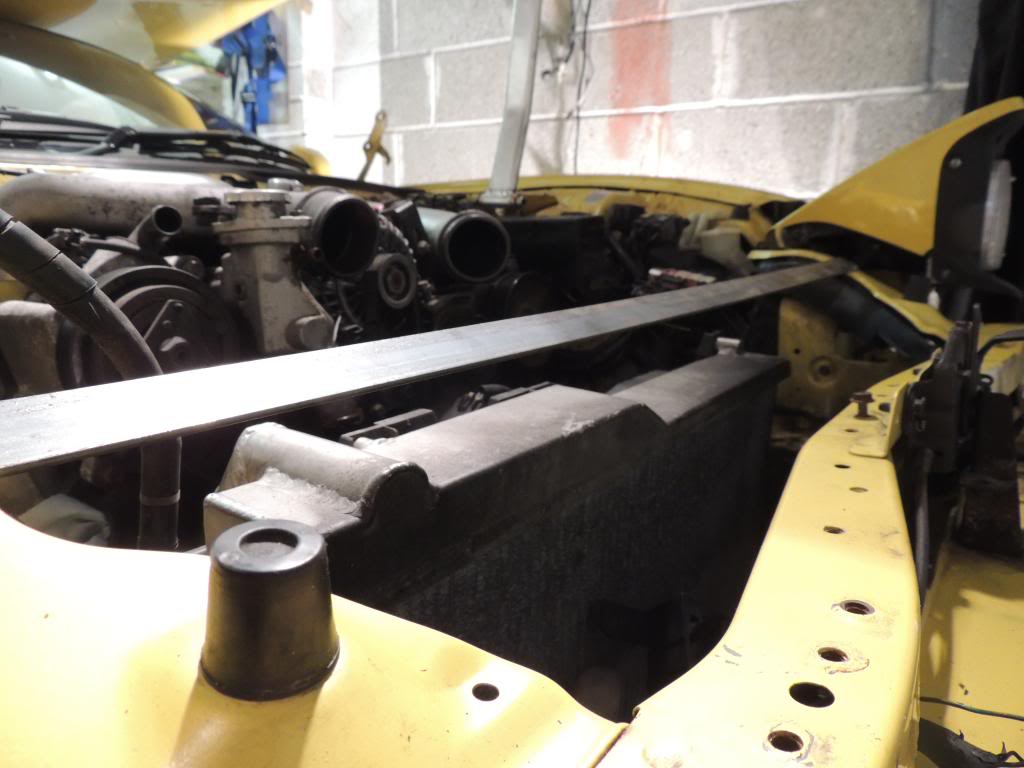
Question: any one fitted these kits before and know how the pipe work is ment to go as i have ended up using a hks pipe for one bit but there is still a 3" gap, its like a really bad puzzle.
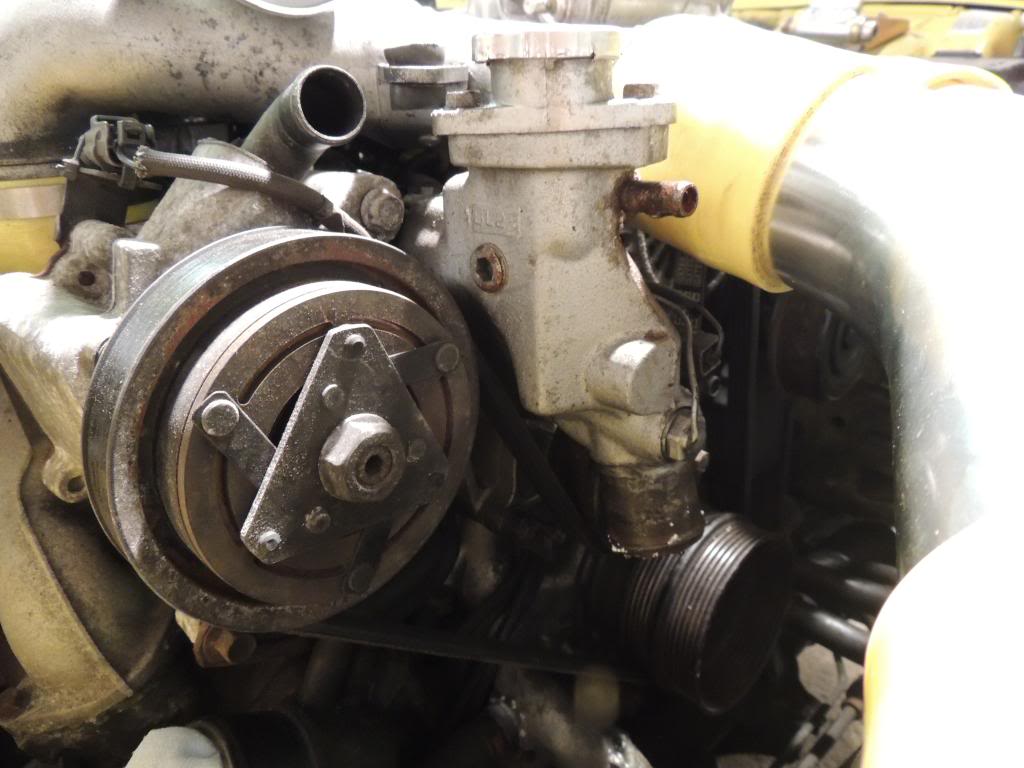
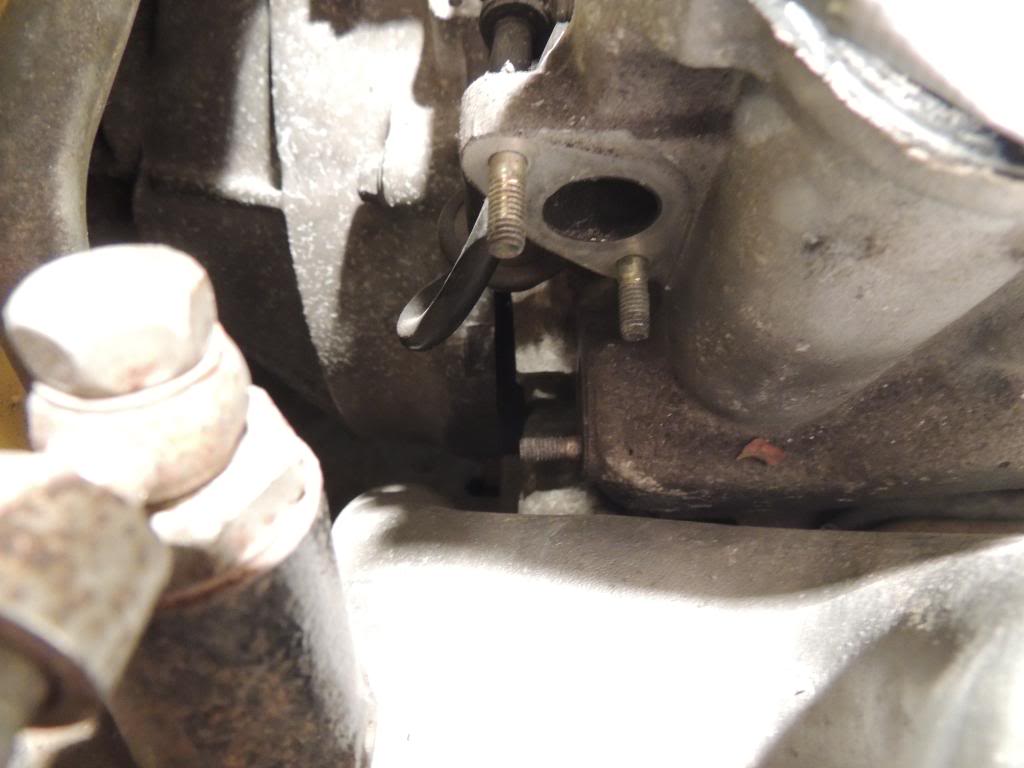
Question: I am going to be removing the air pump as soon as the blanking plates and pulleys arive, can i use the screw in the side of the stat housing (see pic below) to plumb in a clloant temp sensor? or is there a better plase that dosnt involve having a hose joiner type thing?
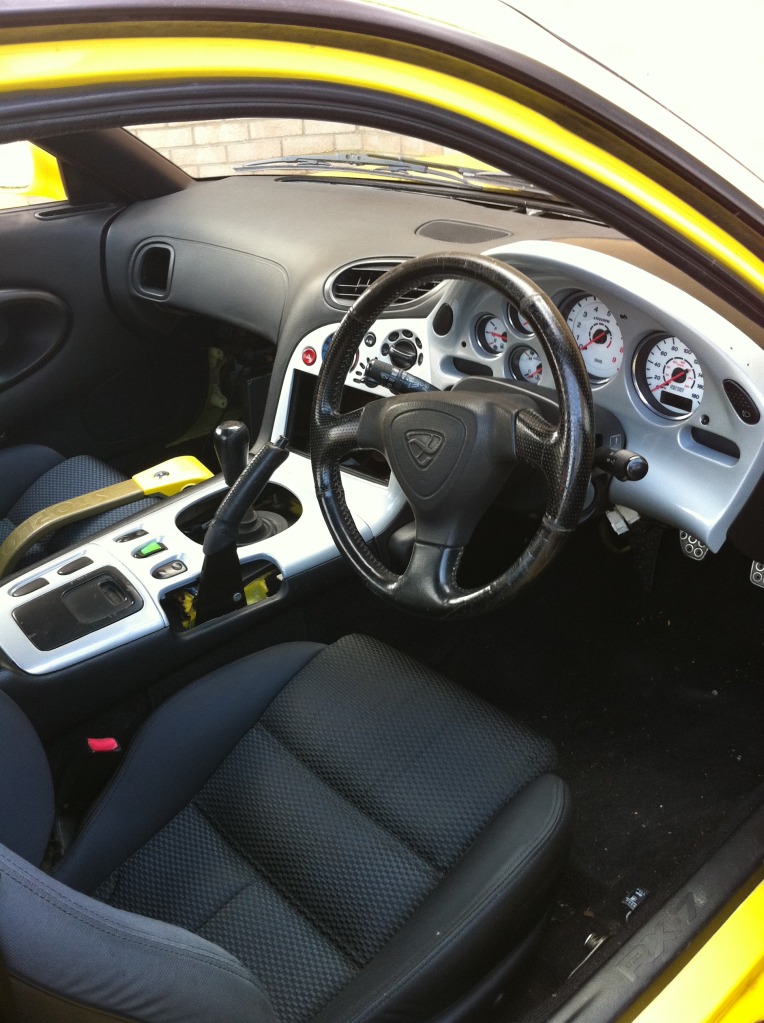
Heres how the interior is looking:
And the bits left to fit:
Cheers for looking and thanks in advance for the help.
--------------------------------------------------------
A bit more progress, I got my DM oil filter sensor plate through along with the blankings for the air pump (that job may have to wait till april as theres a drift day on the 23rd i want to go to and only have limmeted time to work on the car)
I also fitted in the new battery, painted the rad bracket, extended the wires to the fans, and got the temp sensor hole taped inthe stat housing.
With the rad in place i test fitted the coolant piping (theres quite a curve to them both but it is coil filled so shouldnt restrict the flow)
next up is to flush the coolent system, plumb that up and refill with fresh fluids, connect up the ic pipes and replace the oil,then get it back on the road for a bit.

I have had to make up a few bits to get it to fit.
Question: any one fitted these kits before and know how the pipe work is ment to go as i have ended up using a hks pipe for one bit but there is still a 3" gap, its like a really bad puzzle.
Question: I am going to be removing the air pump as soon as the blanking plates and pulleys arive, can i use the screw in the side of the stat housing (see pic below) to plumb in a clloant temp sensor? or is there a better plase that dosnt involve having a hose joiner type thing?
Heres how the interior is looking:
And the bits left to fit:
Cheers for looking and thanks in advance for the help.
--------------------------------------------------------
A bit more progress, I got my DM oil filter sensor plate through along with the blankings for the air pump (that job may have to wait till april as theres a drift day on the 23rd i want to go to and only have limmeted time to work on the car)
I also fitted in the new battery, painted the rad bracket, extended the wires to the fans, and got the temp sensor hole taped inthe stat housing.
With the rad in place i test fitted the coolant piping (theres quite a curve to them both but it is coil filled so shouldnt restrict the flow)
next up is to flush the coolent system, plumb that up and refill with fresh fluids, connect up the ic pipes and replace the oil,then get it back on the road for a bit.
Thread Starter
Junior Member
Joined: Jan 2015
Posts: 15
Likes: 0
From: Devon, England
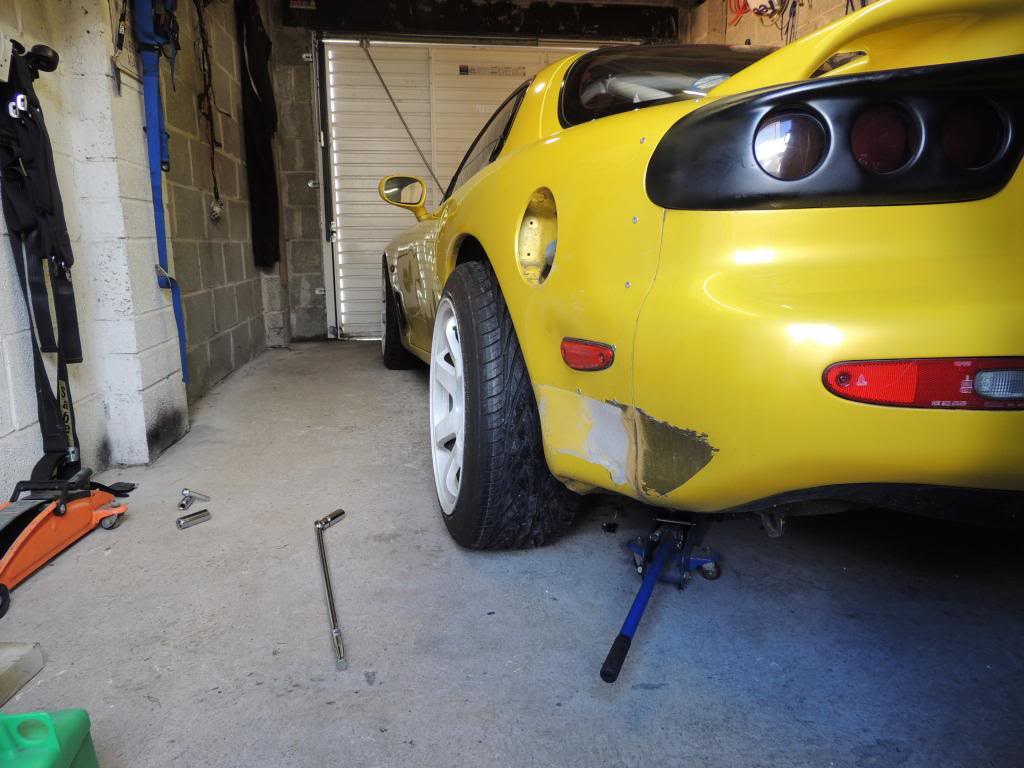
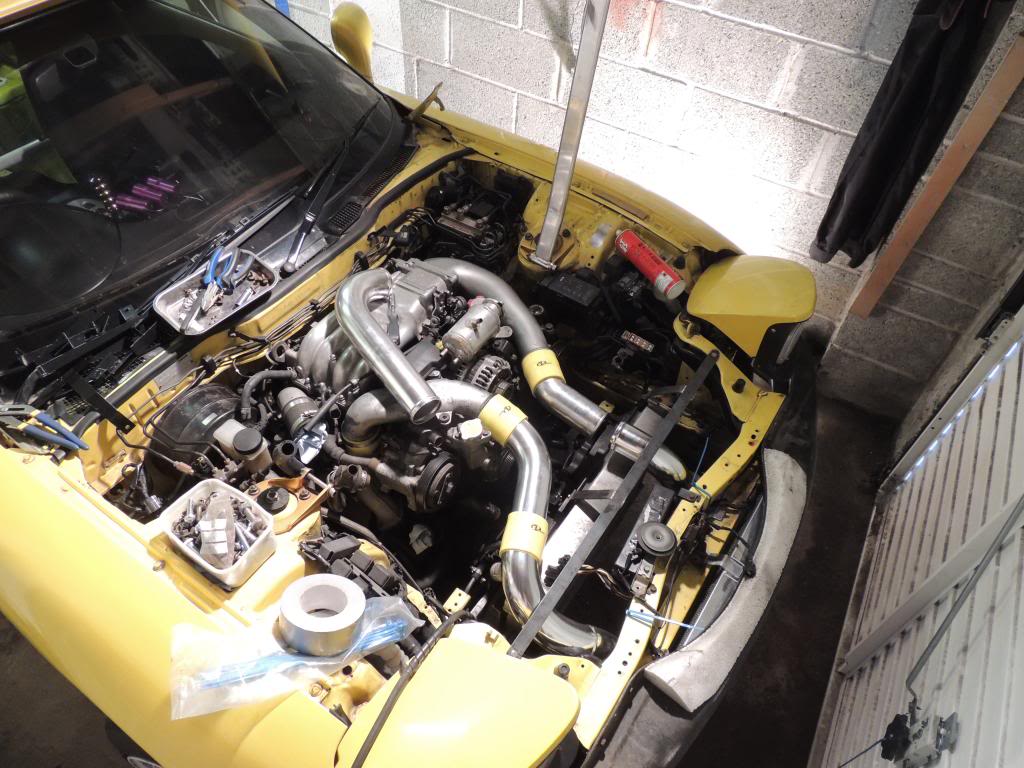
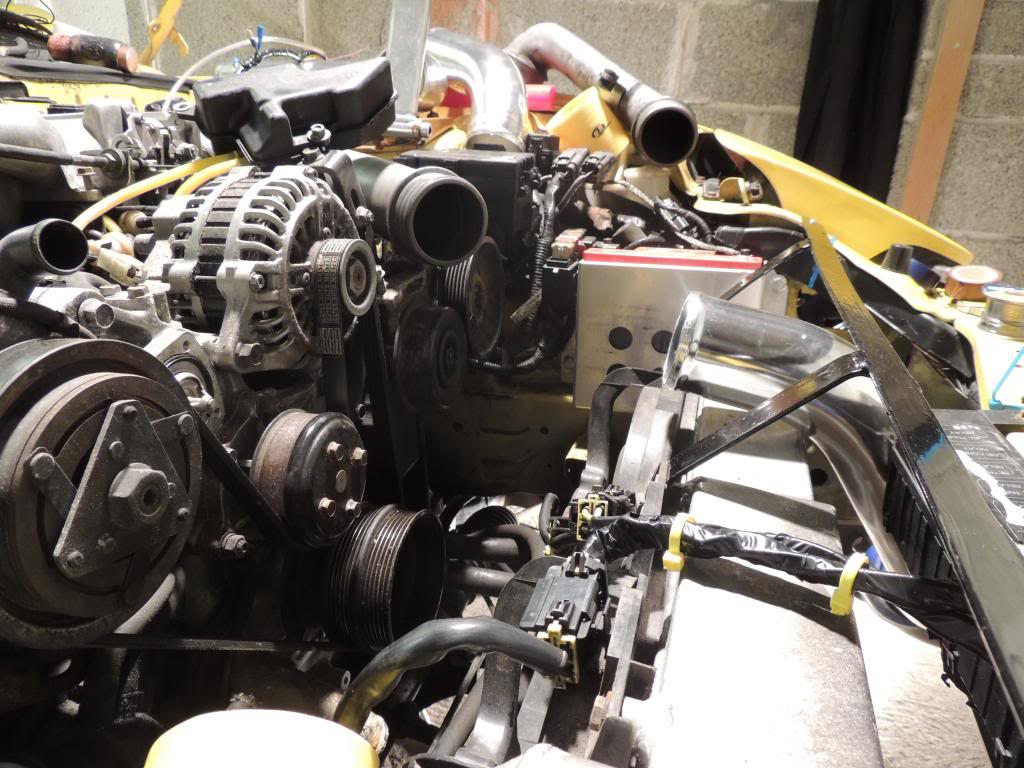
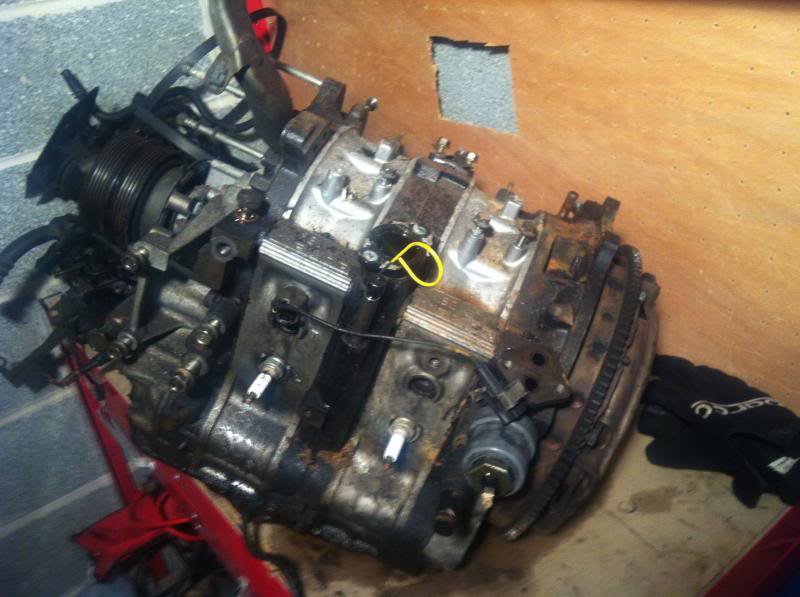
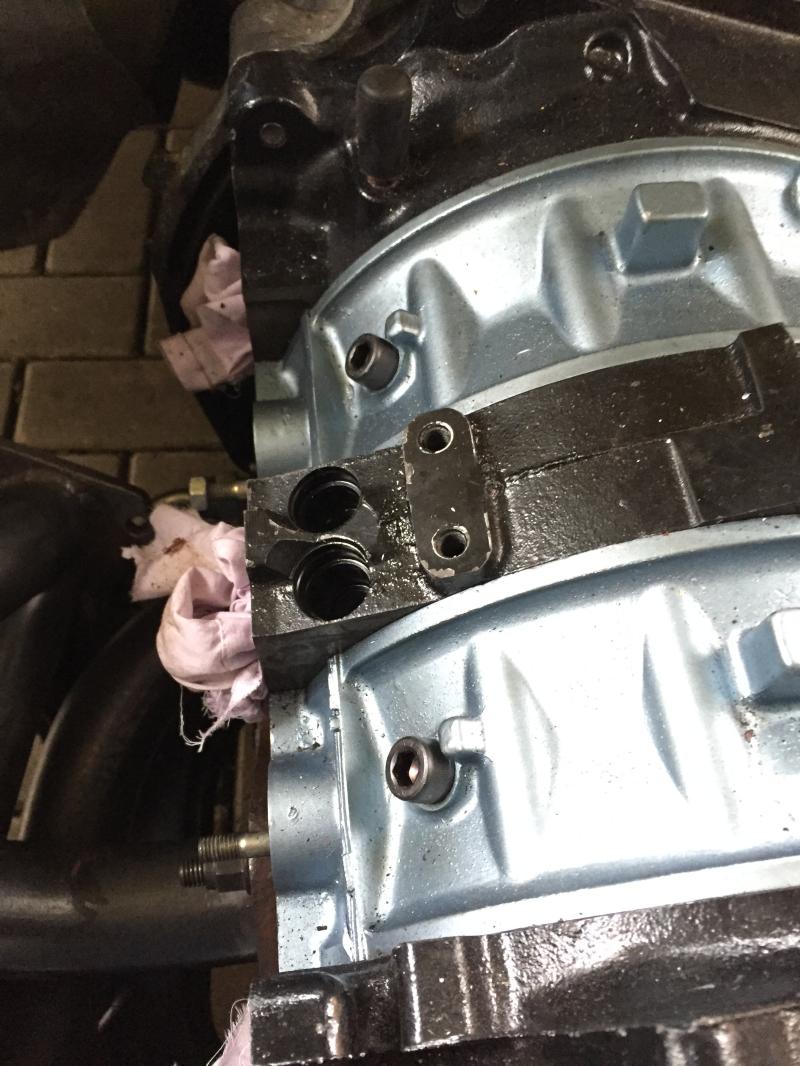
I took the air pump out that night, mainly because I needed to re do the pipe work for the air filters and it was in the way, I have relocated them but due to limited space there close to the rad (not ideal) I will get som ducting up to them.
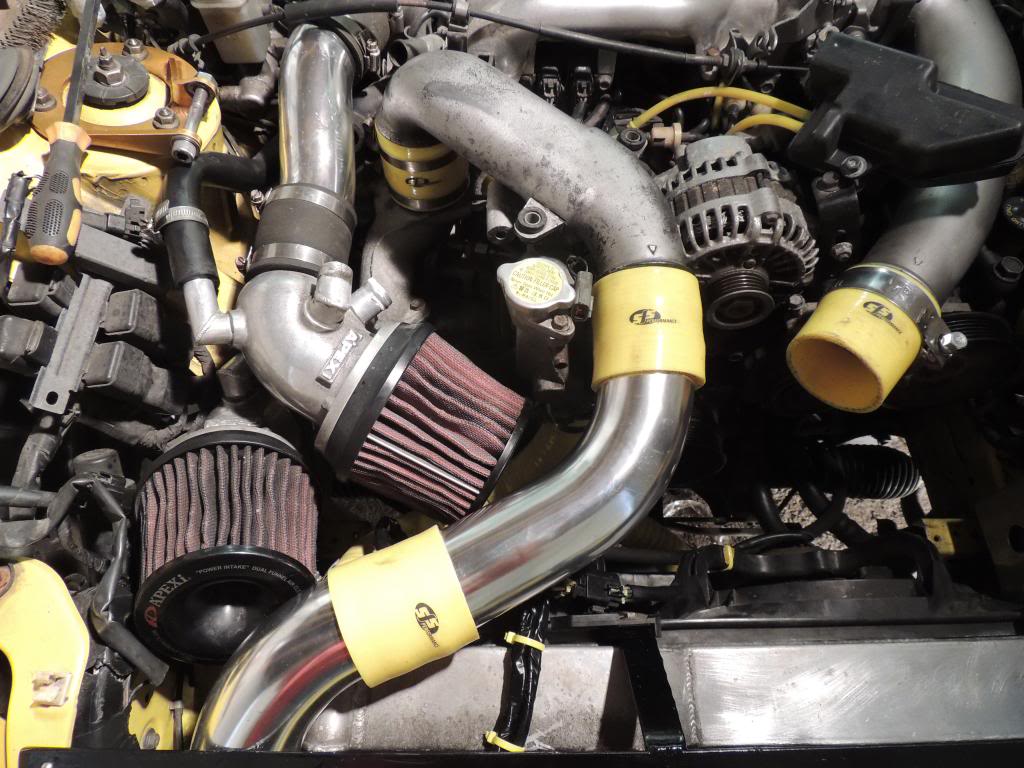
Question: the two pipes that went to the air pump, can I just loop/block them?
I then removed the uim, everything is so brittle under there.
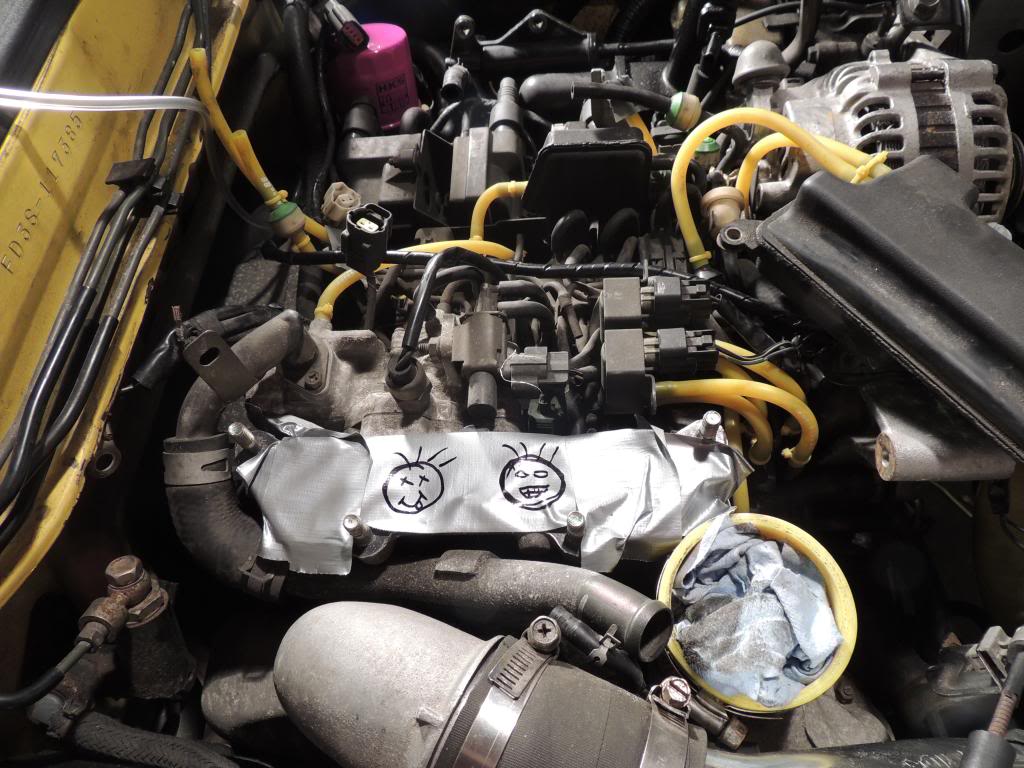
I managed to snap one of the one way valves along with various original pipes,
I then removed the bits that arnt needed for the air pump, I noticed that when the last owner removed the cat they ether snapped off or removed the stud. If its snapped that is going to be a bugger to get out.
Cheers for putting up with the photo whoring.
----------------------------------------------------------
They hold the drift day every now and again at Smetharpe airfield, near honiton, I have been to a couple but i dont think i will be able to attent the next one as i have just found out im moving house (and garage) on the 1st and will have to get everything ready for that,
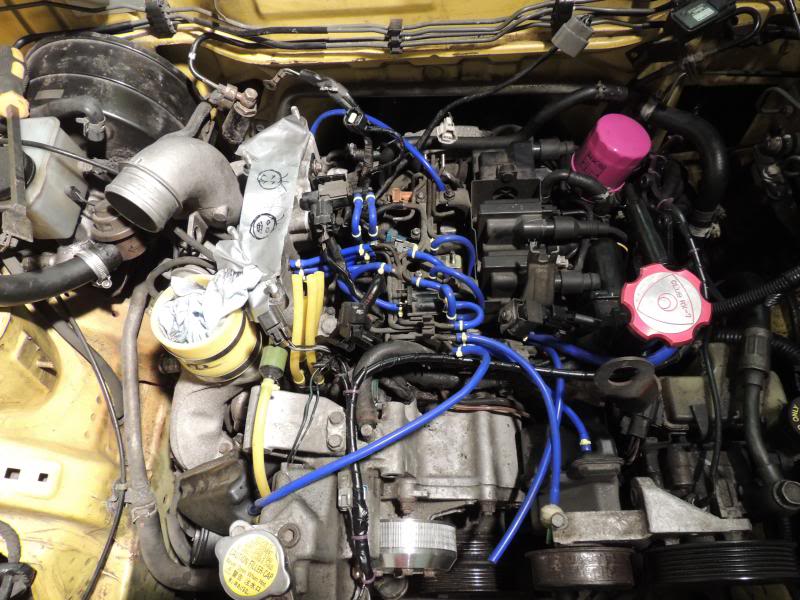
so i spent tonight sorting out the rats nest, i know yellow would of looked better but i had a load of blue hose and needed to get it done so here is where i am now.
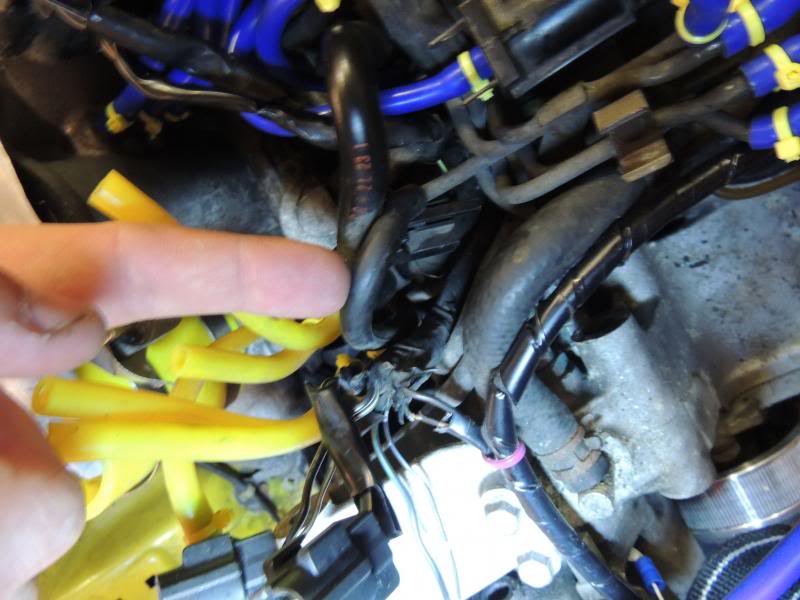
There is one hose that is puzzling me, it was connected to the solinoide closest to the front of the engine (for the twin throttle) and it runs from the big vacume tube at the front end of the fuel rail. Do i need to block it up? if i leave it will it spill fuel?
i also ended up braking this but i think i can fix it.
---------------------------------------------------
Hay dudes and dudetts, today was a good and bad day.
Good: I got the RX back on the road and drove it for the fist time this year :thumbsup:
Bad: I got five minuets up the road and realised I was leaving a trail of coolant behind me, luckily with it being the first test run I had a load of spare fluids in the back.
It turned out to be something really stupid, I forgot to re connect the bottom hose to the throttle body :o
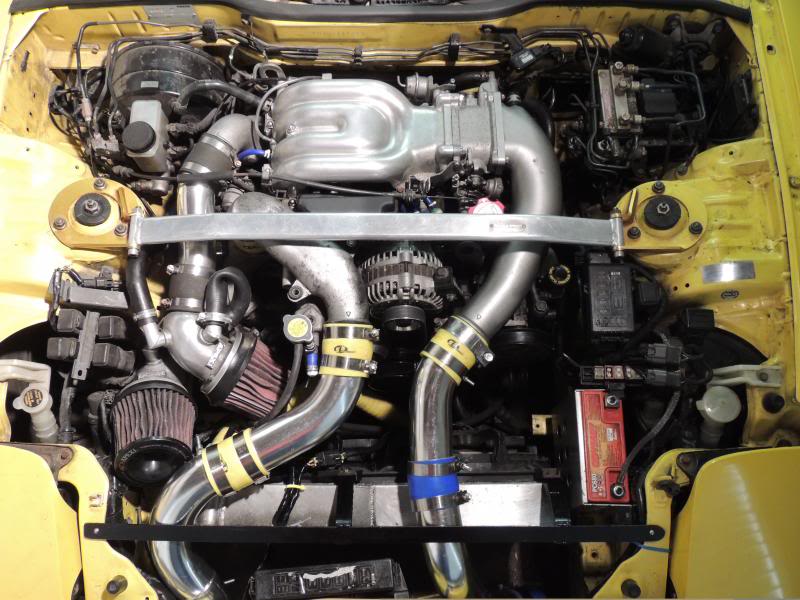
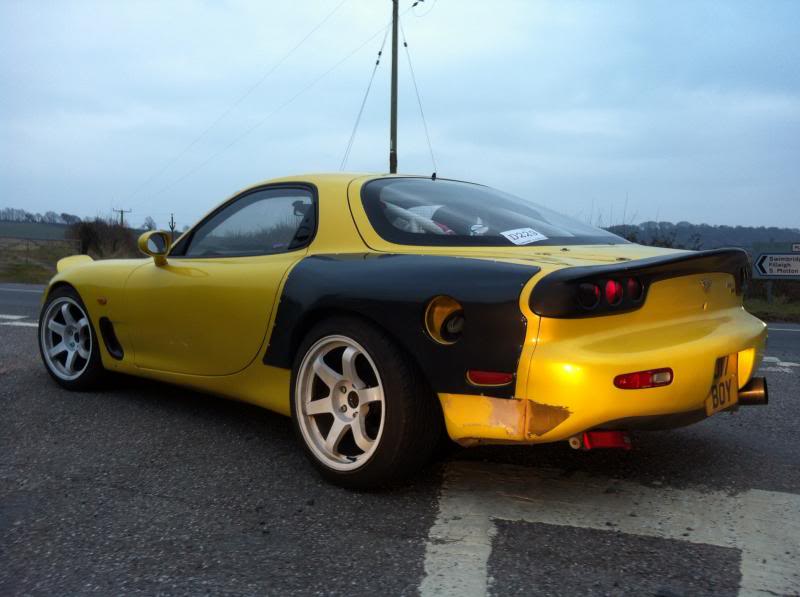
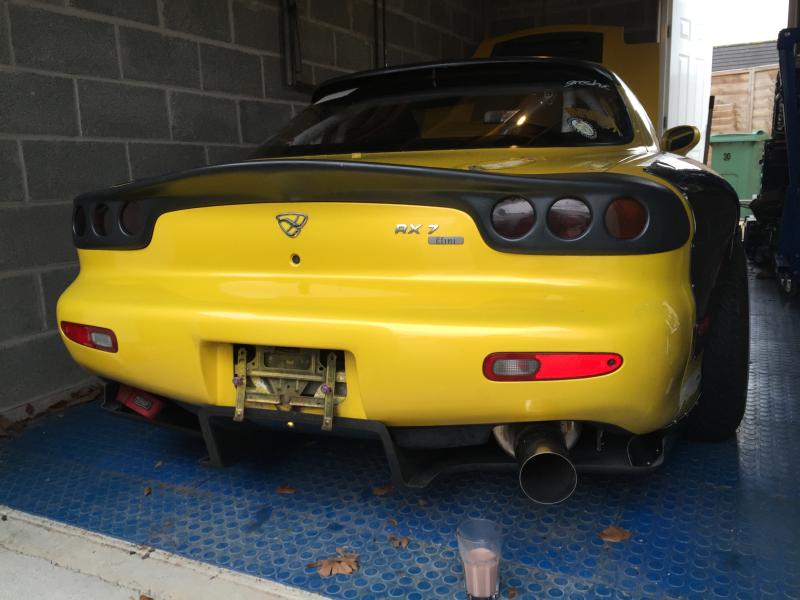
Random pic of it looking cool without a bonnet and number plate.
And one of how the engine bay looks now (if you spot anything wrong please let me know as you may have noticed from the above I'm not that observant)
Cheers y'all!
Question: the two pipes that went to the air pump, can I just loop/block them?
I then removed the uim, everything is so brittle under there.
I managed to snap one of the one way valves along with various original pipes,
I then removed the bits that arnt needed for the air pump, I noticed that when the last owner removed the cat they ether snapped off or removed the stud. If its snapped that is going to be a bugger to get out.
Cheers for putting up with the photo whoring.
----------------------------------------------------------
They hold the drift day every now and again at Smetharpe airfield, near honiton, I have been to a couple but i dont think i will be able to attent the next one as i have just found out im moving house (and garage) on the 1st and will have to get everything ready for that,
so i spent tonight sorting out the rats nest, i know yellow would of looked better but i had a load of blue hose and needed to get it done so here is where i am now.
There is one hose that is puzzling me, it was connected to the solinoide closest to the front of the engine (for the twin throttle) and it runs from the big vacume tube at the front end of the fuel rail. Do i need to block it up? if i leave it will it spill fuel?
i also ended up braking this but i think i can fix it.
---------------------------------------------------
Hay dudes and dudetts, today was a good and bad day.
Good: I got the RX back on the road and drove it for the fist time this year :thumbsup:
Bad: I got five minuets up the road and realised I was leaving a trail of coolant behind me, luckily with it being the first test run I had a load of spare fluids in the back.
It turned out to be something really stupid, I forgot to re connect the bottom hose to the throttle body :o
Random pic of it looking cool without a bonnet and number plate.
And one of how the engine bay looks now (if you spot anything wrong please let me know as you may have noticed from the above I'm not that observant)
Cheers y'all!
Thread Starter
Junior Member
Joined: Jan 2015
Posts: 15
Likes: 0
From: Devon, England
I have been having a bit of trouble with bleeding the coolant system but with a bit of help from YouTube I have got it sorted and took the car out for its first proper run, only 10 miles but it put a hell of a smile on my face.
Couple of pics cus I'm a pic *****:
I'm Un decided on the wheels, I think I prefer the Rotas to the ssr's but I'll give it some more time.
Next up fit the coilovers and enjoy!
--------------------------------------------------
I have been busy moving house so haven't had a chance to get on here, here's a few pics from Sunday just gone, defiantly my most successful drift day so far, the car behaved itself all day and got me home.
Thanks to some help from other FD owners I managed to sort the hunting at idle issue so it is running much more smoothly.
Next few bits to do before next months drift day are:
Bigger oil cooler to keep temps down, possibly with a fan?
MOT
Finally fit my coilovers.

Cheers for taking the time to read, if you have any advice on helpful drift mods (especially tracking/camber to run) I'm all ears
-------------------------------------------------------
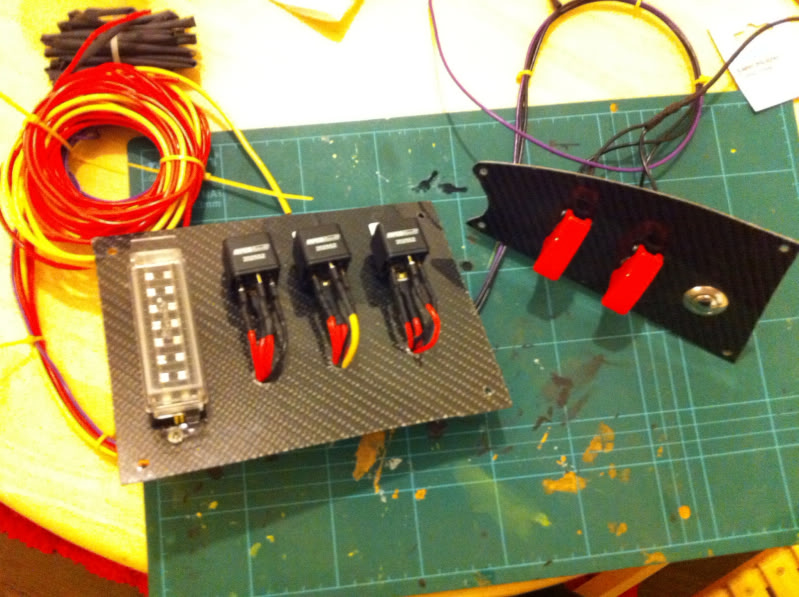
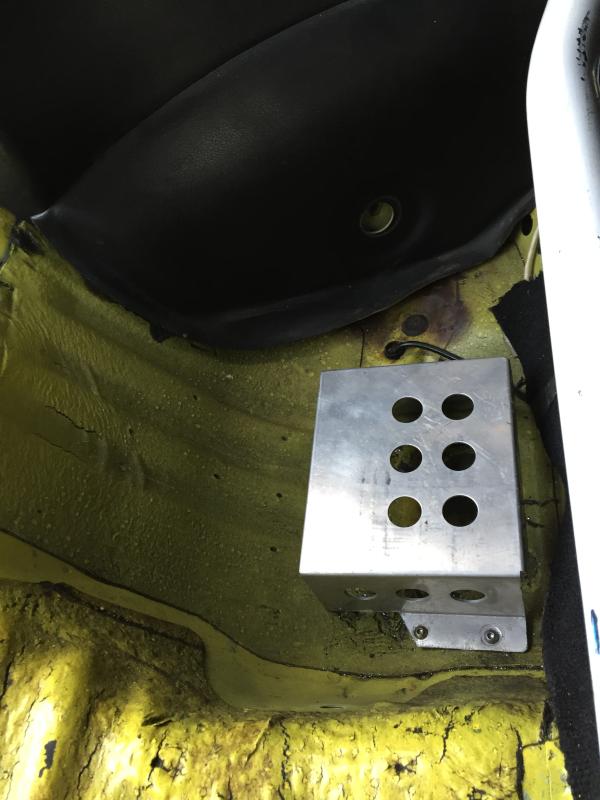
So mot is coming up and one of the things I need is a horn, I can't wire it up the traditional way as the steering wheel boss won't allow it so I have knocked up a plate to go where the heater controls used to be (all heating and ac were removed before I got the car) I am also going to be adding a bigger oil cooler with a fan and a fast speed fan switch, so to make it all neat I have put all the switches in one place.
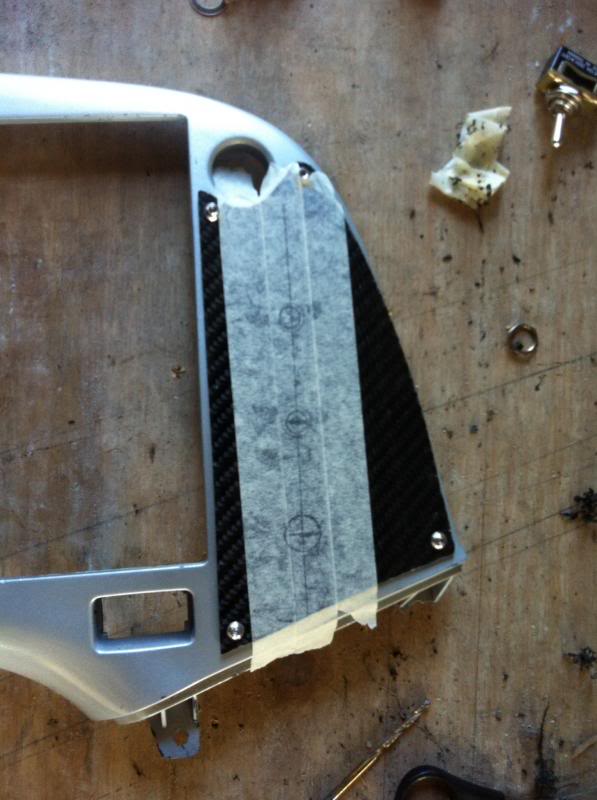
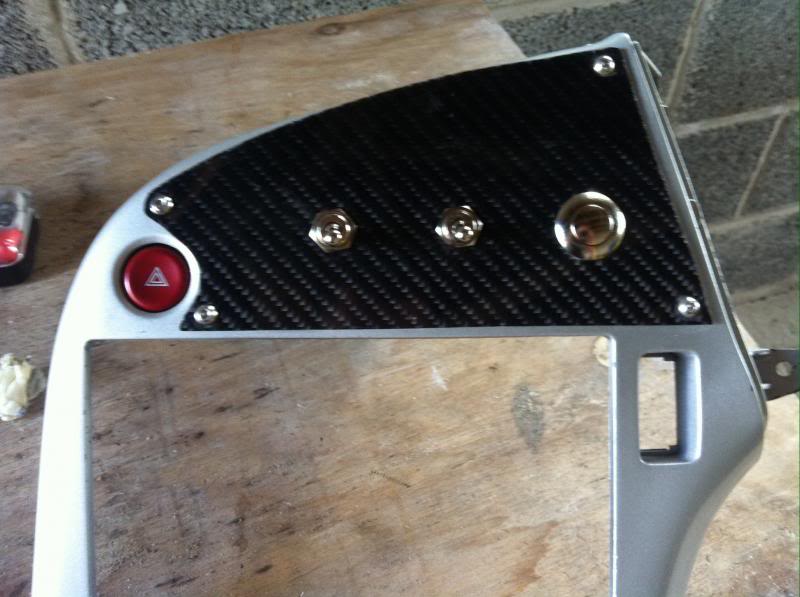
All from some carbon sheet and some riv nuts
Couple of pics cus I'm a pic *****:
I'm Un decided on the wheels, I think I prefer the Rotas to the ssr's but I'll give it some more time.
Next up fit the coilovers and enjoy!
--------------------------------------------------
I have been busy moving house so haven't had a chance to get on here, here's a few pics from Sunday just gone, defiantly my most successful drift day so far, the car behaved itself all day and got me home.
Thanks to some help from other FD owners I managed to sort the hunting at idle issue so it is running much more smoothly.
Next few bits to do before next months drift day are:
Bigger oil cooler to keep temps down, possibly with a fan?
MOT
Finally fit my coilovers.


Cheers for taking the time to read, if you have any advice on helpful drift mods (especially tracking/camber to run) I'm all ears
-------------------------------------------------------
So mot is coming up and one of the things I need is a horn, I can't wire it up the traditional way as the steering wheel boss won't allow it so I have knocked up a plate to go where the heater controls used to be (all heating and ac were removed before I got the car) I am also going to be adding a bigger oil cooler with a fan and a fast speed fan switch, so to make it all neat I have put all the switches in one place.


All from some carbon sheet and some riv nuts
Thread Starter
Junior Member
Joined: Jan 2015
Posts: 15
Likes: 0
From: Devon, England
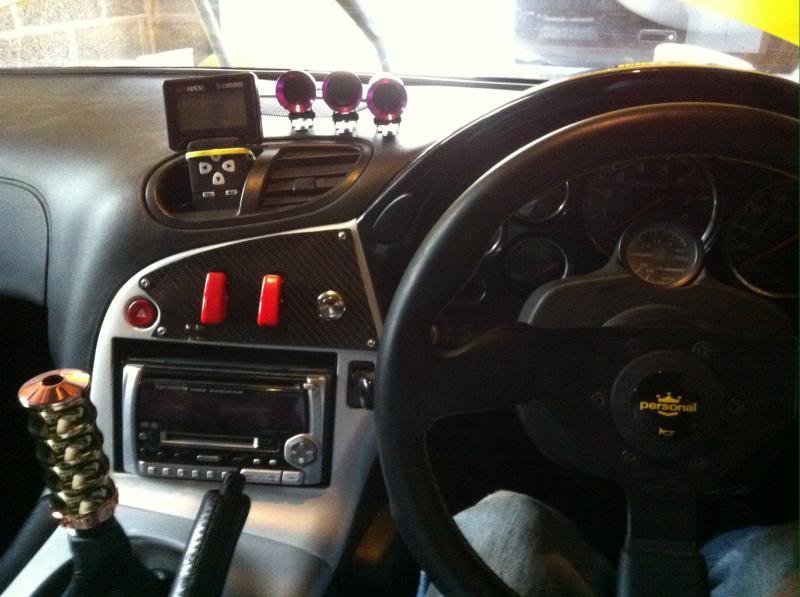
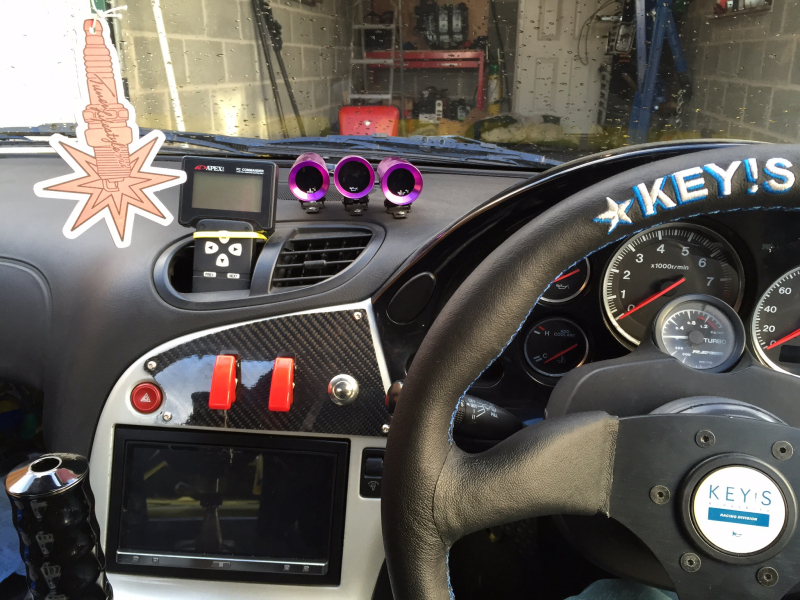
Small update, the dash is finished,
It also passed its MOT wooo hooo!
Next up fit the gear box brace and I should be able to make a set out of this pile of coilovers.
------------------------------------------------------
OK so I has been a while since I posted in here, but I really could do with some help because I think "IT" has happened!
I have done a few drift days over the last couple of months, the last of which was Santa Pod, now I live in Barnstaple which is in North Devon so it is not just a case of popping down the road to get there ( four and a half hours each way) so me and a mate loaded up the rex, checked all the levels and got going at 5 in the morning.
as I have no heating, it was super cold and noisy.
any way we had a blast and the rex preformed perfectly all day except the hot start problem it had developed about a month before, it was never too much of an issue I would just let it cool down or get a jump start and it would be ok.
It also used about a litre and a half or oil and a litre of coolant.
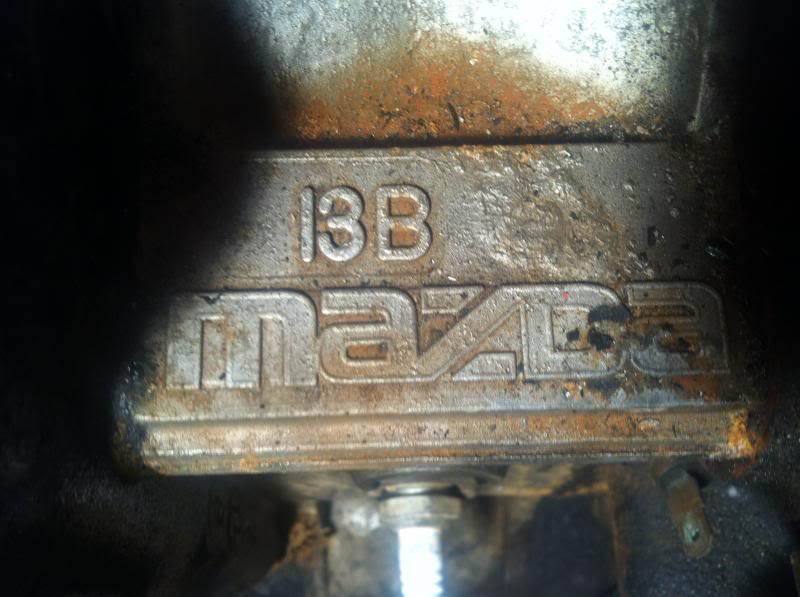
we drifted all day and made it back home safe, I then parked the car in the garage and left it for a couple of days, since then it wont start at all now I am wondering if all those "symptoms" I have been trying to ignore were the engine giving up??? I put the battery on charge today (just in case it was not enough umph for the starter) it still wouldn't start so I got the compression tester out, these are my results...
these are with a pistion tester with the valve taken out, obviously cold as it wont start, with both top plugs removed (for the tester to go in) and the bottom leads disconnected.
Front rotor

Rear rotor

I would appreciate any advice on things to try, dose this sound like the starter is turning over fast enough? or have I killed the engine?
any advice and expertise you may have is greatly appreciated.
cheers in advance
Rob
-------------------------------------------------------
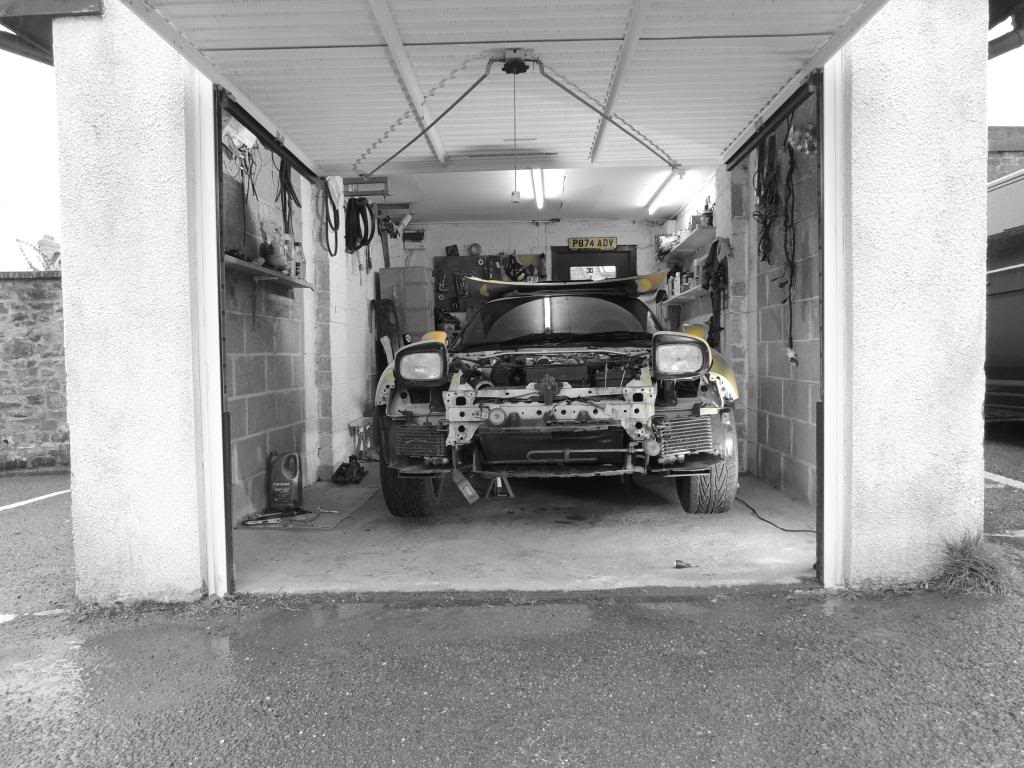
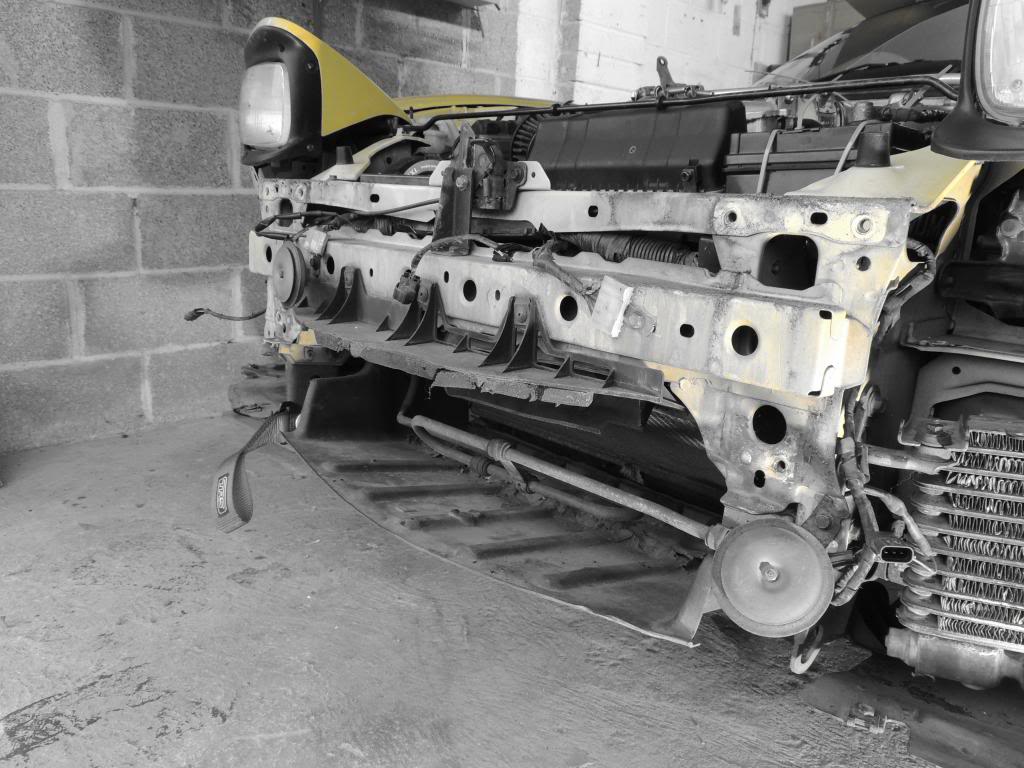
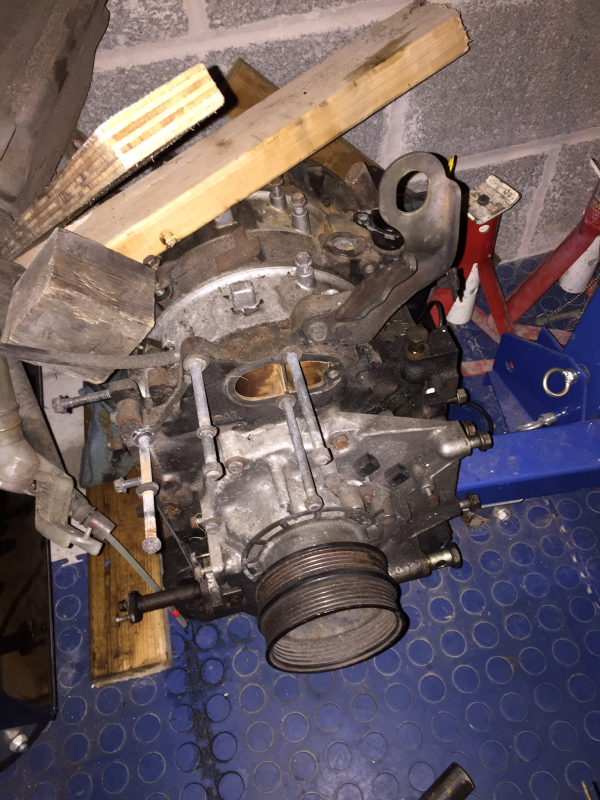
Not too much of an update but the engine is out and mostly striped down.
And the obligatory shot...
I'm still in two minders about whether to rebuild it ,y self or send it off and got it done professionally, with a warranty ect, also if I do send it off to get built it will give me time to do other bits on the car before its back on the road.
-----------------------------------------------------
Just a quick (and poor quality iPhone) shot of the DM front panel that arrived today, I couldn't wait to get it on so out came the spot weld drill bit, simple fit and good quality bit of kit.
-------------------------------------------------------
It was a sunny day today so I pushed the Rex out the garage for some fresh air and got on with some compleat lay non essential mods...
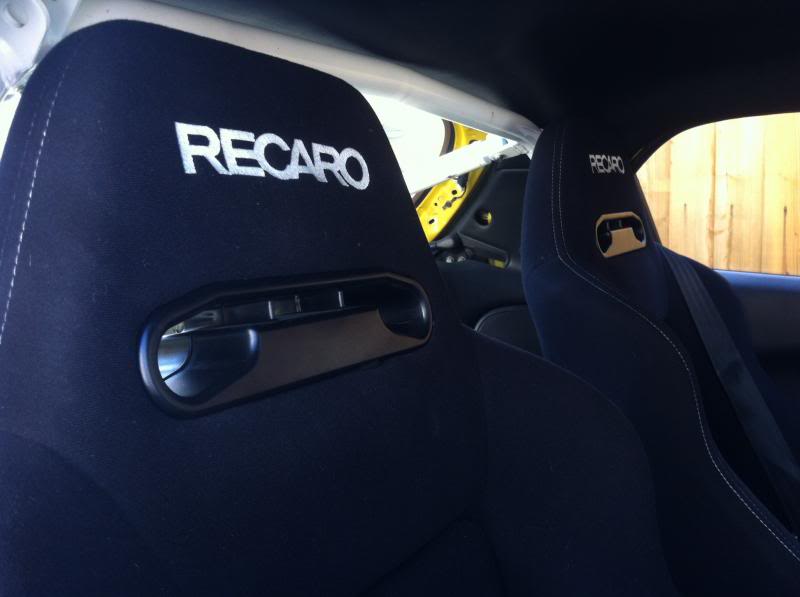
First I got my new Recaros fitted, I'm 30 this year so I'm officily too old (and fat) for the fixed back anymore.
I then got on with repairing, re spraying and fitting my bonnet vent, re light cover and top spoiler.
Make to most of the sun peeps, hopefully the next update will be engine.

It also passed its MOT wooo hooo!
Next up fit the gear box brace and I should be able to make a set out of this pile of coilovers.

------------------------------------------------------
OK so I has been a while since I posted in here, but I really could do with some help because I think "IT" has happened!
I have done a few drift days over the last couple of months, the last of which was Santa Pod, now I live in Barnstaple which is in North Devon so it is not just a case of popping down the road to get there ( four and a half hours each way) so me and a mate loaded up the rex, checked all the levels and got going at 5 in the morning.

as I have no heating, it was super cold and noisy.
any way we had a blast and the rex preformed perfectly all day except the hot start problem it had developed about a month before, it was never too much of an issue I would just let it cool down or get a jump start and it would be ok.
It also used about a litre and a half or oil and a litre of coolant.
we drifted all day and made it back home safe, I then parked the car in the garage and left it for a couple of days, since then it wont start at all now I am wondering if all those "symptoms" I have been trying to ignore were the engine giving up??? I put the battery on charge today (just in case it was not enough umph for the starter) it still wouldn't start so I got the compression tester out, these are my results...
these are with a pistion tester with the valve taken out, obviously cold as it wont start, with both top plugs removed (for the tester to go in) and the bottom leads disconnected.
Front rotor
Rear rotor
I would appreciate any advice on things to try, dose this sound like the starter is turning over fast enough? or have I killed the engine?
any advice and expertise you may have is greatly appreciated.
cheers in advance
Rob
-------------------------------------------------------
Not too much of an update but the engine is out and mostly striped down.

And the obligatory shot...

I'm still in two minders about whether to rebuild it ,y self or send it off and got it done professionally, with a warranty ect, also if I do send it off to get built it will give me time to do other bits on the car before its back on the road.
-----------------------------------------------------
Just a quick (and poor quality iPhone) shot of the DM front panel that arrived today, I couldn't wait to get it on so out came the spot weld drill bit, simple fit and good quality bit of kit.

-------------------------------------------------------
It was a sunny day today so I pushed the Rex out the garage for some fresh air and got on with some compleat lay non essential mods...
First I got my new Recaros fitted, I'm 30 this year so I'm officily too old (and fat) for the fixed back anymore.

I then got on with repairing, re spraying and fitting my bonnet vent, re light cover and top spoiler.


Make to most of the sun peeps, hopefully the next update will be engine.
Thread Starter
Junior Member
Joined: Jan 2015
Posts: 15
Likes: 0
From: Devon, England
I have got some new oil coolers as the car was an auto and only had one from new.
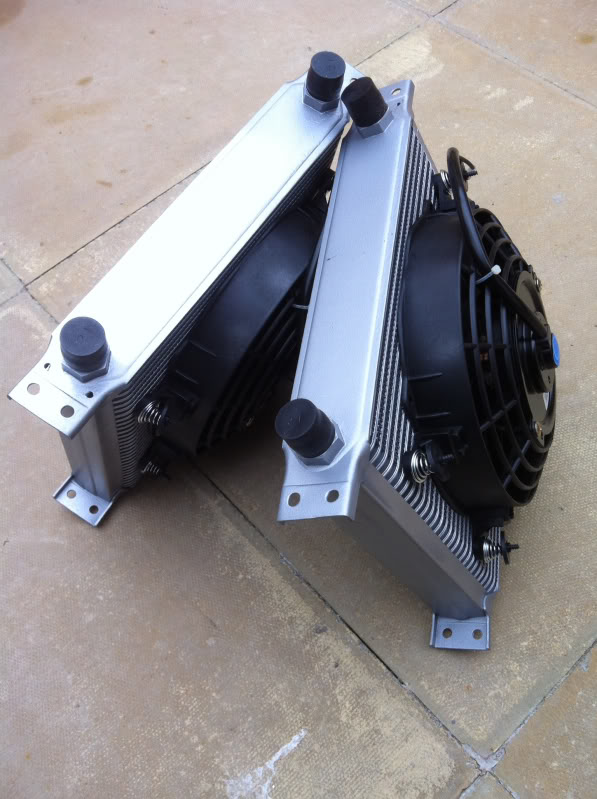
As you can see they have fans on the back as they don't get a massive amount of airflow when drifting.
I will be going with a v-mount when the engine goes back in.
Two switches on the dash will control the fans (all four of them)
One switch will bring on the rad fans on normal speed (for day to day driving)
The other will bring them on faster and bring on the oil cooler fans for when drifting.
Will get the wiring in soon and then I can start fabricating the mounts for rad, inter cooler and oil coolers.
----------------------------------------------------
Couple of arty pics my mate took.no real update.
---------------------------------------------------------
So I picked up the S14 and skided that for the last two months (five events) just to see if I could remember how to drift, it was good fun and at one point I considered braking the RX and keeping it but it just isn't as fun or as cool as an FD so it has now gone and I will concentrating on my RX7.

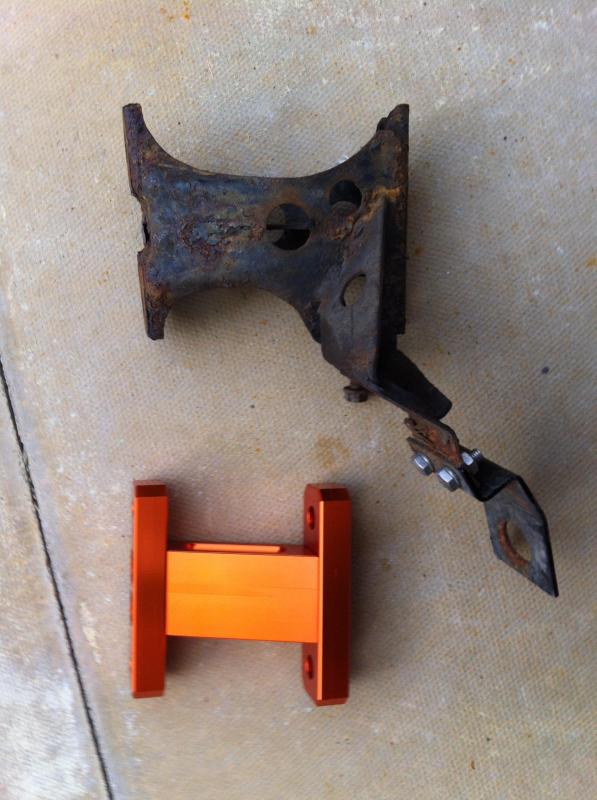
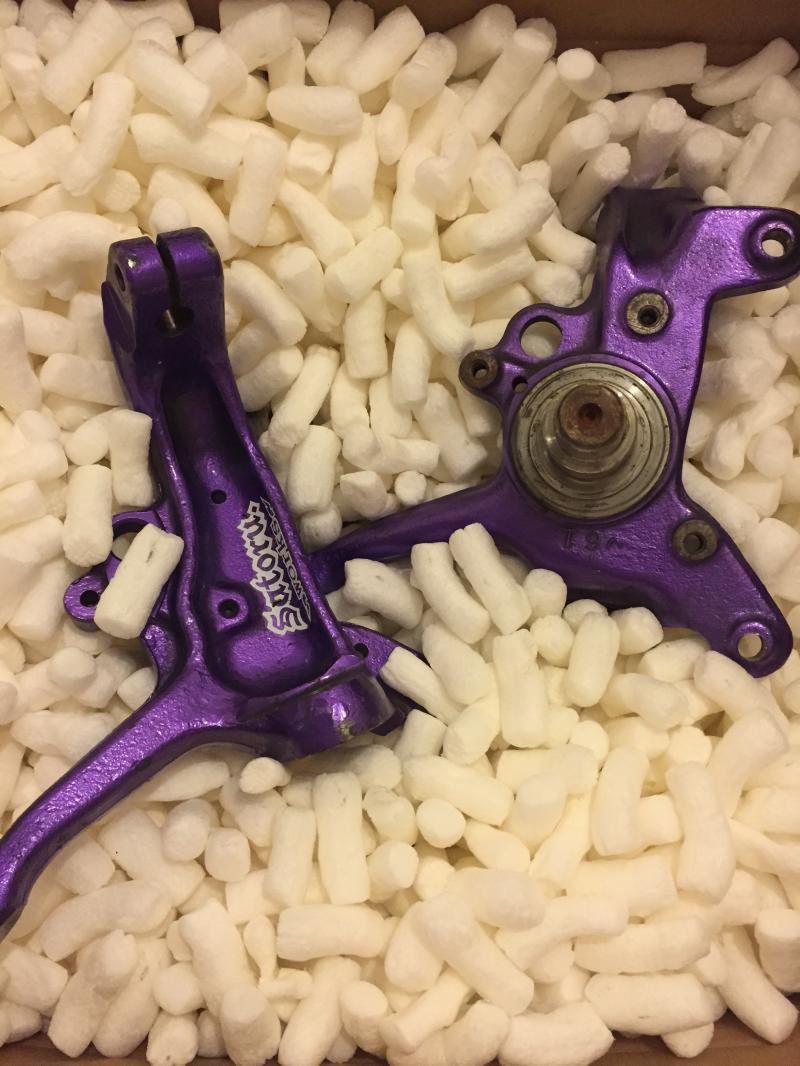
Today the FD got more attention than it has in the last six months, I started by fitting the Super Now anti roll bar mounts and super now tie rod ends (massive thanks to Matt P for sorting the logistics of getting these for me)
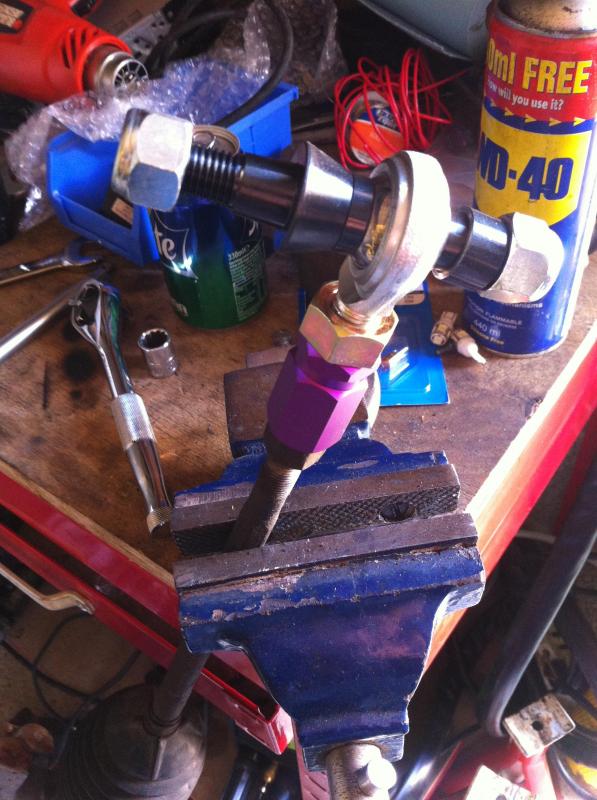
and i attached the Tie rod ends to my manual steering rack (professionally converted by Matt W who is a top chap)

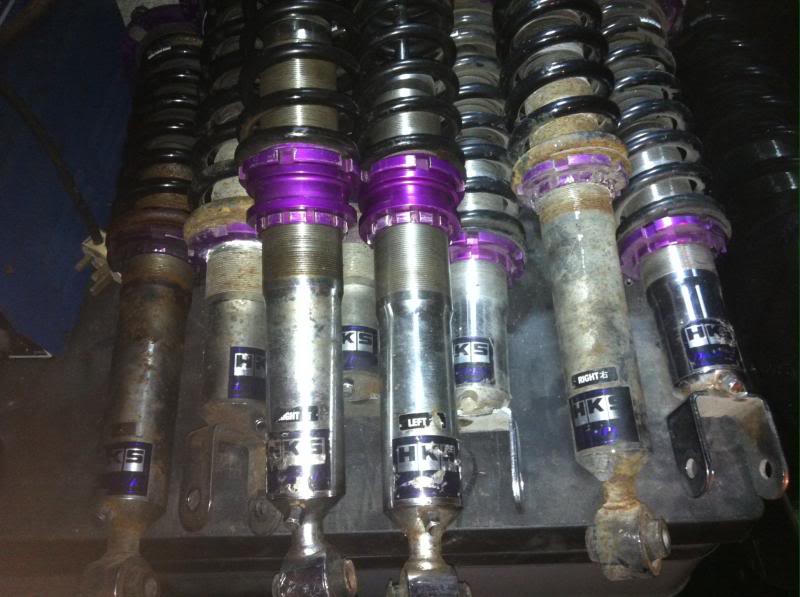
I also finally got round to fitting the HKS coilovers that i refurbed, well the fronts.
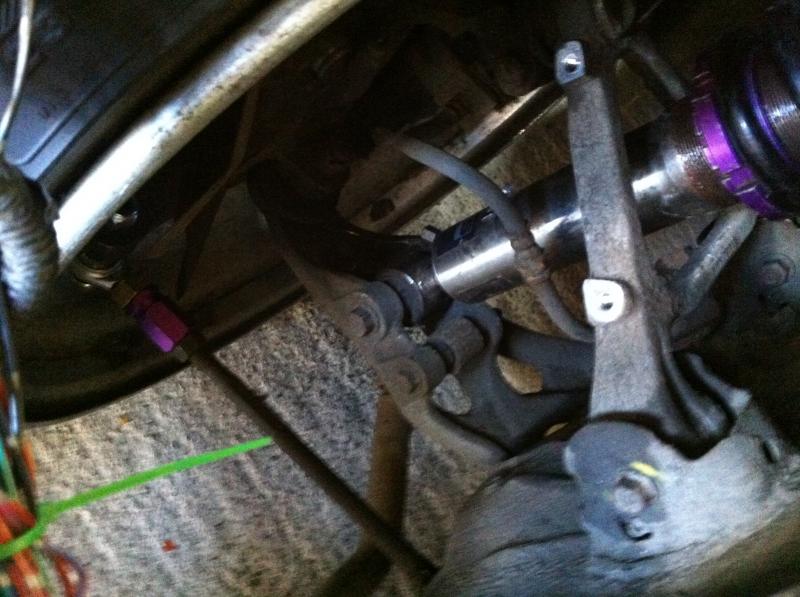
This is how it sits now, which is more complete than it has looked in the last six months, hopefully more updates more often now, but we will see as life as a tendency to get in the way.
As you can see they have fans on the back as they don't get a massive amount of airflow when drifting.
I will be going with a v-mount when the engine goes back in.
Two switches on the dash will control the fans (all four of them)
One switch will bring on the rad fans on normal speed (for day to day driving)
The other will bring them on faster and bring on the oil cooler fans for when drifting.
Will get the wiring in soon and then I can start fabricating the mounts for rad, inter cooler and oil coolers.
----------------------------------------------------
Couple of arty pics my mate took.no real update.
---------------------------------------------------------
So I picked up the S14 and skided that for the last two months (five events) just to see if I could remember how to drift, it was good fun and at one point I considered braking the RX and keeping it but it just isn't as fun or as cool as an FD so it has now gone and I will concentrating on my RX7.

Today the FD got more attention than it has in the last six months, I started by fitting the Super Now anti roll bar mounts and super now tie rod ends (massive thanks to Matt P for sorting the logistics of getting these for me)


and i attached the Tie rod ends to my manual steering rack (professionally converted by Matt W who is a top chap)

I also finally got round to fitting the HKS coilovers that i refurbed, well the fronts.


This is how it sits now, which is more complete than it has looked in the last six months, hopefully more updates more often now, but we will see as life as a tendency to get in the way.
Thread Starter
Junior Member
Joined: Jan 2015
Posts: 15
Likes: 0
From: Devon, England
So I have been busy with work and away for a month, with no real time to work on the car but the last week or so I have made a list of all the stuff that needs doing and will be doing everything I can to get the car ready for March.
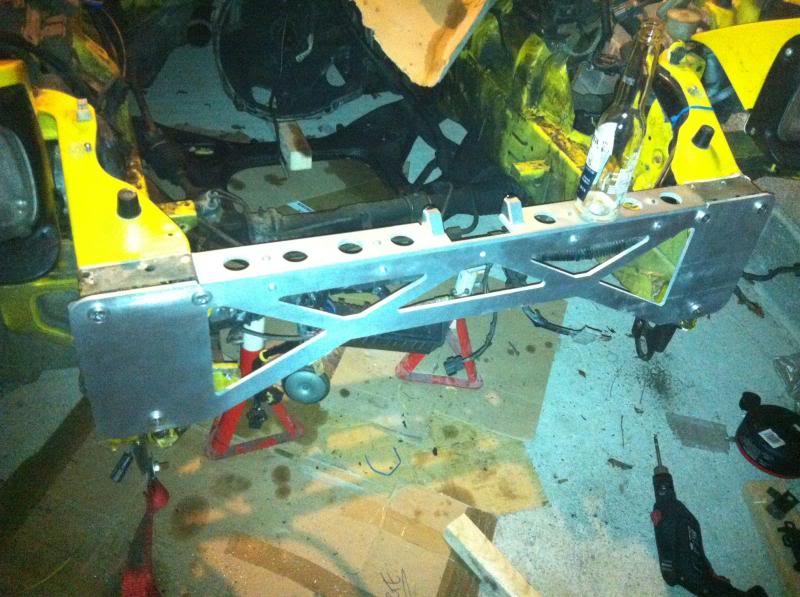
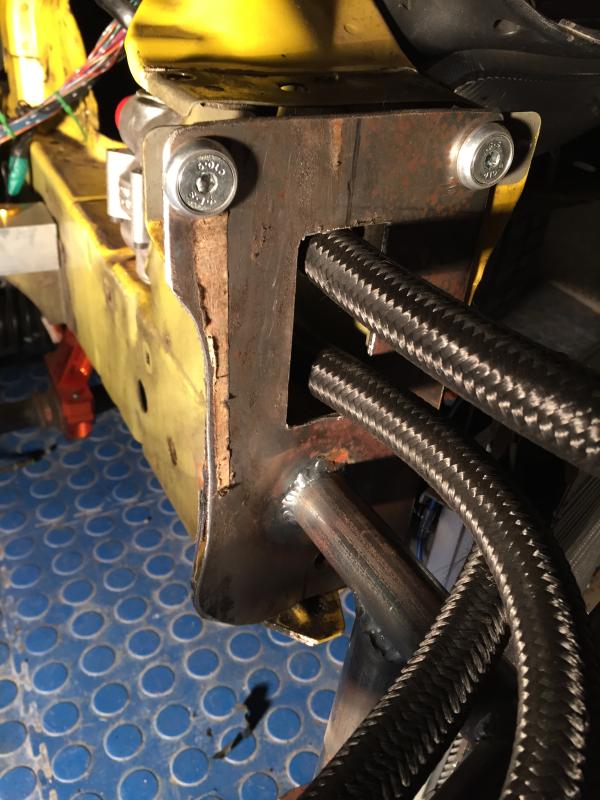
as well as refurbing and fitting the rear coil overs, mounting the rear ARB mounts and bushes and fitting uprated steering rack bushes, I have been making the front brace that will hold the twin oil coolers, intercooler and rad.
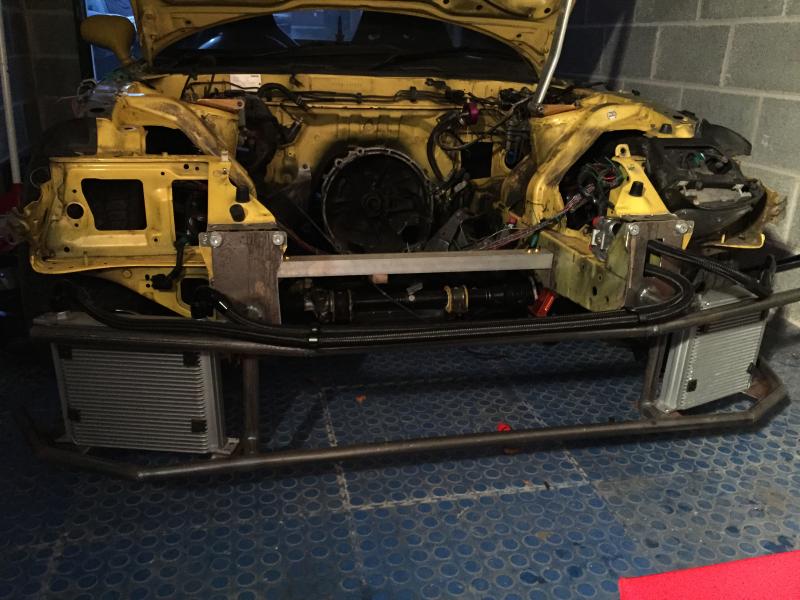
With bumper on.
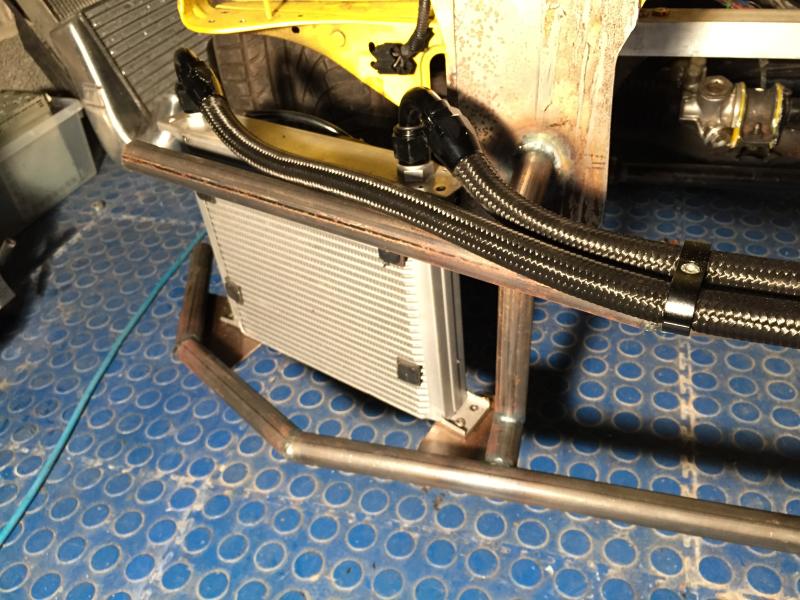
How I have routed it through in to the engine bay. This is just a trail fit, that cut will be smoothed out and the edges covered with silicone hose.
The oil thermostat, mounted out the way on the chassis rail.
----------------------------------------------------------
Not an un-productive day, I got the harnesses fitted (took longer than it should)

I also amounted the battery box behind the passengers seat. I will do the wiring on Tuesday.
And I even got it wet and wiped off all the dirt for the first time in a year lol.
Peace✌️
as well as refurbing and fitting the rear coil overs, mounting the rear ARB mounts and bushes and fitting uprated steering rack bushes, I have been making the front brace that will hold the twin oil coolers, intercooler and rad.

With bumper on.


How I have routed it through in to the engine bay. This is just a trail fit, that cut will be smoothed out and the edges covered with silicone hose.

The oil thermostat, mounted out the way on the chassis rail.

----------------------------------------------------------
Not an un-productive day, I got the harnesses fitted (took longer than it should)


I also amounted the battery box behind the passengers seat. I will do the wiring on Tuesday.

And I even got it wet and wiped off all the dirt for the first time in a year lol.

Peace✌️
Trending Topics
Thread Starter
Junior Member
Joined: Jan 2015
Posts: 15
Likes: 0
From: Devon, England
Little update, interior is back together, just waiting on the gear and handbrake gaiters.
NOW out with the old
AND in with the new.
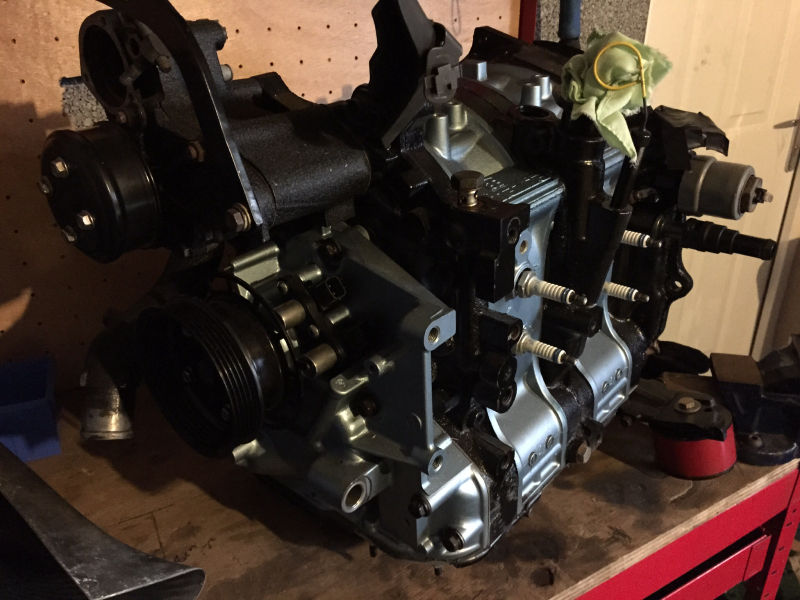
The new engine was supplied by Tom and rebuilt comprehensively with all new gaskets, seals and tips. It is also street ported to the pineapple racing template and has Banzai racing mounts and sump brace 😜
Next thing on the list is a decent clutch that will take 450hp and not ruin my left leg, any suggestions
Oh and a single turbo kit.
-------------------------------------------------
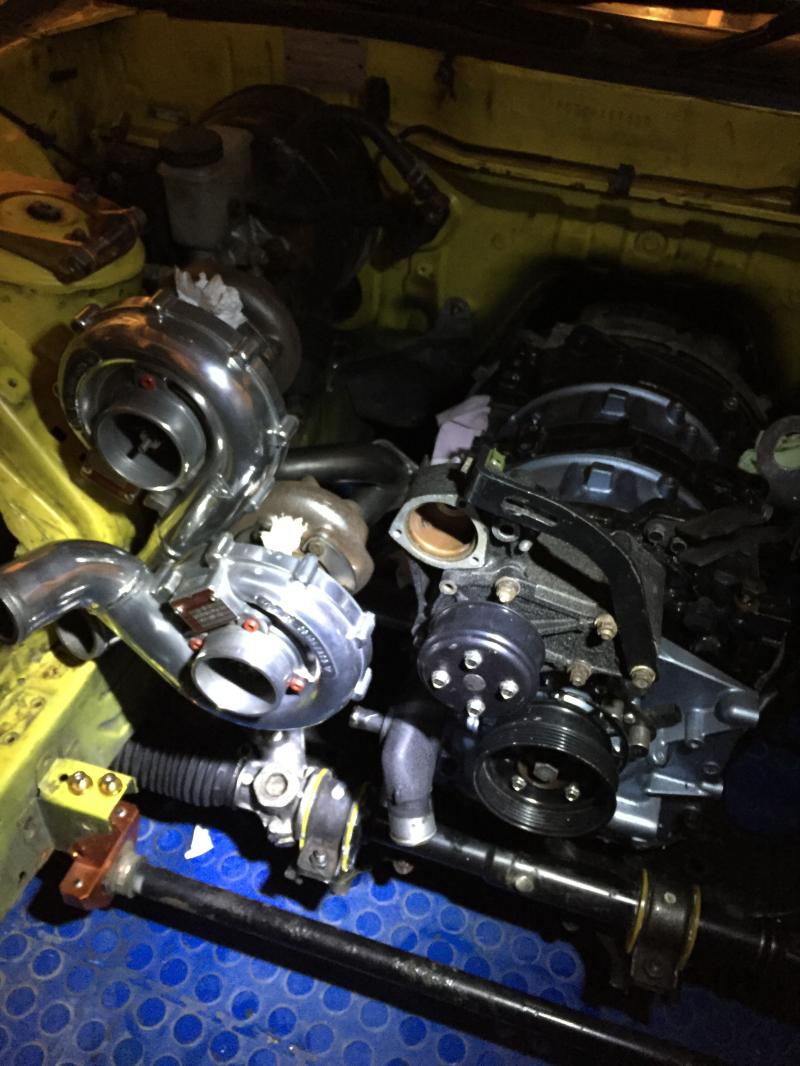
THE ENGINE IS IN (coming back out soon for a few bits to be done
 )
)Hay chaps, thanks to some help from you guys I got my engine in, and my project has hope again.
I went for the OS Gikin twin plate clutch, hopefully that will not be too harsh on my leg. no pics of that im afraid.
but here are a few of the engine in place.


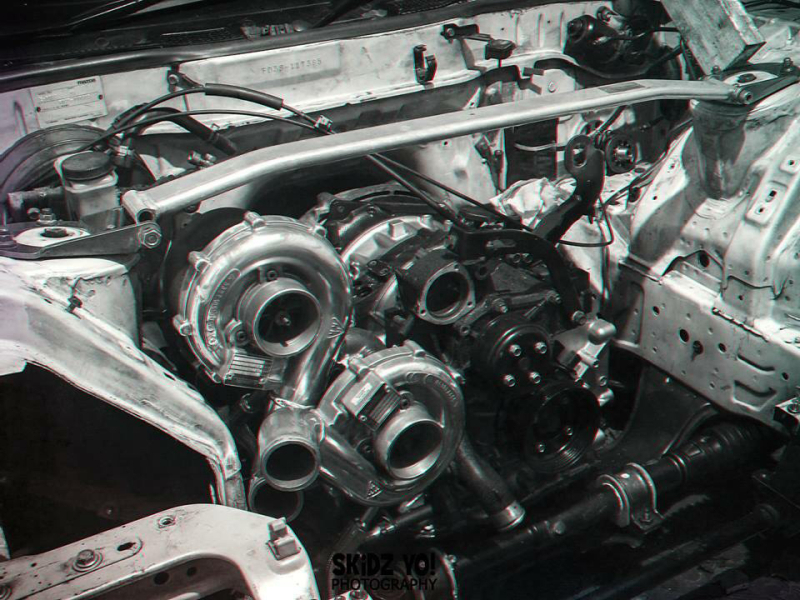
Next up is TURBO ('s) and boy have I got a stonker of a kit on the way :thumbsup:
Thread Starter
Junior Member
Joined: Jan 2015
Posts: 15
Likes: 0
From: Devon, England
A sneak preview before the big update in a few days. Sorry for the crappy phone pics.
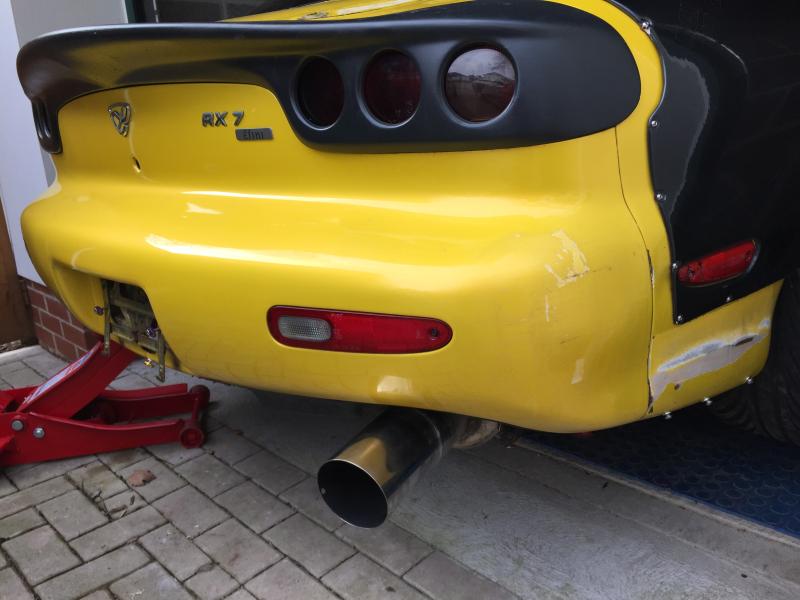
It comes with a beasty 4" one piece exhaust system (it's going to be loud)
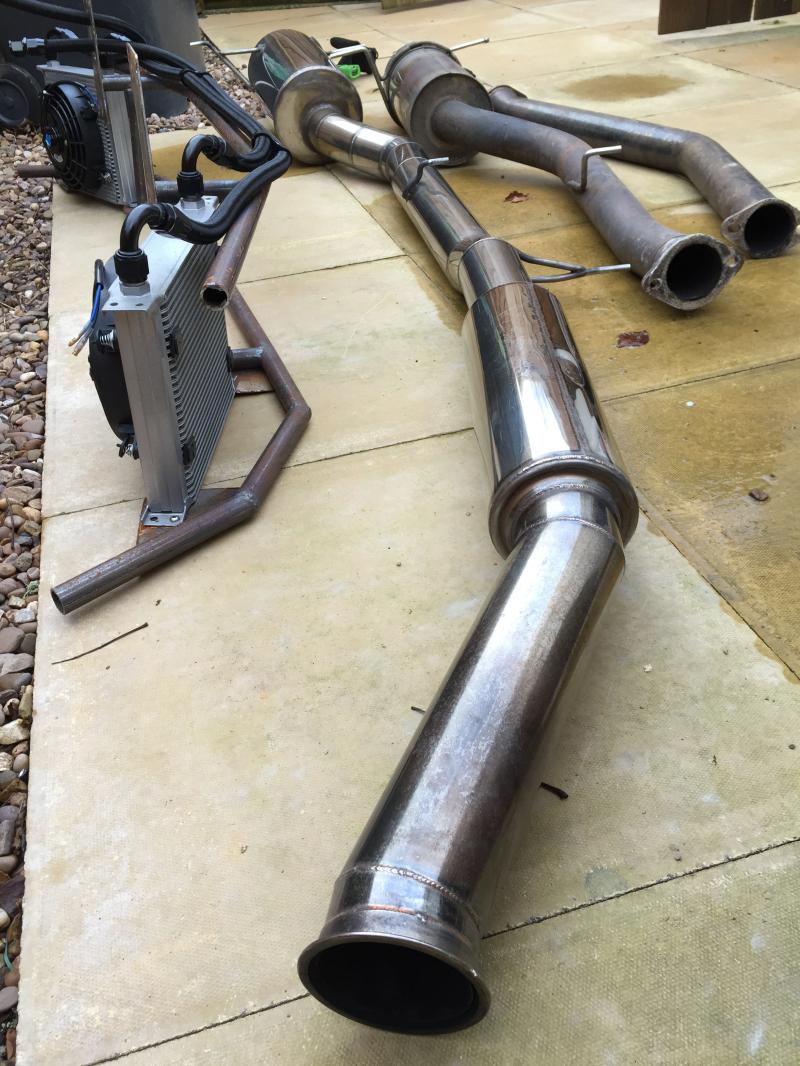
I already miss the dolphin pipe but I guess this ASBO spec will have to do
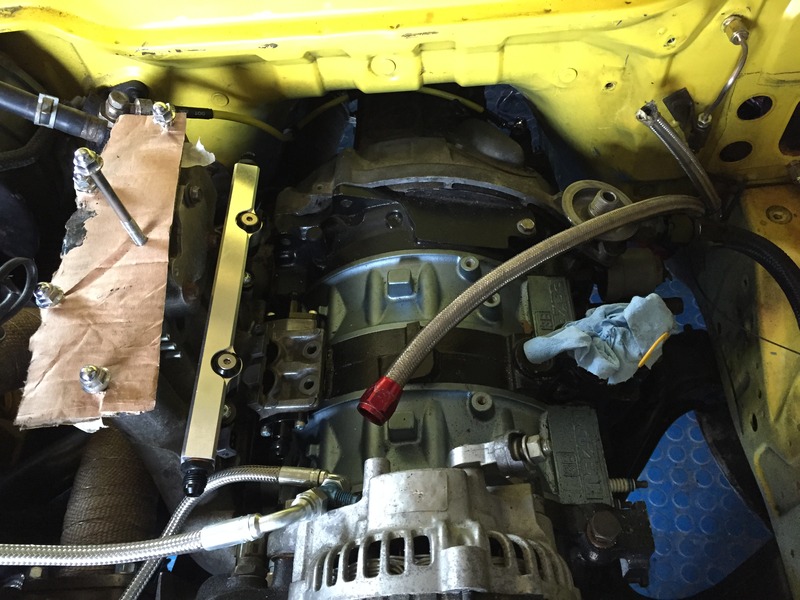
I fitted up the the turbos and the oil return, the only problem so far is that one of the oil return feeds is fowled by the steering rack ( in this pic the engine is raised a couple of inches) I have tried it without the pedestal but you can't put the pipe on as the engine bolt is in the way, I think I will cut and weld the pedestal unless anyone has any better suggestions?
------------------------------------------------------
Some arty pics, just because.
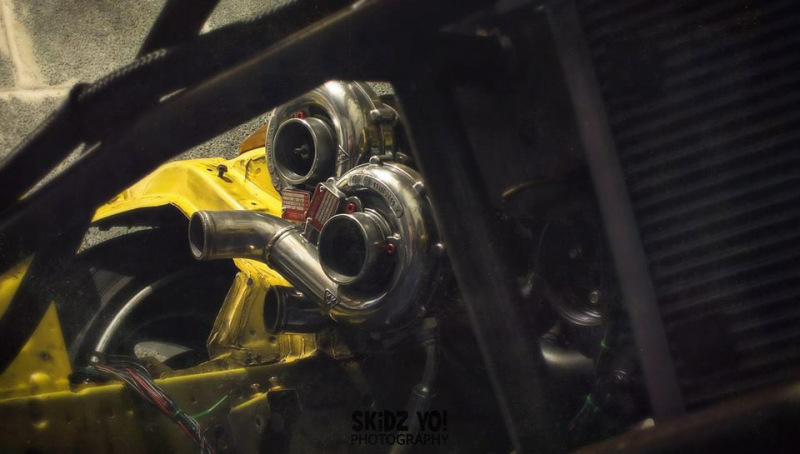
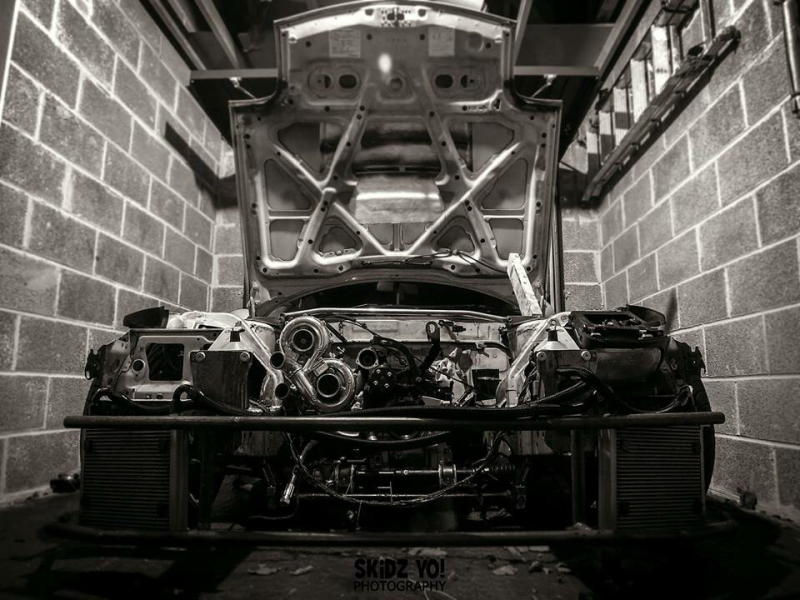
Peace ✌️
--------------------------------------------------------
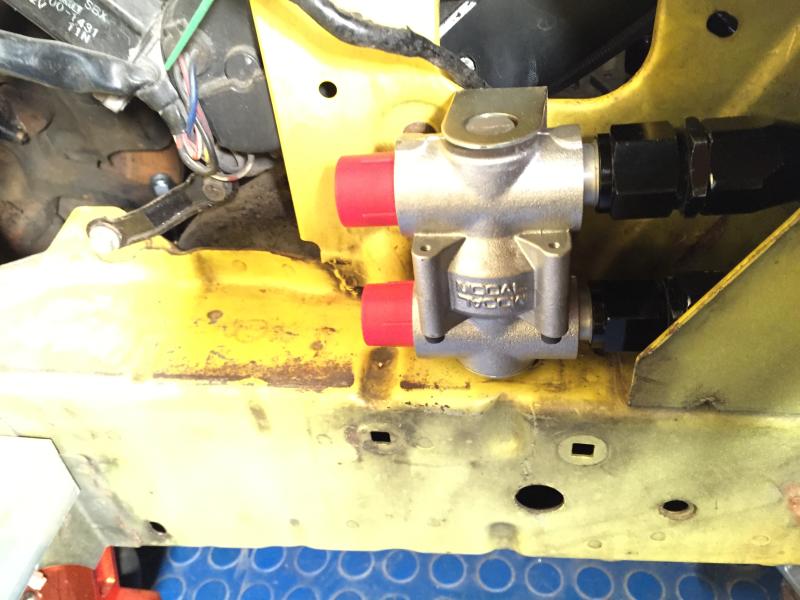
ABS delete update:
So I took all the abs unit and most of the brake lines a while back as I knew I was going to run a delete kit, I looked on sites for full abs delete kits but I couldn't find any In the uk and the U.S. kits were a lot to post.
So in the spirit of DIY I have started the delete myself.
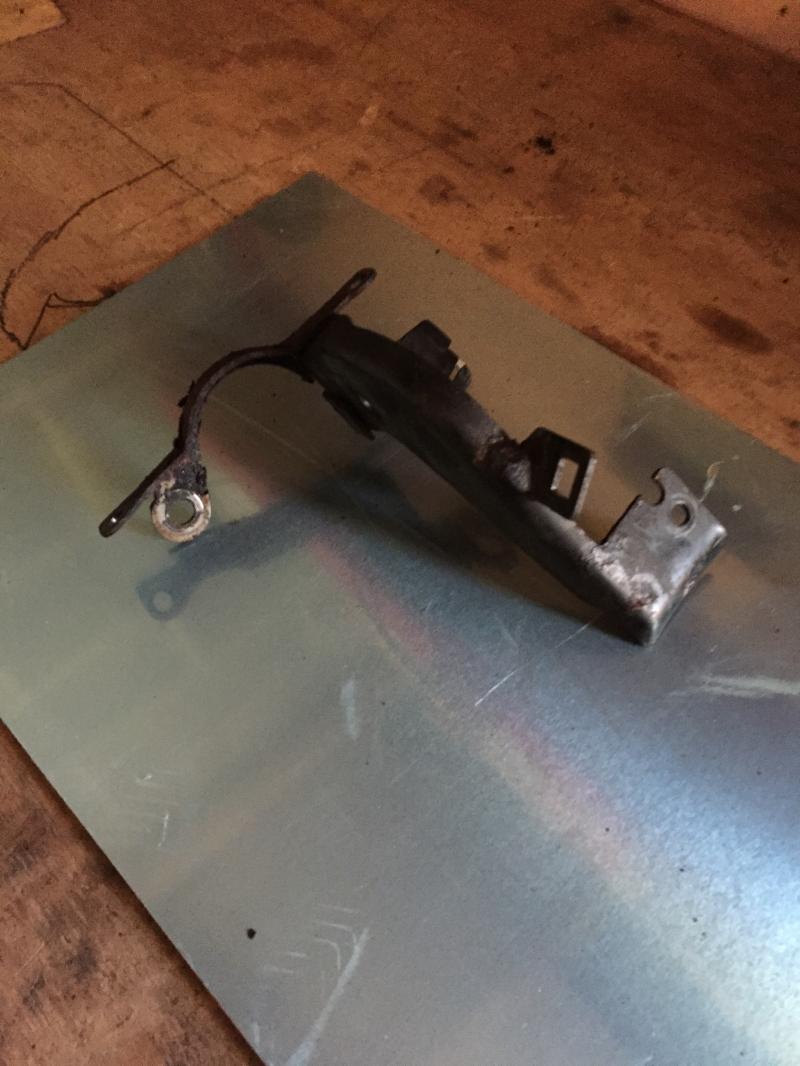
First of was mounting the prop valve, I started with a very messy area around the servo.
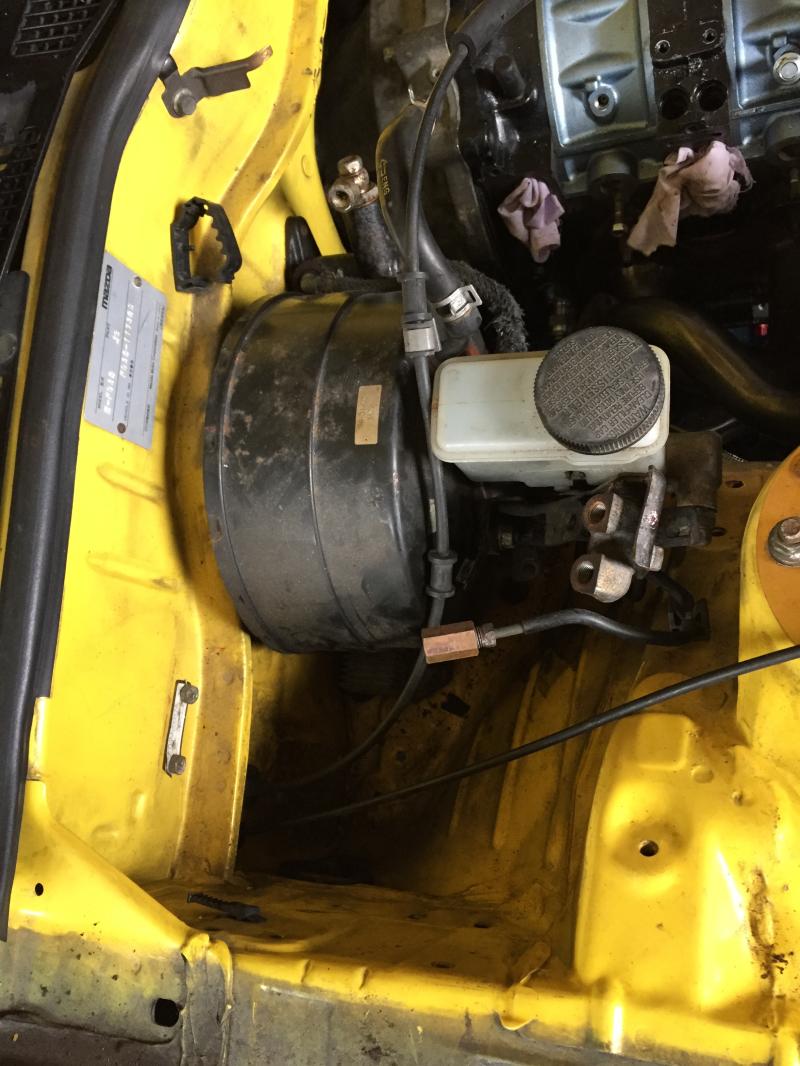
Took off all the gubins and got some ally plate.
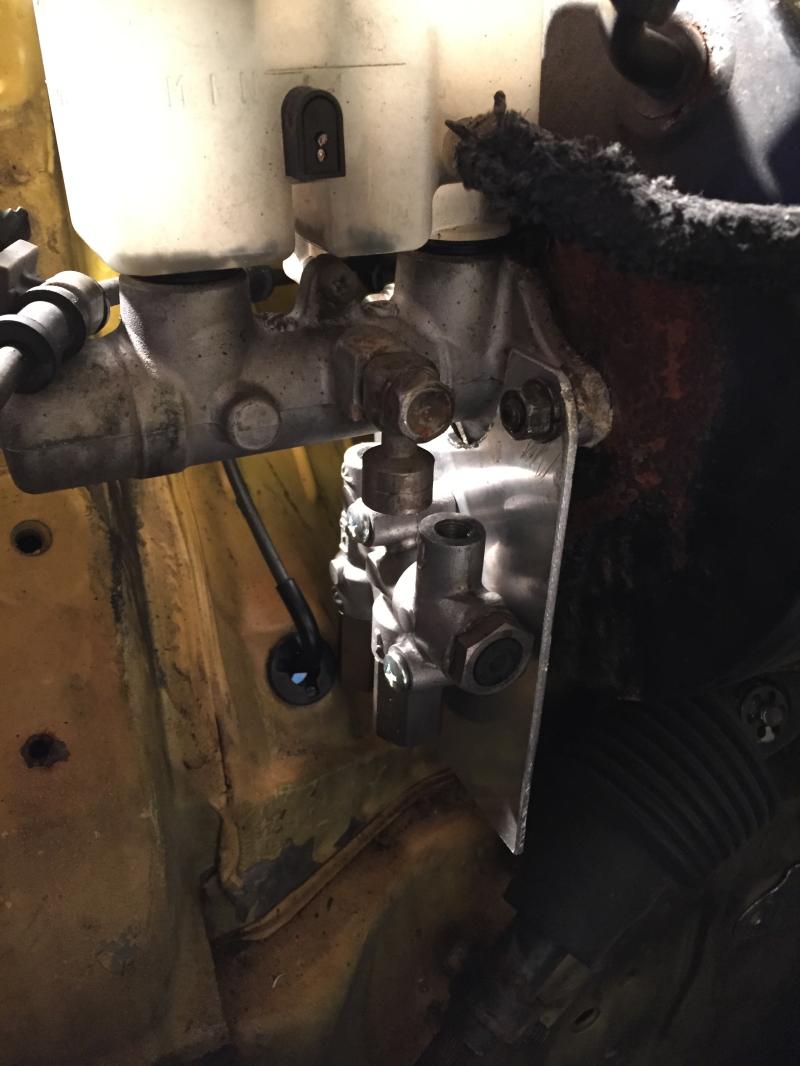
Cut it to shape and mounted the prop valve. I will trim it shorter once I know I don't need the excess.
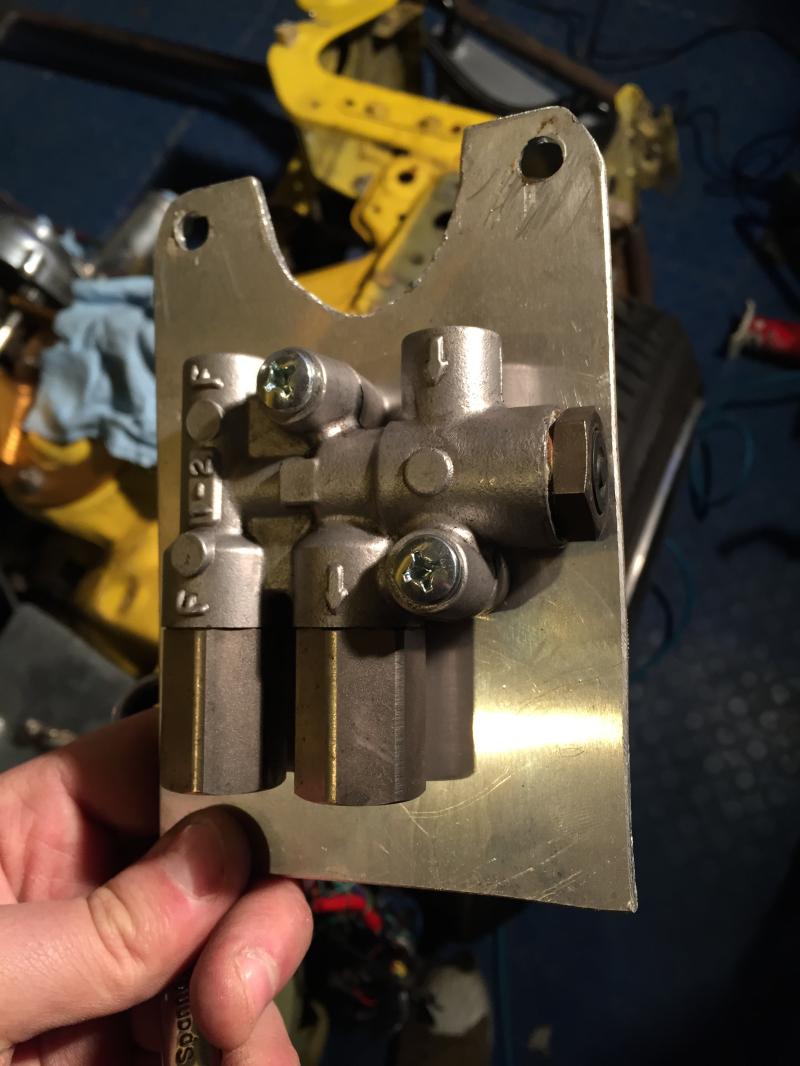
And voil� it's nicely hidden.
Next up mounting the hydro handbrake 👍
It comes with a beasty 4" one piece exhaust system (it's going to be loud)
I already miss the dolphin pipe but I guess this ASBO spec will have to do
I fitted up the the turbos and the oil return, the only problem so far is that one of the oil return feeds is fowled by the steering rack ( in this pic the engine is raised a couple of inches) I have tried it without the pedestal but you can't put the pipe on as the engine bolt is in the way, I think I will cut and weld the pedestal unless anyone has any better suggestions?
------------------------------------------------------
Some arty pics, just because.
Peace ✌️
--------------------------------------------------------
ABS delete update:
So I took all the abs unit and most of the brake lines a while back as I knew I was going to run a delete kit, I looked on sites for full abs delete kits but I couldn't find any In the uk and the U.S. kits were a lot to post.
So in the spirit of DIY I have started the delete myself.
First of was mounting the prop valve, I started with a very messy area around the servo.

Took off all the gubins and got some ally plate.

Cut it to shape and mounted the prop valve. I will trim it shorter once I know I don't need the excess.

And voil� it's nicely hidden.

Next up mounting the hydro handbrake 👍
Thread Starter
Junior Member
Joined: Jan 2015
Posts: 15
Likes: 0
From: Devon, England
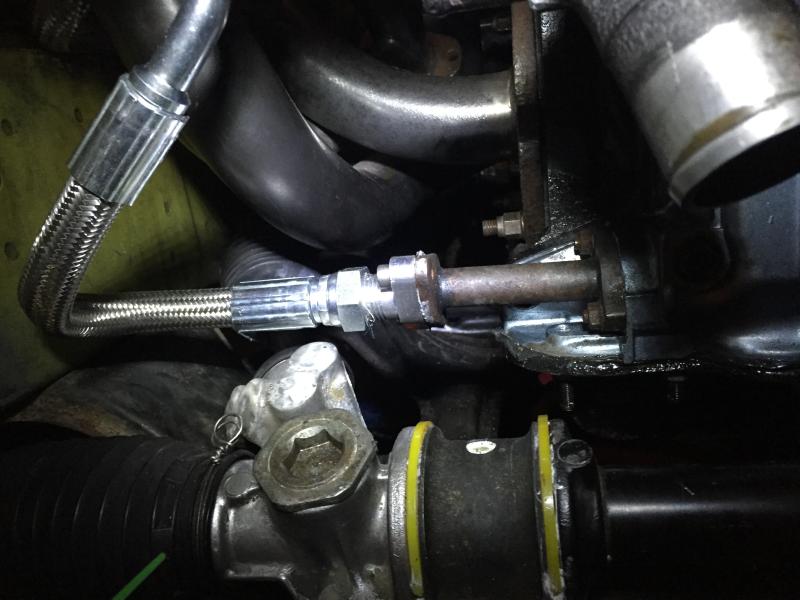
Today I set about sorting the oil return issue, a quick chop and weld and it was good to go, i just have to get one or the braided hoses shortened and it'll be ready to rock.
and painted it black to make it look smarter

I also blocked up the OMP injector holes with M10x1.25 bolts cut down to size, i went for something with a nice looking top so it didn't look too bodged.
I did get my Hydro handbrake fitted today but no pics as it was too dark by the time i had finished.
----------------------------------------------------
I decided today was going to be a day for working on the rex, i even moved a dentist appointment so i could crack on. unfortunately my knee had other ideas and at around 14:00 i was kneeling down and cought it wrong and now it is the size of a small balloon (its an old injury that hasn't caused me a problem in eight years  )
)
before that though i managed to sort the problem i had been having with my couch master cylinder, it didn't want to bolt up the the OS Gikin adaptor as the thread was fubard, it would thread in when the cylinder wasn't there but it wouldn't under pressure.
in a light bulb moment I threaded in a couple of studs and bolted it up, and it is sitting good.
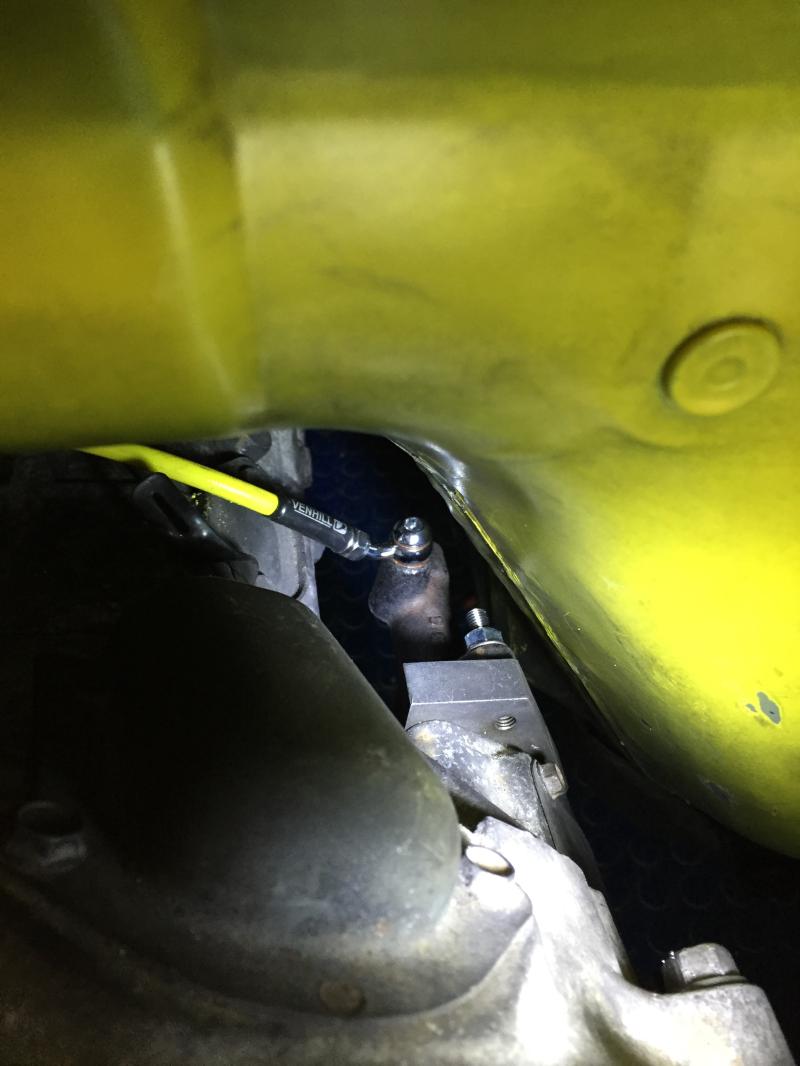
The reason i had it off was to fit the braided couch line that i had made by Venhill on eBay, i can't recommend them enough, they make them to order with a whole selection of fittings and they are quick, cheap and good quality.
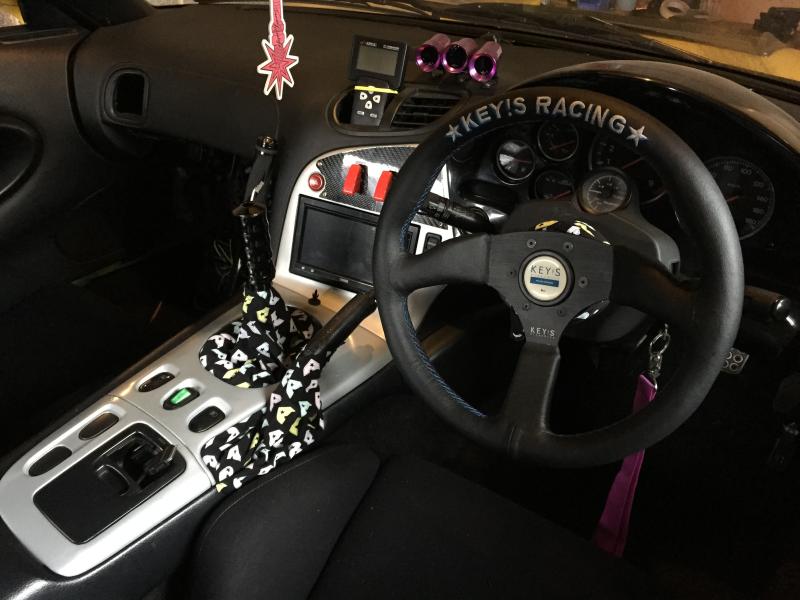
I also did some non essentials like fitting the gear and handbrake gaiters a friend made for me (not to everyones taste i know)
I managed to finish off fitting the rear defuser, i still have the back mountings to make and to trim a bit for the new exhaust but i like the look, i can see that it is going to cause trouble on the devon roads though.
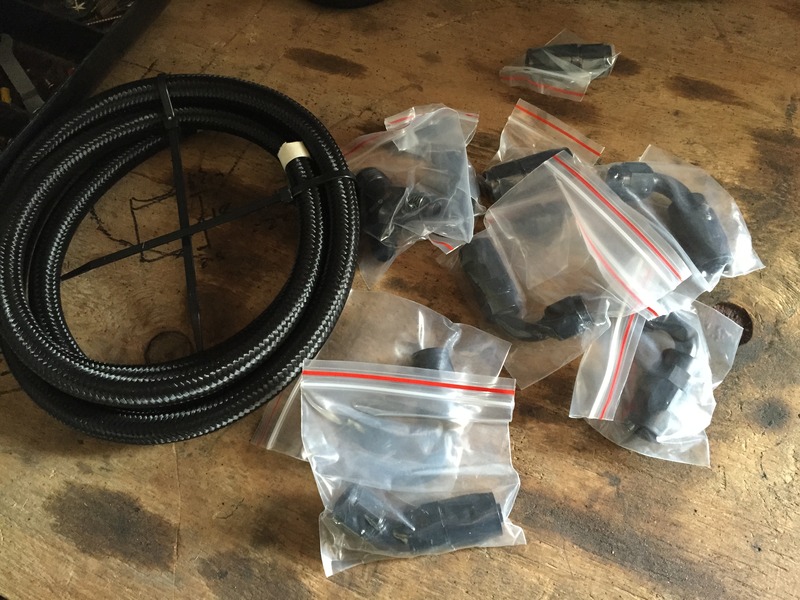
lastly, these bad boys arrived.
but more on that another day, for now I'm off to A&E :p

and painted it black to make it look smarter

I also blocked up the OMP injector holes with M10x1.25 bolts cut down to size, i went for something with a nice looking top so it didn't look too bodged.

I did get my Hydro handbrake fitted today but no pics as it was too dark by the time i had finished.
----------------------------------------------------
I decided today was going to be a day for working on the rex, i even moved a dentist appointment so i could crack on. unfortunately my knee had other ideas and at around 14:00 i was kneeling down and cought it wrong and now it is the size of a small balloon
(its an old injury that hasn't caused me a problem in eight years ) before that though i managed to sort the problem i had been having with my couch master cylinder, it didn't want to bolt up the the OS Gikin adaptor as the thread was fubard, it would thread in when the cylinder wasn't there but it wouldn't under pressure.
in a light bulb moment I threaded in a couple of studs and bolted it up, and it is sitting good.

The reason i had it off was to fit the braided couch line that i had made by Venhill on eBay, i can't recommend them enough, they make them to order with a whole selection of fittings and they are quick, cheap and good quality.
I also did some non essentials like fitting the gear and handbrake gaiters a friend made for me (not to everyones taste i know)

I managed to finish off fitting the rear defuser, i still have the back mountings to make and to trim a bit for the new exhaust but i like the look, i can see that it is going to cause trouble on the devon roads though.

lastly, these bad boys arrived.

but more on that another day, for now I'm off to A&E :p
Thread Starter
Junior Member
Joined: Jan 2015
Posts: 15
Likes: 0
From: Devon, England
So the last couple of days have been all about the fuel system, I had purchased a Swirl pot setup ages ago off Lee Mills and it had just sat in the shed, now that I am upgrading the injectors and fuel rails it made sense to fit this swell.
so i started by removing all the old hard lines and Charcoal canister.

It was a bitch to get the new swirl pot in place, I think you are meant to remove the n/s drive shaft but aint nobody got time for that.
I then ran the new lines to the front of the car. Im still waiting on the P-clips the secure these properly.
Next up was to supply the fuel pumps with a new live so i made up a small loom with a couple of relays on.

I then installed my DM fuel rail with Bosh 1680 injectors.
Just as I was finishing this the postie arrived with all the fittings for making the fuel lines in the engine bay so I cracked on with that. I forgot to order the an8 fitting to go on the fuel supply so I couldn't get it totally plumbed up but I am please with what I did do.
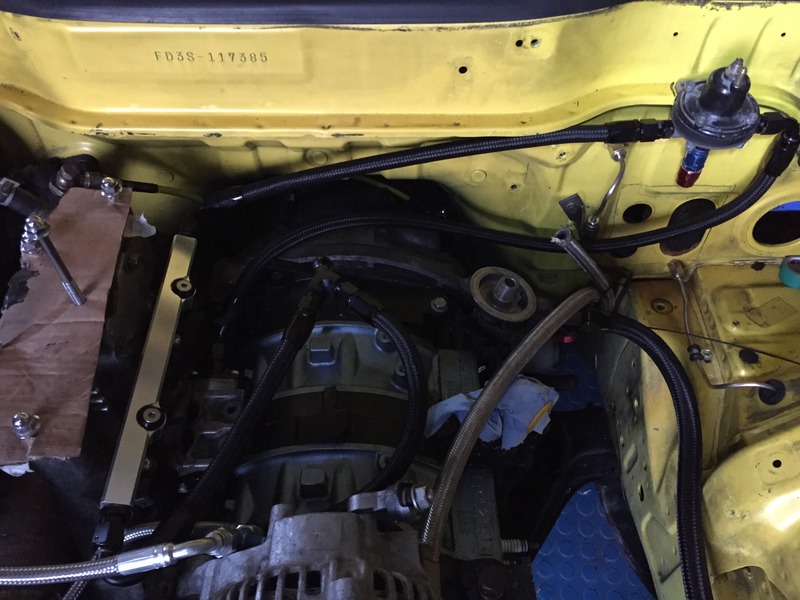
After a hard days work I was left looking like I work in a cole mine, Im still getting the dirt and rust out of my eyes now :o

Cheers for reading
so i started by removing all the old hard lines and Charcoal canister.

It was a bitch to get the new swirl pot in place, I think you are meant to remove the n/s drive shaft but aint nobody got time for that.
I then ran the new lines to the front of the car. Im still waiting on the P-clips the secure these properly.
Next up was to supply the fuel pumps with a new live so i made up a small loom with a couple of relays on.

I then installed my DM fuel rail with Bosh 1680 injectors.

Just as I was finishing this the postie arrived with all the fittings for making the fuel lines in the engine bay so I cracked on with that. I forgot to order the an8 fitting to go on the fuel supply so I couldn't get it totally plumbed up but I am please with what I did do.


After a hard days work I was left looking like I work in a cole mine, Im still getting the dirt and rust out of my eyes now :o

Cheers for reading
Thread Starter
Junior Member
Joined: Jan 2015
Posts: 15
Likes: 0
From: Devon, England
First of all i would like to say a massive thanks to TRIND-FD for sorting me out the injector i need and arranging getting it to my Injector guy.
On that note if you are after getting your injectors cleaned and flow tested check out mrinjector.co.uk the service has been spot on so far.
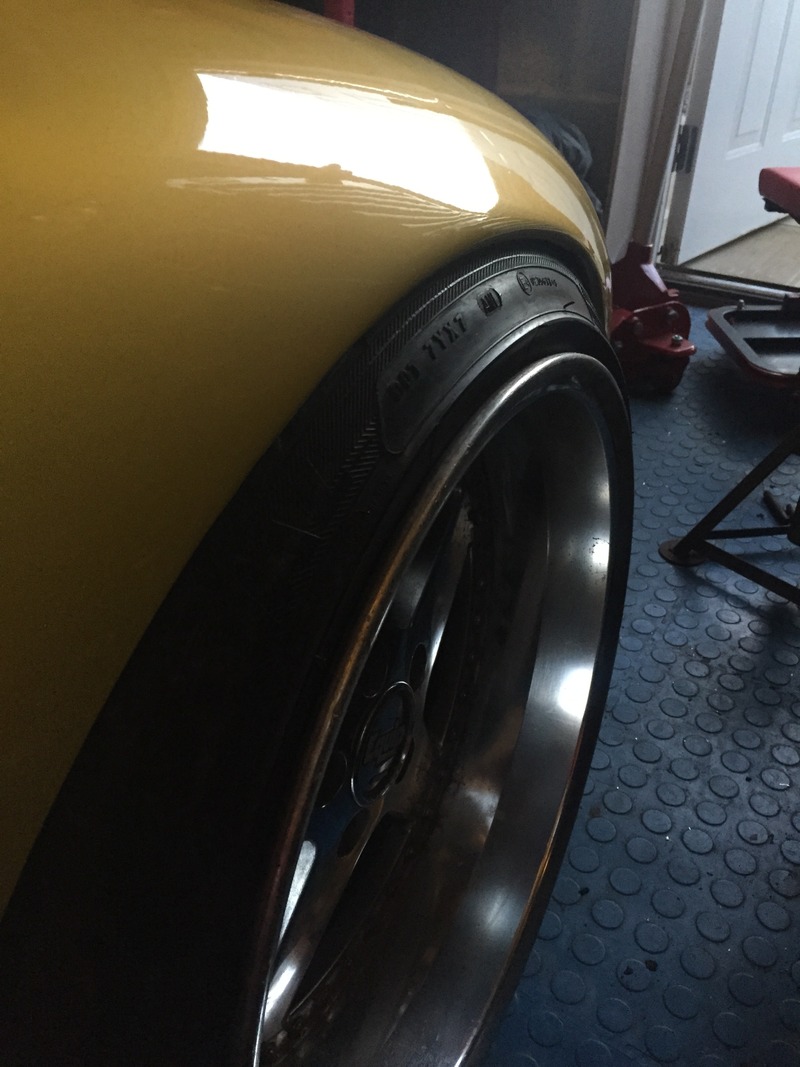
For the first time in a while the car is sat on its own wheels.
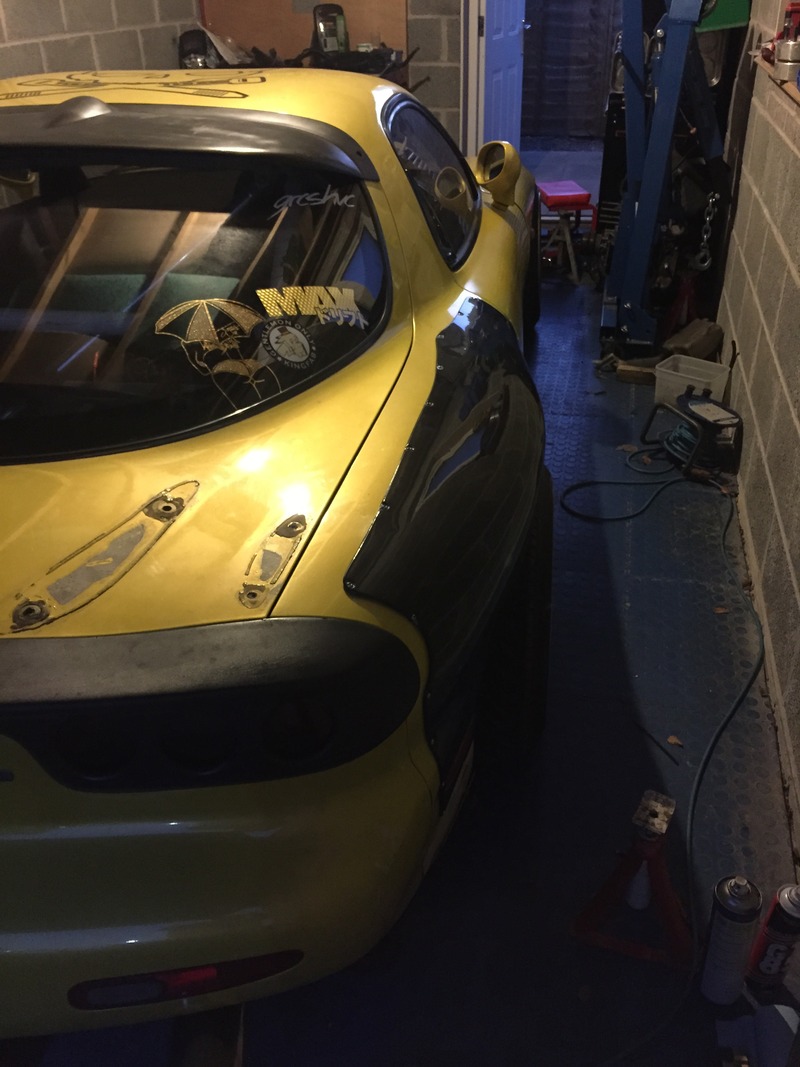
The only problem being is that i ether need to wind the coilers up of get an arch roller cuts it is sitting on the tyre at the mo.
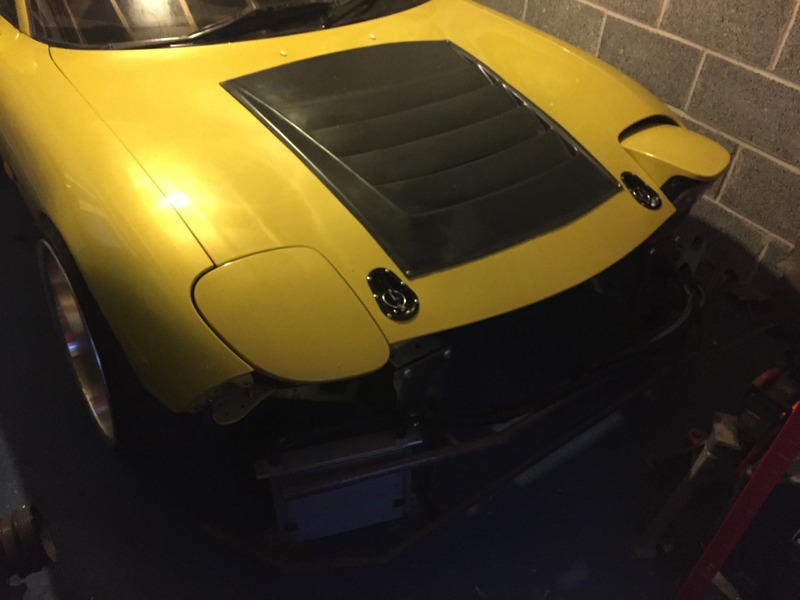
I fitted the bonnet pins, there are three awkward layers to the bonnet but is was nothing that a dremel and a bit of time couldn't fix.
Cheers Y'all
On that note if you are after getting your injectors cleaned and flow tested check out mrinjector.co.uk the service has been spot on so far.
For the first time in a while the car is sat on its own wheels.

The only problem being is that i ether need to wind the coilers up of get an arch roller cuts it is sitting on the tyre at the mo.

I fitted the bonnet pins, there are three awkward layers to the bonnet but is was nothing that a dremel and a bit of time couldn't fix.

Cheers Y'all

Thread
Thread Starter
Forum
Replies
Last Post
NickNac113
1st Generation Specific (1979-1985)
13
Oct 1, 2015 09:25 PM