
Alex --- Daily Driven Track Abused----Road Race--Drift--Street Build----PICTURE HEAVY


Alex --- Daily Driven Track Abused----Road Race--Drift--Street Build----PICTURE HEAVY
TUNE IN ON THIS BUILD- it will be changing picture after picture.Lots of changes and building here.
DAILY DRIVEN TRACK ABUSED
January , 2014 I decided to set a game plan to build a car that will meet my needs in every field of auto racing and enjoyment. I grabbed a composition notebook and began labeling it by sections of the car and what i would like to do. Between January and May the goal was to collect all the parts I needed to start the build. The start-off time of the build day was June 7 and to be completed before Sevenstock. Let me be the first to say that I could not have done this without the help of friends and family. It sure was a painfull 5 months to show date but we pulled it off. Now with the current exposure of the car, a handful of sponsors and lots of track days ahead. This thread will be forever changing for the better.
Grab some popcorn and some cold ones. This is one heavy picture thread.
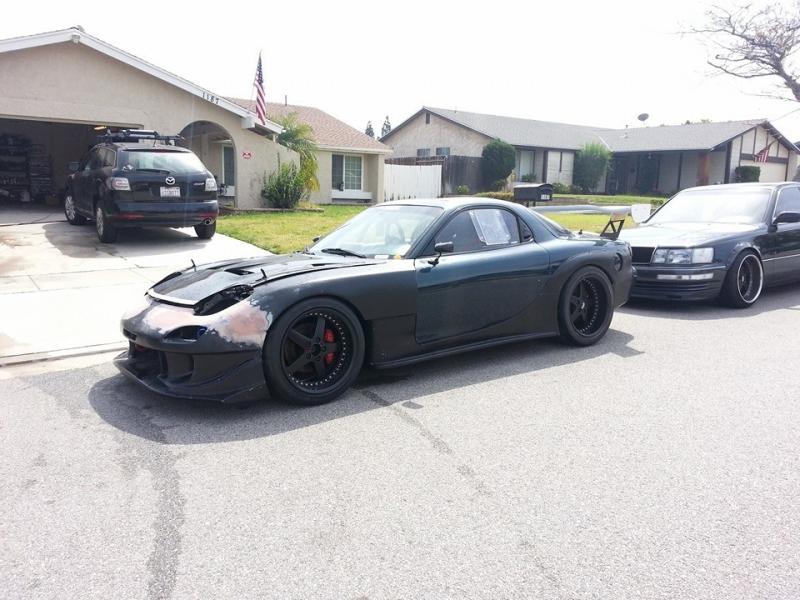
BEFORE
And the build thread up to that day
https://www.rx7club.com/build-thread...thread-900239/
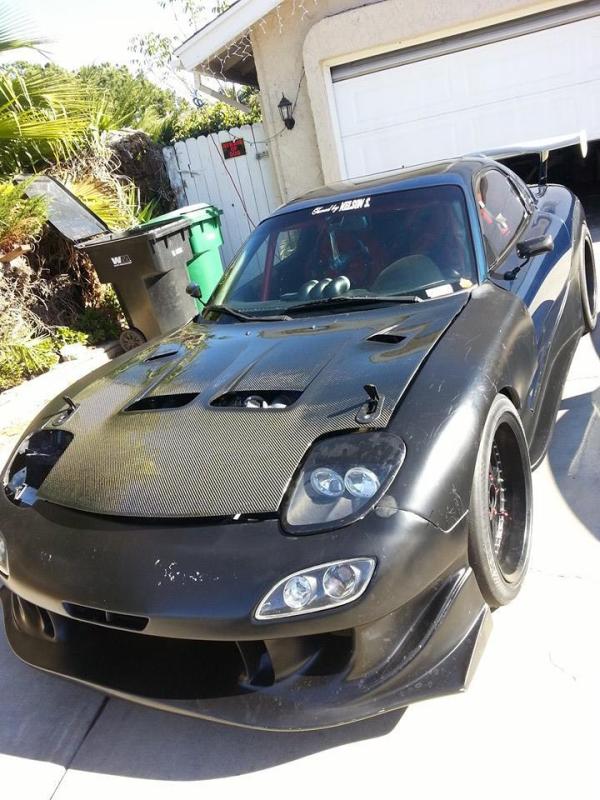
CURRENT
MODS LIST
EXTERIOR
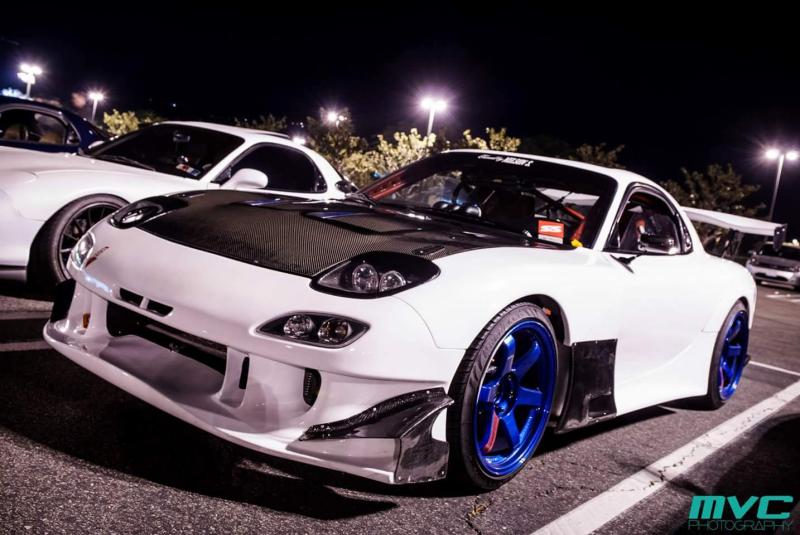
2011 Lexus LFA white color code
Re Amemiya ADGT bumper w/carbon canards
Re Amemiya ADGT side skirts
Re Amemiya ADGT fenders w/ Carbon panels
Re Amemiya ADGT rear fenders,widend 3/4" on the rears and modified
Shineautoproject Carbon Re PRO diffuser w/ side and center generator and moded rear apron
Shineautoproject Carbon Rear Tailight lip wing
JKL Gt Fiberglass wing w/ Carbon Sideplates
Knightsports Carbon Hood with FD1 Hood latches
Uras Turn signals
RE Amemiya Sleek lights w/ Evo R lenses ARCustom modified vent and 80mm HID slim lights
Sparco Tow strap
APR Carbon GT mirrors
Glass sunroof
HotWaterLabs Carbon bumper guard
LED license plate bolts
RE Amemiya Rear tow hook
INTERIOR
GSWERKS Built 10 point cage with front gussets and Xbar
ROTORSEVEN center bezel and radio panel
Haltech RACEPAQ IQ3 display
Autometer Cobalt digital Fuel Gauge
PAINLESS Performance 21 circuit wiring
ROTORSEVEN Battery and ground blocks
SummitRacing battery relocation kit with battery cutoff
SummitRacing Battery cage mount in rear bin
FEED ground battery on/off
KARTEK Baterry disconnect switch center panel mounted
ROTORSEVEN center switches
CORBEU 5 point FIA harness with harness seperator on roll bar
Kartek remote shock reservoir mounts
Allstar performance Blower with hoses and Custom Ice cooler in rear bin
Allstar Performance Rollbar Mount
LOKAR helmet mount
LOKAR steering wheel Mount
MOMO 330mm suede steering wheel with Rare RED horn button
NRG quick release on BOSS hub
Spirit R Gas pedal
JDM fd3s arm rest pad
RACESHIELD FIA head net with center mount Ratchet strap
Recaro Spirit R Kevlar seats with Tilt Rails
ASD Hydro pass through Ebrake on Wilwood cylinder
Joes Racing wide racing mirror
KARTEK roll bar mirror mount
Wilwood Proportion Valve Custom In-cabin center panel mounted
B2A aluminum door panels w/Martinez Upholstry made leather/carbon door panel wrap w/miata door handles
Kicker 6" components with tweeters
Pioneer Indash dvd/navigation
ARCustom under dash aluminum command center for ecu,wideband,power/ground blocks and painless wiring
ENGINE
ROTORSEVEN/ Lucky7RACING Stock port Motor
ALS apex seals with Mazda springs
Atkins Solid Fd corners and springs
Rotary Aviaton Oring kit
PERFORMANCE
HALTECH Platinum Sport1000
HALTECH Wideband
HALTECH oil pressure and fuel tempature sensors
AEM WATER/METH Injection 1 gallon
ACT 11 lb Flywheel
ACT extreme pressure plate on 6 puck sprung disc
ACT clutch release collar
Turblown 304 Stainless steel ehaust manifold
INCONEL heat shield,engine to manifold, and turbo gasket
Turbosmart 40mm wastegates running 2 of them on 14psi springs
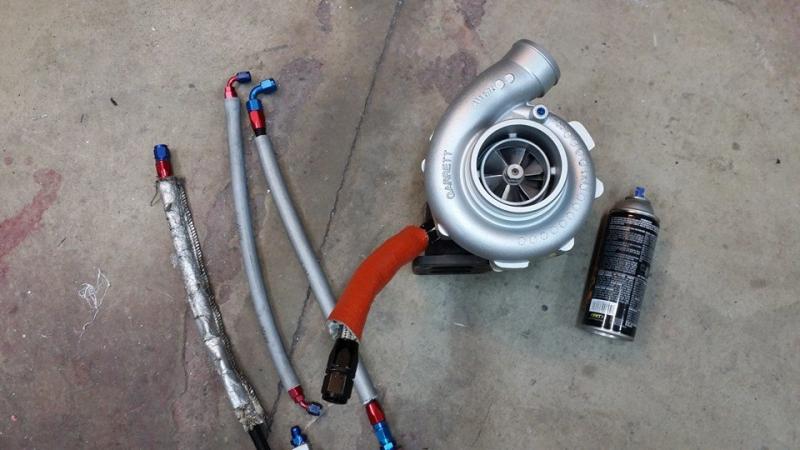
Garrett GT4094R Dual BB turbo w/ATP custom water line fittings
Turbosmart Race 50mm Blowoff valve
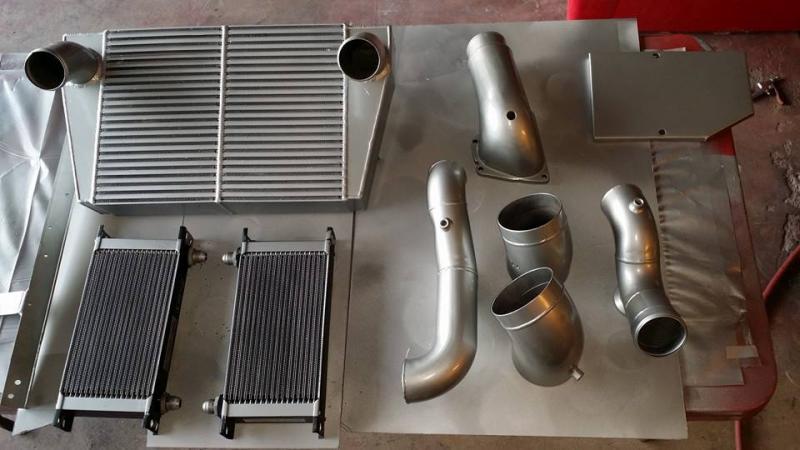
Garrett Custom intercooler
ROTORSEVEN Aluminum airbox w/sealed lid and DEI wrapped gold tape and KandN 4"air filter
RotaryWorks 80mm Throttle body
Greddy Elbow with Air temp bung and AEM injection bung
ARCustom UIM stripped and ported w/ tapped fittings
FFE fuel rails
FFE Trigger Kit
Injector dynamic 1000cc primaries and 2000cc secondaries
JEGS fuel y-block
Greddy Pulley kit
SummitRacing -6AN fuel lines with dei sleeves
AEROMOTIVE fuel pressure regulator
AEROMOTIVE 100micron filter
PineappleRacing BT pulley kit
AFTERMARKET INDUSTRIES Complete Fuel system ----TOPSECRET------
ROTORSEVEN Fuel pick up with bulkheads on all lines and bulkhead connectors
Summitracing -8AN fuel feed from tank to y-block
LS2 smart coils on ARCustom Coil relocation mount bracket
MSD sparkplug wires
MOCAL oil thermostat
SETRAB 19row oil coolers w/ -10an lines feed and returns
JEGS -10AN ported bung fitting
ARCustom Cooling system mount subframe
KOYO radiator v-mounted with ACFabrication reroutes
Samco raditor hoses
ROTORSEVEN Coolant fillerneck w/RE Amemiya Coolant pressur cap
SummitRacing coolant catch tank with ARCustom Earls -4an Lines
Summitracing Oil catch breather tank with Rear iron breather to catch and UNI filter
IRP oil filler neck with -10AN lines to catch tank
FOOTWORK
RACE
Enkie RPF1 18X10 +38 square set up
NITTO NT01 274-40-18
STREET
VOLK TE37SL hyper blue 18x10 +30 and 18x11 +18
WORK Equip 18x11 +22 and 18x10 +22
Nankang 275-35-18/ 255-35-18
Project Kics lugnuts
Brembo crossdrilled slotted rotors
EBC blue stuff brake pads front and rear
Goodrich SS brake lines
ROTORSEVEN ABS Delete KIT - Earls teflon ss braid lines and fittings
Eibach Sway Bar oversized
Racing Beat swaybar reinforcement bar
Stance GR+3 WAY coilovers with external reservoirs
Greddy Strut bar
ICE
Pioneer avic z1
Kicker component 6" with tweeters
QSTARZ LAP TIMER
From here on out the car will slowly start to transform. I will update the front page as new parts are added.
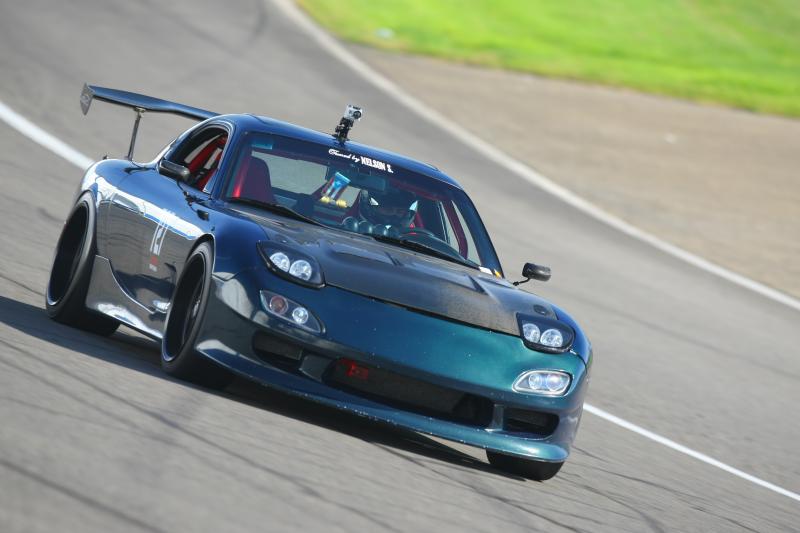
Please subscribe and follow me on this 2015 journey as I compete in RedlineTimeattack series and Global Time attack! Also keep an eye out for SUPER STREET MAGAZINE April/May issue end of FEB real soon You can also follow me on instagram @alexrodriguezrx7 or Facebook under the same name Thank you!
DAILY DRIVEN TRACK ABUSED
January , 2014 I decided to set a game plan to build a car that will meet my needs in every field of auto racing and enjoyment. I grabbed a composition notebook and began labeling it by sections of the car and what i would like to do. Between January and May the goal was to collect all the parts I needed to start the build. The start-off time of the build day was June 7 and to be completed before Sevenstock. Let me be the first to say that I could not have done this without the help of friends and family. It sure was a painfull 5 months to show date but we pulled it off. Now with the current exposure of the car, a handful of sponsors and lots of track days ahead. This thread will be forever changing for the better.
Grab some popcorn and some cold ones. This is one heavy picture thread.
BEFORE
And the build thread up to that day
https://www.rx7club.com/build-thread...thread-900239/

CURRENT


MODS LIST
EXTERIOR
2011 Lexus LFA white color code
Re Amemiya ADGT bumper w/carbon canards
Re Amemiya ADGT side skirts
Re Amemiya ADGT fenders w/ Carbon panels
Re Amemiya ADGT rear fenders,widend 3/4" on the rears and modified
Shineautoproject Carbon Re PRO diffuser w/ side and center generator and moded rear apron
Shineautoproject Carbon Rear Tailight lip wing
JKL Gt Fiberglass wing w/ Carbon Sideplates
Knightsports Carbon Hood with FD1 Hood latches
Uras Turn signals
RE Amemiya Sleek lights w/ Evo R lenses ARCustom modified vent and 80mm HID slim lights
Sparco Tow strap
APR Carbon GT mirrors
Glass sunroof
HotWaterLabs Carbon bumper guard
LED license plate bolts
RE Amemiya Rear tow hook
INTERIOR
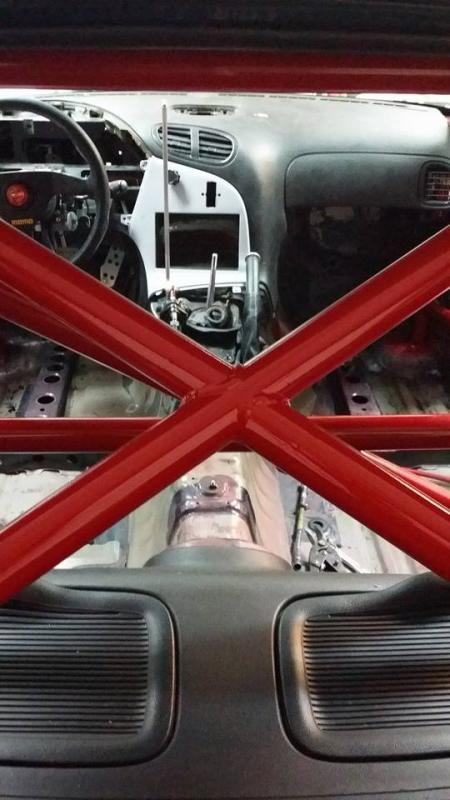
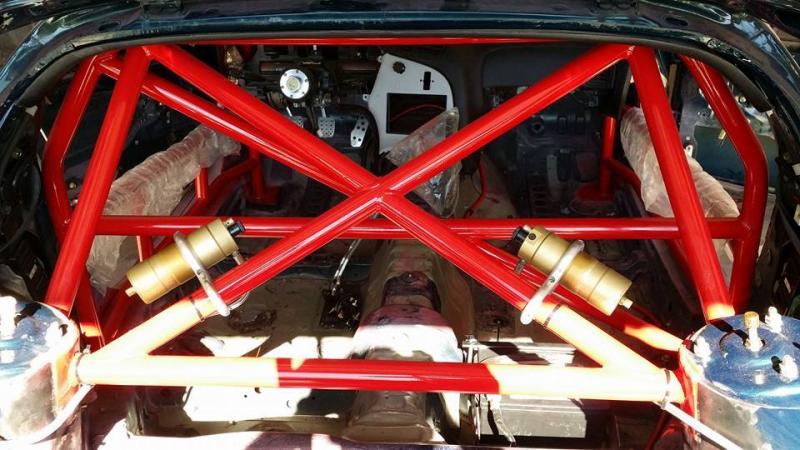
GSWERKS Built 10 point cage with front gussets and Xbar
ROTORSEVEN center bezel and radio panel
Haltech RACEPAQ IQ3 display
Autometer Cobalt digital Fuel Gauge
PAINLESS Performance 21 circuit wiring
ROTORSEVEN Battery and ground blocks
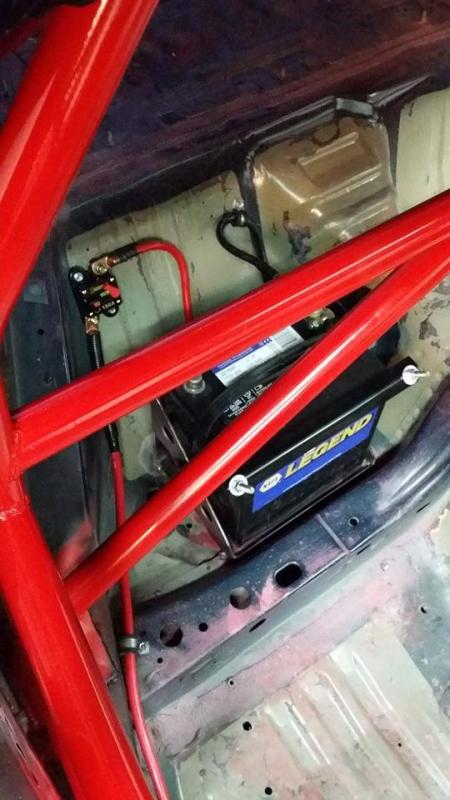
SummitRacing battery relocation kit with battery cutoff
SummitRacing Battery cage mount in rear bin
FEED ground battery on/off
KARTEK Baterry disconnect switch center panel mounted
ROTORSEVEN center switches
CORBEU 5 point FIA harness with harness seperator on roll bar
Kartek remote shock reservoir mounts
Allstar performance Blower with hoses and Custom Ice cooler in rear bin
Allstar Performance Rollbar Mount
LOKAR helmet mount
LOKAR steering wheel Mount
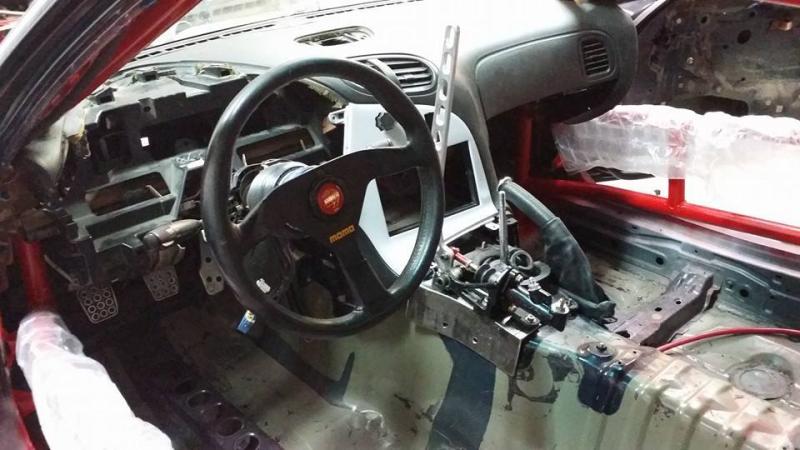
MOMO 330mm suede steering wheel with Rare RED horn button
NRG quick release on BOSS hub
Spirit R Gas pedal
JDM fd3s arm rest pad
RACESHIELD FIA head net with center mount Ratchet strap
Recaro Spirit R Kevlar seats with Tilt Rails
ASD Hydro pass through Ebrake on Wilwood cylinder
Joes Racing wide racing mirror
KARTEK roll bar mirror mount
Wilwood Proportion Valve Custom In-cabin center panel mounted
B2A aluminum door panels w/Martinez Upholstry made leather/carbon door panel wrap w/miata door handles
Kicker 6" components with tweeters
Pioneer Indash dvd/navigation
ARCustom under dash aluminum command center for ecu,wideband,power/ground blocks and painless wiring
ENGINE
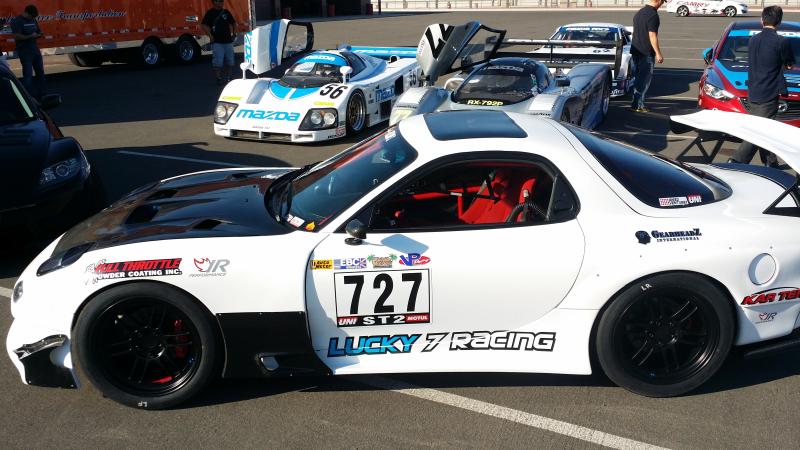
ROTORSEVEN/ Lucky7RACING Stock port Motor
ALS apex seals with Mazda springs
Atkins Solid Fd corners and springs
Rotary Aviaton Oring kit
PERFORMANCE
HALTECH Platinum Sport1000
HALTECH Wideband
HALTECH oil pressure and fuel tempature sensors
AEM WATER/METH Injection 1 gallon
ACT 11 lb Flywheel
ACT extreme pressure plate on 6 puck sprung disc
ACT clutch release collar
Turblown 304 Stainless steel ehaust manifold
INCONEL heat shield,engine to manifold, and turbo gasket
Turbosmart 40mm wastegates running 2 of them on 14psi springs
Garrett GT4094R Dual BB turbo w/ATP custom water line fittings
Turbosmart Race 50mm Blowoff valve
Garrett Custom intercooler
ROTORSEVEN Aluminum airbox w/sealed lid and DEI wrapped gold tape and KandN 4"air filter
RotaryWorks 80mm Throttle body
Greddy Elbow with Air temp bung and AEM injection bung
ARCustom UIM stripped and ported w/ tapped fittings
FFE fuel rails
FFE Trigger Kit
Injector dynamic 1000cc primaries and 2000cc secondaries
JEGS fuel y-block
Greddy Pulley kit
SummitRacing -6AN fuel lines with dei sleeves
AEROMOTIVE fuel pressure regulator
AEROMOTIVE 100micron filter
PineappleRacing BT pulley kit
AFTERMARKET INDUSTRIES Complete Fuel system ----TOPSECRET------
ROTORSEVEN Fuel pick up with bulkheads on all lines and bulkhead connectors
Summitracing -8AN fuel feed from tank to y-block
LS2 smart coils on ARCustom Coil relocation mount bracket
MSD sparkplug wires
MOCAL oil thermostat
SETRAB 19row oil coolers w/ -10an lines feed and returns
JEGS -10AN ported bung fitting
ARCustom Cooling system mount subframe
KOYO radiator v-mounted with ACFabrication reroutes
Samco raditor hoses
ROTORSEVEN Coolant fillerneck w/RE Amemiya Coolant pressur cap
SummitRacing coolant catch tank with ARCustom Earls -4an Lines
Summitracing Oil catch breather tank with Rear iron breather to catch and UNI filter
IRP oil filler neck with -10AN lines to catch tank
FOOTWORK
RACE
Enkie RPF1 18X10 +38 square set up
NITTO NT01 274-40-18
STREET
VOLK TE37SL hyper blue 18x10 +30 and 18x11 +18
WORK Equip 18x11 +22 and 18x10 +22
Nankang 275-35-18/ 255-35-18
Project Kics lugnuts
Brembo crossdrilled slotted rotors
EBC blue stuff brake pads front and rear
Goodrich SS brake lines
ROTORSEVEN ABS Delete KIT - Earls teflon ss braid lines and fittings
Eibach Sway Bar oversized
Racing Beat swaybar reinforcement bar
Stance GR+3 WAY coilovers with external reservoirs
Greddy Strut bar
ICE
Pioneer avic z1
Kicker component 6" with tweeters
QSTARZ LAP TIMER
From here on out the car will slowly start to transform. I will update the front page as new parts are added.
Please subscribe and follow me on this 2015 journey as I compete in RedlineTimeattack series and Global Time attack! Also keep an eye out for SUPER STREET MAGAZINE April/May issue end of FEB real soon
You can also follow me on instagram @alexrodriguezrx7 or Facebook under the same name Thank you!
Last edited by Alex Rodriguez; Jan 23, 2015 at 02:04 AM.
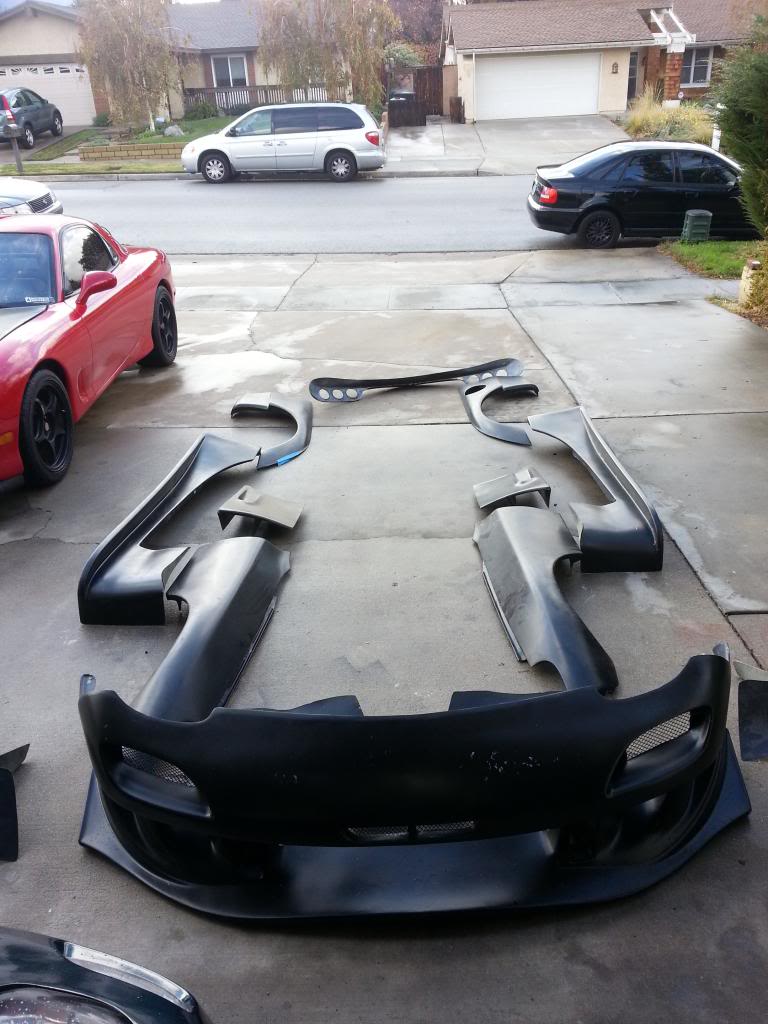
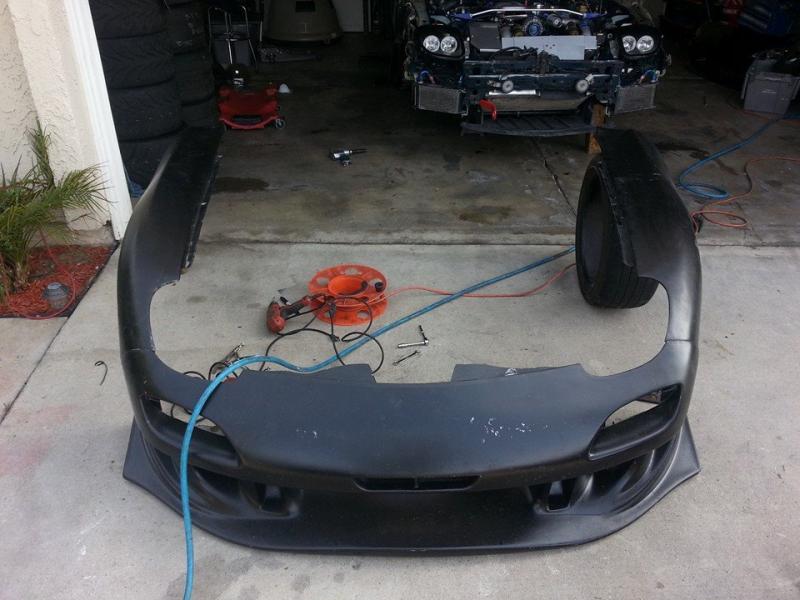
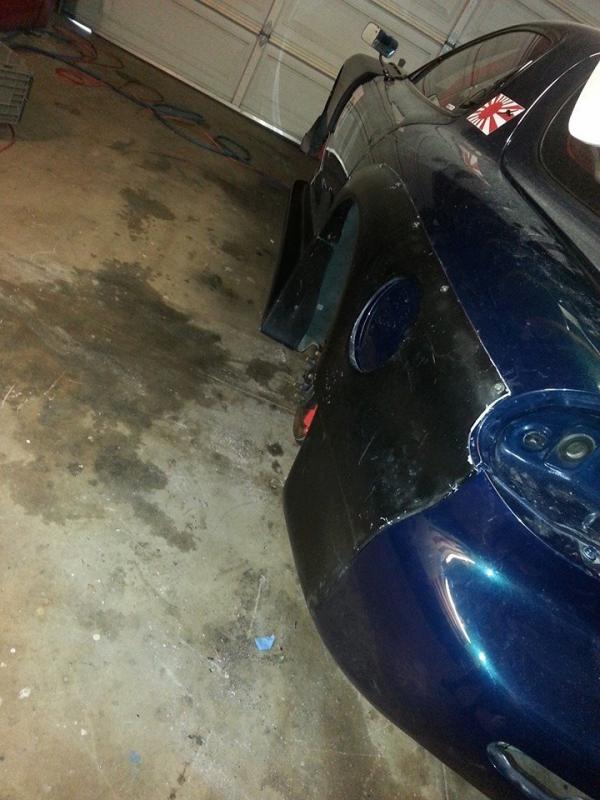
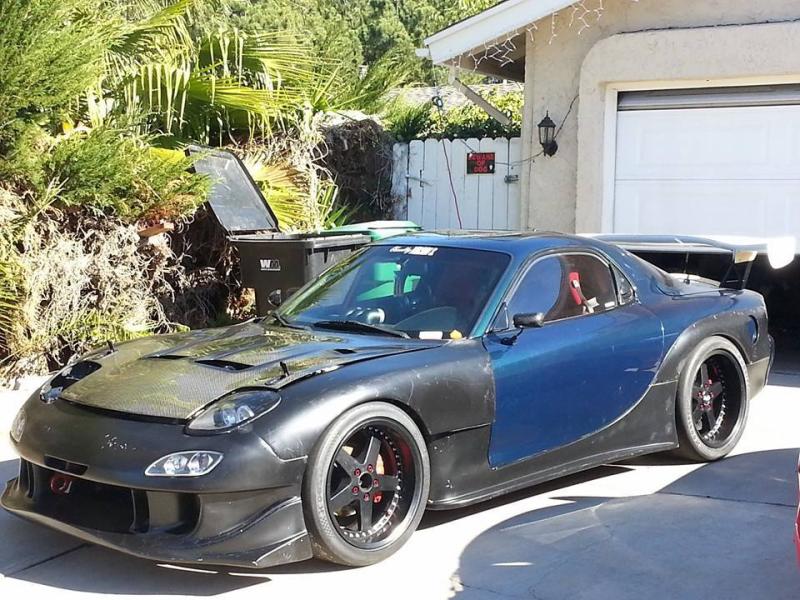
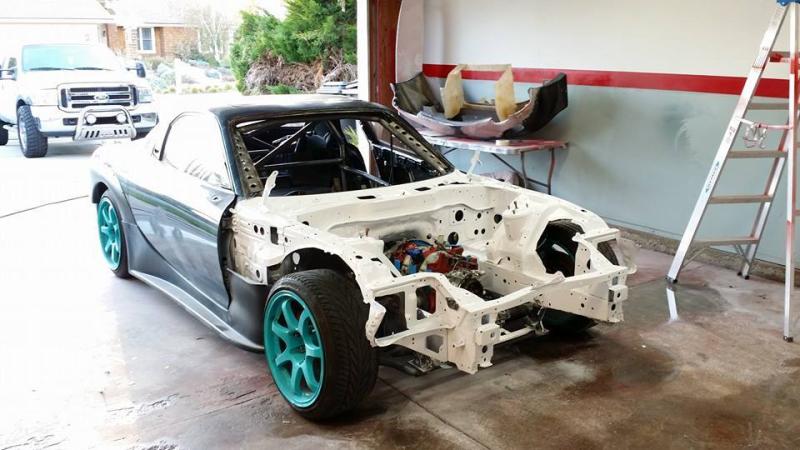
What a car will be without a vision. Took me almost 3 months to source everything pictured. A lot of it was not pretty and definetely needed lots of love. Heres when the build begins.


Last edited by Alex Rodriguez; Jan 22, 2015 at 11:28 PM.
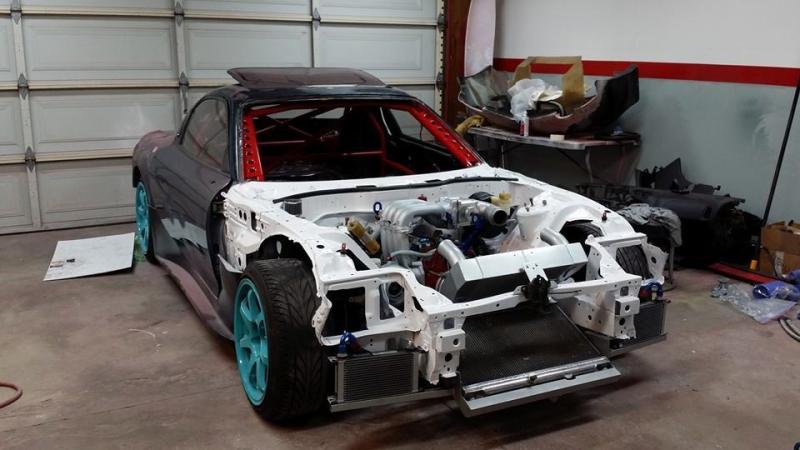
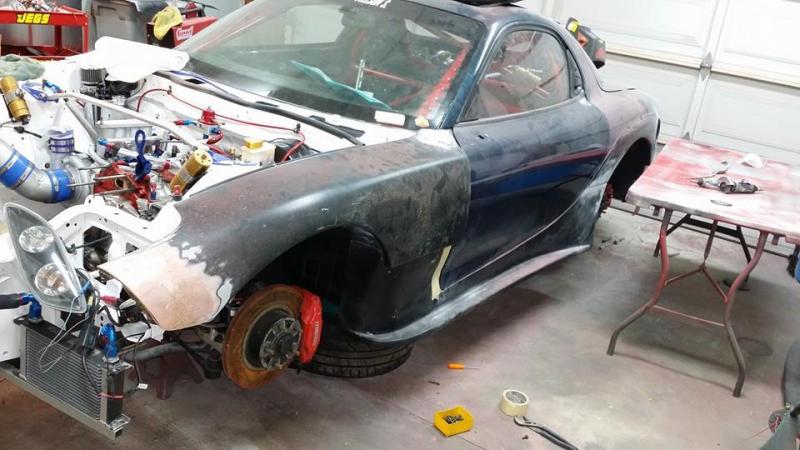
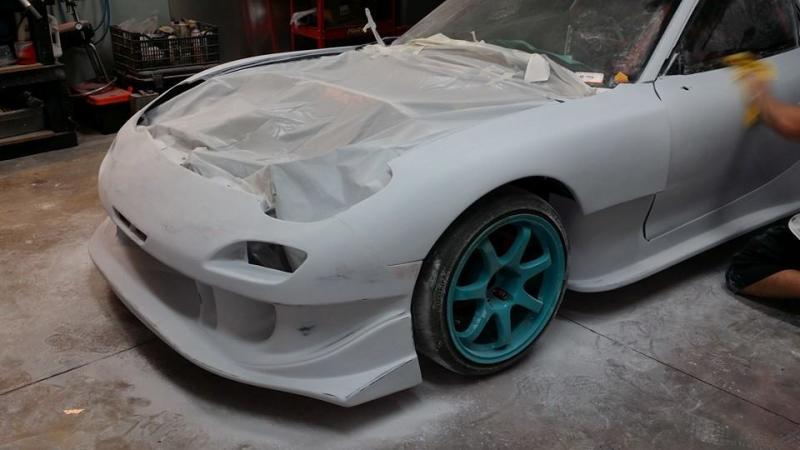
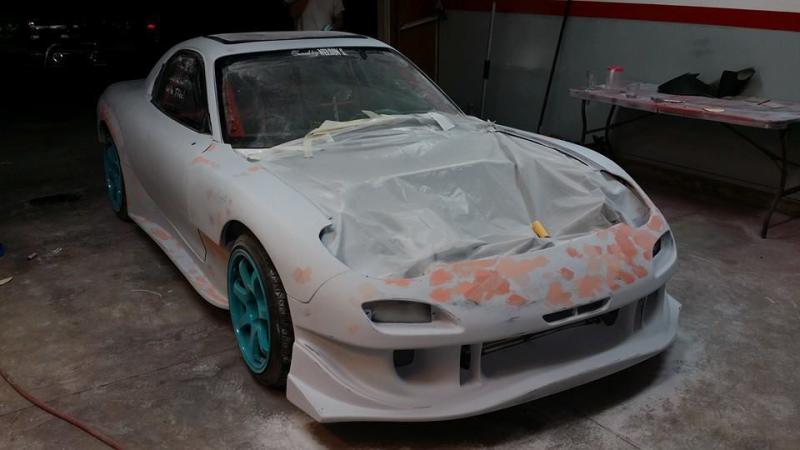
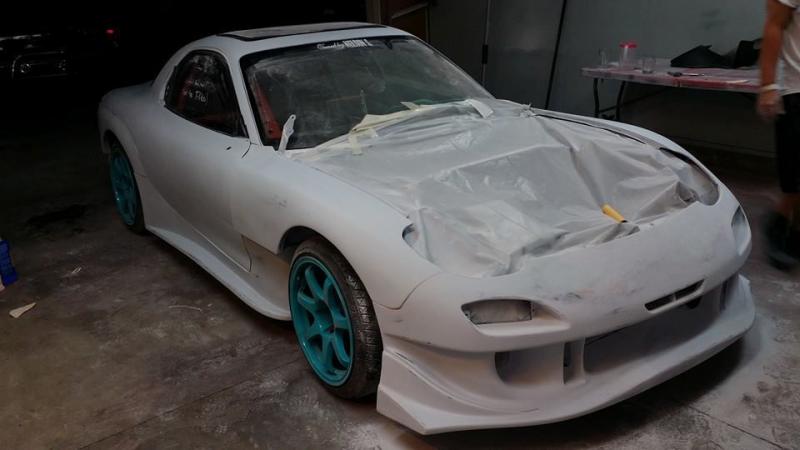
Anyone that knows me knows I dont like crappy fitting body panels or paint. Since I do all my bodywork and paint I make sure I dont have either


Last edited by Alex Rodriguez; Jan 22, 2015 at 11:41 PM.
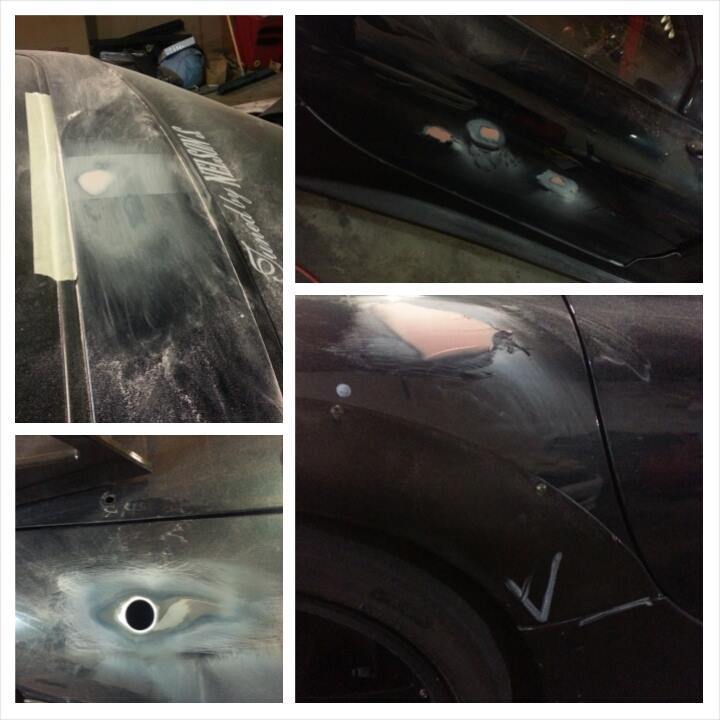
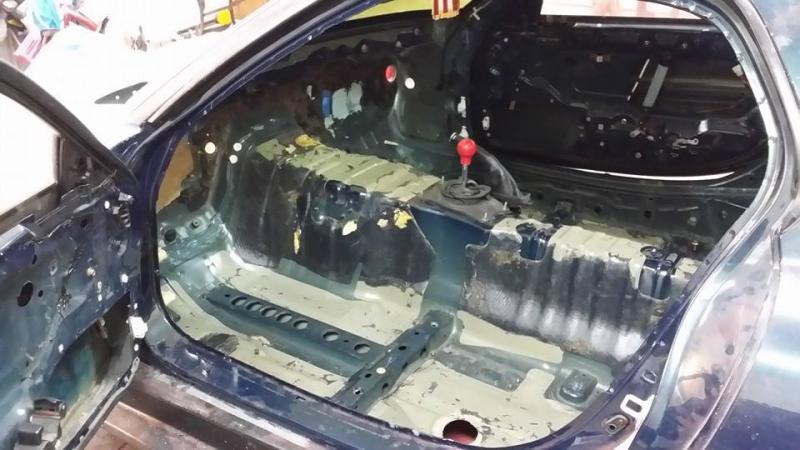
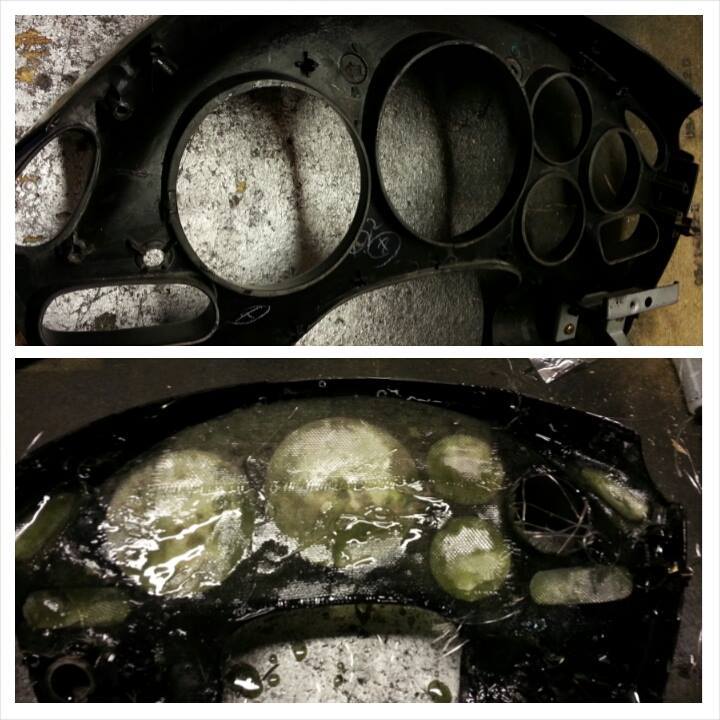
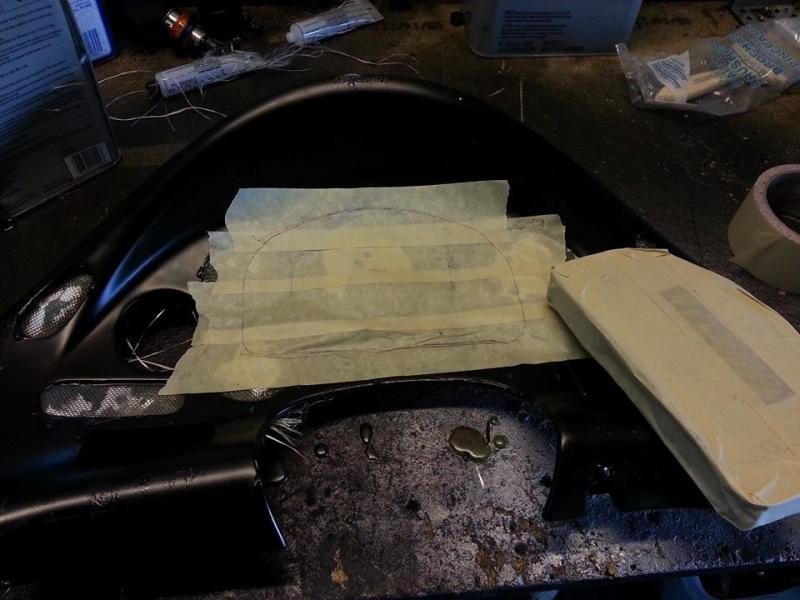
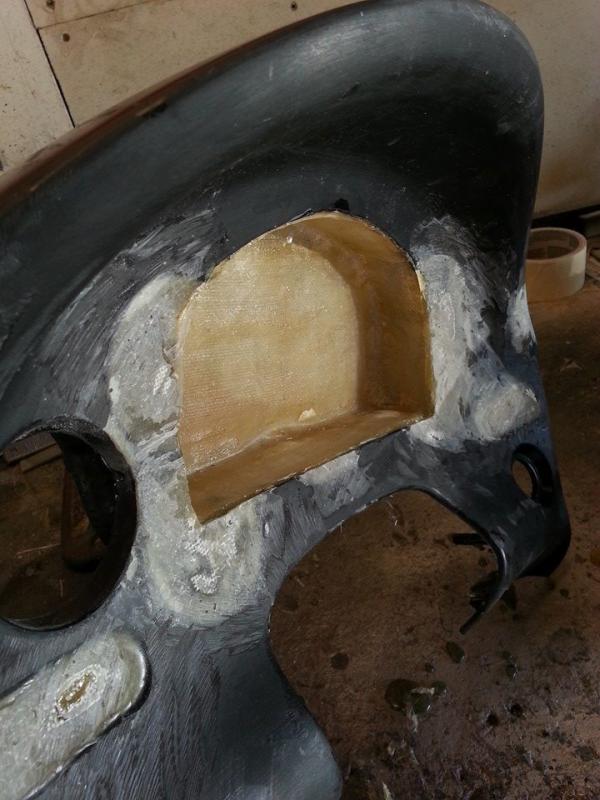
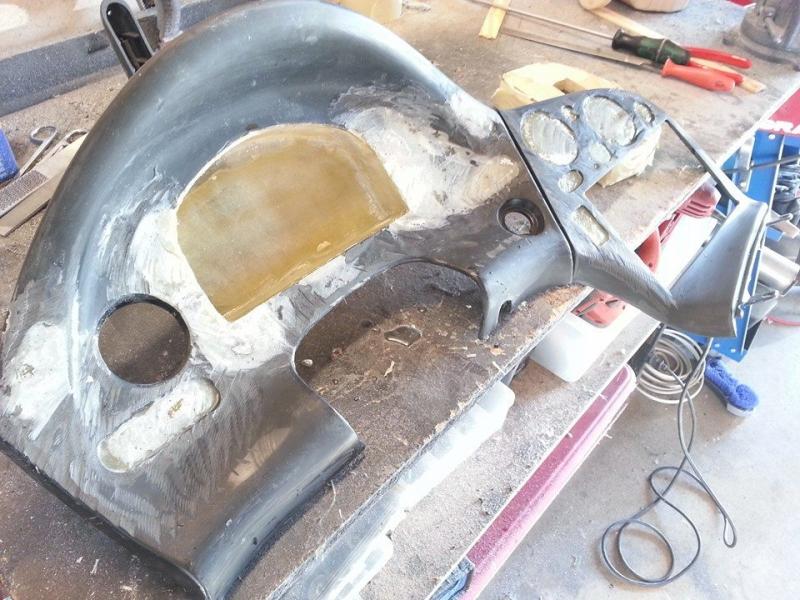
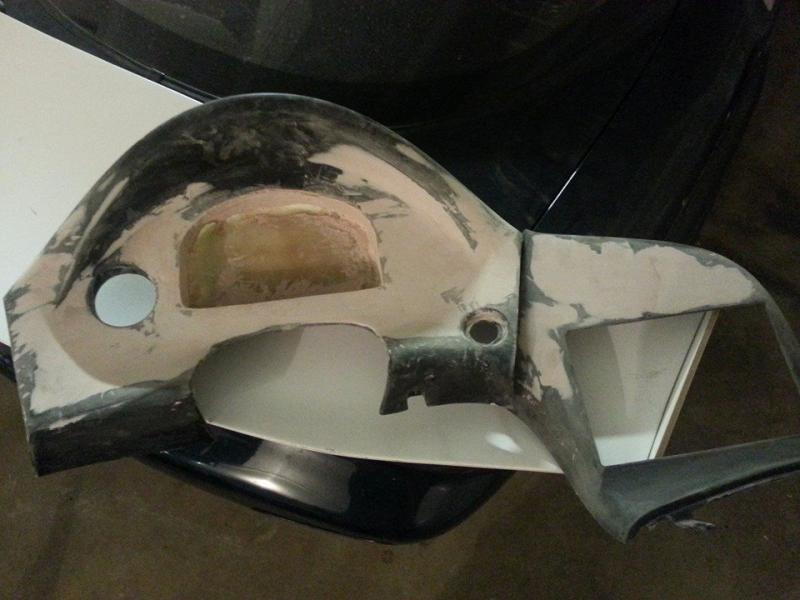
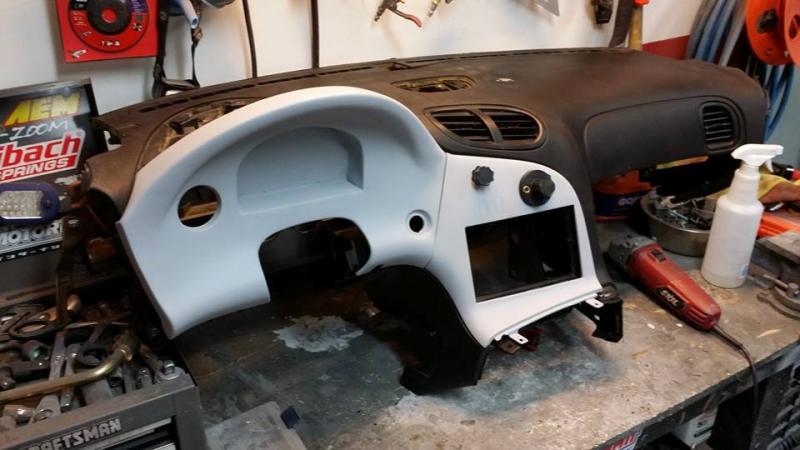
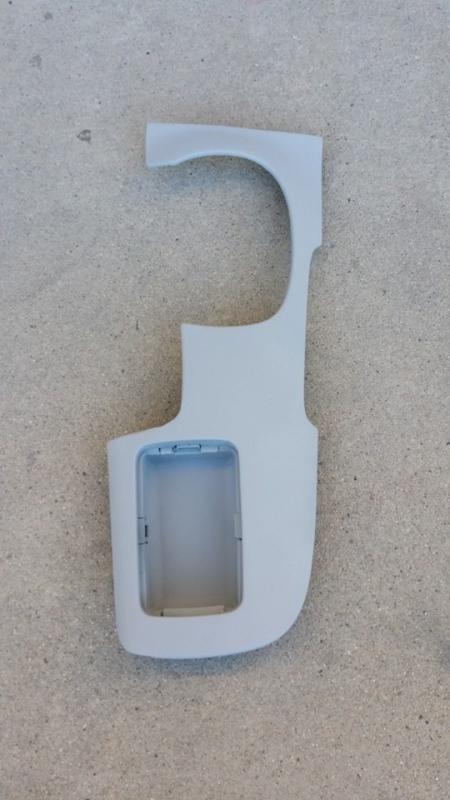
Here I began doing all the small dents, Stripping the sound deadning material, and building the new gauge cluster housing for the Haltech IQ3 Racepaq
 [/URL]

[/URL]


Last edited by Alex Rodriguez; Jan 23, 2015 at 12:10 AM.
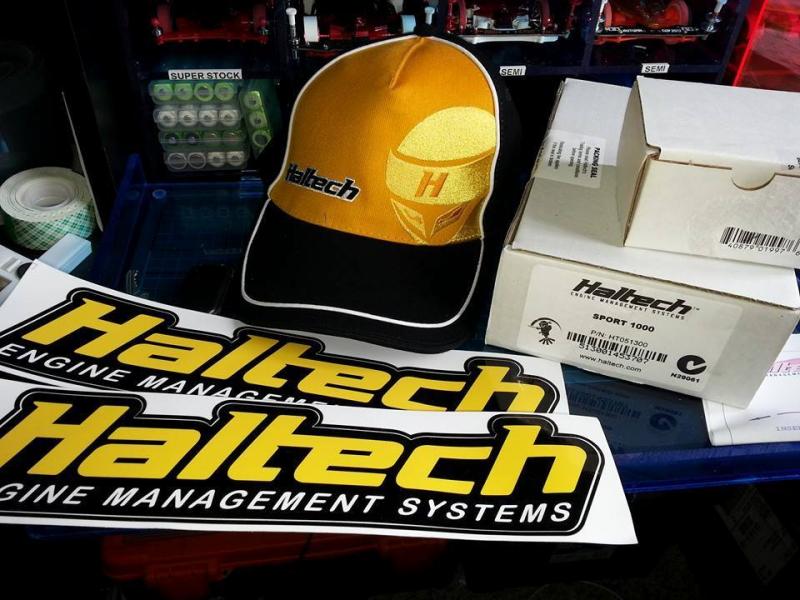
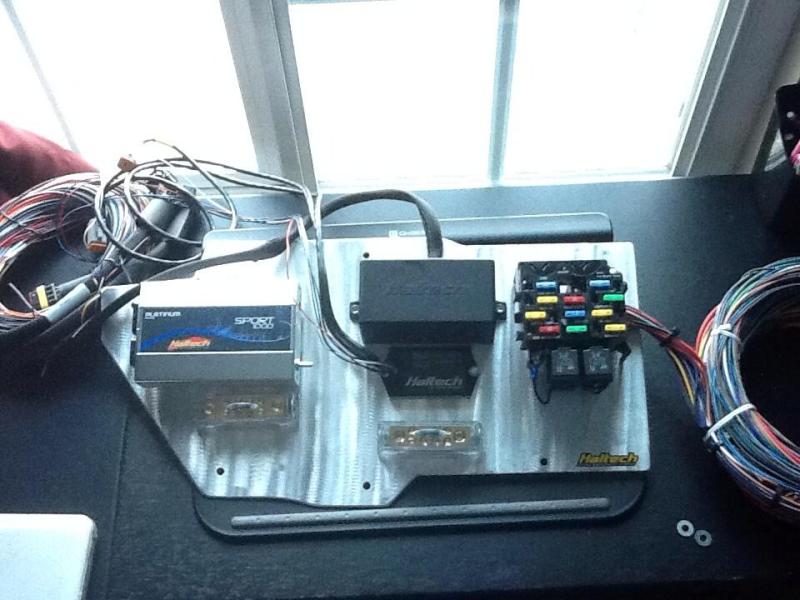
Haltech Platinum Sport P1000 with IQ3 racepaq, full harness, wideband ,sensors, and Tuning support by my long time friend and sponsor Nelson Siverio.
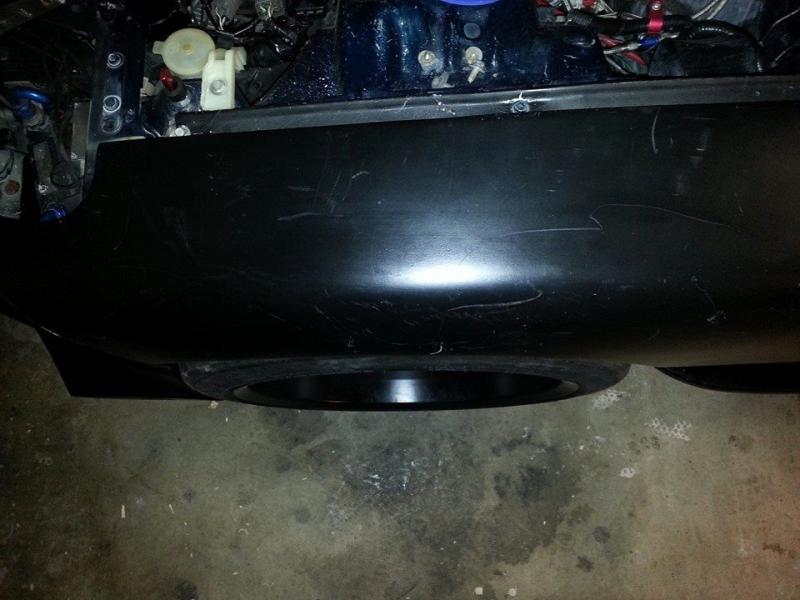
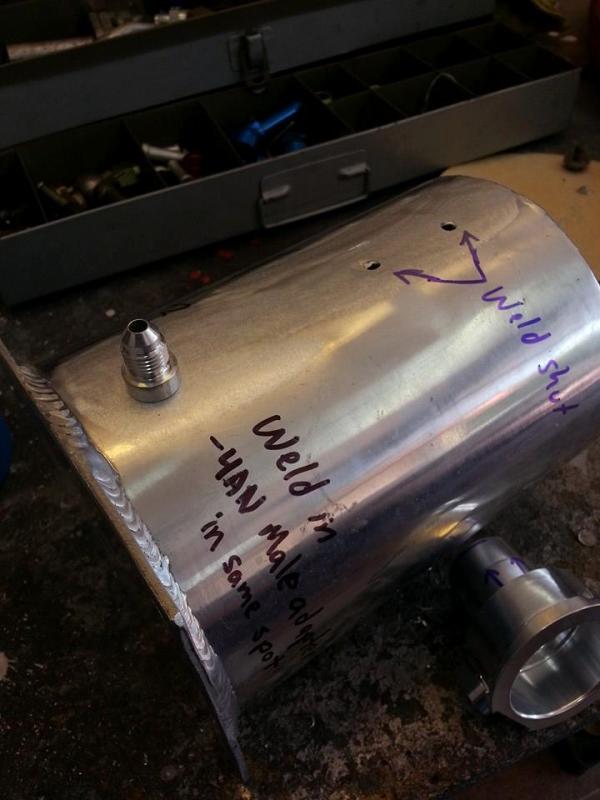
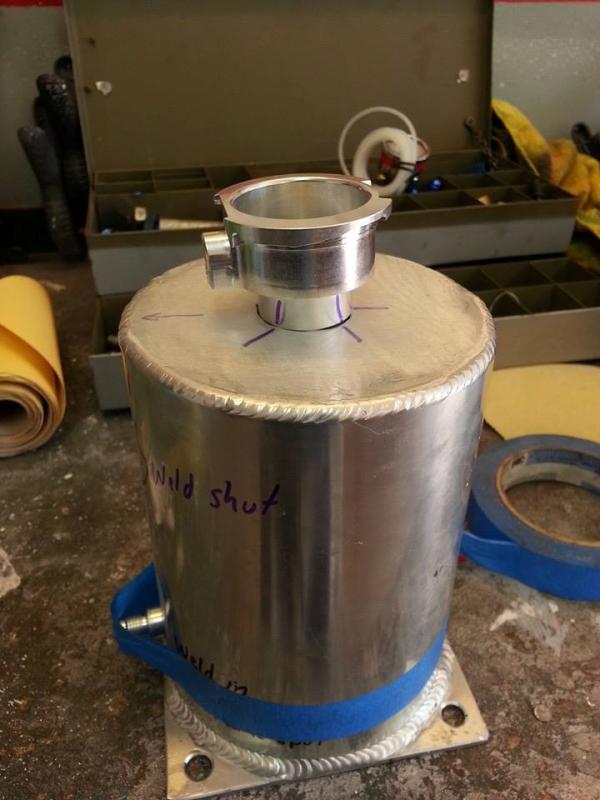
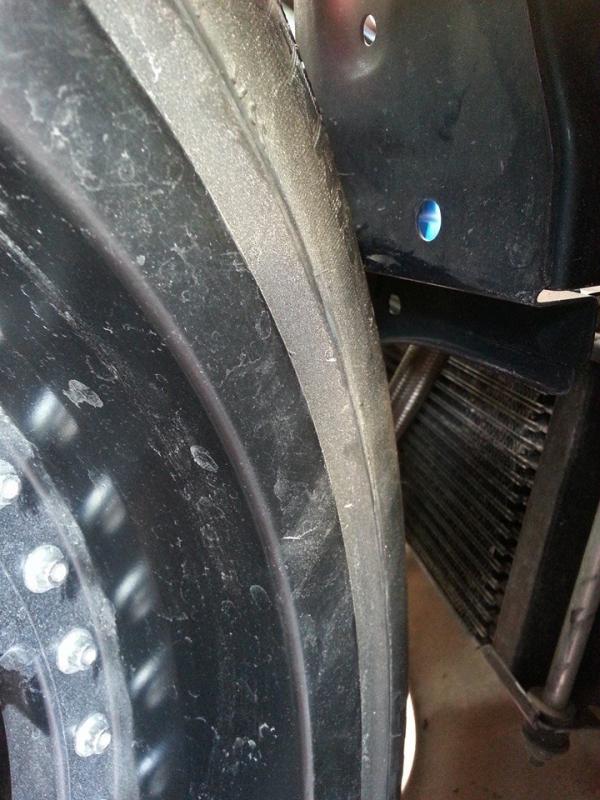
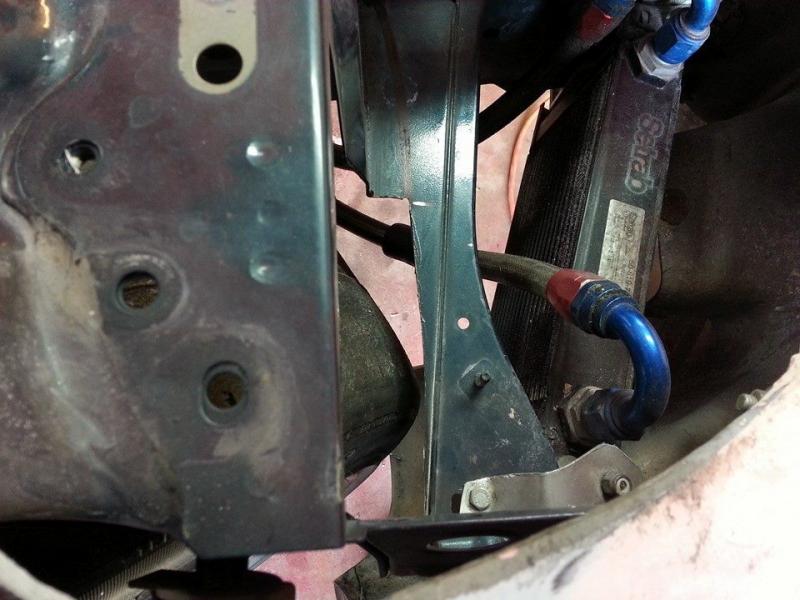
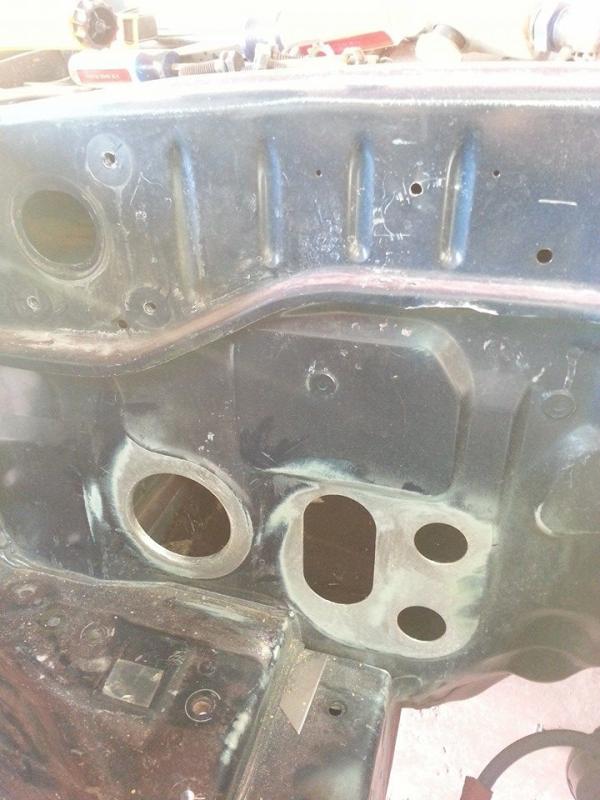
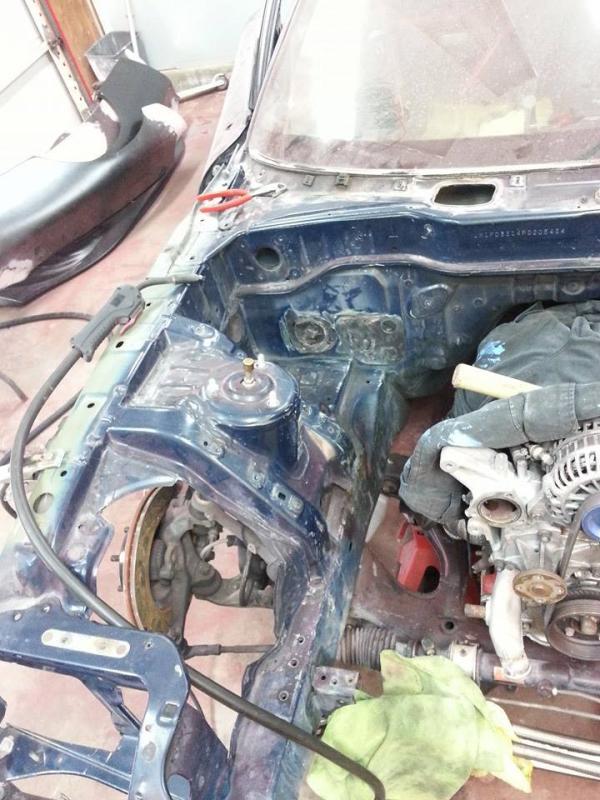
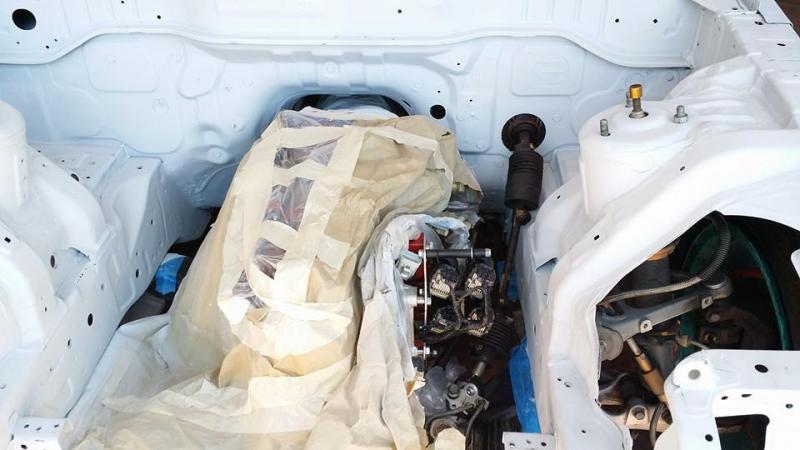
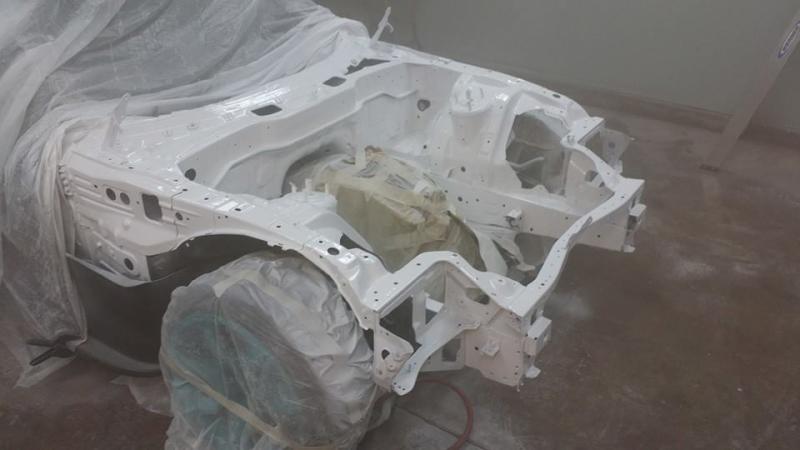
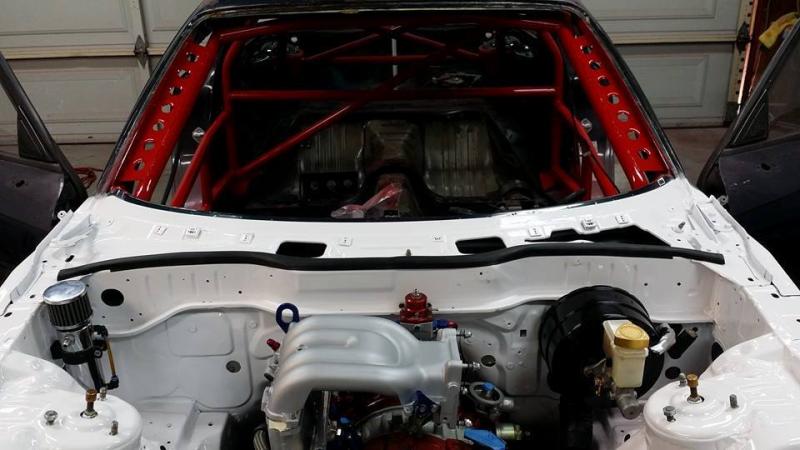
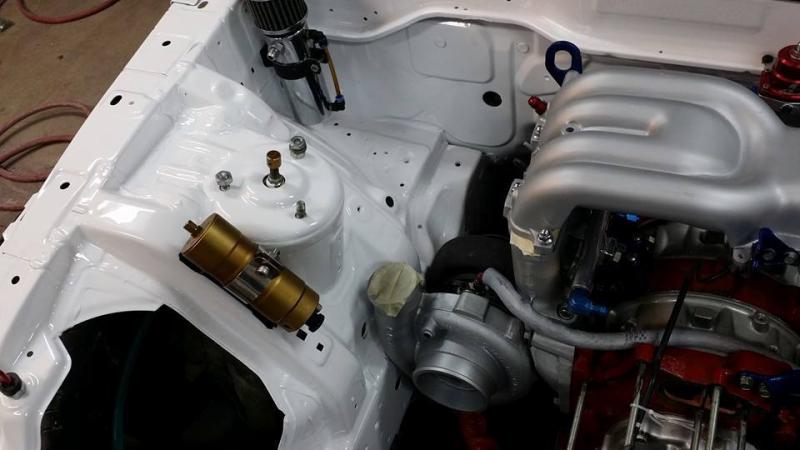
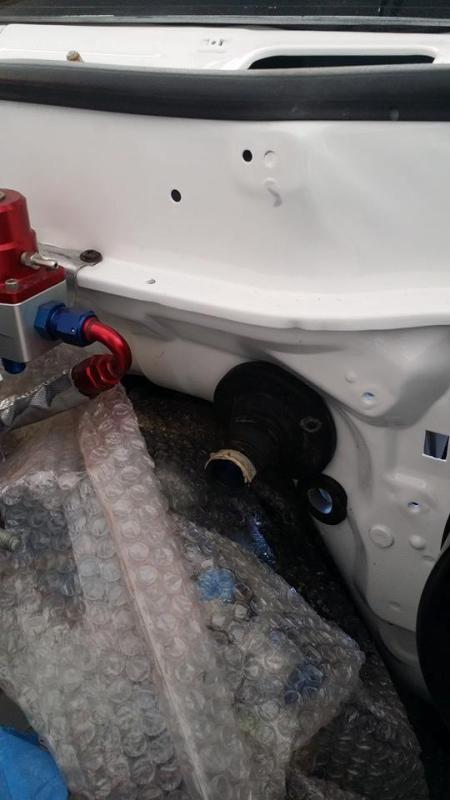
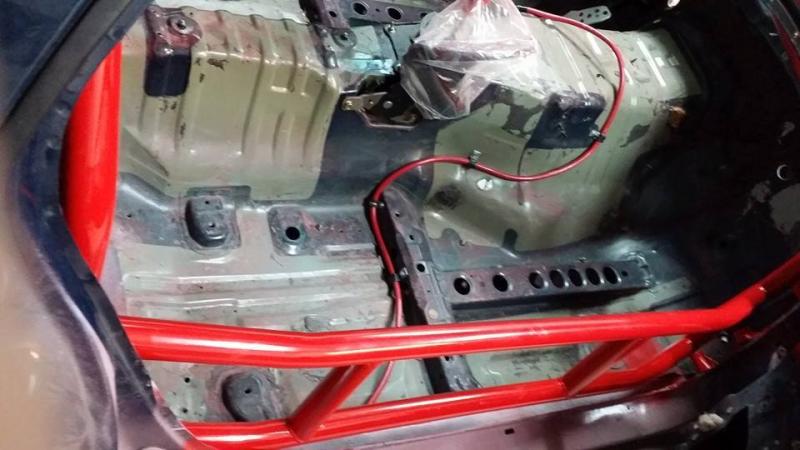
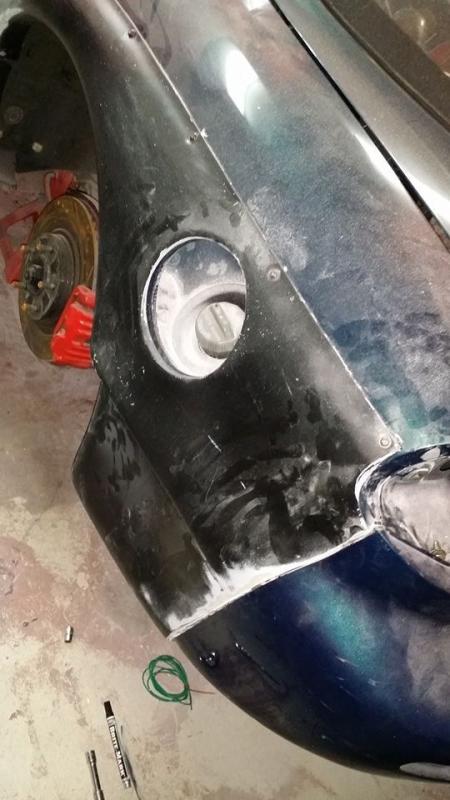
In order for me to get as much room for angle and tire. I removed the OEM reservoirs for coolant and wiper fluid. For my new tank i am using a 3L tank that will be relocated to the ABS location. The front area will be trimmed to clear up to 295-35-18.
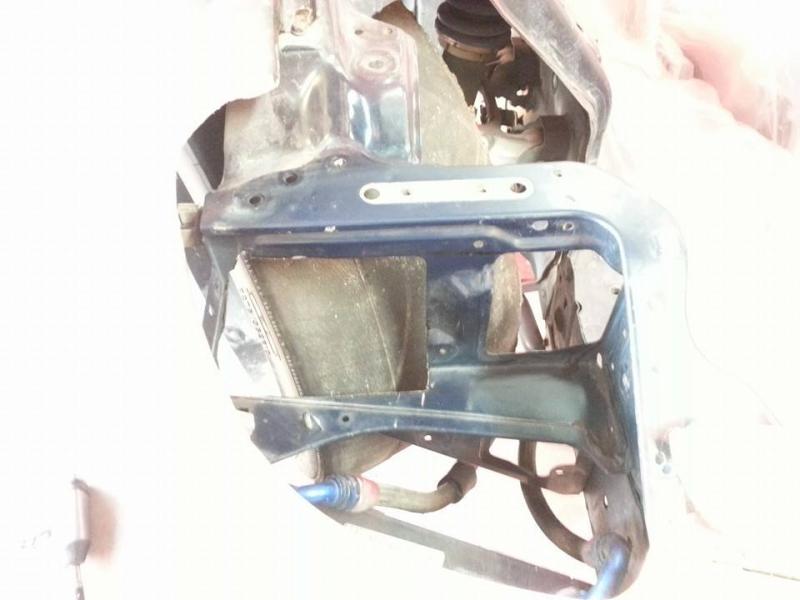
After certain cuts it was time to seal up the firewall and start prepping the engine bay for paint. Since i am doing a full color change the engine bay will be shot first. I am using PCL polyuerathane sealer primer

In order for me to get as much room for angle and tire. I removed the OEM reservoirs for coolant and wiper fluid. For my new tank i am using a 3L tank that will be relocated to the ABS location. The front area will be trimmed to clear up to 295-35-18.


After certain cuts it was time to seal up the firewall and start prepping the engine bay for paint. Since i am doing a full color change the engine bay will be shot first. I am using PCL polyuerathane sealer primer


Last edited by Alex Rodriguez; Jan 23, 2015 at 12:45 AM.


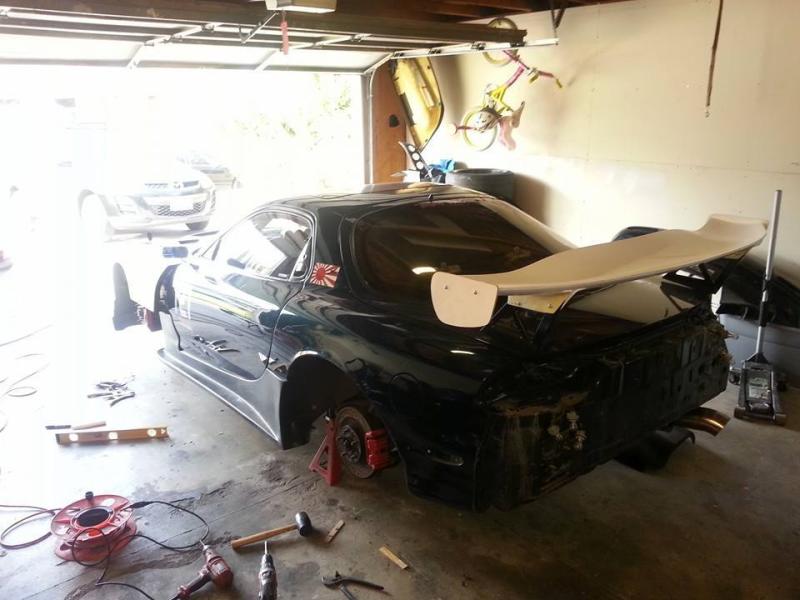
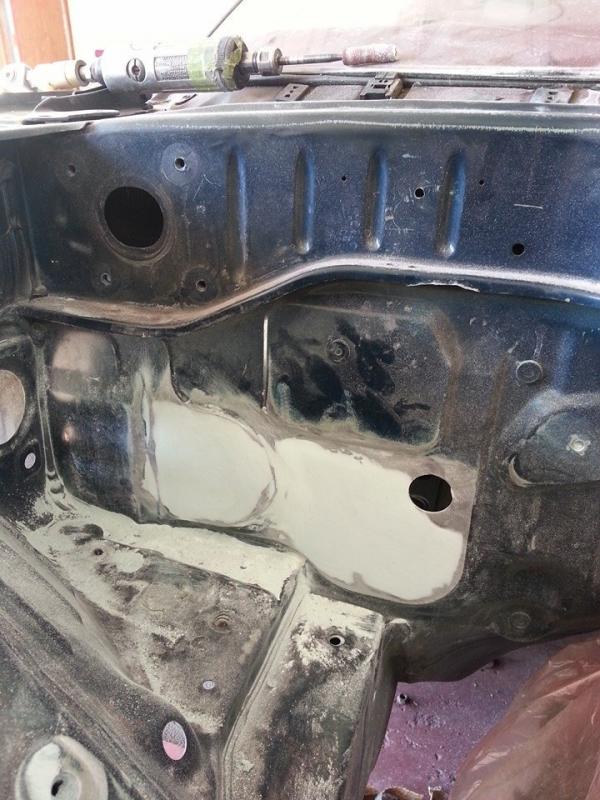
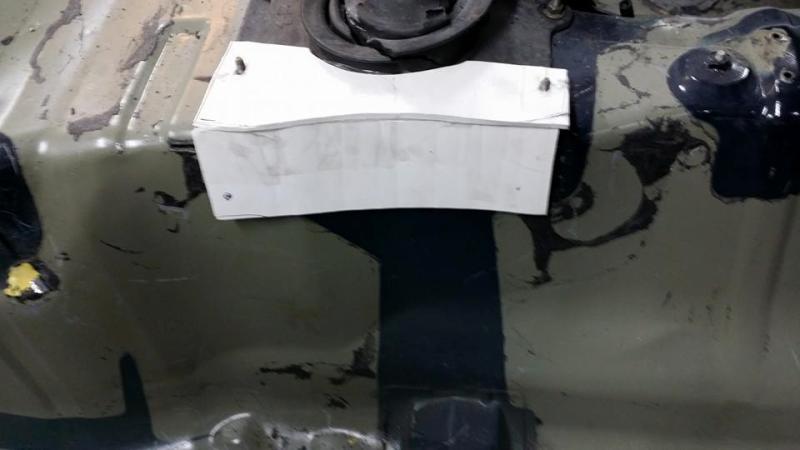
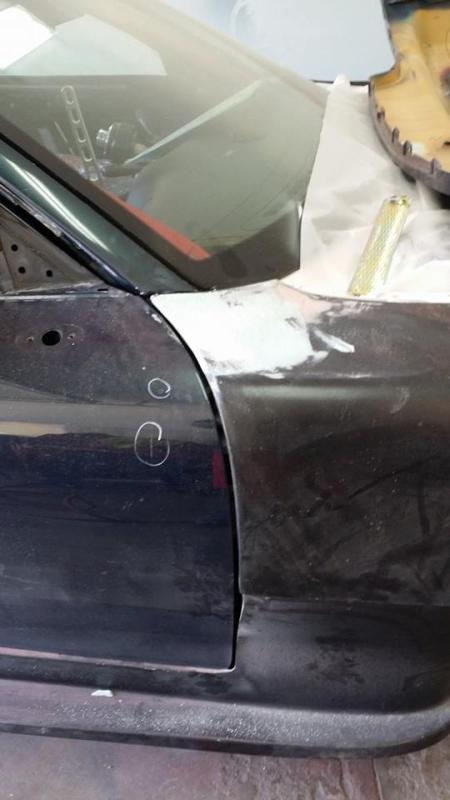
Time to cover up the wing holes,antenna and squirter.


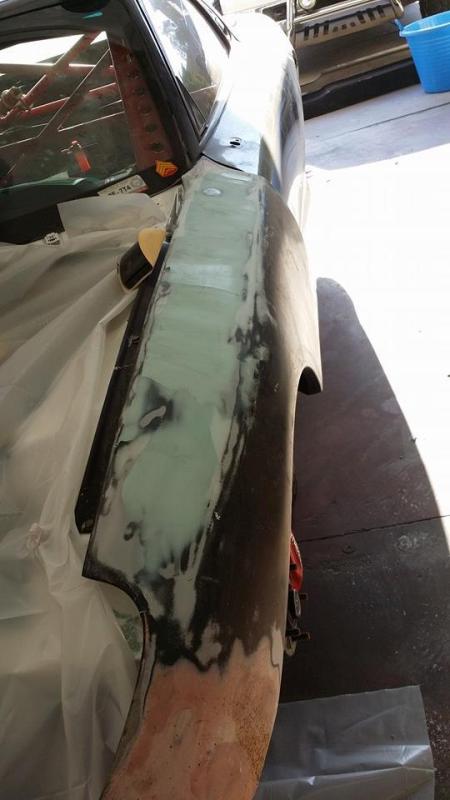
prepped for primer


primed

dry ice ftw

Summit Racing Battery mount that will be welded when the cage gets ready to be built.

Last edited by Alex Rodriguez; Jan 23, 2015 at 01:14 AM.
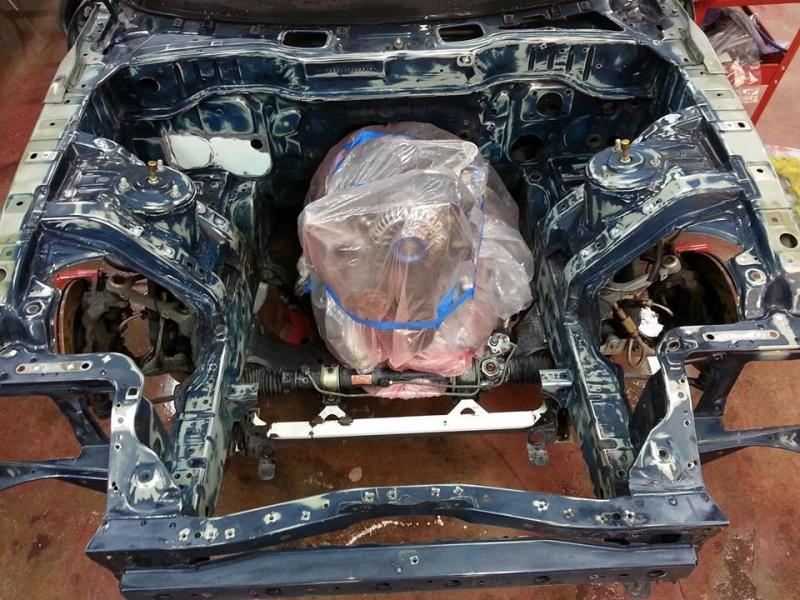
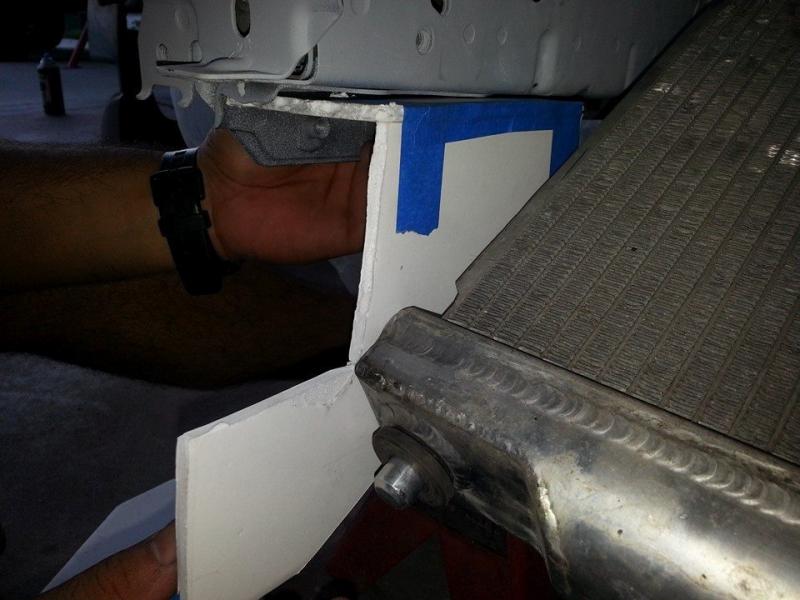
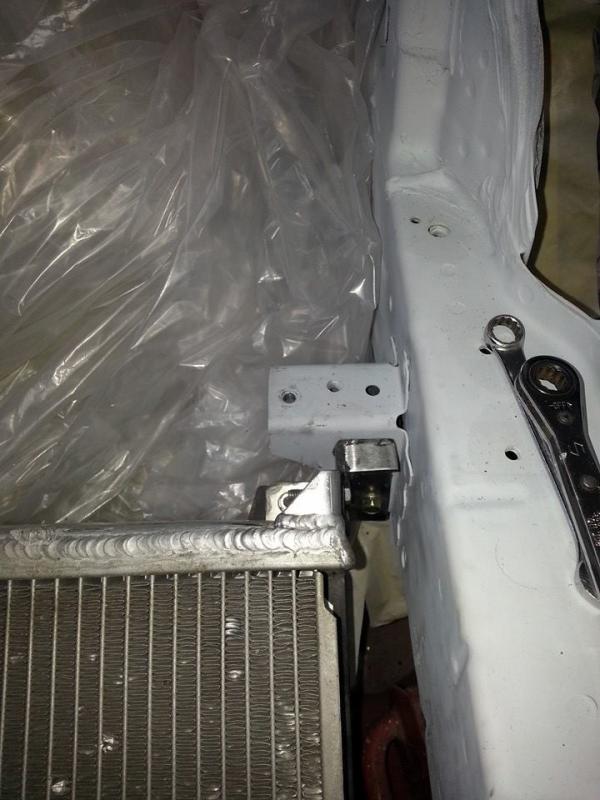
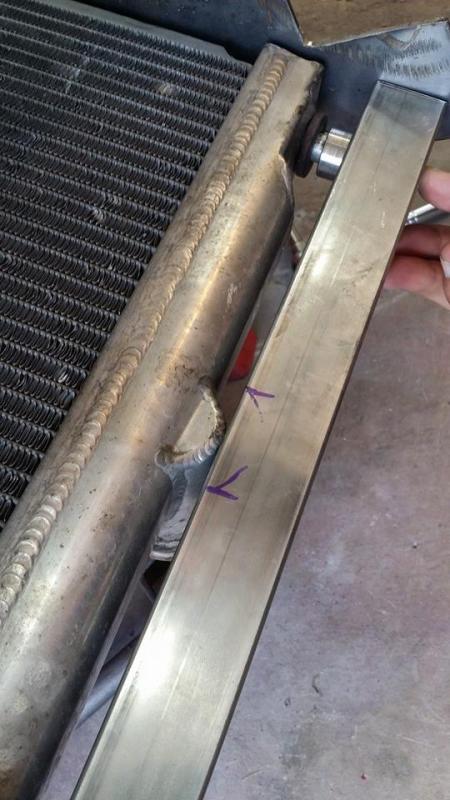
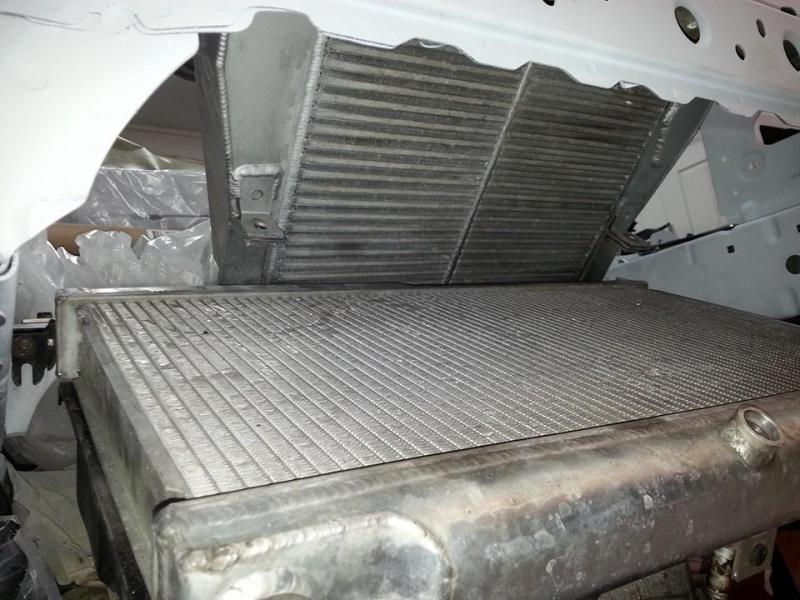
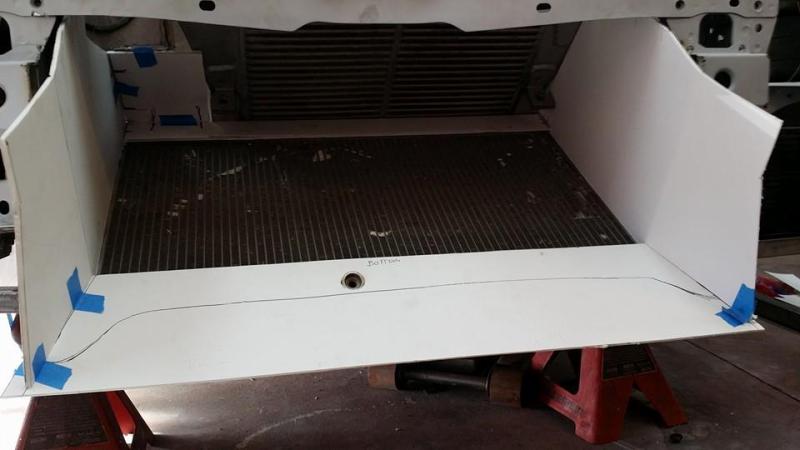
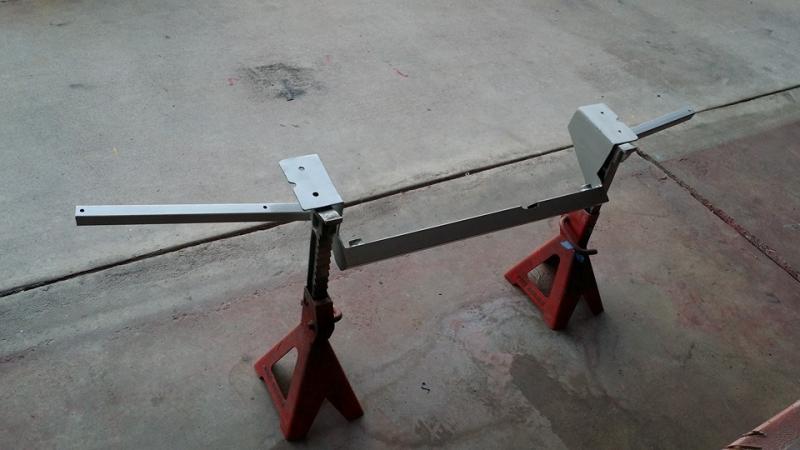
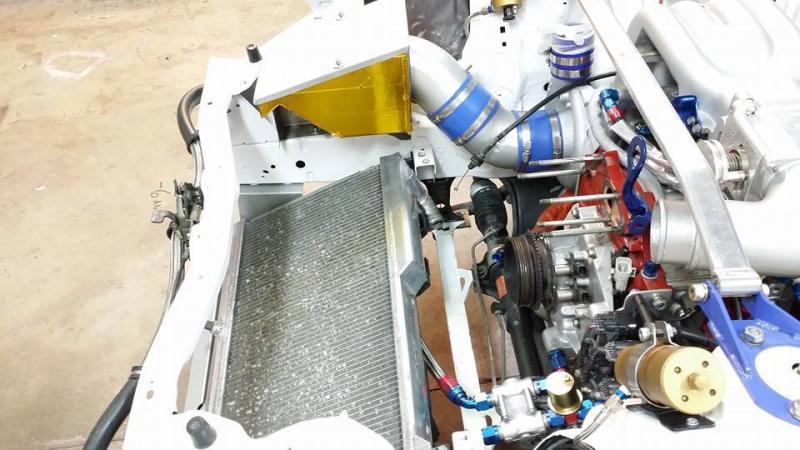
Next up was to mount the radiator. I wanted to build a subframe type mounting system so everything can be removed as one. Also to build strong points to protect the radiator or oil coolers.
[/URL]

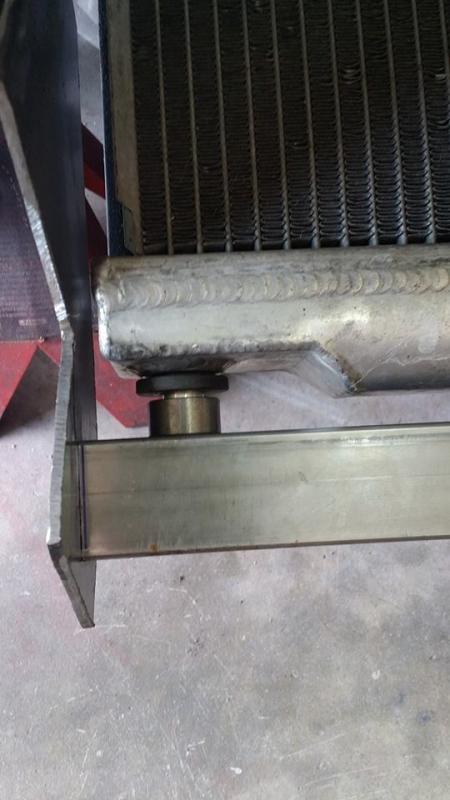
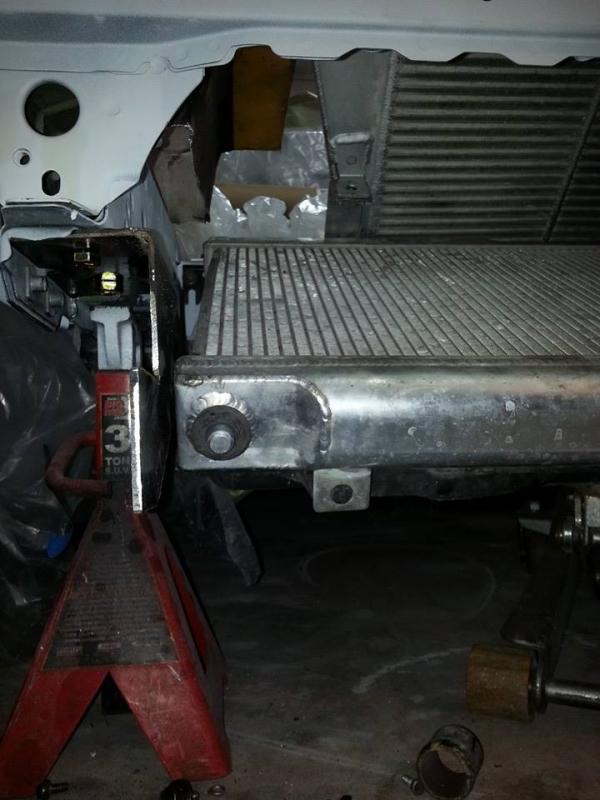
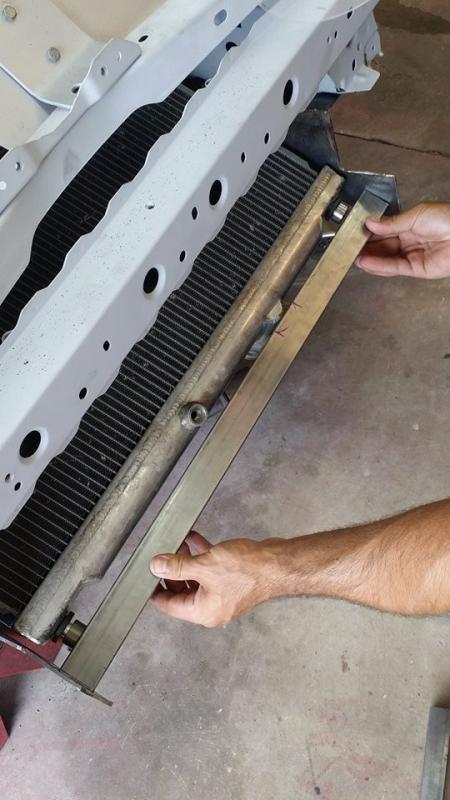
rubber spacers to cushion the radiator from the mount
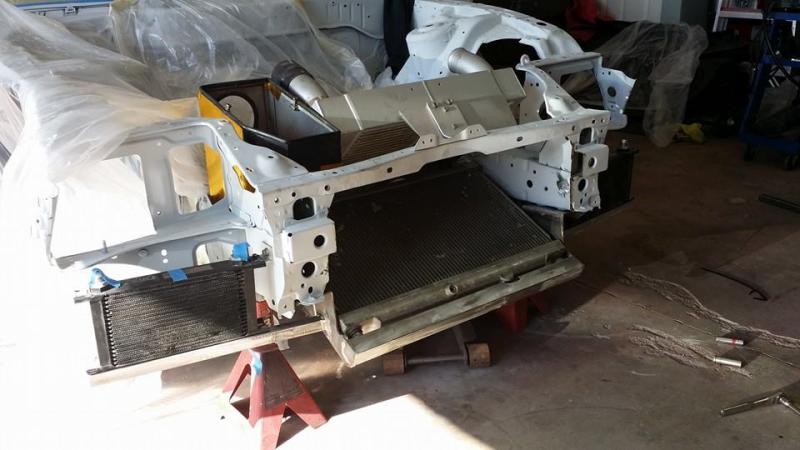
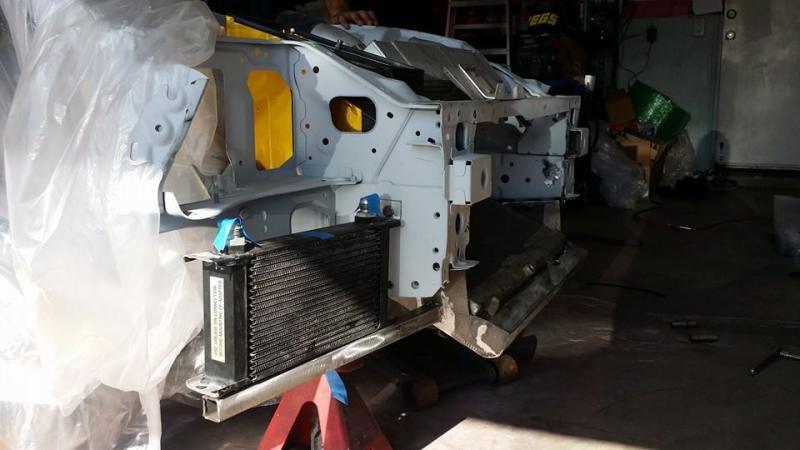
For the oil coolers now.


[/URL]


rubber spacers to cushion the radiator from the mount

For the oil coolers now.


Last edited by Alex Rodriguez; Jan 23, 2015 at 01:48 AM.
Trending Topics
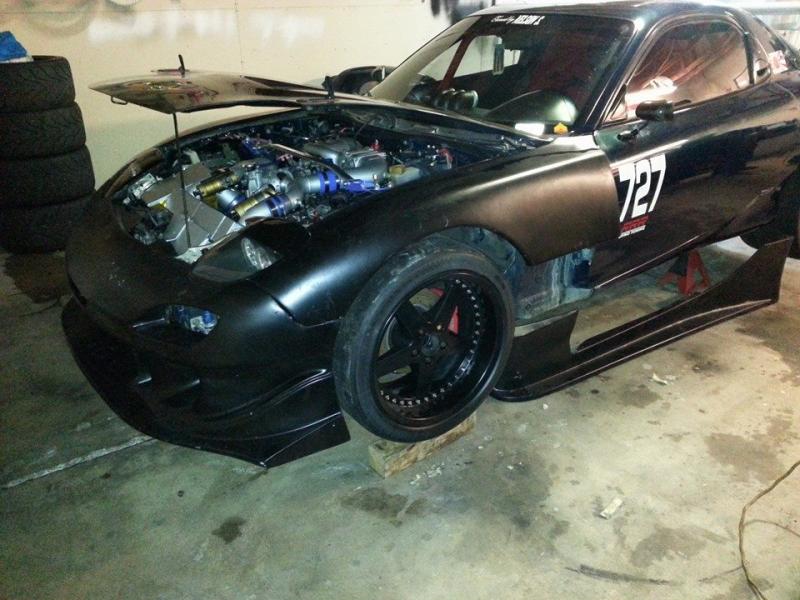
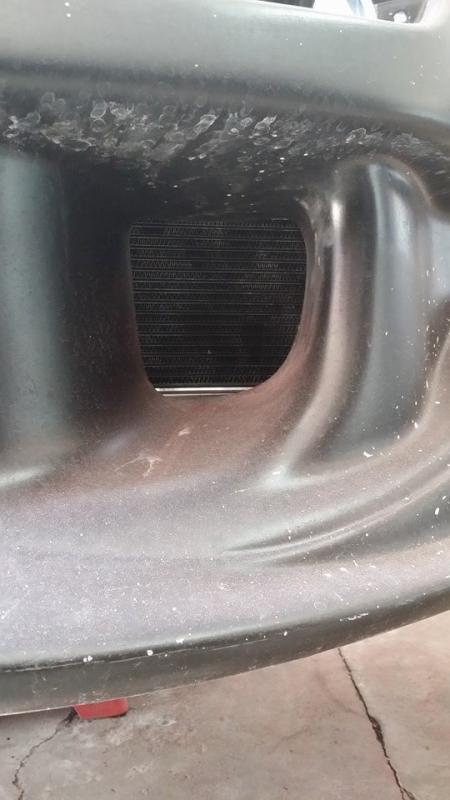
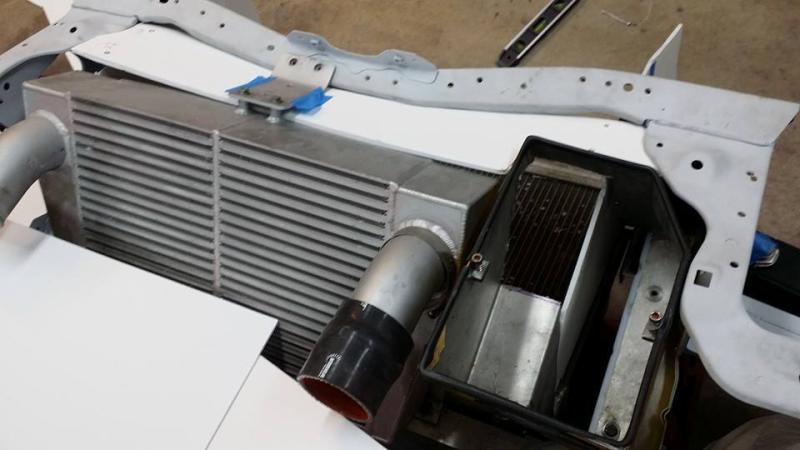
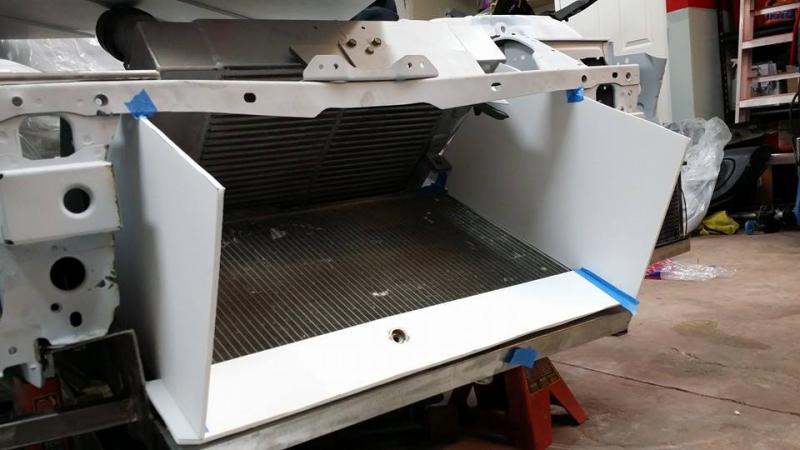
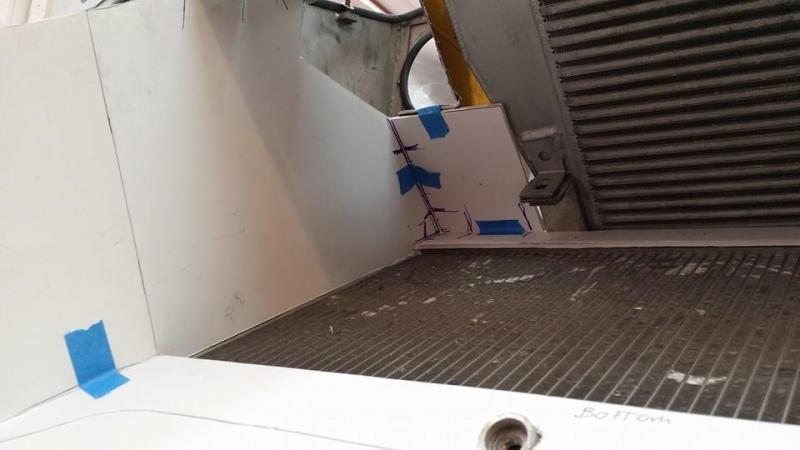
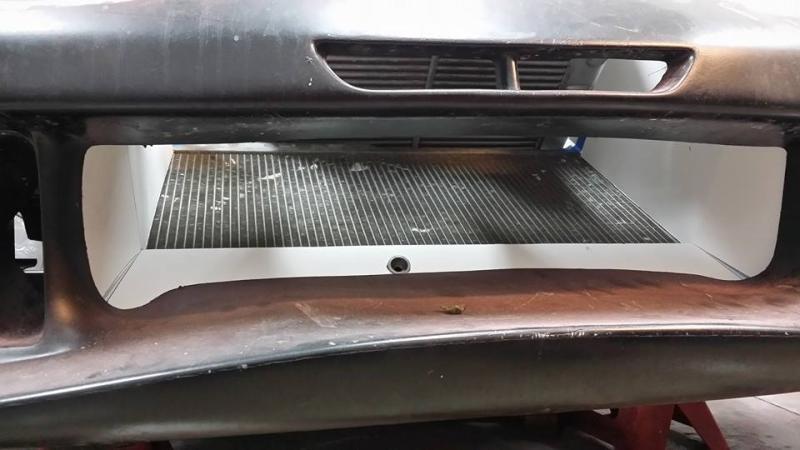
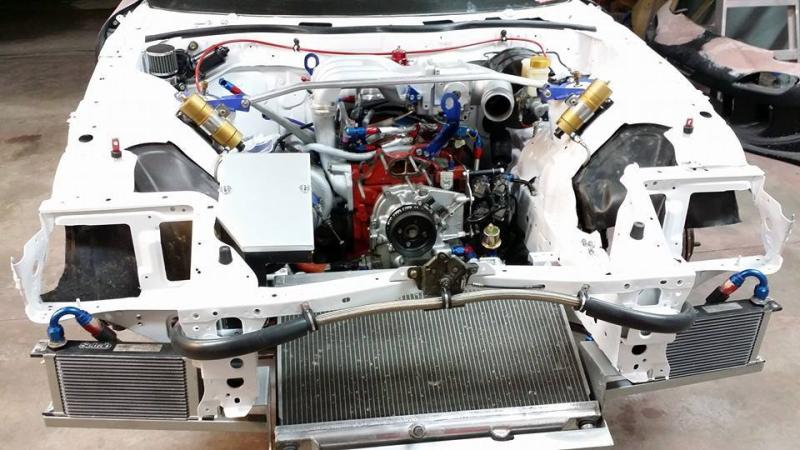
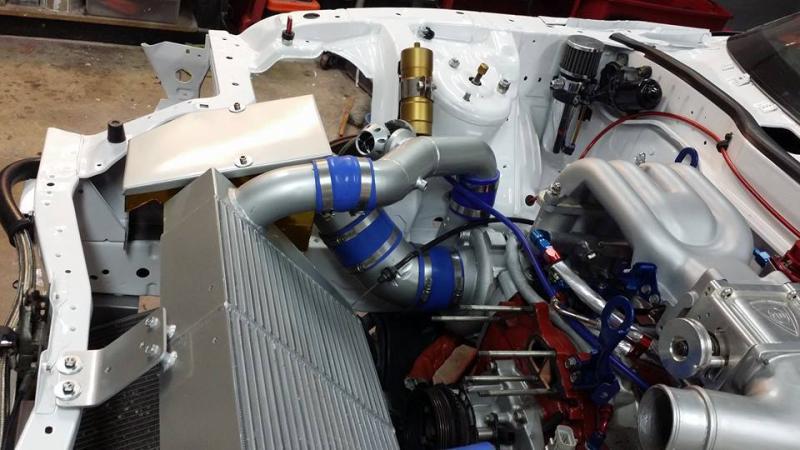
Next up was to make sure the bumper sat well and on the radiator support frame. 90% of your cooling comes from Proper ducting. In the next pictures you will see how my ducting seals every area between the vmount and forces air into my airbox.

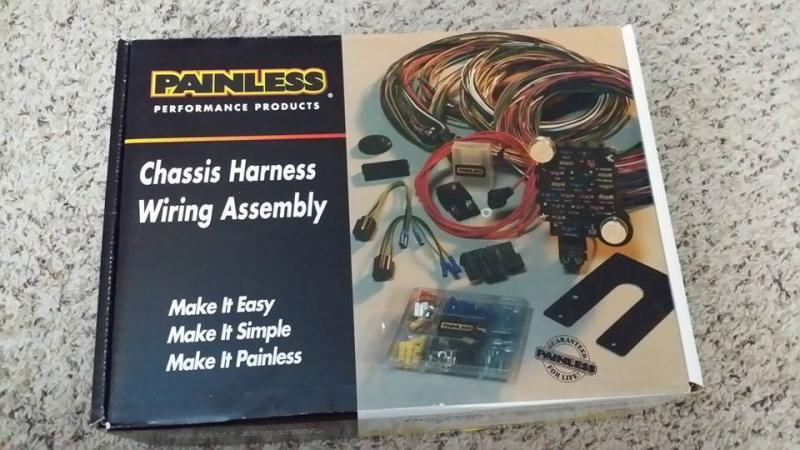
PAINLESS Performance time. Let me say first hand the FD harness is a nightmare if you want to properly strip it all and keep your bare nessecities. The car will no longer have an oem wire inside or in the bay.
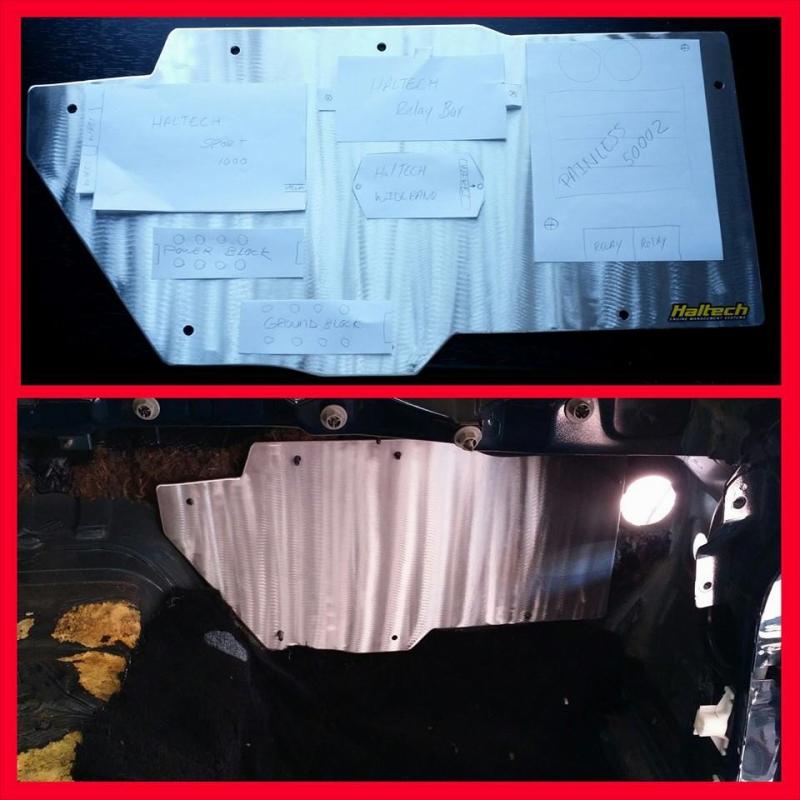
Command Central!
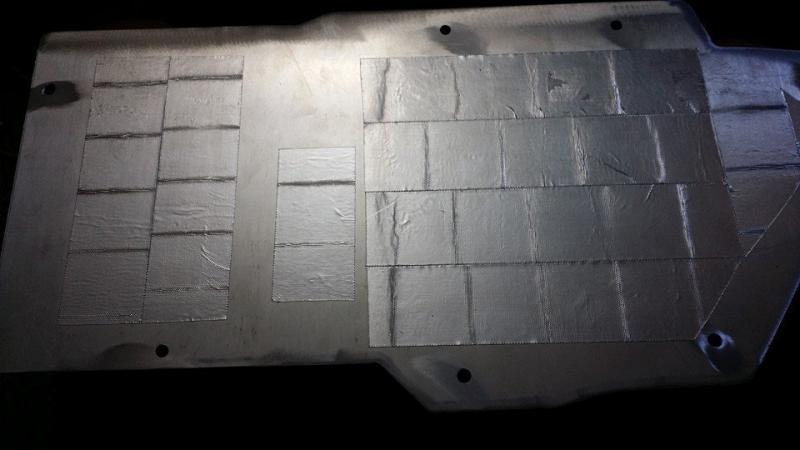
Everything electrical in the car will be mounted here. For troubleshooting and easy to reach location. It is hidden under the dash and protected both sides with DEI reflecagold and head sound deadner on the wall and floor for extra heat protection. Bit over board but hey better safe than sorry.


PAINLESS Performance time. Let me say first hand the FD harness is a nightmare if you want to properly strip it all and keep your bare nessecities. The car will no longer have an oem wire inside or in the bay.

Command Central!
Everything electrical in the car will be mounted here. For troubleshooting and easy to reach location. It is hidden under the dash and protected both sides with DEI reflecagold and head sound deadner on the wall and floor for extra heat protection. Bit over board but hey better safe than sorry.

Last edited by Alex Rodriguez; Jan 23, 2015 at 09:33 PM.
This is some thick barrier tape by DEI.
Command station mounting
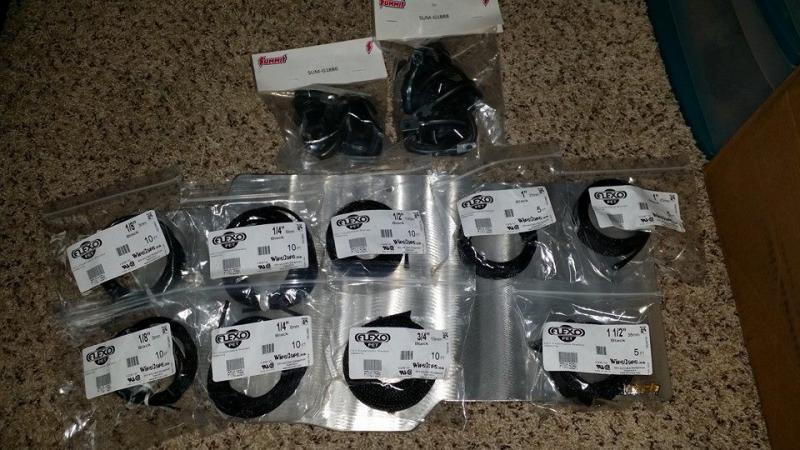
The whole car is getting flexo sleeve wrap/heat shrink instead of tape or corrugated loom for to keep the harness slim and easy to identify wires
As i am working on certain areas of the car parts are starting to come in. Injector dynamics 2000cc and 1000cc injectors and bag of copper eylets for the battery relocation, altenator, on/off kill and breaker and starter.

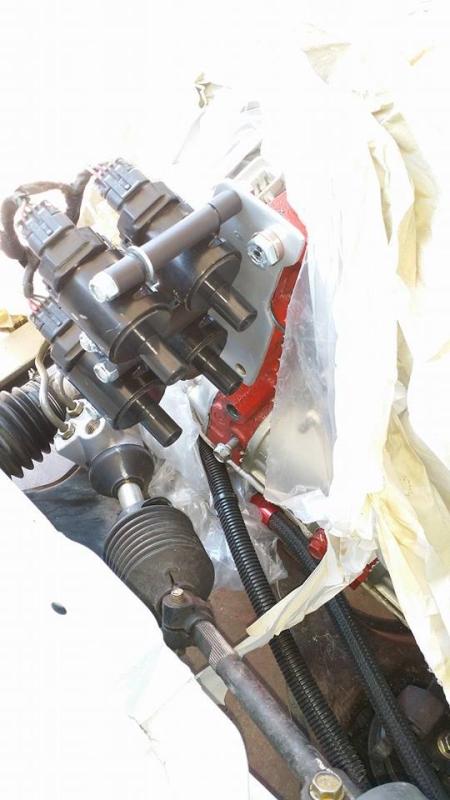
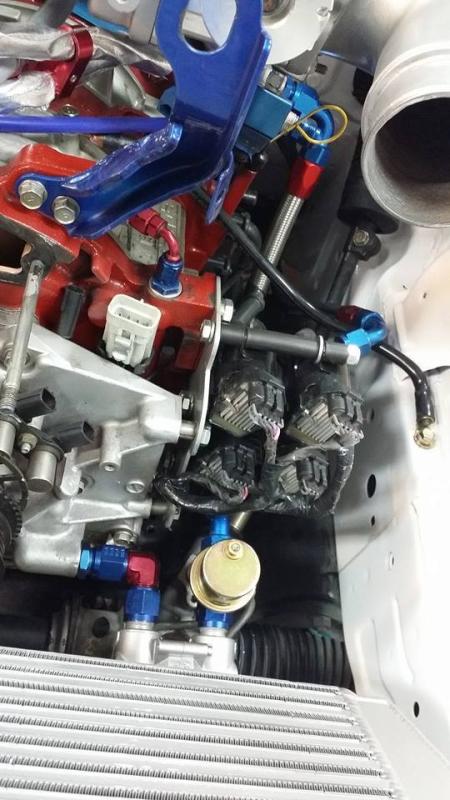
One thing about me is i like custom. If i can figure a way to do something diffrent and it accomodates other custom parts i am game. Since i dont have power steering never have and never will...(You will see later on when i post my track pics hehe) i used the existing holes and began making a mount for my LS2 coils.
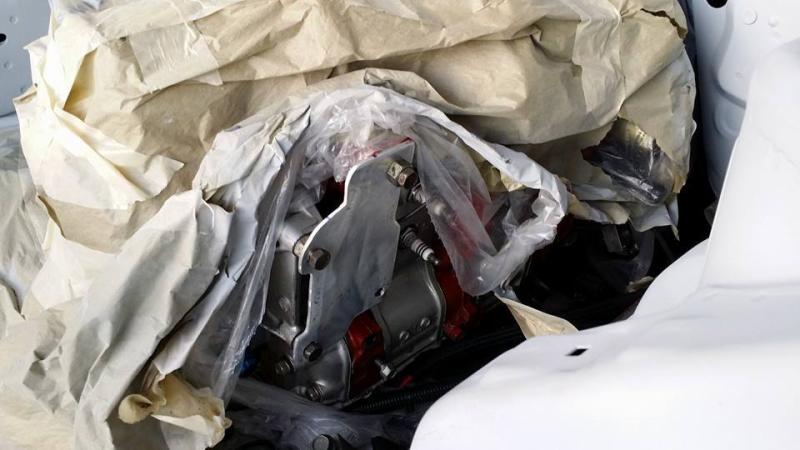
New seals and a good cleaning The rotary works 80mm Throttle body. Thank you Jordan Sanderson for the hook up.
Dont get me wrong I love powder coating but with these cars constatntly been taking apart ,recoating parts gets old. I learned a long time ago $5 can of high temp paint works just as good so everything was stripped ,sanded, prepped and shot with autozone high temp paint
My cooling system subframe
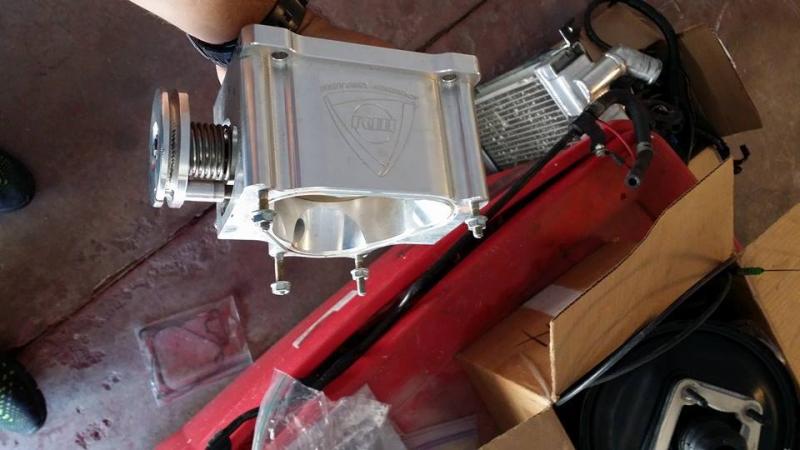
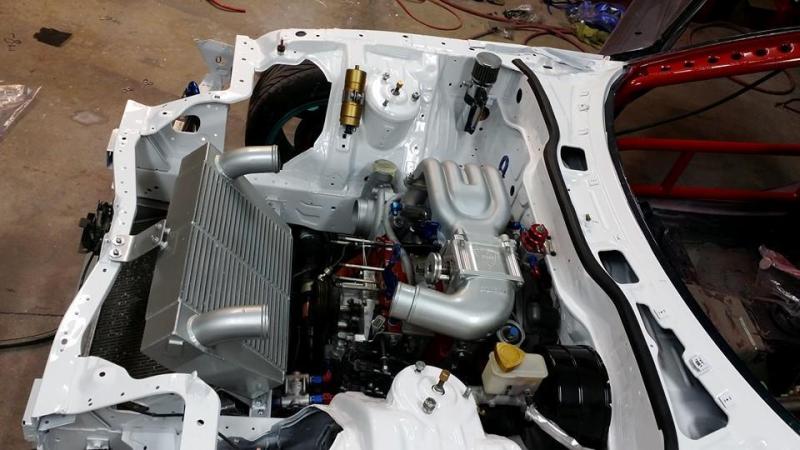
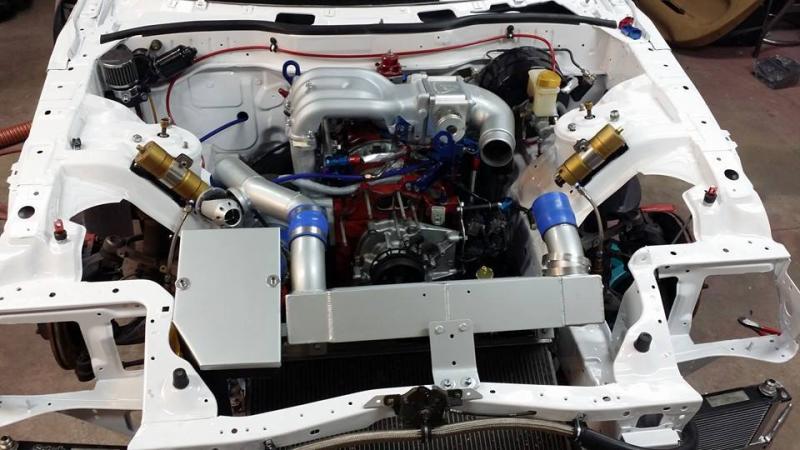
Garrett GT4094R got a new spray on the compressor and heat shielding on the coolant and oil lines.

Command station mounting

The whole car is getting flexo sleeve wrap/heat shrink instead of tape or corrugated loom for to keep the harness slim and easy to identify wires

As i am working on certain areas of the car parts are starting to come in. Injector dynamics 2000cc and 1000cc injectors and bag of copper eylets for the battery relocation, altenator, on/off kill and breaker and starter.

One thing about me is i like custom. If i can figure a way to do something diffrent and it accomodates other custom parts i am game. Since i dont have power steering never have and never will...(You will see later on when i post my track pics hehe) i used the existing holes and began making a mount for my LS2 coils.


New seals and a good cleaning The rotary works 80mm Throttle body. Thank you Jordan Sanderson for the hook up.

Dont get me wrong I love powder coating but with these cars constatntly been taking apart ,recoating parts gets old. I learned a long time ago $5 can of high temp paint works just as good so everything was stripped ,sanded, prepped and shot with autozone high temp paint

My cooling system subframe

Garrett GT4094R got a new spray on the compressor and heat shielding on the coolant and oil lines.

Last edited by Alex Rodriguez; Jan 24, 2015 at 02:31 AM.
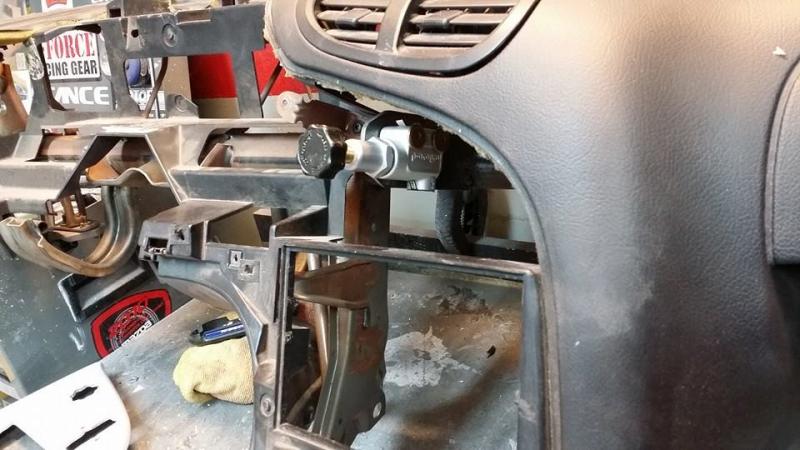
A little bit more massaging on the interior and fitting of my on/off breaker. In-cabin Wilwood brake proportioning valve and IQ3 racepaq.

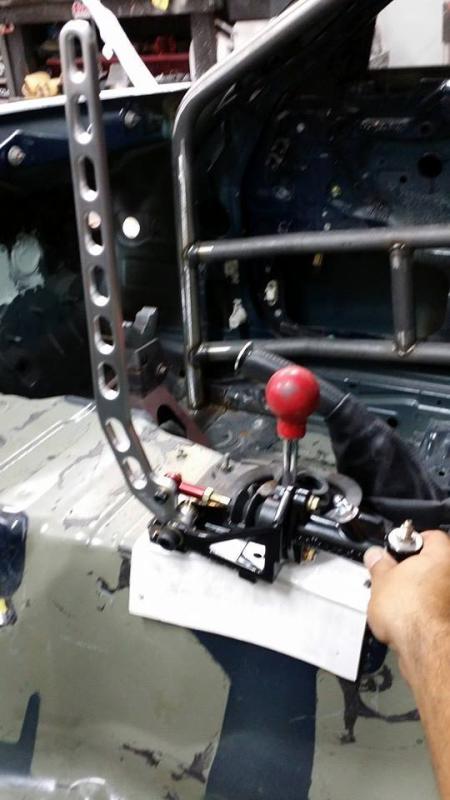
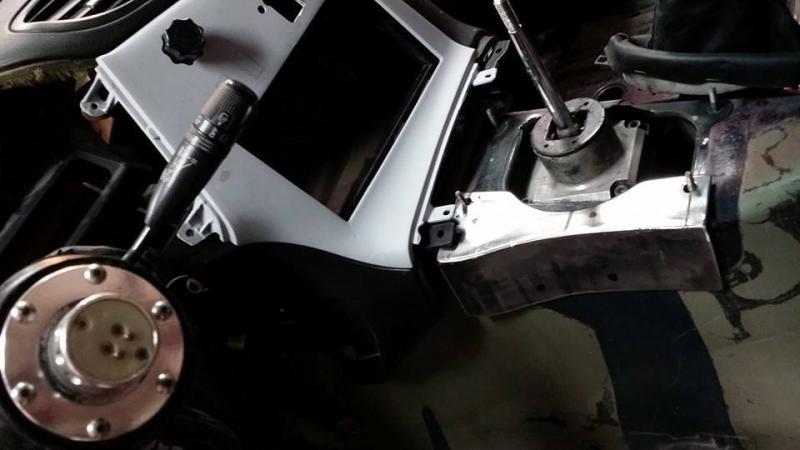
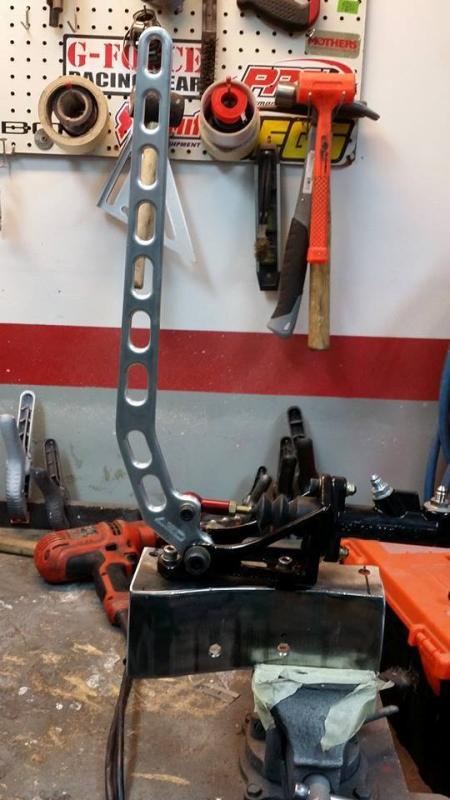
Here I start building a custom mount for the ASD Hydraulic drift handle. Since i want to retain my complete interior and ensure the seat still moves forward and rear without touching. I had to follow the tunnel contour.
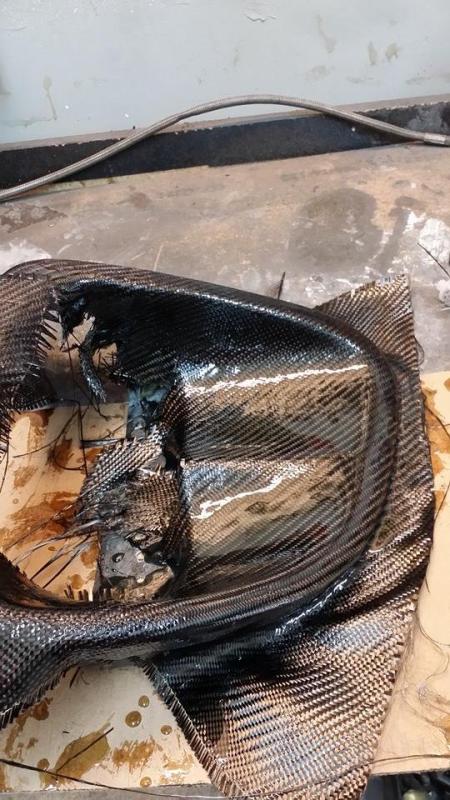
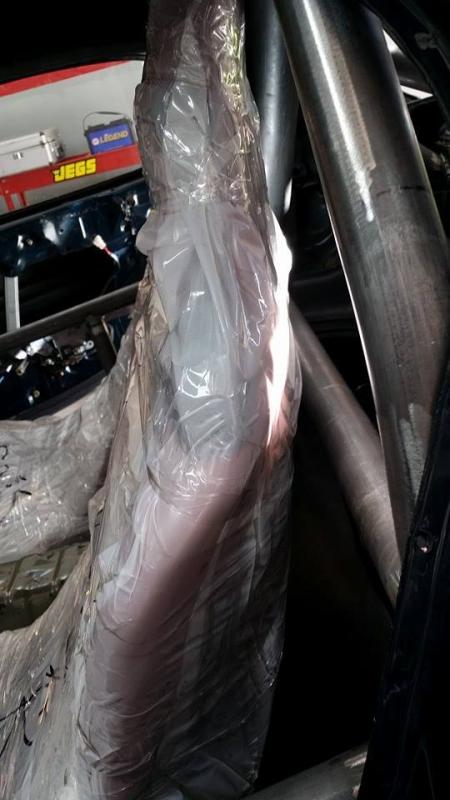
Since I am a cheap-*** and dont feel like painting the buckets again. I decided to take my authentic ReAmemiya buckets and hand lay carbon on them.
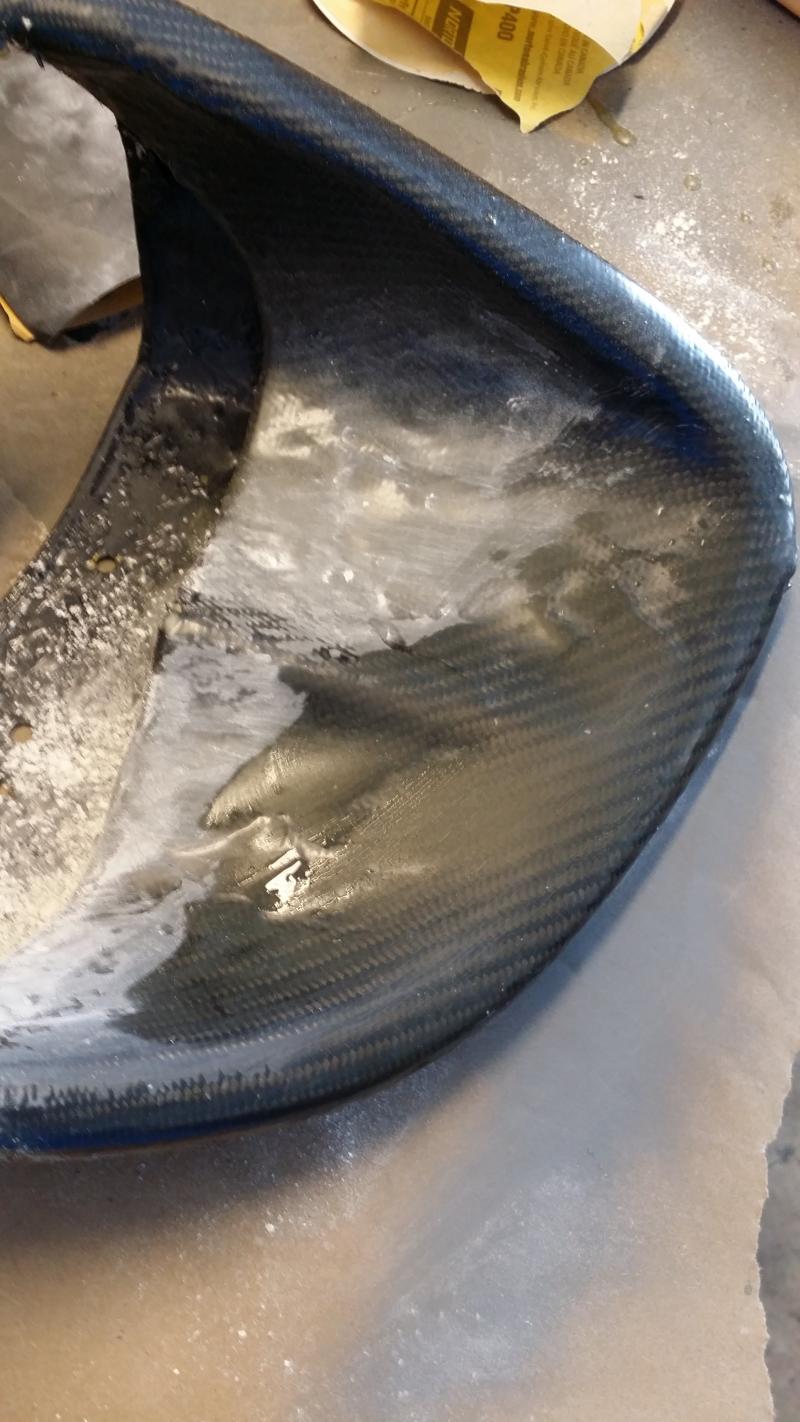
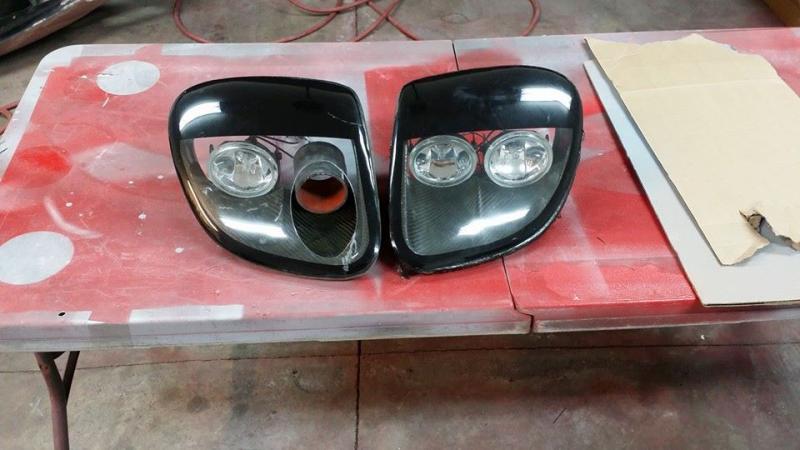
After a few hours of wetsanding the resin and smoothing the mounting edges. I decided since my passenger side light had a crack why not experiment and cut a vent until i source another set of lenses from ReA or EvoR.Far from been done

Last edited by Alex Rodriguez; Jan 25, 2015 at 02:28 AM.
Thanks guys everything i am posting began in Jun2014 keep checking the thread. I have over 2000 pictures and videos i will be posting. I should of done the thread a long time ago but car deserves it So here it goes.
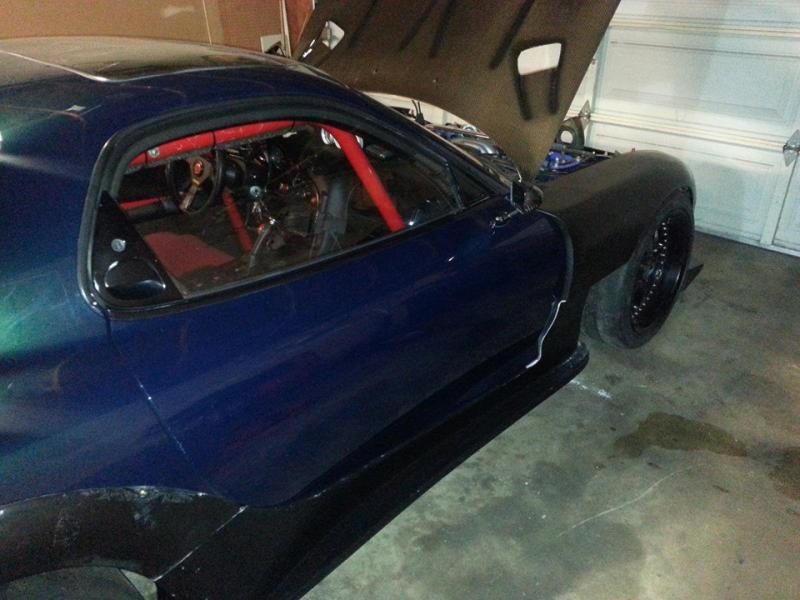
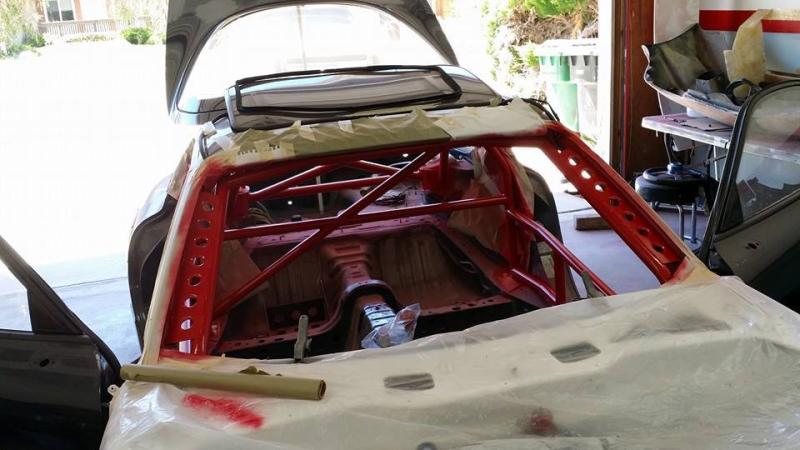
Now that the interior was stripped and i had some down time to attend other parts of the car that did not have to be on. I called up Daniel Carillo owner /welder of GSWERKS in Palmdale California to sit down with me and draw up a game plan for the cage. I wanted 10point with gussets, NASA and Drift legal. He made a few calls to racing sanctions for approval and we set on a game plan of 1 week from drop off to pick But there was a Twist I want my interior and to be able to install and remove my dash. With 3 of those days actually finishing the bending/welding. 2 of them were spent building the cage around my interior. Car was done in 5 days.
Window removed time to get busy
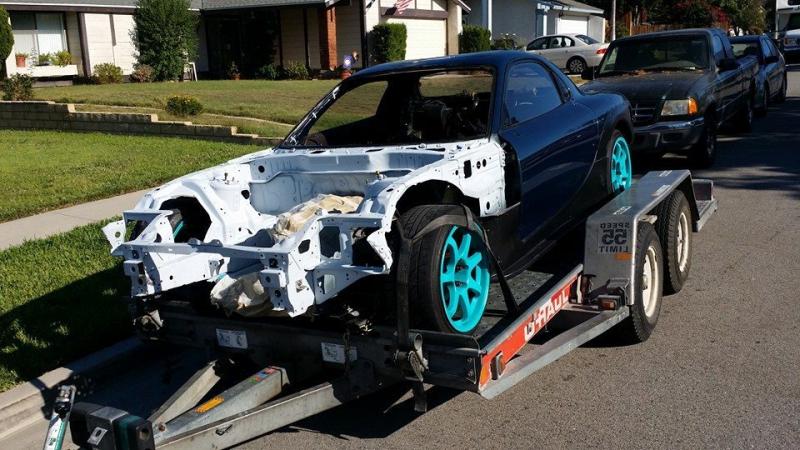
Engine bay still has ligh primer but roller wheels are on and off to GSWERKS
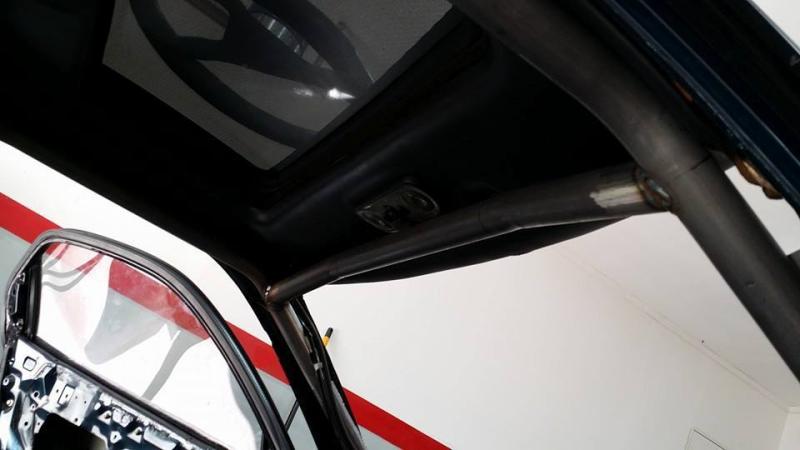
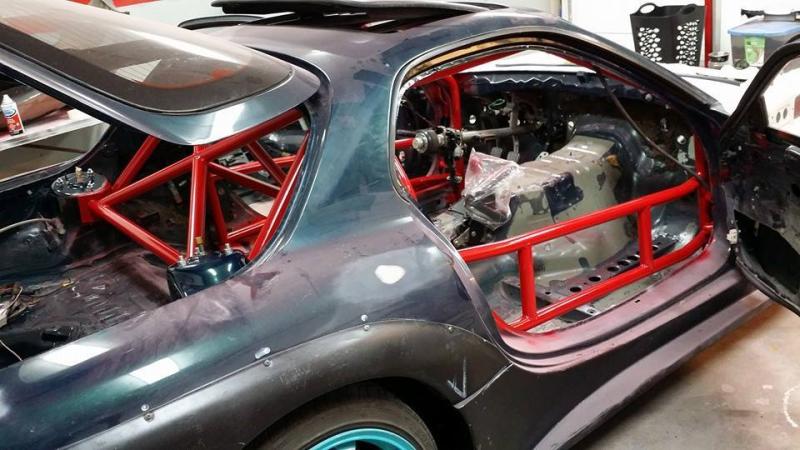
CAGE IS DONE!!!
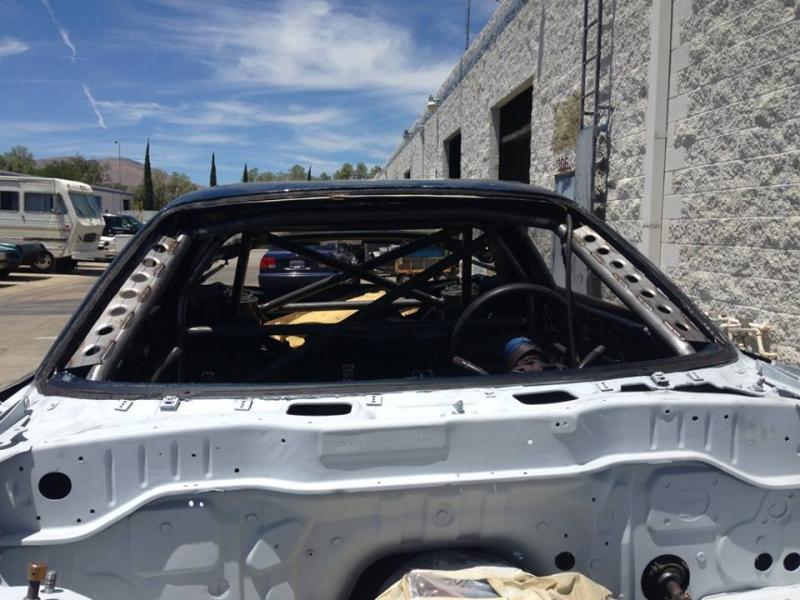
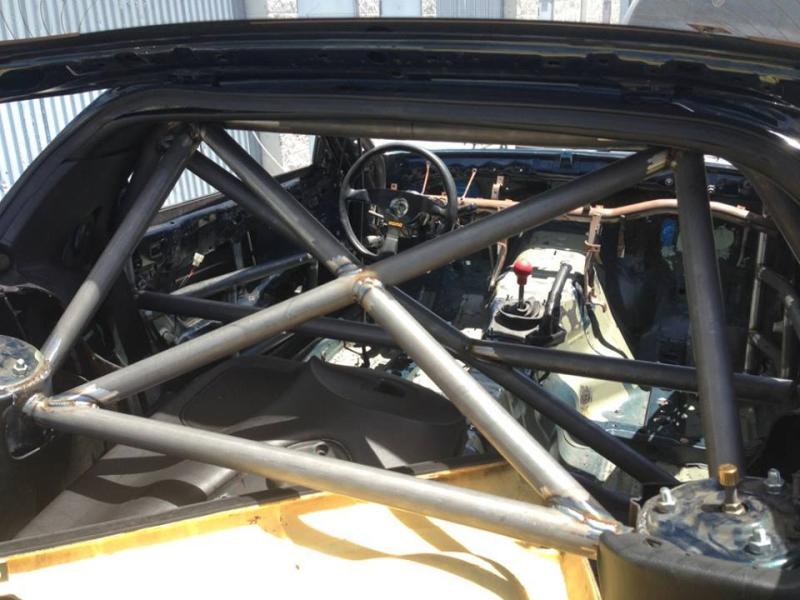
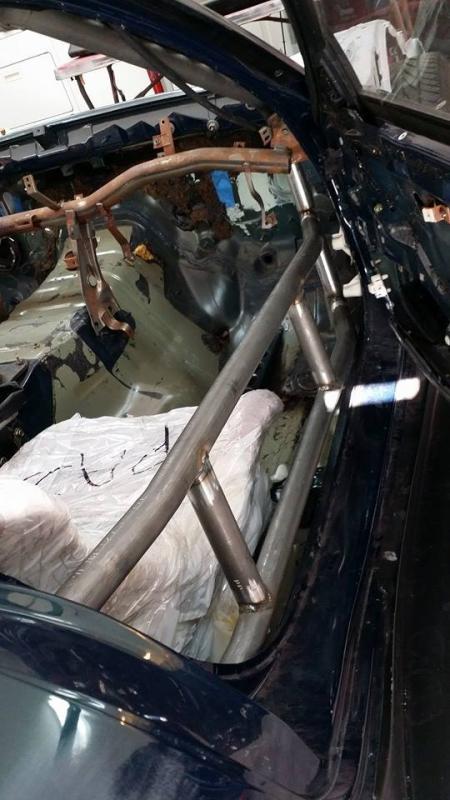
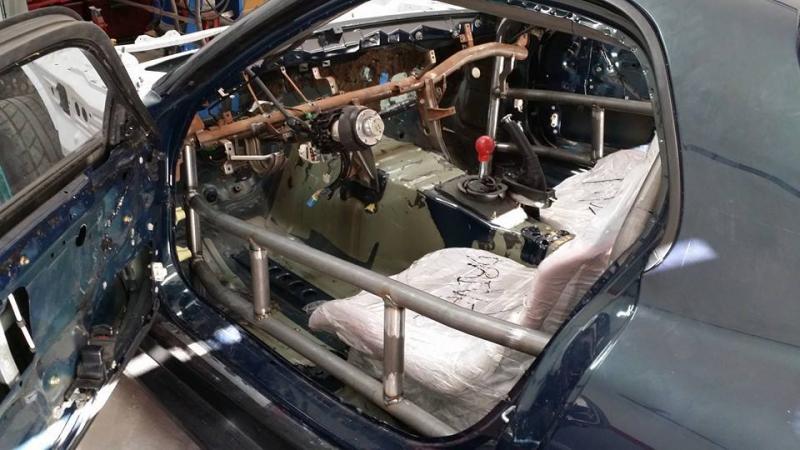
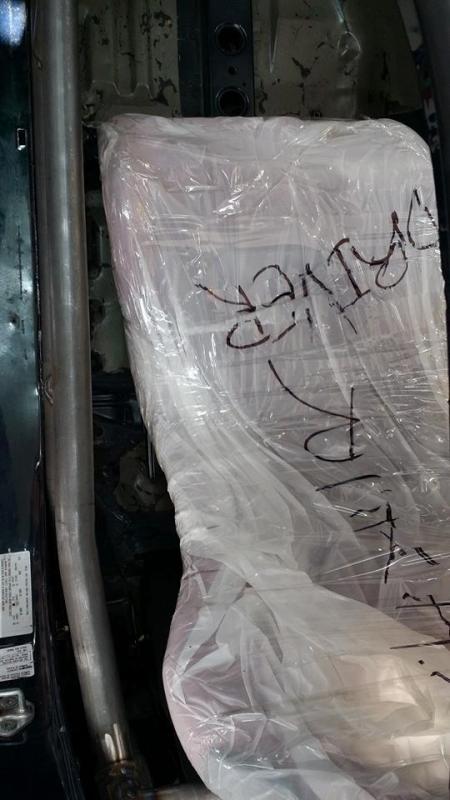
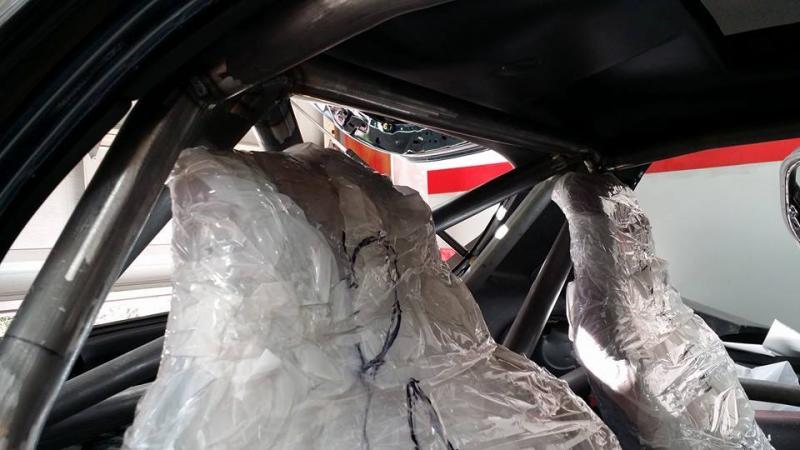
Seat room, plenty on the sides, head room as well no more tapping my head on the top bar and the seat all the way back.
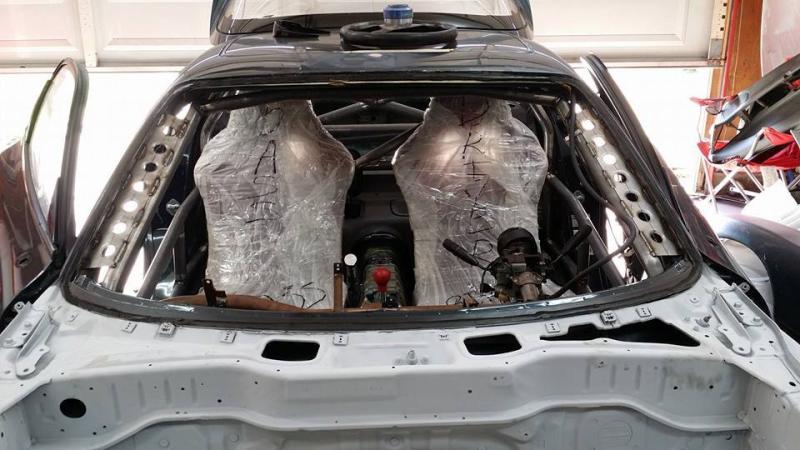
Now that the interior was stripped and i had some down time to attend other parts of the car that did not have to be on. I called up Daniel Carillo owner /welder of GSWERKS in Palmdale California to sit down with me and draw up a game plan for the cage. I wanted 10point with gussets, NASA and Drift legal. He made a few calls to racing sanctions for approval and we set on a game plan of 1 week from drop off to pick But there was a Twist I want my interior and to be able to install and remove my dash. With 3 of those days actually finishing the bending/welding. 2 of them were spent building the cage around my interior. Car was done in 5 days.
Window removed time to get busy

Engine bay still has ligh primer but roller wheels are on and off to GSWERKS

CAGE IS DONE!!!


Seat room, plenty on the sides, head room as well no more tapping my head on the top bar and the seat all the way back.


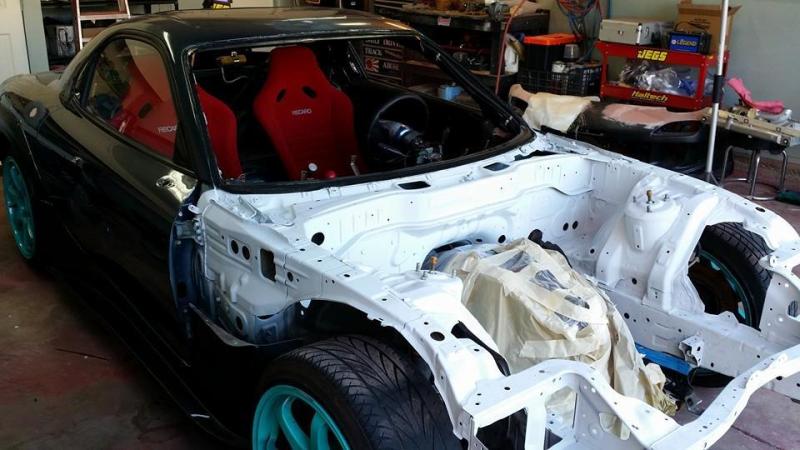
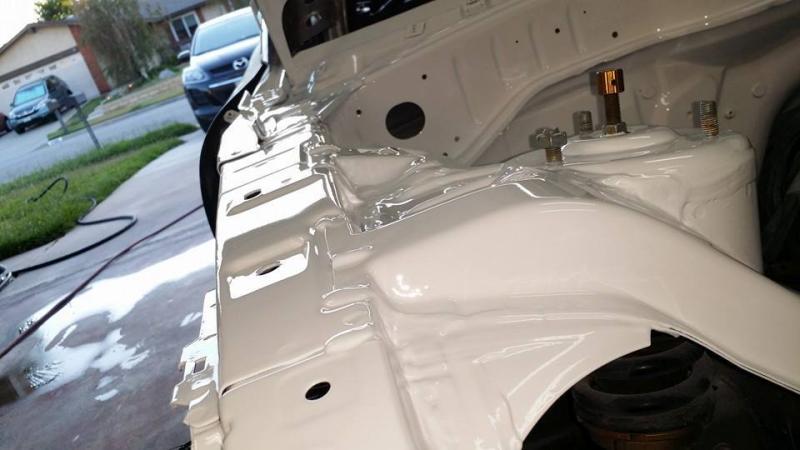
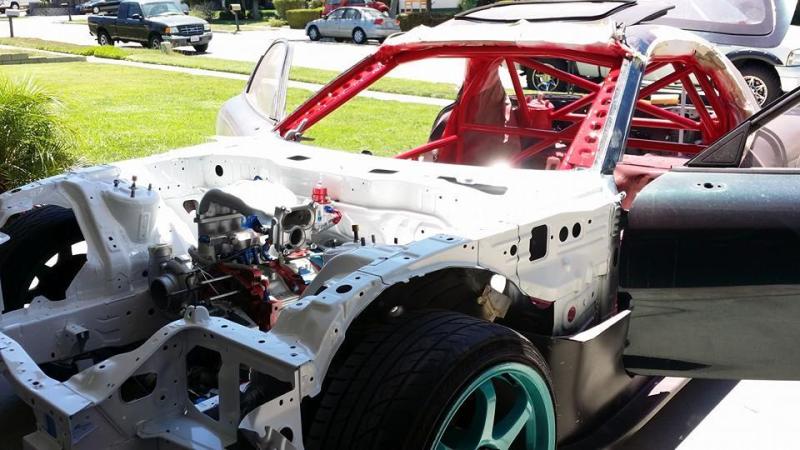
Engine bay wetsanded and prepped for the 2012 Lexus LFA Whitest White.
Boom
A little bit of sunrise red to gow ith a black interior and recaro spirit r seats should set it off.

Boom


A little bit of sunrise red to gow ith a black interior and recaro spirit r seats should set it off.


Last edited by Alex Rodriguez; Jan 24, 2015 at 03:29 AM.


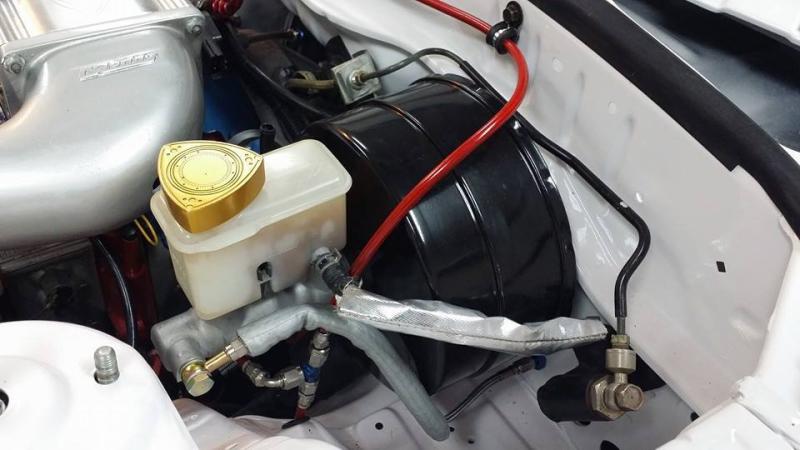
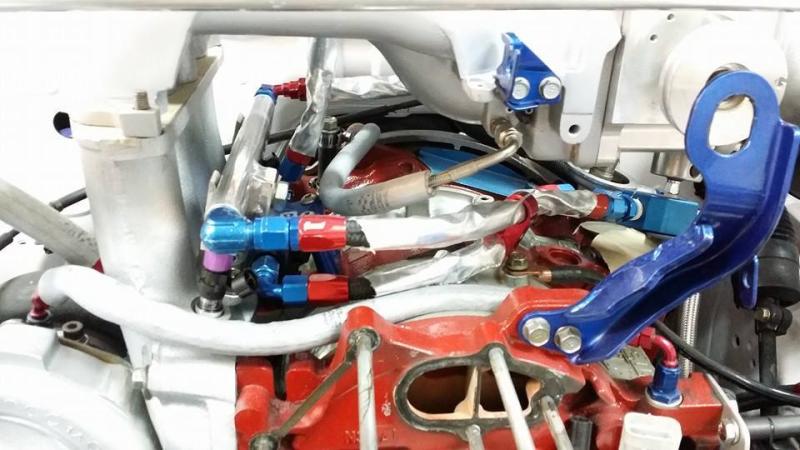
My custom coolant neck and water pump outlet with welded AN fittings and stripped the smog pump bracket and any misc extra material not needed.


Last edited by Alex Rodriguez; Jan 25, 2015 at 02:40 AM.

Fun is just beginning gents
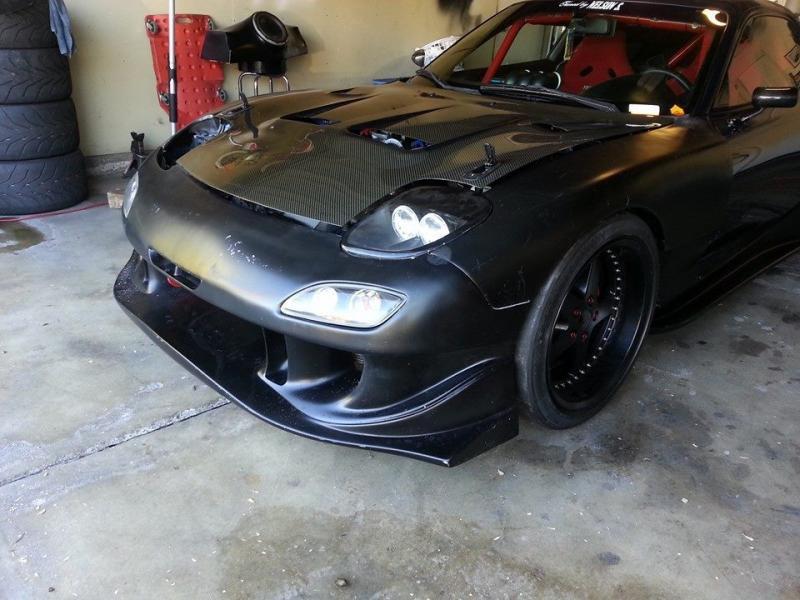
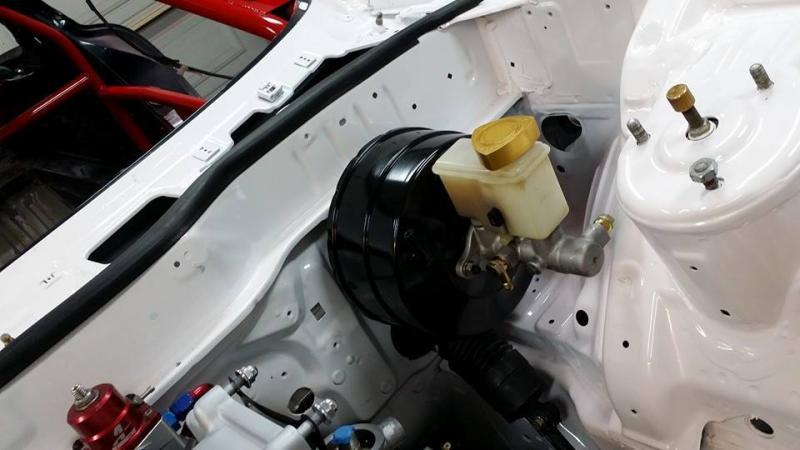
Updates as promised. I waited a couple days after the clear was cured and began installing all my peripherals back on.


This is where my ecu harness and any other wire will now be rerouted to. Away from heat and short.
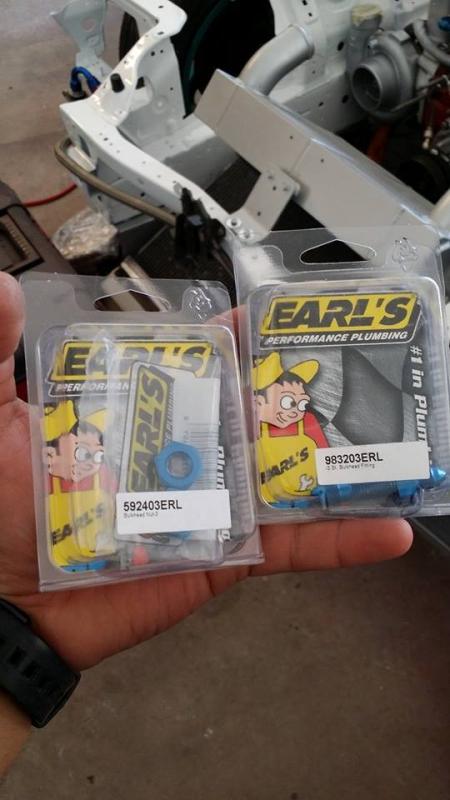
Bulkhead -3AN adapters for my Brake lines for the Hydraulic rear brakes.
Updates as promised. I waited a couple days after the clear was cured and began installing all my peripherals back on.


This is where my ecu harness and any other wire will now be rerouted to. Away from heat and short.

Bulkhead -3AN adapters for my Brake lines for the Hydraulic rear brakes.


I trimmed the center console to fit around the Hydraulic brake also deleted all the buttons and lines.
Welded a bracket to the center bar to hold my proportioning valve.
I bent som heavy gauge steel I had. Then welded the two and drilled the holes for the top and bottom. Sits flush and its beyond sturdy.
I say she is pretty level
Got these cool mounts from a new sponsor at Kartek they are remote reservoir mounts for my Stance GR+3 ways
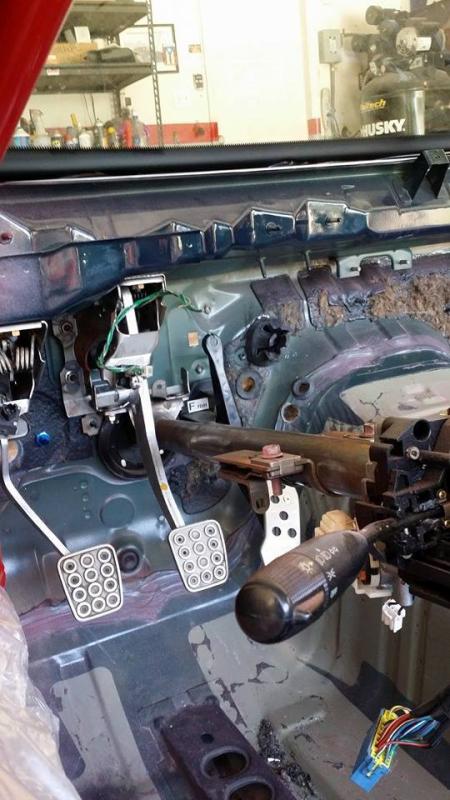
Here in the bottom left by the brake pedal mount you will see where my rear brake lines route.


Welded a bracket to the center bar to hold my proportioning valve.

I bent som heavy gauge steel I had. Then welded the two and drilled the holes for the top and bottom. Sits flush and its beyond sturdy.


I say she is pretty level

Got these cool mounts from a new sponsor at Kartek they are remote reservoir mounts for my Stance GR+3 ways


Here in the bottom left by the brake pedal mount you will see where my rear brake lines route.


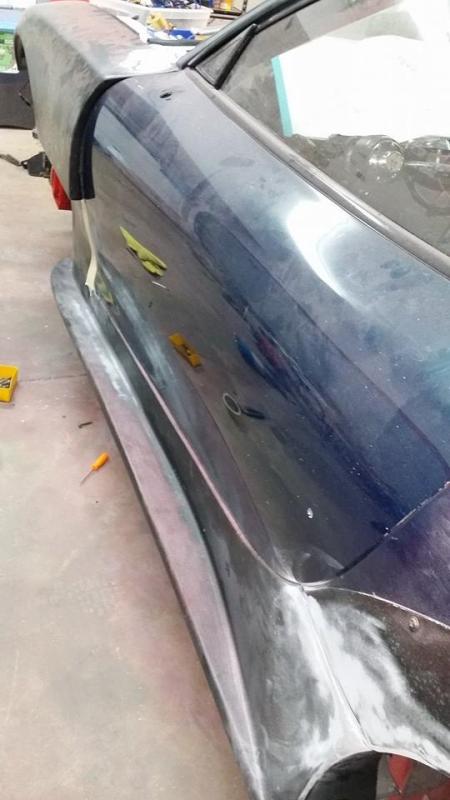
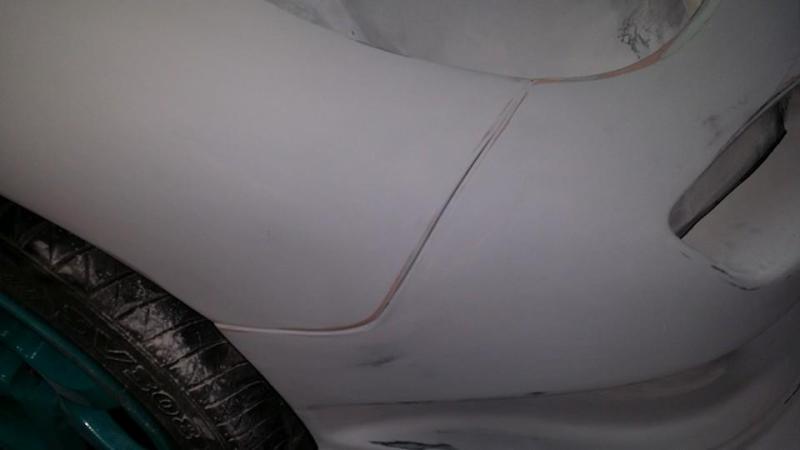
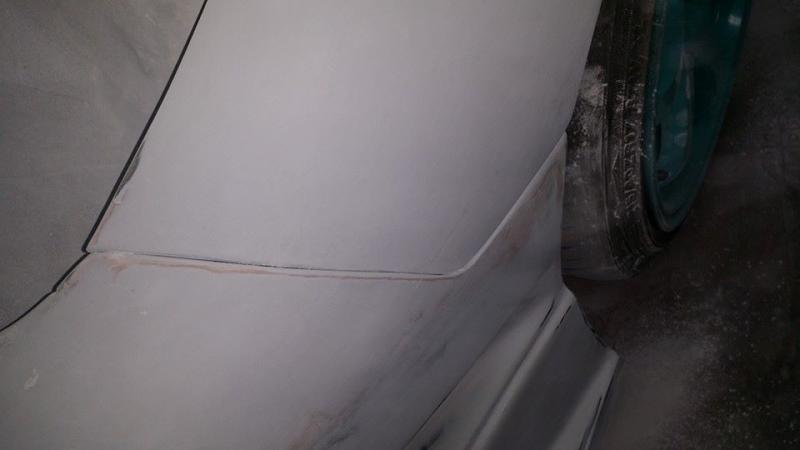
Did you fuse hour fenders and bumper together and then cut them to make your own fender gap? Is that just a method of getting it perfect? (I have no real body work experience other than occasional fiber glass projects)


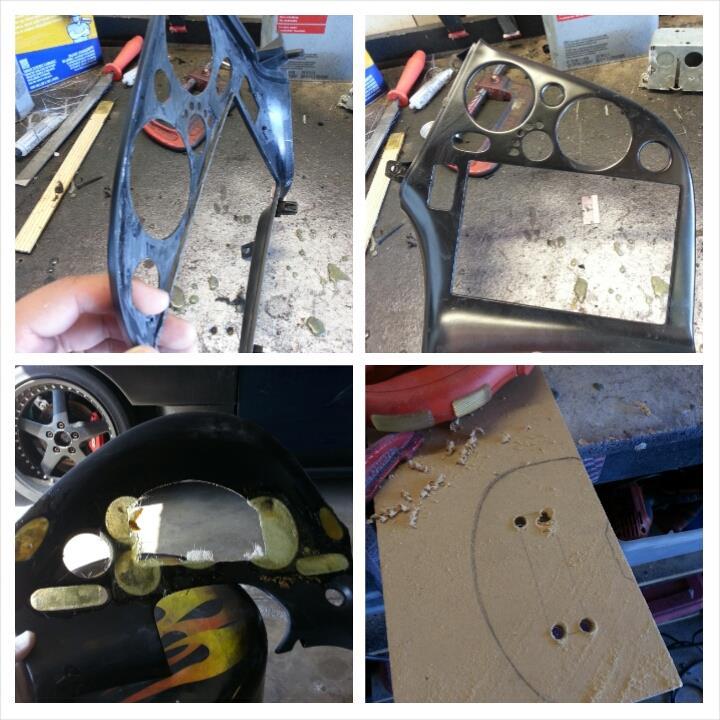
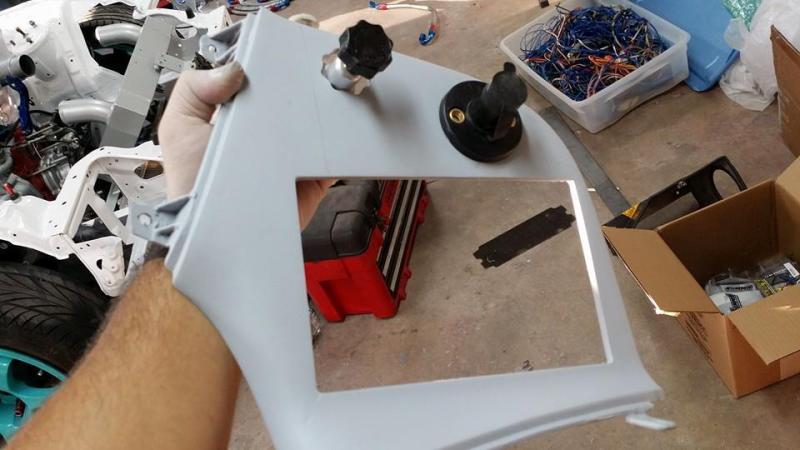
First coat of the new Gauge cluster and center panels


HERES THE FUN PART ......WIRING!!!!!YEEEEE
My main goal was to retain the oem combination switch to control my lights,wiper and turn signals. A few hours studying the wiring diagram and asking a few friends who were in the process in doing the wiring we managed to pin point every single wire and adapted it to the Painless 21 circuit kit. We also did the Haltech harness as well. I want to thank John Vargas, Joey Rivera, John Ambrosio,Jason Hite and Jimmy Cade. With their help we managed to wire the car up in no time...just lying it was a nightmare but easy.


Last edited by Alex Rodriguez; Jan 25, 2015 at 02:16 AM.
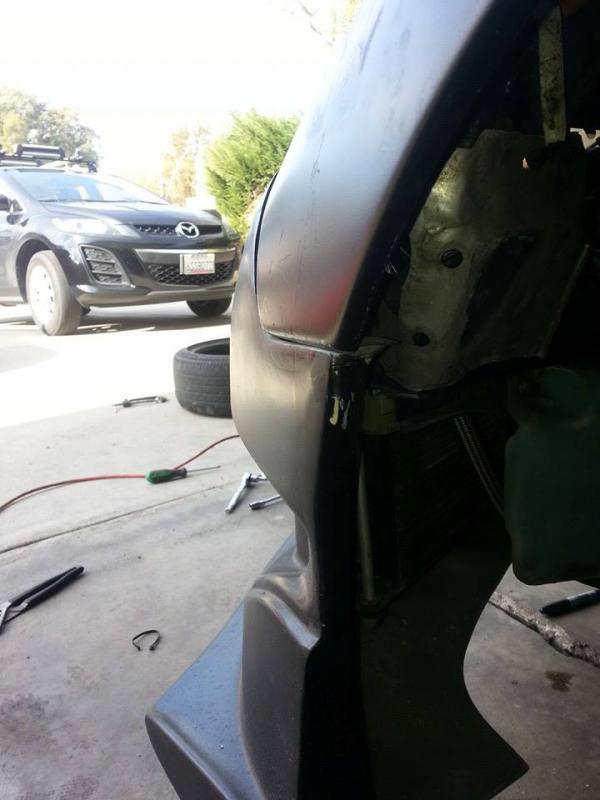
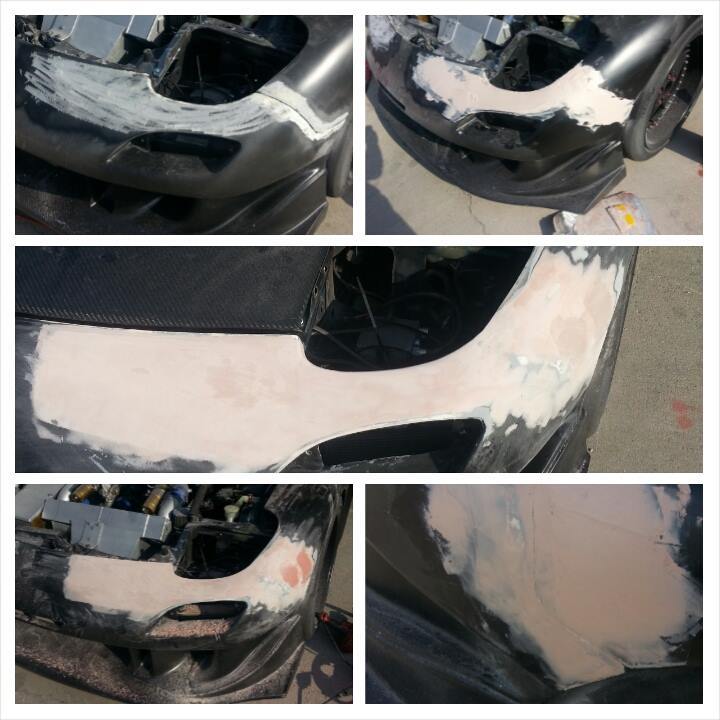
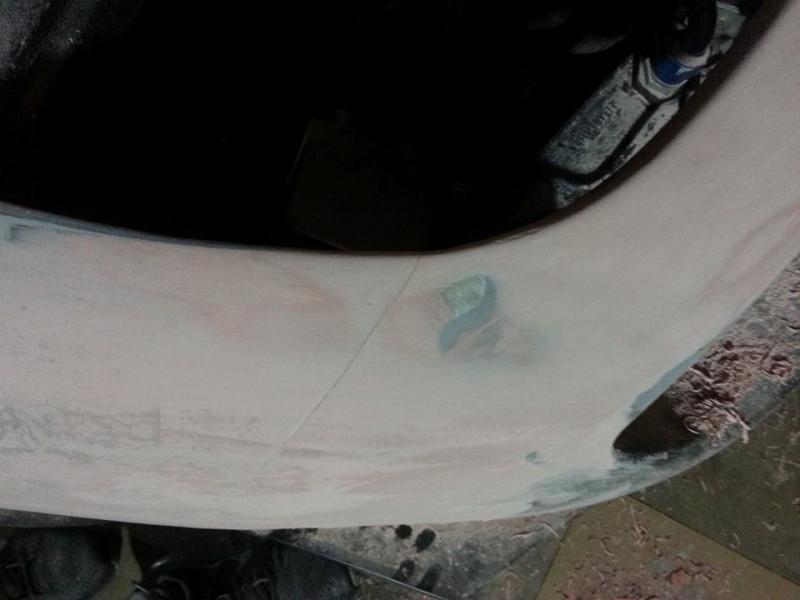
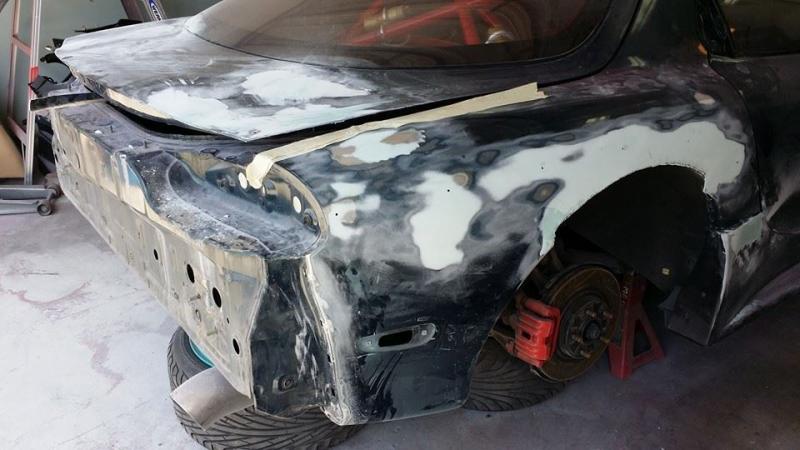
My method is get the two body parts to join as close as possible. Sand the area with 80grit then areas where they joint with 40grit on a DA. Then I lay bondo on the whole section evenly to get the actual body form and countours. Just before it hardens i get a razor blade and cut the joint lines. A few minutes after i tap the panel with my fist to ensure both pieces are seperate then feather both joints to create a perfect body line.
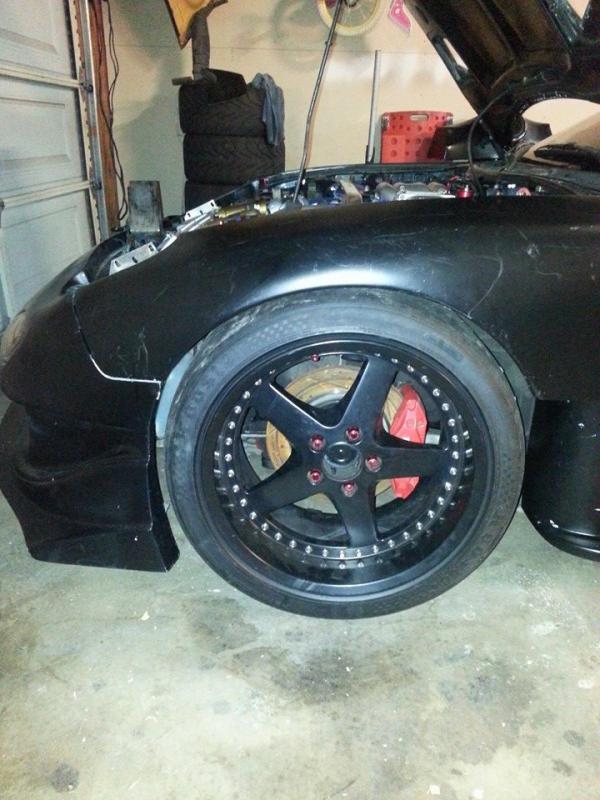
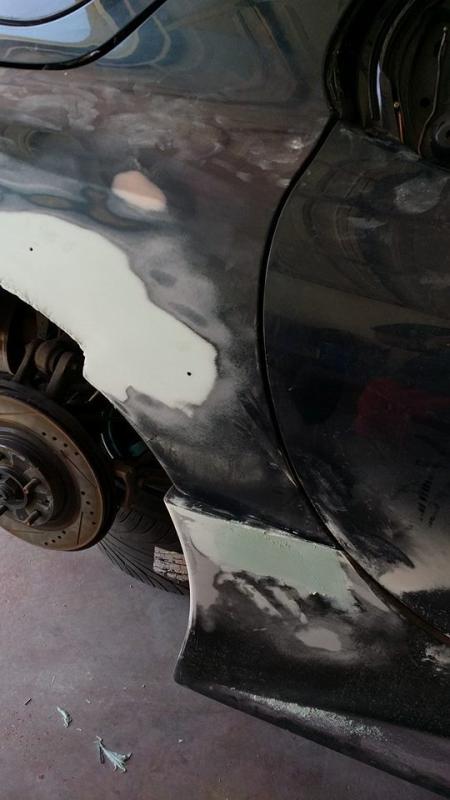
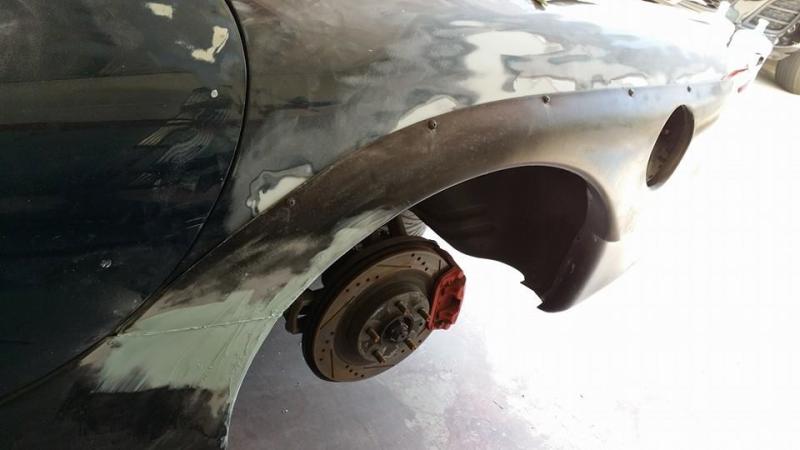
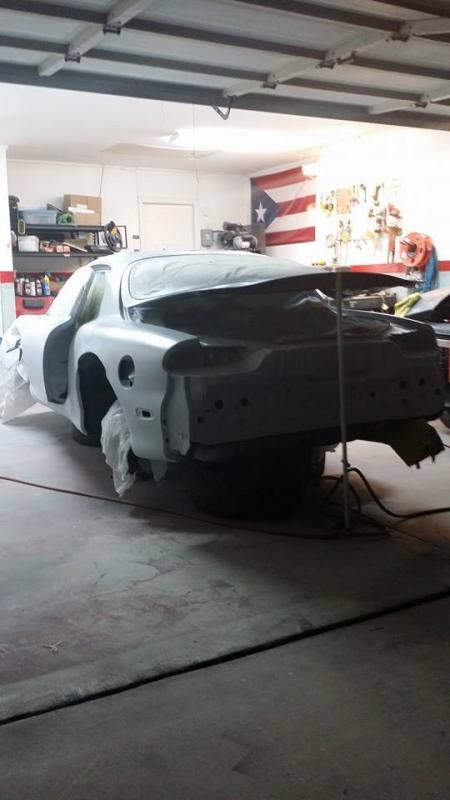
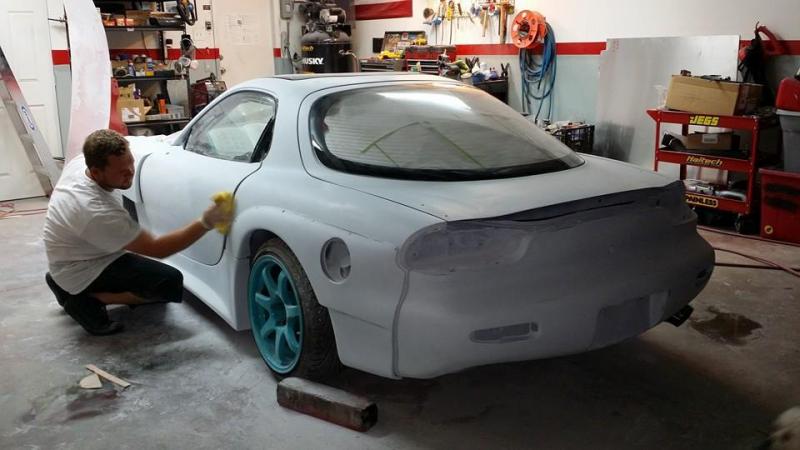
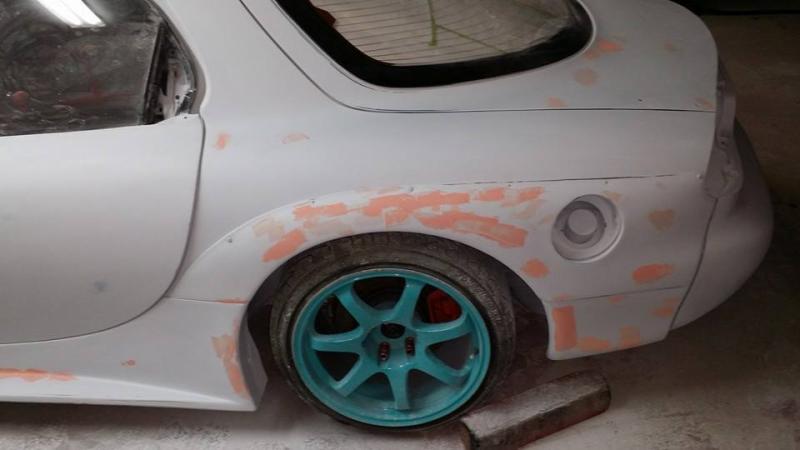
Rear quarters cut up and welded the whole seam. This is the tideous part of the build. I absolutely hate cutting quarter panels but for the track days this car will see its a must.

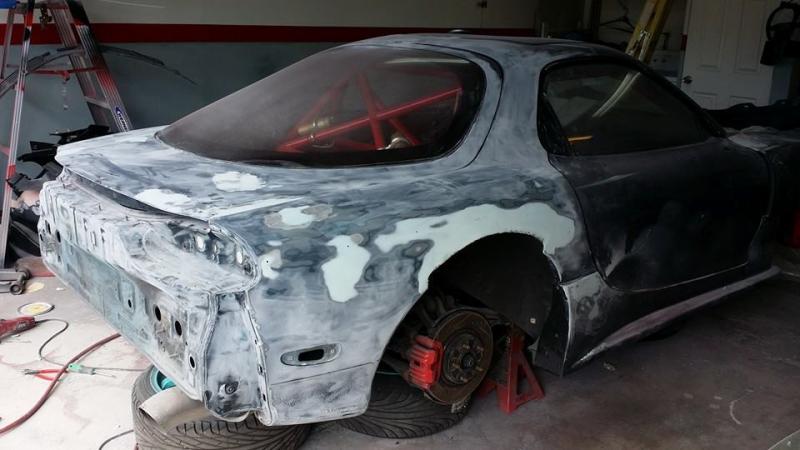
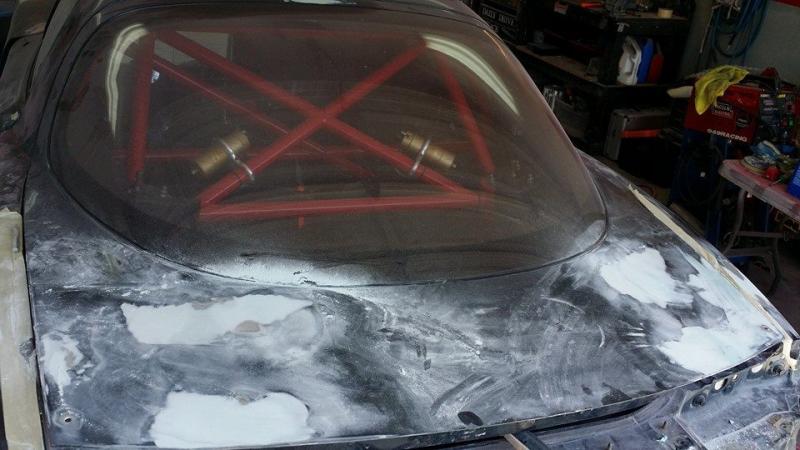


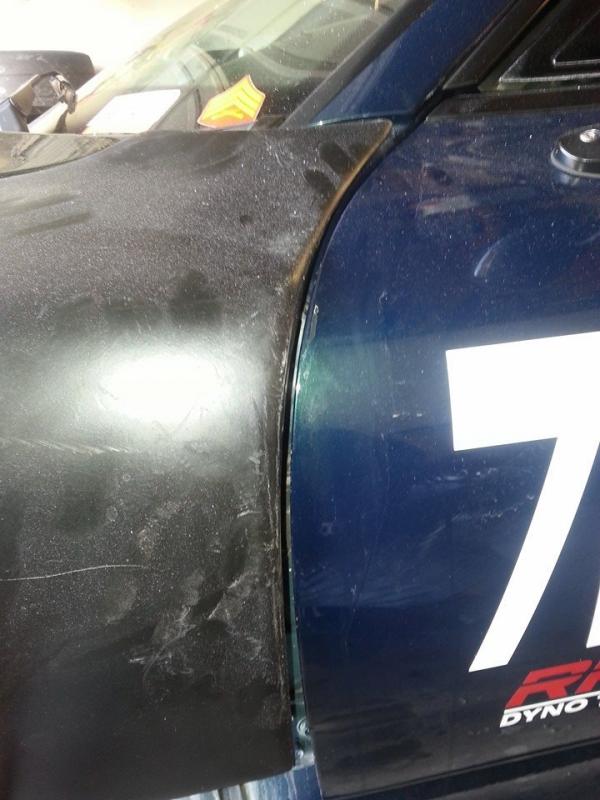
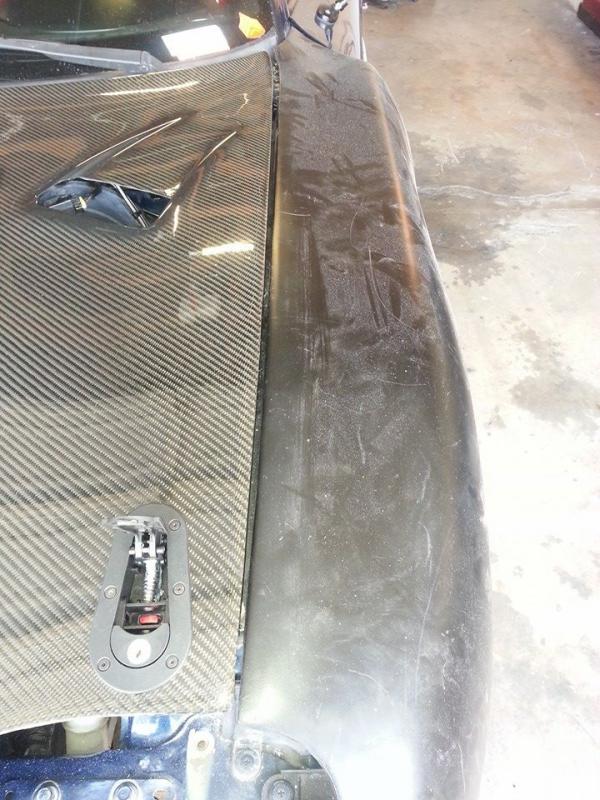
This next section getting the car ready for paint in the short amount of time I had was almost impossible if my cousin Kyle wouldnt taken his vacation time to help me finish. We spent almost a week from the time he arrived to the day we finished the car. For those that dont know I do all my bodywork and paint as well. My garage was converted into a booth. I had 2 puller fans on my side door to 4 filters. I also have 6 2x4 lights in my ceiling. Prior to painting the whole garage was tarped and degreased washed out.Enjoy

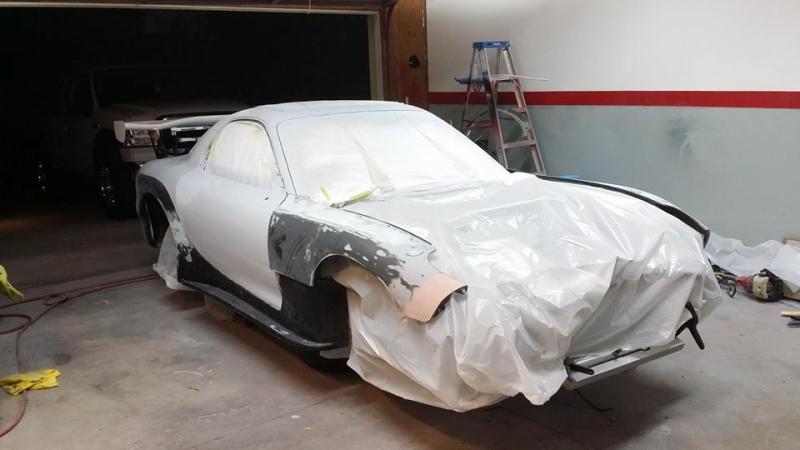


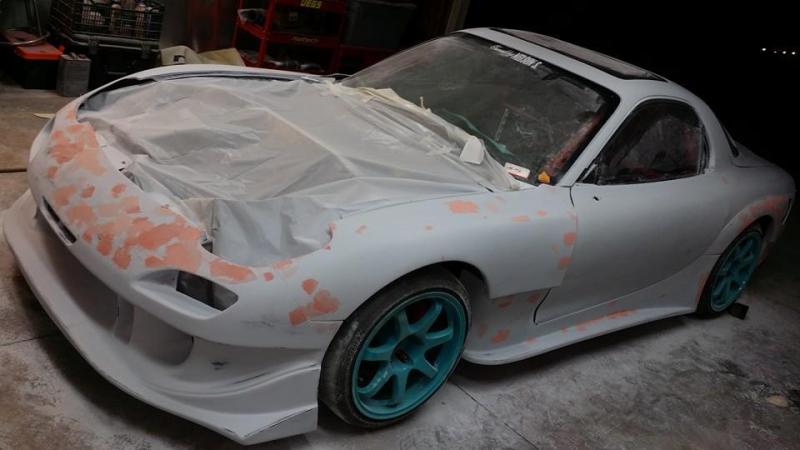
glazing and spot putty the whole car to cover up all the imperfections,scratches,nicks,dings etc....


glazing and spot putty the whole car to cover up all the imperfections,scratches,nicks,dings etc....


This next section getting the car ready for paint in the short amount of time I had was almost impossible if my cousin Kyle wouldnt taken his vacation time to help me finish. We spent almost a week from the time he arrived to the day we finished the car. For those that dont know I do all my bodywork and paint as well. My garage was converted into a booth. I had 2 puller fans on my side door to 4 filters. I also have 6 2x4 lights in my ceiling. Prior to painting the whole garage was tarped and degreased washed out.Enjoy


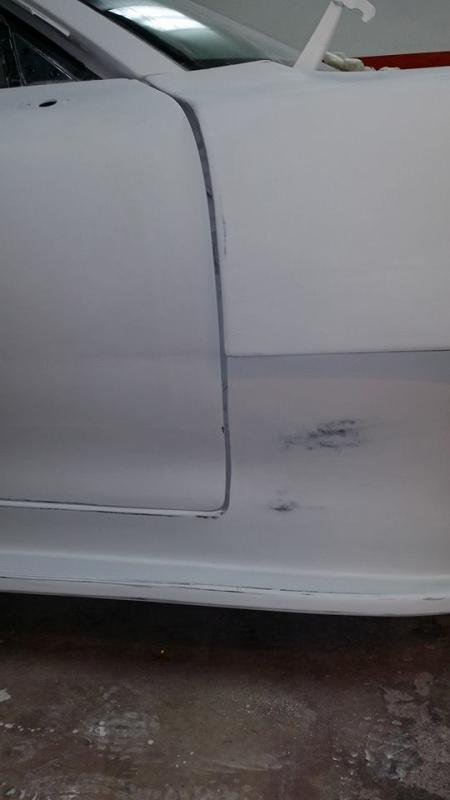


glazing and spot putty the whole car to cover up all the imperfections,scratches,nicks,dings etc....

glazing and spot putty the whole car to cover up all the imperfections,scratches,nicks,dings etc....