The adventures of Danny Mac and Pirate Hooker

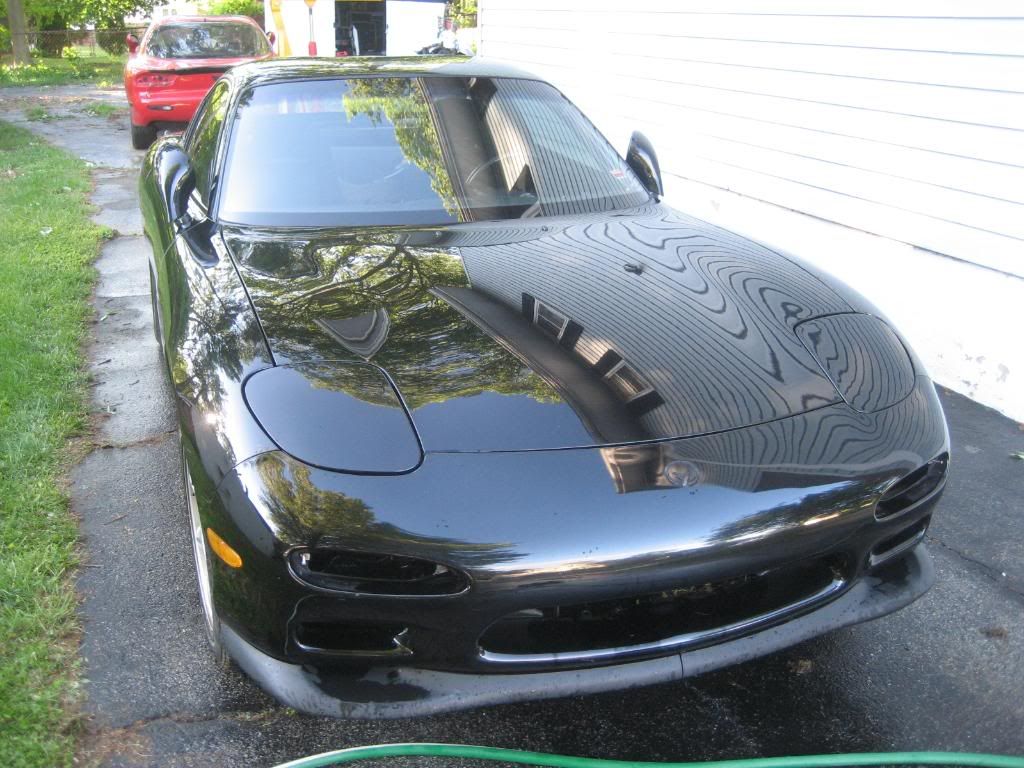
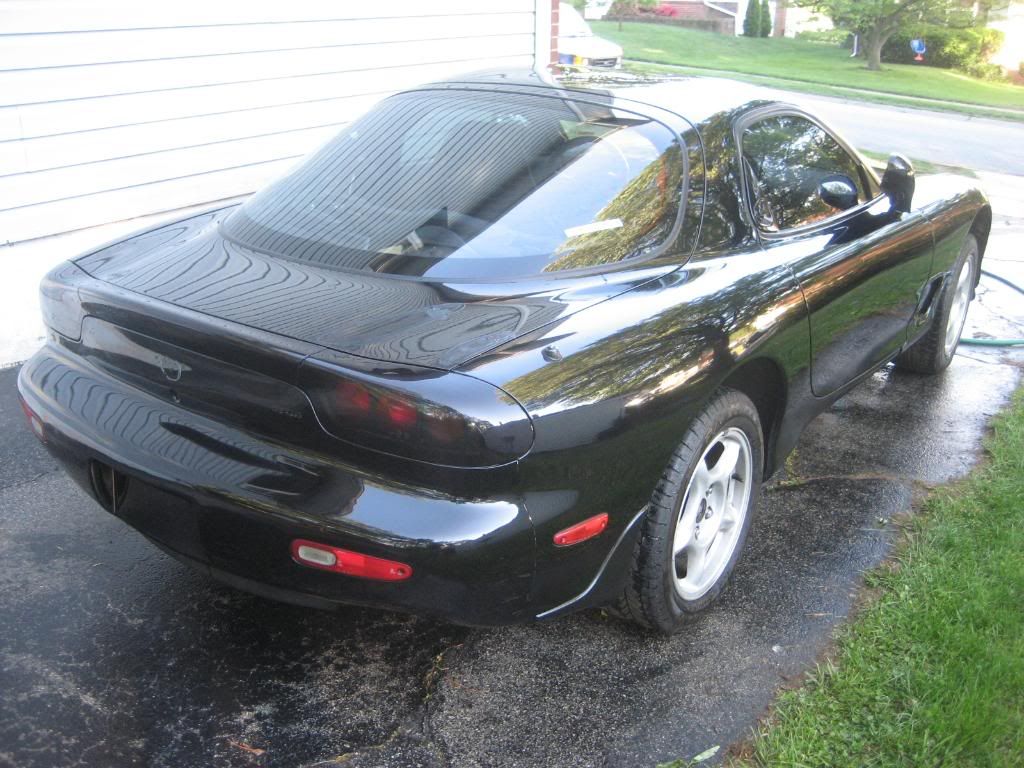
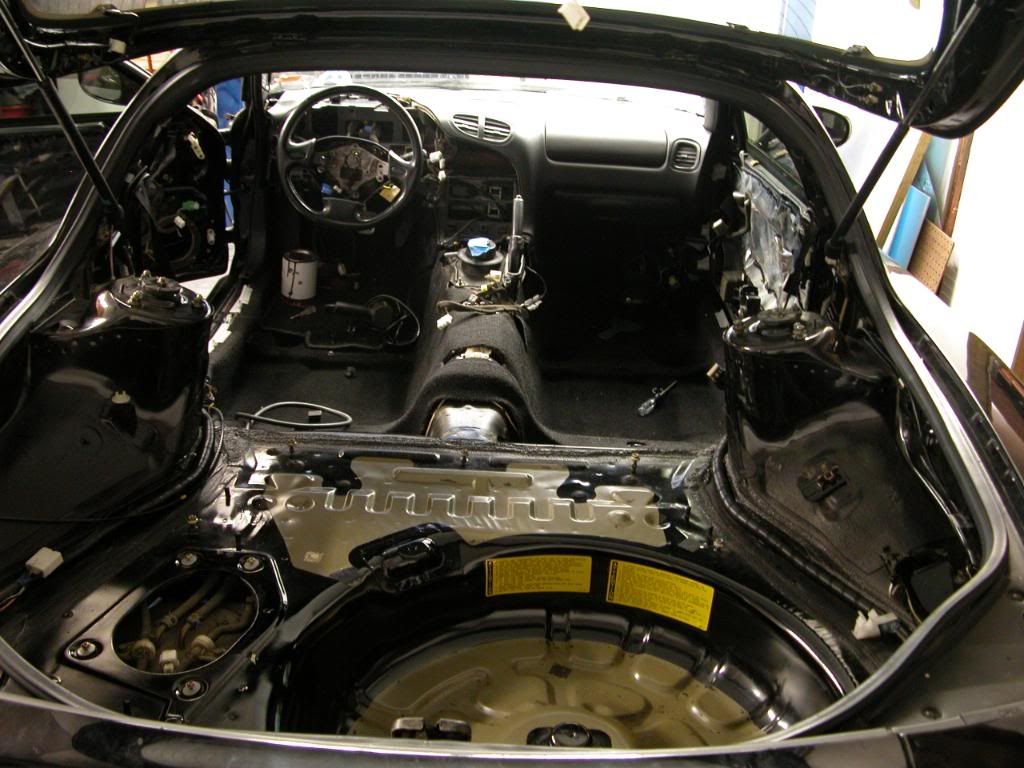
I would like to introduce to everyone my 94 BB R2 more formally known as “Pirate Hooker.” I bought the car as a roller with a “clean” title a few years ago. Initially I was going to build this car quickly with moderate power levels. Nonetheless, I have a bit of OCD when it comes to building my cars, so that idea went out the window quickly. For a while the car just sat in storage until I had the parts and time to actually make progress on it. Here are a few pictures of what it looked like when I bought it. These pictures were taken about a year after purchase and I replaced the rear hatch glass and temporarily removed the rear wing.
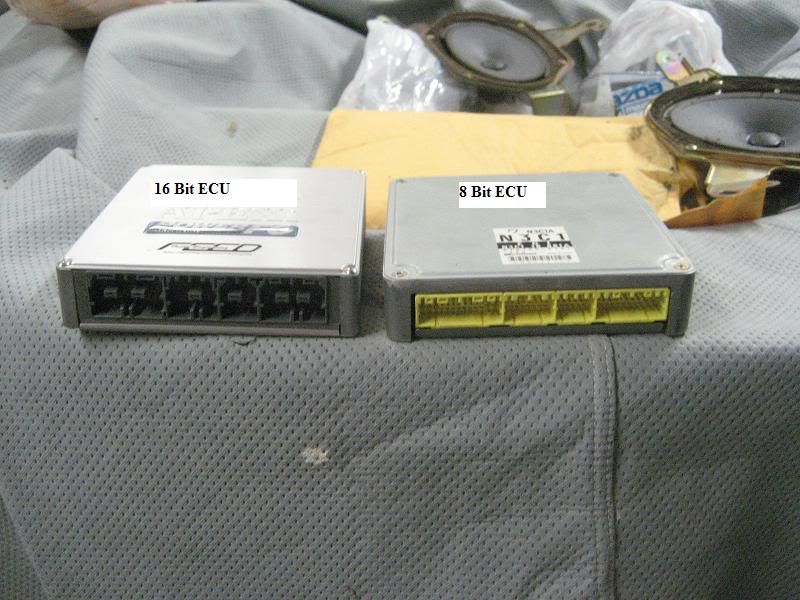
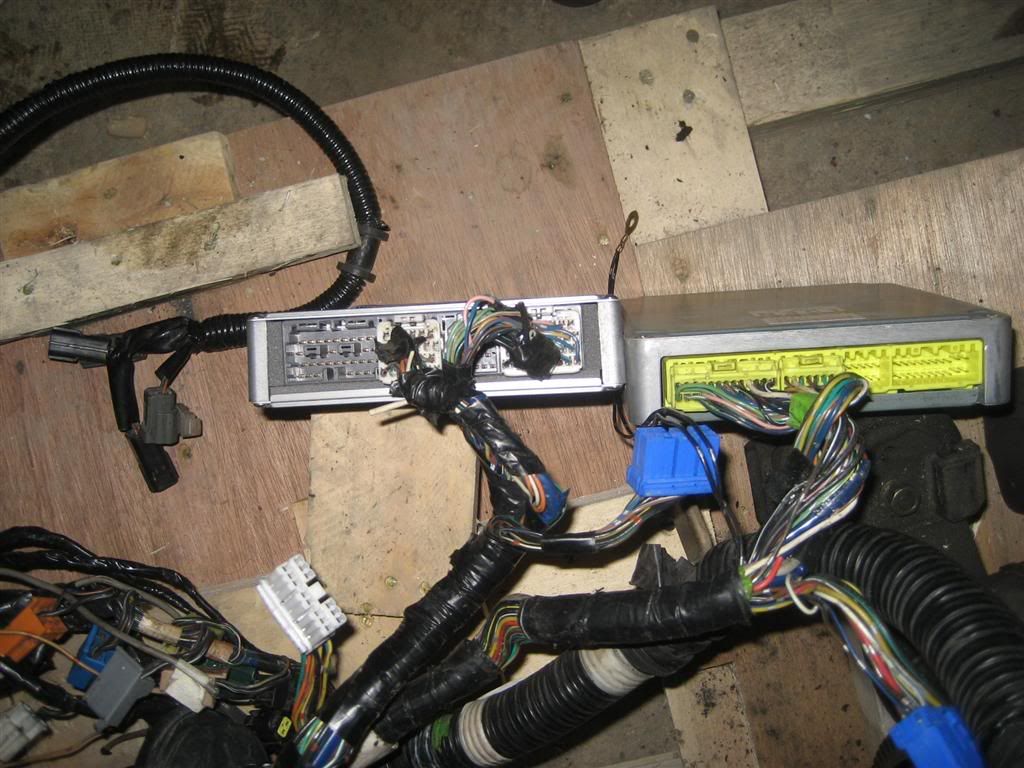
In my infinite wisdom I thought it would be a good idea to buy an engine from Japan instead of trying to piece together one from here. Thanks to FDNewbie; a few grand and about half a year later, I had a shiny, used low mileage 99 spec long block (including turbos) and transmission. When I purchased the engine, I did not realize it was going to come with an uncut wiring harness as well ::BONUS:: I will come back to the wiring harness later though…. I managed to find a 99 spec PFC from Japan which is basically plug and play, or so I thought. instead of trying to piece together one from here.
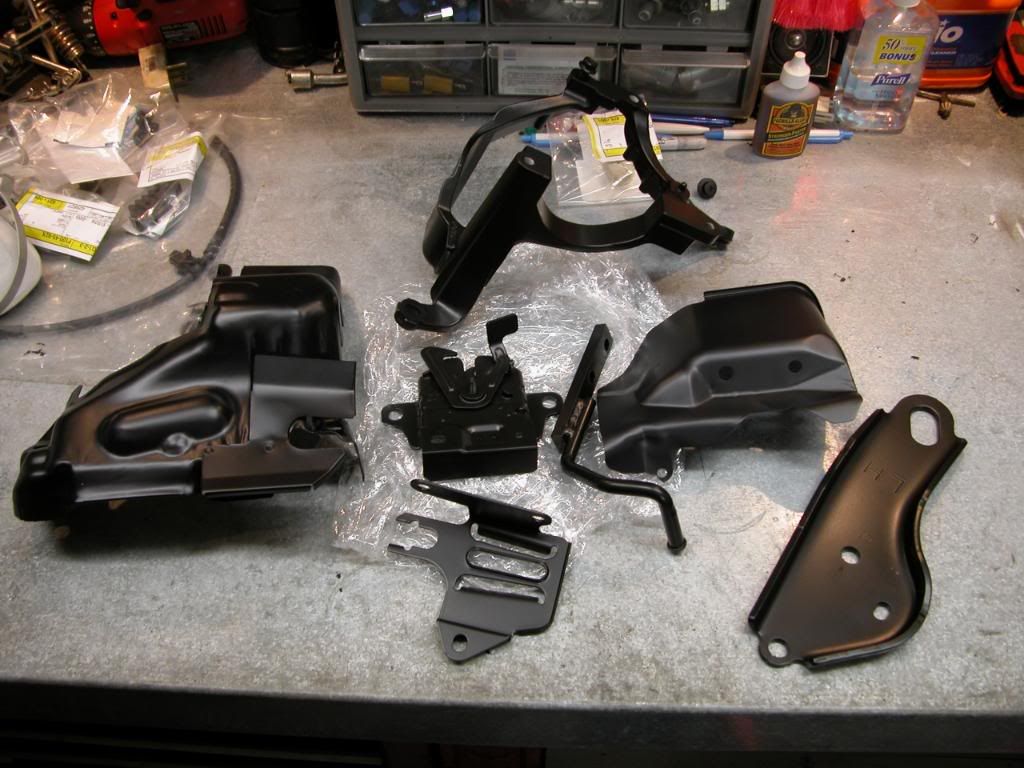
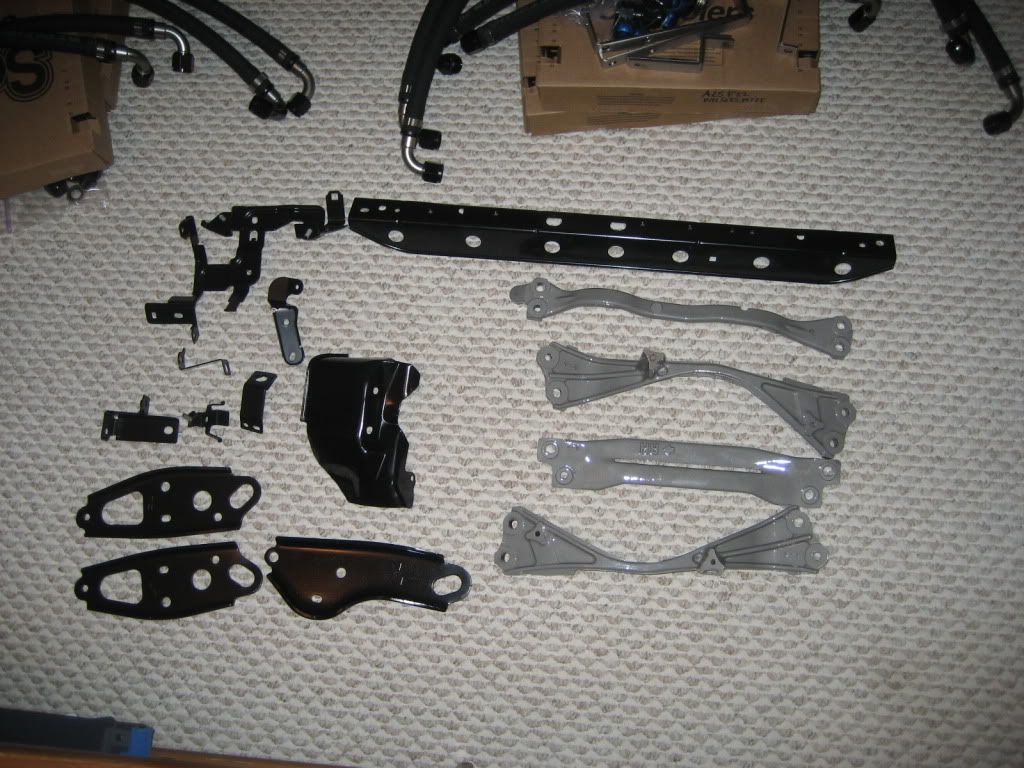
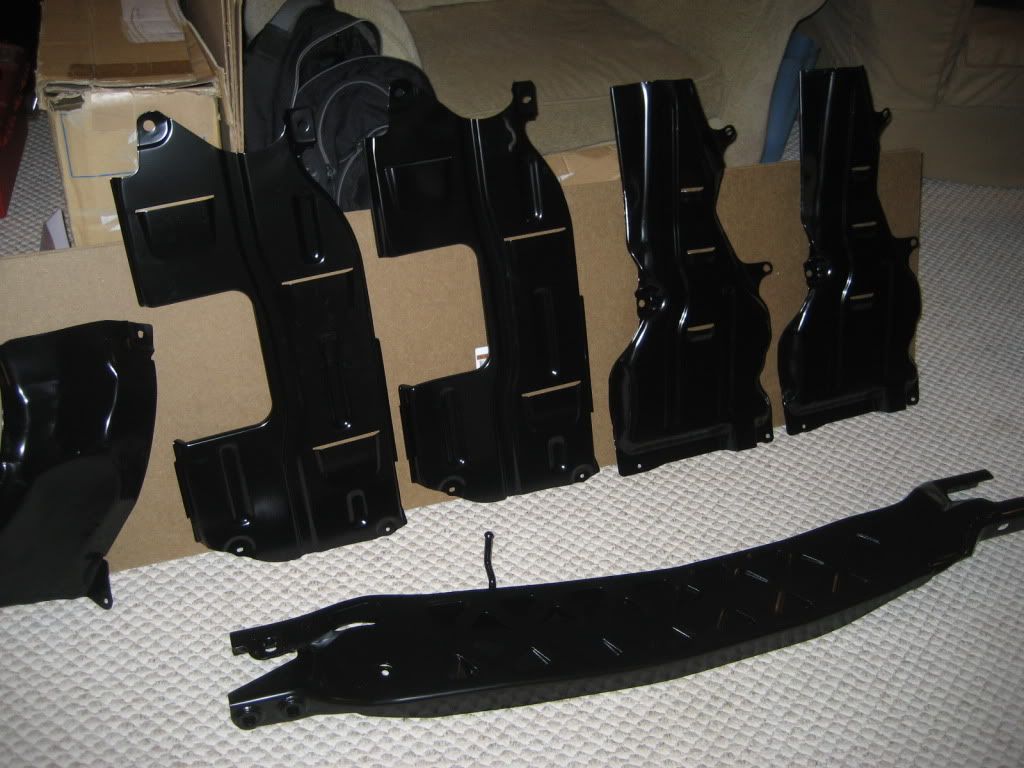
Naturally I decided to take most of the parts off the engine and have them Ceramic (UIM, Y pipe, DP, turbo inlet) and powder coated. While I was at it, I replaced all the vacuum lines with silicone, and whatever check valves I could get to (some are sealed in the black vacuum box). My little project had quickly turned into a restoration. Since my powder coater usually hooks me up if I take him large quantities of parts I tried to think what else I could get coated. A lot of parts in the engine bay get greasy and are difficult to clean, unless they have been coated. Here are a few of the parts I had coated. I’m sure I’m missing a few:
-ABS bracket
- ABS heat shield (ceramic)
- rear exhaust hanger
- hood latch
- rear tie down hook
- Turbo heat shield
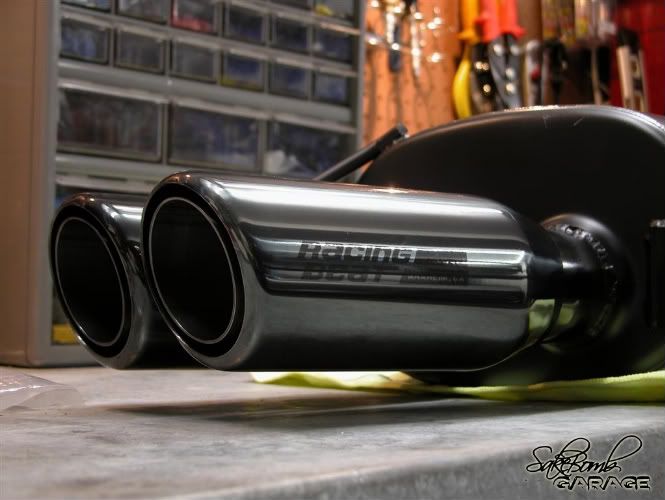
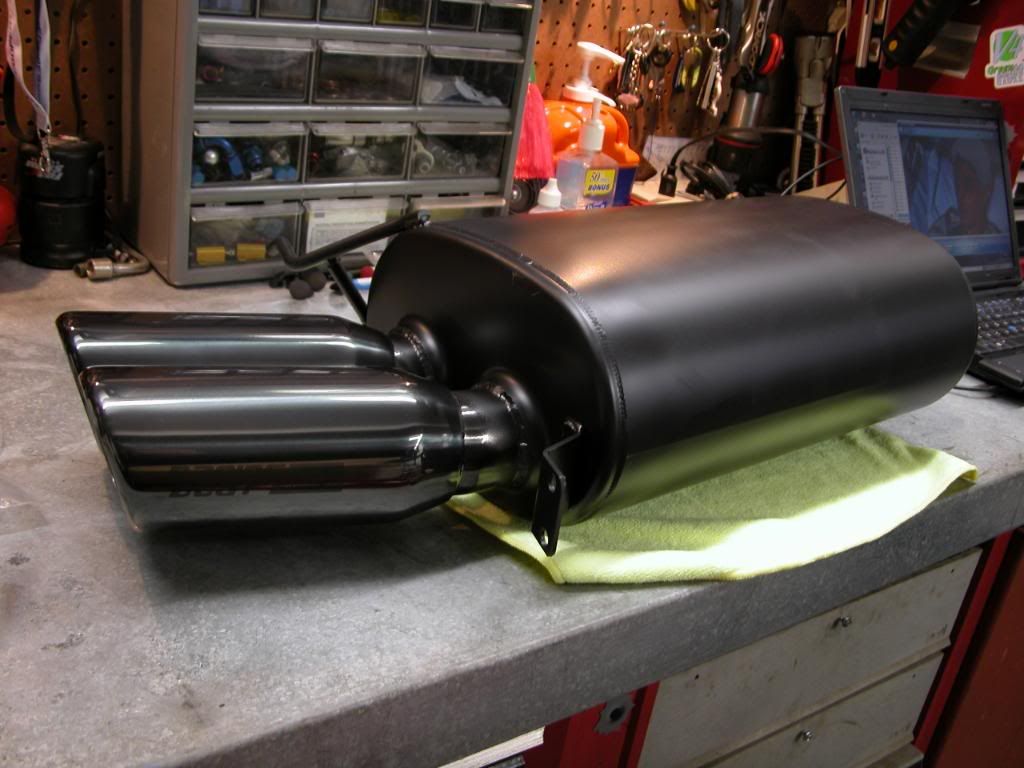
- Racing Beat Dual tip (Ceramic coated muffler, Candy black coated tips)
- HKS RS intakes
- Stock pullies (gloss black)
- Chassis braces (clear)
- PPF
- under body shields
- Firewall coolant pipe and brake booster pipe
- Other **** I don’t feel like listing
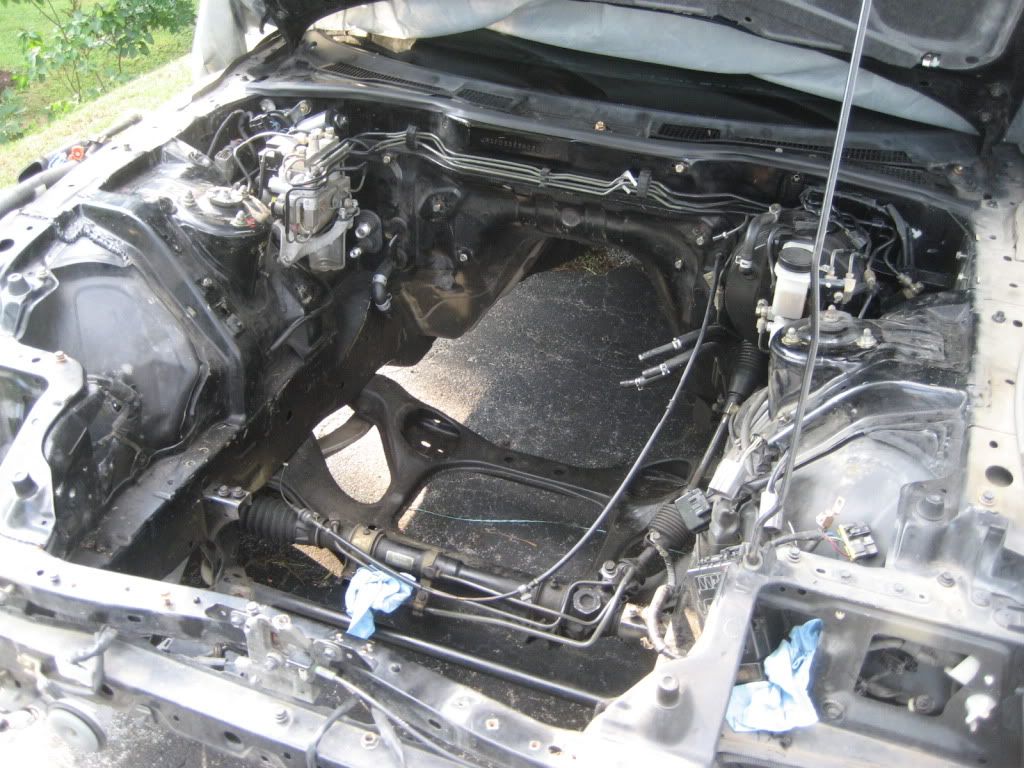
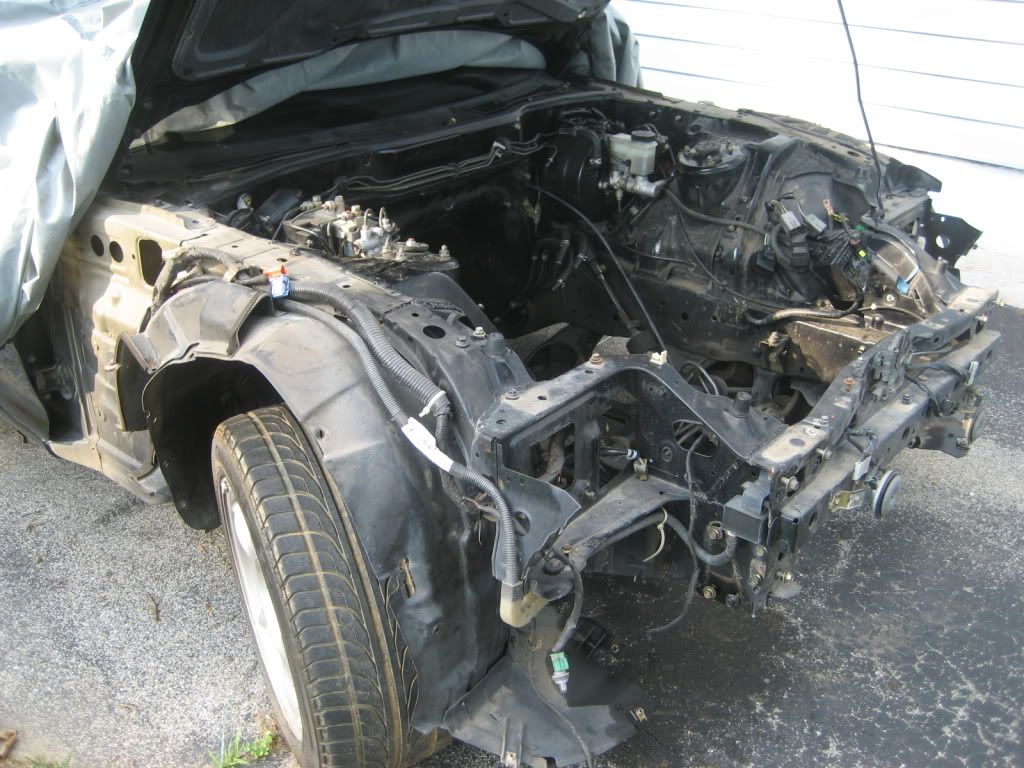
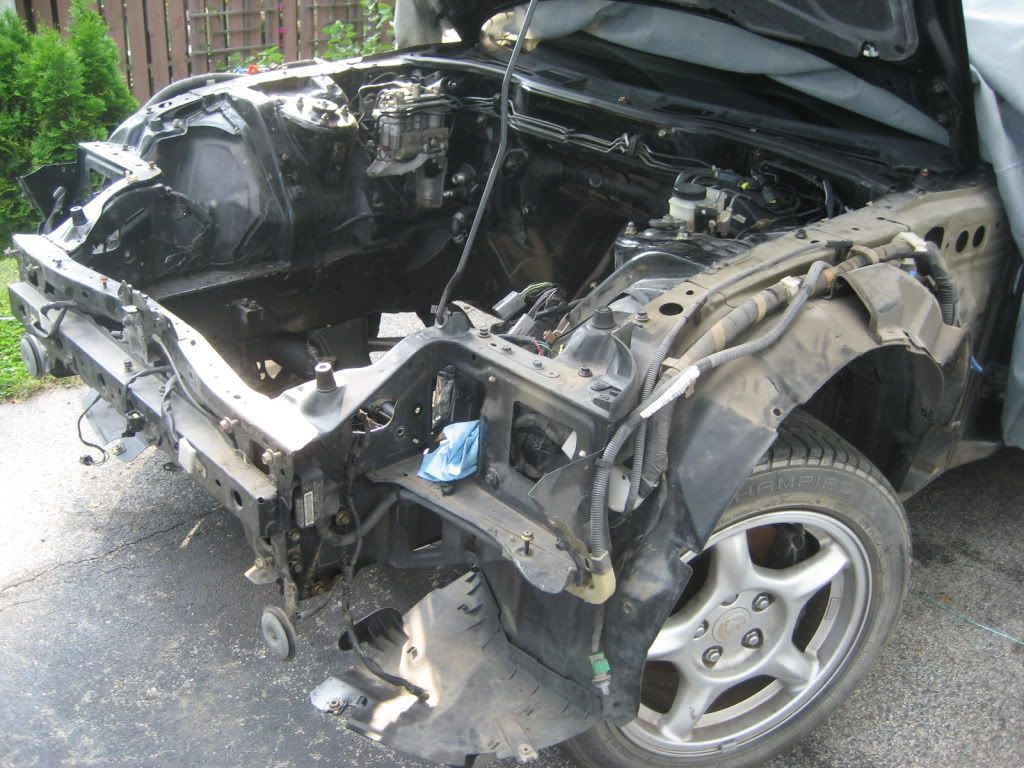
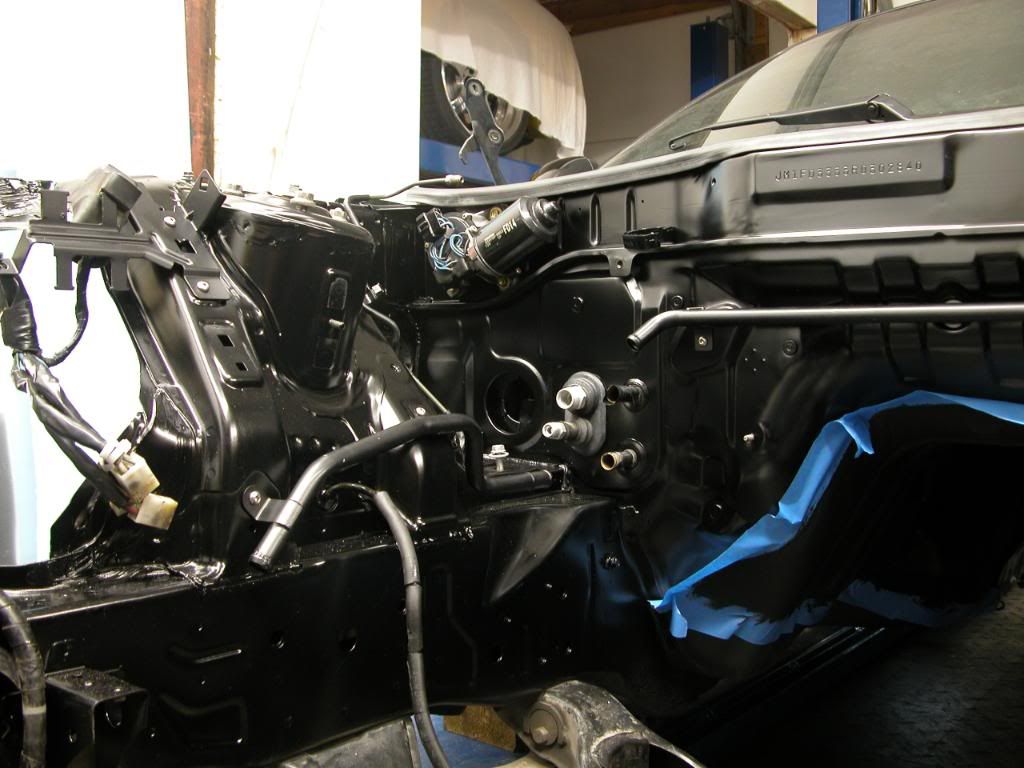
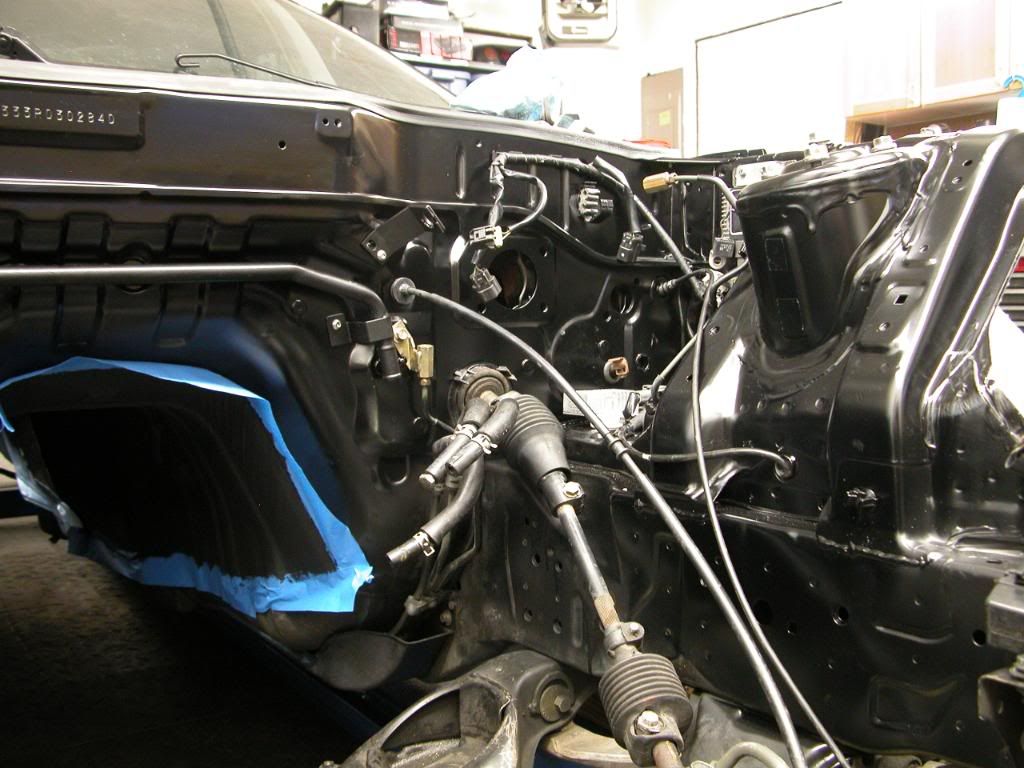
When I removed all the parts from the engine bay for coating, I noticed two things. First, the engine bay paint was in pretty bad shape. Second, the car had been in a front end collision and poorly repaired…see pictures below. Seeing as most of the parts in the engine bay were removed already; I figured now is as good a time as any to have the engine bay re-painted and the front end damage fixed right.
Before
In my infinite wisdom I thought it would be a good idea to buy an engine from Japan instead of trying to piece together one from here. Thanks to FDNewbie; a few grand and about half a year later, I had a shiny, used low mileage 99 spec long block (including turbos) and transmission. When I purchased the engine, I did not realize it was going to come with an uncut wiring harness as well ::BONUS:: I will come back to the wiring harness later though…. I managed to find a 99 spec PFC from Japan which is basically plug and play, or so I thought. instead of trying to piece together one from here.
Naturally I decided to take most of the parts off the engine and have them Ceramic (UIM, Y pipe, DP, turbo inlet) and powder coated. While I was at it, I replaced all the vacuum lines with silicone, and whatever check valves I could get to (some are sealed in the black vacuum box). My little project had quickly turned into a restoration. Since my powder coater usually hooks me up if I take him large quantities of parts I tried to think what else I could get coated. A lot of parts in the engine bay get greasy and are difficult to clean, unless they have been coated. Here are a few of the parts I had coated. I’m sure I’m missing a few:
-ABS bracket
- ABS heat shield (ceramic)
- rear exhaust hanger
- hood latch
- rear tie down hook
- Turbo heat shield
- Racing Beat Dual tip (Ceramic coated muffler, Candy black coated tips)
- HKS RS intakes
- Stock pullies (gloss black)
- Chassis braces (clear)
- PPF
- under body shields
- Firewall coolant pipe and brake booster pipe
- Other **** I don’t feel like listing
When I removed all the parts from the engine bay for coating, I noticed two things. First, the engine bay paint was in pretty bad shape. Second, the car had been in a front end collision and poorly repaired…see pictures below. Seeing as most of the parts in the engine bay were removed already; I figured now is as good a time as any to have the engine bay re-painted and the front end damage fixed right.
Before
Last edited by GoodfellaFD3S; Oct 3, 2009 at 01:25 PM.
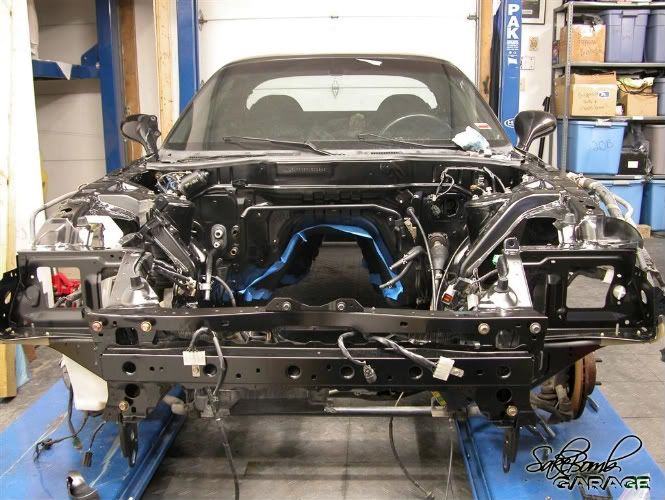
After!!
So, I guess now would be a good time to talk about the goals of this car. The car has turned into a complete restoration and update project; but the goals are simple.
-Quiet interior, so I can make long trips and stay sane.
-330-350 wheel HP on sequential twins
-Emissions legal
-Reliable
-Updated body panels and wheels
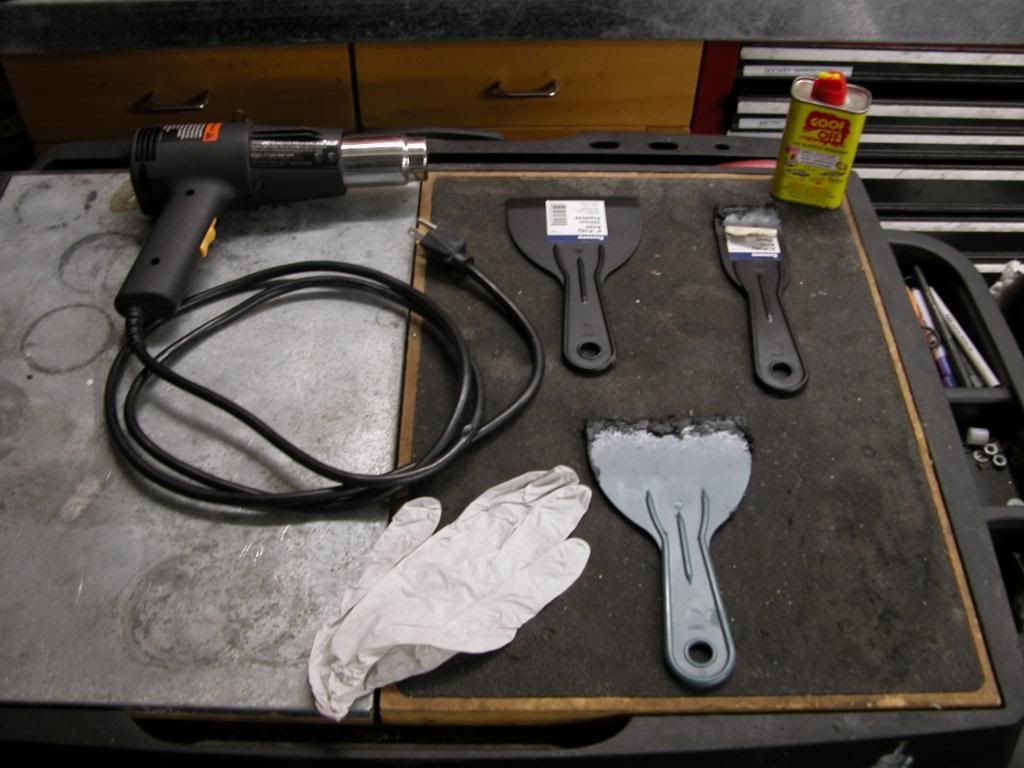
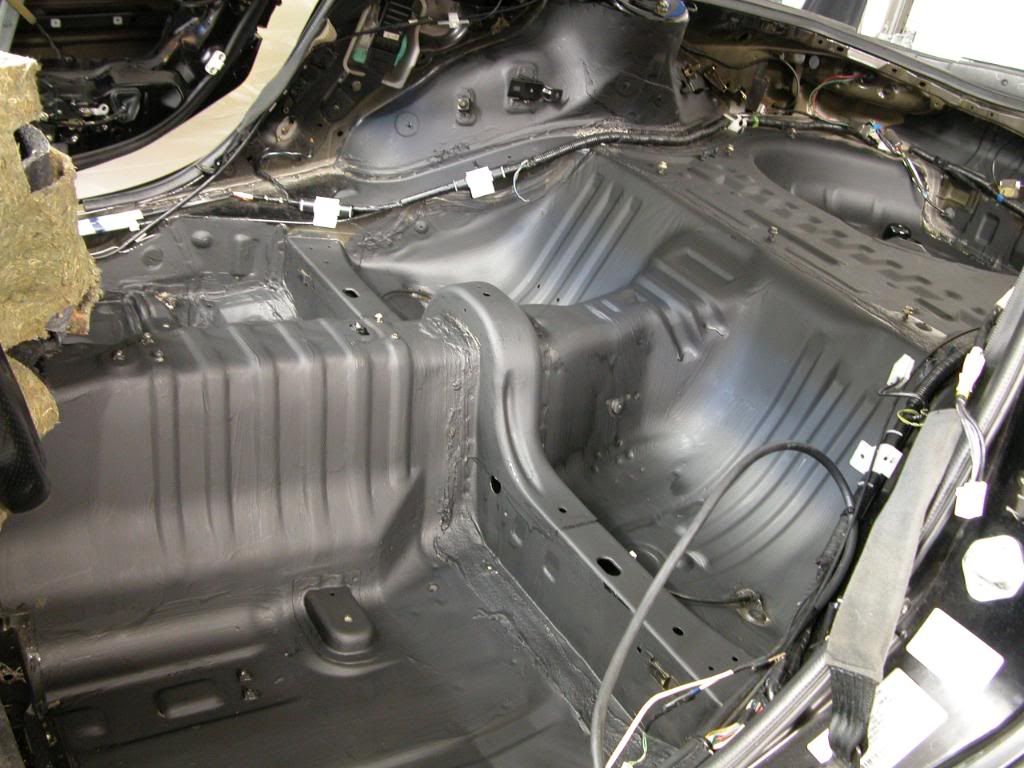
One of the first things I tackled once the car came back from the painters was taking some of the road noise out of the cabin. To do this I purchased a five gallon bucket of Quietcar� from Quietcoat�. There is a thread about this stuff somewhere on the forum. After doing research on the product, my decision was easy. The installation of Quietcar� is just like painting. I used a brush and a small paint bucket. Before I started laying this stuff down, I removed the old sound deadening to negate the added weight as much as possible. For the horizontal surfaces with sound deadening tar on them I used dry ice, a hammer and a chisel; this method works wonders and saves time. However, the vertical surfaces are much more of a PITA. I had to use a heat gun and a plastic scraper, which took forever! **Special note** When using a heat gun on tar, wear an organic respirator! Thanks to Heath for that tip, probably saved a few years of my life. Another tip; goo-gone and a heat gun do wonders for the spots of tar that the scraper did not remove. Here is what the interior looked like after the sound deadening was removed.
Tools I used.
After removing most of the interior…

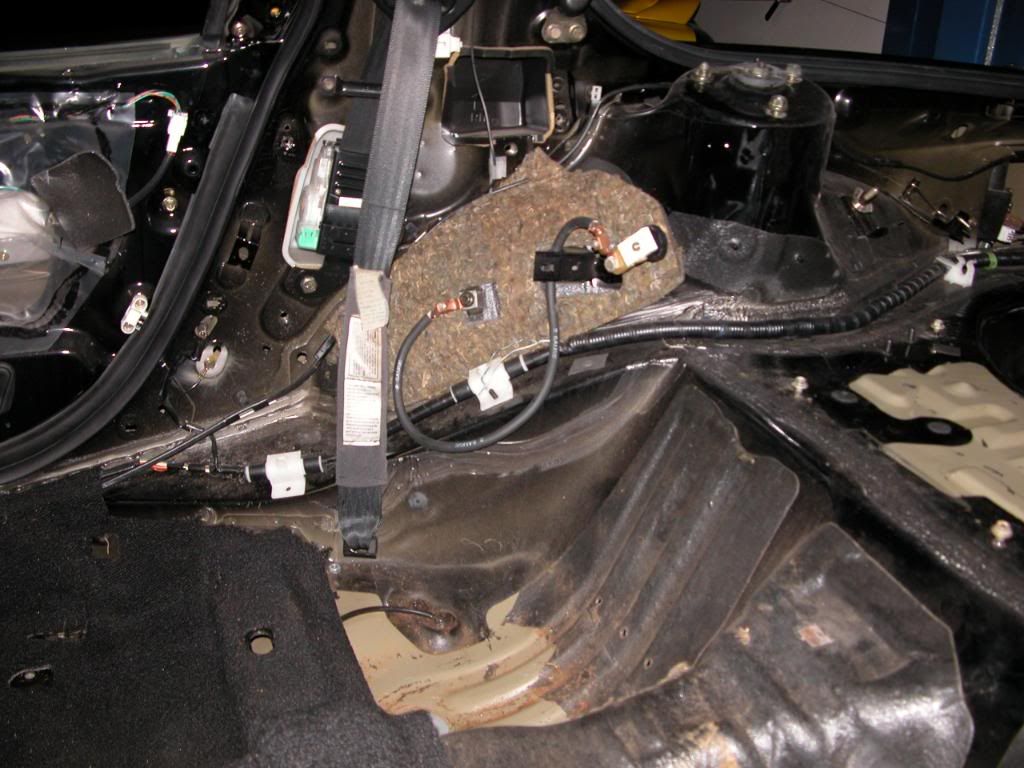
Midway through removing the sound deadening....about this point you'll want to quit.
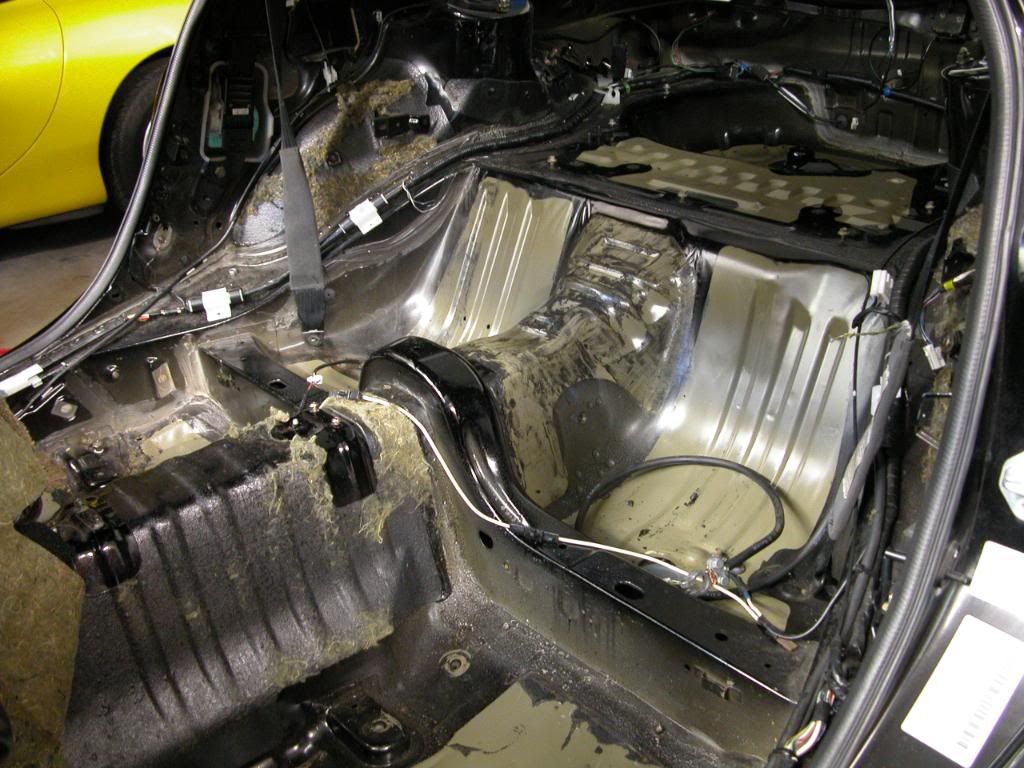
So FRESH and so CLEAN! Probably completely unnecessary to get ALL the tar off, but I did anyway.
I also removed the tar off the area where the rear tool storage bins would go, but these pictures were taken before that.

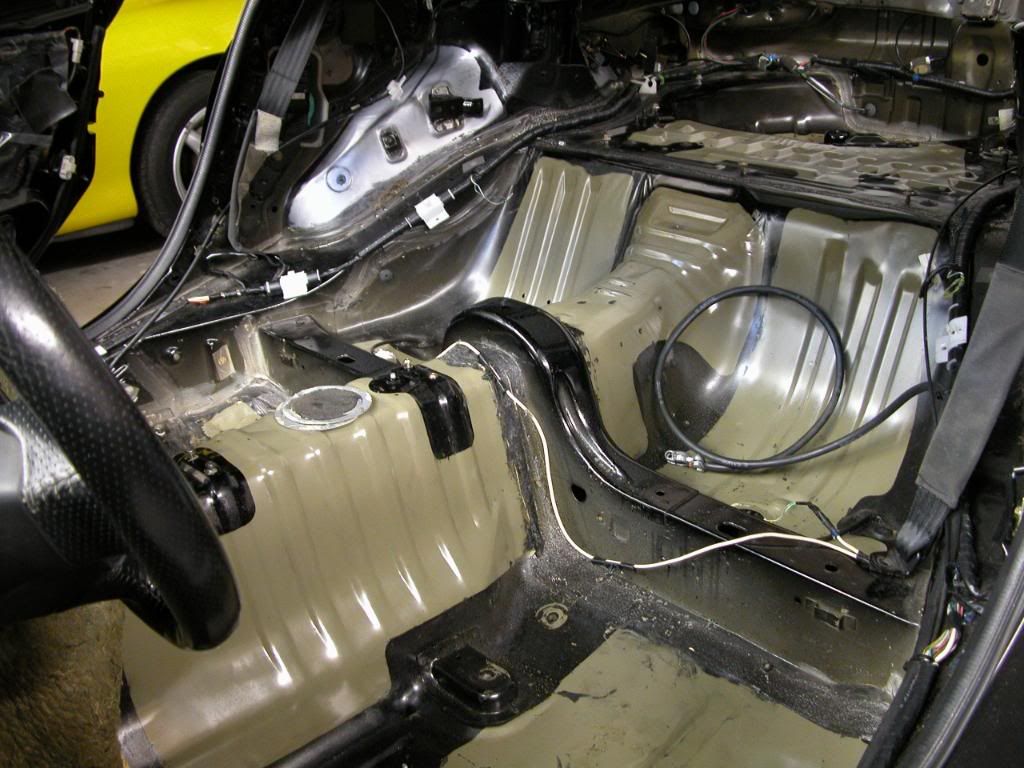
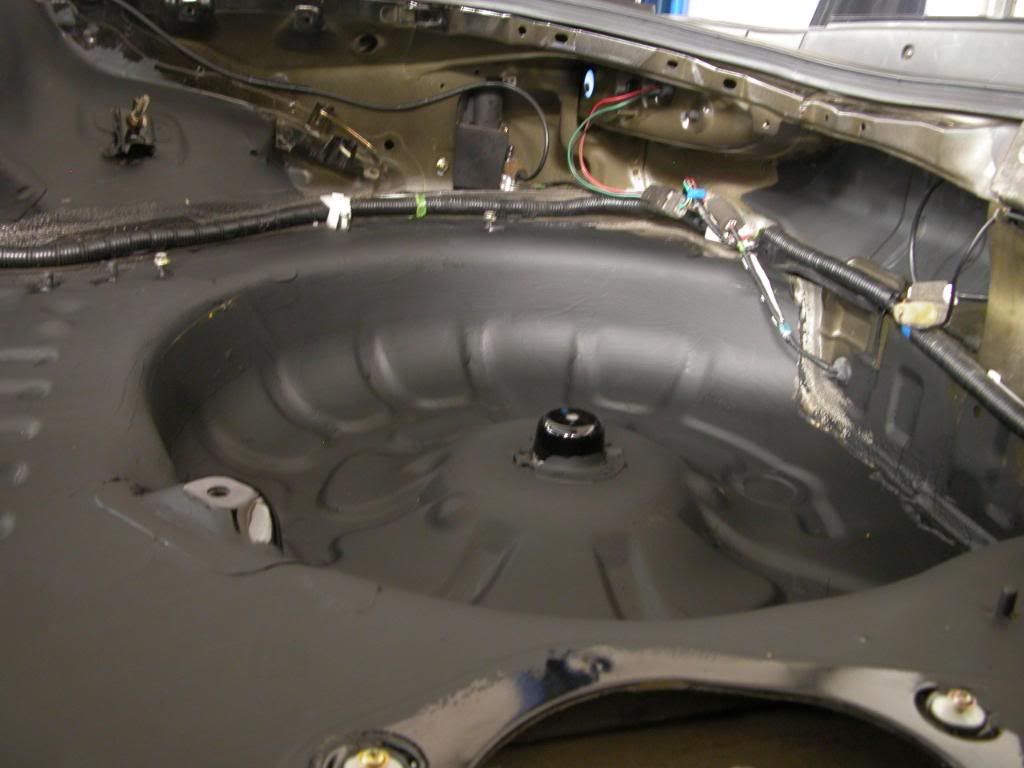
Then a few after pictures, like OMG!
I also coated inside the doors, but the pictures didn't come out that great.
So, I guess now would be a good time to talk about the goals of this car. The car has turned into a complete restoration and update project; but the goals are simple.
-Quiet interior, so I can make long trips and stay sane.
-330-350 wheel HP on sequential twins
-Emissions legal
-Reliable
-Updated body panels and wheels
One of the first things I tackled once the car came back from the painters was taking some of the road noise out of the cabin. To do this I purchased a five gallon bucket of Quietcar� from Quietcoat�. There is a thread about this stuff somewhere on the forum. After doing research on the product, my decision was easy. The installation of Quietcar� is just like painting. I used a brush and a small paint bucket. Before I started laying this stuff down, I removed the old sound deadening to negate the added weight as much as possible. For the horizontal surfaces with sound deadening tar on them I used dry ice, a hammer and a chisel; this method works wonders and saves time. However, the vertical surfaces are much more of a PITA. I had to use a heat gun and a plastic scraper, which took forever! **Special note** When using a heat gun on tar, wear an organic respirator! Thanks to Heath for that tip, probably saved a few years of my life. Another tip; goo-gone and a heat gun do wonders for the spots of tar that the scraper did not remove. Here is what the interior looked like after the sound deadening was removed.
Tools I used.
After removing most of the interior…
Midway through removing the sound deadening....about this point you'll want to quit.
So FRESH and so CLEAN! Probably completely unnecessary to get ALL the tar off, but I did anyway.
I also removed the tar off the area where the rear tool storage bins would go, but these pictures were taken before that.
Then a few after pictures, like OMG!
I also coated inside the doors, but the pictures didn't come out that great.
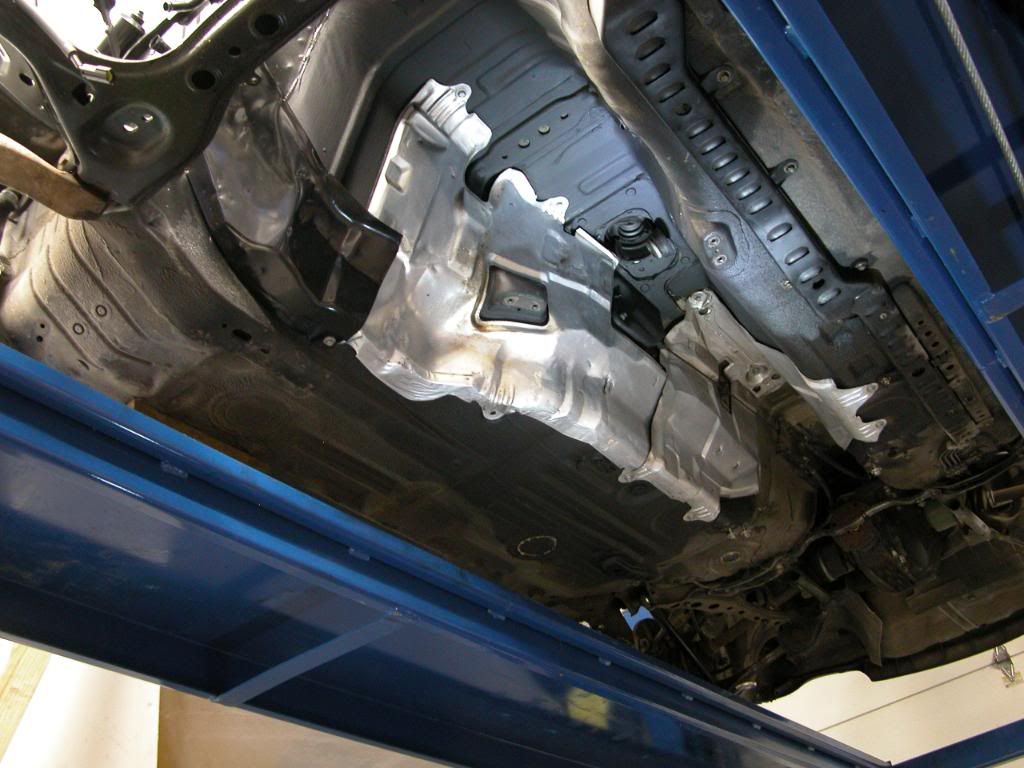
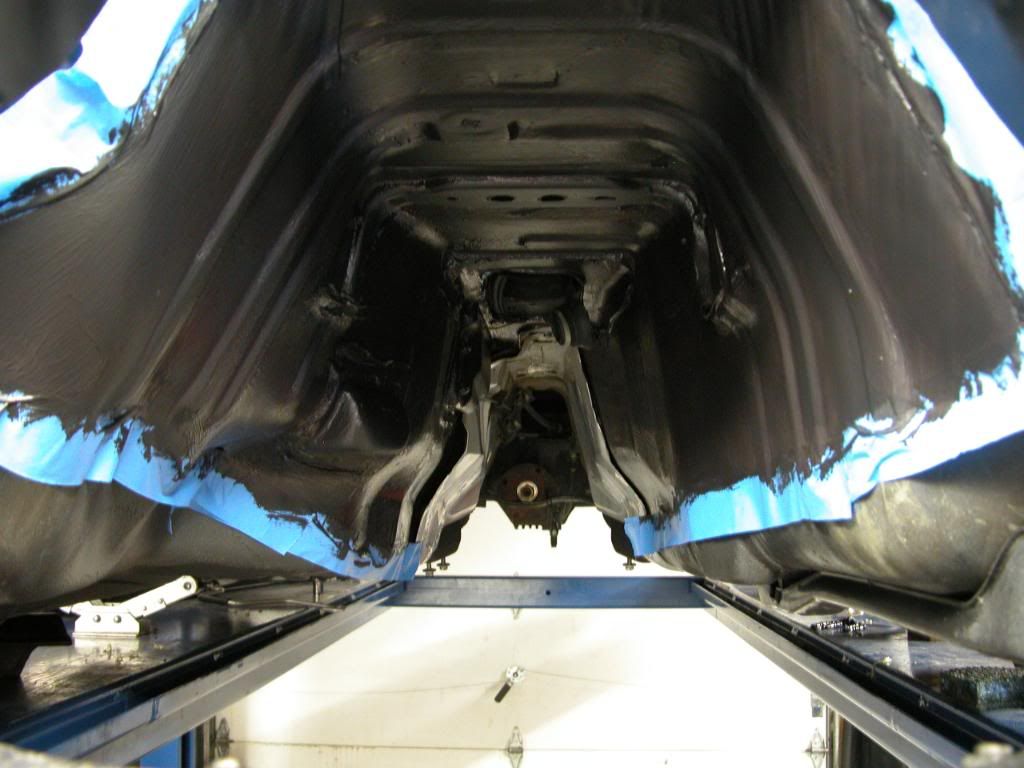
I also went ahead and coated the transmission tunnel under the car. I�m not really sure how much this will help, but I�ll take sound readings once the car is running. Of course I had to clean my trans tunnel heat shield�.extra point at show!
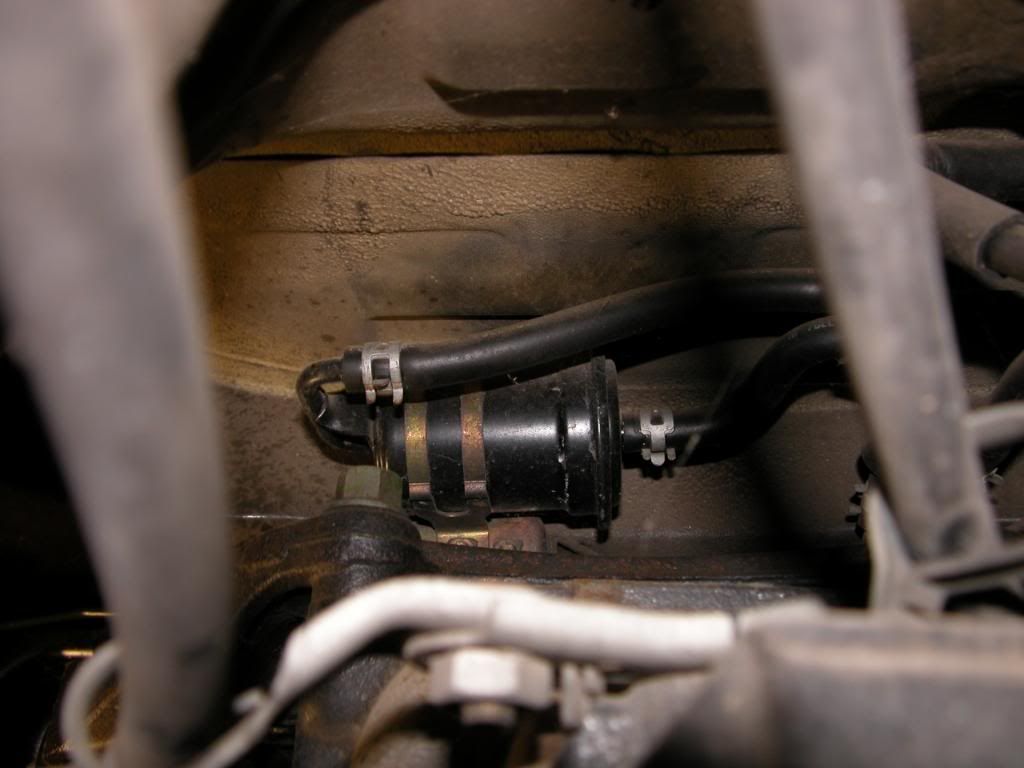
While I had the rear fuel maintenance door off, I figured it would be as good a time as any to install a Denso (supra) pump and relocate the fuel filter. The fuel filter in its stock location is such a joy to change, why would I move it you might ask? Well I am all about the show points, and the judges will obviously award more points if they see the fuel filter in an easy reach location Enough of the shenanigans, here is where the filter was, and where it is now. I used the stock mounting bracket, then drilled and tapped two M8 holes in the sub-frame; then used a little spray paint to make sure the holes didn�t rust (dunno if that will actually work). Once the filter is mounted to the sub-frame, the fuel lines need to be routed from the pump outlet to the IN on the filter; and the OUT on the filter needs to be routed to the line on the chassis leading to the engine bay. 5ft of HP fuel hose should be more then enough.
Stock location: Above the Differential
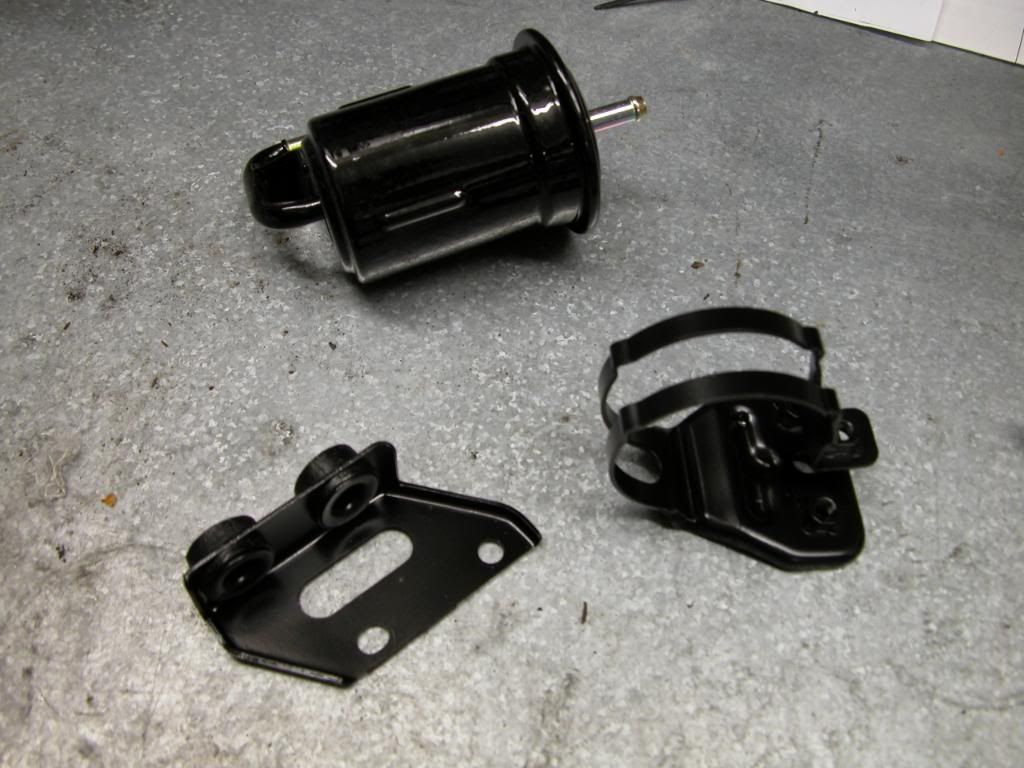
The new filter. Also the mounting bracket was crusty looking, so I media blasted it and put a fresh coat of hot grill paint on.
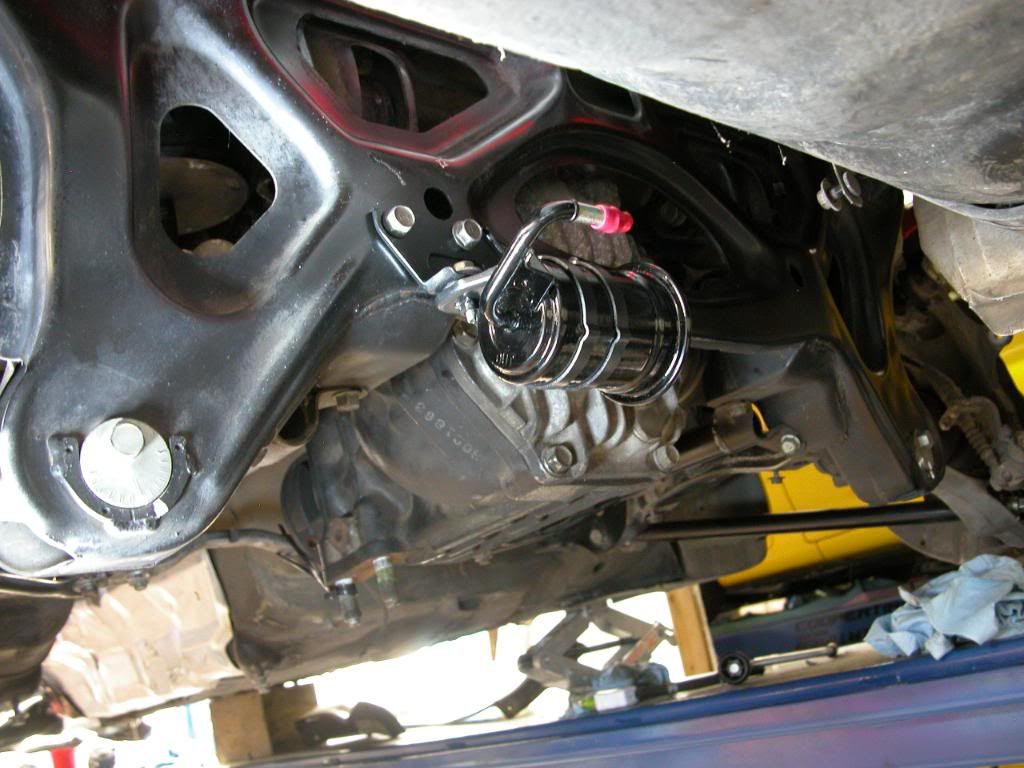
New mounting location, SO EASY to change the filter now! Note: The filter does not hang below the sub-frame, so stop worrying.
Stay tuned for more!!
While I had the rear fuel maintenance door off, I figured it would be as good a time as any to install a Denso (supra) pump and relocate the fuel filter. The fuel filter in its stock location is such a joy to change, why would I move it you might ask? Well I am all about the show points, and the judges will obviously award more points if they see the fuel filter in an easy reach location
Enough of the shenanigans, here is where the filter was, and where it is now. I used the stock mounting bracket, then drilled and tapped two M8 holes in the sub-frame; then used a little spray paint to make sure the holes didn�t rust (dunno if that will actually work). Once the filter is mounted to the sub-frame, the fuel lines need to be routed from the pump outlet to the IN on the filter; and the OUT on the filter needs to be routed to the line on the chassis leading to the engine bay. 5ft of HP fuel hose should be more then enough. Stock location: Above the Differential
The new filter. Also the mounting bracket was crusty looking, so I media blasted it and put a fresh coat of hot grill paint on.
New mounting location, SO EASY to change the filter now! Note: The filter does not hang below the sub-frame, so stop worrying.
Stay tuned for more!!


Trending Topics

Wow you coated the tranny sheet metal cover as well? Have you thought of foaming the car? I poured foam in the center hump thing as well as the sheet metal that the seats mount to, not sure if it made a difference, but with a smack on the hand it did seem to get quieter and hopefully stiffer.

Dan... This is great. Every time I drive a very nice very stock FD I am reminded just how nice they can be. Here, you are remaking or as I call it remanufacturing the car better than it was new. I really like what you're doing. I used more traditional sound deadening and found Quietcoat too late. What did you mean when youy said you were going to "update the body panels"?
Gordon
Gordon
By updating the body panels I mean JDM sides, JDM fenders, 99 wing aaaaaand.....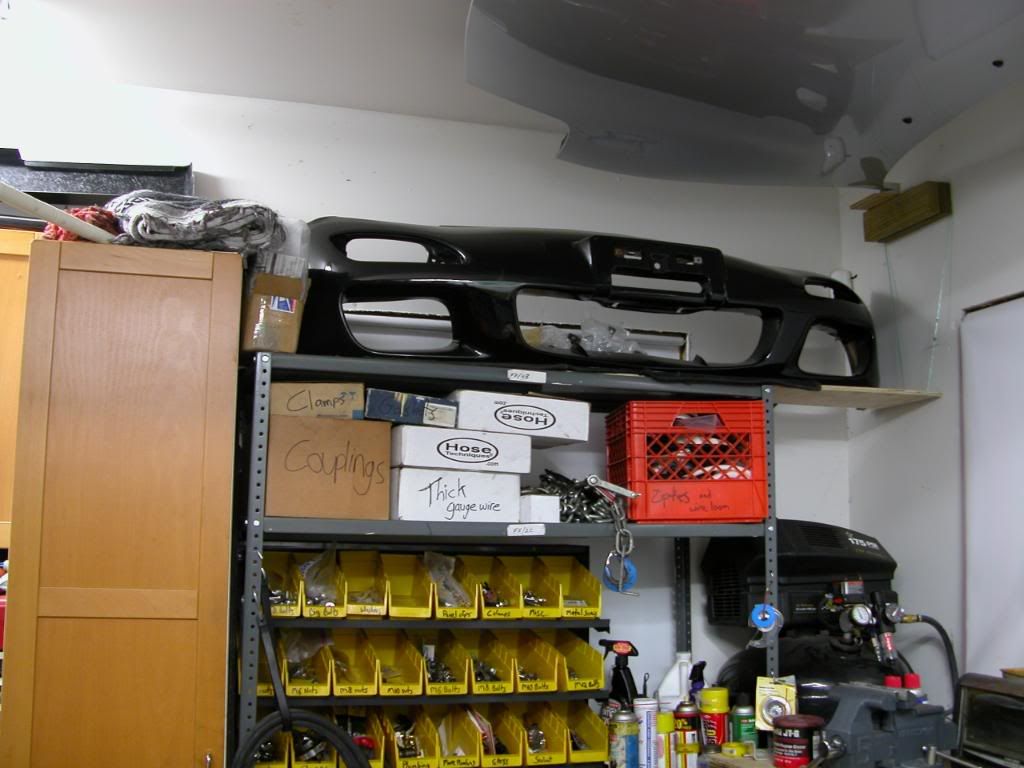
Come on, you really think I would go widebody?
Wow you coated the tranny sheet metal cover as well? Have you thought of foaming the car? I poured foam in the center hump thing as well as the sheet metal that the seats mount to, not sure if it made a difference, but with a smack on the hand it did seem to get quieter and hopefully stiffer.
 There may be a section on it in the future . I used some in the area behind the seat belts and the center hump. More on that later...If I can find pictures of what I did.
 Back to business....
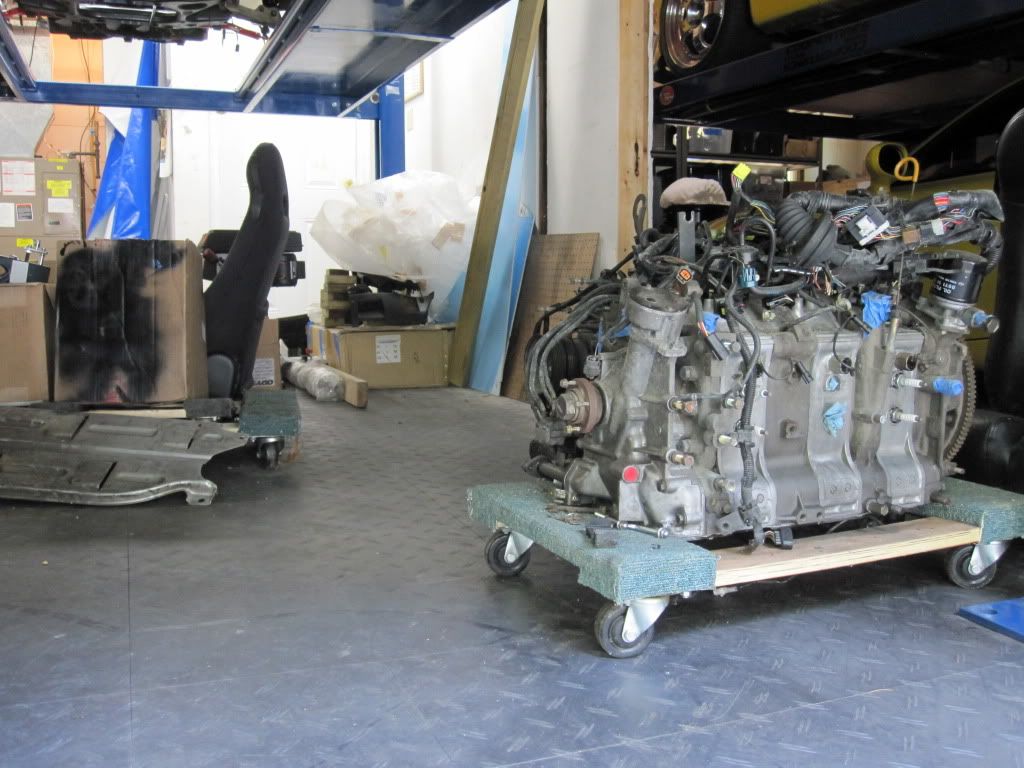
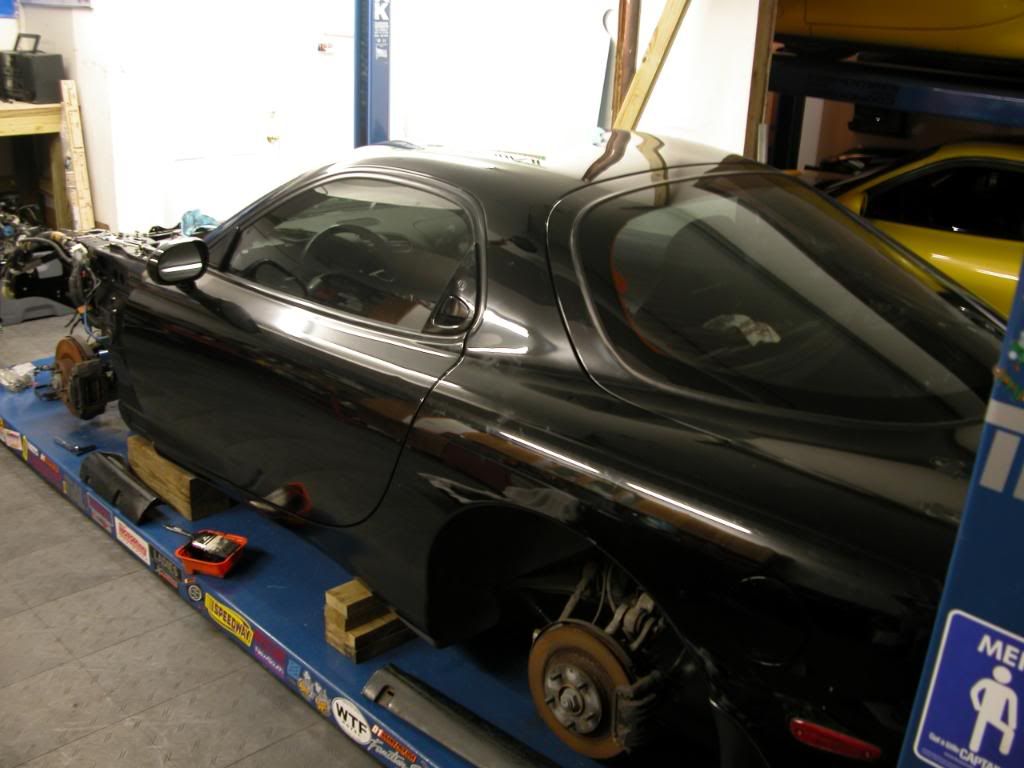
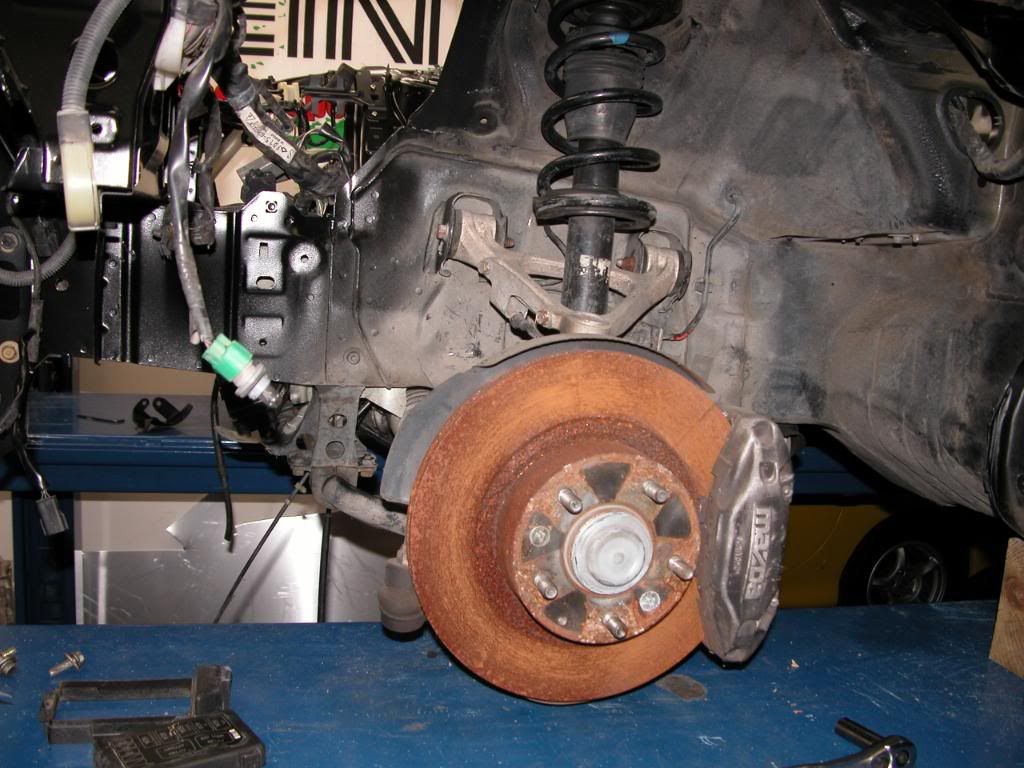
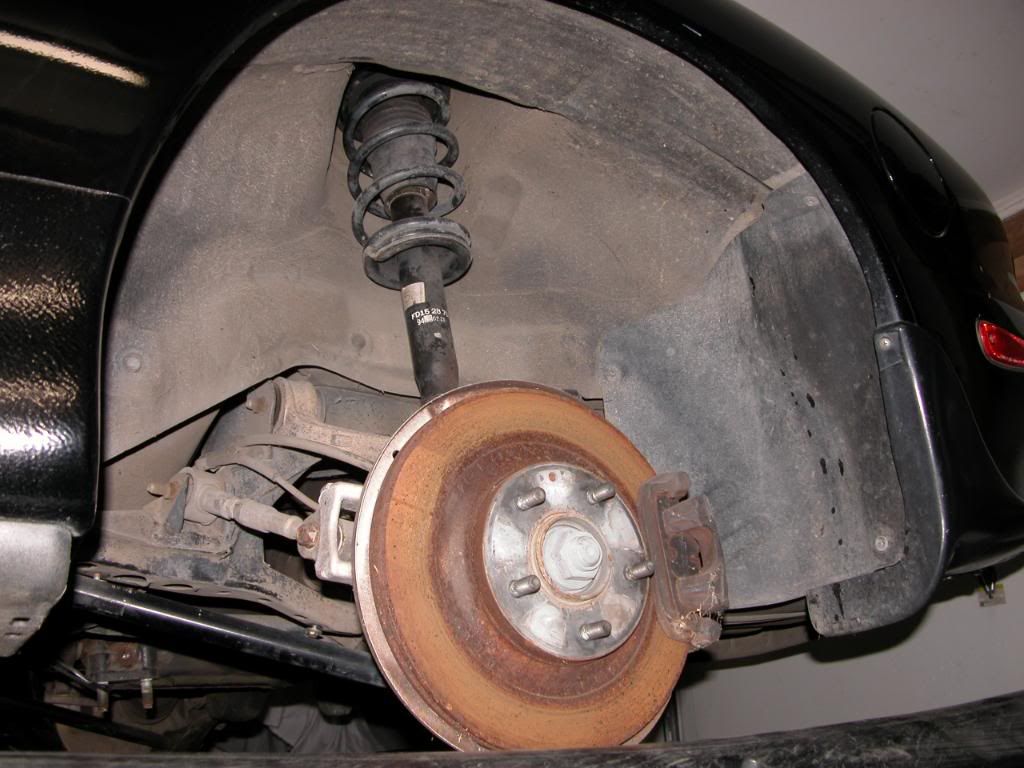
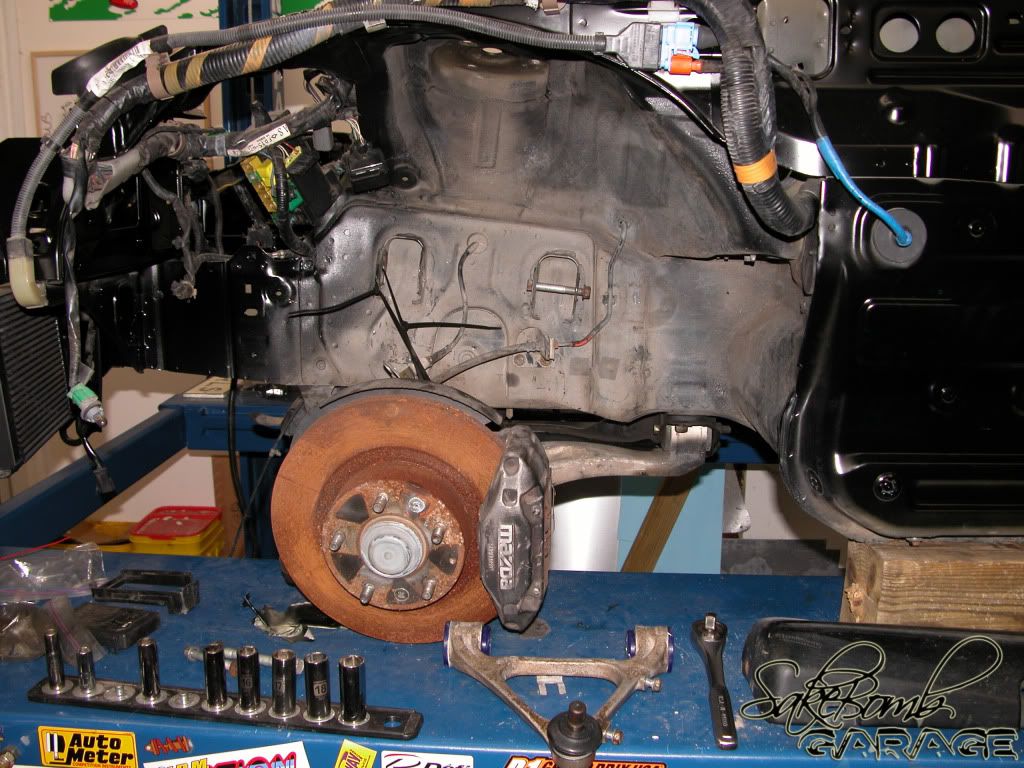
Pirate Hooker has been sitting on the lift for too long. With the exception of the suspension and brakes, this is pretty much what the car looks like now.

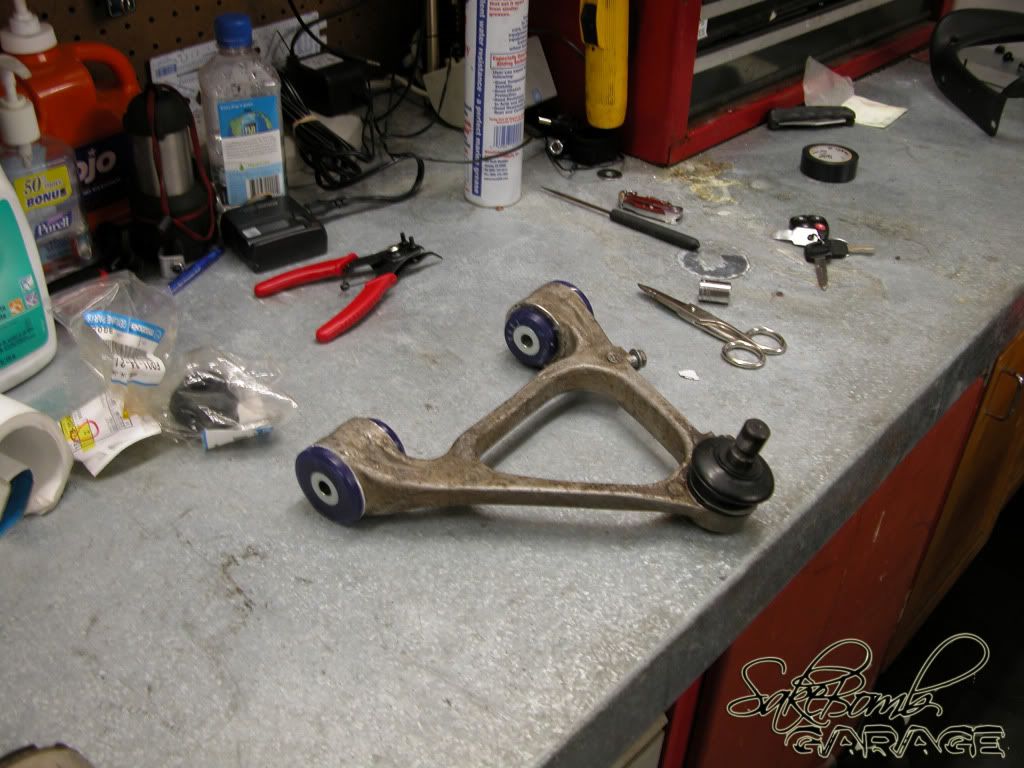
Since the suspension components are around 14 years old and knowing they have seen 70,000 miles +, I figured it would be to my benefit to install new bushings and pillow *****. After a bit of research I decided on Superpro bushings, new OEM pillow ***** and OEM rear lower inner bushings. Due to the difficulty and minimal gains seen by replacing the front lower control arm bushings I decided to skip them. For suspension I choose Stance GR+pro’s, thanks to Ken at Auto RND for great prices; I’ll post my impressions once I have some seat time. To tie the suspension together I went with Tanabe front and rear anti roll bars, as well as an R1 front strut bar (sexified) and an AutoEXE rear strut bar. I have included a few pictures for anyone considering doing the bushings themselves with a press.
Before I started I took a few pictures:
Drivers side front
Drivers side rear, MMMMmmmmm rustah!!
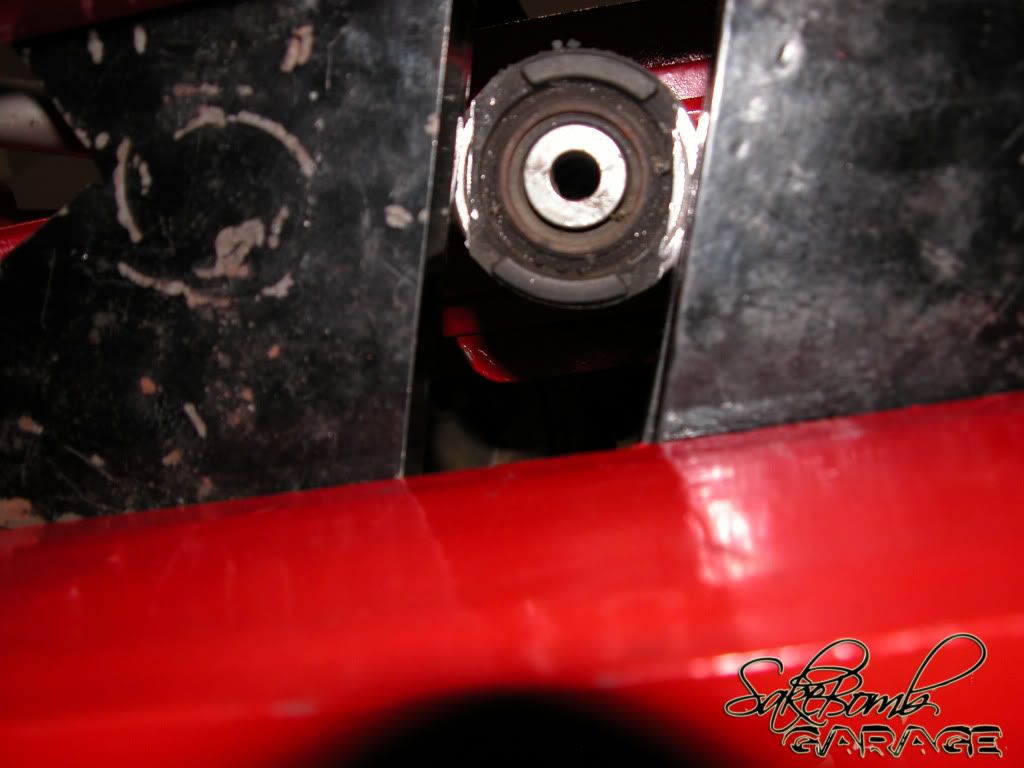
Rear anti-roll bar
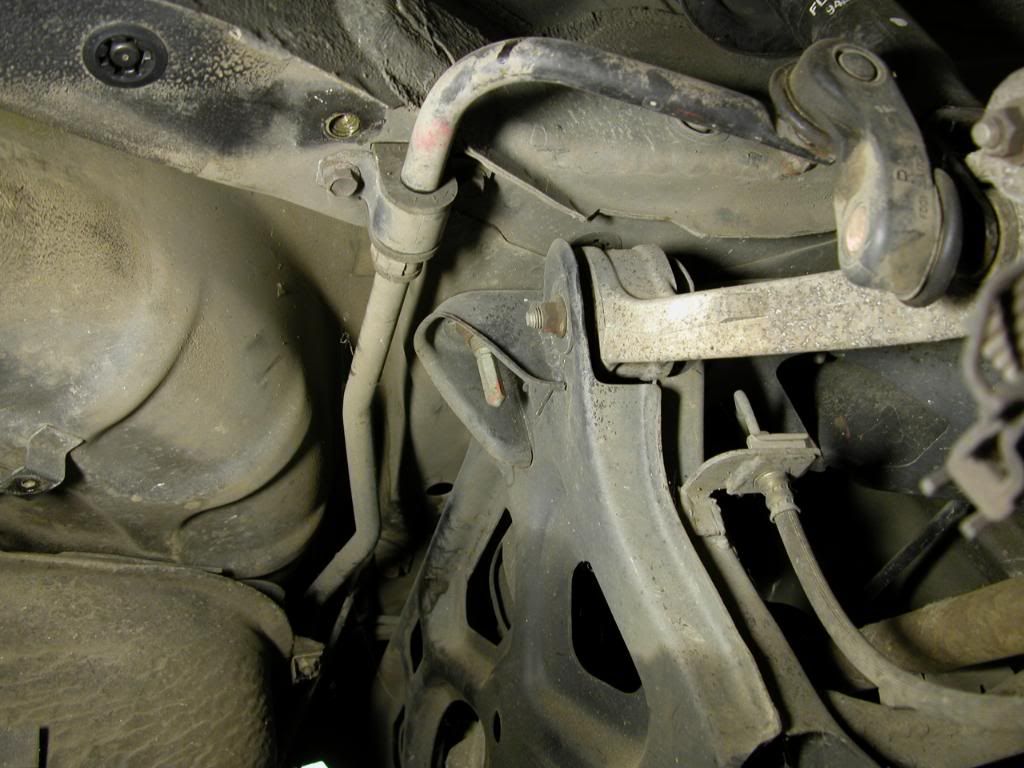
Another shot of the rear anit-roll bar
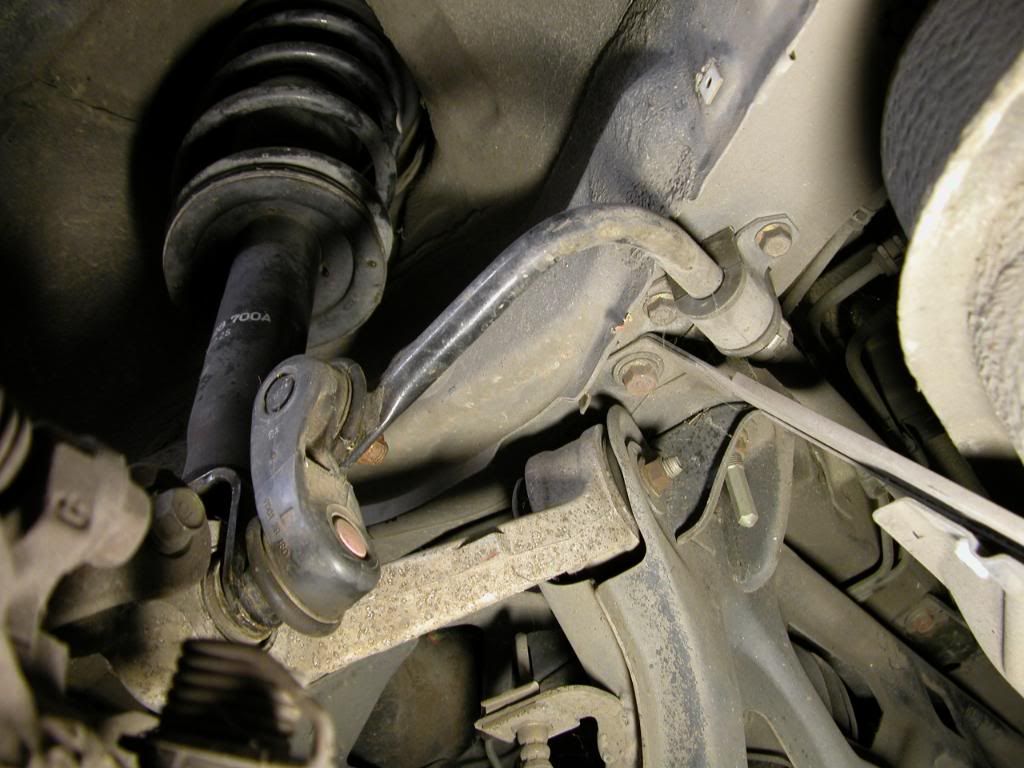
Something's missing...
Now the fun begins.
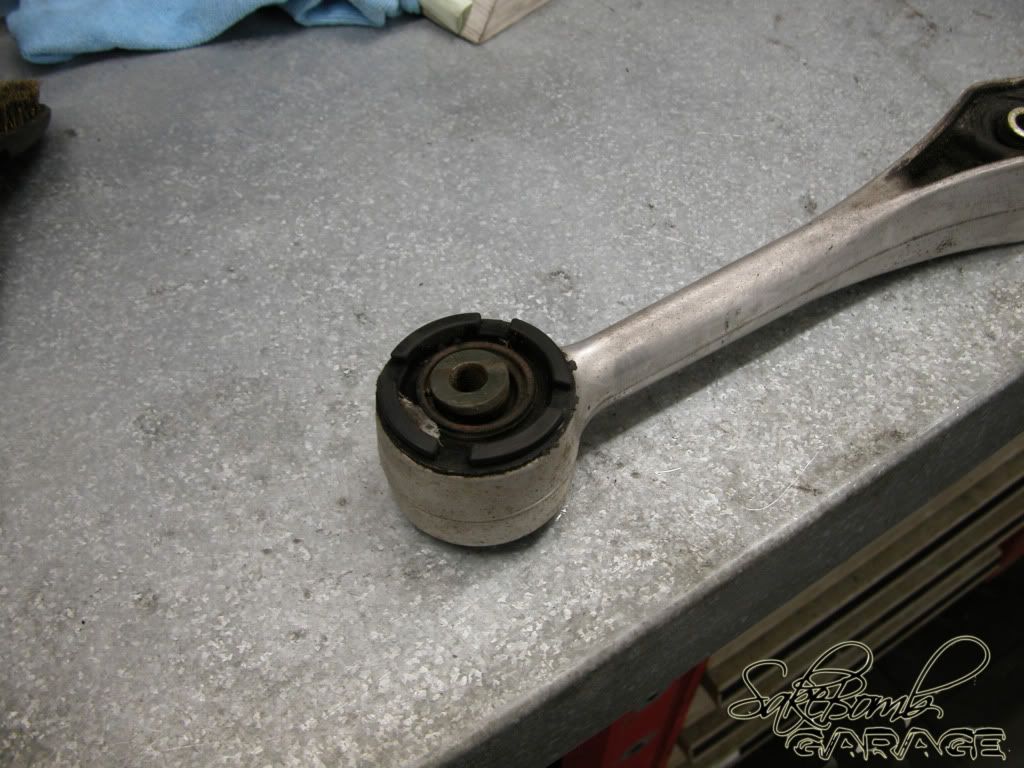
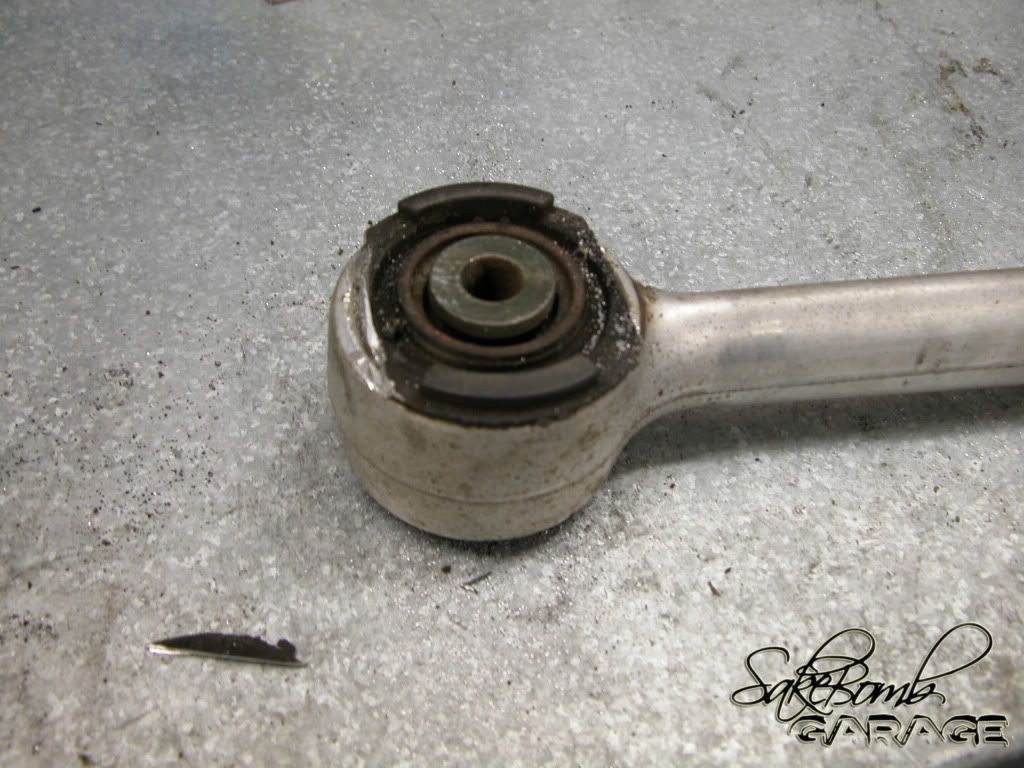
The front upper control arm only needs two bushings. After the original bushings are pressed out, the superpro bushings can be pressed in with a little skill, lube and a vice. I also suggest replacing the dust boot for the ball joint.
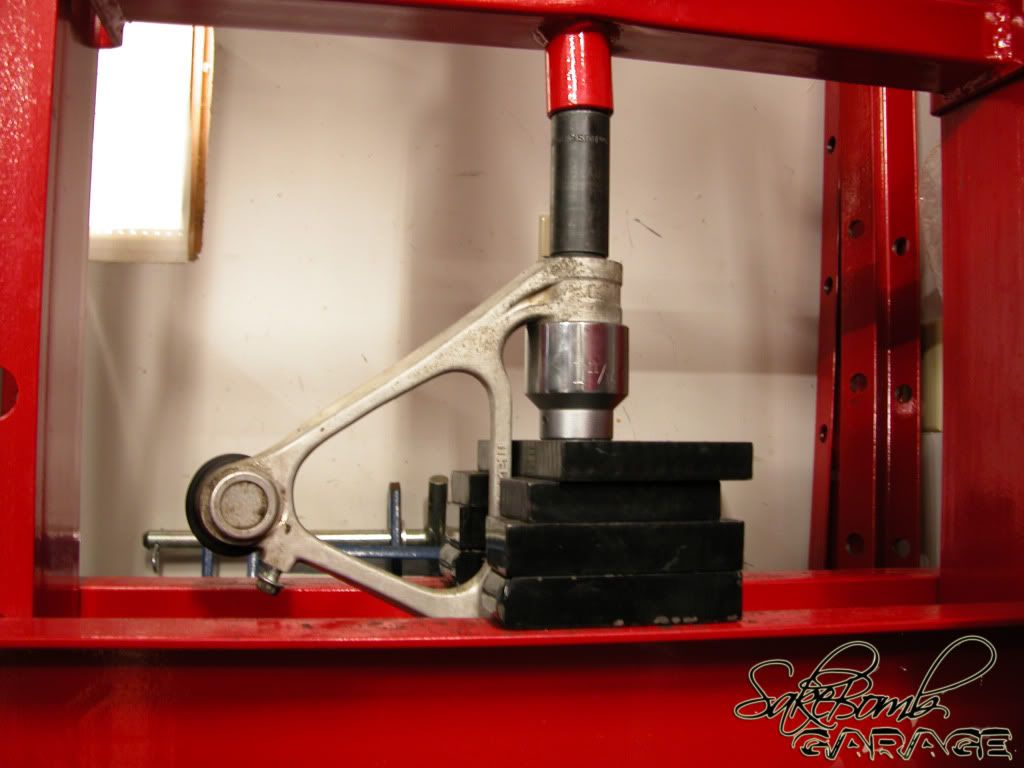
Donez0
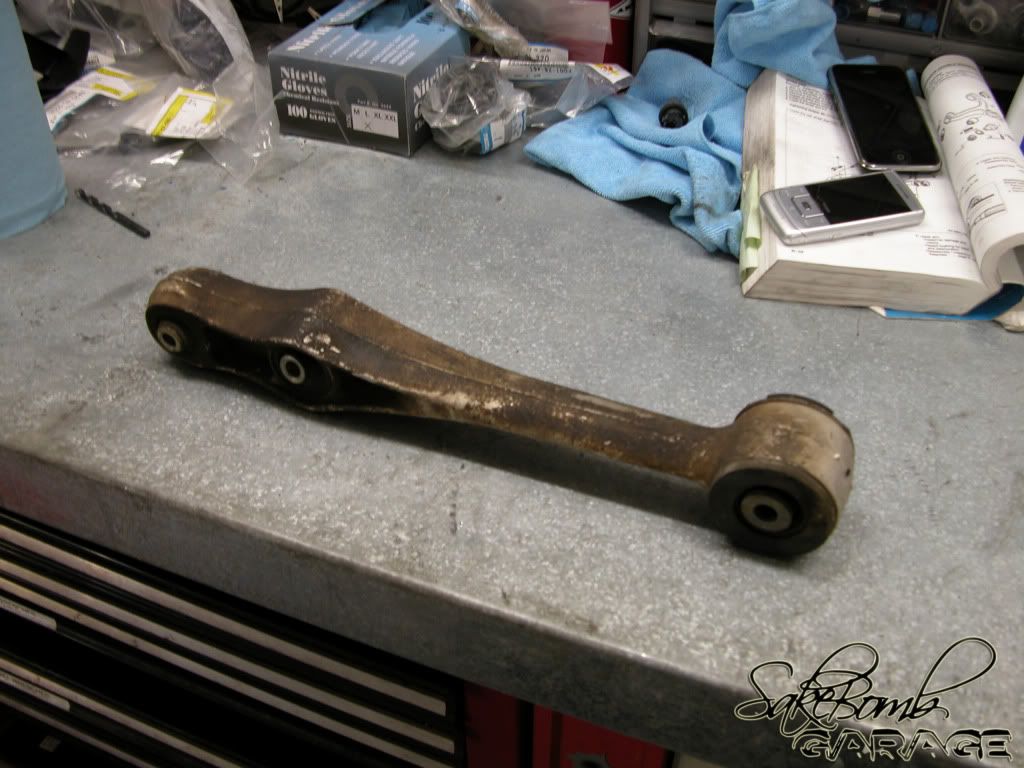
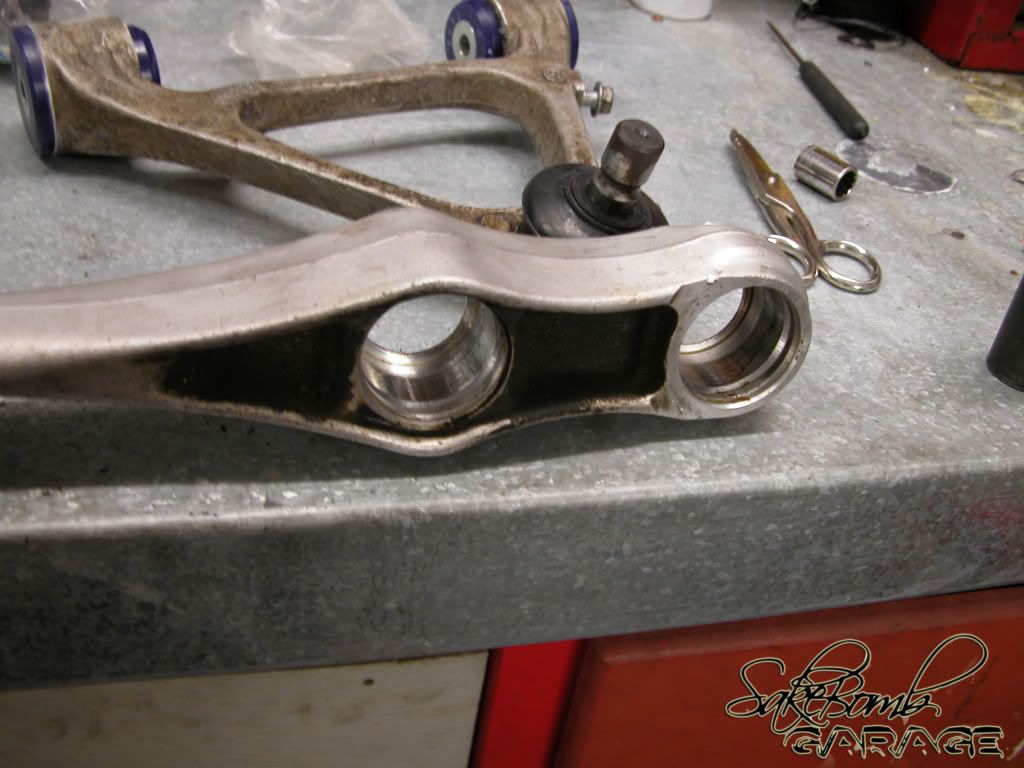
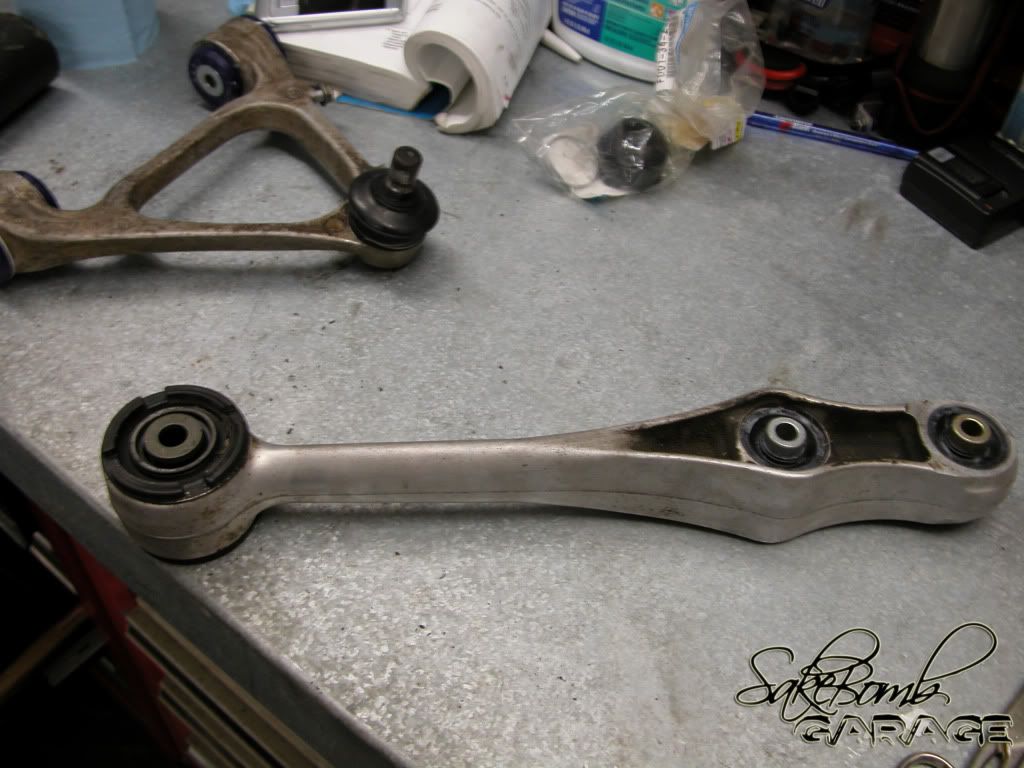
Rear lower control arms needed new pillowballs and inner bushings
Fresh out da car
Get your "exam" gloves on and get freaky..
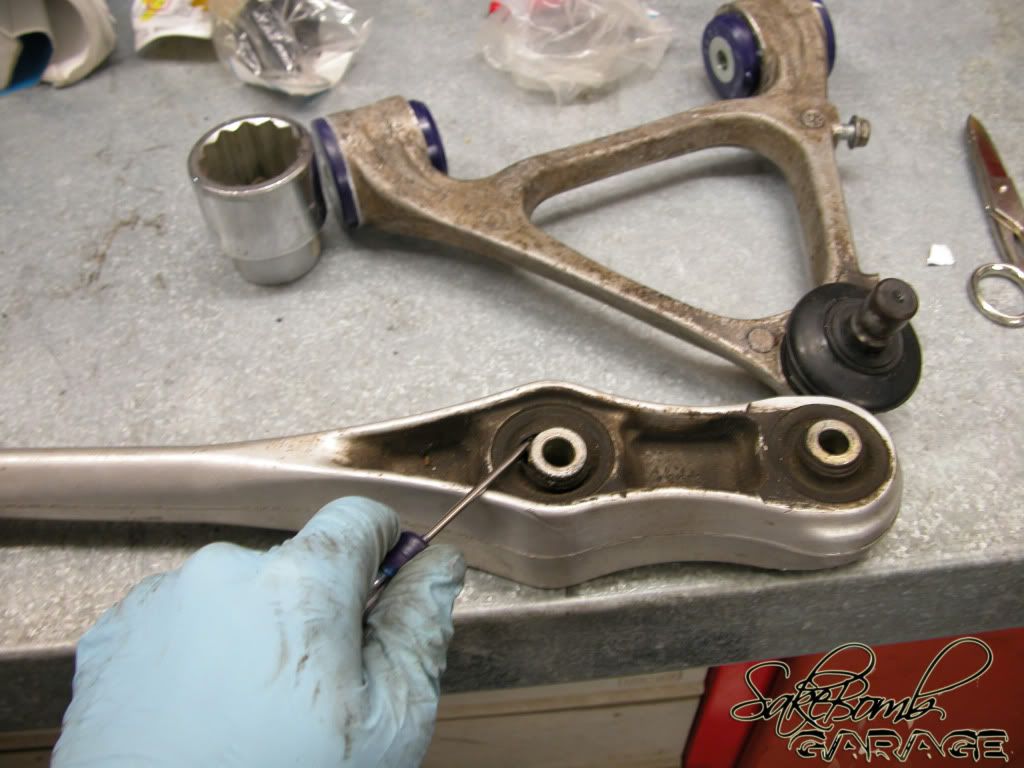
You have to remove the C-clips after cleaning the old grease out under the dust boots.
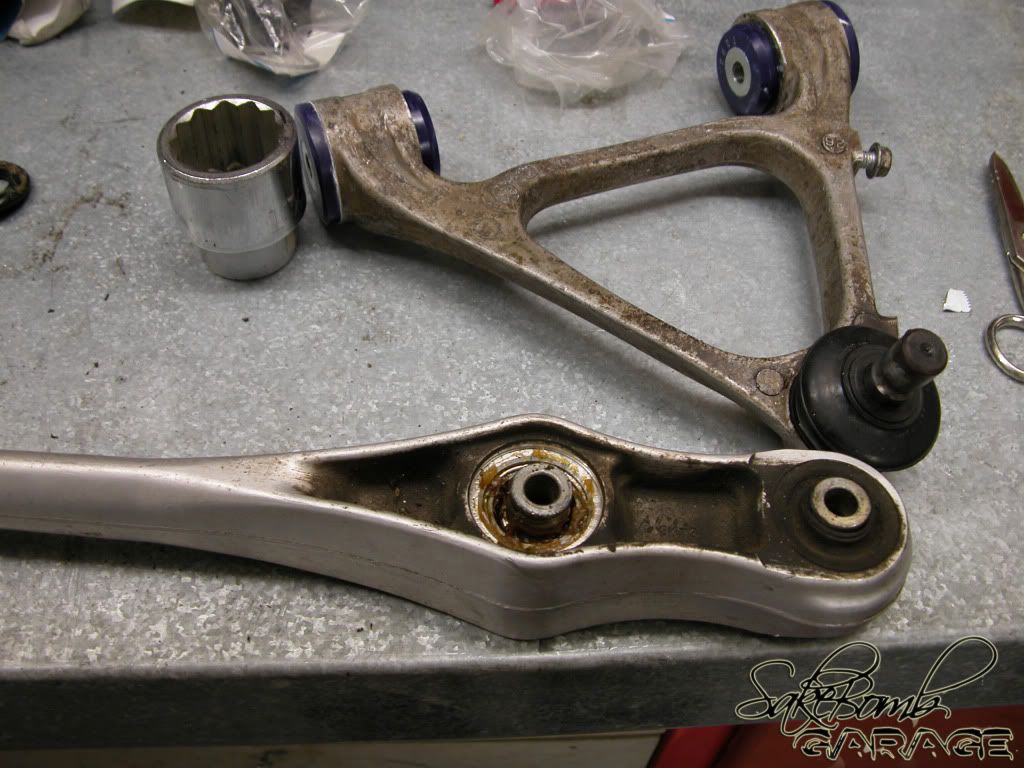
Make sure you press the bushing out from the side opposite the C-clip. I believe there is a bushing how-to somewhere on the forum.
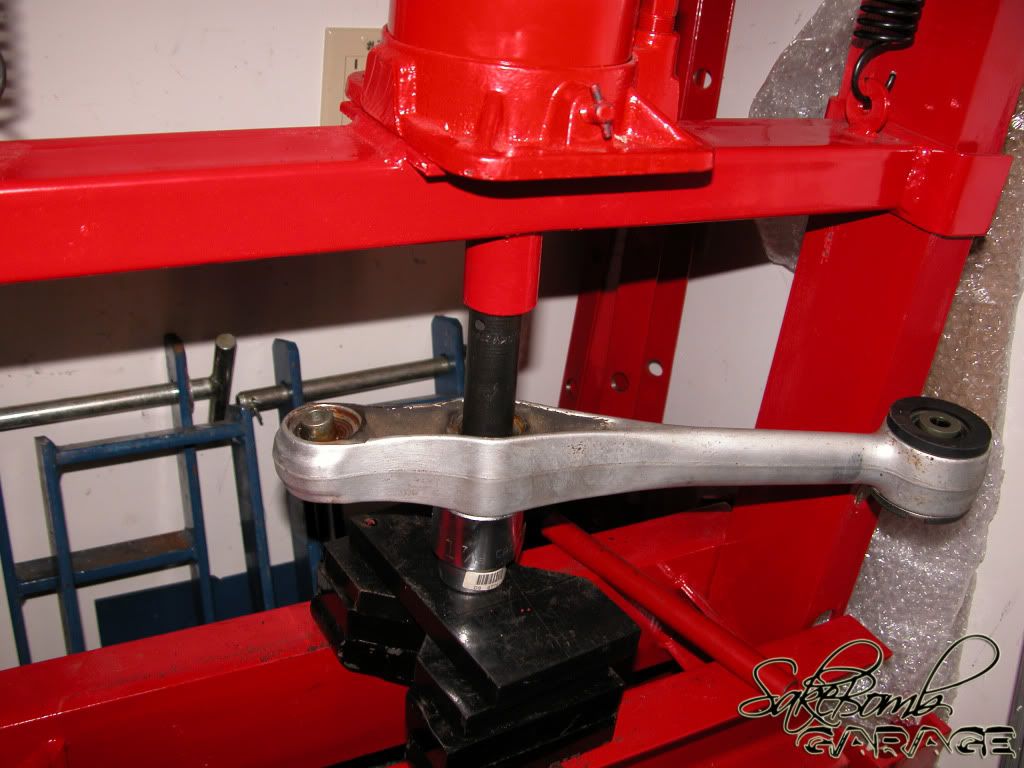
All clean....install in reverse order.
Moving on to the rear lower inner bushing.
The bushing needs to be trimmed with a fine tooth hacksaw so it can be pressed out. Be careful not to trim too much and cut into the control arm. The bushing should look similar to this....
Time to press the bushing out
one side DONE!
The front upper control arm only needs two bushings. After the original bushings are pressed out, the superpro bushings can be pressed in with a little skill, lube and a vice. I also suggest replacing the dust boot for the ball joint.
Donez0
Rear lower control arms needed new pillowballs and inner bushings
Fresh out da car
Get your "exam" gloves on and get freaky..
You have to remove the C-clips after cleaning the old grease out under the dust boots.
Make sure you press the bushing out from the side opposite the C-clip. I believe there is a bushing how-to somewhere on the forum.
All clean....install in reverse order.
Moving on to the rear lower inner bushing.
The bushing needs to be trimmed with a fine tooth hacksaw so it can be pressed out. Be careful not to trim too much and cut into the control arm. The bushing should look similar to this....
Time to press the bushing out
one side DONE!
I see my FD's on the lift in the background and I get so jealous!
Haha, I'll be home in 4 weeks to check out Pirate Hooker in person... I expect it to be 100% completed. Ready..... GO!
PS: attention *****!
Haha, I'll be home in 4 weeks to check out Pirate Hooker in person... I expect it to be 100% completed. Ready..... GO!
PS: attention *****!
I hope you will take the opportunity to clean up those suspension arms. Maybe I will take some pictures of what I did to mine and I can motive you.
The Superpro bushings you will love them, no squeal and they feel great around town really not harsh. There is just one critical peice of information we are missing, what kind of wheels are you going to be running?
The Superpro bushings you will love them, no squeal and they feel great around town really not harsh. There is just one critical peice of information we are missing, what kind of wheels are you going to be running?
-Dan
Last edited by GoodfellaFD3S; Oct 1, 2009 at 06:58 PM.


Joined: Mar 2001
Posts: 30,814
Likes: 655
From: FL-->NJ/NYC again!