
94 RX-7 UN-build thread


Thread Starter
Full Member
Joined: Mar 2004
Posts: 190
Likes: 62
From: Chicago
94 RX-7 UN-build thread
So my brother picked up a gem a few years ago.
94 rx7 with 64k on the clock. Sadly I don't think any of us are sure if its a base, r1 or r2. Definitely not a touring im assuming(no leather or sunroof)..we've probably put hardly 1000 miles on it in that time. Its currently running pump gas and 13lbs of boost. As far as maintenance, fluid changes, etc...wev'e changed the oil(amsoil), replaced the plugs and did a compression test.(its been a few years but I remember numbers were within specs). Additionally every time the gas tank has been filled its been filled with a bottle of amsoil dominator 2 cycle oil along with gasoline. Other than that I pressure tested the car to make sure its got no boost leaks...also pulled a plug and took a look at it...nice tan brown color..seems to be running fine.Its been sitting mostly and he rarely drives it. Reason is simple, its a bit too hardcore and not exactly pleasant as a weekend car. So whats the solution? We'll were going to make it a bit more street friendly.
Here is a mod list of the car accompanied by some pictures. (list supplied by seller when he sold the car)
1994 Mazda RX7 R2
63k original miles only
the car was prepared by Steve Kan in Forth Worth, Texas
Race ported 2 rotor engine with 3mm apex seals
Race tuned at 24psi with 507 HP at the wheels (see attached dyno sheet) that's over 630 HP at the flywheel.
Pettit Racing intercooler with pull fan and switch
HKS TO4R cutback single turbo (best and fastest spooling turbo made by HKS- google it)
JIC FTLAT RACING fully adjustable coil over suspension $$$$ purchased from Japan
Suspension Techniques sway bars.
Haltec fully adjustable computer management (with laptop included)
HKS twin pack ignition
mazdaspeed frame
Kaaz racing differential
CCW racing 3 piece wheels 18 in custom offset
Greddy turbo controller
Greedy electronic boost controller
Pioneer stereo w/ MP3 and pioneer speakers
all real carbon door handles, and vented hood
Dual Nippon Denso Fuel pumps with dual Mazdaspeed oil filters
Oil catch tank
Racing motor mounts
red top high power battery relocated behind driver seat
Full polyurethane bushings (very stiff)
Racing dual oil cooler
racing steering wheel
2 original spare wheels for drag racing fronts included
racing fender flares Pettit Racing
racing front bumper Mazdaspeed GTC
Power steering removed
A/C removed
For starters I would like to get the interior squared away. Previous owner put some type of carbon overlay on the dash and its peeling. Looks horrible. No radio, and the greddy along with the timer are just dangling in the area that would be taken up by the stereo.
I'll get some interior pictures up and hopefully with everyone's guidance I can semi-restore this car back to a more streetable form. Before anyone asks, I don't intend to sell any parts that get taken off.
After the interior is buttoned up, id like to get softer suspension, install PS back in the car, possibly AC and also considering a quieter exhaust. I'd love to hear everyone's feedback. Thanks!
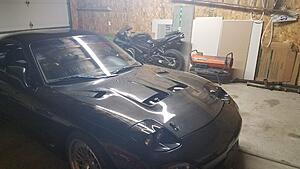
For now here are a few exterior pics and a dynosheet provided by previous owner.


94 rx7 with 64k on the clock. Sadly I don't think any of us are sure if its a base, r1 or r2. Definitely not a touring im assuming(no leather or sunroof)..we've probably put hardly 1000 miles on it in that time. Its currently running pump gas and 13lbs of boost. As far as maintenance, fluid changes, etc...wev'e changed the oil(amsoil), replaced the plugs and did a compression test.(its been a few years but I remember numbers were within specs). Additionally every time the gas tank has been filled its been filled with a bottle of amsoil dominator 2 cycle oil along with gasoline. Other than that I pressure tested the car to make sure its got no boost leaks...also pulled a plug and took a look at it...nice tan brown color..seems to be running fine.Its been sitting mostly and he rarely drives it. Reason is simple, its a bit too hardcore and not exactly pleasant as a weekend car. So whats the solution? We'll were going to make it a bit more street friendly.
Here is a mod list of the car accompanied by some pictures. (list supplied by seller when he sold the car)
1994 Mazda RX7 R2
63k original miles only
the car was prepared by Steve Kan in Forth Worth, Texas
Race ported 2 rotor engine with 3mm apex seals
Race tuned at 24psi with 507 HP at the wheels (see attached dyno sheet) that's over 630 HP at the flywheel.
Pettit Racing intercooler with pull fan and switch
HKS TO4R cutback single turbo (best and fastest spooling turbo made by HKS- google it)
JIC FTLAT RACING fully adjustable coil over suspension $$$$ purchased from Japan
Suspension Techniques sway bars.
Haltec fully adjustable computer management (with laptop included)
HKS twin pack ignition
mazdaspeed frame
Kaaz racing differential
CCW racing 3 piece wheels 18 in custom offset
Greddy turbo controller
Greedy electronic boost controller
Pioneer stereo w/ MP3 and pioneer speakers
all real carbon door handles, and vented hood
Dual Nippon Denso Fuel pumps with dual Mazdaspeed oil filters
Oil catch tank
Racing motor mounts
red top high power battery relocated behind driver seat
Full polyurethane bushings (very stiff)
Racing dual oil cooler
racing steering wheel
2 original spare wheels for drag racing fronts included
racing fender flares Pettit Racing
racing front bumper Mazdaspeed GTC
Power steering removed
A/C removed
For starters I would like to get the interior squared away. Previous owner put some type of carbon overlay on the dash and its peeling. Looks horrible. No radio, and the greddy along with the timer are just dangling in the area that would be taken up by the stereo.
I'll get some interior pictures up and hopefully with everyone's guidance I can semi-restore this car back to a more streetable form. Before anyone asks, I don't intend to sell any parts that get taken off.
After the interior is buttoned up, id like to get softer suspension, install PS back in the car, possibly AC and also considering a quieter exhaust. I'd love to hear everyone's feedback. Thanks!
For now here are a few exterior pics and a dynosheet provided by previous owner.
Last edited by NoMiEzVR4; May 9, 2017 at 12:16 PM.


Looks like a great starting point. There is a thread on refinishing interior panels once you remove the carbon overlay. Looks factory and holds up better than stock.
I used to have JIC flta2's on an old Subaru and they were so harsh, in fact so harsh that one day we went to rotate the tires, jacked up the car and wheel/hub assembly fell off the car because the body of the coilover broke! I have tein flex on my rx7 and it's really a nice setup on the street and for spirited driving, no experience with them on track however.
I used to have JIC flta2's on an old Subaru and they were so harsh, in fact so harsh that one day we went to rotate the tires, jacked up the car and wheel/hub assembly fell off the car because the body of the coilover broke! I have tein flex on my rx7 and it's really a nice setup on the street and for spirited driving, no experience with them on track however.
Thread Starter
Full Member
Joined: Mar 2004
Posts: 190
Likes: 62
From: Chicago
Looks like a great starting point. There is a thread on refinishing interior panels once you remove the carbon overlay. Looks factory and holds up better than stock.
I used to have JIC flta2's on an old Subaru and they were so harsh, in fact so harsh that one day we went to rotate the tires, jacked up the car and wheel/hub assembly fell off the car because the body of the coilover broke! I have tein flex on my rx7 and it's really a nice setup on the street and for spirited driving, no experience with them on track however.
I used to have JIC flta2's on an old Subaru and they were so harsh, in fact so harsh that one day we went to rotate the tires, jacked up the car and wheel/hub assembly fell off the car because the body of the coilover broke! I have tein flex on my rx7 and it's really a nice setup on the street and for spirited driving, no experience with them on track however.
Thanks for the feedback regarding the teins...yeah the JIC's are definitely very harsh. This car will never see track duty in our possession. Its going to be a nice weather weekend cruiser with the occasional spirited WOT pulls. The roads in chicago are terrible, along with teins what other coilovers are recommended for street use/spirited driving?
Last edited by NoMiEzVR4; May 9, 2017 at 12:11 PM.
Thread Starter
Full Member
Joined: Mar 2004
Posts: 190
Likes: 62
From: Chicago
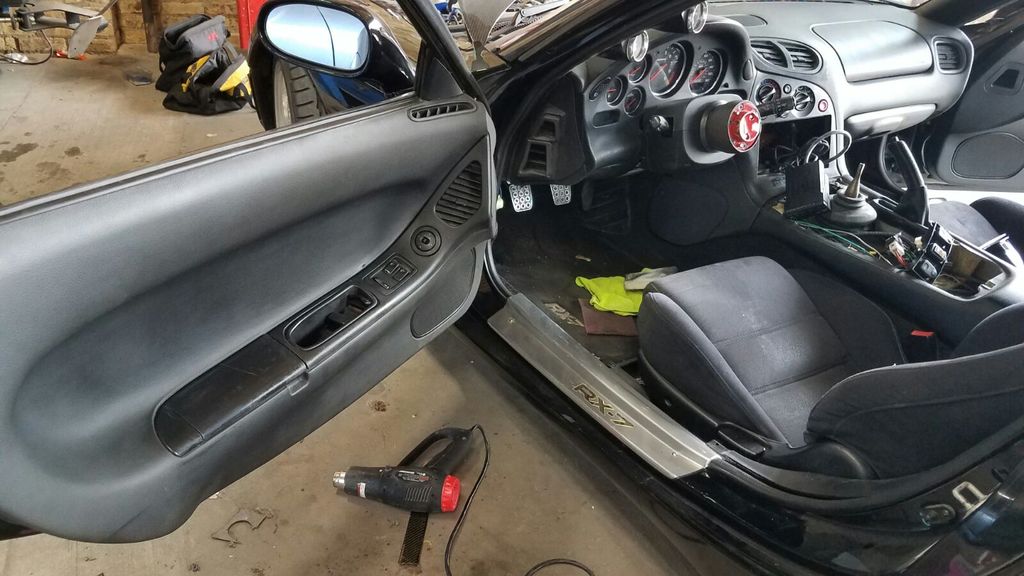
yep..just snapped these yesterday. I'll take one of the engine bay one of these days as well. Oh and please excuse the dust..it gets dusty in the shop.
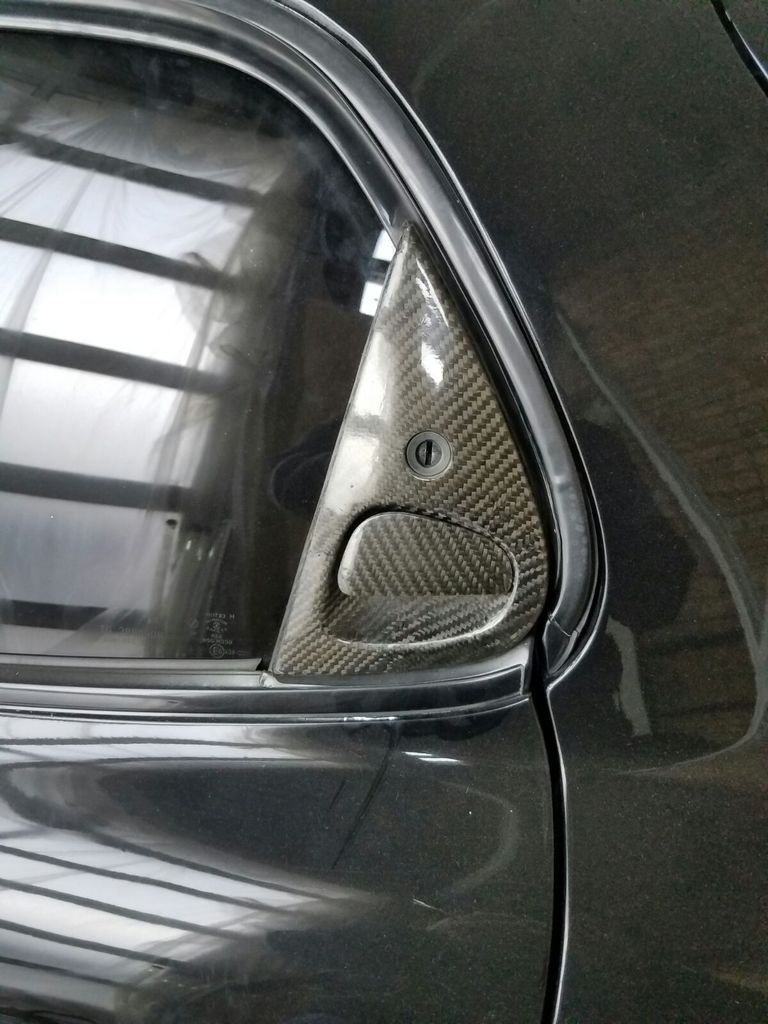
Here is the carbon on the doors..starting to turn yellowish. This will need to go as well. The car has a carbon hood. Id like to swap that out for a scoote2..but thats for later.
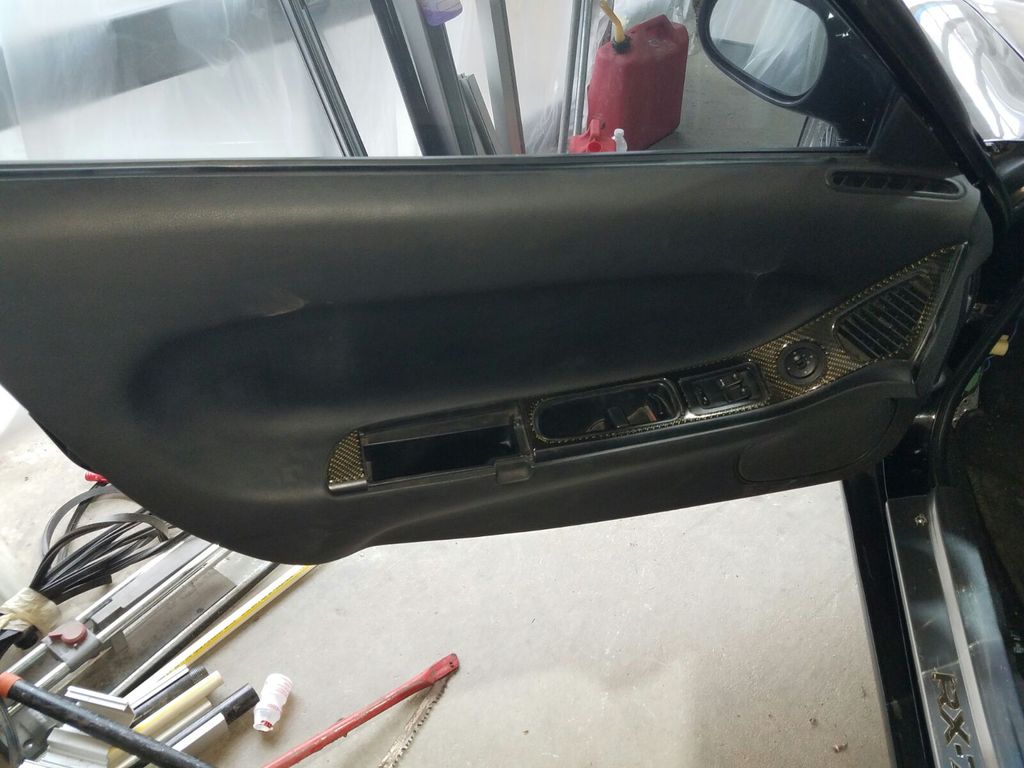
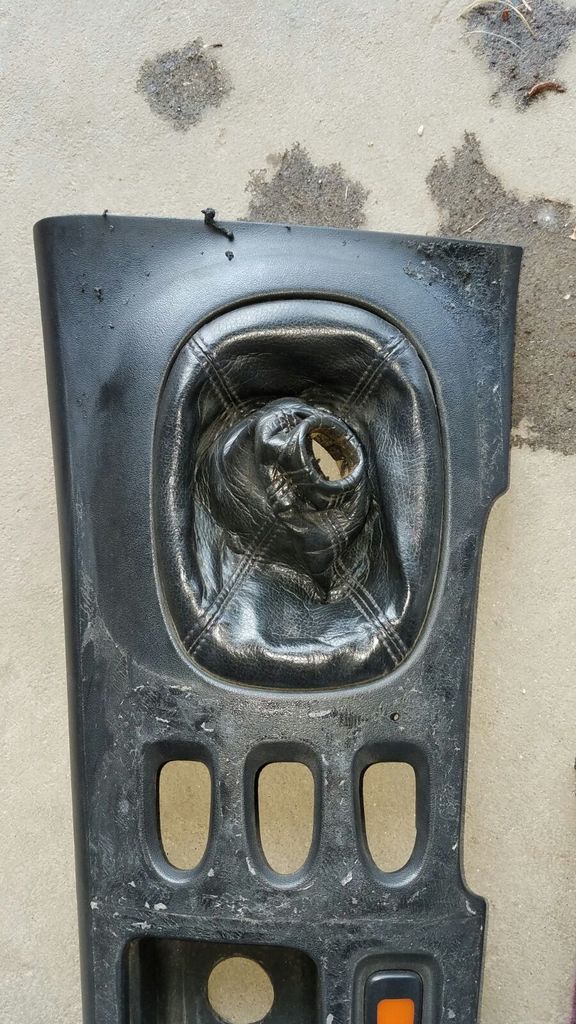
Driver door panel. Now what can I do with this thing? I know the cover is missing/broken. Is this a common problem? Do I need a new complete panel to fix this or can i get just the missing piece?
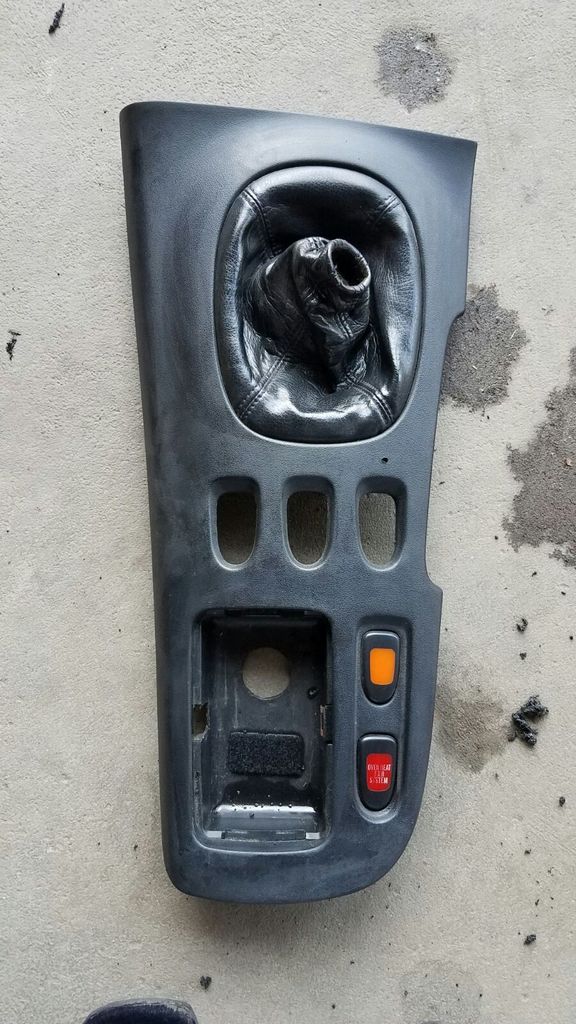
Passenger door looks fine minus the trim
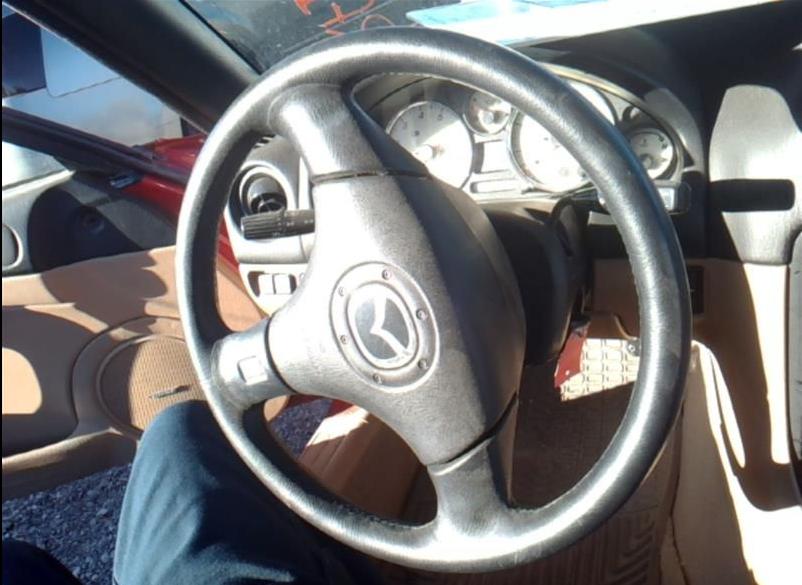
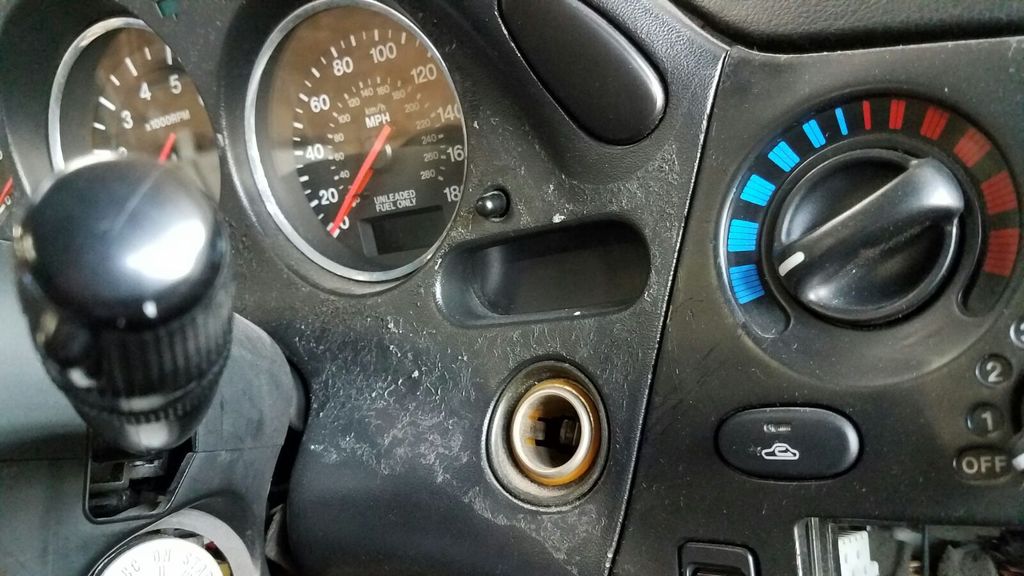
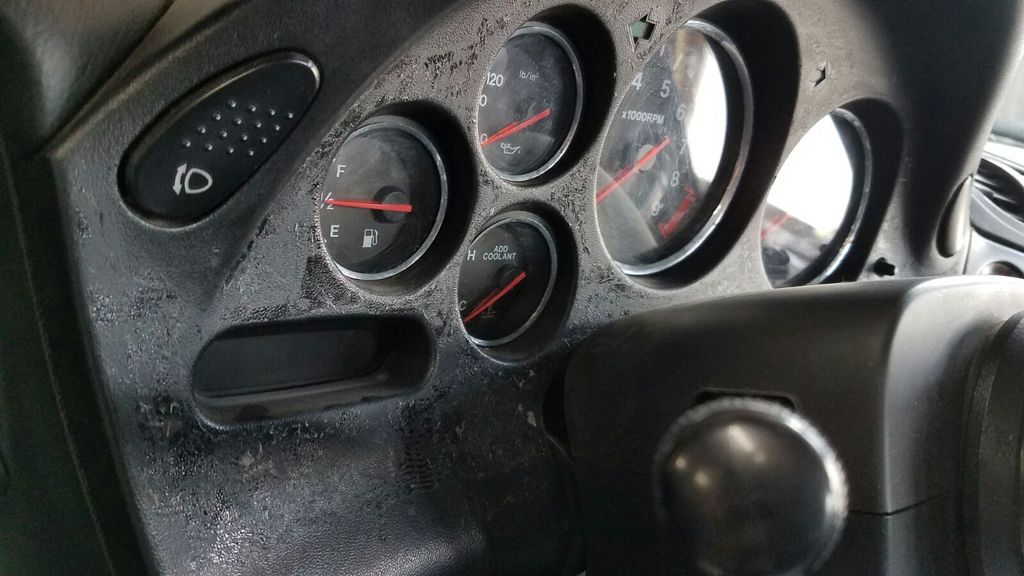
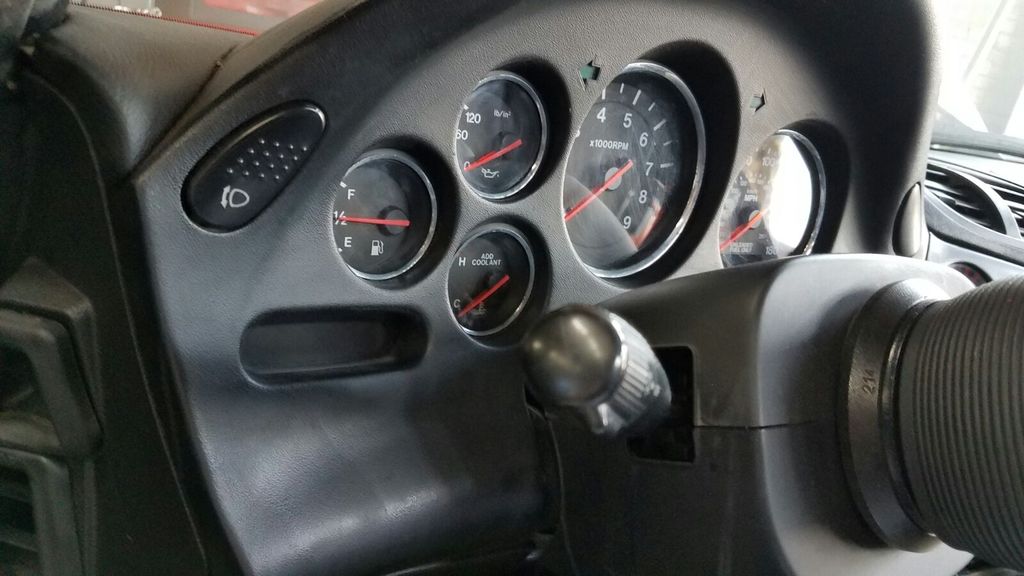
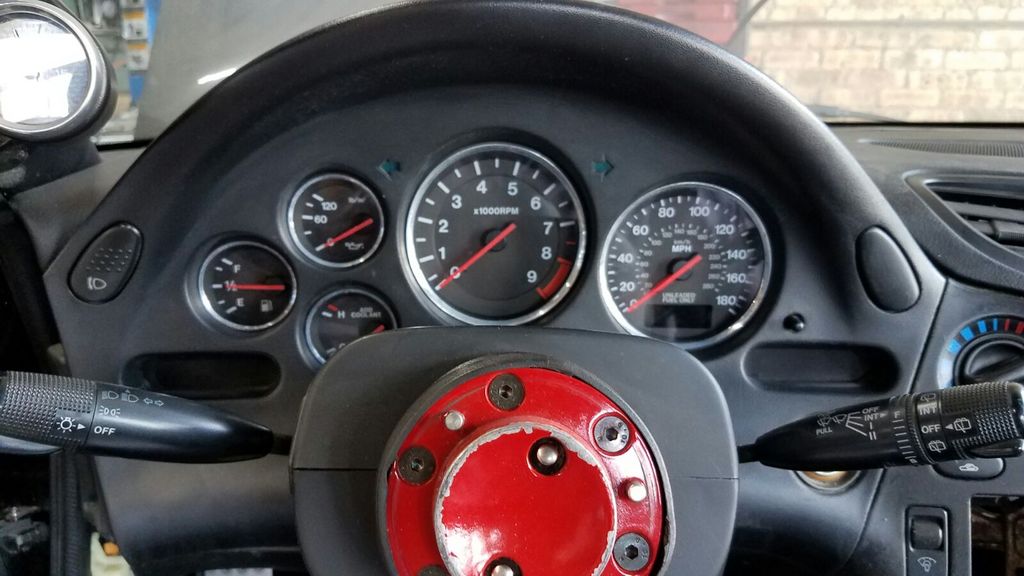
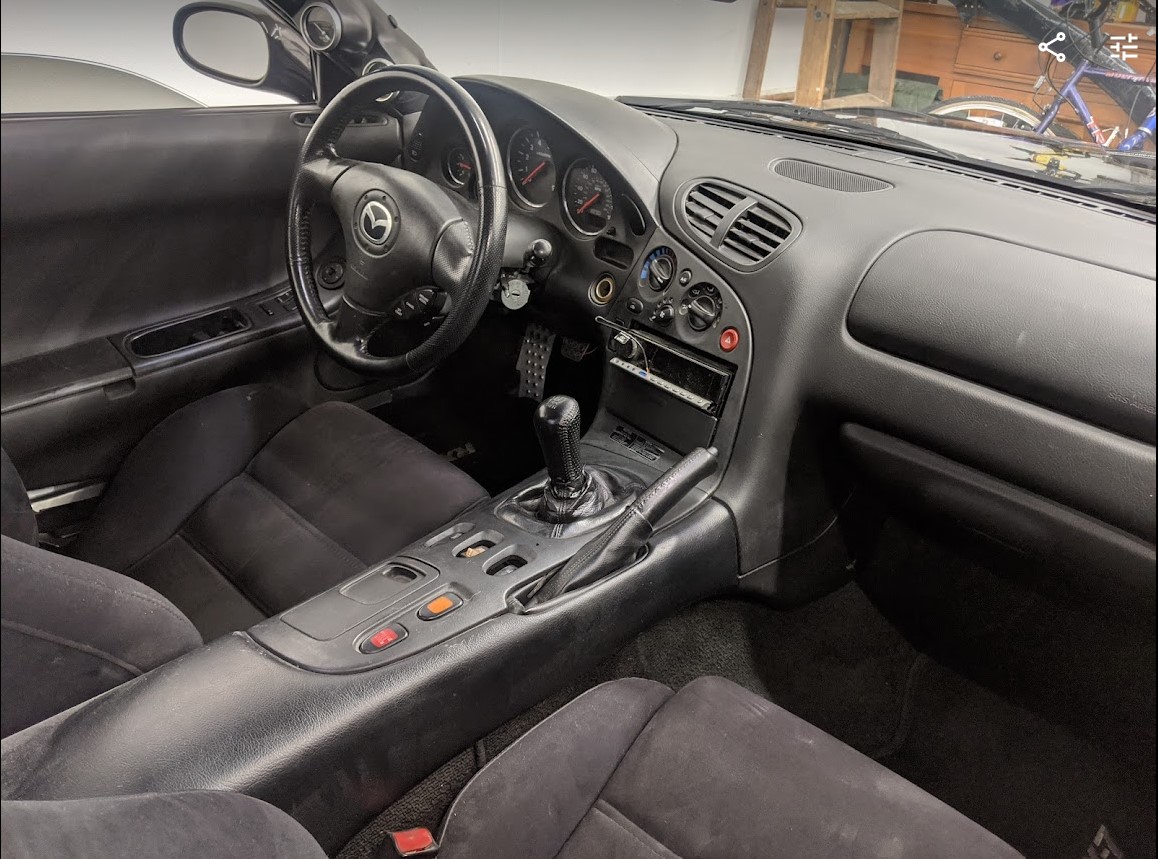
cockpit
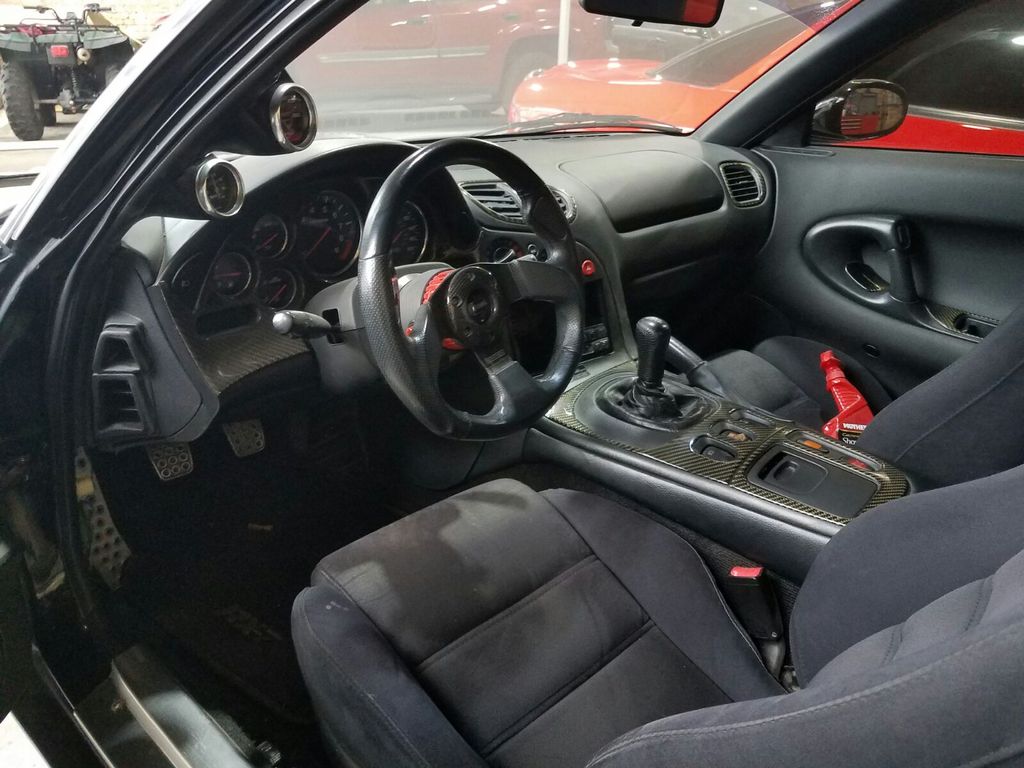
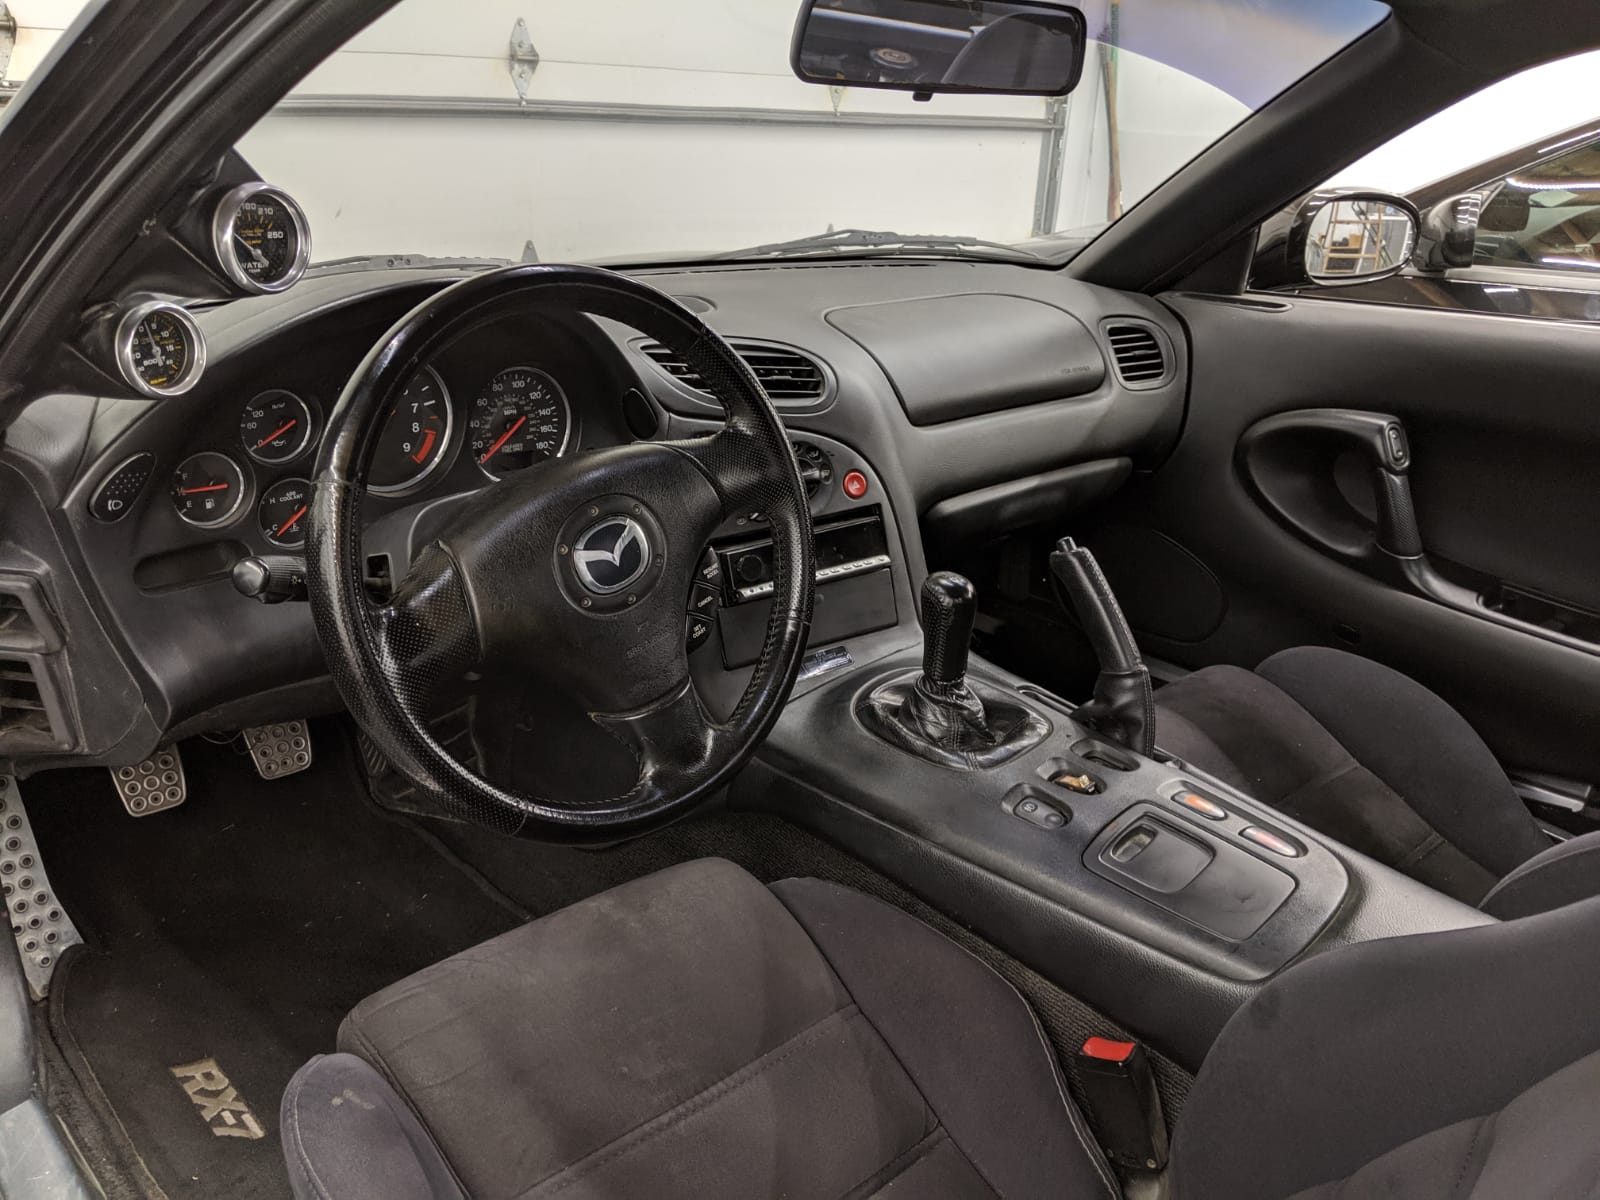
Missing radio. Its a nice steering wheel (removeable too) but its way too small and with no P/S it makes city driving a pain. I'm going to keep an eye out for a mazda Nardi wheel.
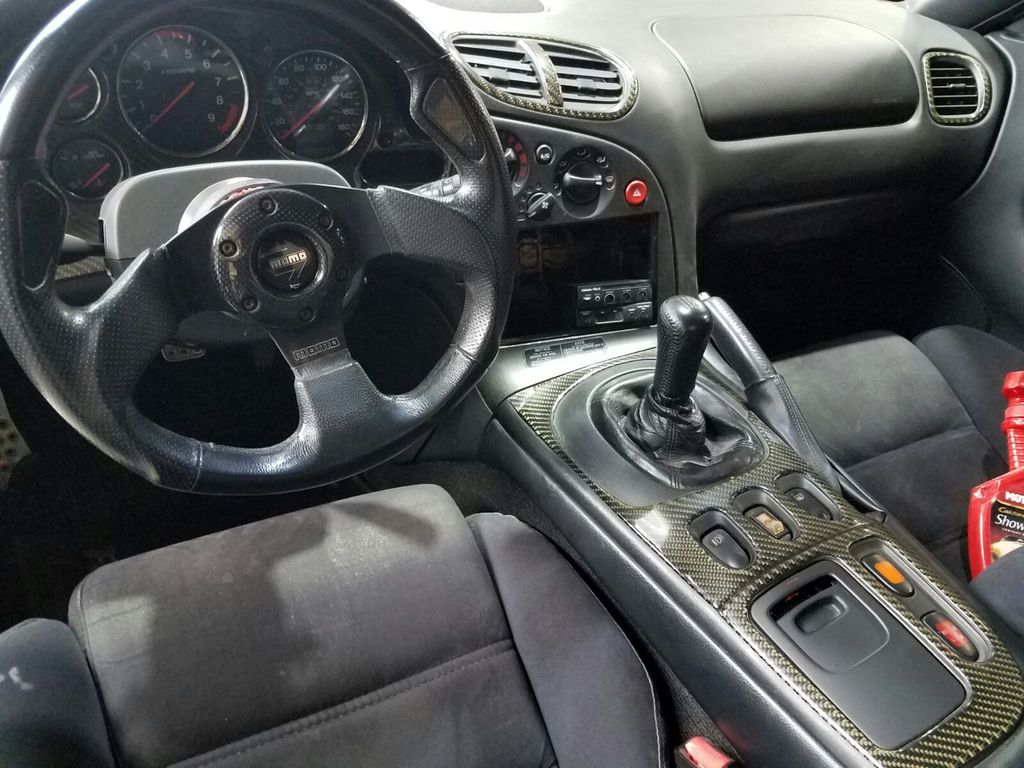
Oh and the car has some type of short shifter which is wicked but damn its SO STIFF. I don't think it should be like that, definitely not normal. Is there anything else anyone else sees that I'm missing? its got coolant and volt autometer gauges on the a pillar. Regarding the radio unit, whats the verdict on getting one of those double din flat screen types?
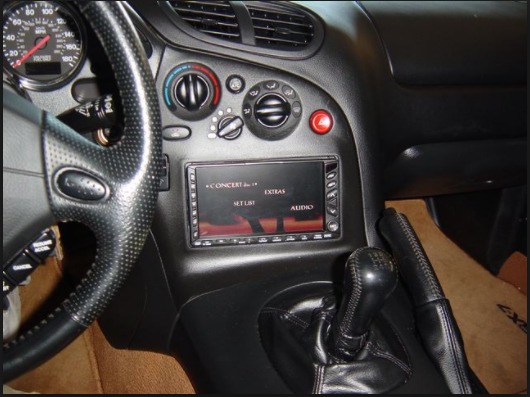
kinda something like this..(though personally I like the OEM radio)
Are people using apps nowadays (torque comes to mind) to view their vital engine functions on their infotainment systems? Id like to get a wbo2 installed as well. Whats everyone's thoughts?
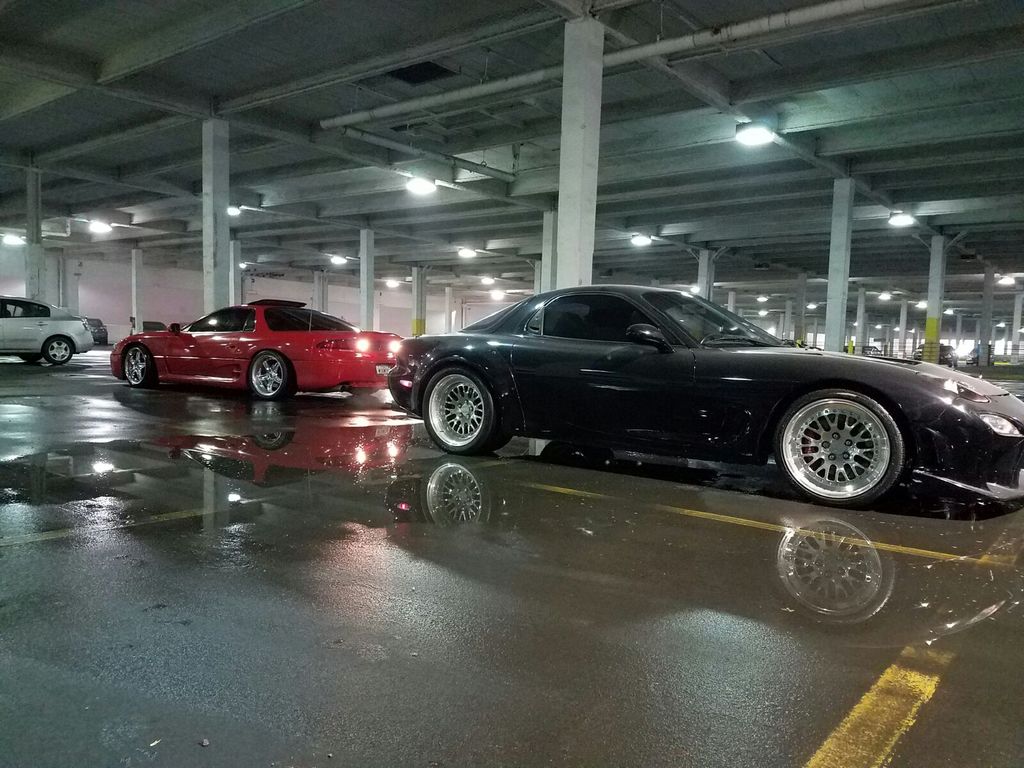
Random shot with my 550hp VR-4
Here is the carbon on the doors..starting to turn yellowish. This will need to go as well. The car has a carbon hood. Id like to swap that out for a scoote2..but thats for later.

Driver door panel. Now what can I do with this thing? I know the cover is missing/broken. Is this a common problem? Do I need a new complete panel to fix this or can i get just the missing piece?

Passenger door looks fine minus the trim

cockpit

Missing radio. Its a nice steering wheel (removeable too) but its way too small and with no P/S it makes city driving a pain. I'm going to keep an eye out for a mazda Nardi wheel.

Oh and the car has some type of short shifter which is wicked but damn its SO STIFF. I don't think it should be like that, definitely not normal. Is there anything else anyone else sees that I'm missing? its got coolant and volt autometer gauges on the a pillar. Regarding the radio unit, whats the verdict on getting one of those double din flat screen types?
kinda something like this..(though personally I like the OEM radio)

Are people using apps nowadays (torque comes to mind) to view their vital engine functions on their infotainment systems? Id like to get a wbo2 installed as well. Whats everyone's thoughts?
Random shot with my 550hp VR-4

Last edited by NoMiEzVR4; May 9, 2017 at 12:13 PM.


Trending Topics

You can get an aftermarket pocket lid from SBG or BubbleTech, but with all the stick on CF trim, you might have to get all new panel or get them refinish once the CF is removed.
I have a lot of different Nardi steering wheel, should have one that suit your need, hit me up if you want to check them out.
I have a lot of different Nardi steering wheel, should have one that suit your need, hit me up if you want to check them out.
Thread Starter
Full Member
Joined: Mar 2004
Posts: 190
Likes: 62
From: Chicago
You can get an aftermarket pocket lid from SBG or BubbleTech, but with all the stick on CF trim, you might have to get all new panel or get them refinish once the CF is removed.
I have a lot of different Nardi steering wheel, should have one that suit your need, hit me up if you want to check them out.
I have a lot of different Nardi steering wheel, should have one that suit your need, hit me up if you want to check them out.
That shifter must be a B&m. People either love them or hate them, I had one and hated it. Super notchy feel, but shortest throw I believe.
A coilover everyone will recommend is the Ohlins but they're about 2k.
ill look for that interior thread
A coilover everyone will recommend is the Ohlins but they're about 2k.
ill look for that interior thread
Yup, B&M has a very notchy feel. I got to try it on another member's car when I was shopping for a STS, and decided that's not what I want for the FD, I ended up going with C's shifter.
Thread Starter
Full Member
Joined: Mar 2004
Posts: 190
Likes: 62
From: Chicago
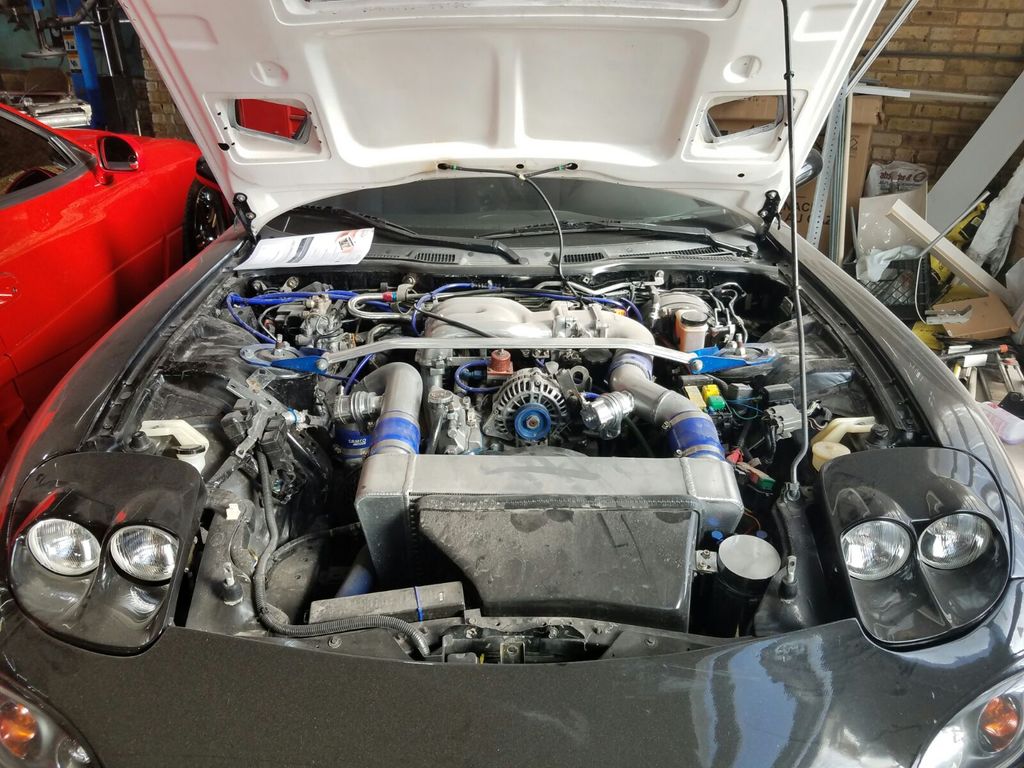
I tried reaching out to bubbleTech with no luck on the door lid. I didn't see it on SBG's site?? Do they offer it? . I'll probably start peeling off the CF this weekend. Here is another sad dusty engine bay picture.
Actually the first thing I'm going to do is wash this thing...looking at these pictures is making me depressed.
Actually the first thing I'm going to do is wash this thing...looking at these pictures is making me depressed.

Last edited by NoMiEzVR4; May 12, 2017 at 09:12 AM.
Thread Starter
Full Member
Joined: Mar 2004
Posts: 190
Likes: 62
From: Chicago
Oh and for those who want to see this beauty in action..here is a video from a few years ago...enjoy!
I've got a nice amount of videos from going out with the locals..subscribe to my channel for more. Once the RX-7 is cleaned up, she's going to get featured in a head to head vs. my 3000GT.
I've got a nice amount of videos from going out with the locals..subscribe to my channel for more. Once the RX-7 is cleaned up, she's going to get featured in a head to head vs. my 3000GT.
Last edited by NoMiEzVR4; May 12, 2017 at 09:23 AM.
That faux-fiber stuff is on the car I'm working on right now. Heat gun and it comes right off. Since it's on 93 plastics they will probably need to be further refinished, but don't get too carried away until you get them off and see how everything looks. I would use a heat gun on low, don't want to get too hot and melt the plastics!
The Bubbletech map pocket lids are outstanding, but you may have to wait for one. If so it's well worth it. They are damn-near unbreakable - Benny handed me one at Deal's Gap one year and dared me to break it. I couldn't. They also look and fit amazing.
Good luck with the build!
Dale
The Bubbletech map pocket lids are outstanding, but you may have to wait for one. If so it's well worth it. They are damn-near unbreakable - Benny handed me one at Deal's Gap one year and dared me to break it. I couldn't. They also look and fit amazing.
Good luck with the build!
Dale
Thread Starter
Full Member
Joined: Mar 2004
Posts: 190
Likes: 62
From: Chicago
That faux-fiber stuff is on the car I'm working on right now. Heat gun and it comes right off. Since it's on 93 plastics they will probably need to be further refinished, but don't get too carried away until you get them off and see how everything looks. I would use a heat gun on low, don't want to get too hot and melt the plastics!
The Bubbletech map pocket lids are outstanding, but you may have to wait for one. If so it's well worth it. They are damn-near unbreakable - Benny handed me one at Deal's Gap one year and dared me to break it. I couldn't. They also look and fit amazing.
Good luck with the build!
Dale
The Bubbletech map pocket lids are outstanding, but you may have to wait for one. If so it's well worth it. They are damn-near unbreakable - Benny handed me one at Deal's Gap one year and dared me to break it. I couldn't. They also look and fit amazing.
Good luck with the build!
Dale
I'm still waiting to hear back from bubbletech regarding the map lid...guess ill have to keep waiting for a new batch.
I managed to replace the battery this weekend. Swapped in a new optima red top, it was relocated(from previous owner) to behind the drivers seat. Good thing is its, easily accessible. Bad thing is, its literally just sitting there in the pocket. I would like to use a battery tie down but I definitely do not want to drill any holes in the car.
After replacing the battery I managed to start the car, its been sitting for quite some time, a few months for sure. Took it for a quick spin around the block, wow this thing is so different compared to my VR-4. 2 things immediately struck me..1. the steering wheel is a joke. Its gotta be less than 100mm..its tiny and im a small guy! secondly the exhaust is so damn loud...it sounds badass don't get me wrong but its just too much. What are some popular dual tip exhaust systems out there(RB dual tip i heard is very restrictive) that wont kill performance but also wont be ultra loud? I don't mind an exhaust system that makes itself known, but this thing is 4" straight from the turbo out to the canister...so you can begin to get an idea of how loud it really is.
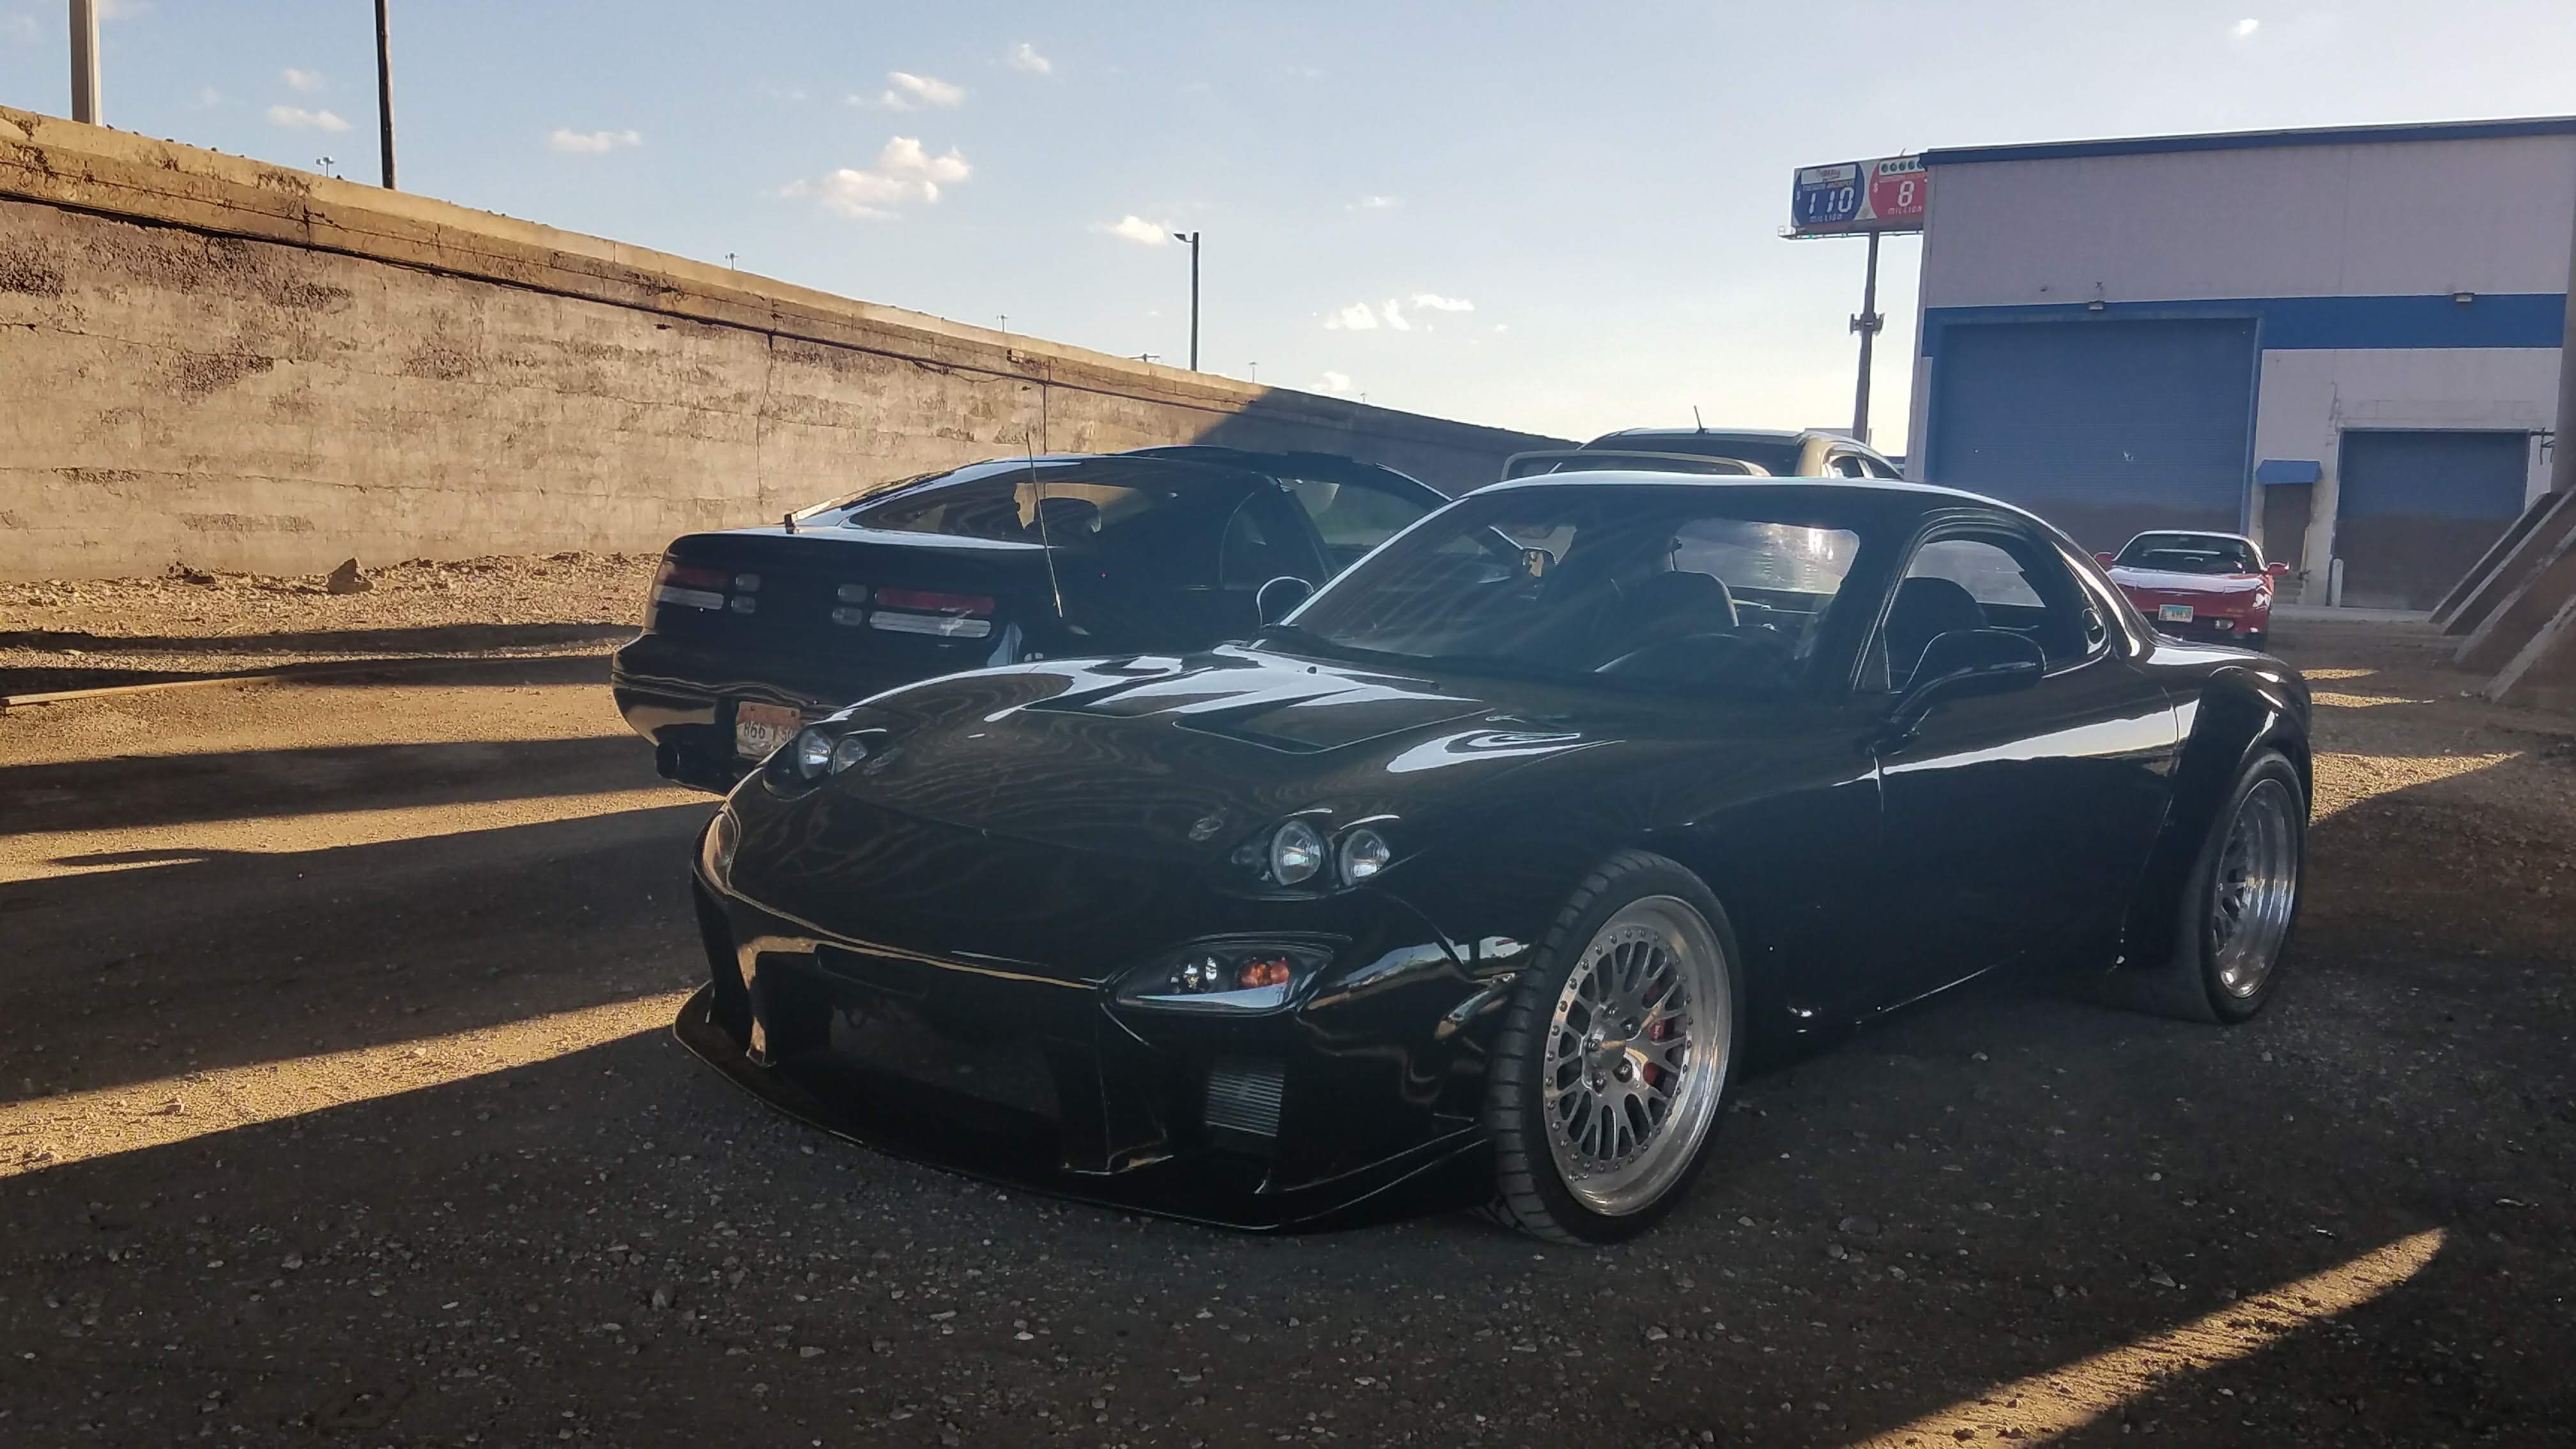
Quick picture i snapped of her out in the wild after such a long time!

Last edited by NoMiEzVR4; May 24, 2017 at 12:00 PM.
Thread Starter
Full Member
Joined: Mar 2004
Posts: 190
Likes: 62
From: Chicago
Haven't updated this thread recently but I have been busy with the car. I figured I would post when I made some decent progress..not really doing any fun stuff yet with the car.
So for starters, I purchased a few parts...
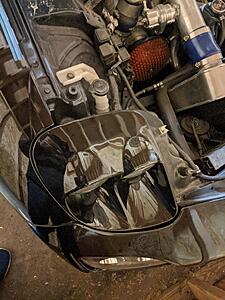
New Filter element for HKS MegaFlow--I honestly didn't want to keep this setup but due to space limitations I was left with no choice.

Power Steering Pump with bracket/lines--looking forward to driving this car with power steering

Finally I also picked up a new steering wheel also from a Miata--I've already shared my thoughts on how small the current wheels is.
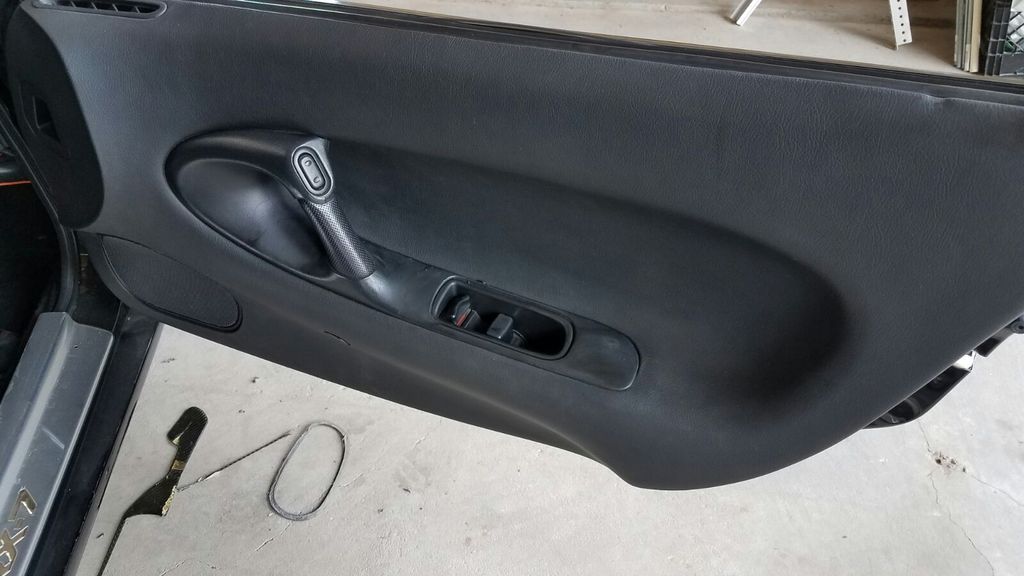
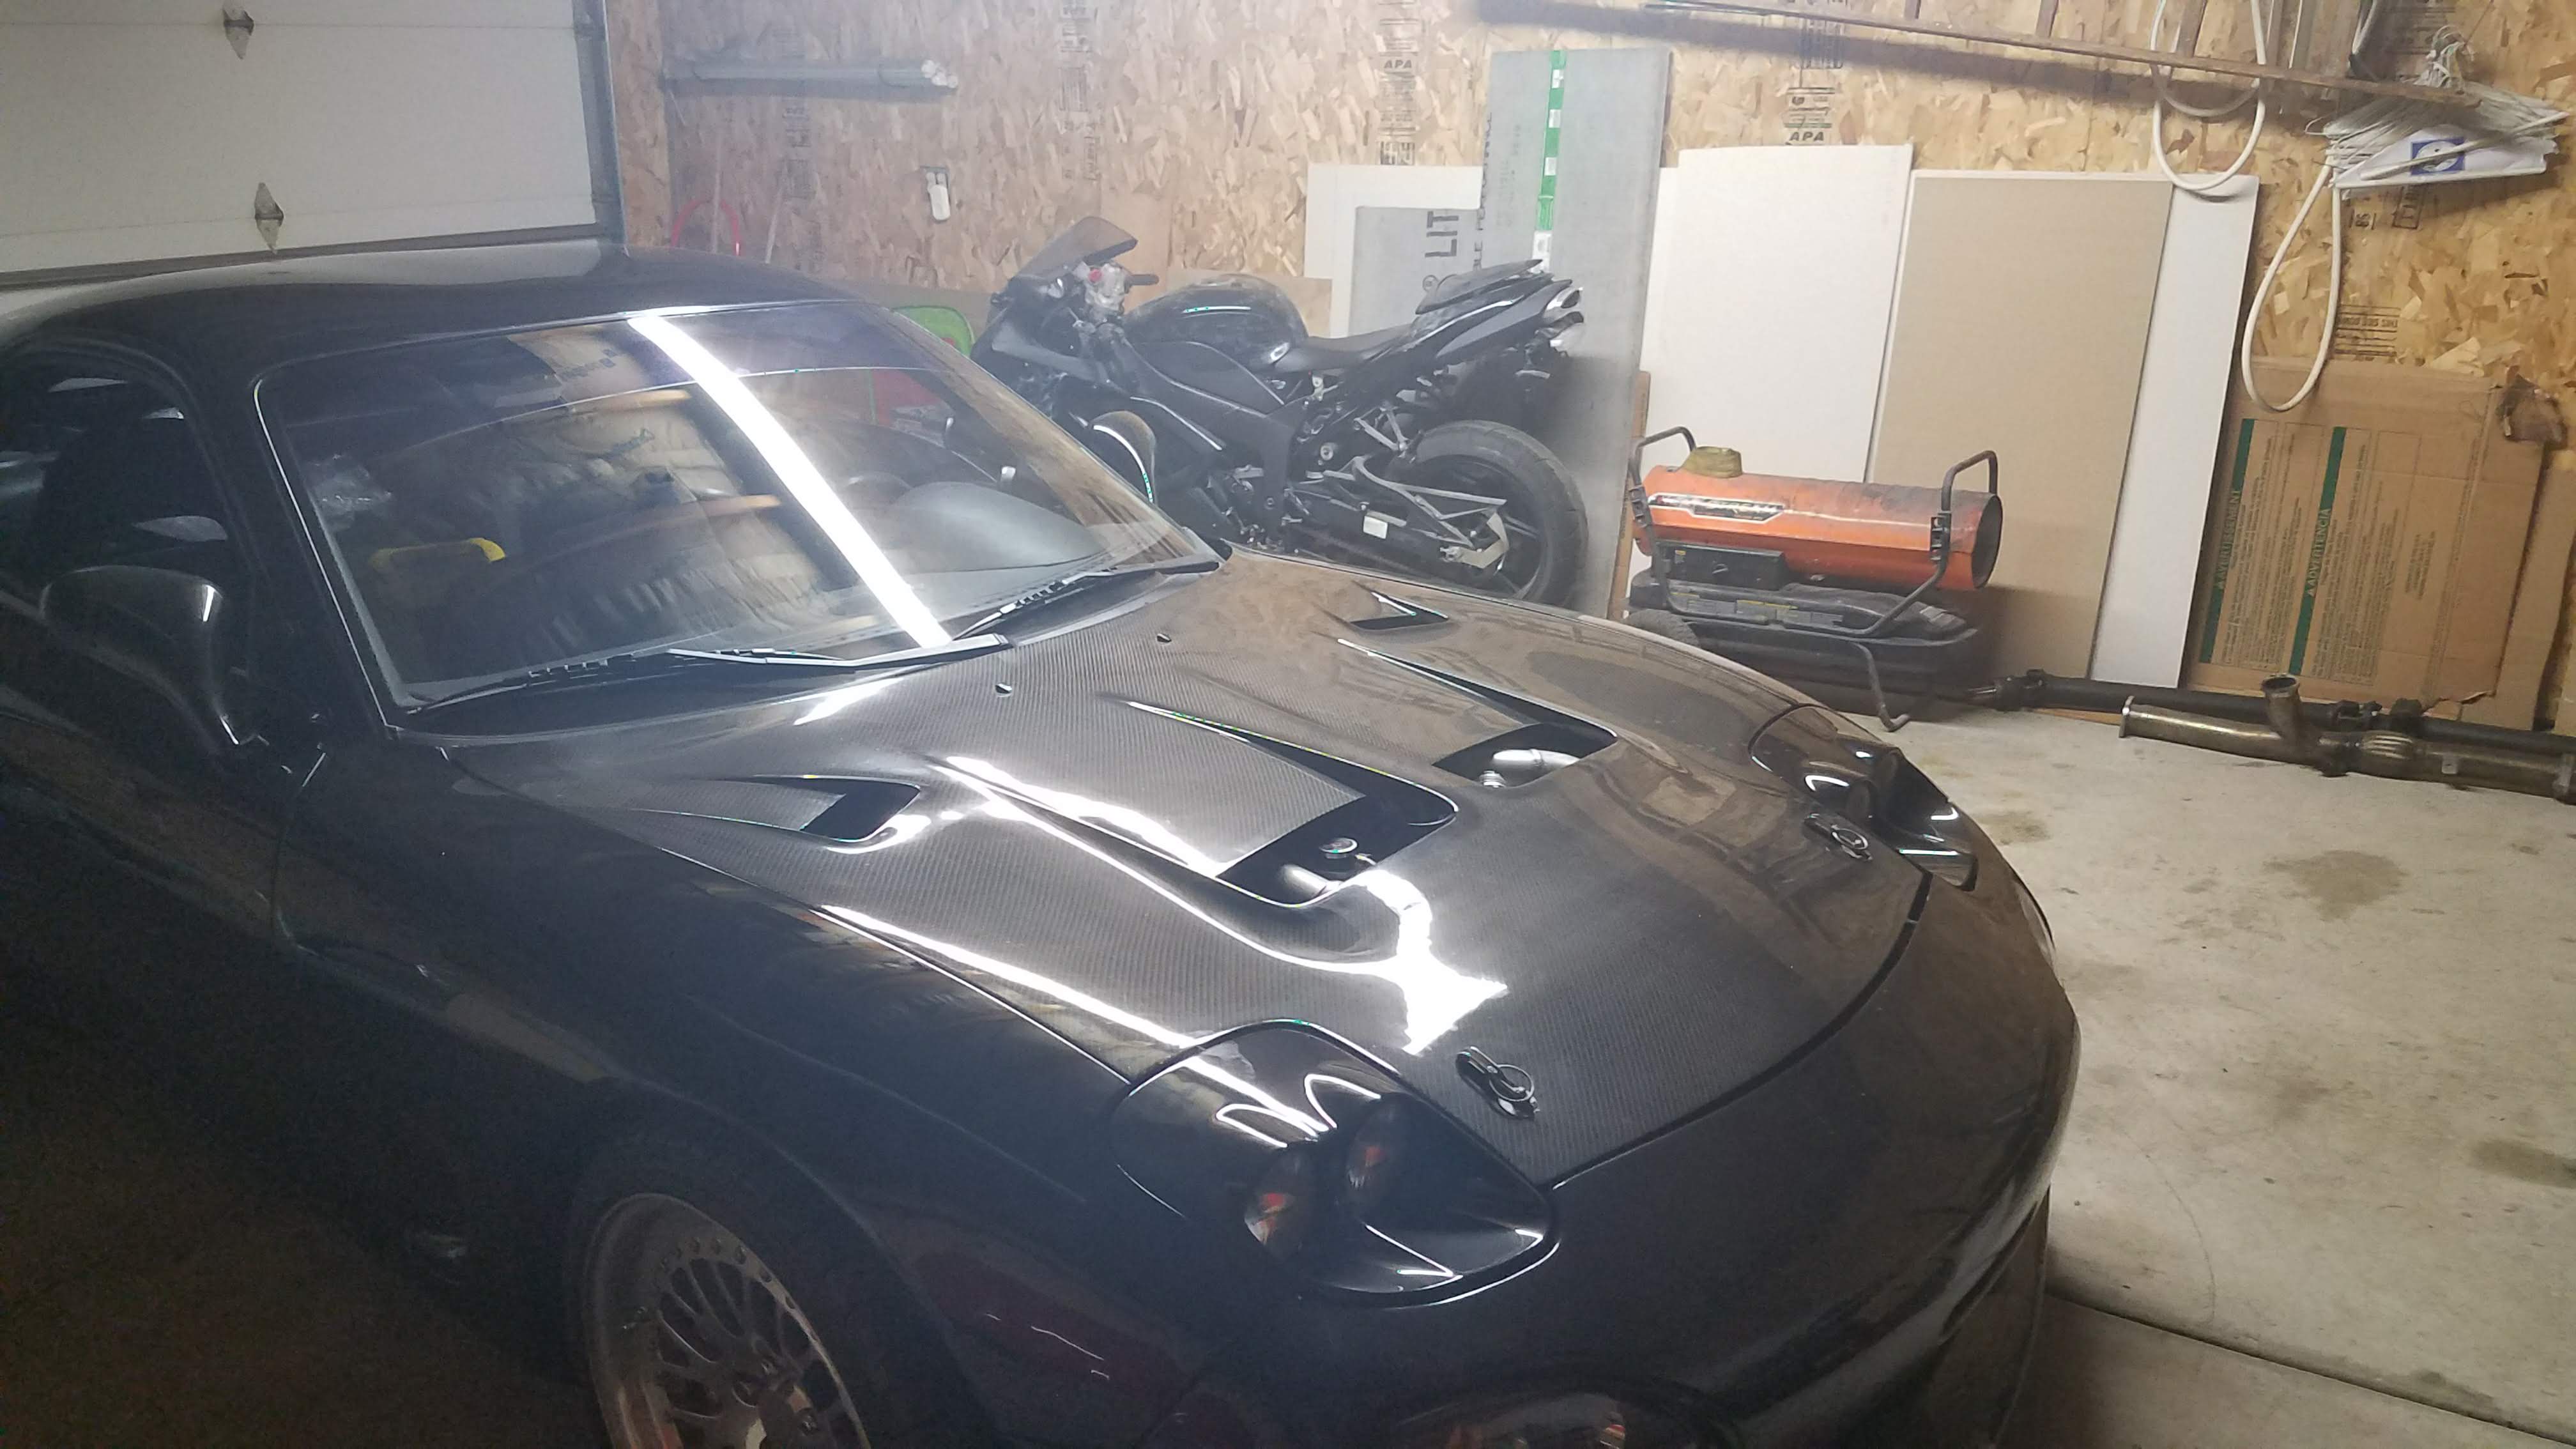
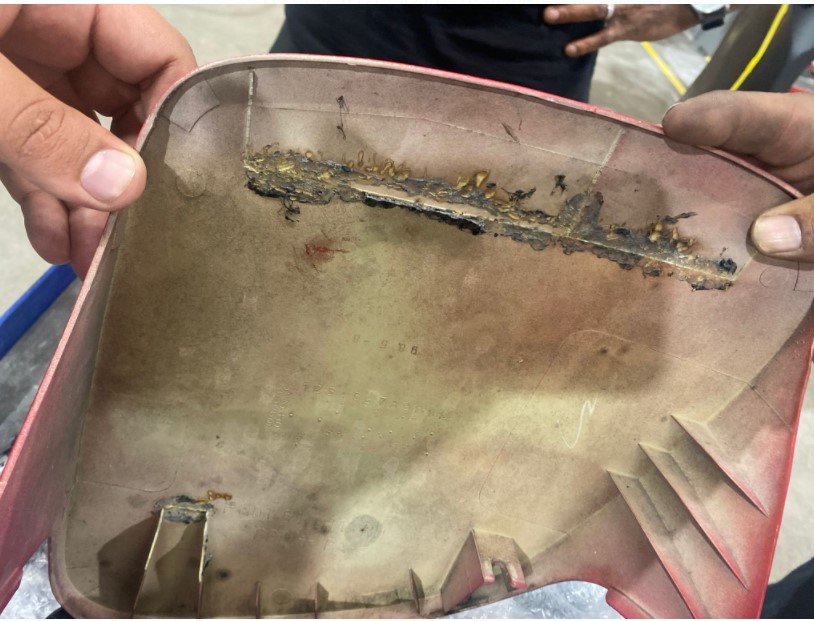
So my plan was to start on the interior and work my way outwards. First on the list was to delaminate the CF trim inside the car. Armed with a heat gun and a plastic spatula type of tool I went to work...
As you can see, although the trim was peeling off, but it was leaving lots of glue/sealant behind. I grabbed a diluted version of a chemical cleaner and with a hard bristled brush, ended up with this as the result..keep in mind this isn't after cleaning the trims, just removing the crap off it.
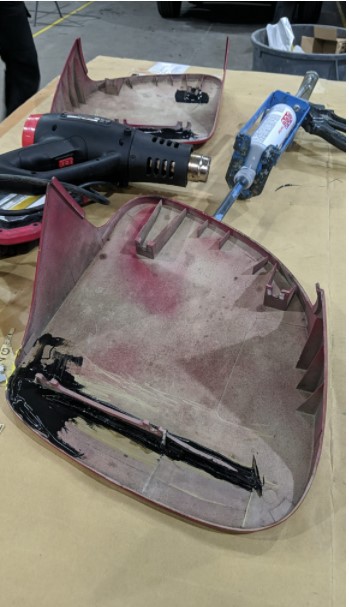
Much nicer
Doors cleaned up pretty well also. I see a small little bubble forming on the driver door card, is that normal for FD's? Oh..and guess what I found?? The MAPLid...!! it was sitting inside the car all along..dont ask where..
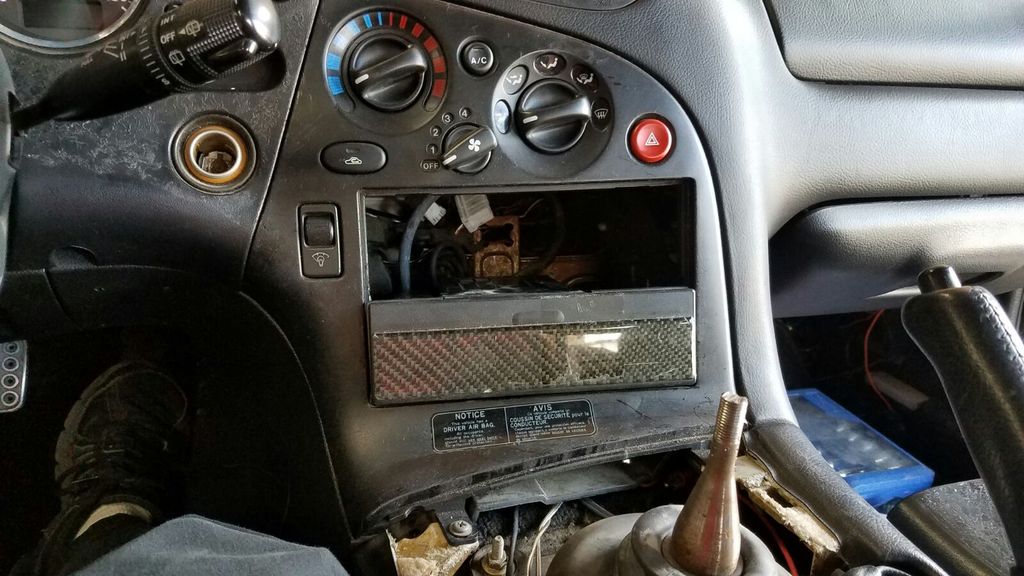
So with the first mini project out of the way, my next objective was to tidy up the center console. The GReddy ProfecB along with the turbo timer were already an eyesore just sitting there, even worse was the wiring harnesses running to them. It literally seemed like it was wired in by a high schooler. So I was anxious to clean up the wiring...what I didn't realize was where it would lead me.
So for starters, I purchased a few parts...
New Filter element for HKS MegaFlow--I honestly didn't want to keep this setup but due to space limitations I was left with no choice.
Power Steering Pump with bracket/lines--looking forward to driving this car with power steering

Finally I also picked up a new steering wheel also from a Miata--I've already shared my thoughts on how small the current wheels is.

So my plan was to start on the interior and work my way outwards. First on the list was to delaminate the CF trim inside the car. Armed with a heat gun and a plastic spatula type of tool I went to work...

As you can see, although the trim was peeling off, but it was leaving lots of glue/sealant behind. I grabbed a diluted version of a chemical cleaner and with a hard bristled brush, ended up with this as the result..keep in mind this isn't after cleaning the trims, just removing the crap off it.
Much nicer


Doors cleaned up pretty well also. I see a small little bubble forming on the driver door card, is that normal for FD's? Oh..and guess what I found?? The MAPLid...!! it was sitting inside the car all along..dont ask where..


So with the first mini project out of the way, my next objective was to tidy up the center console. The GReddy ProfecB along with the turbo timer were already an eyesore just sitting there, even worse was the wiring harnesses running to them. It literally seemed like it was wired in by a high schooler. So I was anxious to clean up the wiring...what I didn't realize was where it would lead me.
Last edited by NoMiEzVR4; Jun 7, 2017 at 02:49 PM.
Thread Starter
Full Member
Joined: Mar 2004
Posts: 190
Likes: 62
From: Chicago
Another hack...the coin holder was 'modified' so that the EBC/TT could be hidden inside.
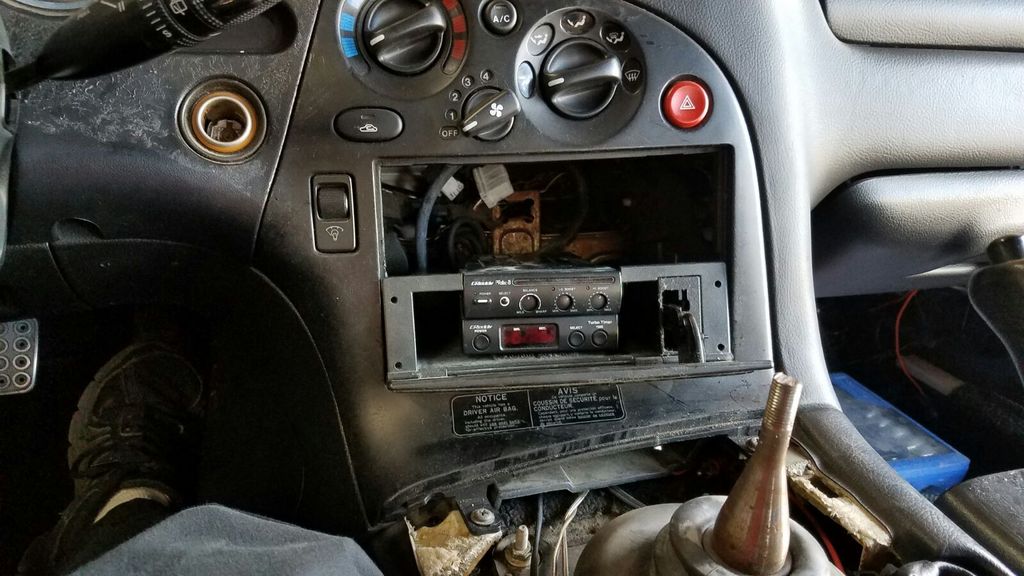
I ended up removing the trim off of it also..
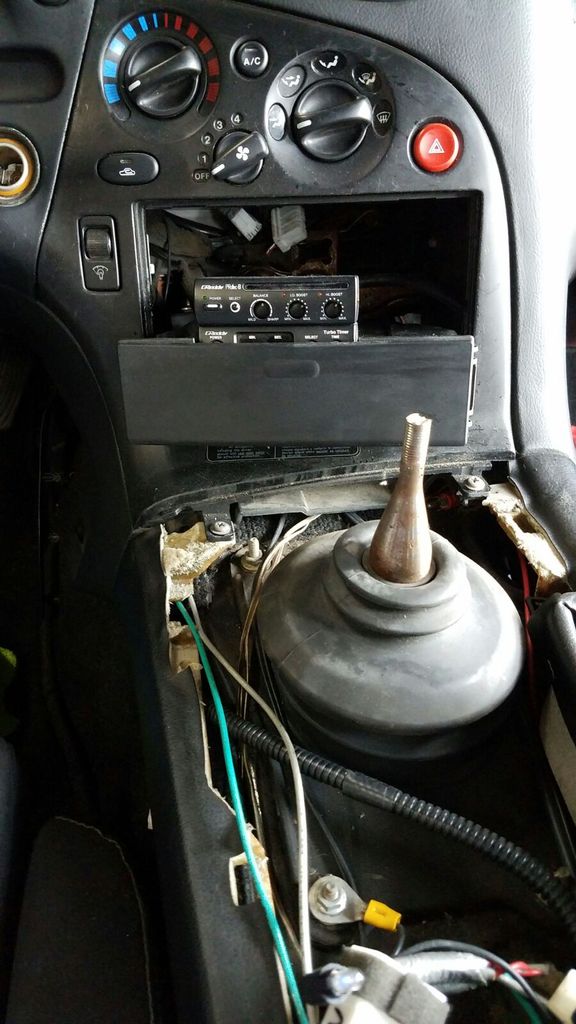
I had my doubts about the wiring that was done for the EBC/TT and gauges but I wasn't expecting anything super crazy. Afterall, the car ran, the gauges worked and it held boost fine.
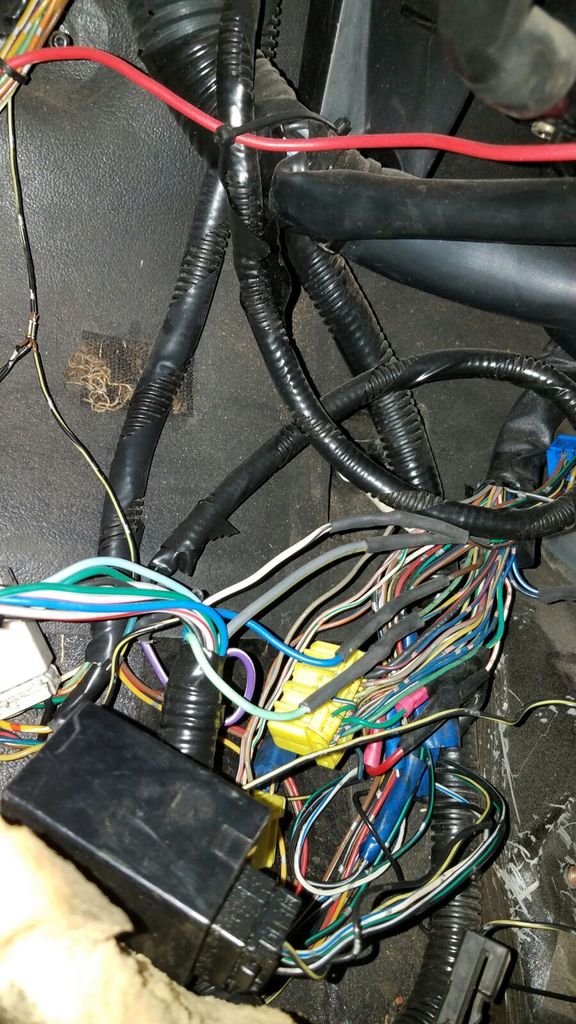
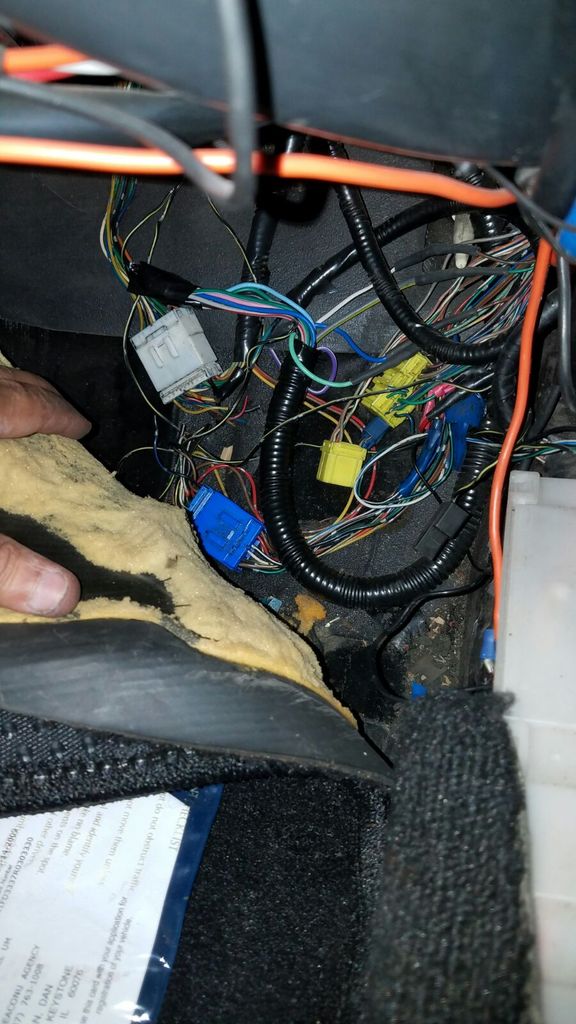
Turns out the the wiring in this car is a complete hackjob. I have no idea how this car ran. Speaker wire, duct tape, miles of electrical tape everywhere inside the cockpit. In addition, there's a ton of useless wires just running to nowhere..?? My plan was to just remove the driver kickpanel so I could trace the wires but I ended up ripping apart the whole interior to chase random wires.
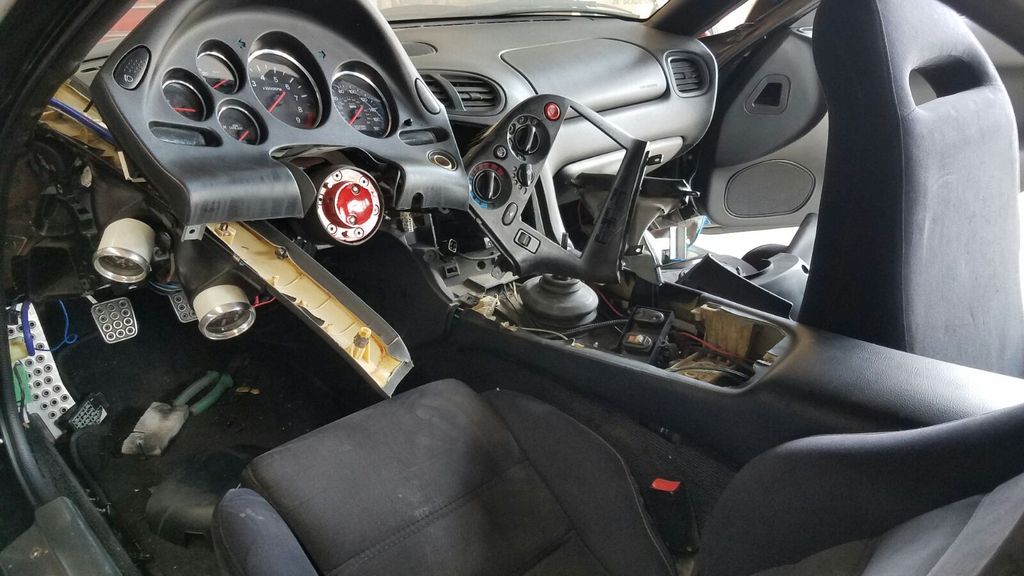
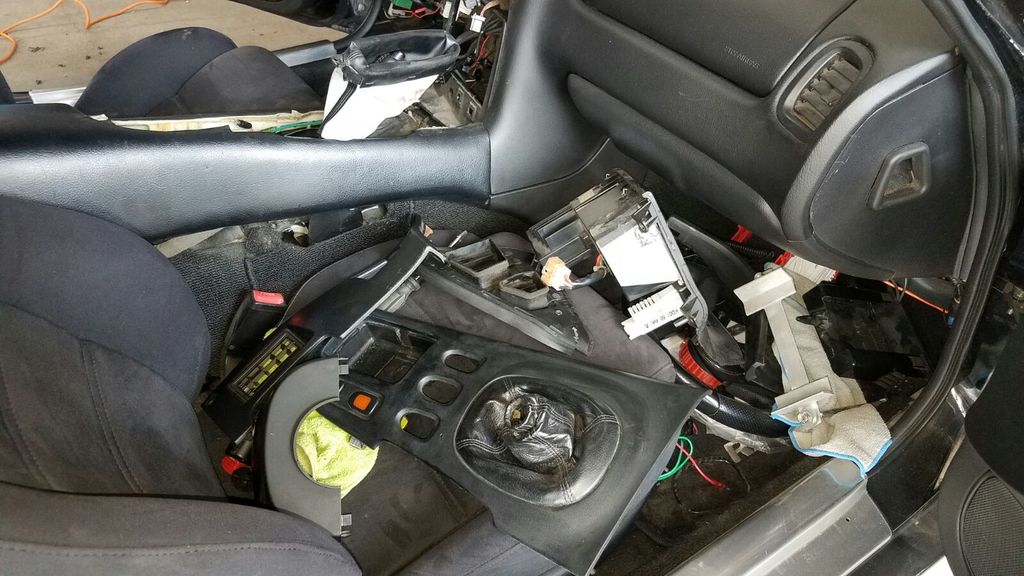
Pulled out everything minus the dash and set it aside for now
Here is a shot of what I've pulled out so far...and theres still more!!!
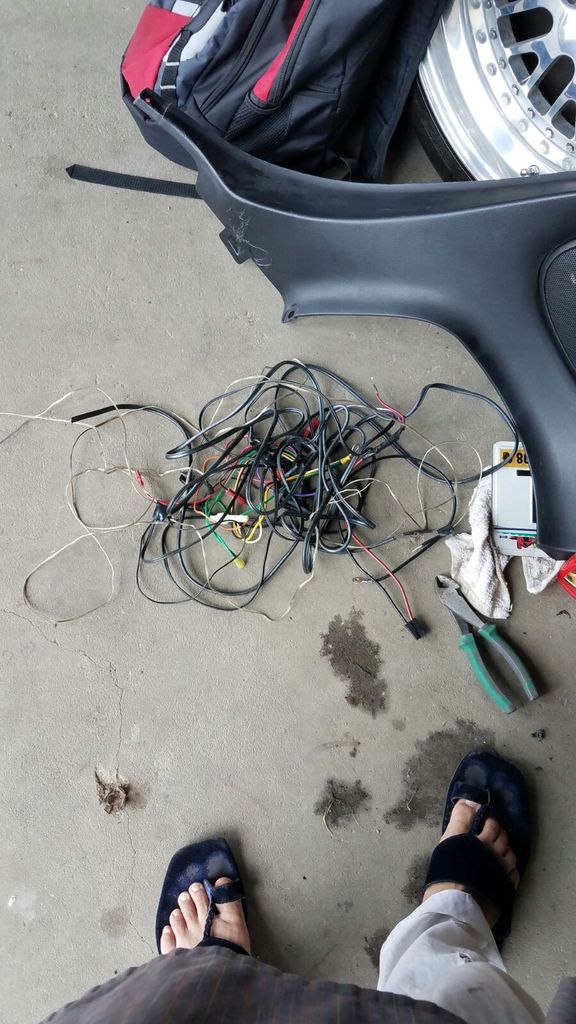
Like i said earlier..duct tape and electrical tape in abundance everywhere inside the cockpit.
Some thoughts regarding pulling the interior apart on this car...having a lightweight car comes at a cost. Almost every panel seems to be made of plastic...which is now well over 20yrs old which makes it quite brittle and frail. There were already a few broken tabs and pieces before I got my hands on it so I had to be even more cautious. It did come apart pretty quickly though, it doesn't help that screws were missing in some spots though..
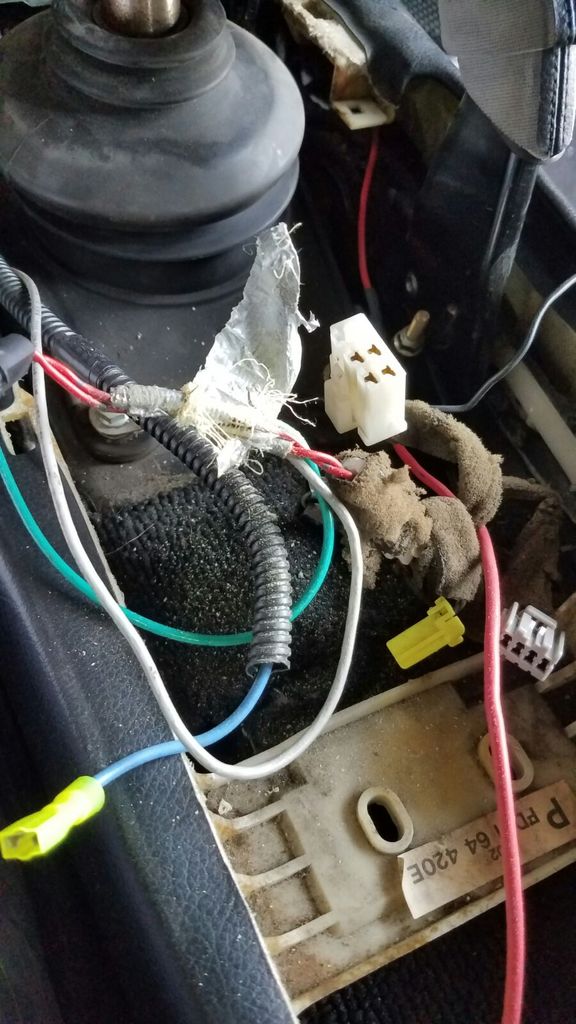
So while following wires I stumbled upon this..seems like the factory ECU harness...it was just stuffed behind the carpet, jumbled up. I'm not sure whats being utilized from the original harness but its definitely not good news. Looks like I'll have to get into the dash to take a visual at the Haltech...definitely not looking forward to that.
Thats all for now...stay tuned for more updates

I ended up removing the trim off of it also..


I had my doubts about the wiring that was done for the EBC/TT and gauges but I wasn't expecting anything super crazy. Afterall, the car ran, the gauges worked and it held boost fine.
Turns out the the wiring in this car is a complete hackjob. I have no idea how this car ran. Speaker wire, duct tape, miles of electrical tape everywhere inside the cockpit. In addition, there's a ton of useless wires just running to nowhere..?? My plan was to just remove the driver kickpanel so I could trace the wires but I ended up ripping apart the whole interior to chase random wires.


Pulled out everything minus the dash and set it aside for now

Here is a shot of what I've pulled out so far...and theres still more!!!

Like i said earlier..duct tape and electrical tape in abundance everywhere inside the cockpit.

Some thoughts regarding pulling the interior apart on this car...having a lightweight car comes at a cost. Almost every panel seems to be made of plastic...which is now well over 20yrs old which makes it quite brittle and frail. There were already a few broken tabs and pieces before I got my hands on it so I had to be even more cautious. It did come apart pretty quickly though, it doesn't help that screws were missing in some spots though..
So while following wires I stumbled upon this..seems like the factory ECU harness...it was just stuffed behind the carpet, jumbled up. I'm not sure whats being utilized from the original harness but its definitely not good news. Looks like I'll have to get into the dash to take a visual at the Haltech...definitely not looking forward to that.


Thats all for now...stay tuned for more updates

Try using black platidip on the centre console and trim panels. Mine looked similar to yours but after applying a few layers of plastidip, they look almost factory. It blends in very well with the oem trim and dash.
Thread Starter
Full Member
Joined: Mar 2004
Posts: 190
Likes: 62
From: Chicago
Its been a few years...this car was always on the back burner for some reason. I was always screwing around with my other car. Well in the last year or so I finally got a little more serious and began purchasing parts to do justice to this thing. Its been begging for a long time to be made into a proper-looking and driving street FD.
Ive made some progress on it mechanically from the last time I posted some 4 yrs ago. Sourced an OEM ps pump and made a high-pressure line, so the car has functioning power steering now. Fixed the leak at the oil pan, ended up dropping the subframe to get that done. It had a small coolant leak from the bottom of the radiator petcock, got a new petcock. I was going to replace the current JIC coilovers with something softer, but i manged to turn them to full soft. The car rides much better than before but still leaves a lot to be desired. Going to tweak with it a bit more before I swap them out for some tien flex coilovers. I have a set on my 300zx and vr4 and they ride pretty well. This sums up the work that has been done, it's not a whole lot but definitely in the right direction.
As far as the mechanical work that i would still like to do, I want to hook up the heater core again, still potentially get a quieter catback exhaust, though with the silencer its pretty manageable. Finally the wiring harness on the car needs to be redone. I don't know who did the work, but its very bad. In the next post ill document the cosmetic work ive done on the car.
Thread Starter
Full Member
Joined: Mar 2004
Posts: 190
Likes: 62
From: Chicago
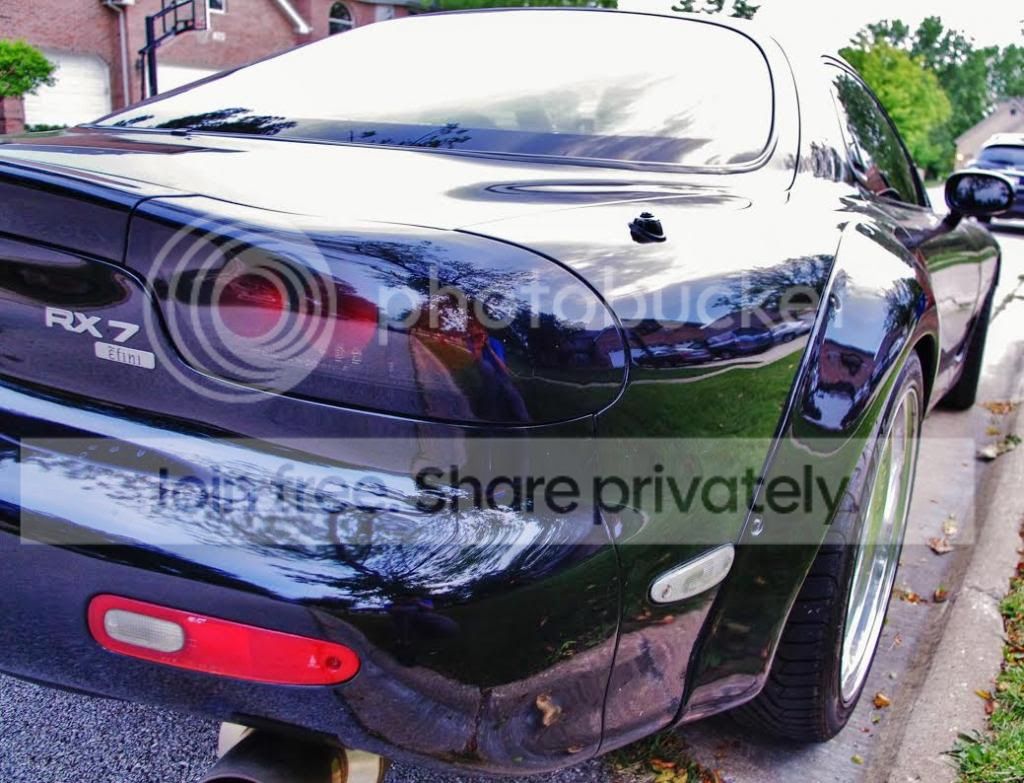
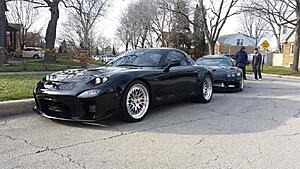
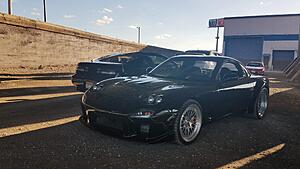
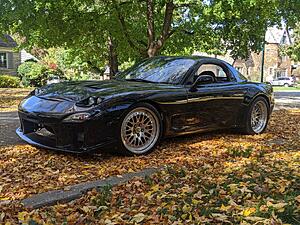
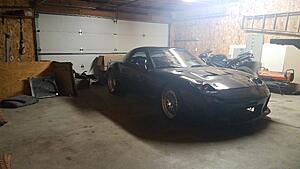
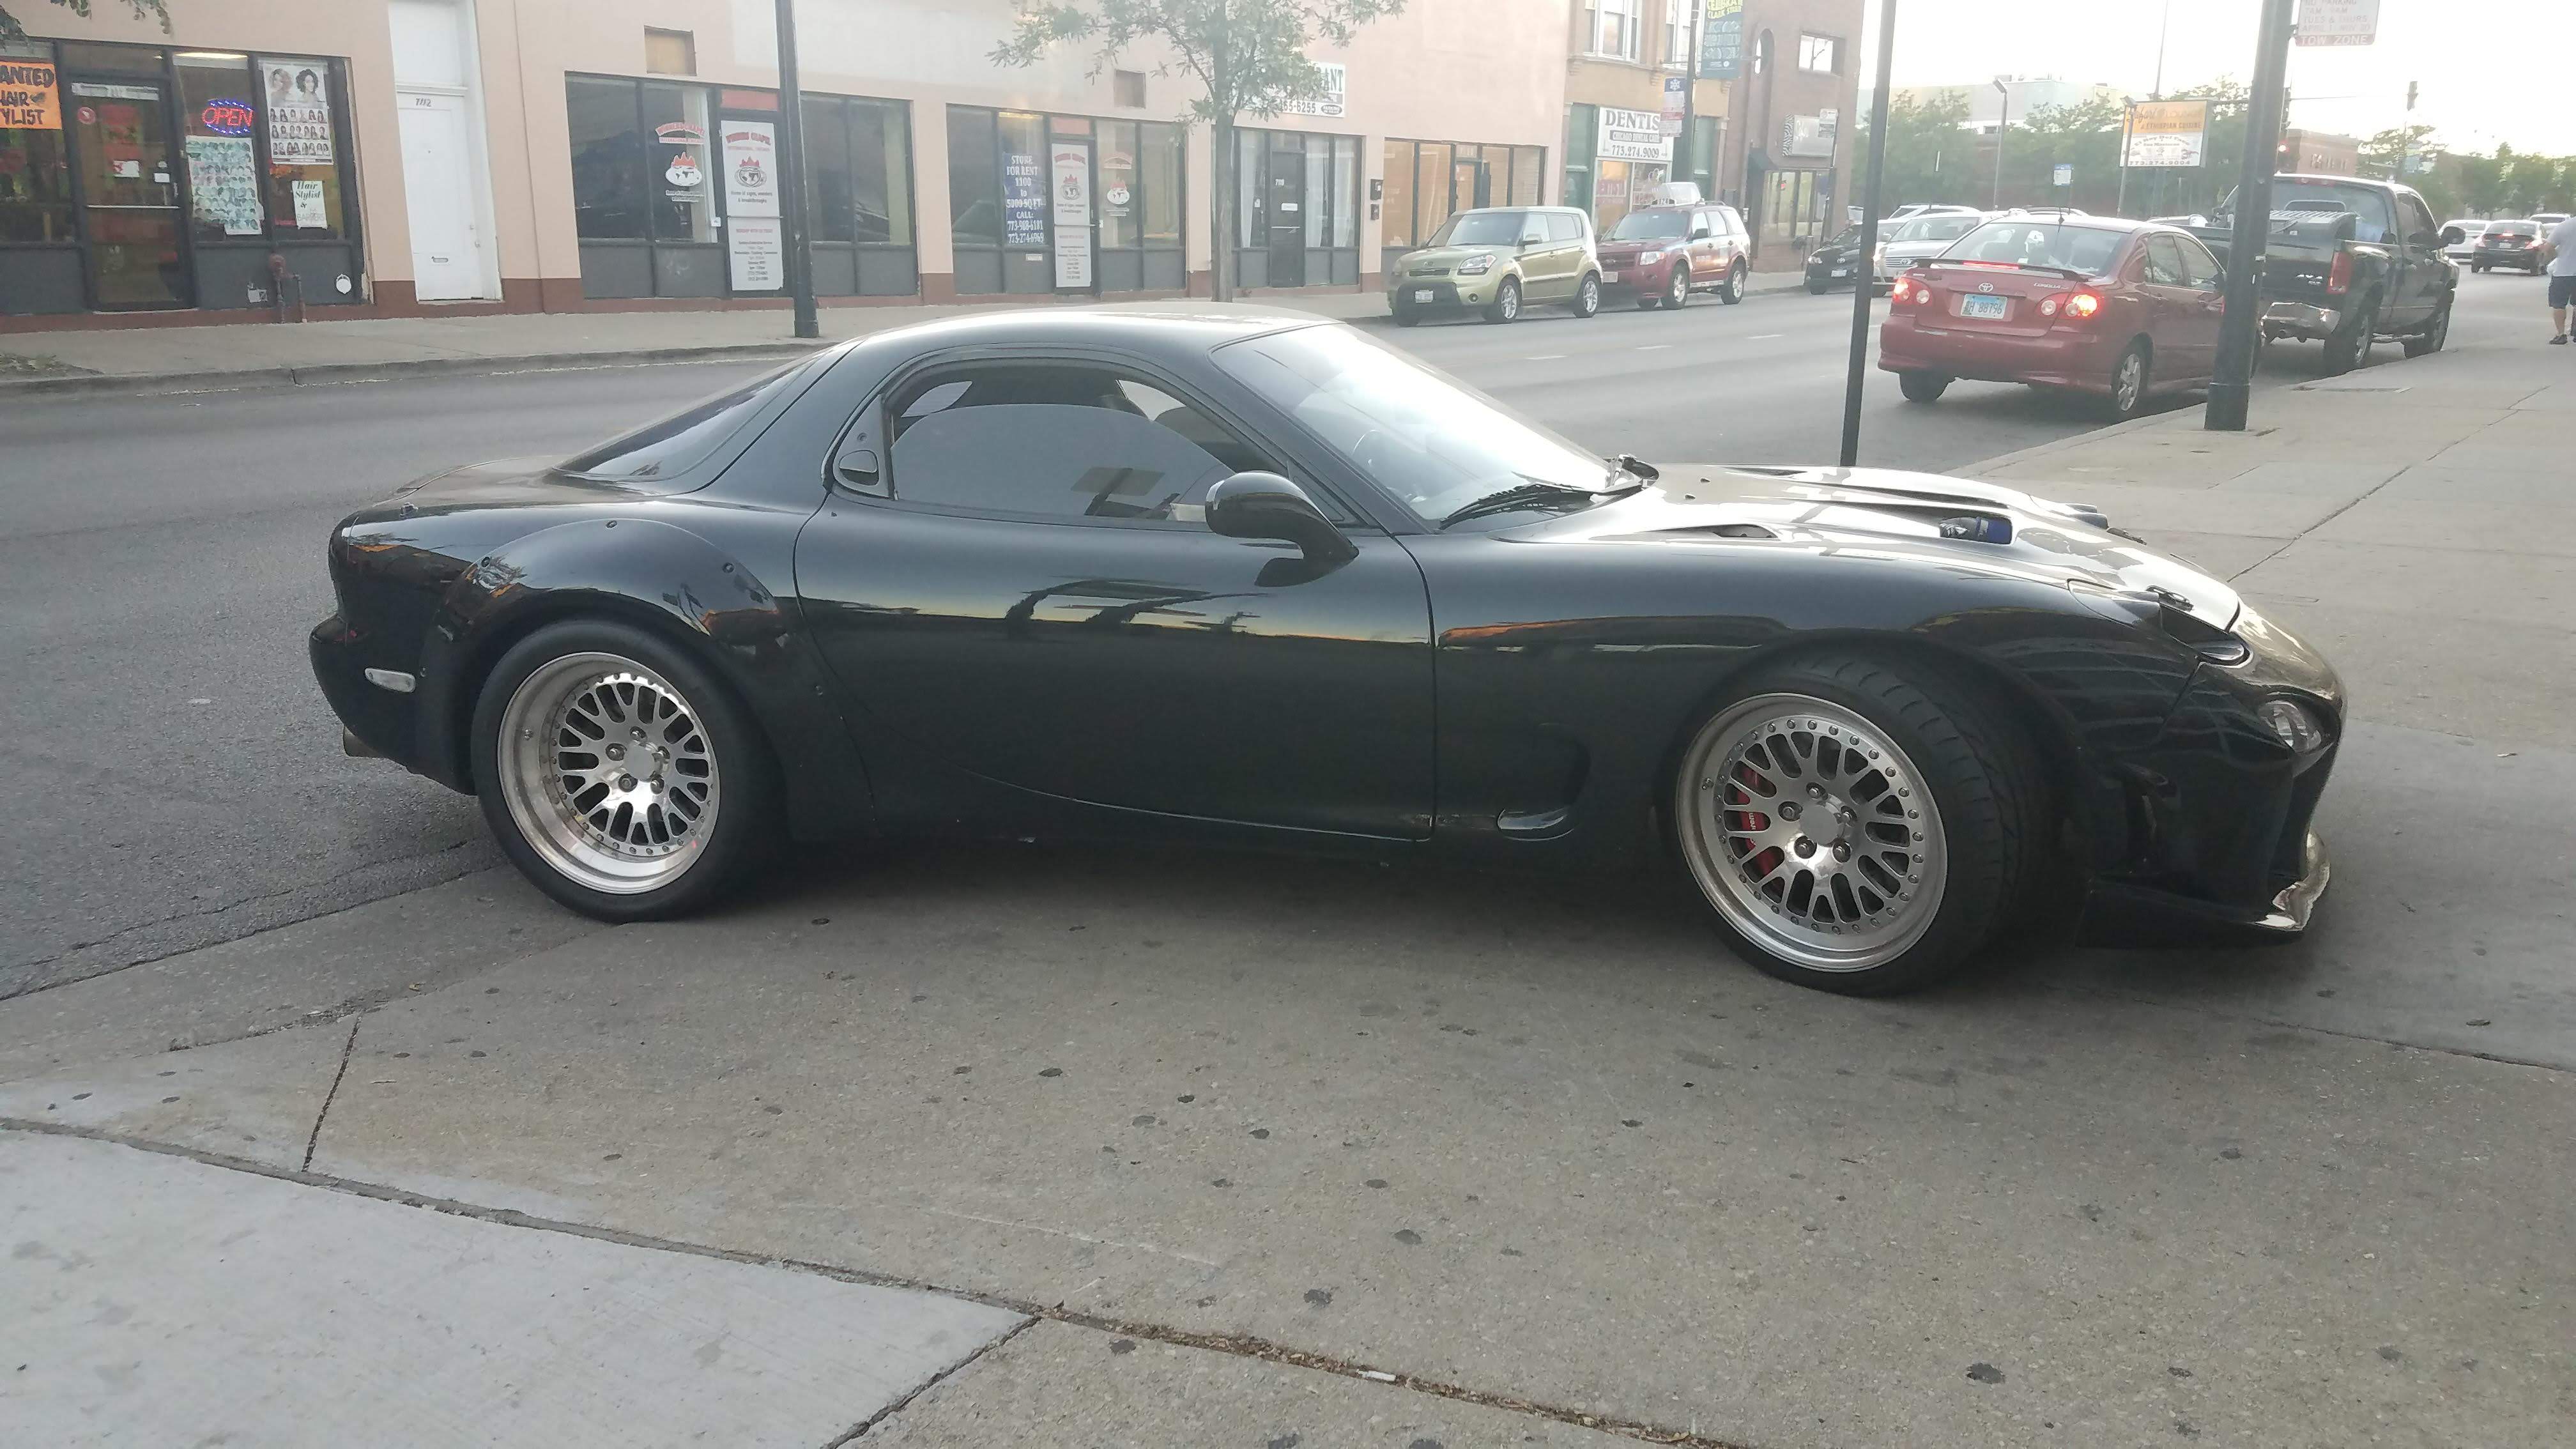
When I purchased the car some 10yrs ago, it came with pettit overfenders in the rear and some UGLY headlamps and bumper. Although parts of the car had money pumped into it, such as the wheels, the overall look of the car never really jived. I was never a fan of the GTC bumper and frog eye ebay headlamps. The non-black carbon hood didn't help with the overall package. The FD is a beautiful car and the combination of parts on the car along with the rear wing delete really took away from the beauty. If it was up to me, i would never put overfenders on the car but i bought with em and there's no going back. The flatness of the front fenders with the widely exaggerated rears also just looked off. Worst of all, aside from looking ugly, the parts had horrendous fitment. Headlamps, hood and bumper had very noticeable gaps and alignment on everything was way off. Here are a few pictures showing the starting point. It doesn't look horrible in all the pictures, but the look that it portrayed never appealed to me.


Thread Starter
Full Member
Joined: Mar 2004
Posts: 190
Likes: 62
From: Chicago
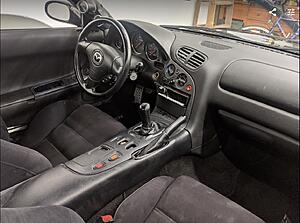
i just realized when i left this thread off last, i was working on the interior. I managed to get it all cleaned up and installed an OEM style mazda wheel. The passenger side window switch was inoperative so i got a replacement and additionally some trim prices were missing which i managed to source as well. Pictures incoming shortly. Now it looks like a proper 64k mile interior. Still need to wire up the radio however. Yes, the center console buttons behind the shifter need to be screwed in as well.
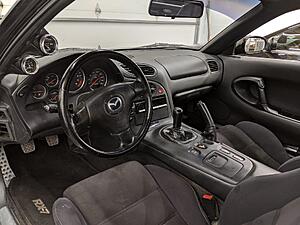
lower steering cover hasn't been installed yet and interior still needs proper cleaning but im happy with it. Radio has not been securely mounted yet nor has it been wired in. And that missing cigarette lighter needs to be sourced as well, im sure a universal should do the trick.
lower steering cover hasn't been installed yet and interior still needs proper cleaning but im happy with it. Radio has not been securely mounted yet nor has it been wired in. And that missing cigarette lighter needs to be sourced as well, im sure a universal should do the trick.
Last edited by NoMiEzVR4; Jul 25, 2021 at 02:26 PM.
Thread Starter
Full Member
Joined: Mar 2004
Posts: 190
Likes: 62
From: Chicago
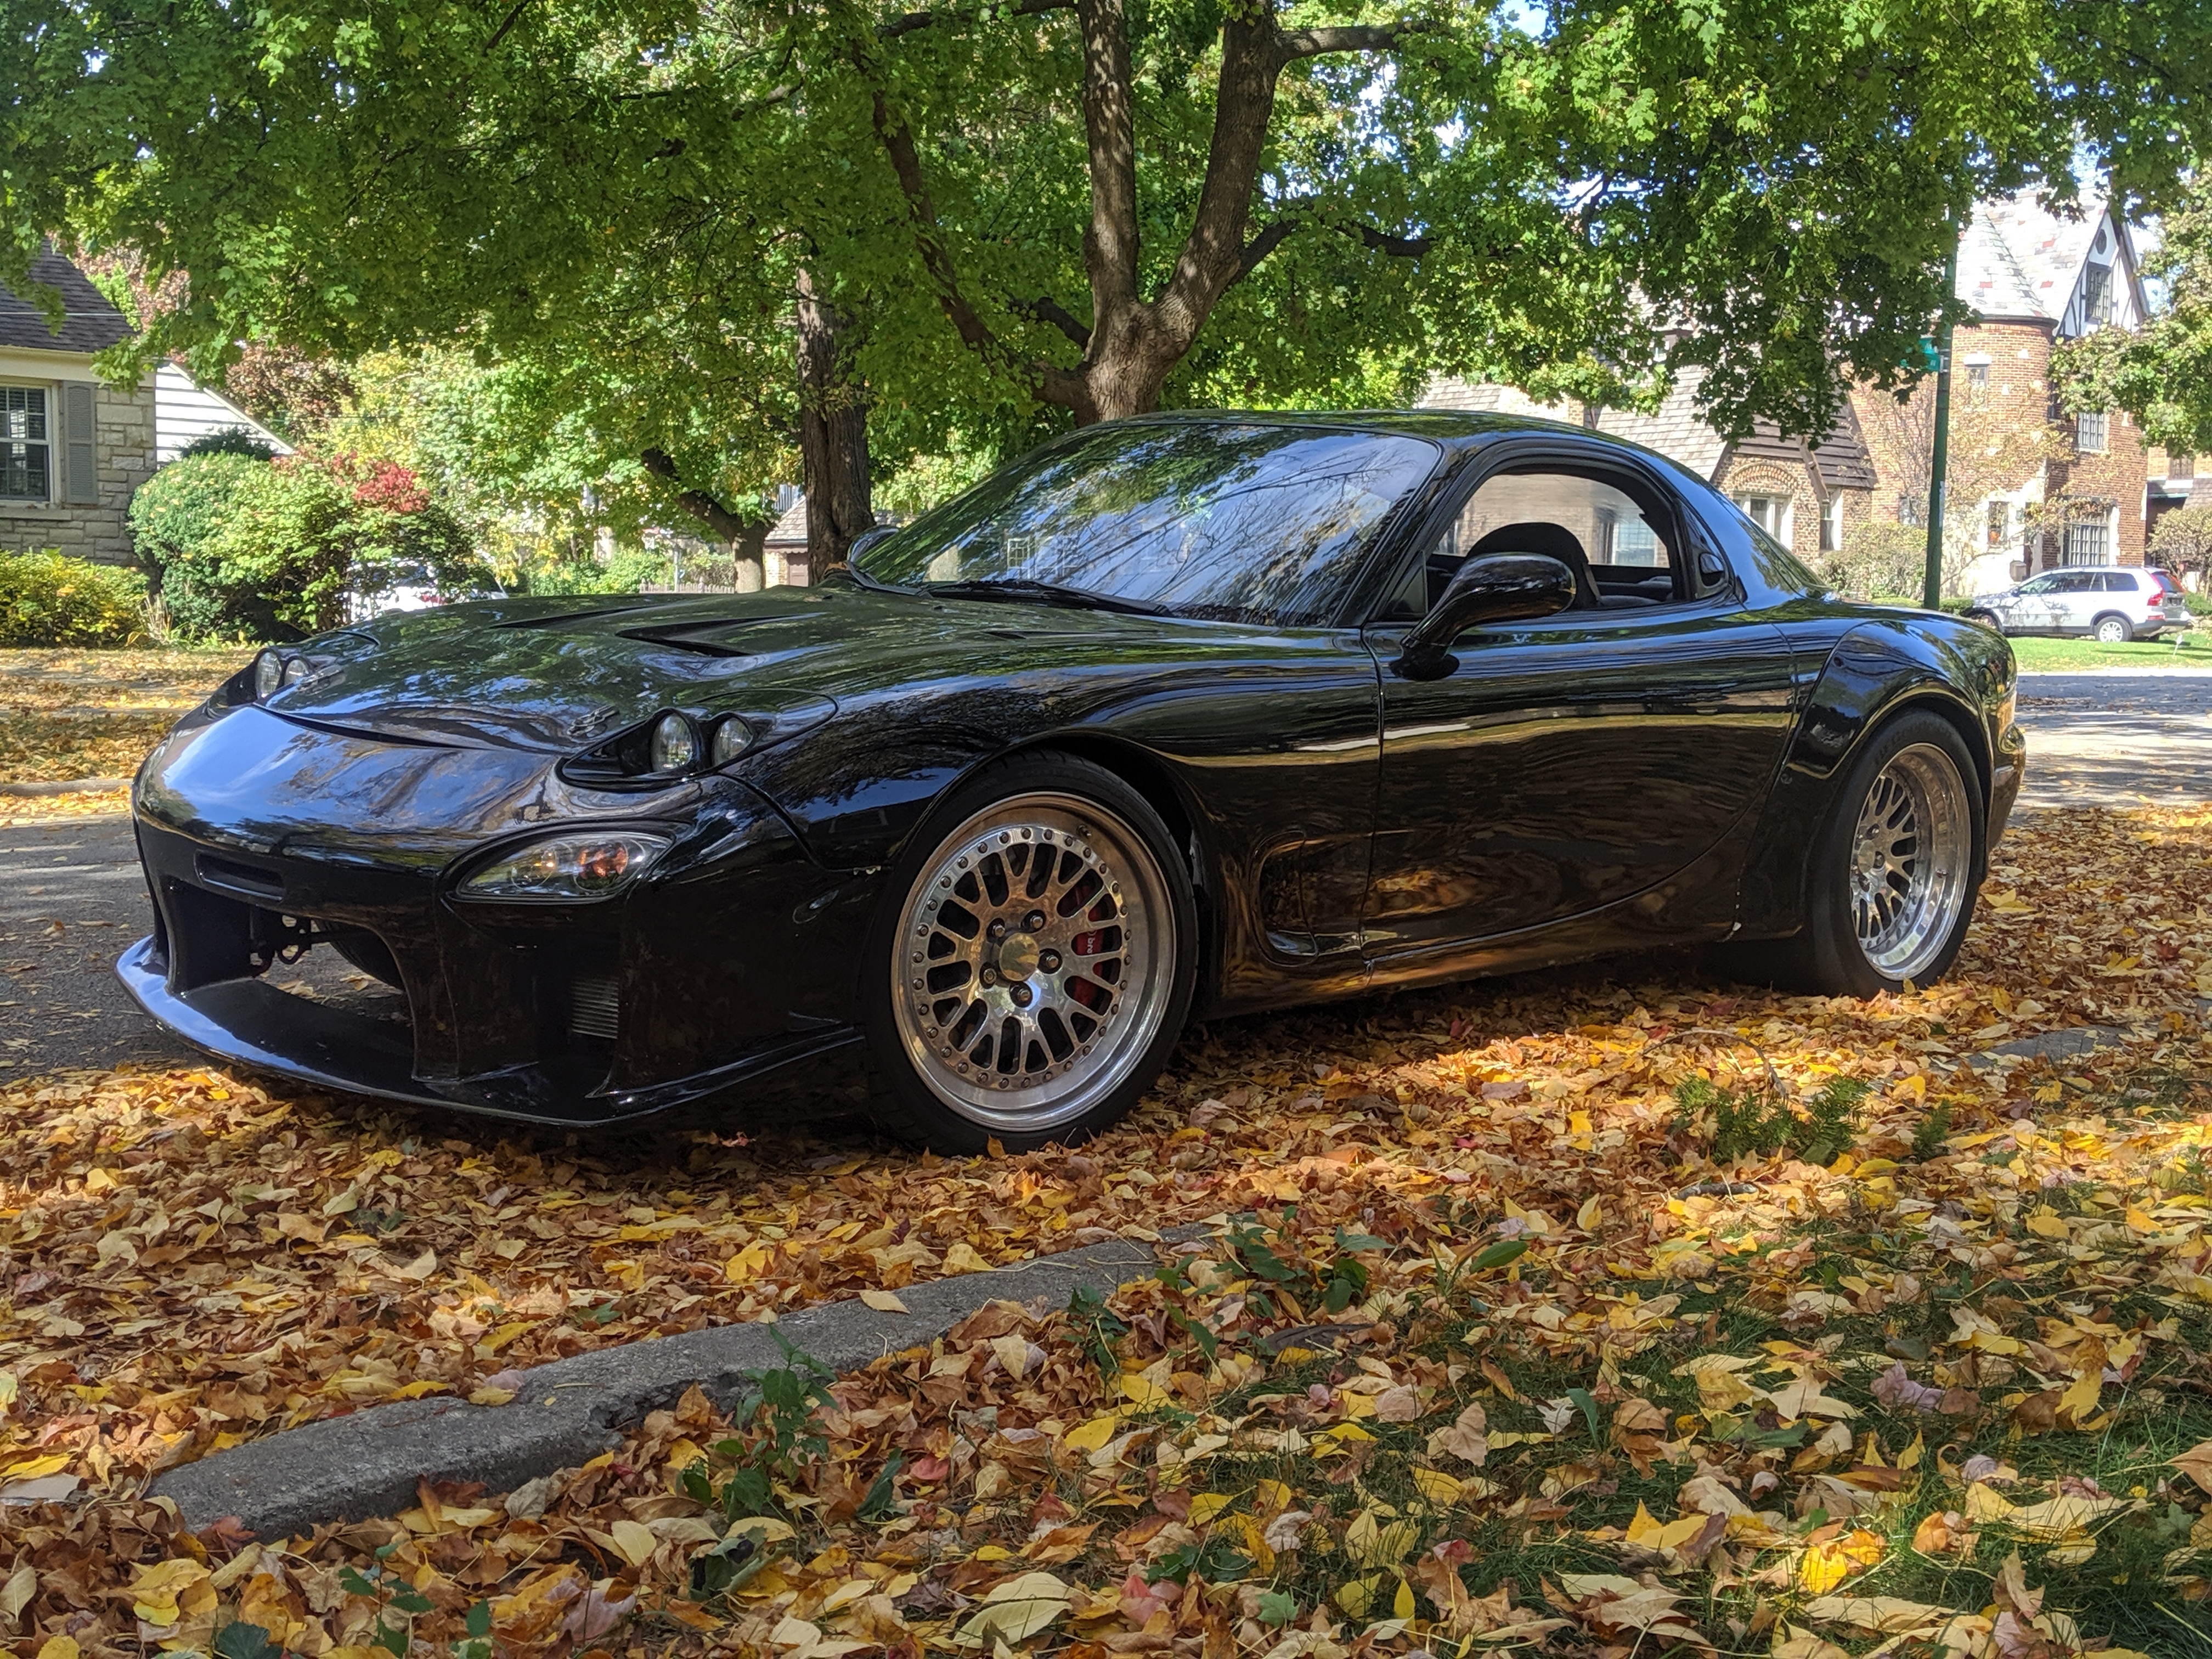
First order of business regarding the cosmetics was figuring out what I wanted. That was easy. Initally I had planned on sleek headlights, RE Amimiya/EVO-R 90mm kit. However, fortunately, after not being able to find a set in HID and for the price I wanted, i changed my mind and went back to popups. Initially i was afraid of getting them because of them being old and having various types of failure points, headlamp motors inop, lids being broken, halogen bulbs needing updating, but i figured if im going to do it, may as well do it right. So ended up sourcing some lights from overseas with the help of a local friend. Took me a good 4 months to find popups, but i found a set. They weren't perfect either, upon arrival after shipping they were damaged even farther despite paying extra for more padding.
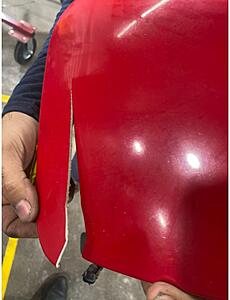

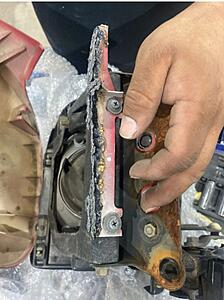
We used plastic epoxy to fix the mounting tabs on the lamps. I could have purchased new lids but the guys in the shop said after fixing id never notice.
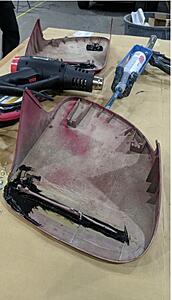
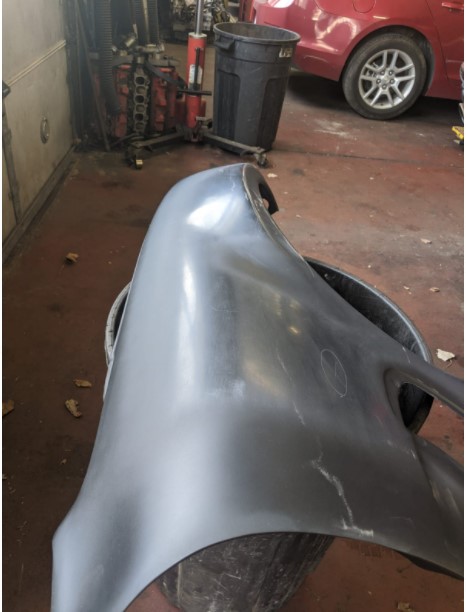
I sold the old headlights and then also sold the old hood. I think it was a knight sports carbon hood with pins. No OEM latch or cable. so it had a huge gap in the center where it would meet the bumper. Just looked tacky overall. The replacement was a Scoote 2. IDK how many are fans of this bumper, but when growing up I remember seeing that orange FD on the cover of some tuner magazine and when time came to pick a hood for the car, i already had my mind set.
I was going back and forth on the fenders. The pettit rears and OEM fronts just didn't look right. The rear was on steroids and the front was just so plain as far as the body lines went when looking at the car from the rear. Ultimately I decided to sell them. Had a local guy pick them up. The replacement set took a few months to get. Ended up going with burnout style fenders +20mm from shine auto, built to order. Great company to do service with.


Finally that leaves us with the bumper. Tons of choices but this was an easy one. I'll update later with more info with what I decided.


We used plastic epoxy to fix the mounting tabs on the lamps. I could have purchased new lids but the guys in the shop said after fixing id never notice.
I sold the old headlights and then also sold the old hood. I think it was a knight sports carbon hood with pins. No OEM latch or cable. so it had a huge gap in the center where it would meet the bumper. Just looked tacky overall. The replacement was a Scoote 2. IDK how many are fans of this bumper, but when growing up I remember seeing that orange FD on the cover of some tuner magazine and when time came to pick a hood for the car, i already had my mind set.

I was going back and forth on the fenders. The pettit rears and OEM fronts just didn't look right. The rear was on steroids and the front was just so plain as far as the body lines went when looking at the car from the rear. Ultimately I decided to sell them. Had a local guy pick them up. The replacement set took a few months to get. Ended up going with burnout style fenders +20mm from shine auto, built to order. Great company to do service with.
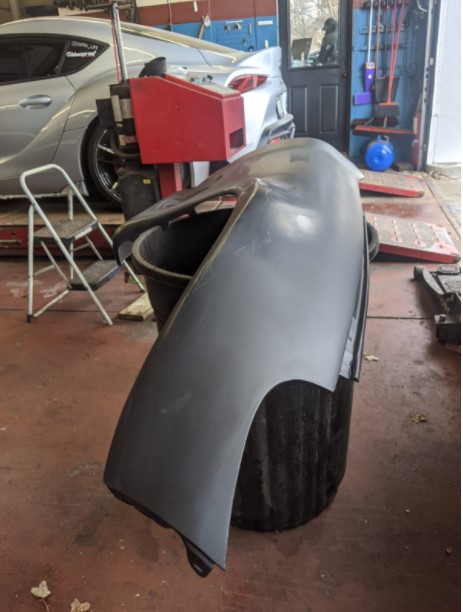
Finally that leaves us with the bumper. Tons of choices but this was an easy one. I'll update later with more info with what I decided.