
93 VR Touring burn victim rebuild


Pre-Winter hibertnation update
I've made a little progress before I put her away for the winter. I installed a fresher Front wiring harness. Unfortunately, the previous owner had cut the Front relay box out of it...Sooo:
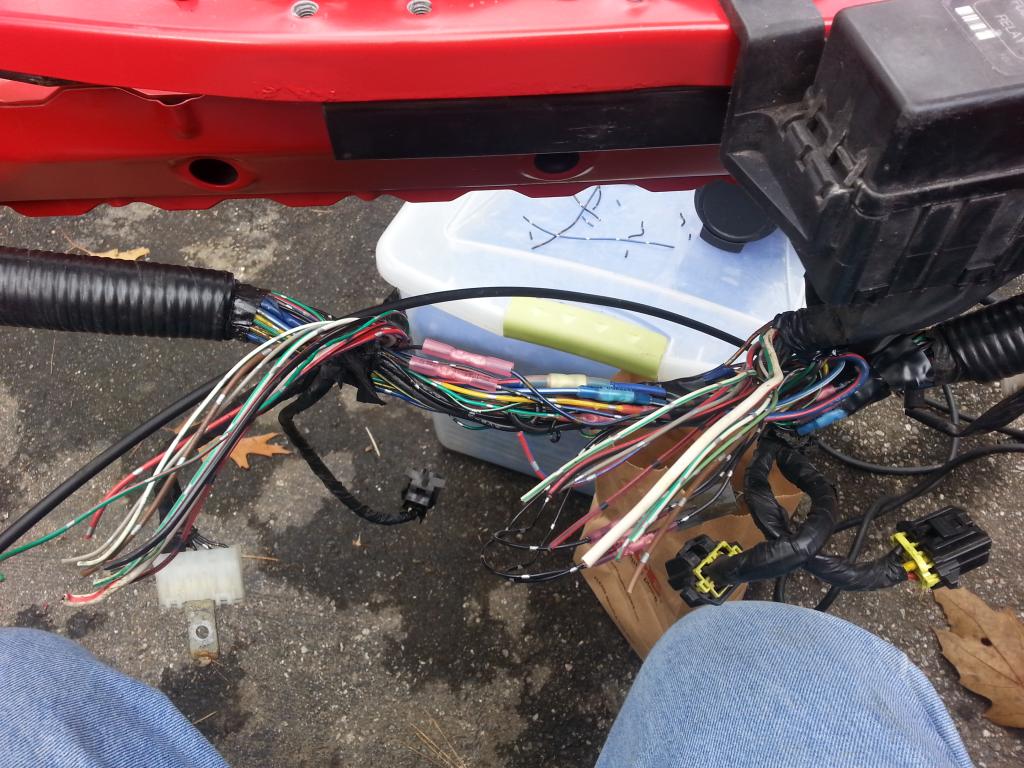
I did a little surgery and added it back in from my original harness. It also had some dried up goop on the main fuse box and diagnostic plug that would not clean off. so I de-pinned bot boxes and put back some much better condition (and washed) boxes that's fitting of a freshley painted engine bay. All tucked up:
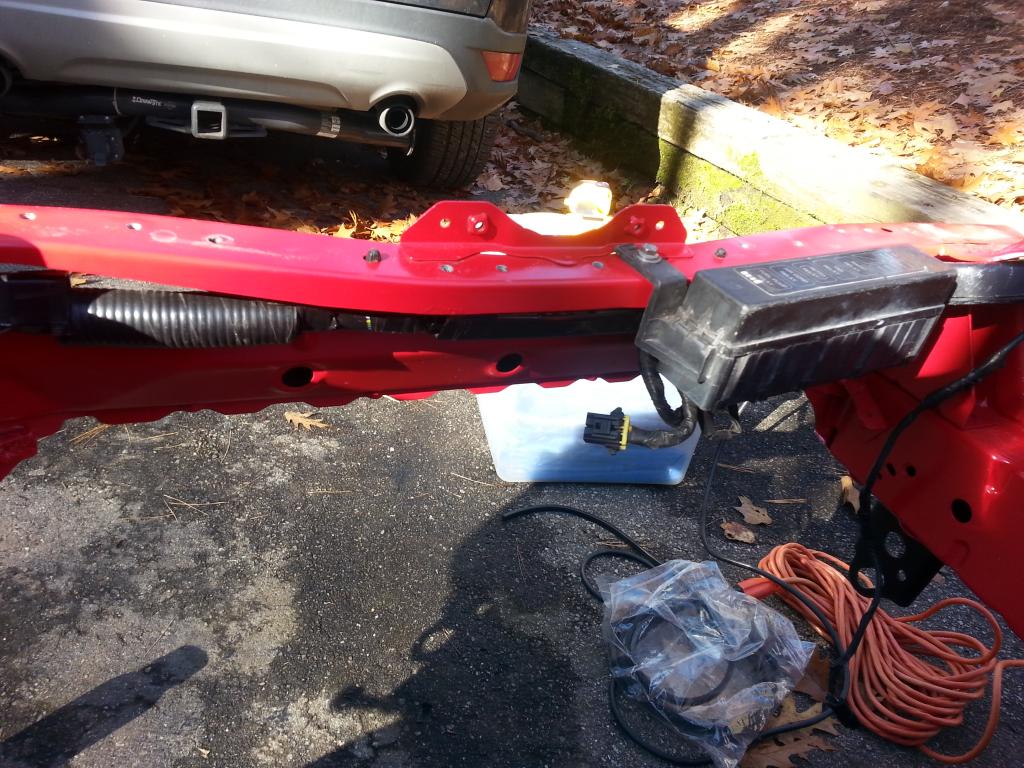
I added a few more brackets in and purchased some more hardware. My aim is to use stainless hex flange bolts (close to what the factory bolts were) everywhere that's visable and not a structural component and use grade 10.9 hex flange in hidden area's and for structural peices. Suspension and brake will be re-used or replaced with factory peices as they seem to be much higher grade components.
I also managed to pick up these for only $200:
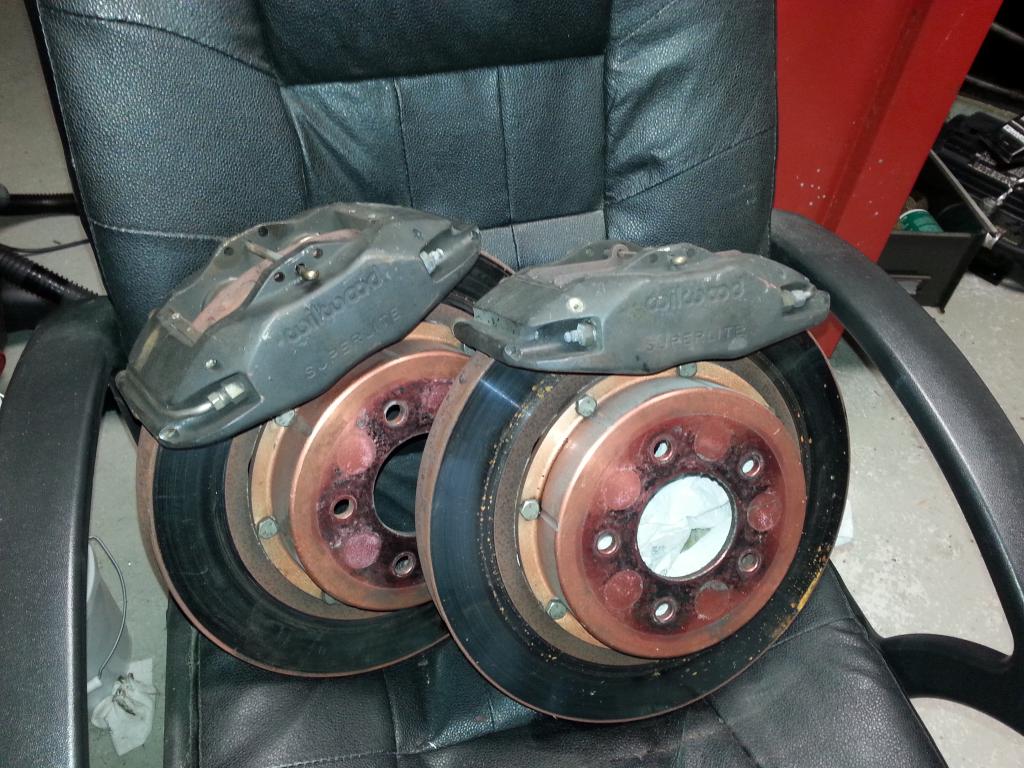
It's missing a few peices and will need re-building/turning, but I thought was a pretty good deal. These seem to be older peices as the new Wilwood calipers look a bit different. Does anyone know who migh have put this kit together originally?
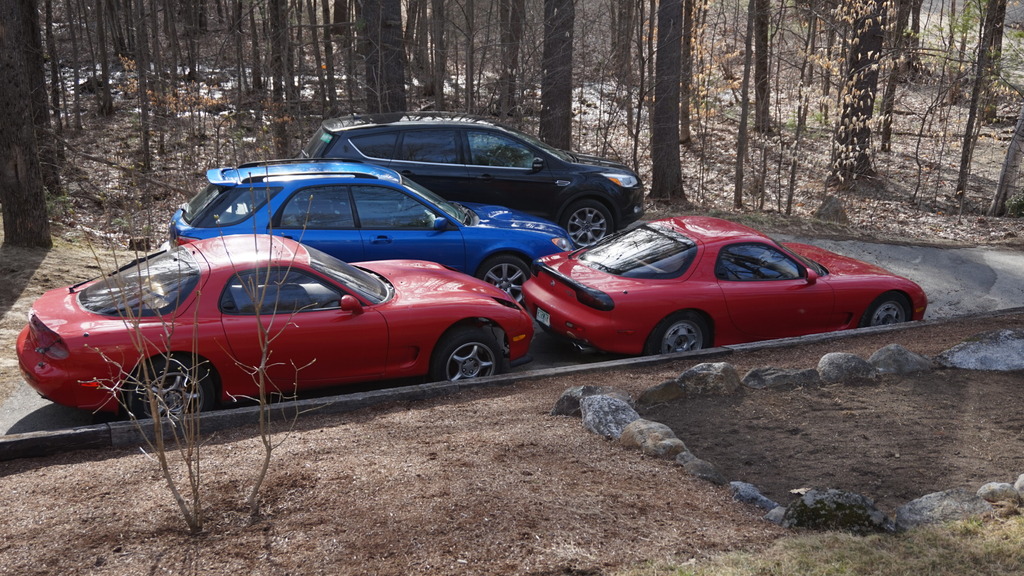
And tucked in for the winter:
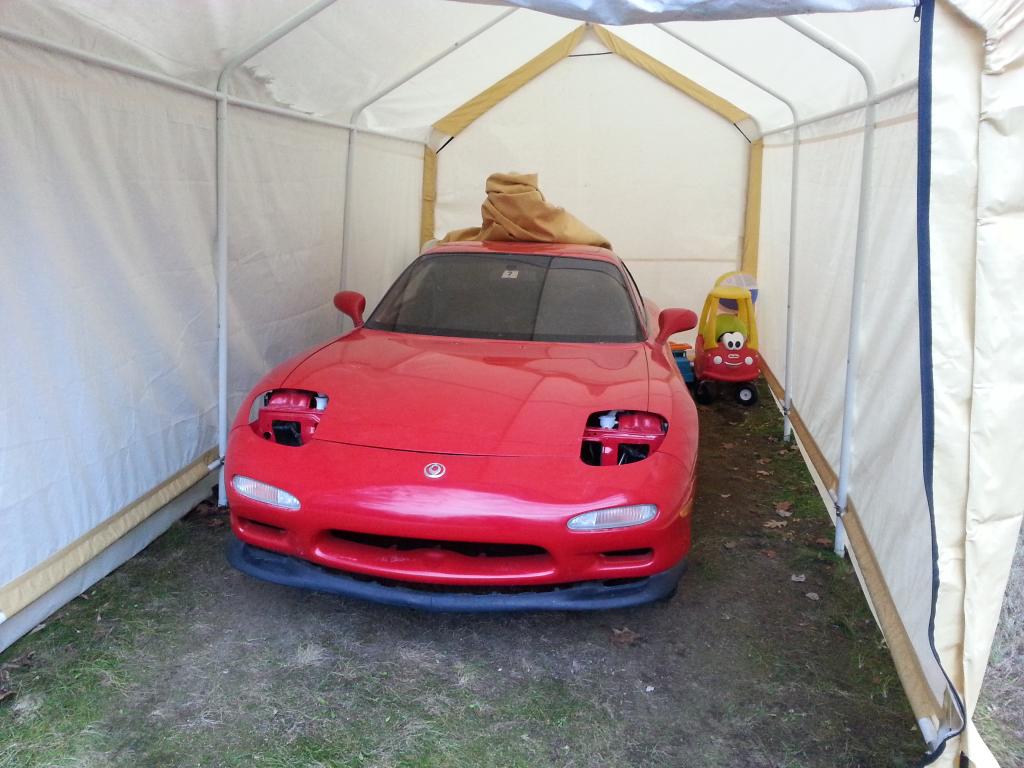
I have most of the interior in the house and will most likely work on re-finishing and cleaning up throughout the winter, but I don't expect too much progress before spring. I did manage to take the dash apart so that I can get the re-bar painted. You can't see it, but I just cant stand to have it rusting up behind the dash board.
Anyway, that's all for now.

I did a little surgery and added it back in from my original harness. It also had some dried up goop on the main fuse box and diagnostic plug that would not clean off. so I de-pinned bot boxes and put back some much better condition (and washed) boxes that's fitting of a freshley painted engine bay. All tucked up:

I added a few more brackets in and purchased some more hardware. My aim is to use stainless hex flange bolts (close to what the factory bolts were) everywhere that's visable and not a structural component and use grade 10.9 hex flange in hidden area's and for structural peices. Suspension and brake will be re-used or replaced with factory peices as they seem to be much higher grade components.
I also managed to pick up these for only $200:

It's missing a few peices and will need re-building/turning, but I thought was a pretty good deal. These seem to be older peices as the new Wilwood calipers look a bit different. Does anyone know who migh have put this kit together originally?
And tucked in for the winter:

I have most of the interior in the house and will most likely work on re-finishing and cleaning up throughout the winter, but I don't expect too much progress before spring. I did manage to take the dash apart so that I can get the re-bar painted. You can't see it, but I just cant stand to have it rusting up behind the dash board.
Anyway, that's all for now.
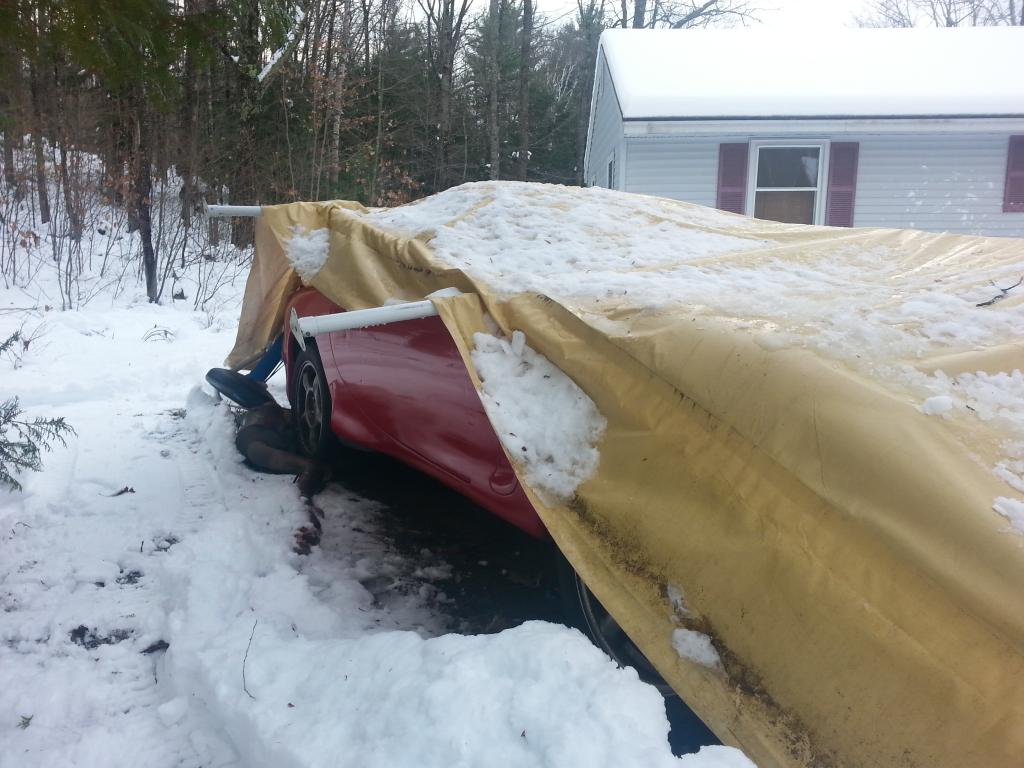
So.... had a bit of anti-progress while i was away for Thanksgiving break. New england had a good pre-winter storm and without me here to clear snow off the car port, this happened:

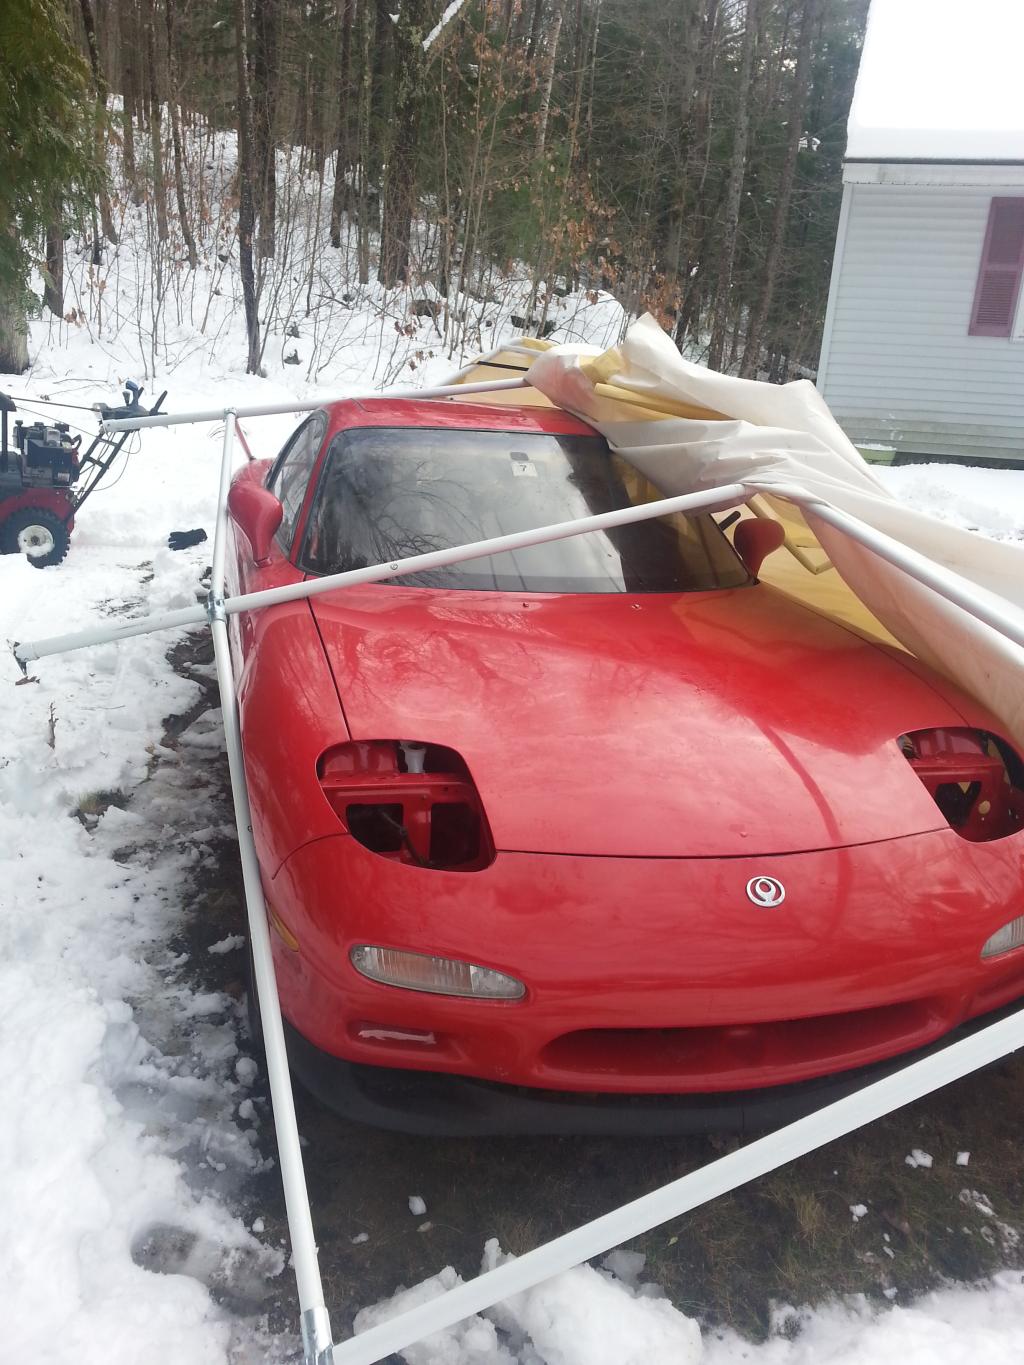
Fortunately the only damage was over the passenger fender and quarter:
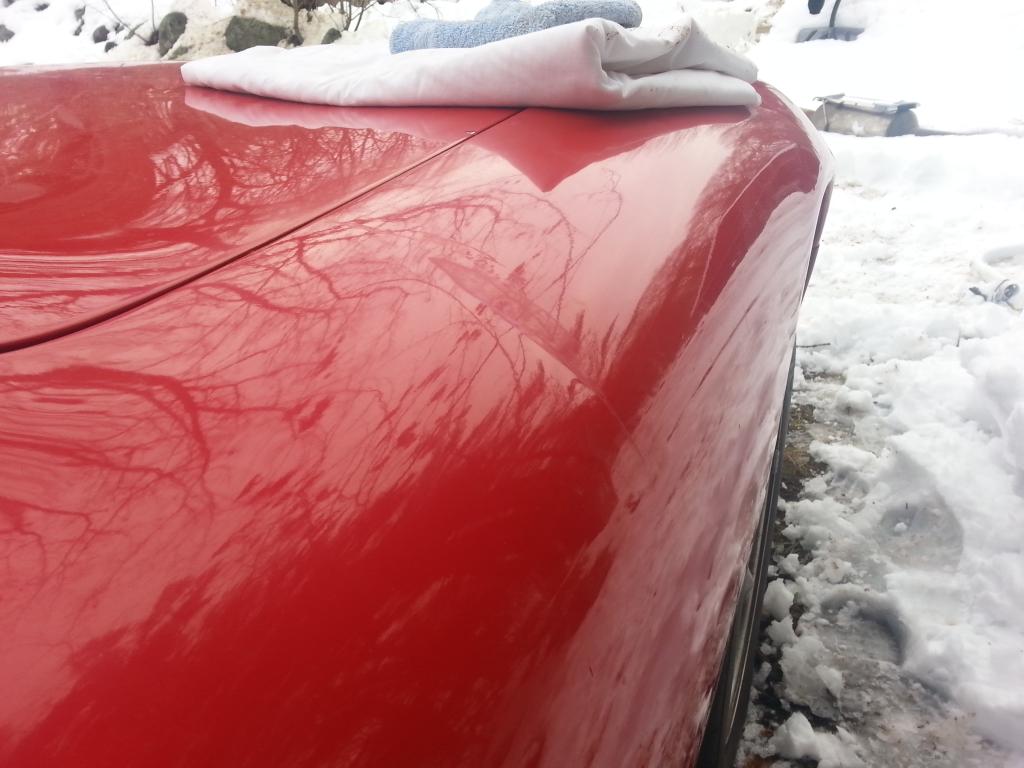
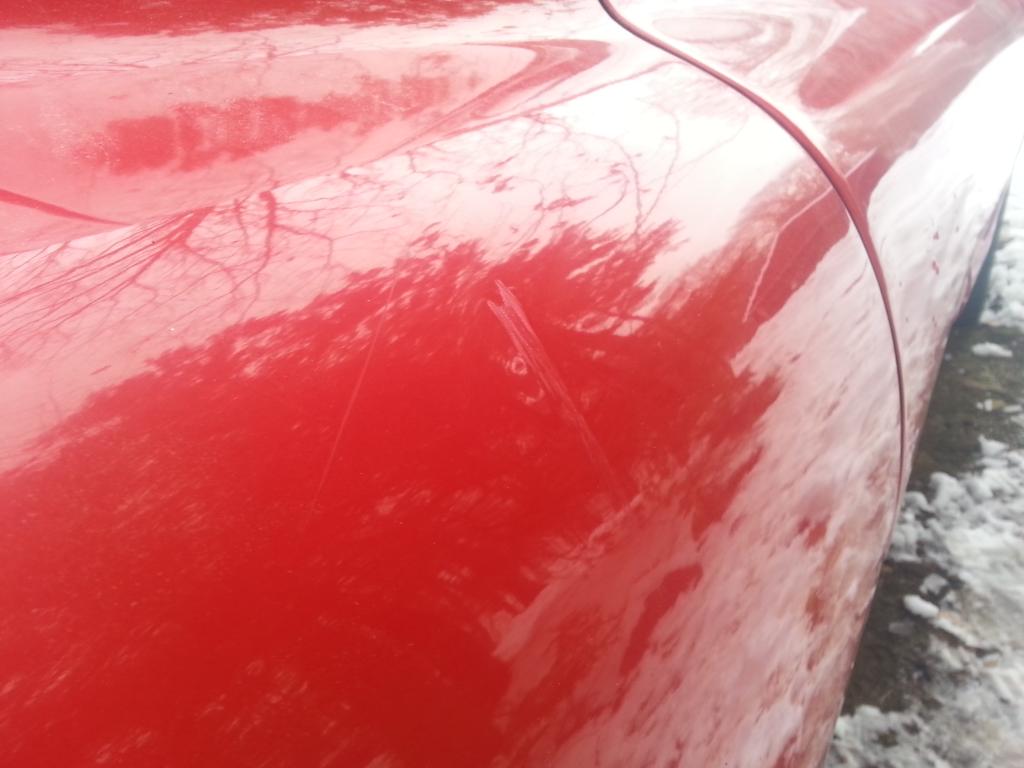
The pictures kinda look like it was just scratched, but it is in fact dented up where the poles rolled over when it fell. The pole did only fall on the rear glass, so the roof was spared and it didn't touch the hood. I think I got away pretty well considering. Since I'm planning to paint it anyway, this shouldn't be too big of a deal, but I was hoping to have a few years before paint would be necessary. I re-covered it with a tarp strapped to the port's anchors (they didn't pull out, but the cables snapped) as I don't have the money right now (or probably before the ground freezes) to put up a new and higher qulity port. Oh well....
As a side note, this was a harbor freight tent, and for those that aren't as familiar with harbor freght, you get what you pay for. This lasted pretty well through last winter when I cleared the snow off regularly. The pole wall thickness was far to thin, as well as the tarp material and overall construction was poor. I knew going into it that I would have to watch it during snowfall and that I was probably taking a litte risk. I just didn't think about the fact that I might not be there when it needed me most. For keeping general purpose things and lawn care equipment dry it's probably worth the risk. However, with prized posessions and the like, I urge you to spend the extra money to get something that will hold up well. I'm now $200 behind on the $500 or so I should have spent in the first place. Anyway...

You're really hitting all the little details with the car, look like its coming along great, wish I had the time to do all that!
I had a buddy who's FC was totaled by his carport in a snow storm, that's what's kept me from storing mine under one.
What are your plans engine wise for the car?
I had a buddy who's FC was totaled by his carport in a snow storm, that's what's kept me from storing mine under one.
What are your plans engine wise for the car?
My current running car has a stock, never opened engine run off a PFC. It has an RE Amemiya SMIC, HKS downpipe, rx7store cat, racing beat dual cat back, 1680cc secondaries, supra fuel pump, kayo rad. Probably a few other things I don't remember.
The plan:
When the chassis is prepped, the engine will come out and be rebuilt by me. The point is to freshen up all the seals, check all the tolerances and possibly street port it. I'd like to upgrade the turbos to at least a bnr stage 3, maybe a single turbo, but not quite sure yet. I'm trying to remind myself that this will almost exclusively be a street car, so I don't want to go too big power wise. I just want an all around nice car in the best condition I can reasonably get it.
I tried to find pics of the current setup, but I can't find any anywhere.
As of right now I'm not getting anywhere with the build as I tore my right ACL in a skiing accident. I had some indoor stuff planned but I'm on crutches and moving into the basement shop is a pain. I should know more this week about surgery/recovery, but for now I'm stalled.
Just a head up, if you find a good Paintless Dent Repair guy he should be able to PDR those dents out no problem. Then just a bit of sanding and buffing and you will never know it happened!
I know of someone I'll be contacting in the spring for paintless dent removal. Travels and is pretty good. Friend of a friend type deal.
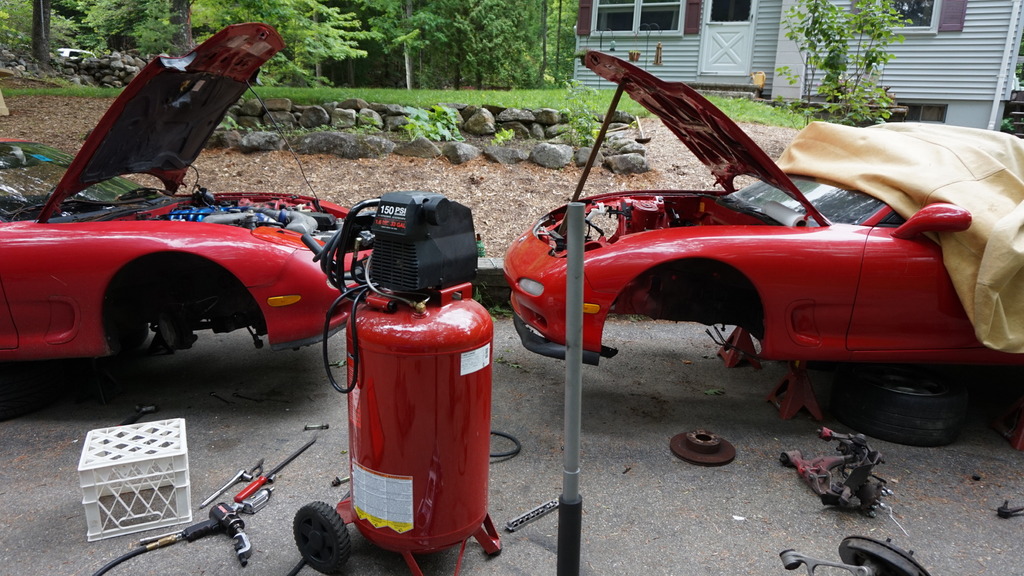
Just an update. Got the cars out this weekend
Plans for this year are to remove the suspension and subframe, powder coat everything and install new SuperPro Bushings and pillow *****. If I make good headway the running car will get dismantled and sold so I don't have to store it next winter.

Plans for this year are to remove the suspension and subframe, powder coat everything and install new SuperPro Bushings and pillow *****. If I make good headway the running car will get dismantled and sold so I don't have to store it next winter.
Haven't posted any updates because it's been slow going. But I'm starting to make a little head way.
Mounted some R1 dual oil coolers:
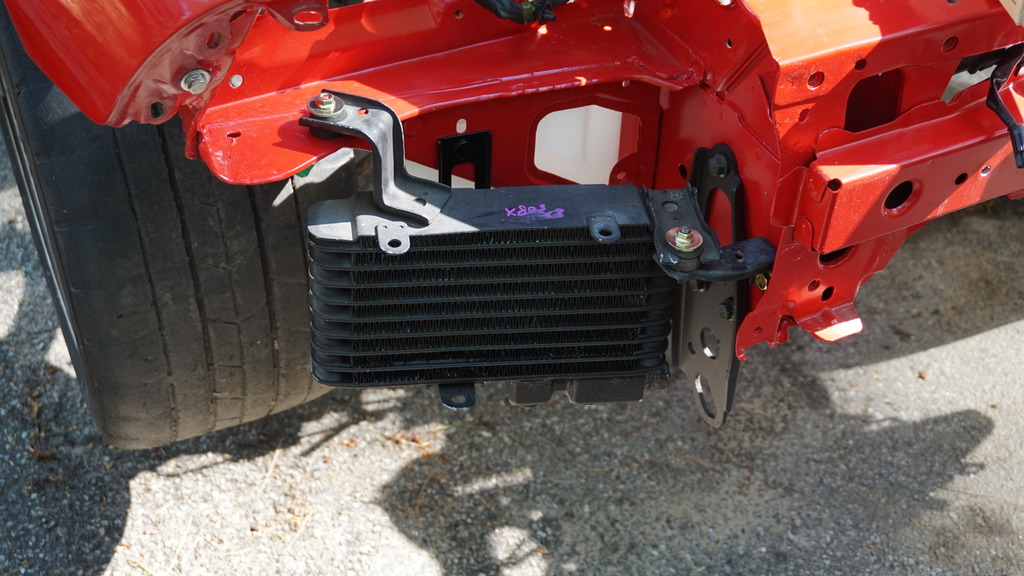
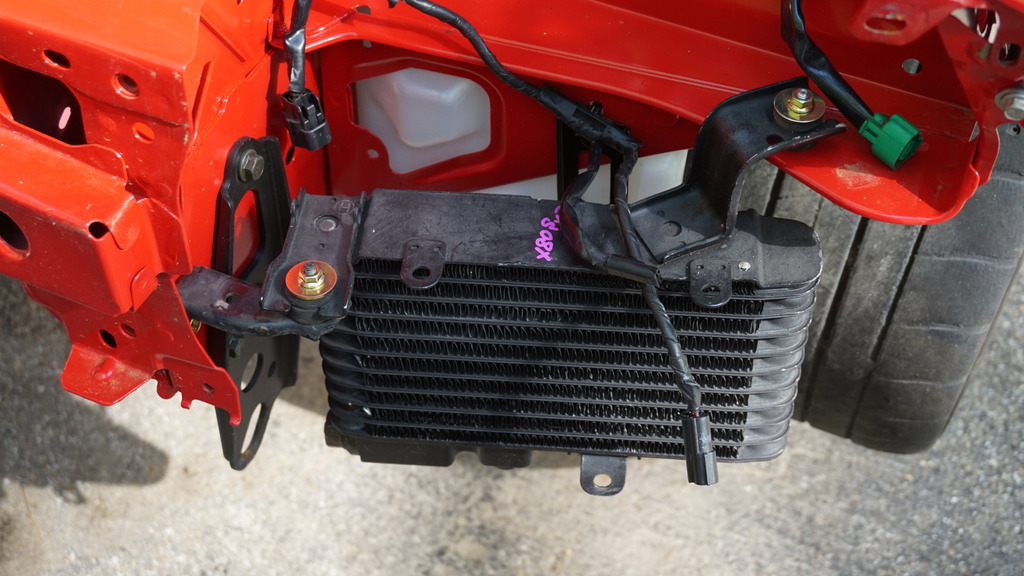
No lines yet.
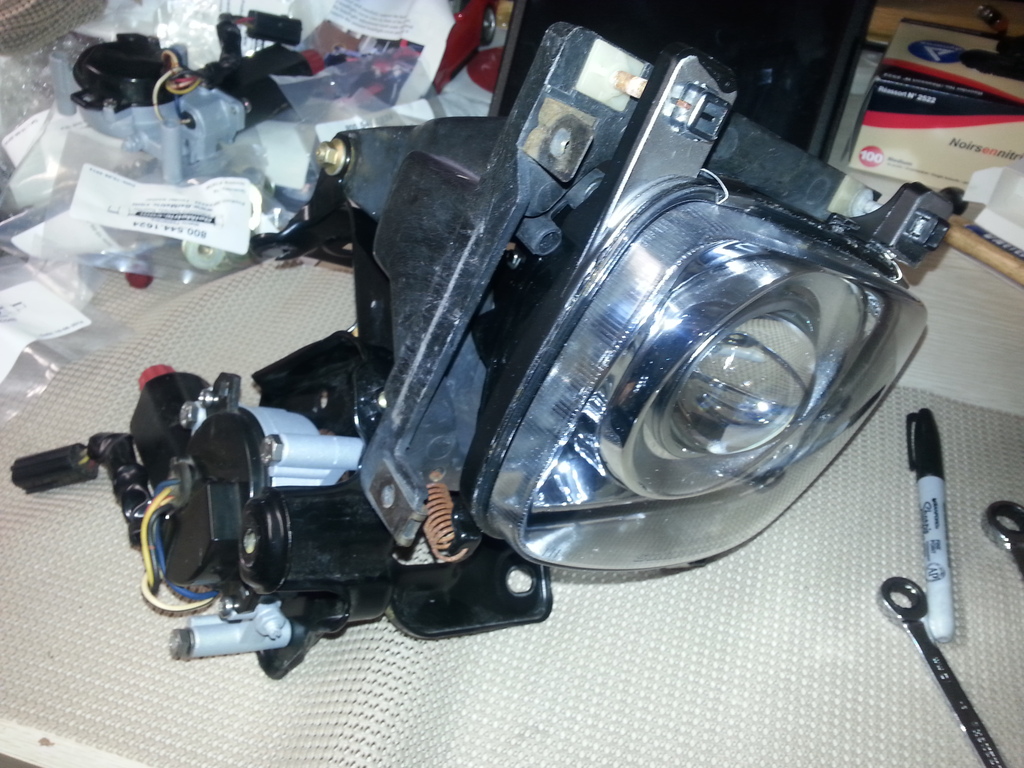
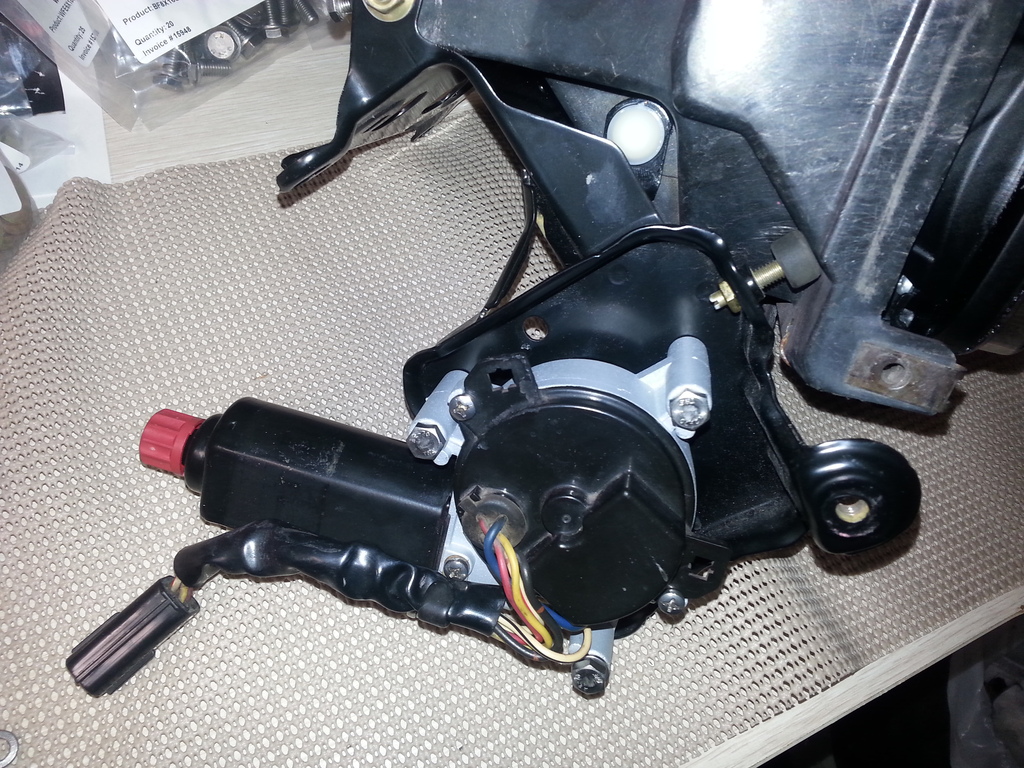
Started putting back together the headlight assemblies with SBG HID projectors:
Motors cleaned up and powder coated:
Removed the front suspension and subframe from the running car to be swapped with the restored car. The subframe is already powder coated and the arms ball joints are in better condition and will provide a better base for painting:
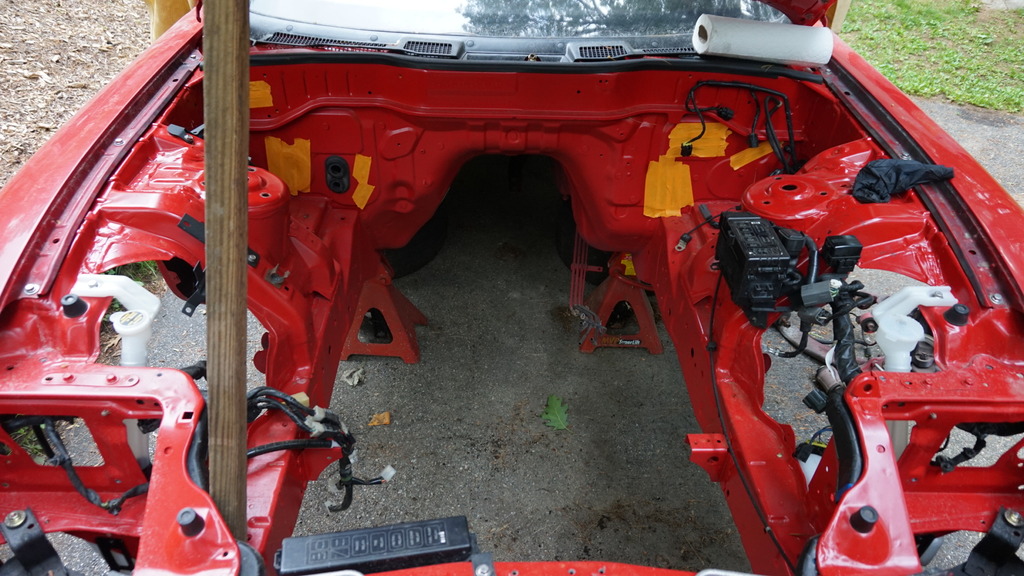
Painted engine bay. Powder coated sub frame hasn't been installed yet. I'll need to get new hardware to bolt it together. Current stuff is rusty:
Here's the current setup in the running car:
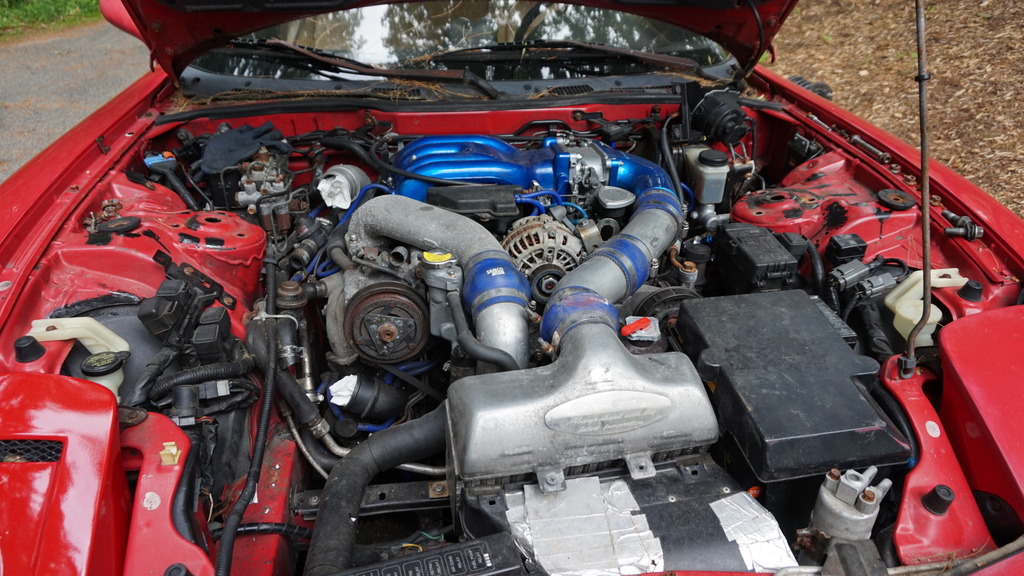
Don't mind the missing air filters. Current plan is to disassemble the A-arms and replace the bushings and paint all components before re-installing. Then move to the rear suspension. I've picked up a set of SuperPro bushings and will likely go with J-AUTO pillow bushings.
That's all for now. Thanks for looking.
Mounted some R1 dual oil coolers:


No lines yet.
Started putting back together the headlight assemblies with SBG HID projectors:

Motors cleaned up and powder coated:

Removed the front suspension and subframe from the running car to be swapped with the restored car. The subframe is already powder coated and the arms ball joints are in better condition and will provide a better base for painting:

Painted engine bay. Powder coated sub frame hasn't been installed yet. I'll need to get new hardware to bolt it together. Current stuff is rusty:

Here's the current setup in the running car:

Don't mind the missing air filters. Current plan is to disassemble the A-arms and replace the bushings and paint all components before re-installing. Then move to the rear suspension. I've picked up a set of SuperPro bushings and will likely go with J-AUTO pillow bushings.
That's all for now. Thanks for looking.

Thread
Thread Starter
Forum
Replies
Last Post