
93 VR Touring burn victim rebuild


Hello all,
I started my rebuild this weekend and thought I'd share.
A little back story... Car had an engine fire and was purchased by my then employer around 2003. I started doing work on it for him including pulling the engine and many of the engine bay bits. We put it on hold and stored it. I no longer work for him but I convinced him to sell it to me last year. I already own a 93 VR Touring, but it was kind of a rust bucket with faded paint and needs more love than I can give it. I'll most likely take the engine out of the old one and anything else I need to get this running. My brother in law is very interested in the old one. Rust is a bit more up his alley.
This car I've decided to give a bit more attention to. The goal is a clean car, tasteful mods to the tune of 350-400 rear horses. Paint the engine bay while everything is apart. Some undercoating in the wheel wells, powder coat brackets, sound deadening for the interior. Clean up the interior plastics and replace the broken peices. Probably a lot of things I'm not thinking about right now. I want this prepped well enough so that my (now one year old) son can take a nice car to prom some day. Mostly Street, probably won't track it, but never say never.
On to the build...
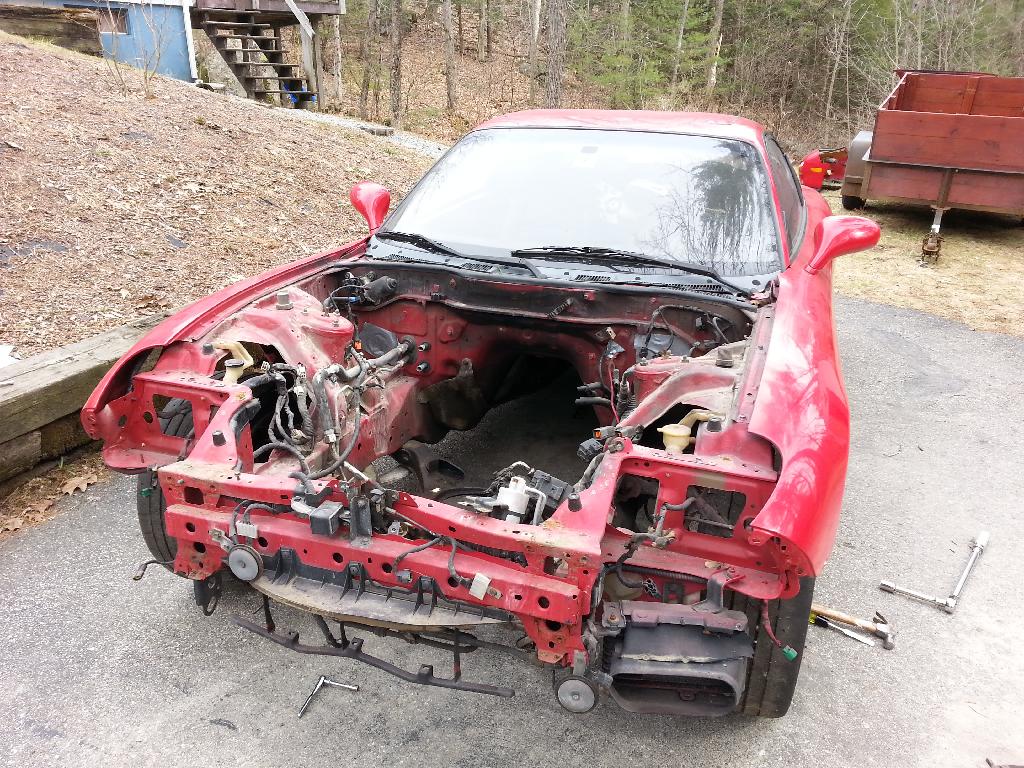
Here they are together:
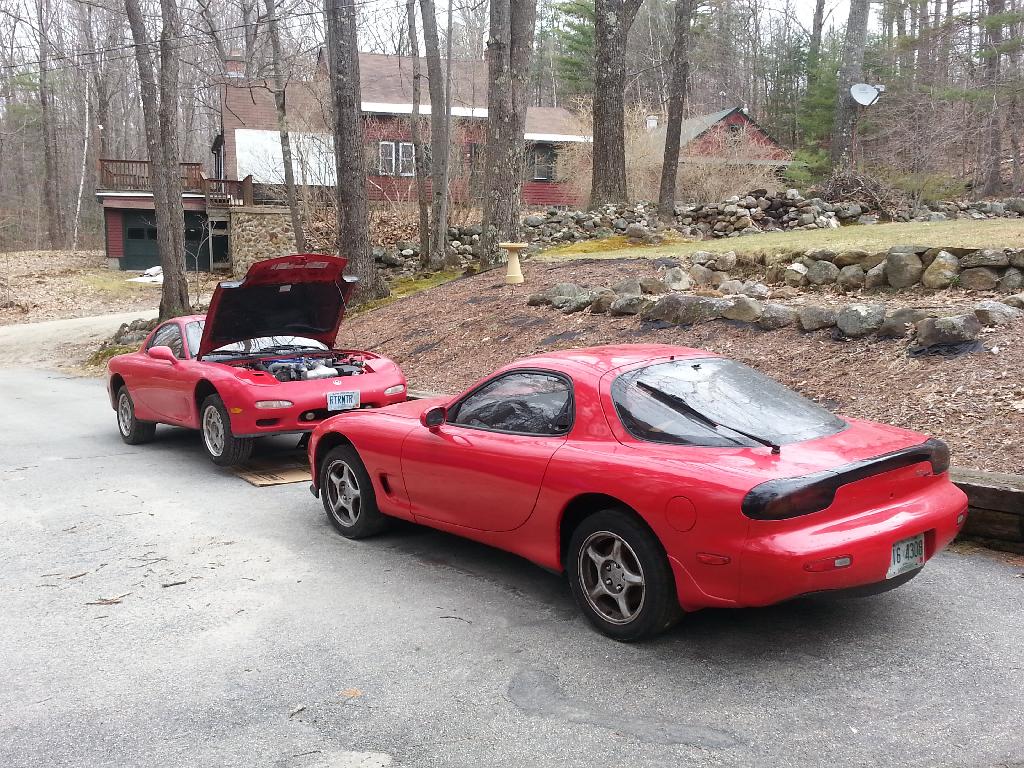
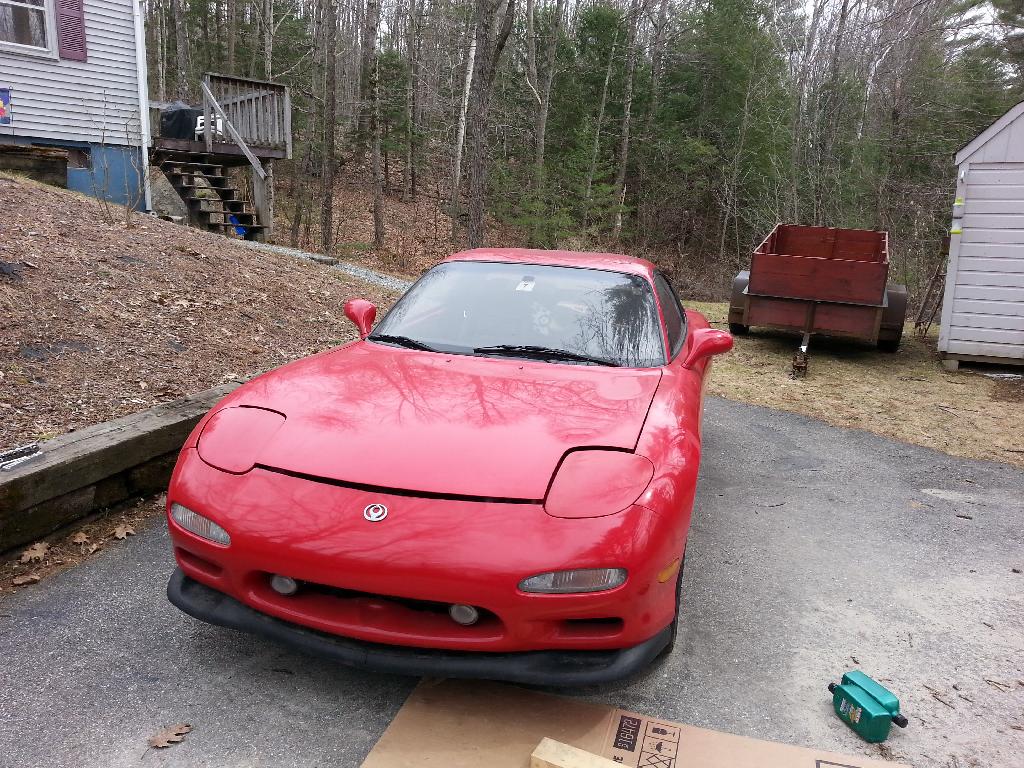
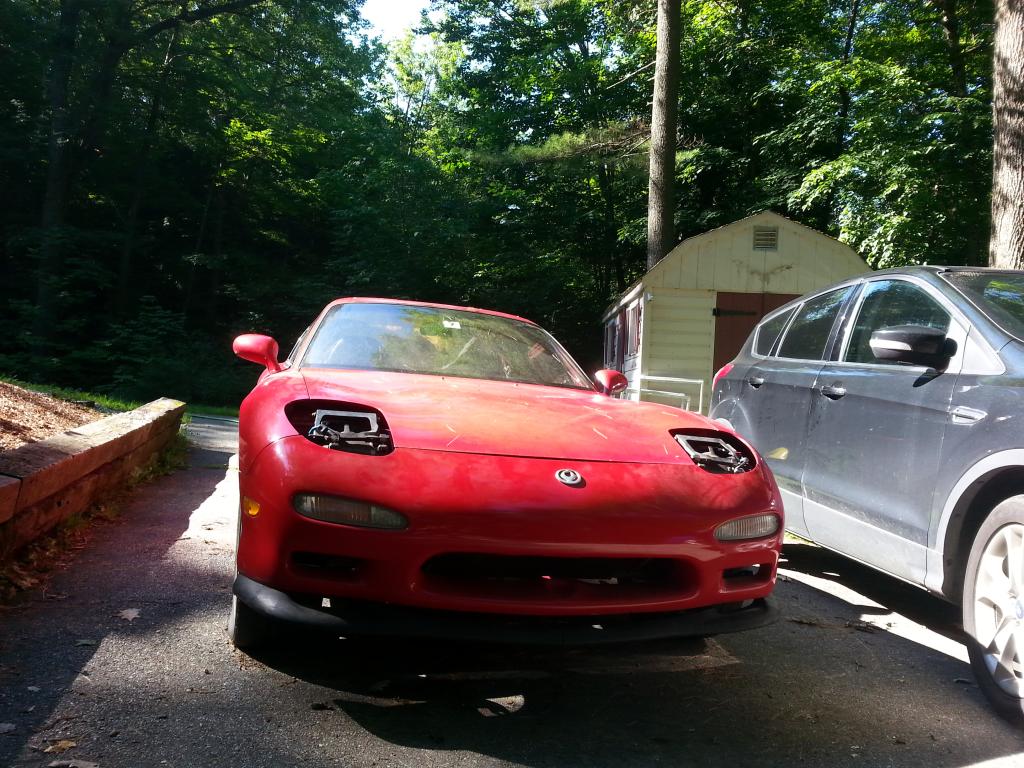
New (to me) one is on the right. Here's how she looked when I started:
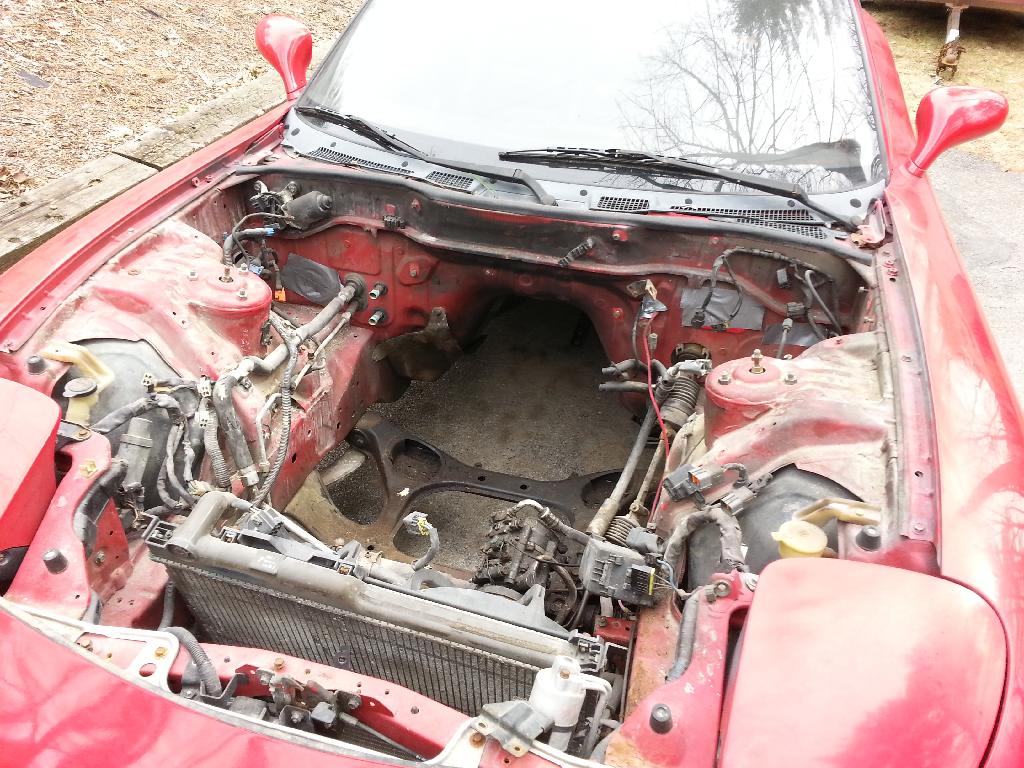
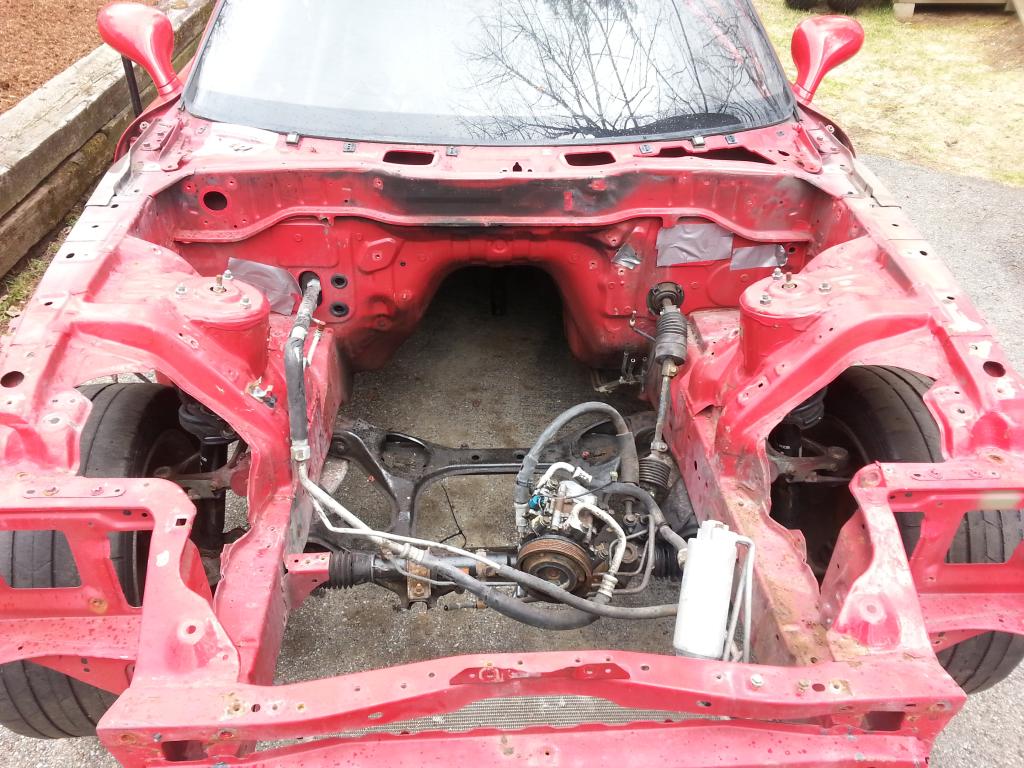
Here's the engine bay covered in extinguisher crud:
Bumper off:
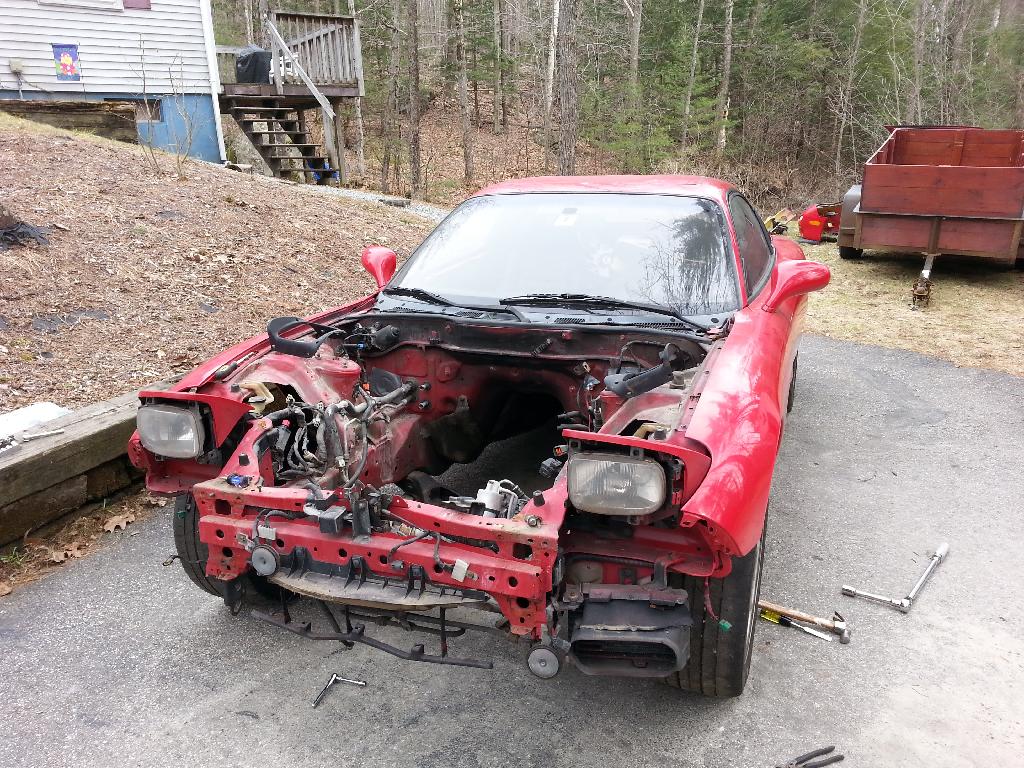
Headlight buckets out:
Fenders out:
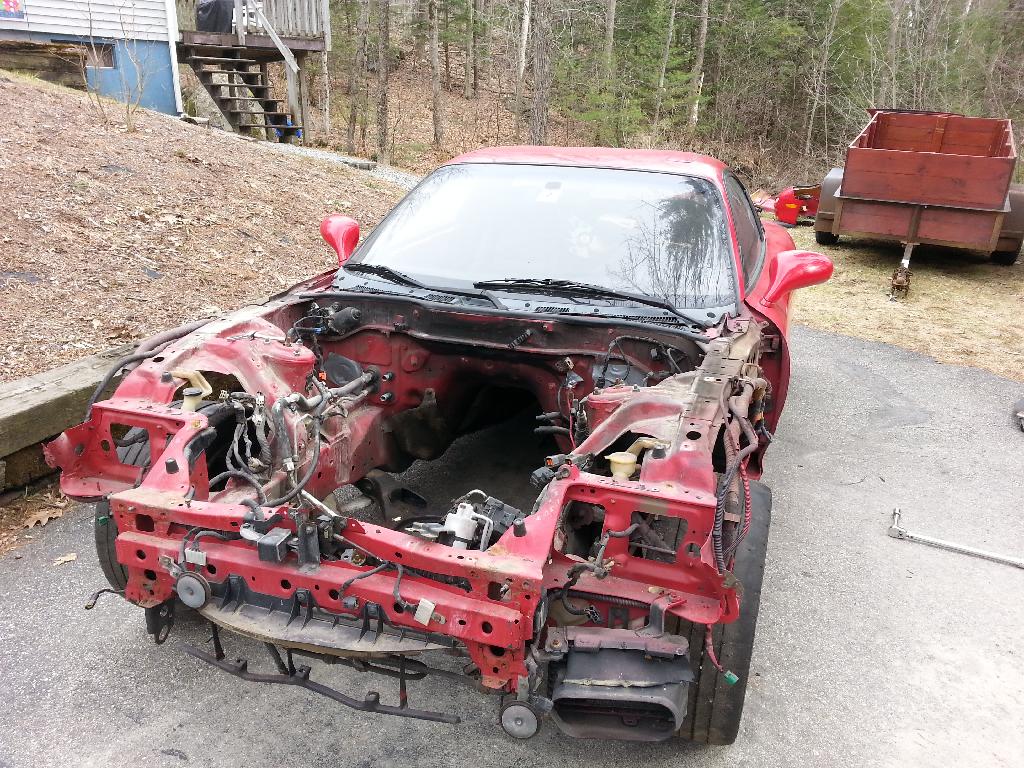
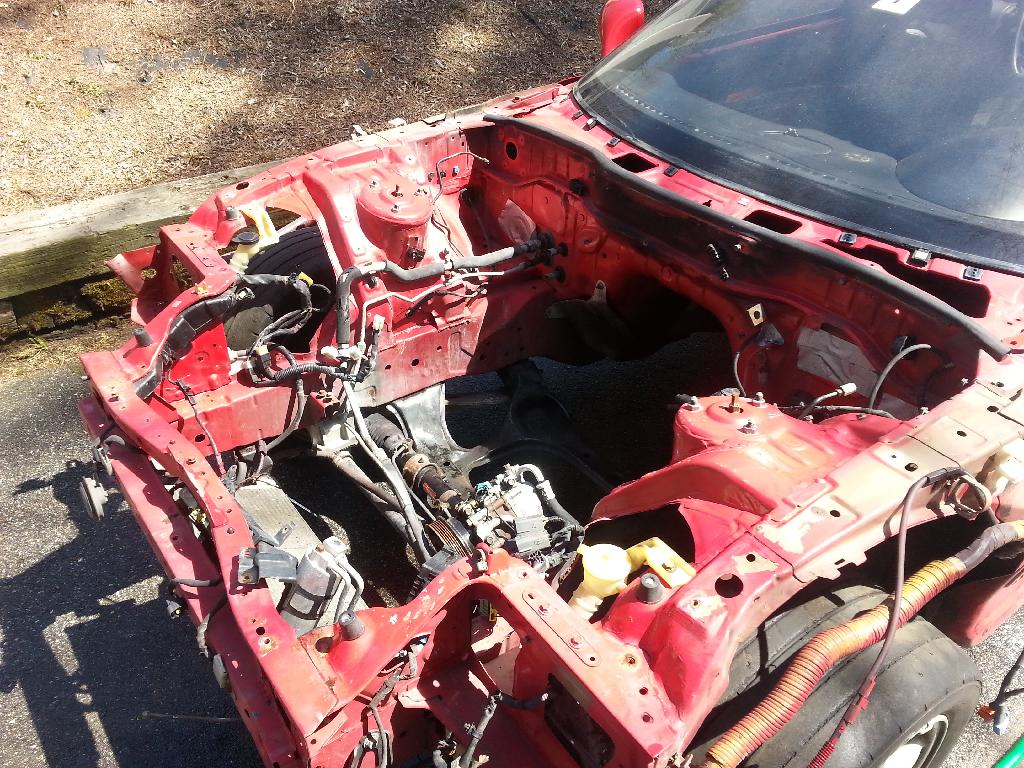
Power washed:
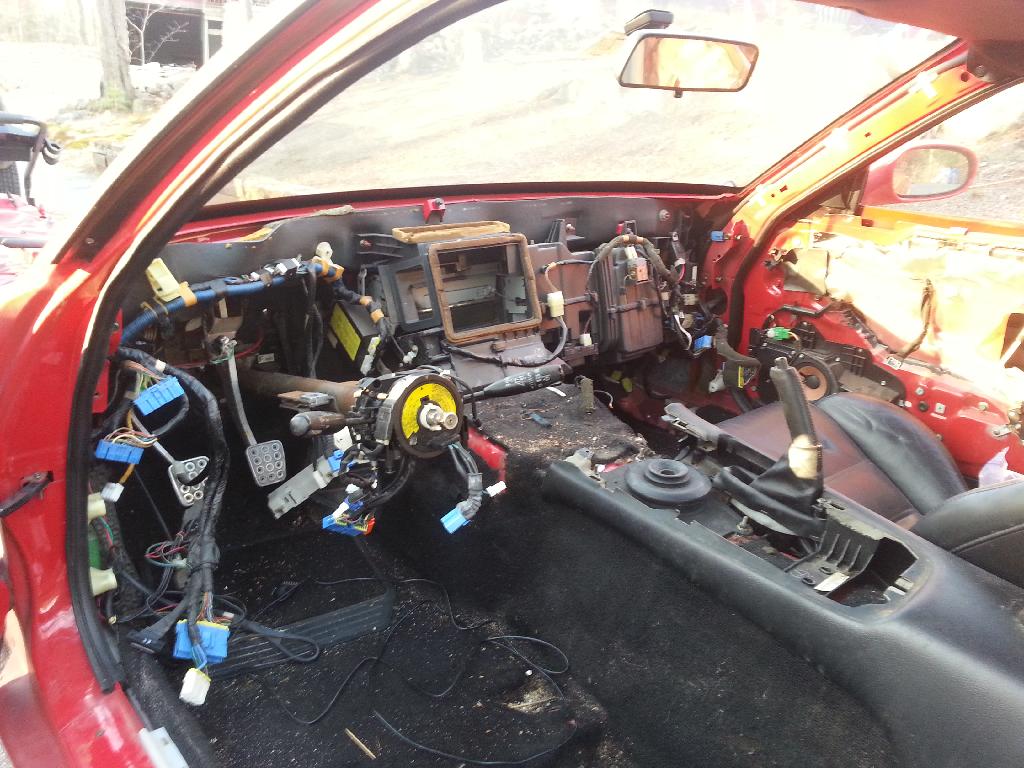
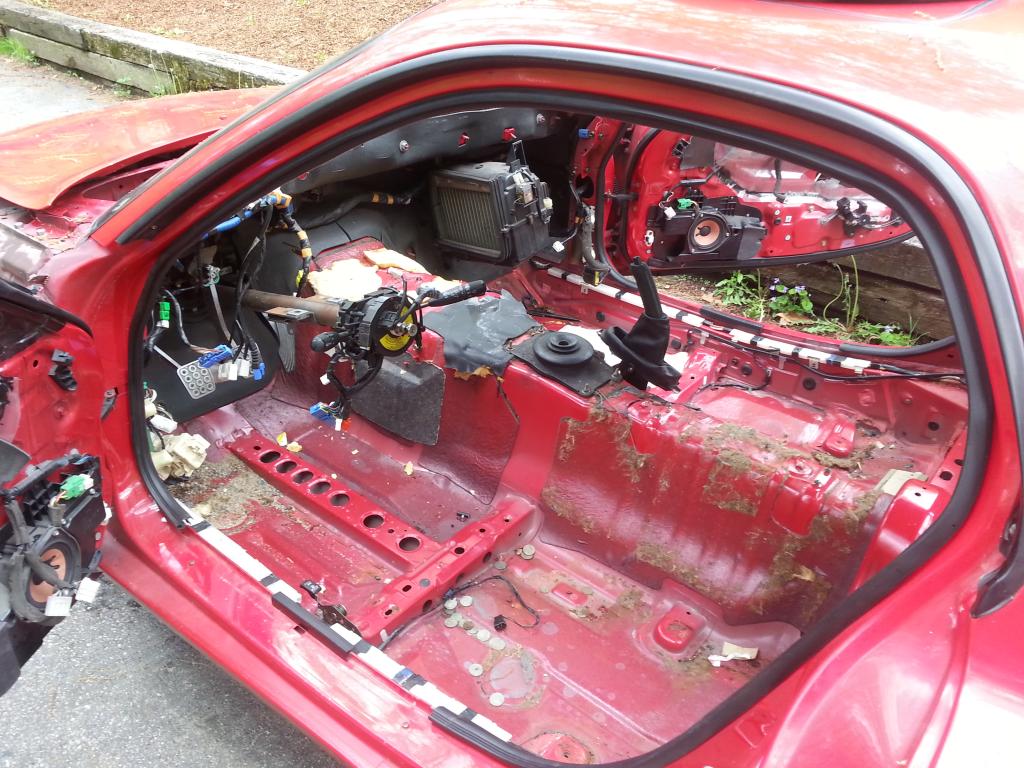
Dash out to get access to the front wire harness:
That's all for now. Hopefully I'll be able to update this frequently. Next stop is to get the front harness removed and any little bits that'll be in the way of painting and get it sent off for a quick engine bay spray.
I started my rebuild this weekend and thought I'd share.
A little back story... Car had an engine fire and was purchased by my then employer around 2003. I started doing work on it for him including pulling the engine and many of the engine bay bits. We put it on hold and stored it. I no longer work for him but I convinced him to sell it to me last year. I already own a 93 VR Touring, but it was kind of a rust bucket with faded paint and needs more love than I can give it. I'll most likely take the engine out of the old one and anything else I need to get this running. My brother in law is very interested in the old one. Rust is a bit more up his alley.
This car I've decided to give a bit more attention to. The goal is a clean car, tasteful mods to the tune of 350-400 rear horses. Paint the engine bay while everything is apart. Some undercoating in the wheel wells, powder coat brackets, sound deadening for the interior. Clean up the interior plastics and replace the broken peices. Probably a lot of things I'm not thinking about right now. I want this prepped well enough so that my (now one year old) son can take a nice car to prom some day. Mostly Street, probably won't track it, but never say never.
On to the build...
Here they are together:

New (to me) one is on the right. Here's how she looked when I started:

Here's the engine bay covered in extinguisher crud:

Bumper off:

Headlight buckets out:

Fenders out:

Power washed:

Dash out to get access to the front wire harness:

That's all for now. Hopefully I'll be able to update this frequently. Next stop is to get the front harness removed and any little bits that'll be in the way of painting and get it sent off for a quick engine bay spray.


Thanks guys,
No progress on the car this weekend as the weather is crappy. Thought I'd share some of the work I did over the winter to some of the engine bay bits.
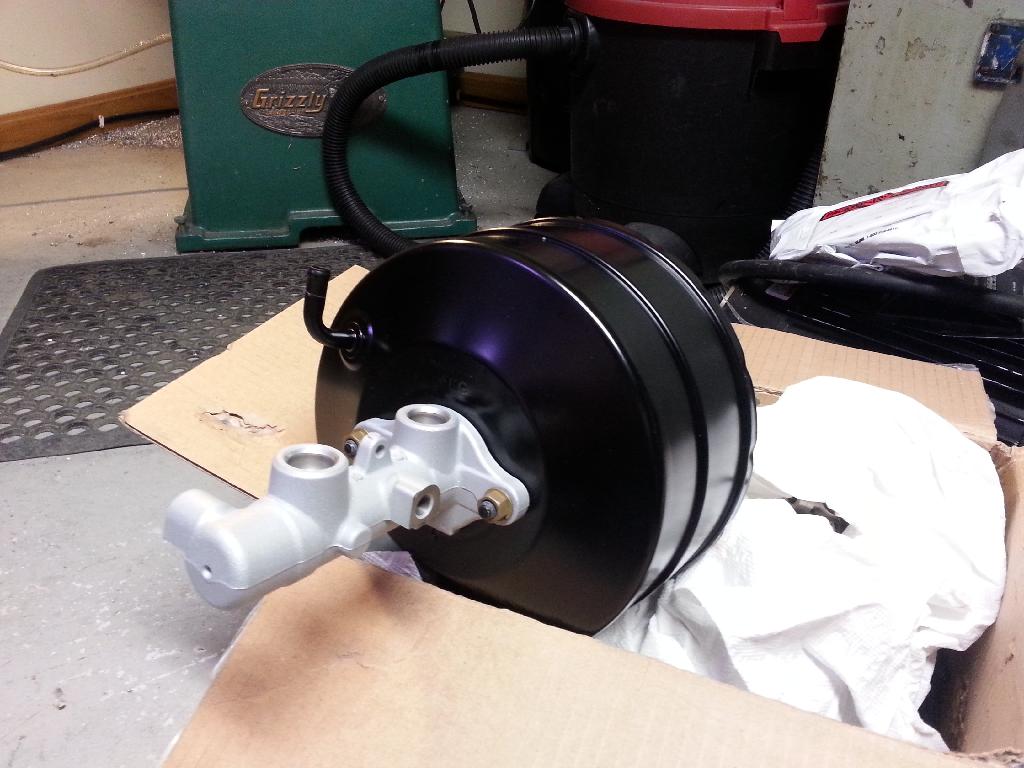
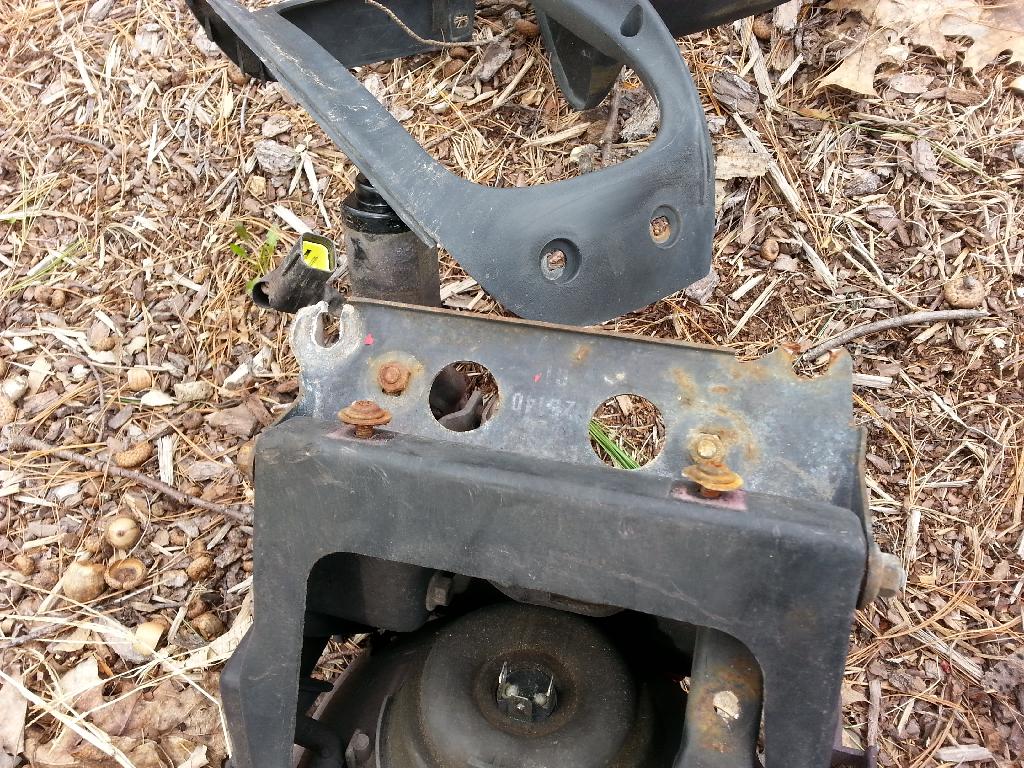
Brake booster sandblasted and painted. Brake master sandblasted and powdercoated:
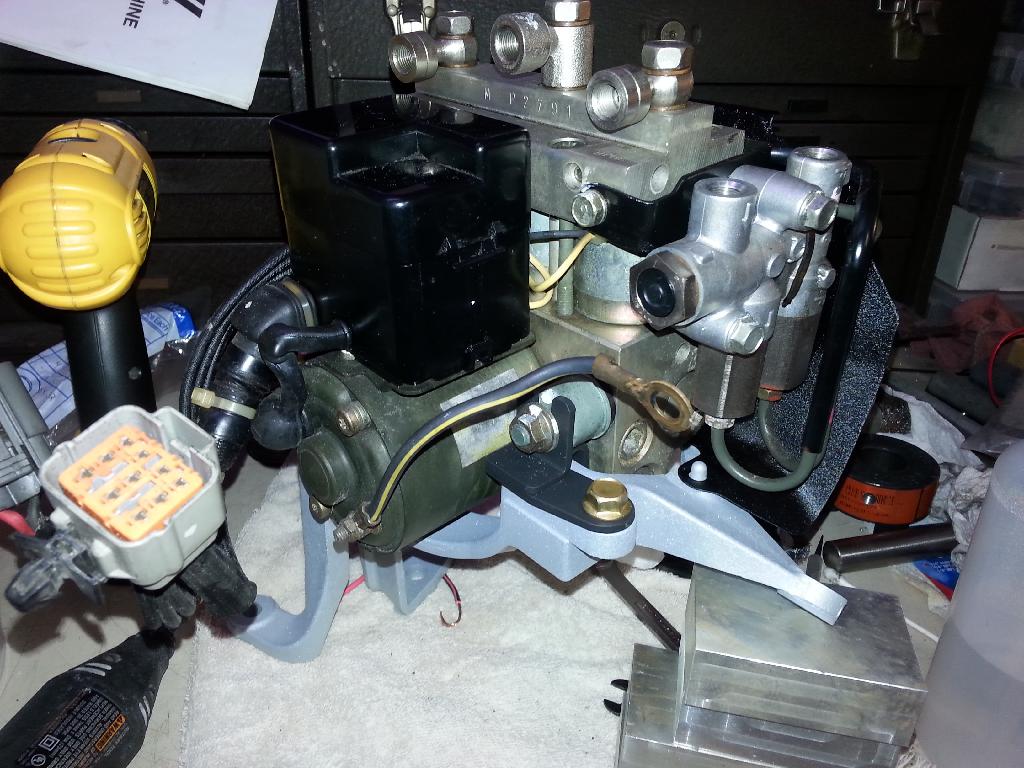
New (to me) ABS unit cleaned up, bracket and heat shield powdercoated:
Power steering pump, disassembled, sandblasted, painted/powder coated and rebuilt:

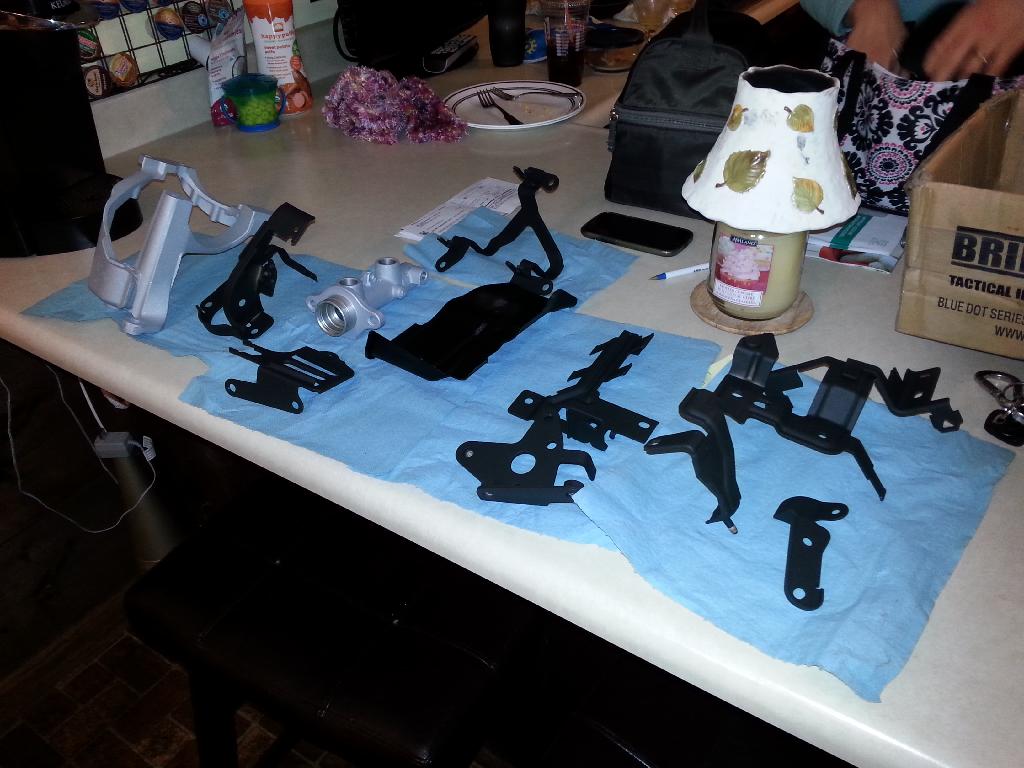
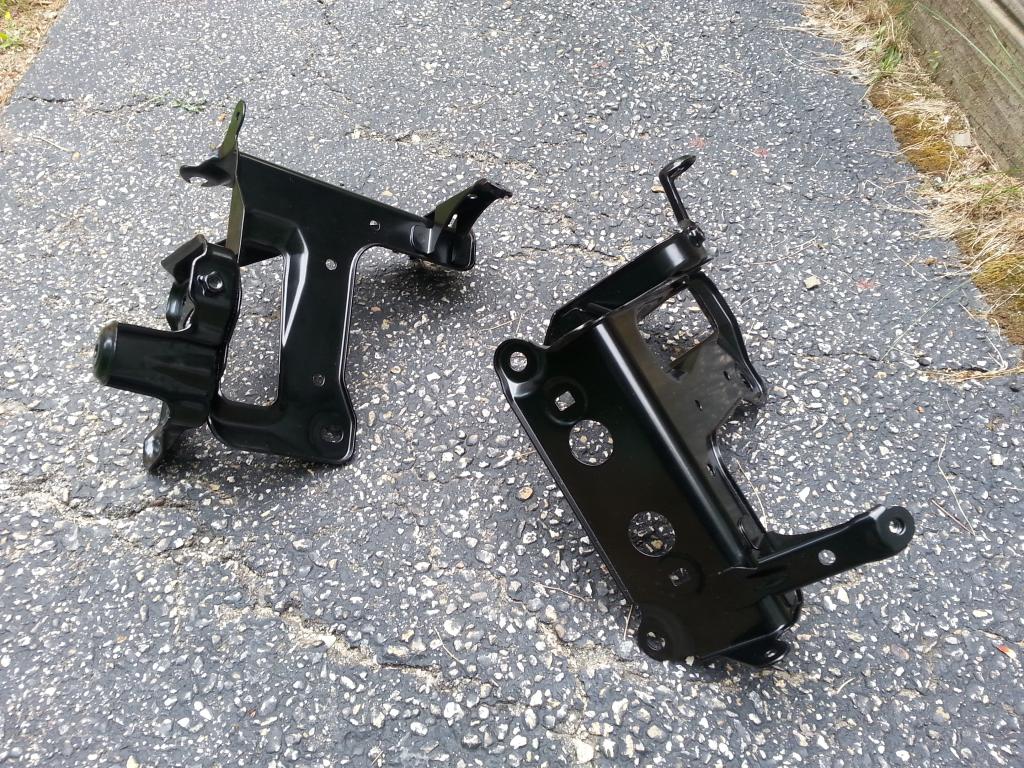
A slew of other brackets that got sandblasted and powdercoated:
All hardware is getting sandblasted and re-plated with zinc with a home setup I have (unless it's still in good condition). With the engine fire you can imagine there's a lot of rust and corrosion.
No progress on the car this weekend as the weather is crappy. Thought I'd share some of the work I did over the winter to some of the engine bay bits.
Brake booster sandblasted and painted. Brake master sandblasted and powdercoated:

New (to me) ABS unit cleaned up, bracket and heat shield powdercoated:

Power steering pump, disassembled, sandblasted, painted/powder coated and rebuilt:

A slew of other brackets that got sandblasted and powdercoated:

All hardware is getting sandblasted and re-plated with zinc with a home setup I have (unless it's still in good condition). With the engine fire you can imagine there's a lot of rust and corrosion.
A bit more progress today. Removed everything except for a few plastic clips that hold the brake lines and Ac pipes to the strut towers. As still seems to have pressure so no way to remove that yet. We'll see what the body guy wants to do about that. Hopefully they can do their job without removing it.
Anyone have suggestions on getting the plastic clips out of the strut towers? Everything else I was able to get to from behind and remove without breaking it. Don't want to break these peices off if I don't have to.

Anyone have suggestions on getting the plastic clips out of the strut towers? Everything else I was able to get to from behind and remove without breaking it. Don't want to break these peices off if I don't have to.
Looks good! Easy to paint now.
for those clips, they're old, we're exposed to the heat of a fire, you're probably going to break them trying to get them off. Or you could just leave them on and paint over them. You can get them from Ray new if you're that animate about having them.
also, for the AC system, do you know if it even works? Granted, it may still have some refrigerant in it that will need to be evacuated out but if this car was sitting for any length of time, it probably has moisture in the system anyways. I would suggest evacuating out the system and then disconnect the lines to replace all the seals.
btw, it's illegal to purge refrigerant to the atmosphere.
Trending Topics
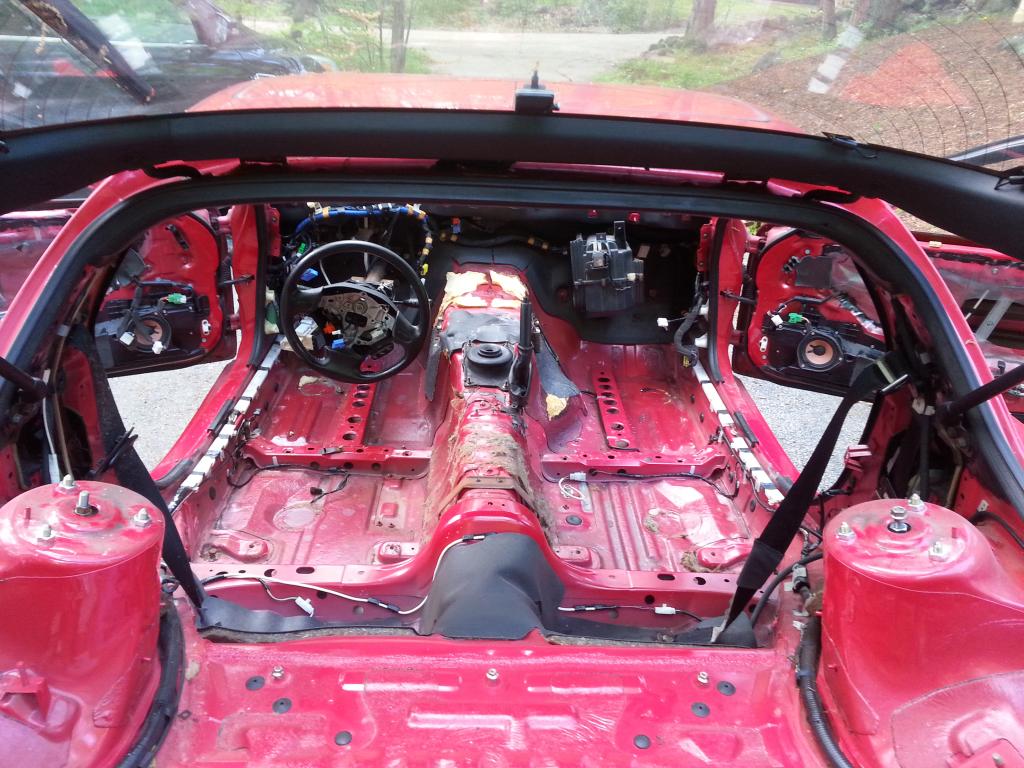
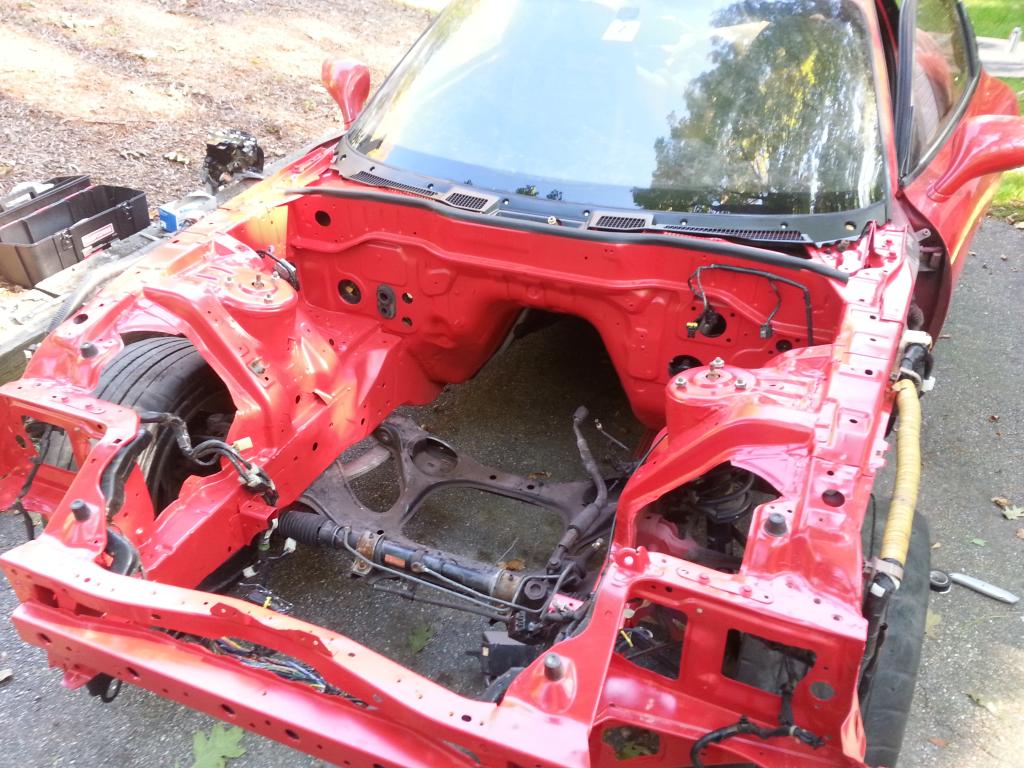
Well, I managed to get a little more done this weekend. I stripped out all of the interior except for the headliner and a few of the pads on the firewall.
And after cleanup/vacuum:
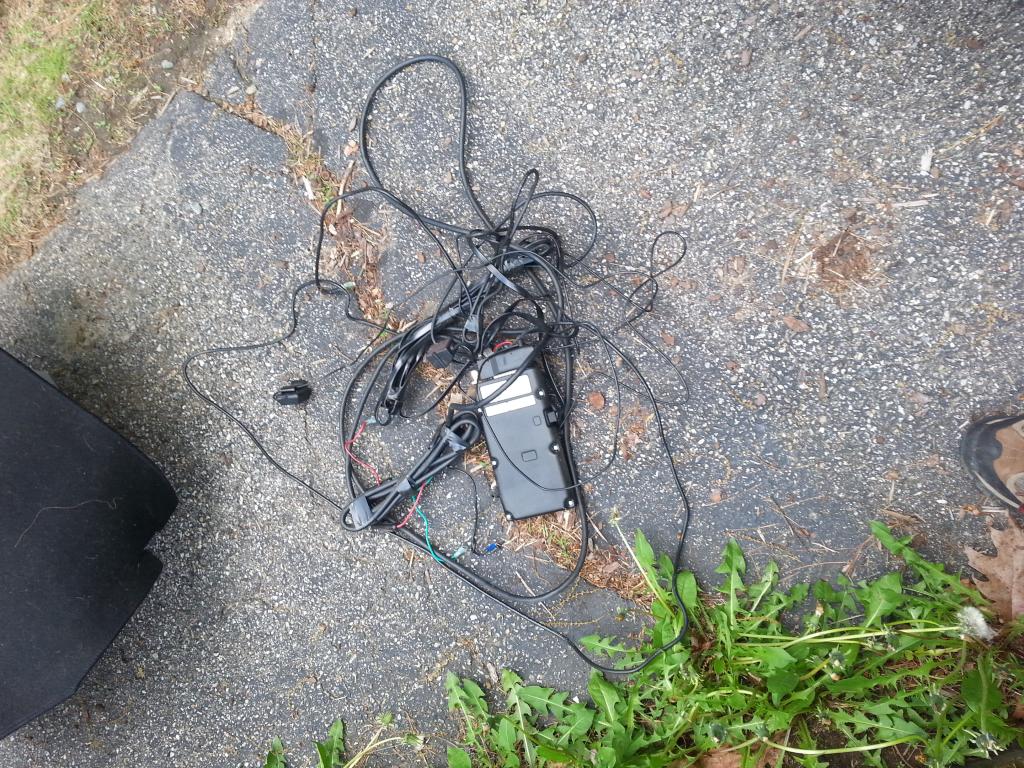
Also dug out this little bit of history. Car phone setup:
Next step is to bring it to the body shop. They will be staightening a small amount of damage at the drivers headlight bucket and assessing for any further damage. Then painting the bay. As much as I'd like to paint the whole thing, that's not really in the budget right now and the paint is "pretty good". In otherwords most people won't notice the problems, but I will.
A couple questions for those that have done this before. Taking out the old carpet left a lot of foam and matting stuck to the tranny tunnel and floors. What is the best way to remove this? I was thinking of going at it with a razor scraper or something, but if there's a better way I'm all ears.
I would like to add sound deadening. Should I remove the old stuff first or just layer over it? I've seen it done both ways and I'm leaning towards leaving it, as I'm not that worried about added weight anyway. Also, dynamat is the go-to brand name, but is there a cheaper, off-brand alternative that is reasonably comparable?
The (black) carpet that came out is so-so at best. I've found one listed at rx7partstrader.com, but I've never hear of them before and the only thread I can find says they hadn't been responding to phone calls. Price seems good though. Obviously finding a quality OEM used piece is my preference, but I have an in on getting one of the ACC replacement carpets. It's about $150 shipped, and I've seen at least one thread where someone was satisfied with it (can't find it anymore). Problem is I got one from the same company for my old 2nd Gen and the fitment was horrible. Does anyone have some experience with these before I dive in?
Any thoughts are appretiated guys and I'll keep looking on my own.

And after cleanup/vacuum:

Also dug out this little bit of history. Car phone setup:

Next step is to bring it to the body shop. They will be staightening a small amount of damage at the drivers headlight bucket and assessing for any further damage. Then painting the bay. As much as I'd like to paint the whole thing, that's not really in the budget right now and the paint is "pretty good". In otherwords most people won't notice the problems, but I will.
A couple questions for those that have done this before. Taking out the old carpet left a lot of foam and matting stuck to the tranny tunnel and floors. What is the best way to remove this? I was thinking of going at it with a razor scraper or something, but if there's a better way I'm all ears.
I would like to add sound deadening. Should I remove the old stuff first or just layer over it? I've seen it done both ways and I'm leaning towards leaving it, as I'm not that worried about added weight anyway. Also, dynamat is the go-to brand name, but is there a cheaper, off-brand alternative that is reasonably comparable?
The (black) carpet that came out is so-so at best. I've found one listed at rx7partstrader.com, but I've never hear of them before and the only thread I can find says they hadn't been responding to phone calls. Price seems good though. Obviously finding a quality OEM used piece is my preference, but I have an in on getting one of the ACC replacement carpets. It's about $150 shipped, and I've seen at least one thread where someone was satisfied with it (can't find it anymore). Problem is I got one from the same company for my old 2nd Gen and the fitment was horrible. Does anyone have some experience with these before I dive in?
Any thoughts are appretiated guys and I'll keep looking on my own.
Small update. I've been waiting for my body guy to be able to take in my car. Hopefully in the next couple weeks. He broke his ankle so he's a little out of commission.
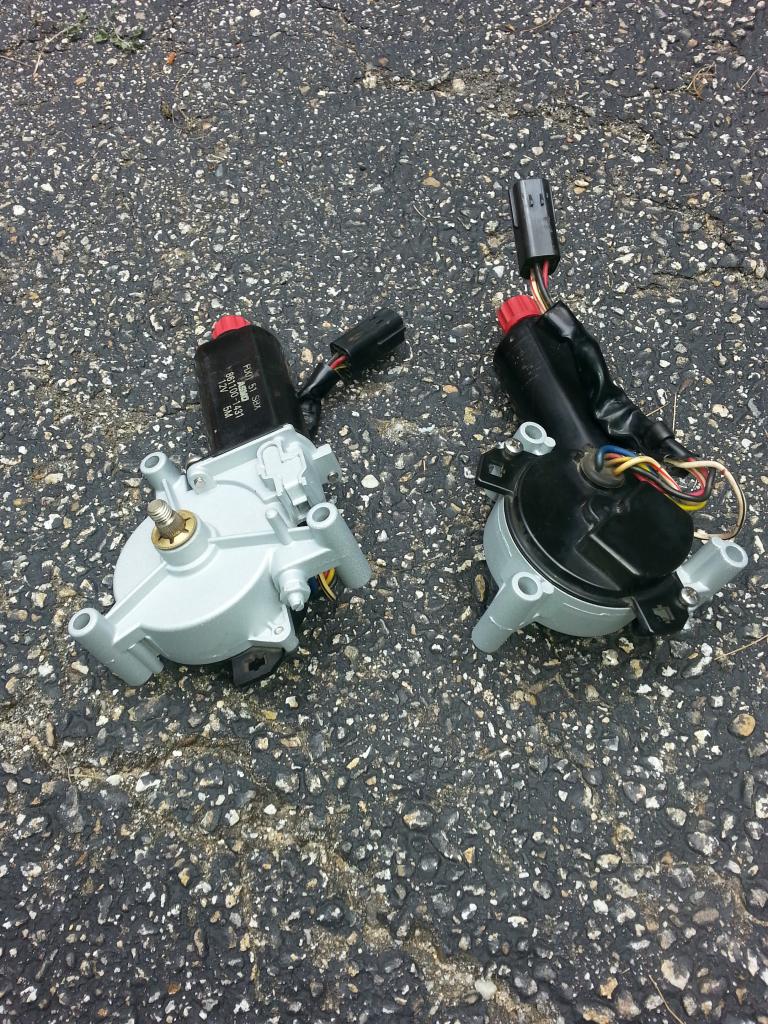
Anyway, I got the headlight brackets and motor housings powder coated.
Motors reassembled and tested:
Brackets Powdercoated:
Here is a pic of the headlight assembly when removed:
Some of the hardware for the headlight assemblies that I have re-plated:

I've done some reading on sound deadening and came across this site:
Welcome to Sound Deadener Showdown | Sound Deadener Showdown
There's quite a bit of what (at least to me) seems to be quite well thought out information on eliminating road noise and rattles. I think I will be going for a relatively quieted (hopefully) comfortable (for an rx7) noise level. I'm getting tired of yelling at my passengers, in particular my wife. And I'd like to be able to enjoy my music again. So I've measured out the interior and have a materials list going for when I'm ready to start this.
Major priorities are to get the front engine bay straightened and painted then get it on jack stands to start refurbishing the suspension bushings and powder coat the sub-frames/bits. I think I've decided to go with SuperPro Bushings. The concensus seems to be that road harshness is not to bad and that they'll most likely last longer than any stock replacements. I will be looking into replacing the pillow ***** as well.
Meanwhile I'll be plugging away with powder coating the small bits and replating/replacing hardware.
Anyway, I got the headlight brackets and motor housings powder coated.
Motors reassembled and tested:

Brackets Powdercoated:

Here is a pic of the headlight assembly when removed:

Some of the hardware for the headlight assemblies that I have re-plated:

I've done some reading on sound deadening and came across this site:
Welcome to Sound Deadener Showdown | Sound Deadener Showdown
There's quite a bit of what (at least to me) seems to be quite well thought out information on eliminating road noise and rattles. I think I will be going for a relatively quieted (hopefully) comfortable (for an rx7) noise level. I'm getting tired of yelling at my passengers, in particular my wife. And I'd like to be able to enjoy my music again. So I've measured out the interior and have a materials list going for when I'm ready to start this.
Major priorities are to get the front engine bay straightened and painted then get it on jack stands to start refurbishing the suspension bushings and powder coat the sub-frames/bits. I think I've decided to go with SuperPro Bushings. The concensus seems to be that road harshness is not to bad and that they'll most likely last longer than any stock replacements. I will be looking into replacing the pillow ***** as well.
Meanwhile I'll be plugging away with powder coating the small bits and replating/replacing hardware.
Quick update from the weekend. I put the fenders and bumper on so the body shop can straighten the frame and had her towed over. Hopefully work will start on it next week.

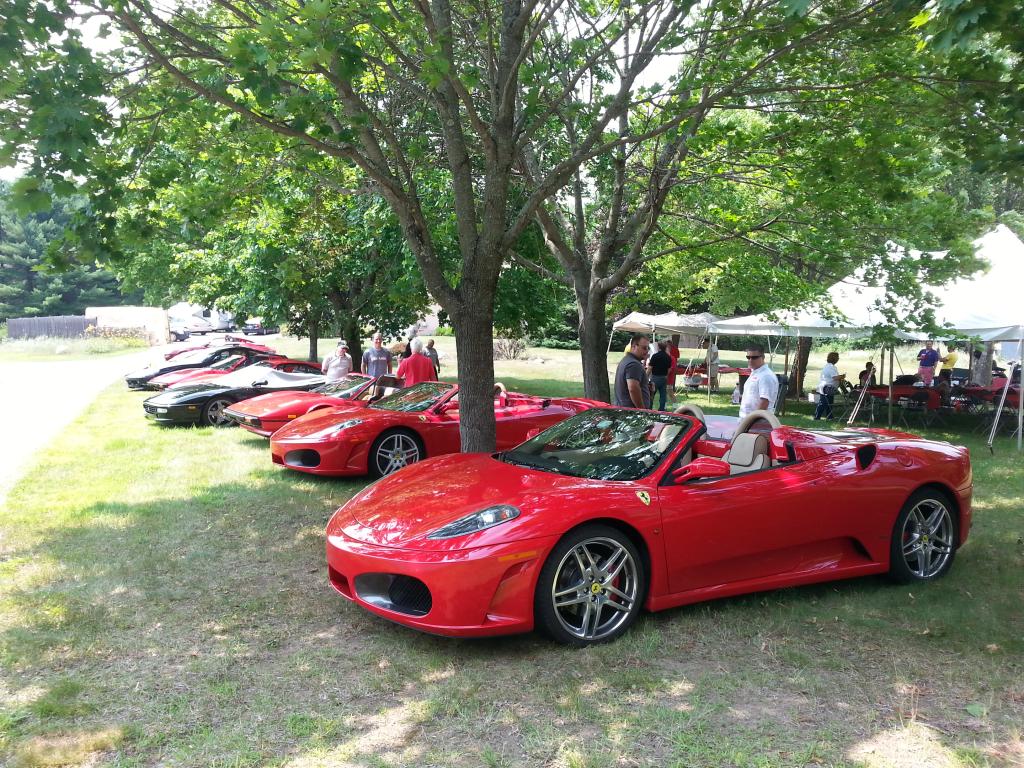
Also a buddy of mine father owns a Ferrari 308 and has a Ferrari group cookout once a year. There were a few 360 modena's, a couple F430's, a 550 Marennelo and a handful of 308's and 328's in attendance. Great BBQ as well.
Work will be slow going with the car being away, but when it comes back, I should be tearing into the suspension and rebuilding and replacing Bushings. Can't wait to get all this powder coated stuff back on the car.


Also a buddy of mine father owns a Ferrari 308 and has a Ferrari group cookout once a year. There were a few 360 modena's, a couple F430's, a 550 Marennelo and a handful of 308's and 328's in attendance. Great BBQ as well.

Work will be slow going with the car being away, but when it comes back, I should be tearing into the suspension and rebuilding and replacing Bushings. Can't wait to get all this powder coated stuff back on the car.
She's Back!!
Been to busy to post. In the car's absence I've been working on some house improvements. So not progress on the car on my end.
On the Body shops end though....
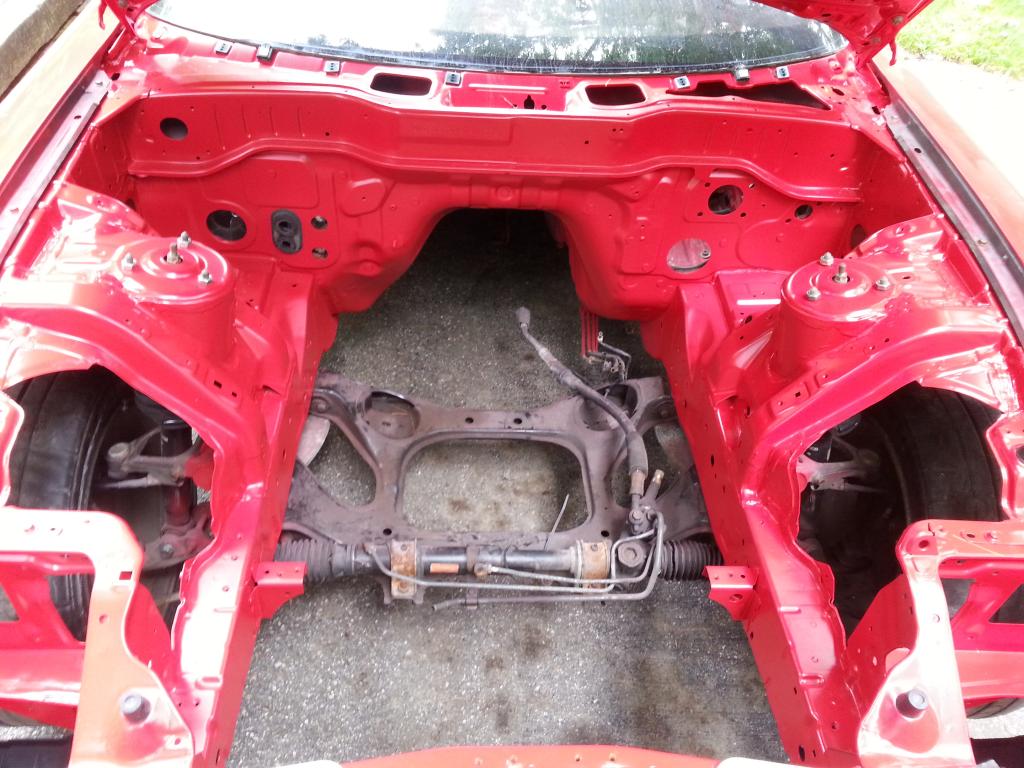
They took their time, but the front end is now straight and the engine bay painted. To those that are gonna say the paint looks a little dull, that's because it is. I decided to go with a sealer. As was explained to me, it's along the lines of what they do on new manufacture cars. Supposedly it will last a bit longer than conventional paint in the engine bay. The sacrifice is a little less shiny.
Unfortunately I'm now in the middle of a bunch of house projects, so the car will get worked on when it gets worked on.
Next in line will be to start remounting some of the various engine bay components. I'll have to start sourcing some hardware as a lot of it was rusted and un-restorable. I'll post as I can.
The engine bay looks great, I love the looks of the engine bay being a bit flat when compared to the exterior, its the way most cars are made from the factory.
The detail of this project is great! Good luck!
The detail of this project is great! Good luck!
more info on that PLATING?
i really want to get into this. it makes everything looks so nice and new!
also, can you document some of the removal/reinstall of the brake lines/ABS pump? i want to do an engine bay strip/repaint one day, but this part of it seems terrible to me. maybe it's not as bad as i imagine?
i really want to get into this. it makes everything looks so nice and new!
also, can you document some of the removal/reinstall of the brake lines/ABS pump? i want to do an engine bay strip/repaint one day, but this part of it seems terrible to me. maybe it's not as bad as i imagine?
Quick update
I had some time to start putting a few things in including the front harness. I had a good condition harness (nice and supple and not dried and cracked). Only problem is that the front relay panel had been cut out. I will splice in my old panel once everything's all lined up. Also put the wiper arms in and painted the cowel and put it on.
Also bought a lot fasteners from bell metric
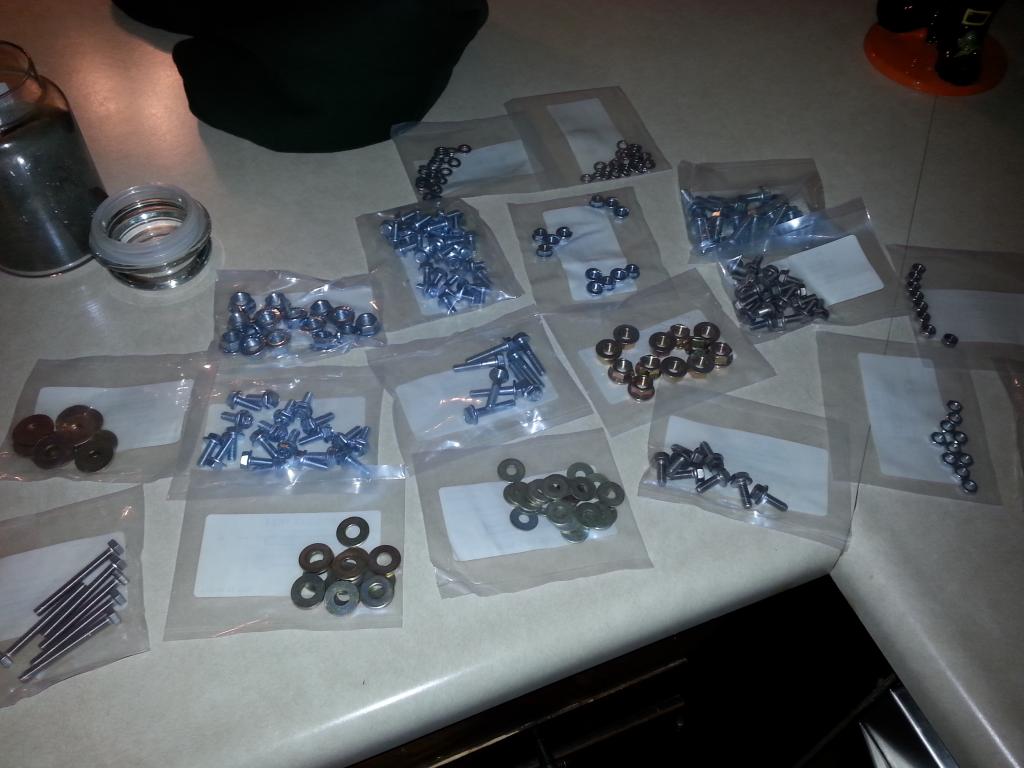
They come in good grades that mostly match the factory styles. Most of them are straight Zinc plated (silver), but I already have the dyes to make them yellow like the factory hardware. I've decided that re-plating is to much of a pain for most hardware considering how rusty they are. I'll only be re-plating where replacing will be exceptionally difficult.
Hopefully this weekend I'll get a little more time to work on it, but that's all for now.
I had some time to start putting a few things in including the front harness. I had a good condition harness (nice and supple and not dried and cracked). Only problem is that the front relay panel had been cut out. I will splice in my old panel once everything's all lined up. Also put the wiper arms in and painted the cowel and put it on.

Also bought a lot fasteners from bell metric

They come in good grades that mostly match the factory styles. Most of them are straight Zinc plated (silver), but I already have the dyes to make them yellow like the factory hardware. I've decided that re-plating is to much of a pain for most hardware considering how rusty they are. I'll only be re-plating where replacing will be exceptionally difficult.
Hopefully this weekend I'll get a little more time to work on it, but that's all for now.
I used belmetric for all my new nuts and bolts too. They're relatively cheap, you can find all the nuts/bolts you need.
I liked how fast they shipped.
Project seems to be coming along great. I should have had my engine bay painted in a matte color but I opted for gloss, which I realize now was a mistake, too hard to keep clean, lol.
I liked how fast they shipped.
Project seems to be coming along great. I should have had my engine bay painted in a matte color but I opted for gloss, which I realize now was a mistake, too hard to keep clean, lol.
Damn... I never knew about Belmetric well thanks for posting I still need tons of bolts so I will most likely go through them!!! Gawd I love this forum!
And great job with working to save this FD It'll be awesome when you get it up and running!
And great job with working to save this FD It'll be awesome when you get it up and running!