
93 Base Unintentional Build: A Story of Potential Disaster


Joined: Oct 2001
Posts: 6,279
Likes: 728
From: Florence, Alabama
"the awful ports"
some good news for Teague here.... fortunately the ports on the irons were able to be completely eradicated (as in rats) so he has a non-mutilated set of CPR ports. also, they didn't touch the exhaust ports so i had a clear shot at them.
the other good news is that Teague's car will be totally de-ratted in short order. i had a week delay on a build item that should arrive tuesday so his motor will be back in Chicago at Elite Rotary Shop by the end of the week.
Keith your are up next.
Howard

Thread Starter
Full Member
Joined: May 2015
Posts: 83
Likes: 3
From: Chicago
Alright.
I got that news from Howard that all the parts are finally in and the motor can go back together. One step closer to actually having the car back in my possession.
Meanwhile back closer to me all the wiring is being cleaned up in the cabin area. Since I'm replacing my gauges the new ones won't be wired into the cig lighter bulb.
I also got the good news that the stereo harness wires are intact, so I can just wire all my stuff in with oem style plugs. Nice!
Soon.
Last edited by Lord Bro; Jan 14, 2016 at 08:29 AM.
Thread Starter
Full Member
Joined: May 2015
Posts: 83
Likes: 3
From: Chicago
Alright looks like the motor is complete!
04G35S this means it's your turn

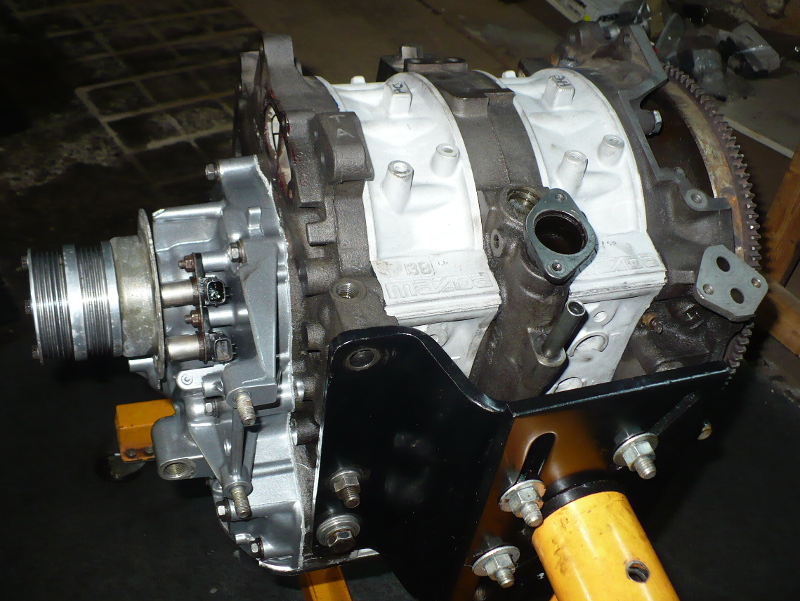
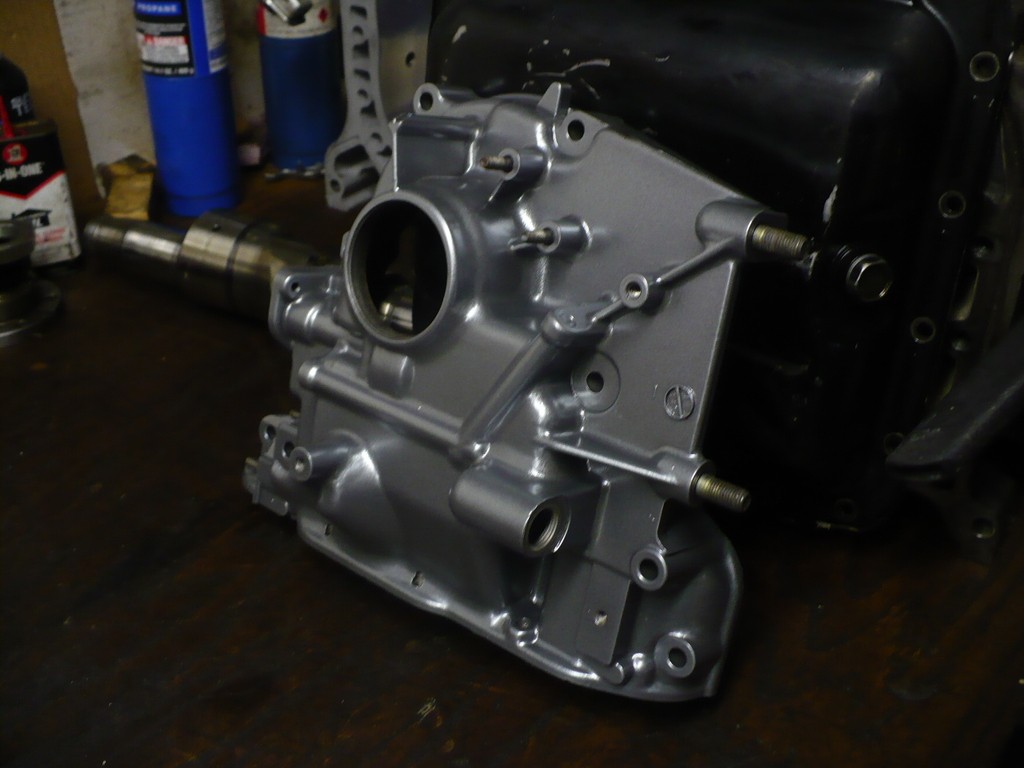
Elite gave me a nice gift of silver powdercoating for my engine front cover, so that should look really clean installed. Everything should be coming back from the near frozen north presently, which means it should be going back in my car shortly.
04G35S this means it's your turn
Elite gave me a nice gift of silver powdercoating for my engine front cover, so that should look really clean installed. Everything should be coming back from the near frozen north presently, which means it should be going back in my car shortly.
Last edited by Lord Bro; Jan 18, 2016 at 10:44 AM.
Joined: Oct 2001
Posts: 6,279
Likes: 728
From: Florence, Alabama
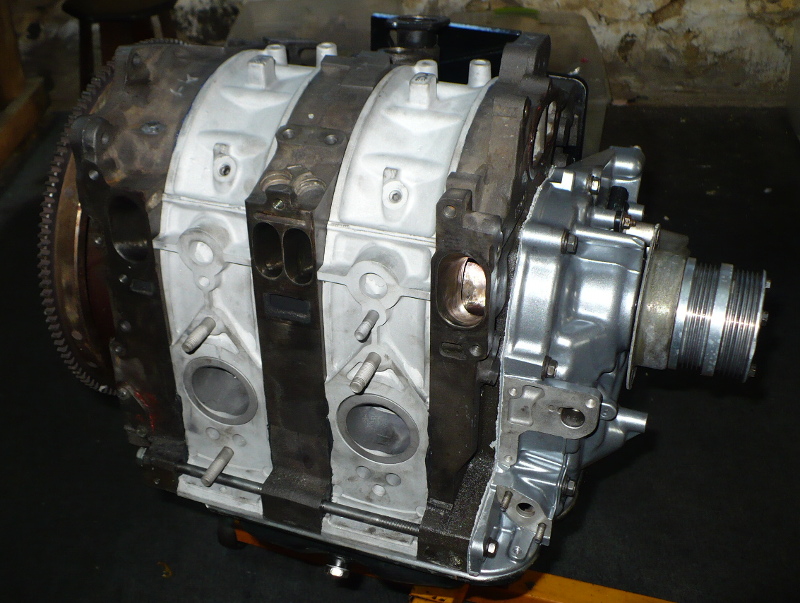
it is really nice to see this motor back together again. i take particular pleasure in getting it back in Teague's FD as it was in such sad shape.
the 13BREW is such an awesome motor but some people shouldn't be allowed anywhere near them with tools.
the rear main bearing was all copper. it didn't take long to finger the culprit.
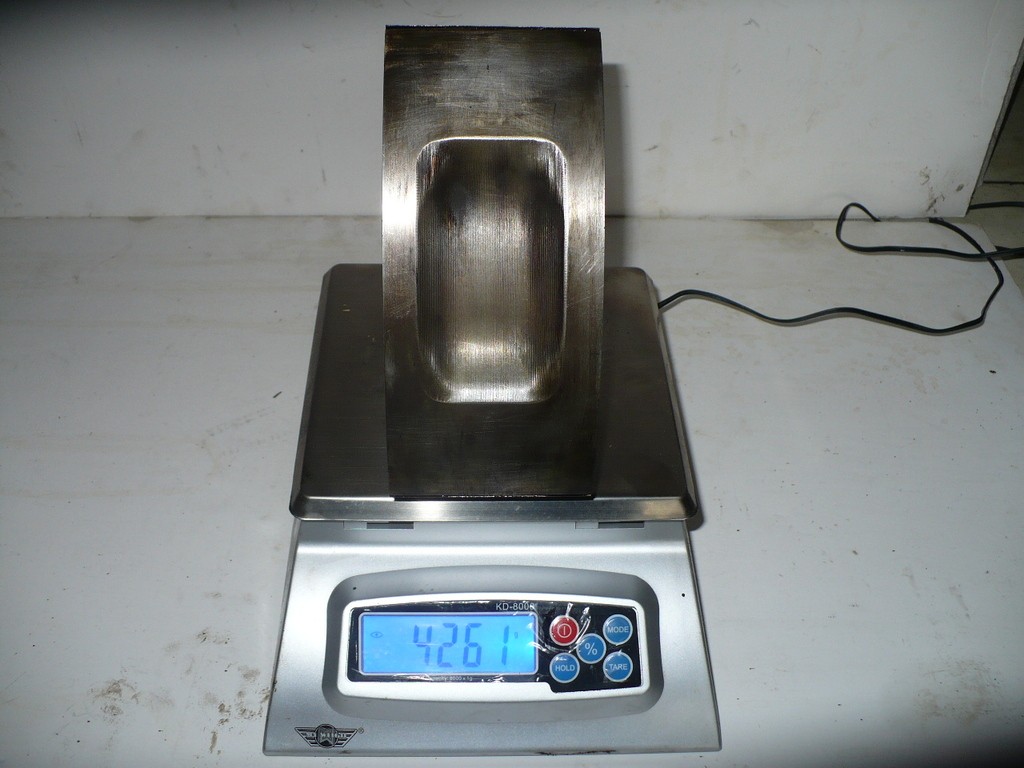
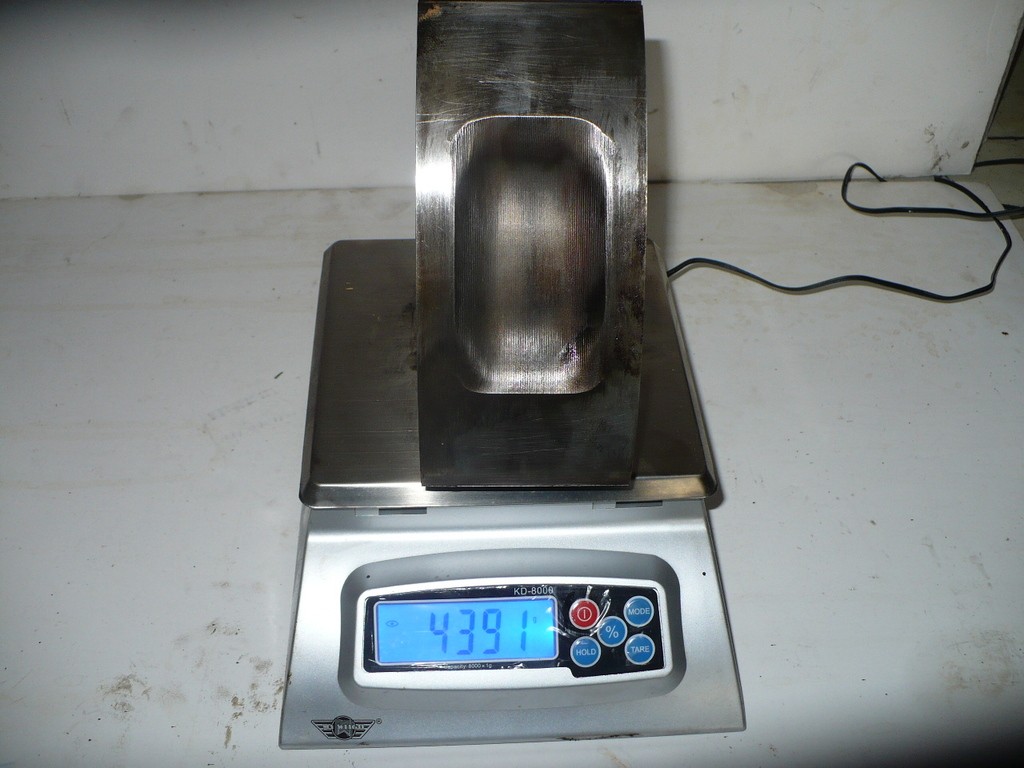
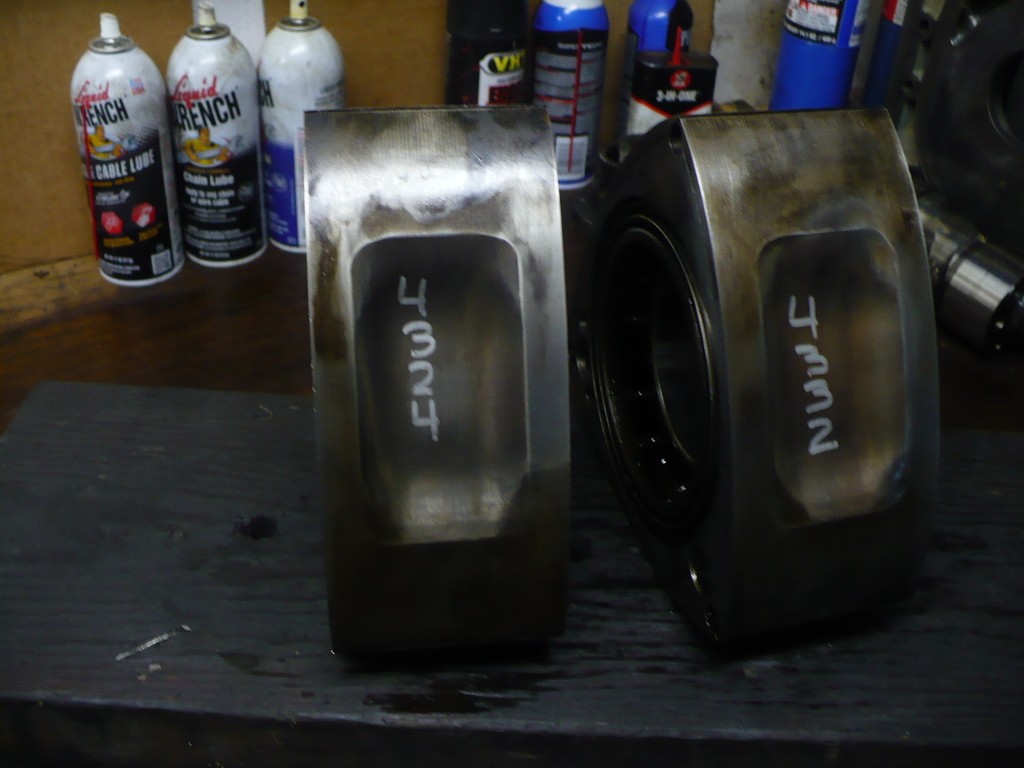
the rear rotor was 130 grams heavier than the front rotor! you can get by at 50 grams (not recommended) but 130! no doubt it was hammering the bearing. here's a stack of one inch washers that weigh 109. yikes.
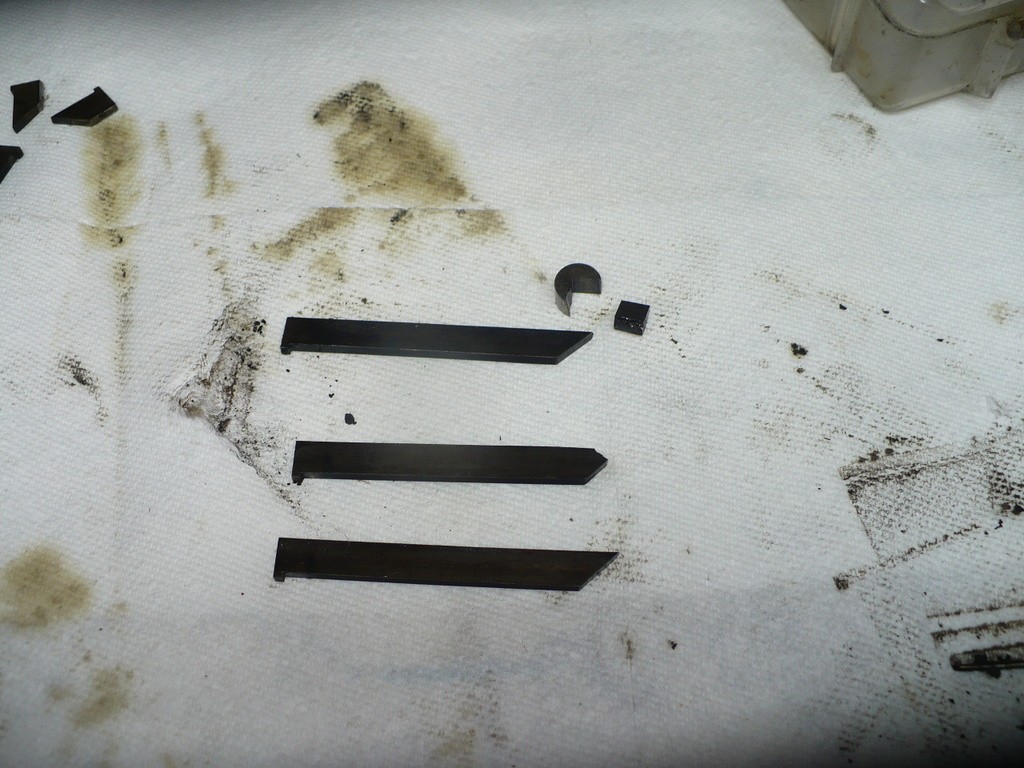
next problem, someone cut the rotors for 3 mm seals. only problem was there was less than a .001 apex seal to groove clearance. the apex seals were pinching.
.002 is my happy number.
why would anyone go to the trouble of machining a set of rotors that were 130 grams apart?
oh but i am not finished w the rotors... both had collapsed faces from detonation.
here's one of them
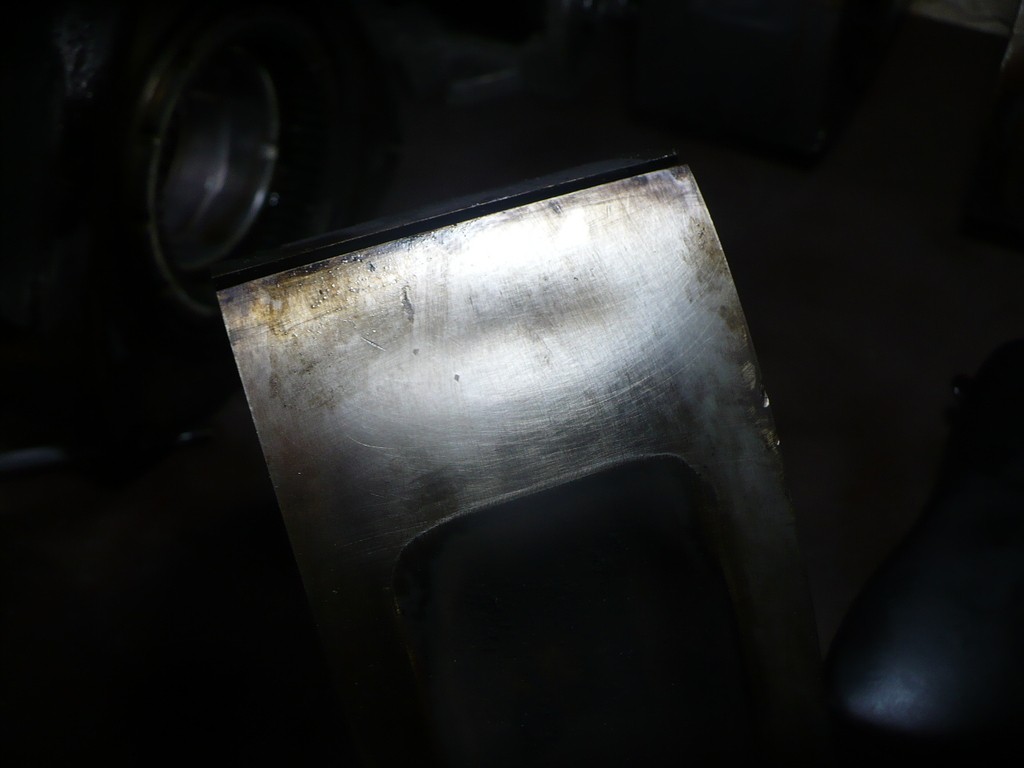
detonation led to this:
i could have opened the clearance on the rotors but when they scaled out at 130 grams diff it was time for plan B.
a spiffy newish set that were 8 grams apart and have a perfect .002 clearance for all 6 (2 mm) apex seals all the way across the groove.
other build features of the incoming motor were:
an oilpump that you could barely rotate (a first for me) replace
a gasket for the oilpan that was sealed w the crappy orange sealer and was leaking on both sides of the gasket.
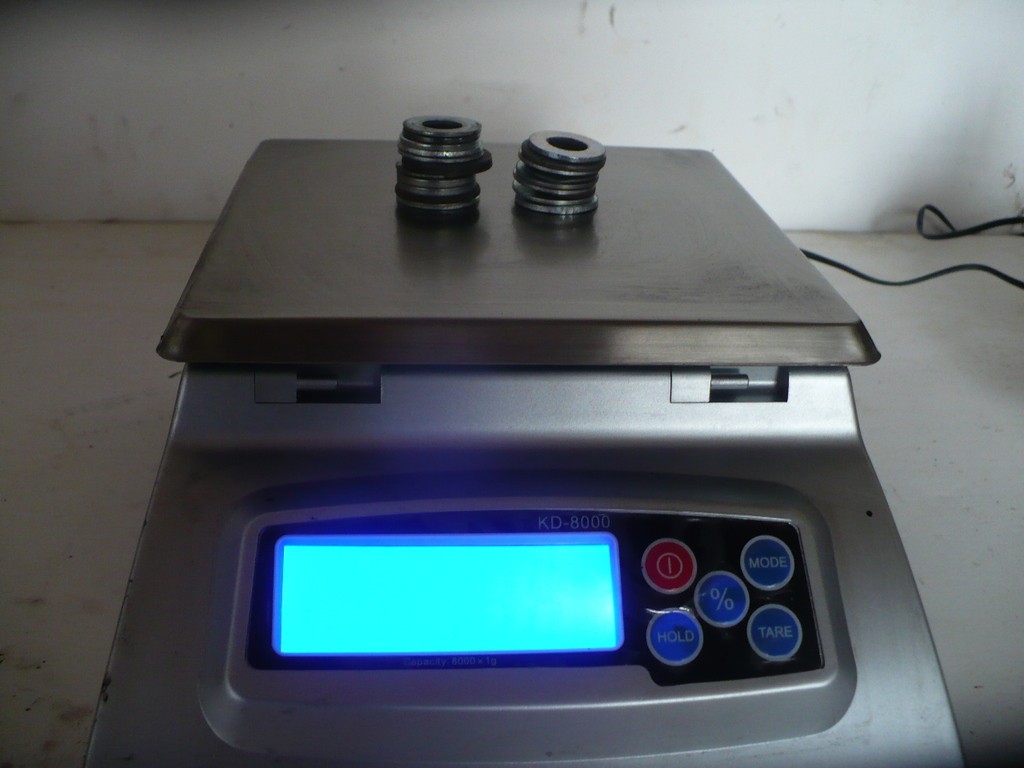
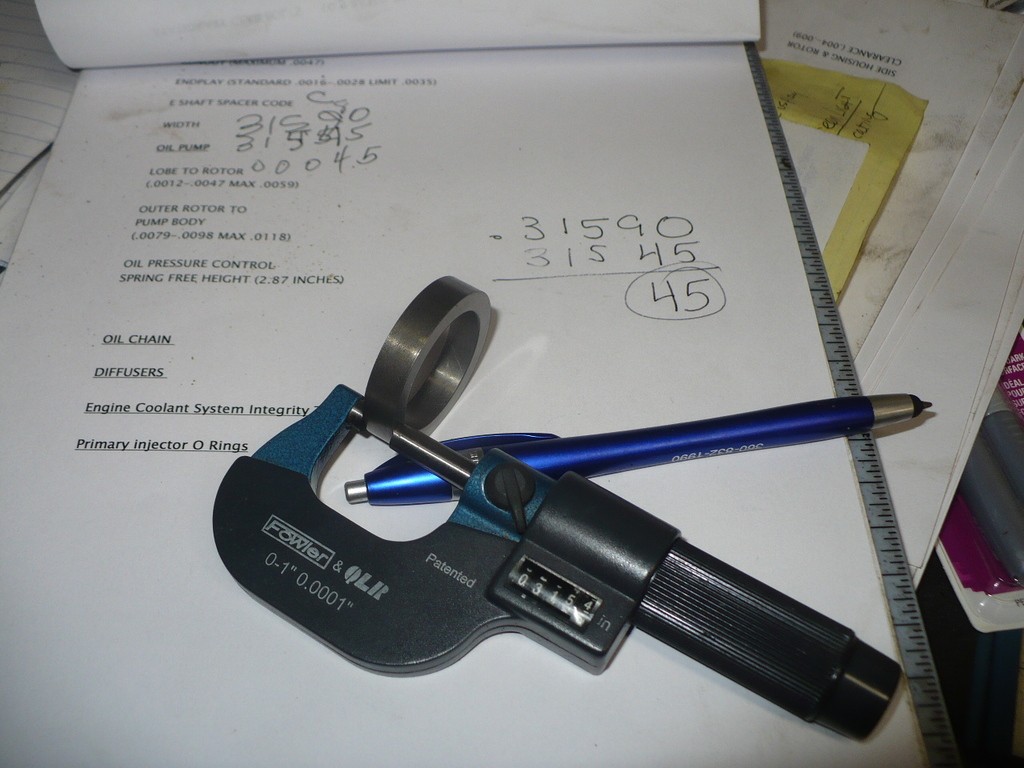
no crank endplay. re-setting to .0018. here's a spacer..
once i reported in on the oilpump Teague made the mistake of remarking, looks like we have run out of things that could be surprises...
oops,
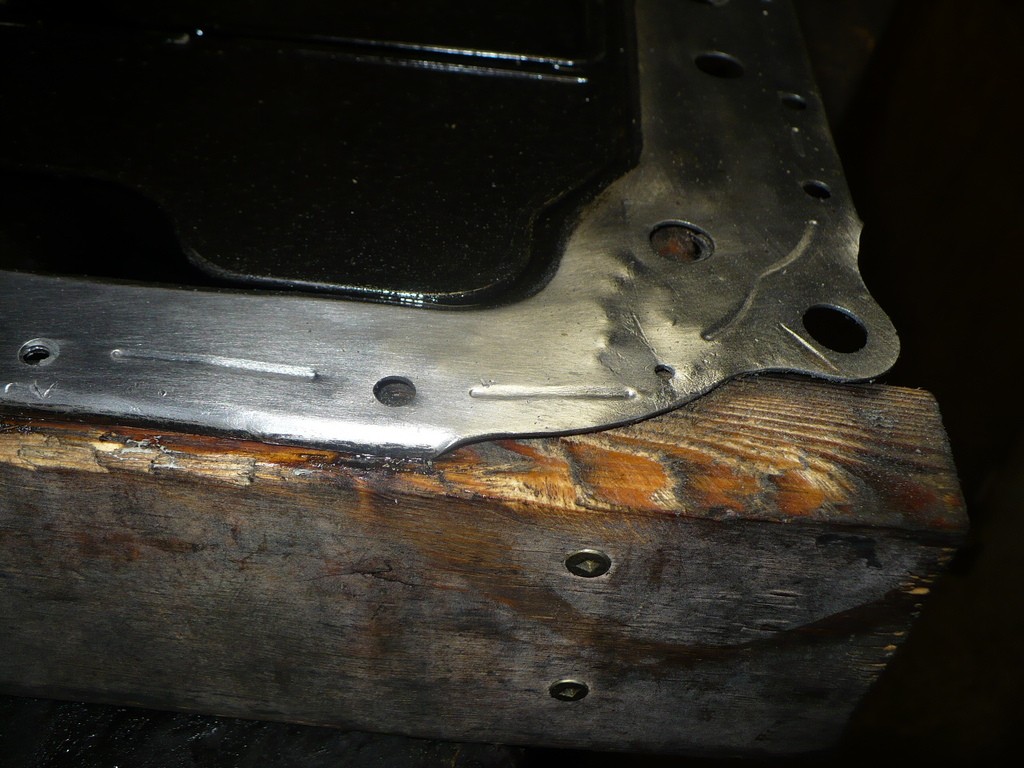
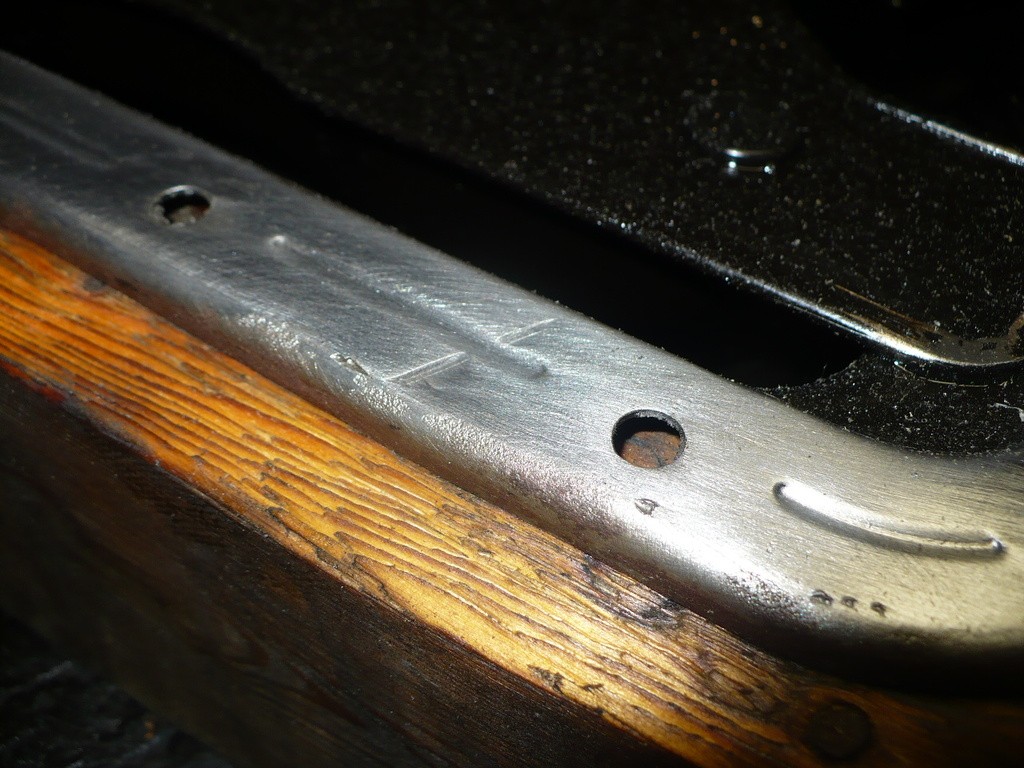
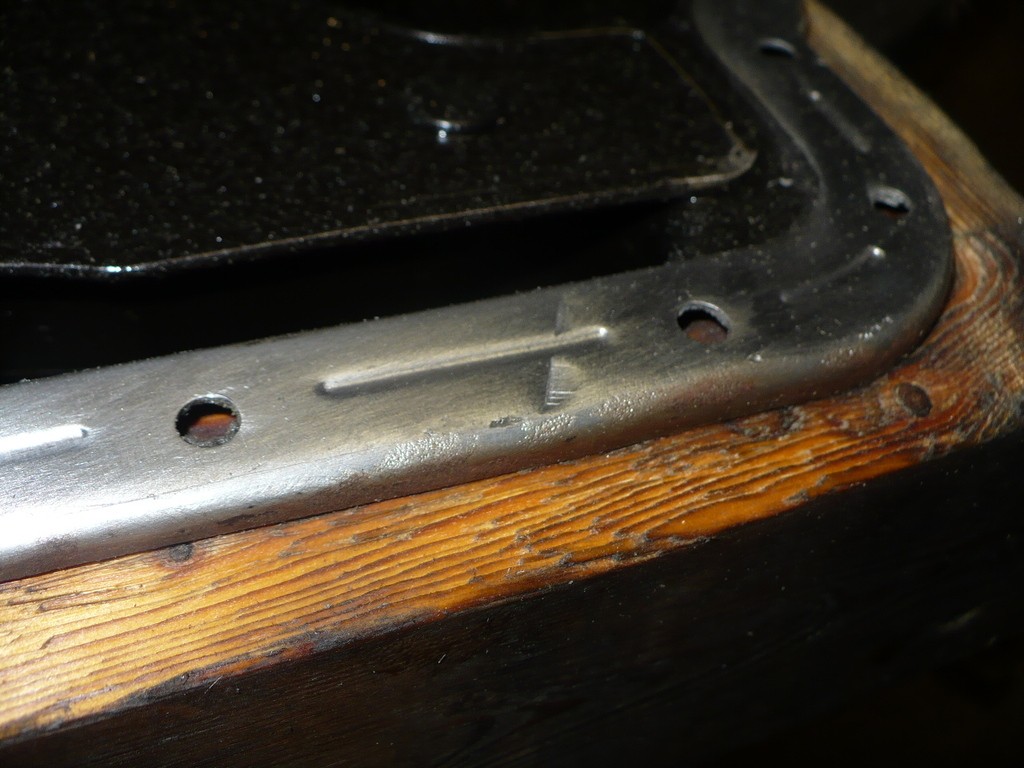
someone got creative w the front cover
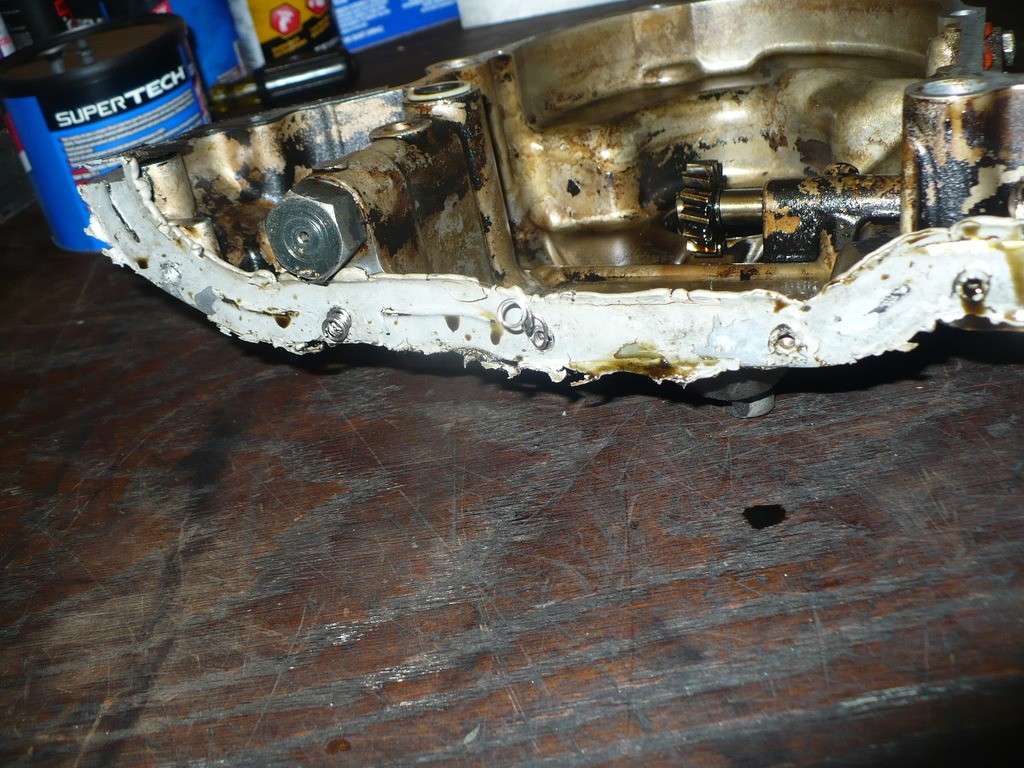
pretty screwed, Sal did his powdercoat thing and we swapped in another front cover:
someone perhaps was working out their aggression w the oilpan? needless to say it is on a significant discard pile.
post is continued as limited to 12 pics.
Howard
the 13BREW is such an awesome motor but some people shouldn't be allowed anywhere near them with tools.
the rear main bearing was all copper. it didn't take long to finger the culprit.
the rear rotor was 130 grams heavier than the front rotor! you can get by at 50 grams (not recommended) but 130! no doubt it was hammering the bearing. here's a stack of one inch washers that weigh 109. yikes.
next problem, someone cut the rotors for 3 mm seals. only problem was there was less than a .001 apex seal to groove clearance. the apex seals were pinching.
.002 is my happy number.
why would anyone go to the trouble of machining a set of rotors that were 130 grams apart?
oh but i am not finished w the rotors... both had collapsed faces from detonation.
here's one of them
detonation led to this:
i could have opened the clearance on the rotors but when they scaled out at 130 grams diff it was time for plan B.
a spiffy newish set that were 8 grams apart and have a perfect .002 clearance for all 6 (2 mm) apex seals all the way across the groove.
other build features of the incoming motor were:
an oilpump that you could barely rotate (a first for me) replace
a gasket for the oilpan that was sealed w the crappy orange sealer and was leaking on both sides of the gasket.
no crank endplay. re-setting to .0018. here's a spacer..
once i reported in on the oilpump Teague made the mistake of remarking, looks like we have run out of things that could be surprises...
oops,
someone got creative w the front cover
pretty screwed, Sal did his powdercoat thing and we swapped in another front cover:
someone perhaps was working out their aggression w the oilpan? needless to say it is on a significant discard pile.
post is continued as limited to 12 pics.
Howard
Last edited by Howard Coleman; Jan 18, 2016 at 04:09 PM.
Joined: Oct 2001
Posts: 6,279
Likes: 728
From: Florence, Alabama
for a complete rundown on the motor see the major part of this post which is #29
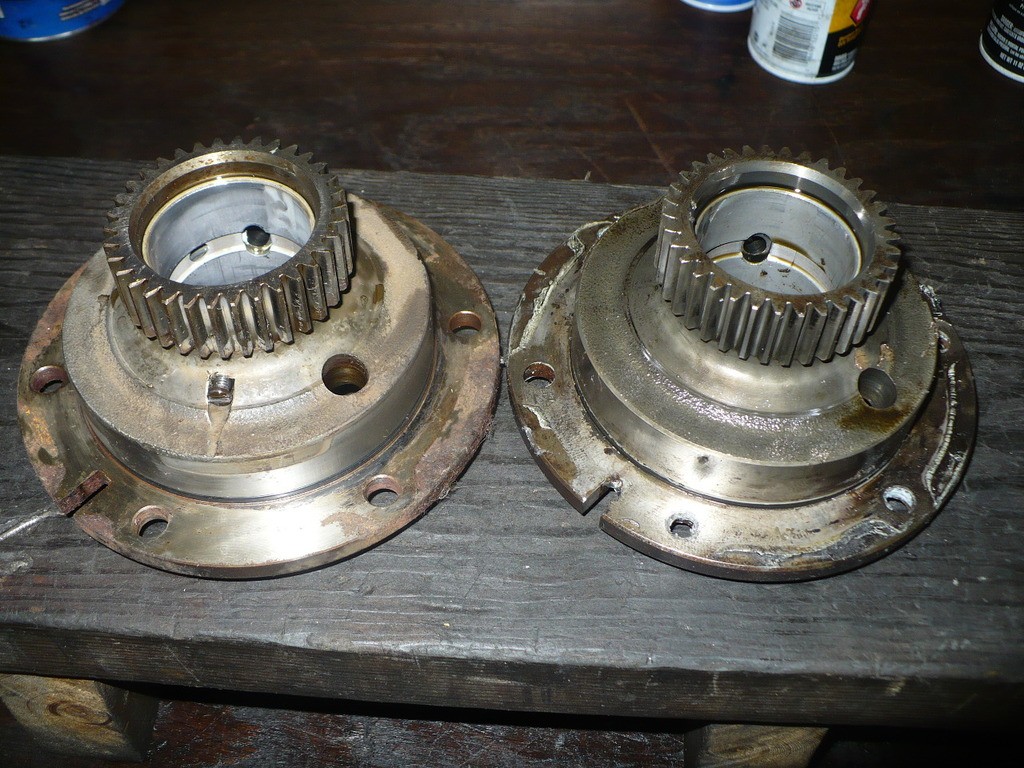
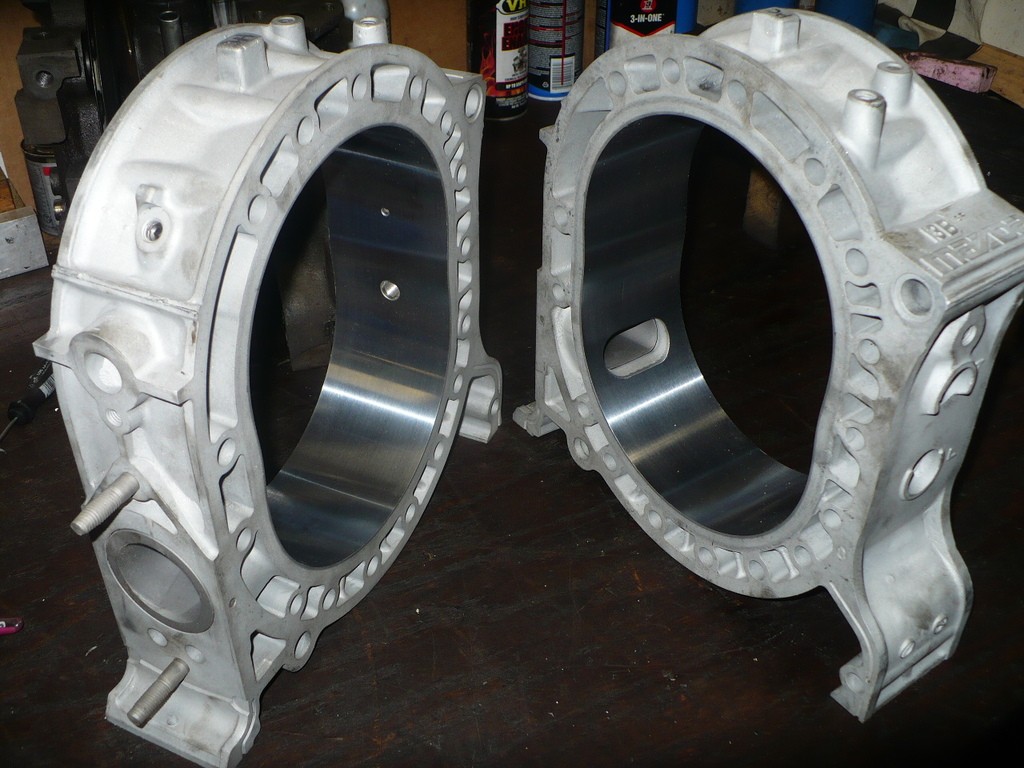
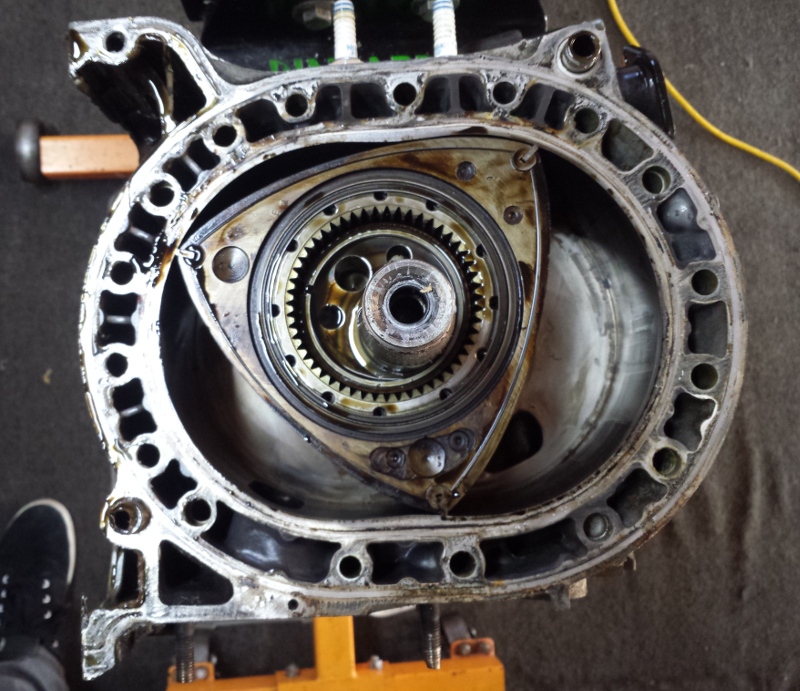
then there is the mystery rear stationary gear. who stole the bearing lock screw port? this is a first for me and i am closing in on 100 BREW engines. perhaps it comes from a different model rotary. but whatever it is, it isn't going in to the motor.
the story has a happy ending so w all the ugliness above i wanted to leave you w a happy face. here's some inside (pre-porting) beauty for you. thanks for the hone
Goopy as well as your apex seals.
resurrecting BREWs one at a time.
Keith, it's all about YOU this week. (KeithWeek)
Howard
Last edited by Howard Coleman; Jan 18, 2016 at 04:07 PM.
Thread Starter
Full Member
Joined: May 2015
Posts: 83
Likes: 3
From: Chicago
So my engine is back at Elite, which means the reassembly has begun.
If I can't drive fast for a while, I'll need to play some tunes. I've made good progress on the Raspberry Pi car computer:

The black rectangle I drew is roughly the size of a standard double-din unit, perhaps slightly larger. The opening in the dash is slightly larger than a standard head unit, and I'll be ditching the bezel so I'll have a little more room to work. The 7" touchscreen looks nice too and is going to work great until I break the ribbon cable.
If can place everything right I can keep a divider in the center of the arrangement like so, and then have a small fan continuously push air over all the little heat sinks to keep temperatures in check.

I'll be using 2x 2x50W amps to provide 50 Watts each over 4 channels, while still making it easy for me to set power to the front and rear speakers separately.
I was able to cut the height of the USB hub in half by removing the plastic casing. I also exposed the screw holes on the USB hub board, so it will be easier to mount. At the moment I've got my sound card, wireless networking, bluetooth, and the touchscreen attached to the USB hub, but we'll see what available space dictates in the end.
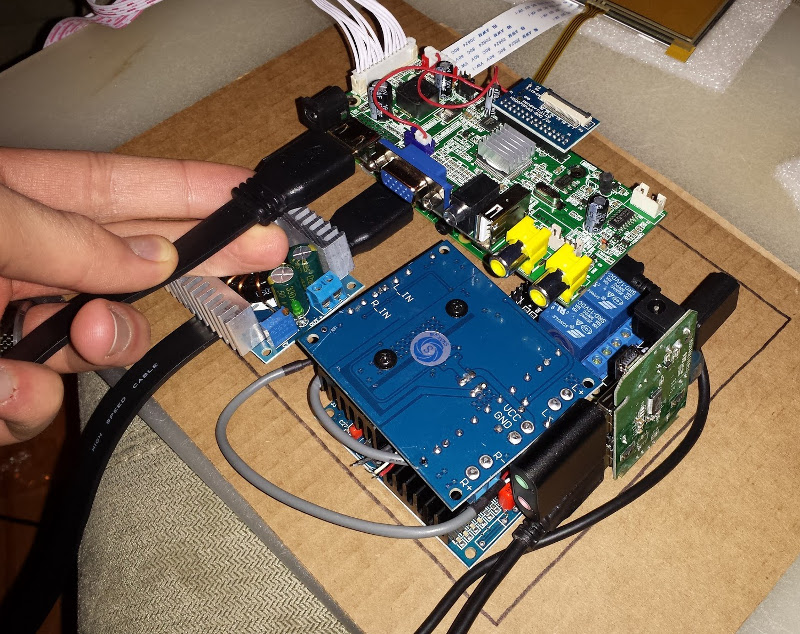
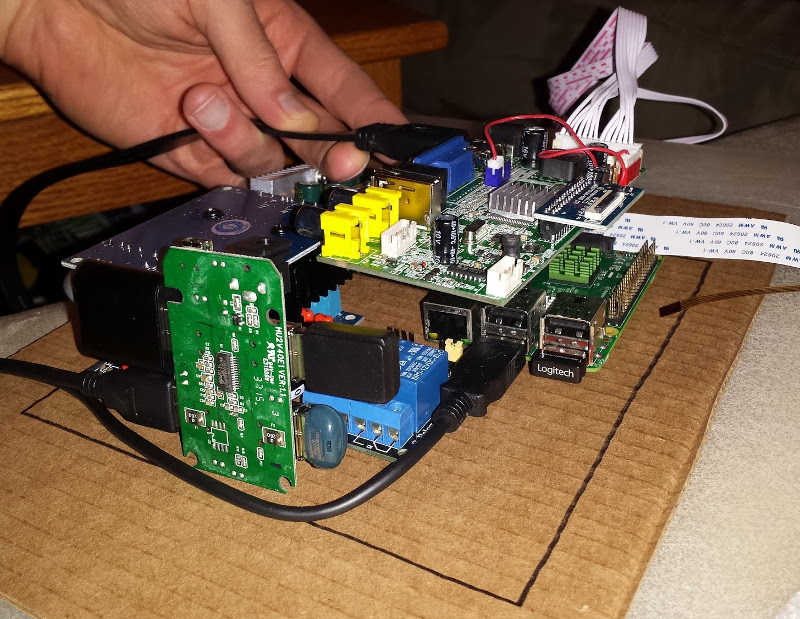
It's definitely possible to fit all the components into the space I'll have available. With components stacked like this I'm only using about half the vertical space I'll have. This is good, because I have none of the cables hooked up in these pictures, and they are going to take up some space.
I'm excited to see everything start going back together. I'm ready.
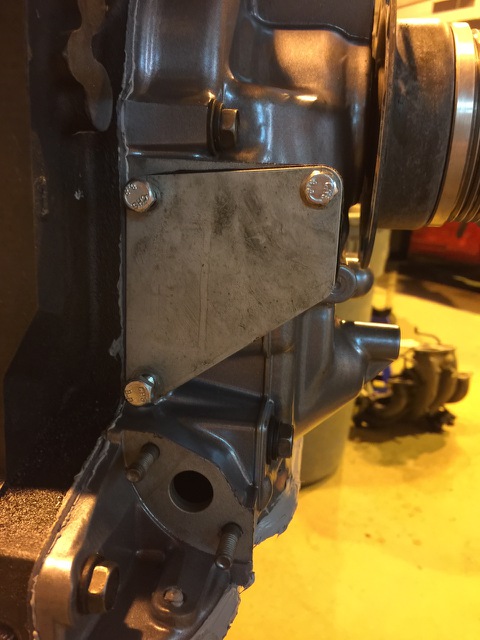
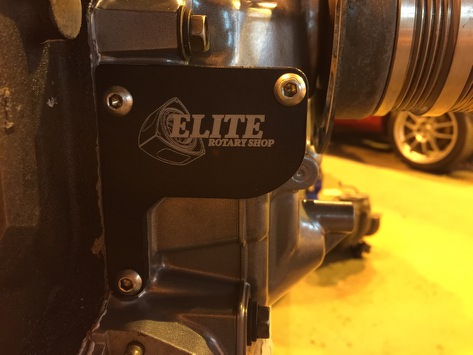
After having done the nice powder coating on the engine front cover, the shop couldn't stand the old blockoff plate being there. They were kind enough to hook me up with one of their custom plates, which looks much nicer.
I have to admit I still get a little worried each time I receive a message from Howard or Elite.
For so much of this process each time I heard from them it was about some awful discovery, so hearing good news is still a little surprising.
If I can't drive fast for a while, I'll need to play some tunes. I've made good progress on the Raspberry Pi car computer:
The black rectangle I drew is roughly the size of a standard double-din unit, perhaps slightly larger. The opening in the dash is slightly larger than a standard head unit, and I'll be ditching the bezel so I'll have a little more room to work. The 7" touchscreen looks nice too and is going to work great until I break the ribbon cable.
If can place everything right I can keep a divider in the center of the arrangement like so, and then have a small fan continuously push air over all the little heat sinks to keep temperatures in check.
I'll be using 2x 2x50W amps to provide 50 Watts each over 4 channels, while still making it easy for me to set power to the front and rear speakers separately.
I was able to cut the height of the USB hub in half by removing the plastic casing. I also exposed the screw holes on the USB hub board, so it will be easier to mount. At the moment I've got my sound card, wireless networking, bluetooth, and the touchscreen attached to the USB hub, but we'll see what available space dictates in the end.
It's definitely possible to fit all the components into the space I'll have available. With components stacked like this I'm only using about half the vertical space I'll have. This is good, because I have none of the cables hooked up in these pictures, and they are going to take up some space.
I'm excited to see everything start going back together. I'm ready.
After having done the nice powder coating on the engine front cover, the shop couldn't stand the old blockoff plate being there. They were kind enough to hook me up with one of their custom plates, which looks much nicer.
I have to admit I still get a little worried each time I receive a message from Howard or Elite.
For so much of this process each time I heard from them it was about some awful discovery, so hearing good news is still a little surprising.
Last edited by Lord Bro; Jan 21, 2016 at 08:00 AM.
Thread Starter
Full Member
Joined: May 2015
Posts: 83
Likes: 3
From: Chicago
Yep there's been a lot to fix... I wish it had been obvious it was in bad shape.

For now the boost controller is getting relocated to the glovebox.
When it was installed previously the vacuum line was tied up so it was almost crimped shut. My knee was hitting it at times as well, so it will be nice to have out of the way.
Depending on how the car computer/radio project goes I may decide to mount it directly below the screen.
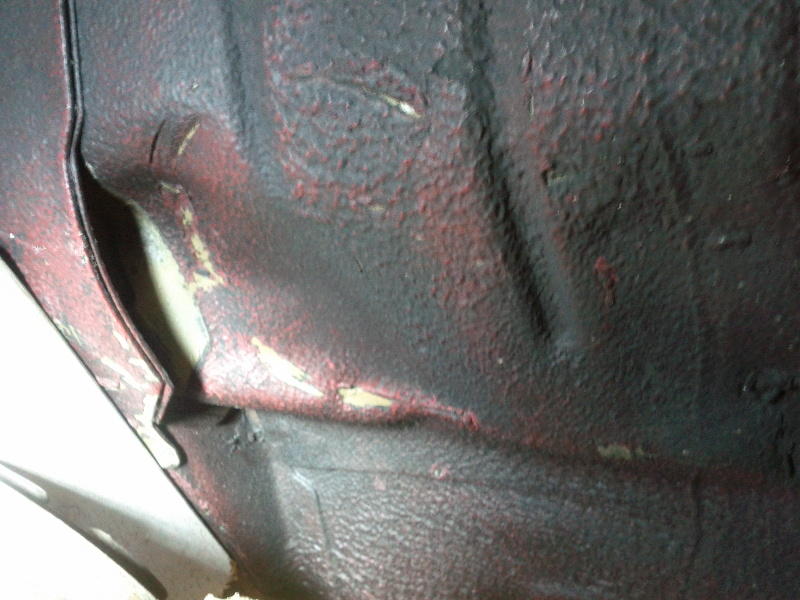
You can see the glovebox repair I have to do at some point. The vinyl material is peeling away from the hard plastic of the glovebox door, which looks pretty bad. Fortunately it's not the end of the world, so I'll just get to it as soon as I can.
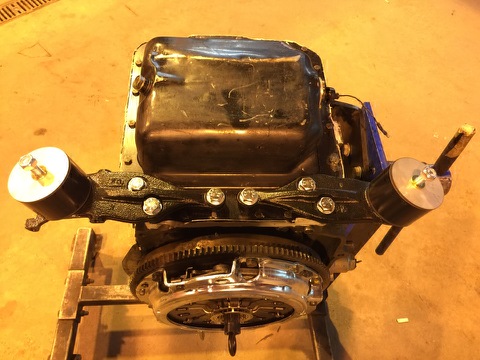
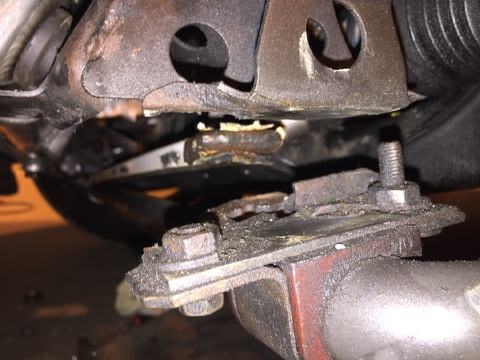
I got some of Elite's 95 duro engine mounts installed. I'll be seeing to the rest of the bushings on my own once I have the car back, but there's no sense in not having these done now.
The engine is actually in the car at this point, so I'm hoping one of these next few posts has a video of the car running in it...
Elite has been really good to me so far. I'm sure it helps that this is a big project, but Sal has gone out of his way to make things look good for me (although the Elite sticker can't hurt).
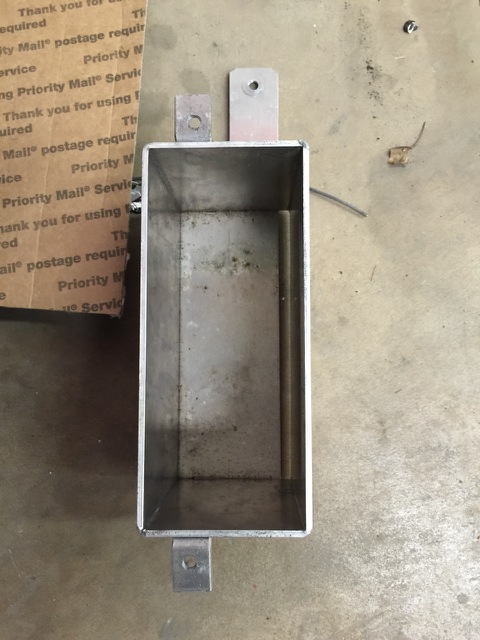
I got a cool message today that I've got this new battery tray installed, which will of course match the rest of the black pieces I picked out.

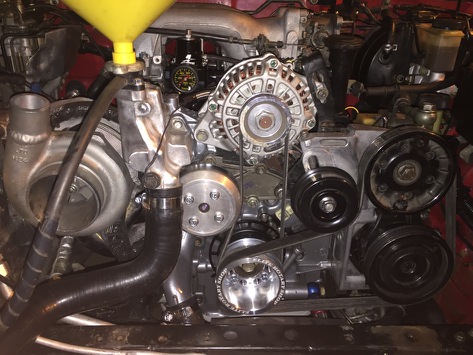
In addition to the battery tray I also got the cool news that they had powder coated my water pump housing the same silver color as the engine front cover.
I like this silver color. It's understated, but is going to be easier to keep clean than rough cast or scratched up and worn surfaces.
So I'm holding my breath, waiting for the call that either everything is running and I can come grab the car, or that the entire shop went up in flames as soon as they turned the key. Only time will tell.
In the meantime I will show off my cable management skills:
For now the boost controller is getting relocated to the glovebox.
When it was installed previously the vacuum line was tied up so it was almost crimped shut. My knee was hitting it at times as well, so it will be nice to have out of the way.
Depending on how the car computer/radio project goes I may decide to mount it directly below the screen.
You can see the glovebox repair I have to do at some point. The vinyl material is peeling away from the hard plastic of the glovebox door, which looks pretty bad. Fortunately it's not the end of the world, so I'll just get to it as soon as I can.
I got some of Elite's 95 duro engine mounts installed. I'll be seeing to the rest of the bushings on my own once I have the car back, but there's no sense in not having these done now.
The engine is actually in the car at this point, so I'm hoping one of these next few posts has a video of the car running in it...
Elite has been really good to me so far. I'm sure it helps that this is a big project, but Sal has gone out of his way to make things look good for me (although the Elite sticker can't hurt).
I got a cool message today that I've got this new battery tray installed, which will of course match the rest of the black pieces I picked out.
In addition to the battery tray I also got the cool news that they had powder coated my water pump housing the same silver color as the engine front cover.
I like this silver color. It's understated, but is going to be easier to keep clean than rough cast or scratched up and worn surfaces.
So I'm holding my breath, waiting for the call that either everything is running and I can come grab the car, or that the entire shop went up in flames as soon as they turned the key. Only time will tell.
In the meantime I will show off my cable management skills:
Last edited by Lord Bro; Jan 28, 2016 at 06:55 AM. Reason: Anger
Thread Starter
Full Member
Joined: May 2015
Posts: 83
Likes: 3
From: Chicago
My first goal is of course just to get the audio up and running when the car is on, either playing locally off the microSD card in the Pi, or from my phone just using the headphone jack. I'm using a couple of relays to give the Pi time to shut down after I turn the car off, and then once a clean shutdown has occurred the entire unit will be physically disconnected from the battery for 0 drain. I'll need to make sure that works the way I want before I continue, otherwise I'd have to shut the radio off each time I went to fill up, which would be tragic.
As far as the audio options my biggest requirement is that I be able to get in the car and start playing music over bluetooth. The AVIC-F90BT unit that's in there right now is pretty nice (ahem, if anyone is interested in buying it), but the one thing it doesn't do is let you stream your music over the bluetooth connection. Getting A2DP to work right, letting me pair my phone and treat the Pi as a bluetooth headset, has been a real pain. I got it working once though before I screwed it up, so I'll be able to get it working again.
There is a USB wifi dongle attached to my hub, so I can do internet radio streaming (or youtube I guess) as long as I set my phone up as a hotspot while I'm on the move. I'd like to try and configure it to work as a hands free phone headset for calls too, so there's a use for my mic jack after all.
As for other normal car headset functionality, I do have a GPS module that I can set up with the Pi. I plan on installing that at a later date, as I have no problem using my phone for now if need be.
The screen I'm using has regular analog inputs that will work with a backup camera, so I may decide to go that route as well. If I don't want the backup camera, I can always just have a push button rear-view.
The really cool part is that I should be able to log from the Power FC to the Pi. Raspexi is a cool project, and they have the libraries they are using available. I thought in addition to the regular data it might be cool to hook up an accelerometer and log the info from that as well, then sync it to video after the fact.
Other than that the sky is the limit. Maybe host a webserver from the car during events so people can connect and look at car telemetry live. If You've got a HAM license you could even broadcast live video from the car back to someone relatively close. Since I've got a lot of free IO pins this could be a cool opportunity for me to add a ton of sensors around the car: live tire temps, air pressure and temp at different spots in the intake, pressure sensors above/below the car perhaps for some info on aerodynamics, a load sensor in the rear under the trunk to help figure out how much downforce I have at speed with the MASSIVE rear wing I don't have. You're really only limited by what you can cram into the available space without anything bursting into flames.
Fire extinguisher is still on the list of things to get...
Last edited by Lord Bro; Jan 28, 2016 at 04:35 PM.
Full Member
Joined: Nov 2009
Posts: 138
Likes: 2
From: Gainesville, FL
Man that's an entire project in itself, how would you output pfc onto the pi? I am assuming you would have to cut the commander off and figure out what each wire does to map to screen output.
I had planned on allowing custom tail lights and in cabin LED's to connect via bluetooth and program a few functions to turn them on/off or to change the LED's sequence
I had planned on allowing custom tail lights and in cabin LED's to connect via bluetooth and program a few functions to turn them on/off or to change the LED's sequence
Thread Starter
Full Member
Joined: May 2015
Posts: 83
Likes: 3
From: Chicago
It sure is, but I've always wanted to do this. I think I wanted a computer in my car before I even really wanted a car haha.
For getting the PFC data to the Pi I'm turning to the RasPexi Viewer Project. The image they have on their Facebook page to describe it is good; let's see if I can hotlink it here:

This is entirely their diagram, but is exactly what I'm doing.
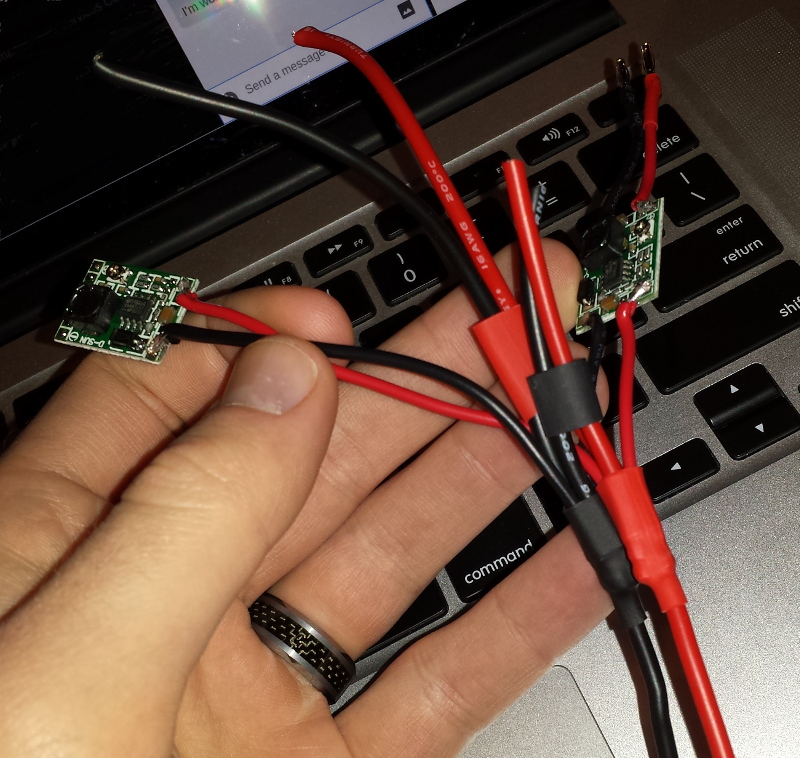
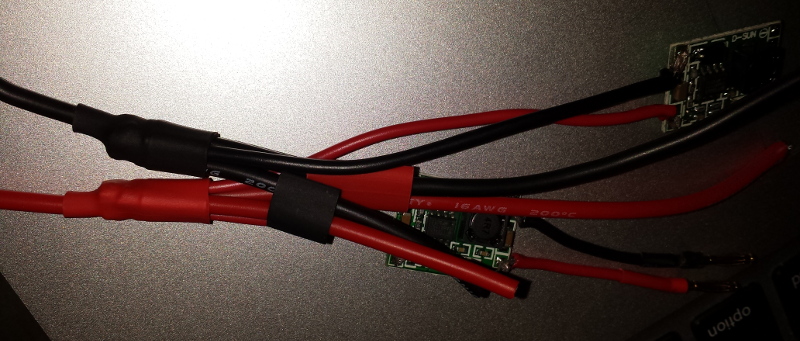
Instead of using a Datalogit or FC Hako I'll be using one of SonicRaT's PowerFC USB Adapter boards, which I'm going to mount inside the stereo area with everything else.
For getting the PFC data to the Pi I'm turning to the RasPexi Viewer Project. The image they have on their Facebook page to describe it is good; let's see if I can hotlink it here:
This is entirely their diagram, but is exactly what I'm doing.
Instead of using a Datalogit or FC Hako I'll be using one of SonicRaT's PowerFC USB Adapter boards, which I'm going to mount inside the stereo area with everything else.
Thread Starter
Full Member
Joined: May 2015
Posts: 83
Likes: 3
From: Chicago
I got that magical first clip of the engine in the car and running today, but not before the news of the remaining things which had been found.
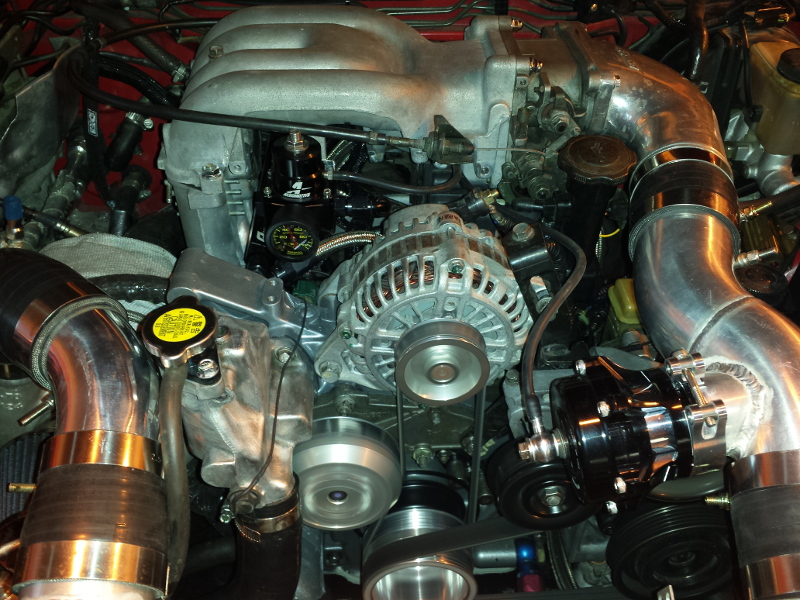
Like I mentioned before there is a piece of pipe welded on the compressor outlet in place of a thinner piece of tubing. The plan had been to cut it off and replace it with a piece of tube the correct size, but that would mean cutting close to the compressor housing, maybe too close. The solution was to port it out as much as possible, and I'll just have to live with it. I'm sure in a side by side comparison with an identical setup where the outlet had a larger inner diameter I would lose out, but I don't expect to take a performance hit from it in the real world.
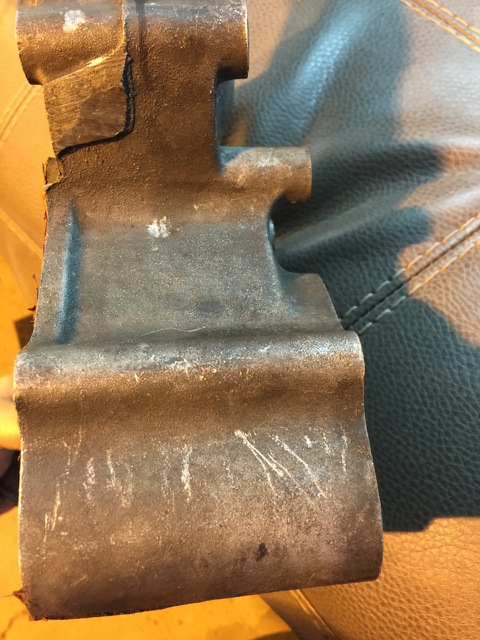
One of the front roll bar mounting brackets is broken. There was actually a reinforcement bar across the mounts, but the stock mounting brackets are just too flimsy I guess so everything failed.
The last bit of bad news was about my gauge cluster. The previous owner had them sent out to rebuilt when they started failing, but due to the other electrical issues it was impossible to tell if they were still bad or not until now. After swapping in a known good set and having them work properly it seems like the set that came with car car will have to be fixed again, or I'll have to get a new cluster. I've got the receipts for the original cluster service, so we'll see where that gets me.
To help soften the blows Elite hooked me up with that nice new battery tray with a bigger tie down bar in black.
I'm ready to have the car back. I'll get the body smoothed out at a shop close to me, which will be nice. This will be the first car I've owned that has a really nice body in great condition, so I'm looking forward to keeping it that way.
I'll be replacing the sway bar brackets with an upgraded set, probably from AWR unless someone has a better suggestion for me. I'll spring for another reinforcement bar as well since it seems like I'll need it.
Like I mentioned before there is a piece of pipe welded on the compressor outlet in place of a thinner piece of tubing. The plan had been to cut it off and replace it with a piece of tube the correct size, but that would mean cutting close to the compressor housing, maybe too close. The solution was to port it out as much as possible, and I'll just have to live with it. I'm sure in a side by side comparison with an identical setup where the outlet had a larger inner diameter I would lose out, but I don't expect to take a performance hit from it in the real world.
One of the front roll bar mounting brackets is broken. There was actually a reinforcement bar across the mounts, but the stock mounting brackets are just too flimsy I guess so everything failed.
The last bit of bad news was about my gauge cluster. The previous owner had them sent out to rebuilt when they started failing, but due to the other electrical issues it was impossible to tell if they were still bad or not until now. After swapping in a known good set and having them work properly it seems like the set that came with car car will have to be fixed again, or I'll have to get a new cluster. I've got the receipts for the original cluster service, so we'll see where that gets me.
To help soften the blows Elite hooked me up with that nice new battery tray with a bigger tie down bar in black.
I'm ready to have the car back. I'll get the body smoothed out at a shop close to me, which will be nice. This will be the first car I've owned that has a really nice body in great condition, so I'm looking forward to keeping it that way.
I'll be replacing the sway bar brackets with an upgraded set, probably from AWR unless someone has a better suggestion for me. I'll spring for another reinforcement bar as well since it seems like I'll need it.
Last edited by Lord Bro; Feb 1, 2016 at 06:56 AM.
Thread Starter
Full Member
Joined: May 2015
Posts: 83
Likes: 3
From: Chicago
I got the car back!
I picked it up from the shop yesterday afternoon, and as usual the weather wouldn't cooperate because I needed to do something car related, so it rained heavily the entire time. When I arrived they were smoothing out a couple spots in the base map, and let me say it was so nice to hear the engine sound perfectly smooth through the revs.
It's surprising how much of a difference there is between the old engine and the new one; you can feel less engine vibration even with the harder mounts.

It's been a rough road to get to this point, full of ups and downs (mostly downs), and I'm not done yet. Before I can really stretch my legs I'll have to get some miles on the motor and get tuned, so I have until spring to sort anything remaining out myself.
Seeing as hopefully the biggest part of this project is done, here's a reminder of where I started and all the things which have been fixed.
When I got the car I started out with some information, some misinformation, and the impression that I was getting a car which was generally in great shape. It came with a good tune, and was ready to go. I had plans to keep the car running great for years and years to come. Maybe eventually I would need to do a rebuild or GHASP do a v8 swap, but I absolutely wanted that to be far in the future.
The important pieces of information I had from the beginning were:
I noticed on the way back from buying the car that there were a couple things to fix which didn't seem like a big deal.
Some interior trim pieces were just getting old and rattling. I suppose it's only to be expected on a car this old, and I look forward to fixing them.
The mirror adjustment switches were inoperative, and the cigarette lighter socket seemed loose.
Of course just days after I got the car back home I parked it, and then it wouldn't start next time I went to go somewhere. Not only that, but my careless downstairs neighbor let the wind throw her door into mine something like the night after I got back.
THE AGONY.
Despite her apologies and being half my size, I can now safely count her among my enemies.
I tried almost everything possible that should have got the car started if it were flooded, but in the end couldn't get the car going. I decided to get the car over to Elite Rotary Shop in Des Plaines so they could help me out, and everyone was optimistic I would be up and running soon.
Unfortunately that was not to be when a compression test showed I was dead in the water, and would need and engine rebuild to get back on the road.
Well ****. I had searched for the better part of a year for a well kept example of a non-sunroof FD in good running condition, and in my excitement ended up with the exact type of money pit I had hoped to avoid. How many non-running RX-7s had I passed up while looking because I was determined to not do an engine build as soon as I got the car? I passed on those for the same reason I passed on buying a BRZ and immediately doing a turbo build, I was determined to get a car that ran close to the way I wanted it to when I bought it.
Luckily we were able to the the engine up to Howard Coleman so he could work his magic and repair any damage, but that turned into its own mess. If you've read Howard's couple of posts about the subject then you know how bad it was, but suffice it to say ~17k on the motor was a bit optimistic. Realistically it was probably ~17k and two owners ago when a compression test was performed, and the last rebuild did both a bad job and probably reused some parts which I would have had replaced as a matter of course. PM me and I'll show you the receipt I have for that rebuild, which was done in 2007. Howard and Elite have been good to me, and Elite even gave me gift of a silver powder coated front engine cover, and Elite OMP block off plate, helping everything look that extra bit nicer.

As soon as the shop started tearing into the car the true disaster was uncovered, and many things had to be done. Many things.... I of course got the bad call and in the end decided on the rebuild. Quickly some more issues were identified, the first being all-around fueling issues. I had a dead fuel pump, some fittings not rated for fuel use, eBay primary injectors somewhat prone to failure, and insufficient fuel filter.
I opted to replace everything and get rid of fueling as a failure point. I had the shop install -6 stainless braided fuel lines all the way from the back, everything terminated with AN fittings, new Walbro 485lph fuel pump, New Aeromotive fuel pressure regulator and fuel filter, Full Function Engineering fuel rails, and Injector Dynamics 850cc and 2200cc injectors.
You could tell something was up with the clutch by looking at it. Bolts were backing out and the things looked crooked somehow. Turns out the clutch disc was for an FC, which is technically possible with some modifications, but they weren't done here. Replaced with new Exedy.
There were some areas which were blocked off badly with multiple clamps and tubes. Anything which I wanted to keep blocked off I had welded shut or plugged.
I had them remove the double throttle for less restriction in the intake while everything was apart. Any of the dangling ground wires, plugs, sensors, etc in the engine bay have been fixed and figured out too.

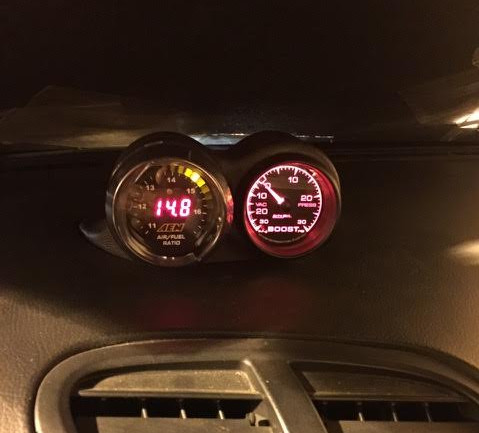
Of course when the wiring harness came out of the car it was a huge mess, with a couple wires clearly hanging on by their last strands. The shop did a great job repairing it, but the interior wiring and running of cables and hoses also had some issues. Hoses for the boost gauge and boost controller were tied up in place, crimping them almost shut. The wiring for the wideband gauge was run down under the carpet, into the support under the seat, and out of a 2"x2" hole cut in the floor from under the car. As if that wasn't bad enough the O2 sensor wasn't a wideband, so again it was replacement time. The new AEM gauge was in black, and I got a new replacement matching boost gauge in black, with power not run from the cigarette lighter... The boost controller will live in the glove box for now.
While finding all of this out I was doing as much research as I could. The car had been tuned in 2012, but it had a big vacuum leak at the time and some issues with the boost controller, which isn't surprising what with the vacuum lines tied up the way they were. A year later the leaks were fixed enough for the car to put down 70 or 80 more horsepower, but the car was never retuned. Nobody has confirmed this for me, but it is my belief that that even with a speed-density type setup this can result in boost spikes and lean conditions. Just another thing to add to the pile.
There was an issue with the turbo piping at the compressor outlet, where a piece of thicker pipe was used instead of appropriate tubing. There was a big inner lip and a size reduction directly at the compressor outlet, so that got cut off and new tubing welded on. I had some questionable welding fixed up on the downpipe as well. this went right along with replacing some of the intercooler piping so the whole thing could be moved to the left, putting it in line with the nice ducting that was there.
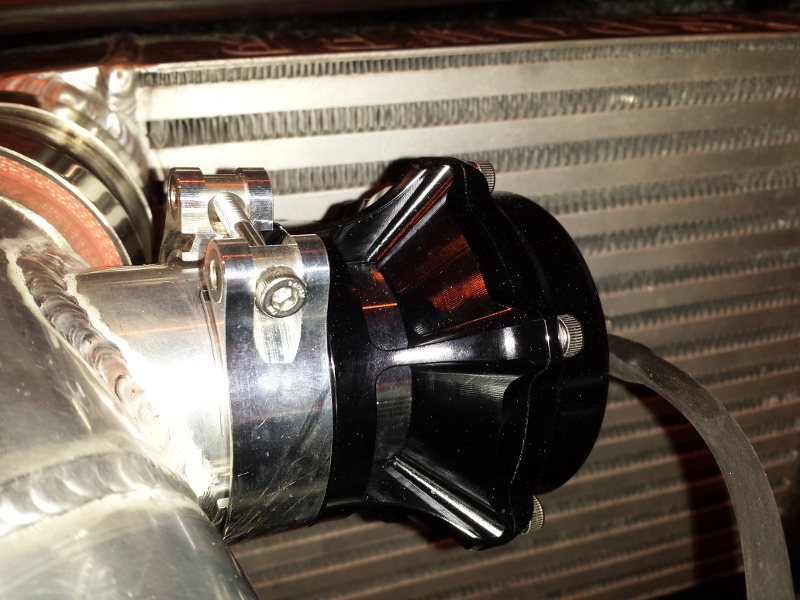
The small Greddy BOV was removed from the intake elbow and replaced with something a bit larger in the form of a nice TiAL, which is located just after the intercooler.
So what made it die? It could have been any one or all of the fuel pump, injectors, ignition and/or grounding issues, boost spikes, lean conditions under boost, or that the engine was already on its last legs before I got the car. By all accounts I could have been stranded or caught on fire due to any number of things.
Now the project can really begin. I'll get the car to the body shop to get all of that mess taken care of, and I have some parts to order immediately. I'll be replacing the diff bushings, and the front roll bar brackets and reinforcement bar pretty quickly, get an AST and oil catch can, and I also need to go through all the remaining unchanged fluids and check everything else for play.
Tonight I'll hopefully have some time to measure the true size of the radio opening and start assembling that project.
In the mean time...
I picked it up from the shop yesterday afternoon, and as usual the weather wouldn't cooperate because I needed to do something car related, so it rained heavily the entire time. When I arrived they were smoothing out a couple spots in the base map, and let me say it was so nice to hear the engine sound perfectly smooth through the revs.
It's surprising how much of a difference there is between the old engine and the new one; you can feel less engine vibration even with the harder mounts.
It's been a rough road to get to this point, full of ups and downs (mostly downs), and I'm not done yet. Before I can really stretch my legs I'll have to get some miles on the motor and get tuned, so I have until spring to sort anything remaining out myself.
Seeing as hopefully the biggest part of this project is done, here's a reminder of where I started and all the things which have been fixed.
When I got the car I started out with some information, some misinformation, and the impression that I was getting a car which was generally in great shape. It came with a good tune, and was ready to go. I had plans to keep the car running great for years and years to come. Maybe eventually I would need to do a rebuild or GHASP do a v8 swap, but I absolutely wanted that to be far in the future.
The important pieces of information I had from the beginning were:
- 1993 VR Base, with engine built by A-Spec w/ 3mm Apex seals, ~17K on motor, ~130K on chassis.
- PowerFC tuned by Steve Kan in December of 2012. Made 350-400 whp at 15psi.
- GT35R turbo
- TurboXS SMIC (actually xs-power upon inspection)
- Greddy Profec-b boost controller
- Bosch 850cc primary, 1680cc fuel injectors w/resistors
- Rx7.com fuel pump upgrade
- Simplified single turbo wiring harness w/ emissions delete
- Stock Flywheel with ACT Xtreme Clutch.
- JDM 5-speed transmission
- Innovate lm-1 wideband O2 gauge
- RX-8 Steering wheel
- Glovebox needs to be repaired.
- The gauge cluster wasn't working properly
I noticed on the way back from buying the car that there were a couple things to fix which didn't seem like a big deal.
Some interior trim pieces were just getting old and rattling. I suppose it's only to be expected on a car this old, and I look forward to fixing them.
The mirror adjustment switches were inoperative, and the cigarette lighter socket seemed loose.
Of course just days after I got the car back home I parked it, and then it wouldn't start next time I went to go somewhere. Not only that, but my careless downstairs neighbor let the wind throw her door into mine something like the night after I got back.
THE AGONY.
Despite her apologies and being half my size, I can now safely count her among my enemies.
I tried almost everything possible that should have got the car started if it were flooded, but in the end couldn't get the car going. I decided to get the car over to Elite Rotary Shop in Des Plaines so they could help me out, and everyone was optimistic I would be up and running soon.
Unfortunately that was not to be when a compression test showed I was dead in the water, and would need and engine rebuild to get back on the road.
Well ****. I had searched for the better part of a year for a well kept example of a non-sunroof FD in good running condition, and in my excitement ended up with the exact type of money pit I had hoped to avoid. How many non-running RX-7s had I passed up while looking because I was determined to not do an engine build as soon as I got the car? I passed on those for the same reason I passed on buying a BRZ and immediately doing a turbo build, I was determined to get a car that ran close to the way I wanted it to when I bought it.
Luckily we were able to the the engine up to Howard Coleman so he could work his magic and repair any damage, but that turned into its own mess. If you've read Howard's couple of posts about the subject then you know how bad it was, but suffice it to say ~17k on the motor was a bit optimistic. Realistically it was probably ~17k and two owners ago when a compression test was performed, and the last rebuild did both a bad job and probably reused some parts which I would have had replaced as a matter of course. PM me and I'll show you the receipt I have for that rebuild, which was done in 2007. Howard and Elite have been good to me, and Elite even gave me gift of a silver powder coated front engine cover, and Elite OMP block off plate, helping everything look that extra bit nicer.
As soon as the shop started tearing into the car the true disaster was uncovered, and many things had to be done. Many things.... I of course got the bad call and in the end decided on the rebuild. Quickly some more issues were identified, the first being all-around fueling issues. I had a dead fuel pump, some fittings not rated for fuel use, eBay primary injectors somewhat prone to failure, and insufficient fuel filter.
I opted to replace everything and get rid of fueling as a failure point. I had the shop install -6 stainless braided fuel lines all the way from the back, everything terminated with AN fittings, new Walbro 485lph fuel pump, New Aeromotive fuel pressure regulator and fuel filter, Full Function Engineering fuel rails, and Injector Dynamics 850cc and 2200cc injectors.
You could tell something was up with the clutch by looking at it. Bolts were backing out and the things looked crooked somehow. Turns out the clutch disc was for an FC, which is technically possible with some modifications, but they weren't done here. Replaced with new Exedy.
There were some areas which were blocked off badly with multiple clamps and tubes. Anything which I wanted to keep blocked off I had welded shut or plugged.
I had them remove the double throttle for less restriction in the intake while everything was apart. Any of the dangling ground wires, plugs, sensors, etc in the engine bay have been fixed and figured out too.
Of course when the wiring harness came out of the car it was a huge mess, with a couple wires clearly hanging on by their last strands. The shop did a great job repairing it, but the interior wiring and running of cables and hoses also had some issues. Hoses for the boost gauge and boost controller were tied up in place, crimping them almost shut. The wiring for the wideband gauge was run down under the carpet, into the support under the seat, and out of a 2"x2" hole cut in the floor from under the car. As if that wasn't bad enough the O2 sensor wasn't a wideband, so again it was replacement time. The new AEM gauge was in black, and I got a new replacement matching boost gauge in black, with power not run from the cigarette lighter... The boost controller will live in the glove box for now.
While finding all of this out I was doing as much research as I could. The car had been tuned in 2012, but it had a big vacuum leak at the time and some issues with the boost controller, which isn't surprising what with the vacuum lines tied up the way they were. A year later the leaks were fixed enough for the car to put down 70 or 80 more horsepower, but the car was never retuned. Nobody has confirmed this for me, but it is my belief that that even with a speed-density type setup this can result in boost spikes and lean conditions. Just another thing to add to the pile.
There was an issue with the turbo piping at the compressor outlet, where a piece of thicker pipe was used instead of appropriate tubing. There was a big inner lip and a size reduction directly at the compressor outlet, so that got cut off and new tubing welded on. I had some questionable welding fixed up on the downpipe as well. this went right along with replacing some of the intercooler piping so the whole thing could be moved to the left, putting it in line with the nice ducting that was there.
The small Greddy BOV was removed from the intake elbow and replaced with something a bit larger in the form of a nice TiAL, which is located just after the intercooler.
So what made it die? It could have been any one or all of the fuel pump, injectors, ignition and/or grounding issues, boost spikes, lean conditions under boost, or that the engine was already on its last legs before I got the car. By all accounts I could have been stranded or caught on fire due to any number of things.
Now the project can really begin. I'll get the car to the body shop to get all of that mess taken care of, and I have some parts to order immediately. I'll be replacing the diff bushings, and the front roll bar brackets and reinforcement bar pretty quickly, get an AST and oil catch can, and I also need to go through all the remaining unchanged fluids and check everything else for play.
Tonight I'll hopefully have some time to measure the true size of the radio opening and start assembling that project.
In the mean time...
Last edited by Lord Bro; Feb 3, 2016 at 07:59 AM.
Thread Starter
Full Member
Joined: May 2015
Posts: 83
Likes: 3
From: Chicago
I had two fun surprises yesterday.
I've measured the inside of the radio area so I know how much space I have for my replacement. It would be nice to use the mounting bracket from the old radio, but it depends on if someone will only buy the old radio if I provide the bracket.
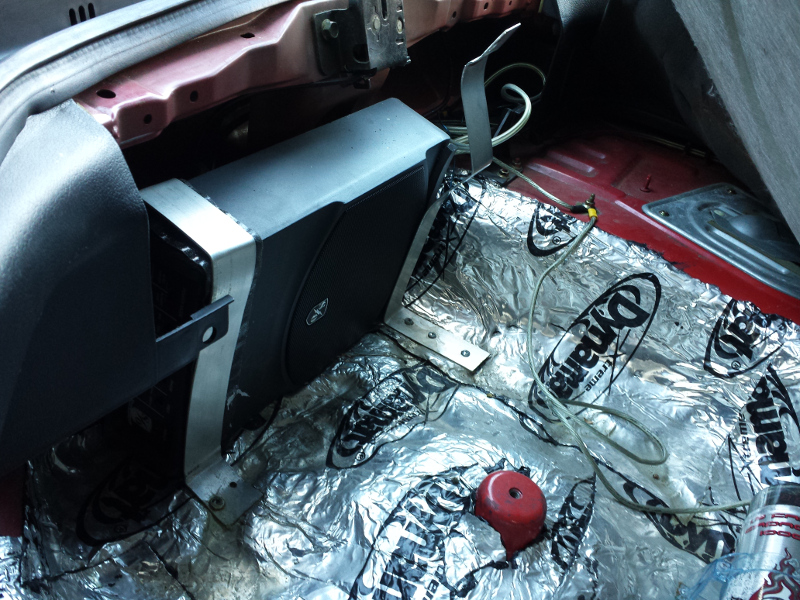
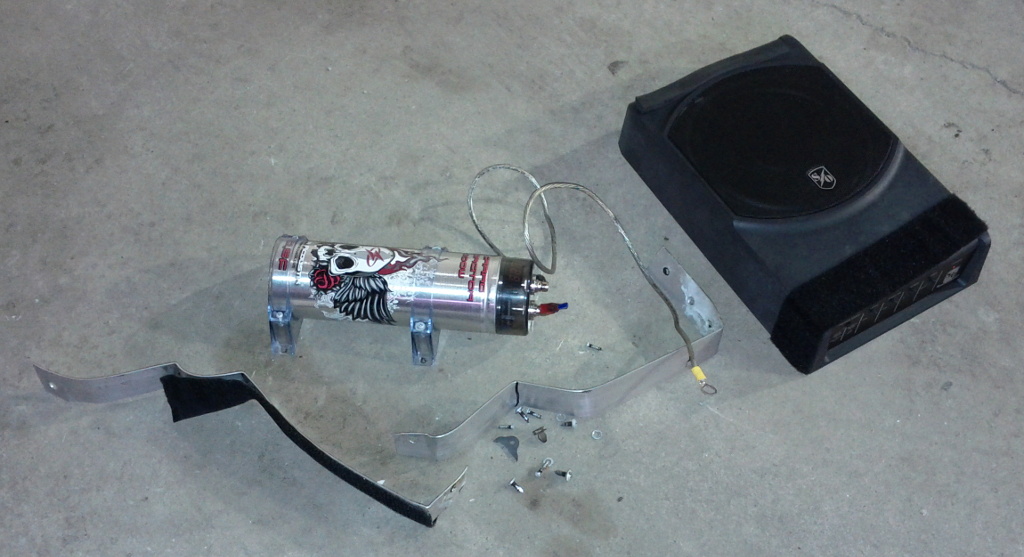
Part of what I wanted to do with the audio equipment was to remove the sub and capacitor from the trunk.
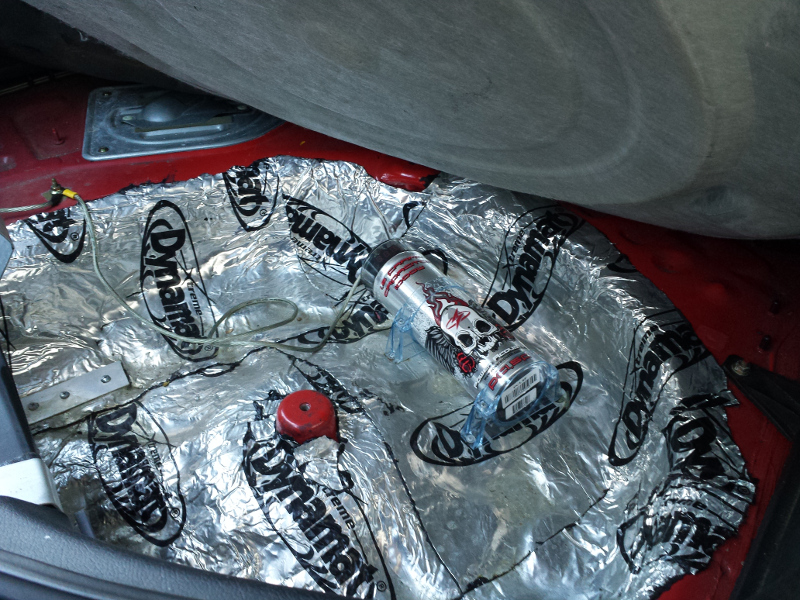
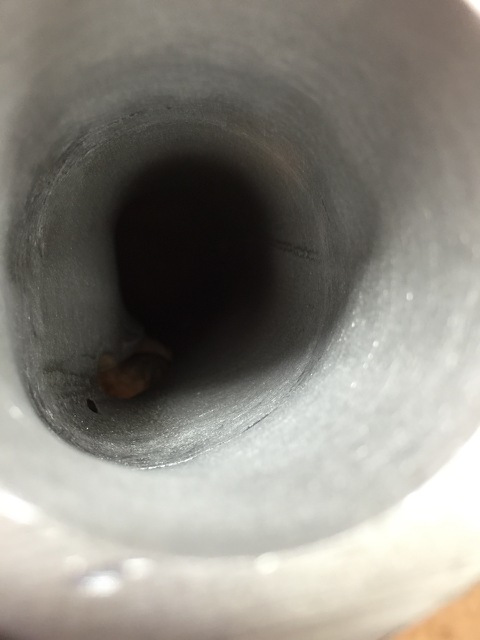
I'm sure someone can spot the problem, which probably means it happened to you at some point...
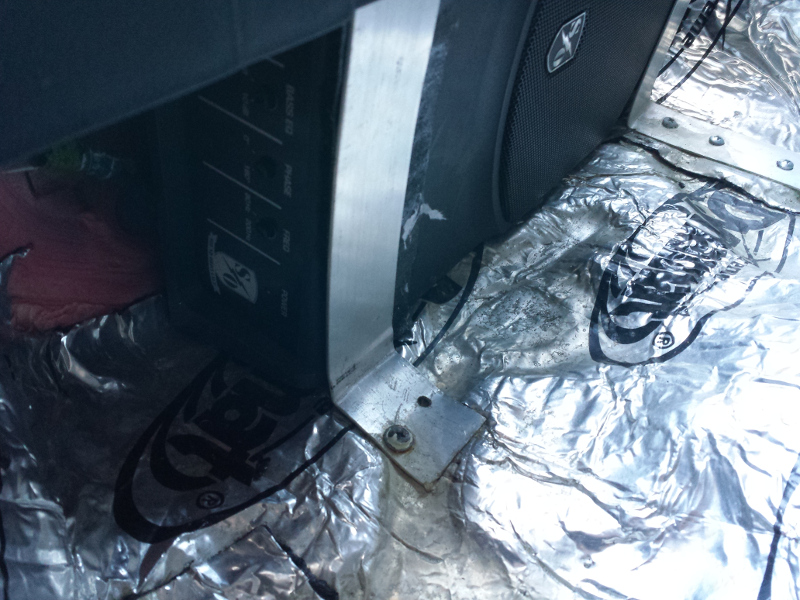
Why is there corrosion on that screw? Oh well, must just be where water collects.
NOPE
When I unscrewed that screw I heard a hiss, and then suddenly smelled fuel.
It doesn't stop, this just keeps getting worse. When will I be able to trust this car? Will I ever be comfortable driving it?
I have a literally full to the brim tank of gas right now, so I'll need to run it down some before draining the tank, dropping it down off the car, and patching it. Now the real question is, how many of the other 8 holes in the trunk floor area go into the gas tank? I still have yet to buy a fire extinguisher.
The second surprise came when I went to start the car to go to get a quote at the body shop. Even though I'm sitting on a battery tender that poor battery had just seen too much abuse to get me going in the cold.
New PC860 battery ordered, along with a lithium battery emergency jump starter.
I also ordered the new front sway bar mounting equipment earlier in the week, so hopefully I can at least take care of the front sway bar and the hole in the floor by next weekend, and some bushings soon as well.
I've measured the inside of the radio area so I know how much space I have for my replacement. It would be nice to use the mounting bracket from the old radio, but it depends on if someone will only buy the old radio if I provide the bracket.
Part of what I wanted to do with the audio equipment was to remove the sub and capacitor from the trunk.
I'm sure someone can spot the problem, which probably means it happened to you at some point...
Why is there corrosion on that screw? Oh well, must just be where water collects.
NOPE
When I unscrewed that screw I heard a hiss, and then suddenly smelled fuel.
It doesn't stop, this just keeps getting worse. When will I be able to trust this car? Will I ever be comfortable driving it?
I have a literally full to the brim tank of gas right now, so I'll need to run it down some before draining the tank, dropping it down off the car, and patching it. Now the real question is, how many of the other 8 holes in the trunk floor area go into the gas tank? I still have yet to buy a fire extinguisher.
The second surprise came when I went to start the car to go to get a quote at the body shop. Even though I'm sitting on a battery tender that poor battery had just seen too much abuse to get me going in the cold.
New PC860 battery ordered, along with a lithium battery emergency jump starter.
I also ordered the new front sway bar mounting equipment earlier in the week, so hopefully I can at least take care of the front sway bar and the hole in the floor by next weekend, and some bushings soon as well.
10-8-10-8
Joined: Jan 2012
Posts: 848
Likes: 12
From: Australia
I really like the attention to detail and the way you've gone about fixing the previous owner's hamfisted attempts at modification. It looks great so far.
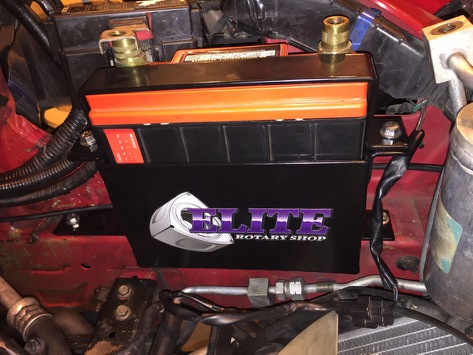
One thing, I'm not entirely sure I would trust that battery clamp system, particularly in a front end accident. The flat metal strap holding the top of the battery down, runs across the top of the battery, right past both terminals... It looks like a potential short/fire waiting to happen, especially if it all gets shunted in a frontal accident or collision.
One thing, I'm not entirely sure I would trust that battery clamp system, particularly in a front end accident. The flat metal strap holding the top of the battery down, runs across the top of the battery, right past both terminals... It looks like a potential short/fire waiting to happen, especially if it all gets shunted in a frontal accident or collision.
Thread Starter
Full Member
Joined: May 2015
Posts: 83
Likes: 3
From: Chicago
More
Before I get going:
I think you make a valid point about safety if some front end damage occurs. It seems like about half of these small battery holders I've seen have straps that run in the same fashion as mine, past the terminals. The rest have a similar kind of strap that goes the short way around, between the terminals instead of past them.
Could it be safer? Probably. I feel like I can say that about a lot of things on this car though; I mean I drove 50 miles today to buy beer with probably several holes in my gas tank so.... In the end I think I'm going to be upgrading to a bigger battery though, so the point will become moot. It's just an added piece of worry to deal with actively tending to this battery all the time, and why add yet another piece of complexity. Alternatively I could make it even more complex and just run two of these batteries in parallel, or have a secondary lithium cell, or make a nice self balancing lithium battery pack w/ some custom electronics...
Now.
PO, PPO, really everyone who has had the car before me:
What the hell? Seriously what were you thinking?
Could you not have spared the minimal effort to at least put all the bolts back on? Would it have been too much to ask for you to use the same jack points every time, so that at least the underbody damage would be limited to specific areas? COULD YOU HAVE NOT PUT ******* HOLES IN MY GAS TANK?
I mean pretty much all of the pain I'm going through is just fixing other peoples shitty DIY mechanic skills. I'm no awesome mechanic myself, but at least I pay attention to detail.... Suffice it to say I clearly no longer have reservations about calling out previous owners for their garbage work. Prepare to see more of it, as usual with pictures for evidence.
Downstairs neighbor:
Yep she hit me again.
I can feel your disbelief through the intertubes. Imagine how much this is driving me insane.

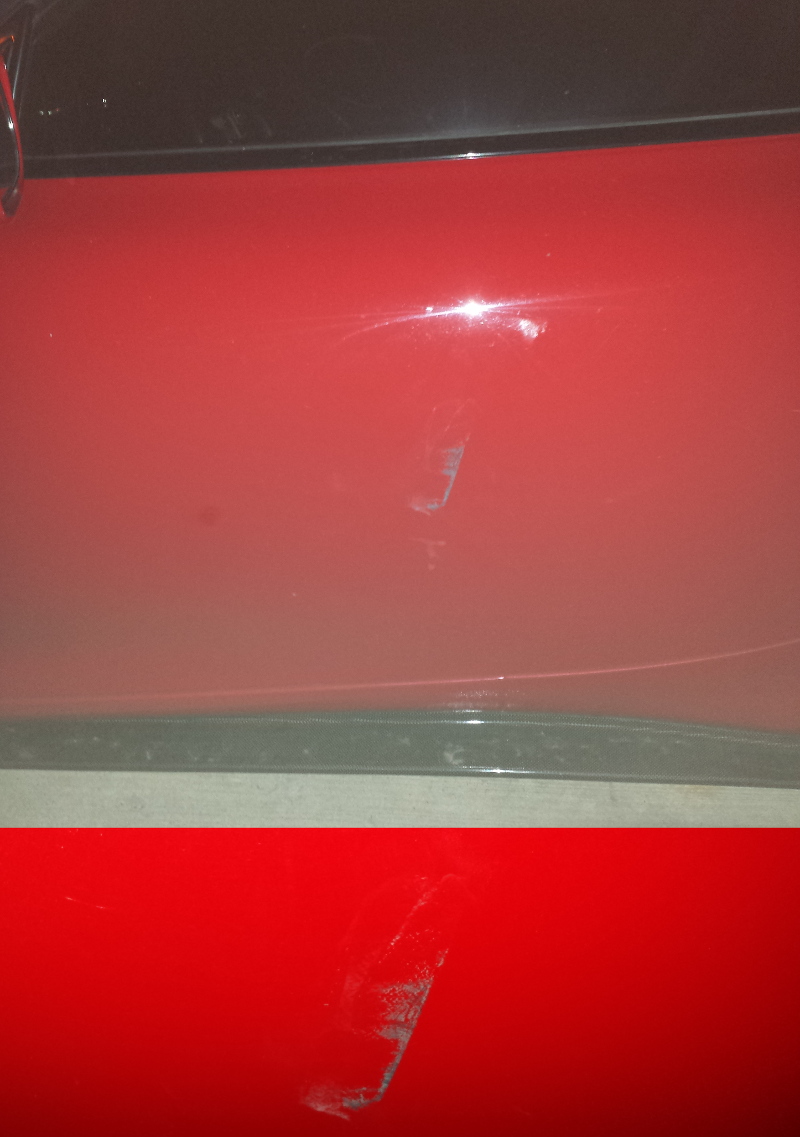
This time it was the front left, on the bumper. The way I park my car this is the most exposed part of it, but that's no excuse. Of course since I had the car cover on there was no paint transfer, and no proof, so no insurance =(. It was a hard enough hit where there are cracks in the paint radiating out from that area, so to be perfect I would get the bumper repainted.
I'm going to attempt some touchup work myself, both to make the car pretty and to prevent rust, so I'll probably do my best to fix the area and see how it comes out. Worst case, I'll prep the bumper myself and just take it to get the final color match and paint done somewhere.
Needless to say I've made getting the security camera back up and running. I fired up a server on a Raspberry Pi, and I'll loop video stored for at least a month.
The good news here is that I won't have to face this feeling of inescapable future damage that's been bugging me. My wife and I were like "screw this, let's buy a house", so soon I will have a garage. I'll be able to do things like leave the car on stands, or attempt projects that span more than a single day. Not getting hit by my neighbor on a biweekly basis will also be nice.
The body shop...:
What a mess.
In retrospect I should have just taken the battery with me or something so it was impossible to start the car. Instead I wrote a large note which sat in the window explaining to not start the car and why (flooding, idiots, possible damage to my new motor), and I talked with the rep who I would be working with. I let him know that if someone screwed around I would know, and that if they started the car and turned it off they would probably flood it, so to be prepared to pay for a tow and repairs. Don't start the car.
Of course along with the call from the body shop saying the door was fixed, I also got the great news that they had started the car and turned it off without letting it warm up, and that it now wouldn't start. There goes any chance of me getting any work done there again.
When I went to pick up the car I couldn't get it started easily, probably due to both how flooded it was and how low the charge on my battery was from them sitting cranking it for a while. ********.
I wish I would have taken a picture of the body shop guy's face when I told him they could expect to pick up the bill for whatever it would take to get me going again.
Luckily for me the guys from Elite drove out to the body shop and got it up and running again for me. It also kind of sounds like they gave the body shop owner a piece of their mind. I'm still putting miles on the engine, so it could have been a lot worse, but it's just another thing that should never have even happened in the first place.
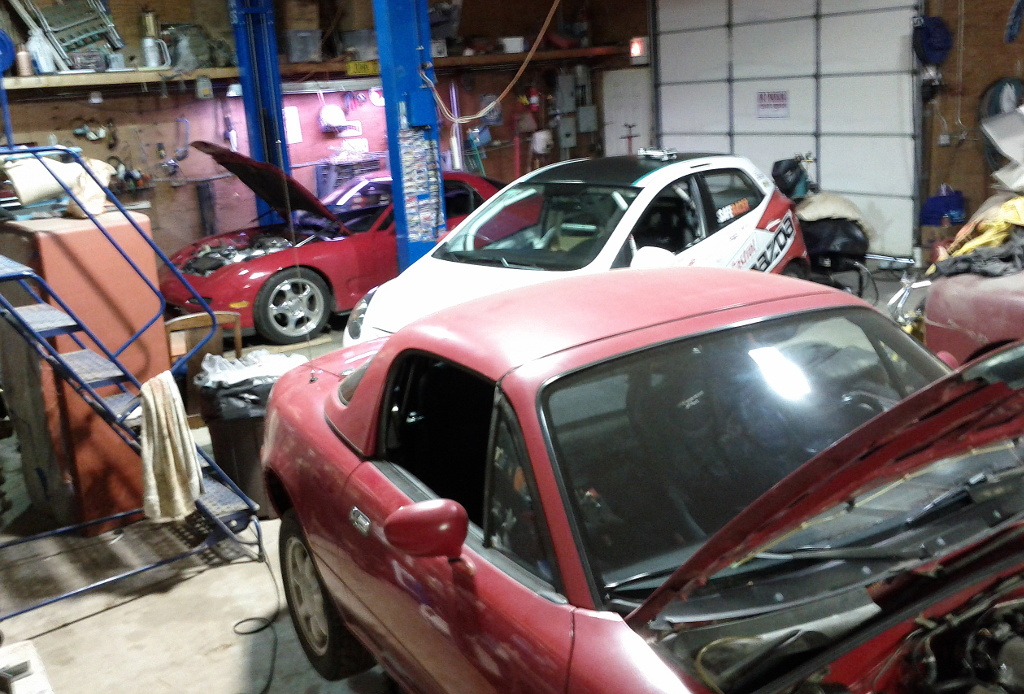
Before I took the car to the body shop I did make time to get the car up in the air so I could really look at everything. It wasn't a pretty picture.
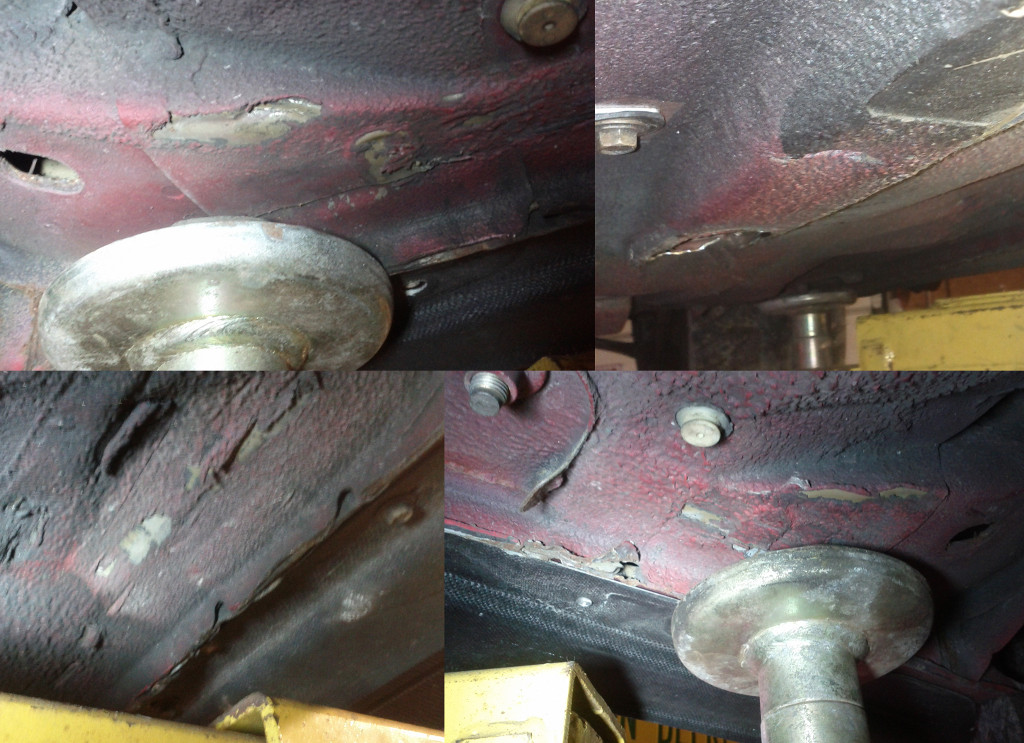
Over the years it looks like every single surface under the car has been used as a jack point. I can understand the pinch welds being a bit mangled, but there are so many other dents and scrapes on the underside that look like carelessness.
I hope whoever was responsible for this one got a good scare when it happened
Of course we checked everything for play, and for the most part it's what you would expect for ~132k on the original bushings. It deserves replacements all around, so I'll add that to the list.
Really I wanted to try and figure out the cause of a couple clunks I hear while driving.
Sometimes I hear a clunk while turning sharply, especially when I'm just starting off. I'm wondering if it's a tire coming in contact with either a piece of suspension, or catching on a fender lip that hasn't been rolled enough. I couldn't figure this one out, so I'll have to drive around in a parking lot for a while.
The other clunk I hear when the drivetrain loads/unloads. It's hard enough that I can feel it each time I shift. I'm sure worn out bushings contribute to how much I can feel it, but I think the real issue is the diff is worn out. If I grab a rear axle I can rotate the driveshaft a good 1/8 to 1/4 of a turn, which I think is enough slop where I could feel it. I'll be looking into this more.
Edit: Happy Pi Day
I think you make a valid point about safety if some front end damage occurs. It seems like about half of these small battery holders I've seen have straps that run in the same fashion as mine, past the terminals. The rest have a similar kind of strap that goes the short way around, between the terminals instead of past them.
Could it be safer? Probably. I feel like I can say that about a lot of things on this car though; I mean I drove 50 miles today to buy beer with probably several holes in my gas tank so.... In the end I think I'm going to be upgrading to a bigger battery though, so the point will become moot. It's just an added piece of worry to deal with actively tending to this battery all the time, and why add yet another piece of complexity. Alternatively I could make it even more complex and just run two of these batteries in parallel, or have a secondary lithium cell, or make a nice self balancing lithium battery pack w/ some custom electronics...
Now.
PO, PPO, really everyone who has had the car before me:
What the hell? Seriously what were you thinking?
Could you not have spared the minimal effort to at least put all the bolts back on? Would it have been too much to ask for you to use the same jack points every time, so that at least the underbody damage would be limited to specific areas? COULD YOU HAVE NOT PUT ******* HOLES IN MY GAS TANK?
I mean pretty much all of the pain I'm going through is just fixing other peoples shitty DIY mechanic skills. I'm no awesome mechanic myself, but at least I pay attention to detail.... Suffice it to say I clearly no longer have reservations about calling out previous owners for their garbage work. Prepare to see more of it, as usual with pictures for evidence.
Downstairs neighbor:
Yep she hit me again.
I can feel your disbelief through the intertubes. Imagine how much this is driving me insane.
This time it was the front left, on the bumper. The way I park my car this is the most exposed part of it, but that's no excuse. Of course since I had the car cover on there was no paint transfer, and no proof, so no insurance =(. It was a hard enough hit where there are cracks in the paint radiating out from that area, so to be perfect I would get the bumper repainted.
I'm going to attempt some touchup work myself, both to make the car pretty and to prevent rust, so I'll probably do my best to fix the area and see how it comes out. Worst case, I'll prep the bumper myself and just take it to get the final color match and paint done somewhere.
Needless to say I've made getting the security camera back up and running. I fired up a server on a Raspberry Pi, and I'll loop video stored for at least a month.
The good news here is that I won't have to face this feeling of inescapable future damage that's been bugging me. My wife and I were like "screw this, let's buy a house", so soon I will have a garage. I'll be able to do things like leave the car on stands, or attempt projects that span more than a single day. Not getting hit by my neighbor on a biweekly basis will also be nice.
The body shop...:
What a mess.
In retrospect I should have just taken the battery with me or something so it was impossible to start the car. Instead I wrote a large note which sat in the window explaining to not start the car and why (flooding, idiots, possible damage to my new motor), and I talked with the rep who I would be working with. I let him know that if someone screwed around I would know, and that if they started the car and turned it off they would probably flood it, so to be prepared to pay for a tow and repairs. Don't start the car.
Of course along with the call from the body shop saying the door was fixed, I also got the great news that they had started the car and turned it off without letting it warm up, and that it now wouldn't start. There goes any chance of me getting any work done there again.
When I went to pick up the car I couldn't get it started easily, probably due to both how flooded it was and how low the charge on my battery was from them sitting cranking it for a while. ********.
I wish I would have taken a picture of the body shop guy's face when I told him they could expect to pick up the bill for whatever it would take to get me going again.
Luckily for me the guys from Elite drove out to the body shop and got it up and running again for me. It also kind of sounds like they gave the body shop owner a piece of their mind. I'm still putting miles on the engine, so it could have been a lot worse, but it's just another thing that should never have even happened in the first place.
Before I took the car to the body shop I did make time to get the car up in the air so I could really look at everything. It wasn't a pretty picture.
Over the years it looks like every single surface under the car has been used as a jack point. I can understand the pinch welds being a bit mangled, but there are so many other dents and scrapes on the underside that look like carelessness.
I hope whoever was responsible for this one got a good scare when it happened
Of course we checked everything for play, and for the most part it's what you would expect for ~132k on the original bushings. It deserves replacements all around, so I'll add that to the list.
Really I wanted to try and figure out the cause of a couple clunks I hear while driving.
Sometimes I hear a clunk while turning sharply, especially when I'm just starting off. I'm wondering if it's a tire coming in contact with either a piece of suspension, or catching on a fender lip that hasn't been rolled enough. I couldn't figure this one out, so I'll have to drive around in a parking lot for a while.
The other clunk I hear when the drivetrain loads/unloads. It's hard enough that I can feel it each time I shift. I'm sure worn out bushings contribute to how much I can feel it, but I think the real issue is the diff is worn out. If I grab a rear axle I can rotate the driveshaft a good 1/8 to 1/4 of a turn, which I think is enough slop where I could feel it. I'll be looking into this more.
Edit: Happy Pi Day
Last edited by Lord Bro; Mar 14, 2016 at 09:06 AM.
Maaaannnn this story was painful to read, but the car seems to be heading in the right direction. I've always said it's best to buy these cars as a shell if you have the space and time (although that probably wasn't possible for you). That way you sort through most of the problems as you build it. Plus you'll feel like you know the car better.
Great work man.
Great work man.
I can relate to the jacking issues. I have a spot under my car that you can see someone broke through the floor and now it has a 1" x 10" rust hole... thats being fixed this spring!


Thread Starter
Full Member
Joined: May 2015
Posts: 83
Likes: 3
From: Chicago
Patched the tank! Finally!
As far as how everything else is going, despite the issues I had with the body shop, the door looks fine. Unless something untoward happens I imagine I'll eventually repaint the car, but for now you have to look really close to see any difference in paint texture. Not bad.
This last weekend I finally had the chance to get the stupid subwoofer and capacitor out of the trunk. I had to wait to actually remove it because of course the screws PO used were going through the trunk floor and into the gas tank, and had to plan on dropping the tank off the car at the same time so I could fix the holes in both the tank and the trunk floor at the same time.
In the end I timed it pretty well, with both my gas light on and the needle below the 'E' mark on the level indicator. When we lowered the tank off the car there couldn't have been a gallon left sloshing around.
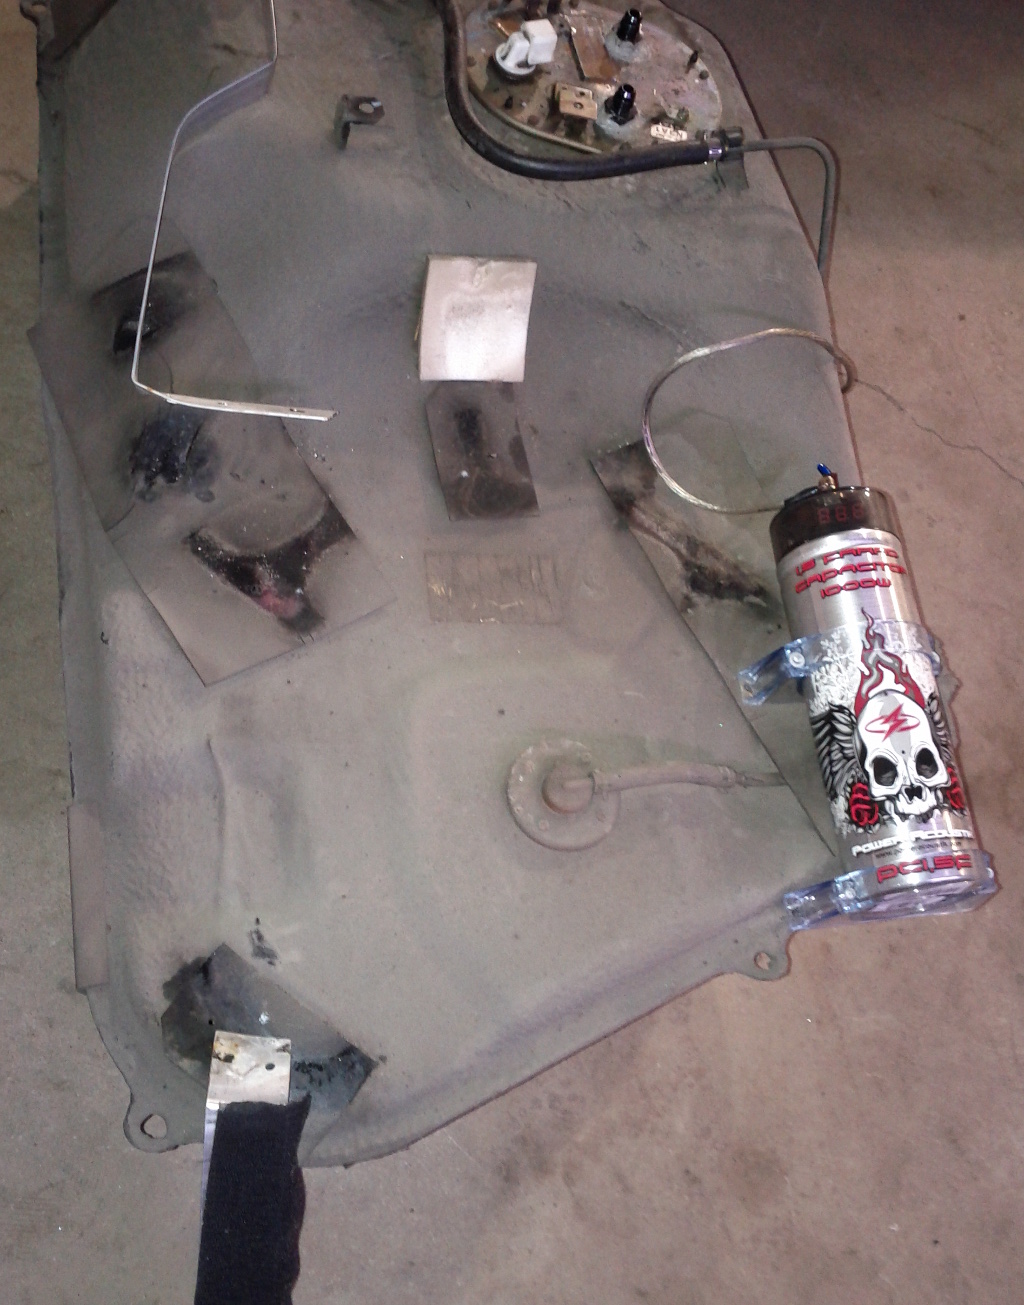
There ended up being 8 screws through the bottom of the trunk floor in the spare tire area, directly under which the gas tank sits. It was 4 screws plus some velcro for mad street cred holding the sub down, and 4 screws holding the capacitor down. One one of the screws for the capacitor didn't touch the tank, which meant 7 possible holes.
By some well needed stroke of luck, there only ended up being a single hole in the gas tank, the one I knew was there from having undone the screw in the trunk and smelling fuel a few weeks ago. As it turned out, the places where PO decided to screw the trunk floor were exactly where those thin foam pads sitting between the tank and trunk bottom were located.

The thickness of the trunk floor, those foam pads, and the rubbery coating sprayed on the tank from the factory were just barely thick enough so that the other 6 screws were touching the tank, but hadn't punctured it. I scraped away all the dirt and tank coating in the 7 contact areas and used a degreaser, and then sprayed some paint on the prepped spots without the hole.
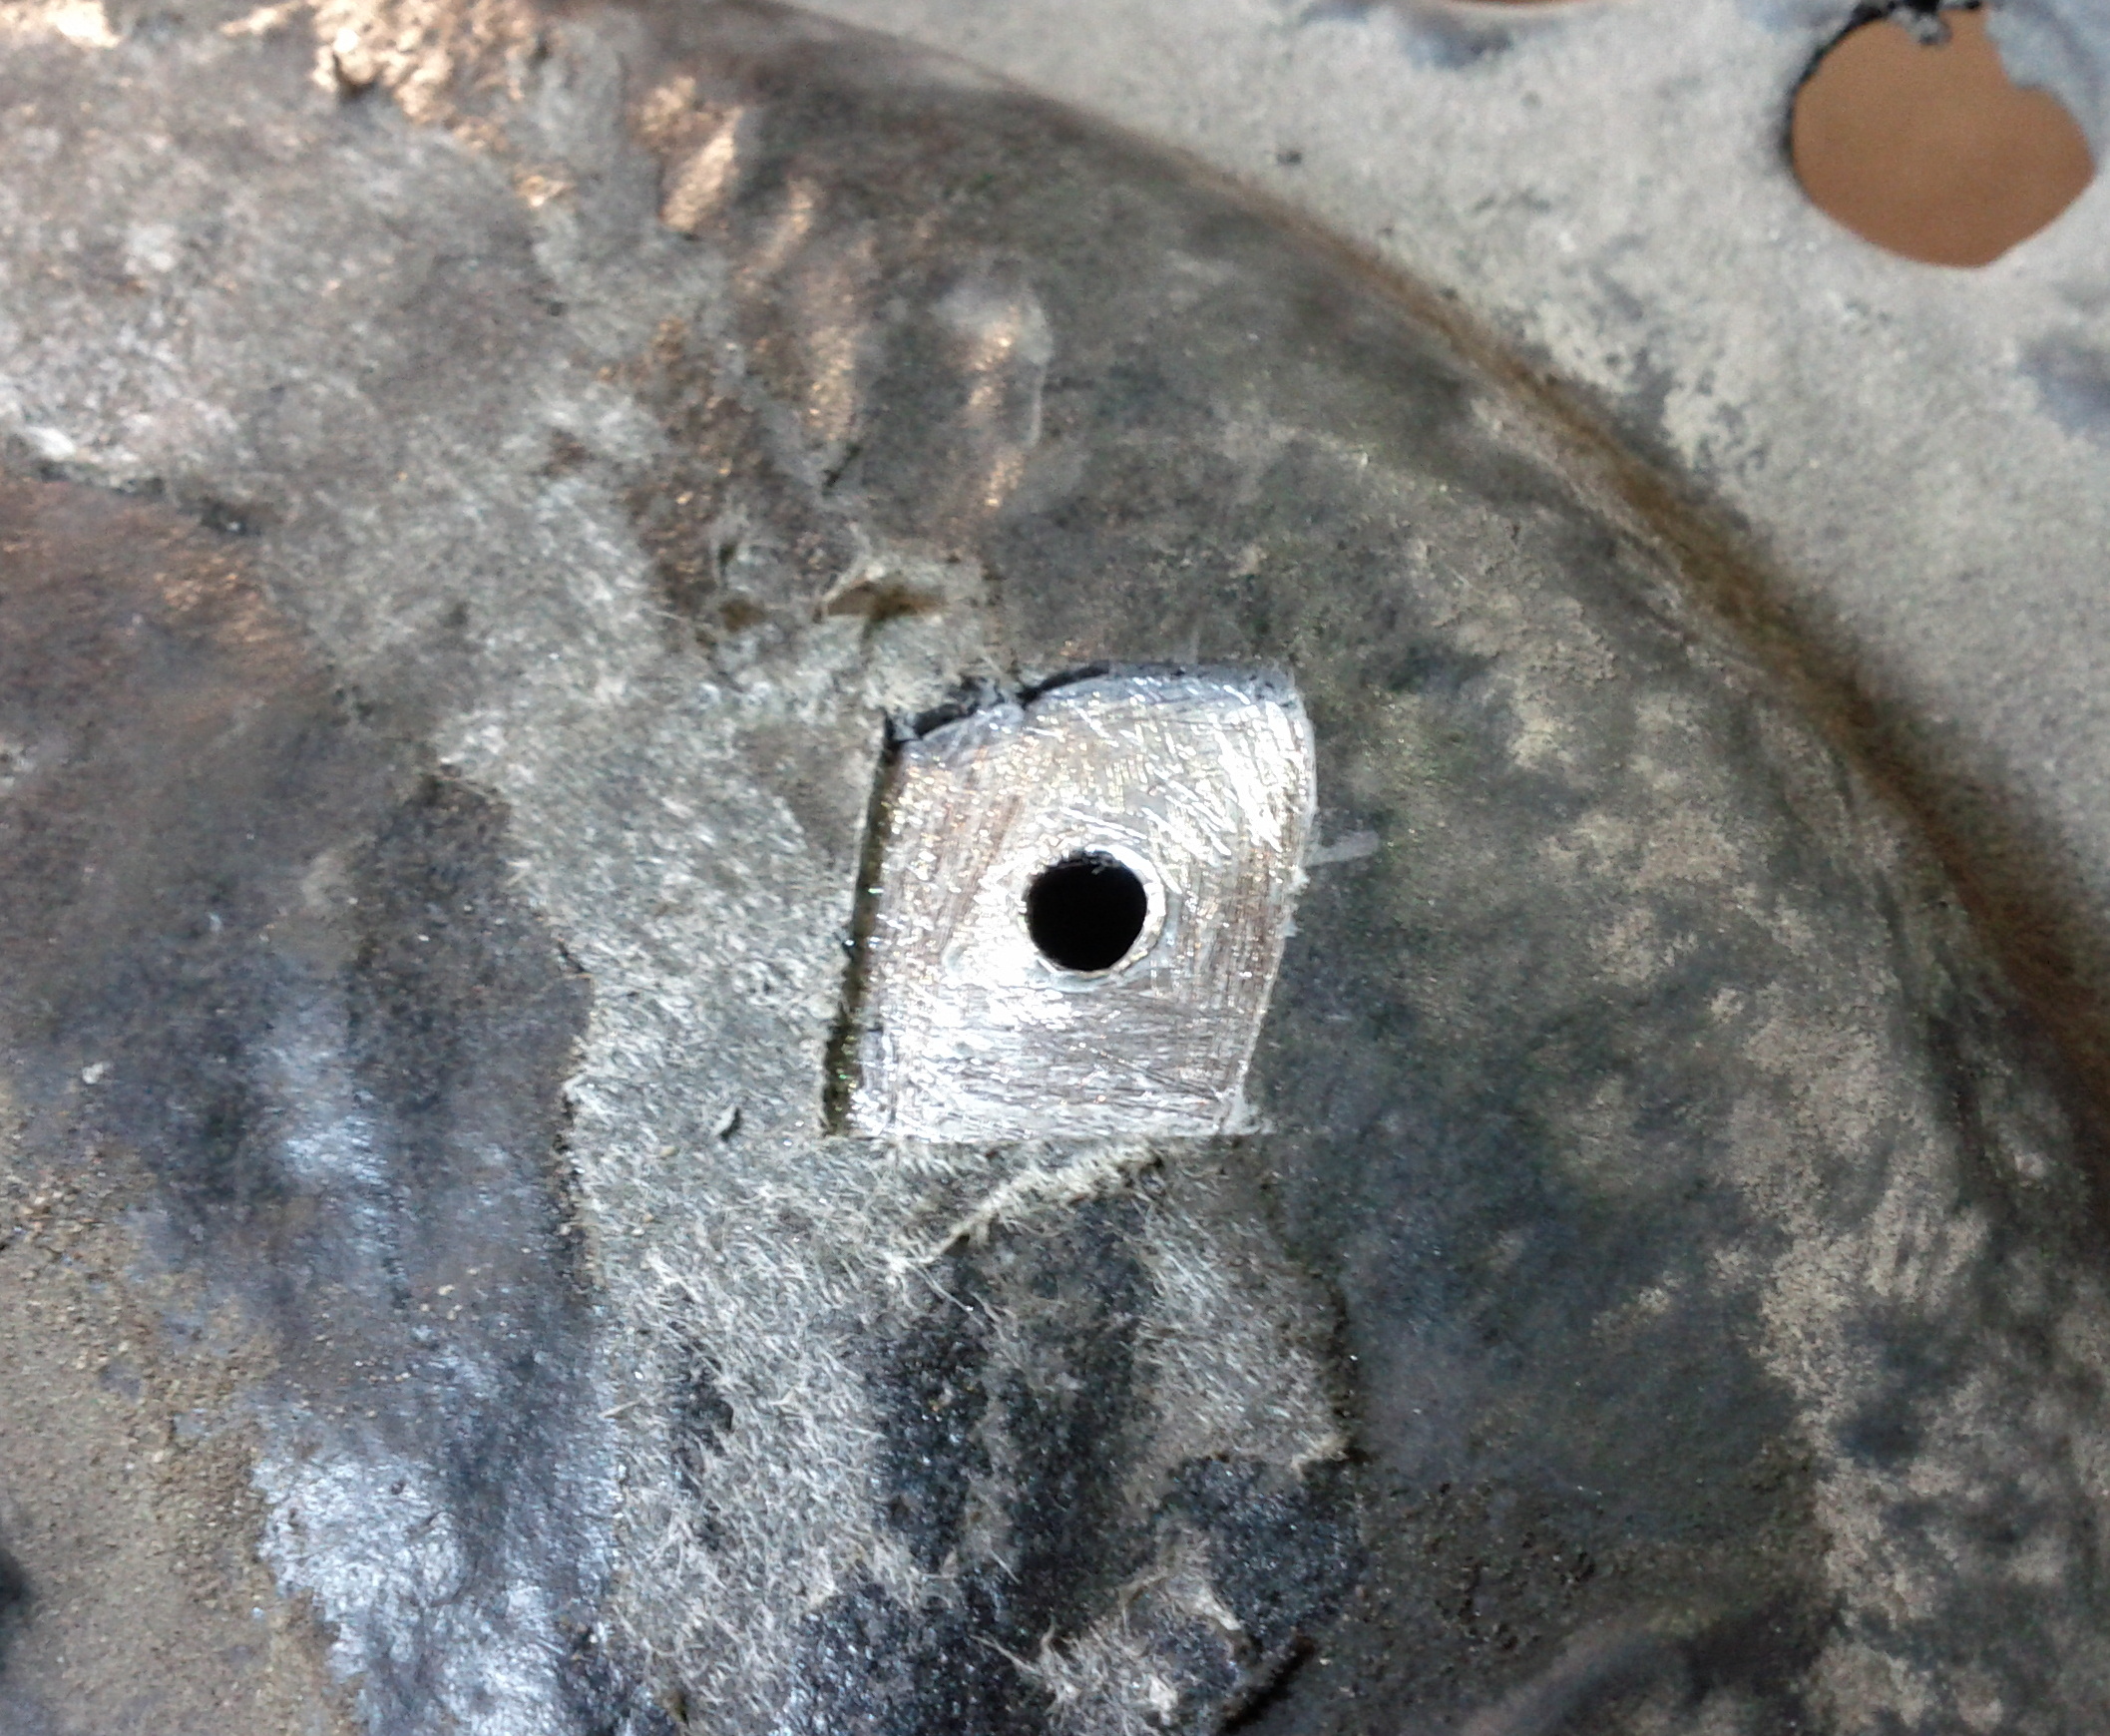
I used some Permatex fuel/ethanol-safe gas tank epoxy to seal up the hole and left it to sit for an hour before pressurizing the system. This is definitely a temporary measure, I think I'd like to drop the tank again at a later date and take it to a radiator shop to get the tank cleaned and the hole brazed shut. It should end up being cheaper by far than trying to get a new tank.
For the holes in the trunk floor I took a bunch of degreaser to everything exposed I could get to, and then just sealed them up with some Right Stuff. There's Dynamat in the spare tire area in the trunk, and the underbody coating underneath, so filling those holes in with metal just wasn't an option this time. Maybe I'll get to actually seal them up if/when I strip the underside of the car and take care of any problem areas.
Track day bro.
I'm still putting miles on the engine in preparation for tuning on the 21st. It's been a lot of trips to 3 Floyd's, 18th Street, and the garage but I should be good to go now. All I can say is every time I drive I'm getting more anxious; this car definitely wants to be driven like an ******* and is being reigned in. It's unfair. Life is unfair.
I'm ready to unleash the bees.