
04G35s Build Thread

Thread Starter
Joined: Jan 2013
Posts: 1,053
Likes: 4
From: Madison, WI
04G35s Build Thread
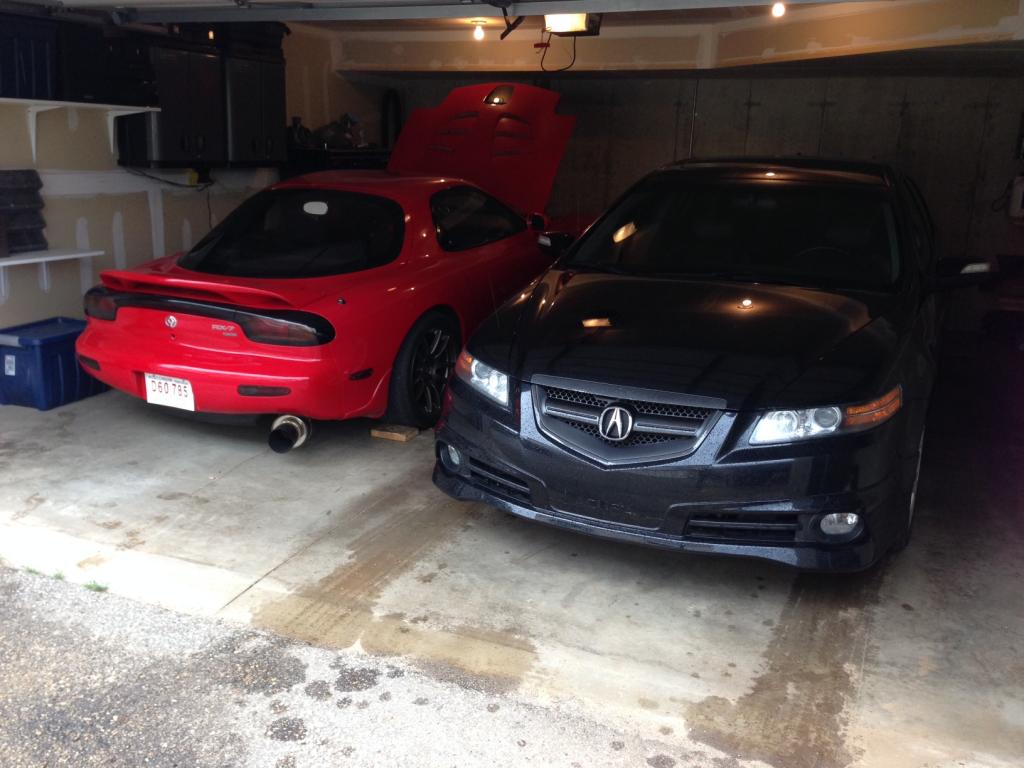
I have been told I should start a build thread from quite a few people so I figured why not. My issue is that I bought the car in June and have since done so much to it that I forget everything I have done! I also suck at stopping to take photos along the way so the start of this thread will kind of suck... just bare with me.
Bought the car from a my brothers fiance's brother-in-law... confusing I know. He gave me a steal of a deal but did not really know what was done to the car and only drove it about 600 miles in just over 6 years!
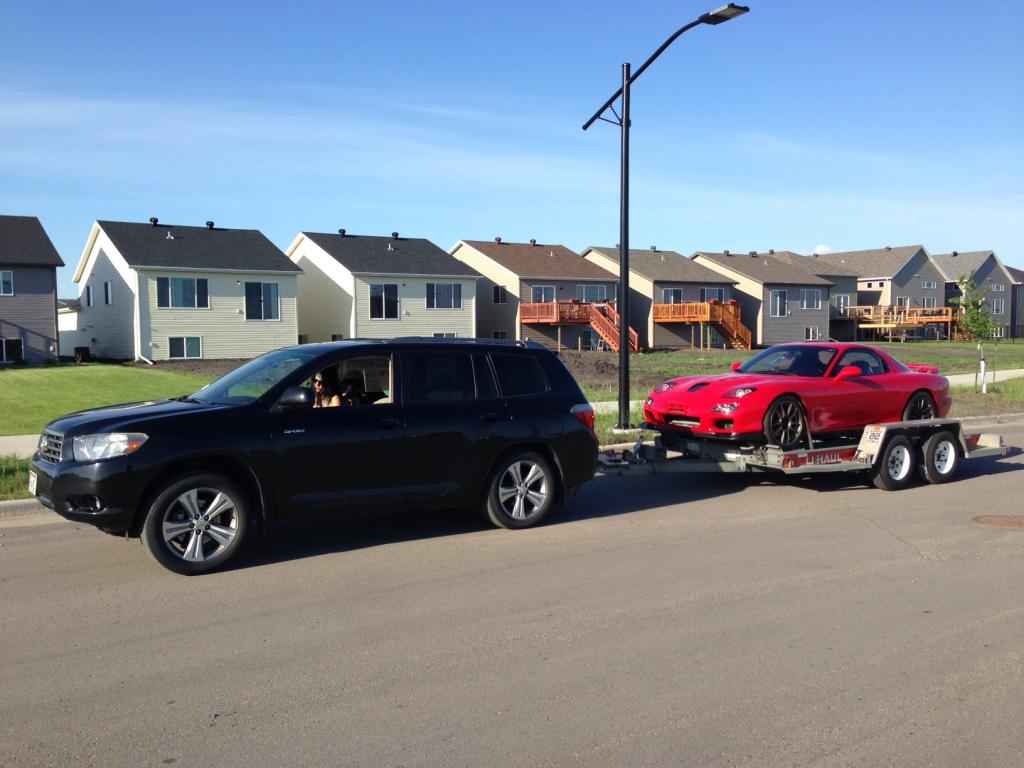
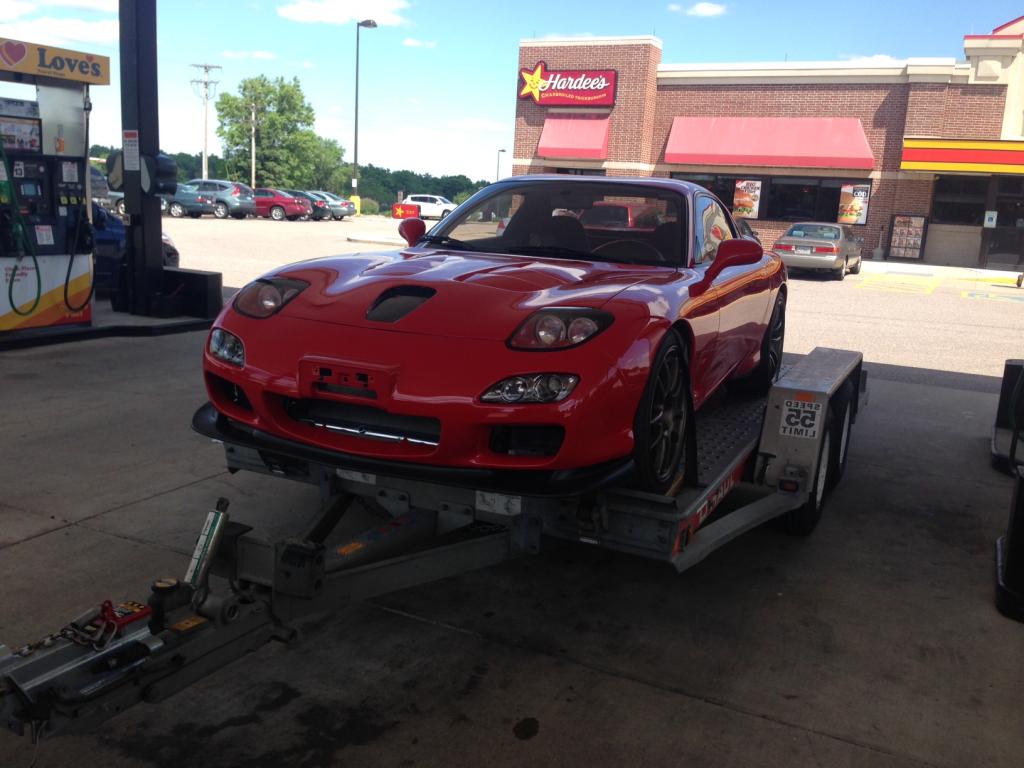
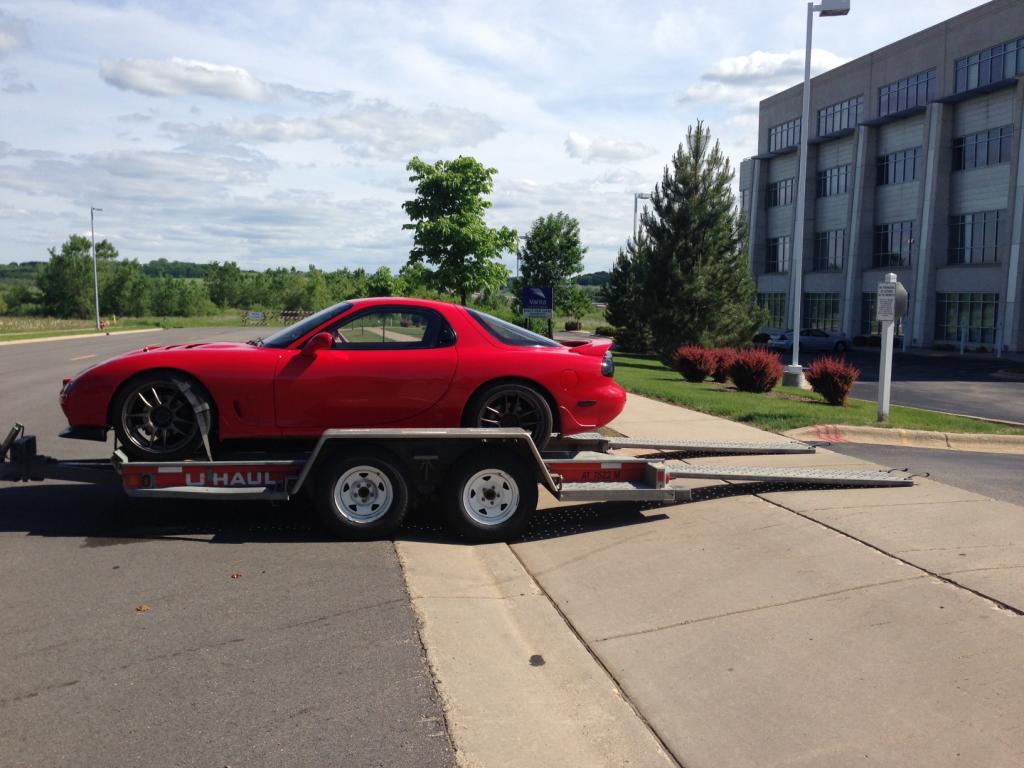
Photos of bringing to Madison, WI from Fargo, ND (My wife could not believe the amount of attention this car got just sitting on the trailer!):
Bought the car from a my brothers fiance's brother-in-law... confusing I know. He gave me a steal of a deal but did not really know what was done to the car and only drove it about 600 miles in just over 6 years!
Photos of bringing to Madison, WI from Fargo, ND (My wife could not believe the amount of attention this car got just sitting on the trailer!):


Thread Starter
Joined: Jan 2013
Posts: 1,053
Likes: 4
From: Madison, WI
Once I got it home it went right on jack stands to try to sort out an idle issue it had and a lean problem a 0-80% throttle. (Crossing my fingers is was a leak of some kind). I replaced a lot of parts at this point and found A LOT of issues!
I dont know what happened to all the photos but it went from wanting to ensure there were no vacuum leaks to pulling off the upper and lower intake manifolds and tapping/plugging all the unused vacuum ports, replacing all the gaskets, sending out the injectors to be cleaned, replacing the throttle cable, replacing the mounts on the custom v-mount as the guy had them bolted directly to the core support with zero rubber mounts, removing all of the OEM and cobbed together fuel lines and replacing them with -8 feed and -6 return, new Walbro 450lph fuel pump, and building a new down pipe to clear the LIM better.
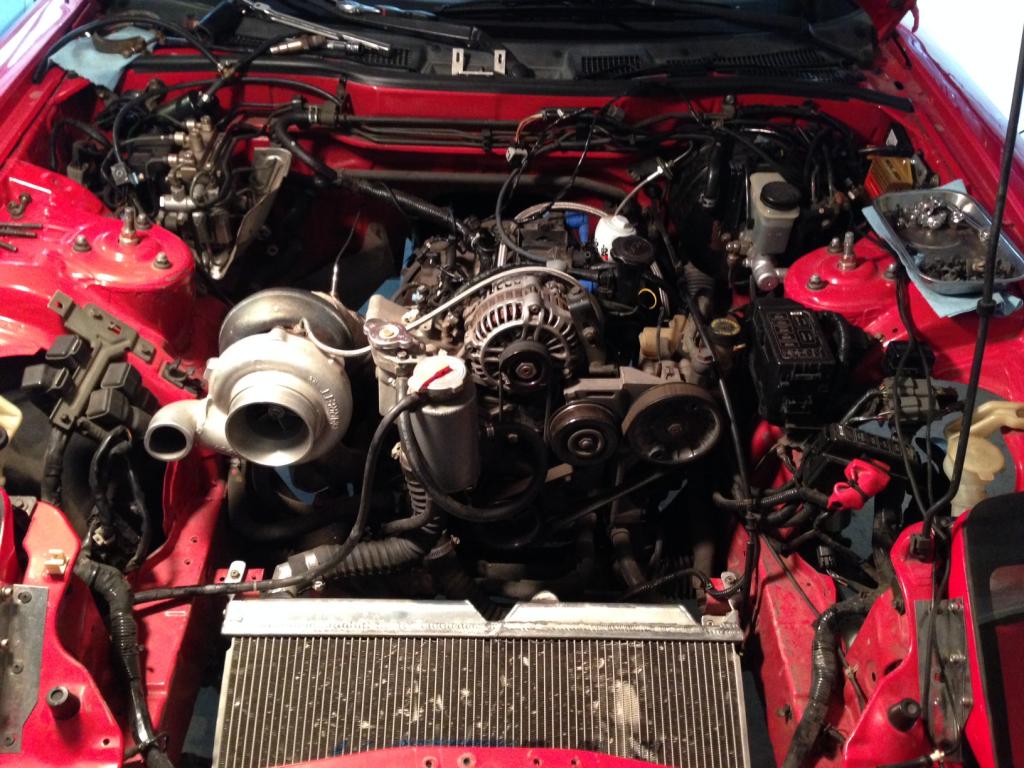

I dont know what happened to all the photos but it went from wanting to ensure there were no vacuum leaks to pulling off the upper and lower intake manifolds and tapping/plugging all the unused vacuum ports, replacing all the gaskets, sending out the injectors to be cleaned, replacing the throttle cable, replacing the mounts on the custom v-mount as the guy had them bolted directly to the core support with zero rubber mounts, removing all of the OEM and cobbed together fuel lines and replacing them with -8 feed and -6 return, new Walbro 450lph fuel pump, and building a new down pipe to clear the LIM better.


Thread Starter
Joined: Jan 2013
Posts: 1,053
Likes: 4
From: Madison, WI
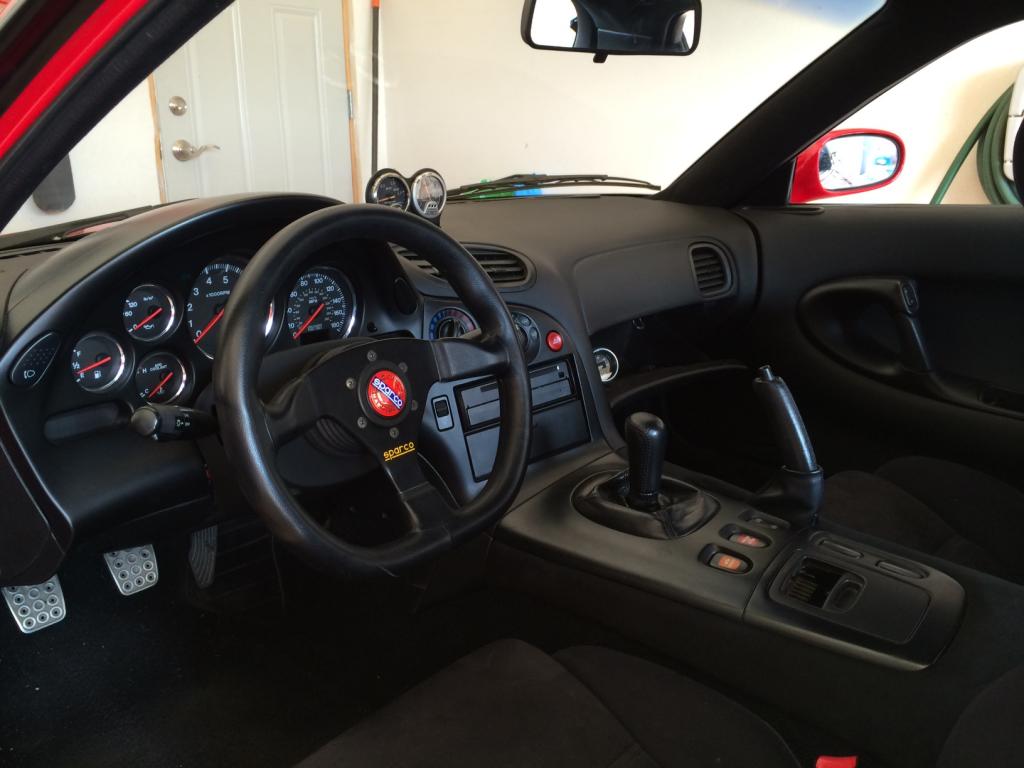
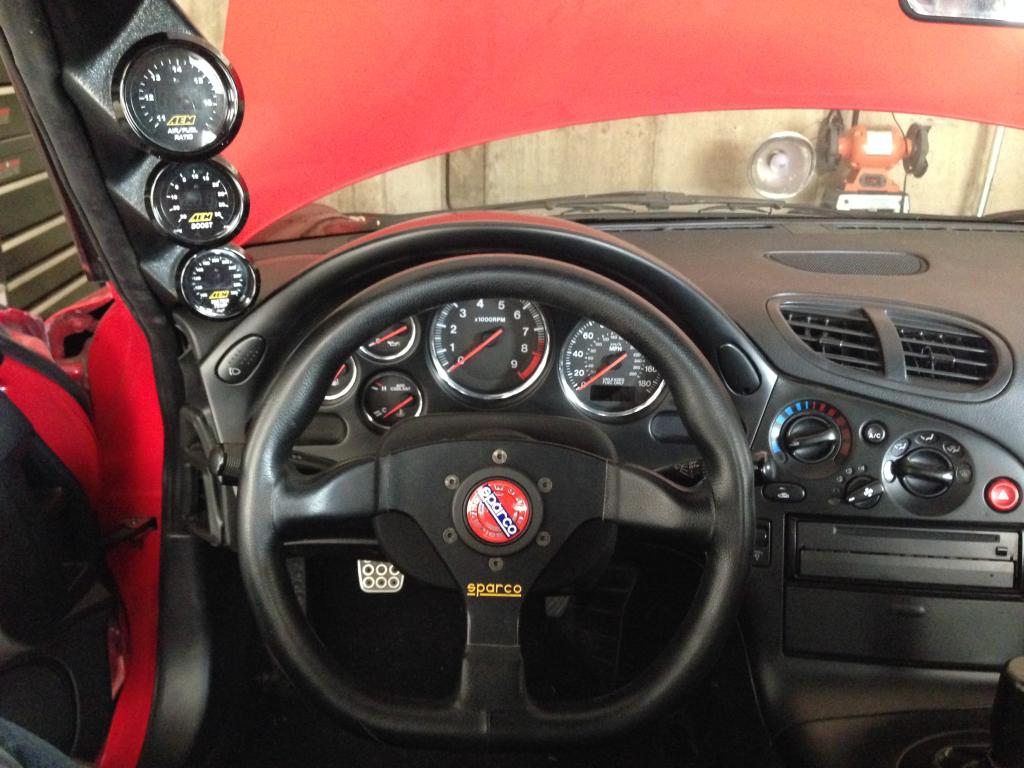
After all that work the car still had the lean issue but ran 10x better! I replaced all the Blitz gauges that were mounted on the center speaker and in the glove box for all AEM gauges mounted on the A-Pillar. (AEM True Boost, AEM Wide Band, & AEM Water Temp)
I did find one bad thing about the car... It looks like at some point a prior owner tried to jack the car up on the floor and tore a hole in it which has since started to rust. There is not a spec of rust anywhere else on the car, so this is a non issue for me considering I manage 7 body shops in the WI area.
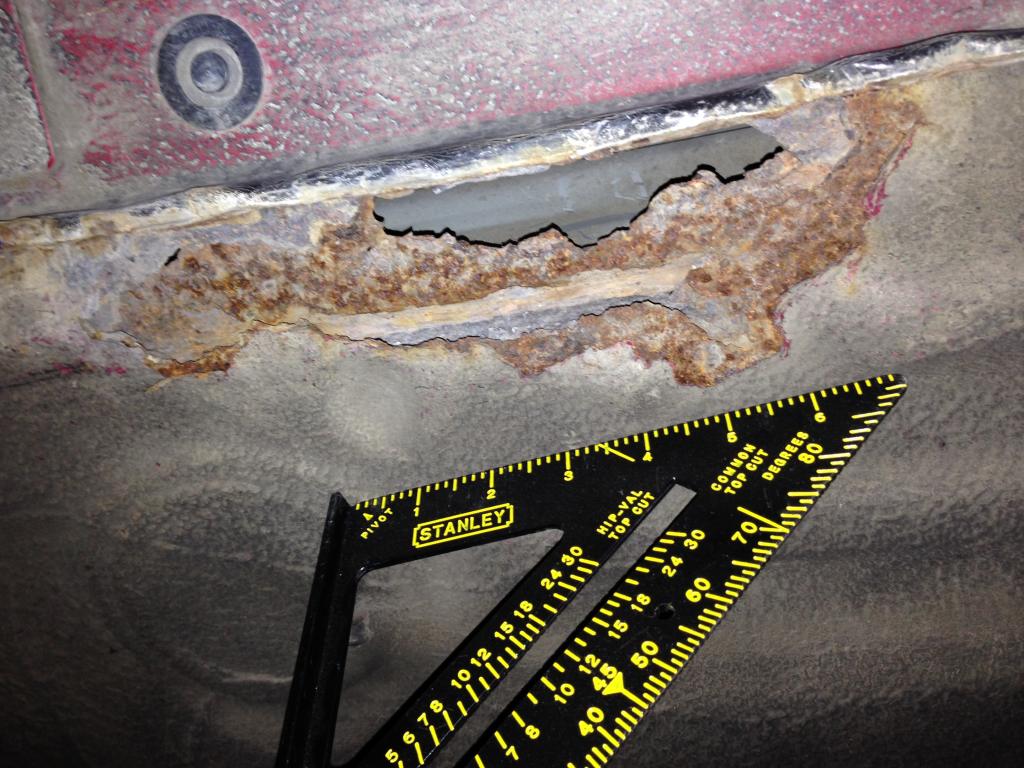


I did find one bad thing about the car... It looks like at some point a prior owner tried to jack the car up on the floor and tore a hole in it which has since started to rust. There is not a spec of rust anywhere else on the car, so this is a non issue for me considering I manage 7 body shops in the WI area.


Thread Starter
Joined: Jan 2013
Posts: 1,053
Likes: 4
From: Madison, WI
This is where the documentation starts to get a little better.
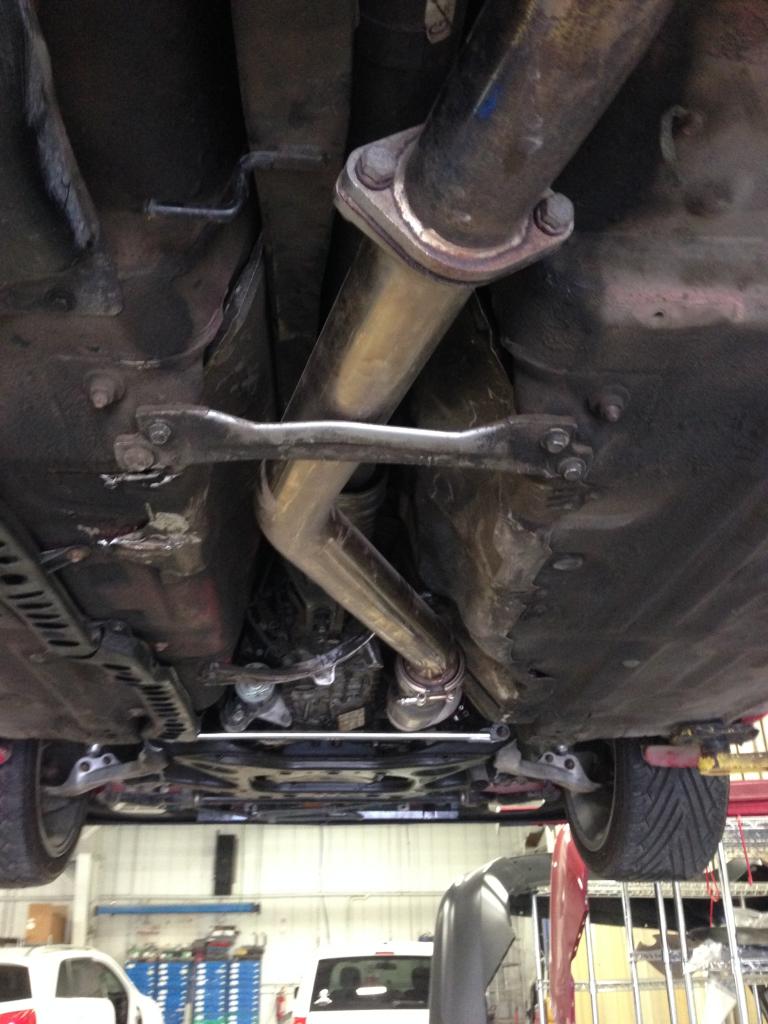
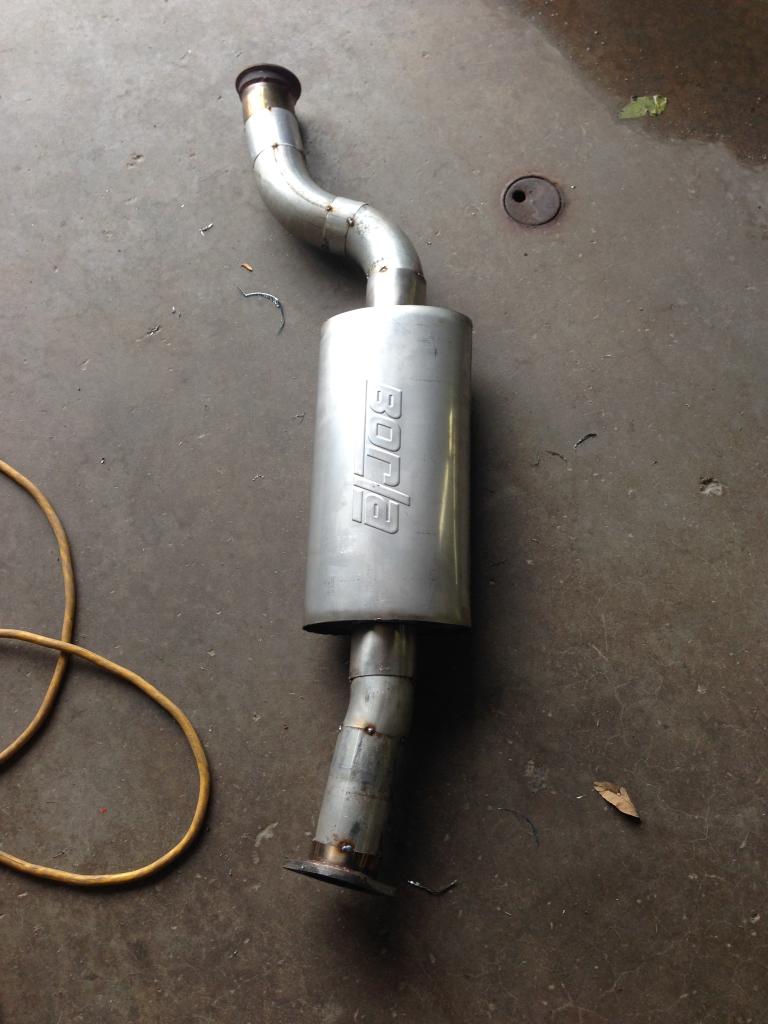
I hated how loud the HKS exhaust was (My wife mainly) so I took out the mid section and made my own with a Borla center muffler. Keep in mind all I had access to was a MIG so the welds are not that great!
Original:
New:
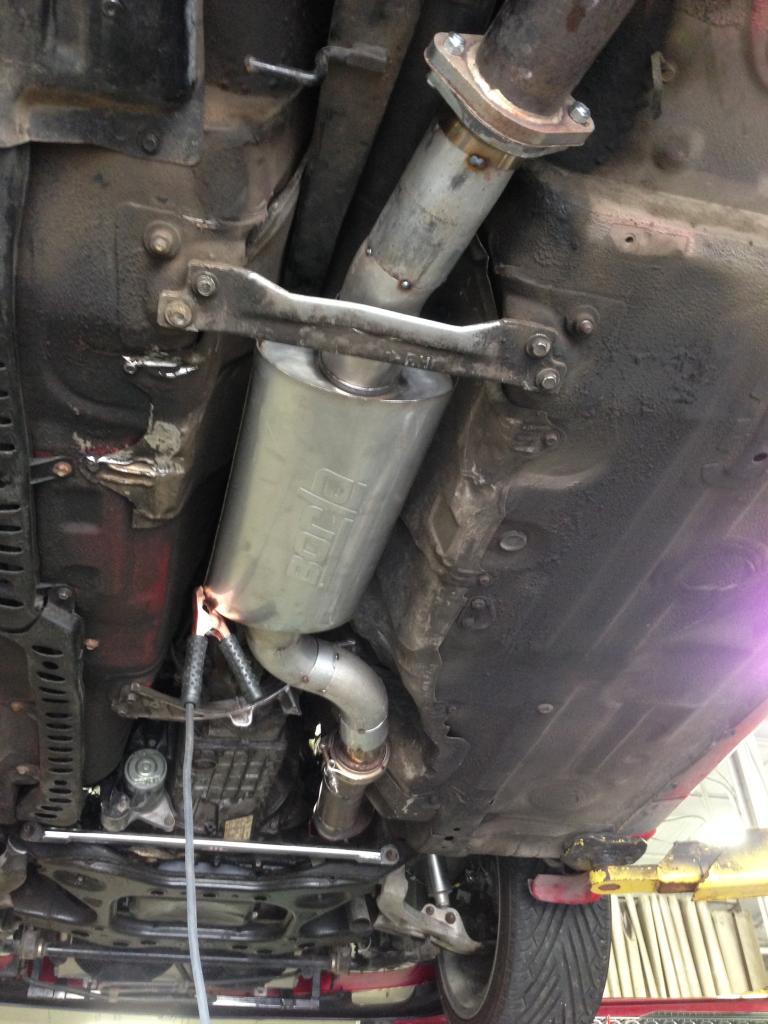
It sounds WAY better with a nice and deep tone! (Yes I know the bottom of the car is HORRIBLY dirty, that will come later)
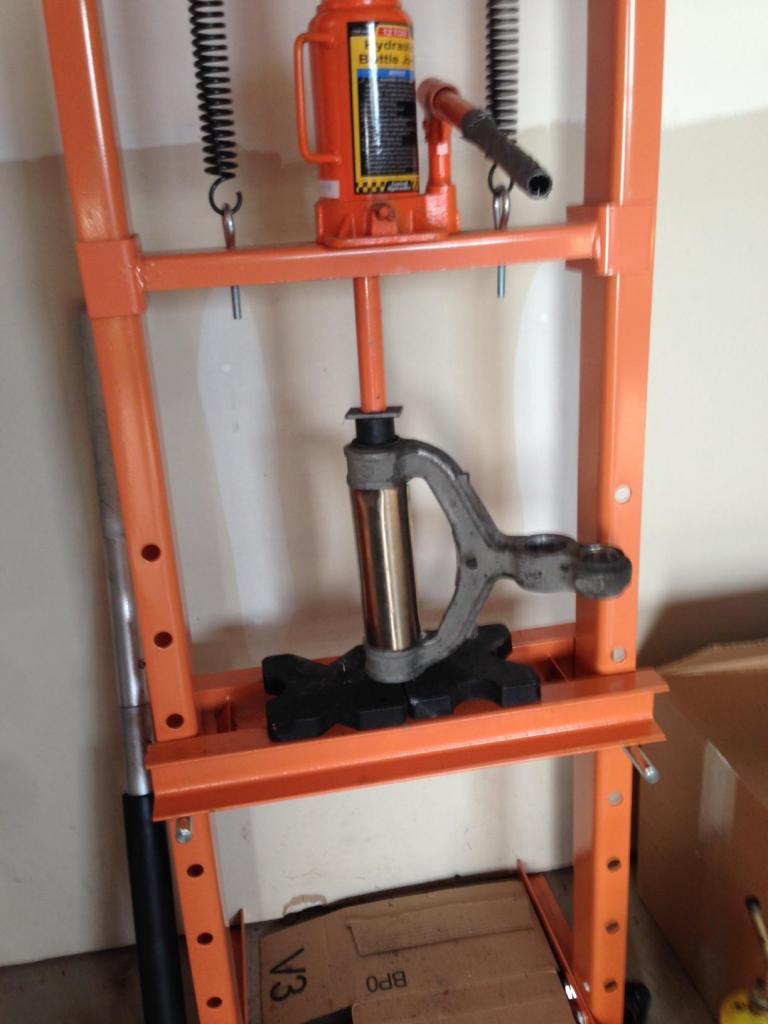
Next on the list was the overly clunky rear end, that meant all new bushings and Pillow *****. With managing body shops I get cost at Mazda so the price was not awful but still hurt!!! I made a sleeve out of old exhaust pipe I had laying around to make pressing the pushing easier, it worked great!
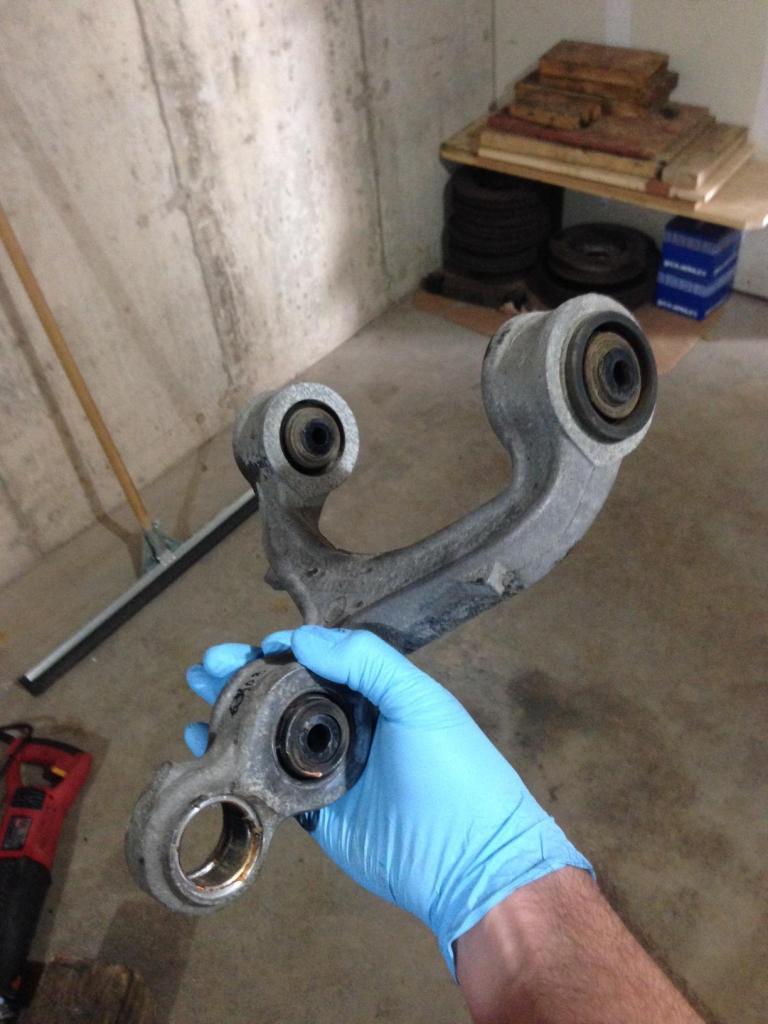
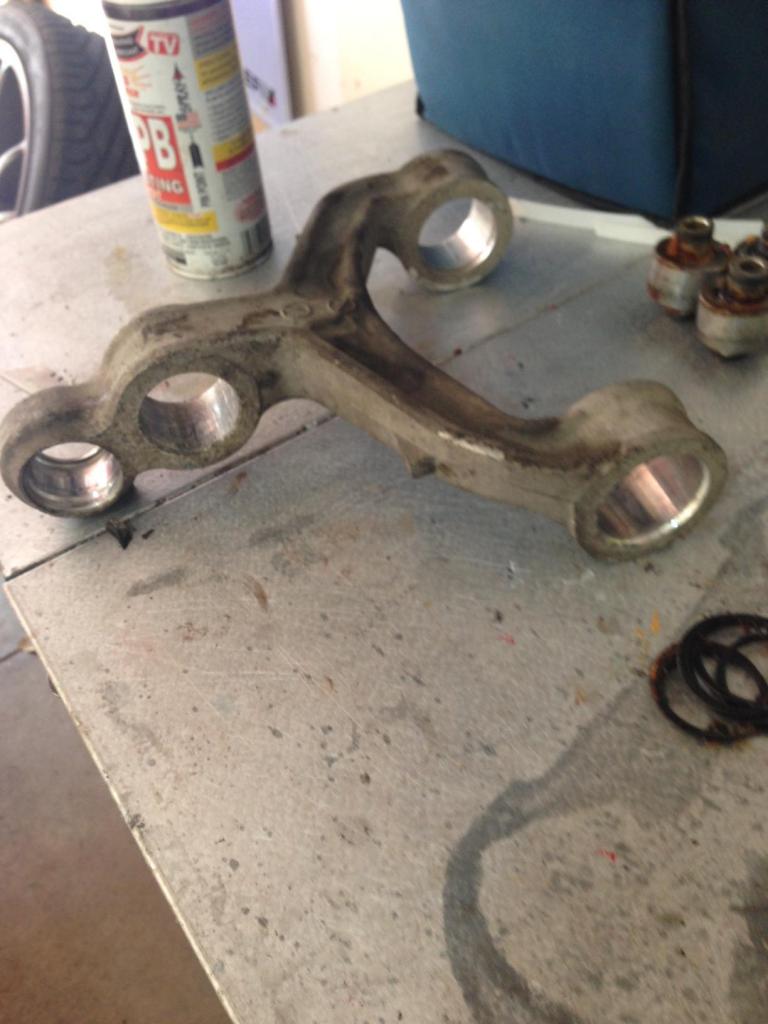
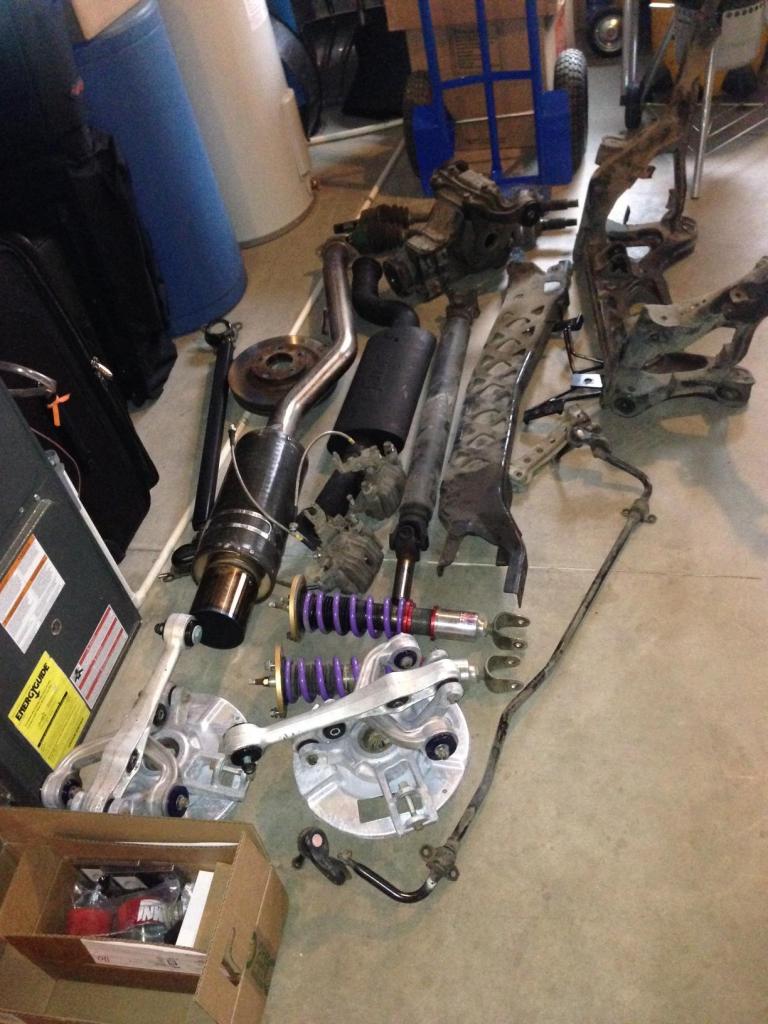
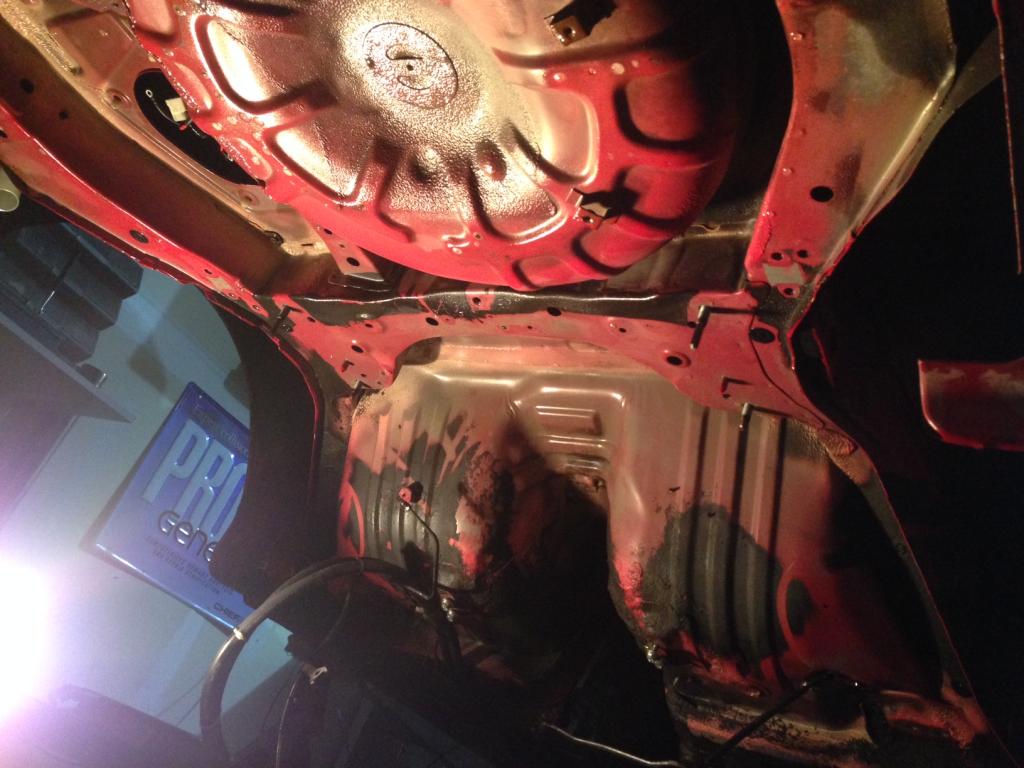
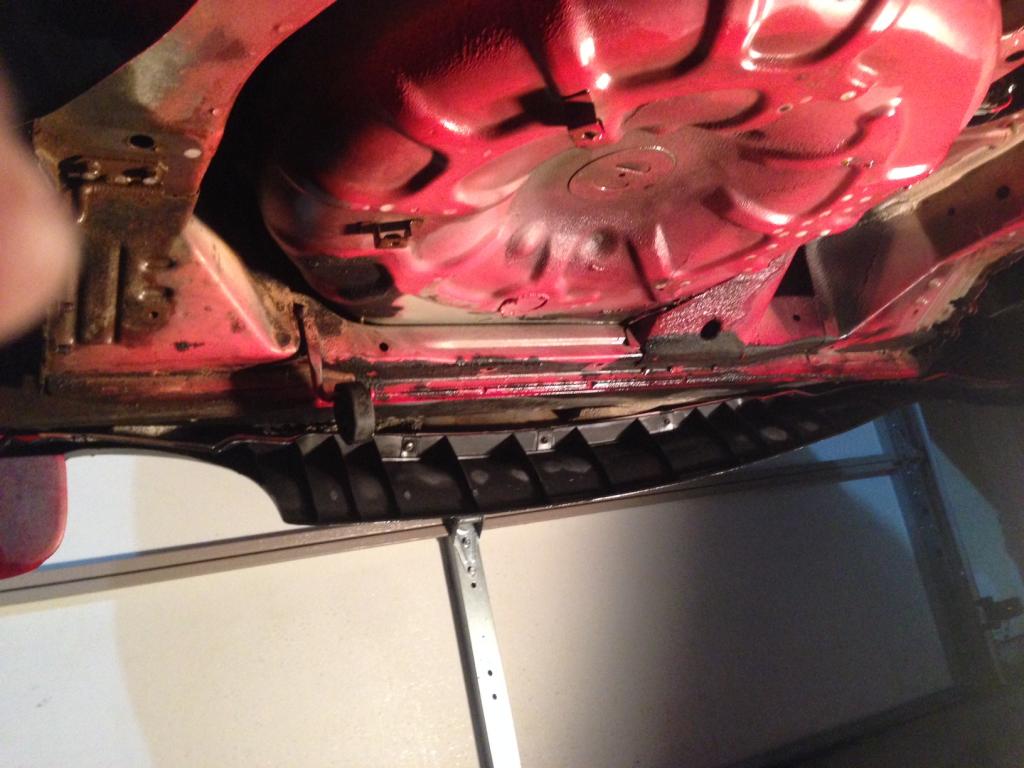
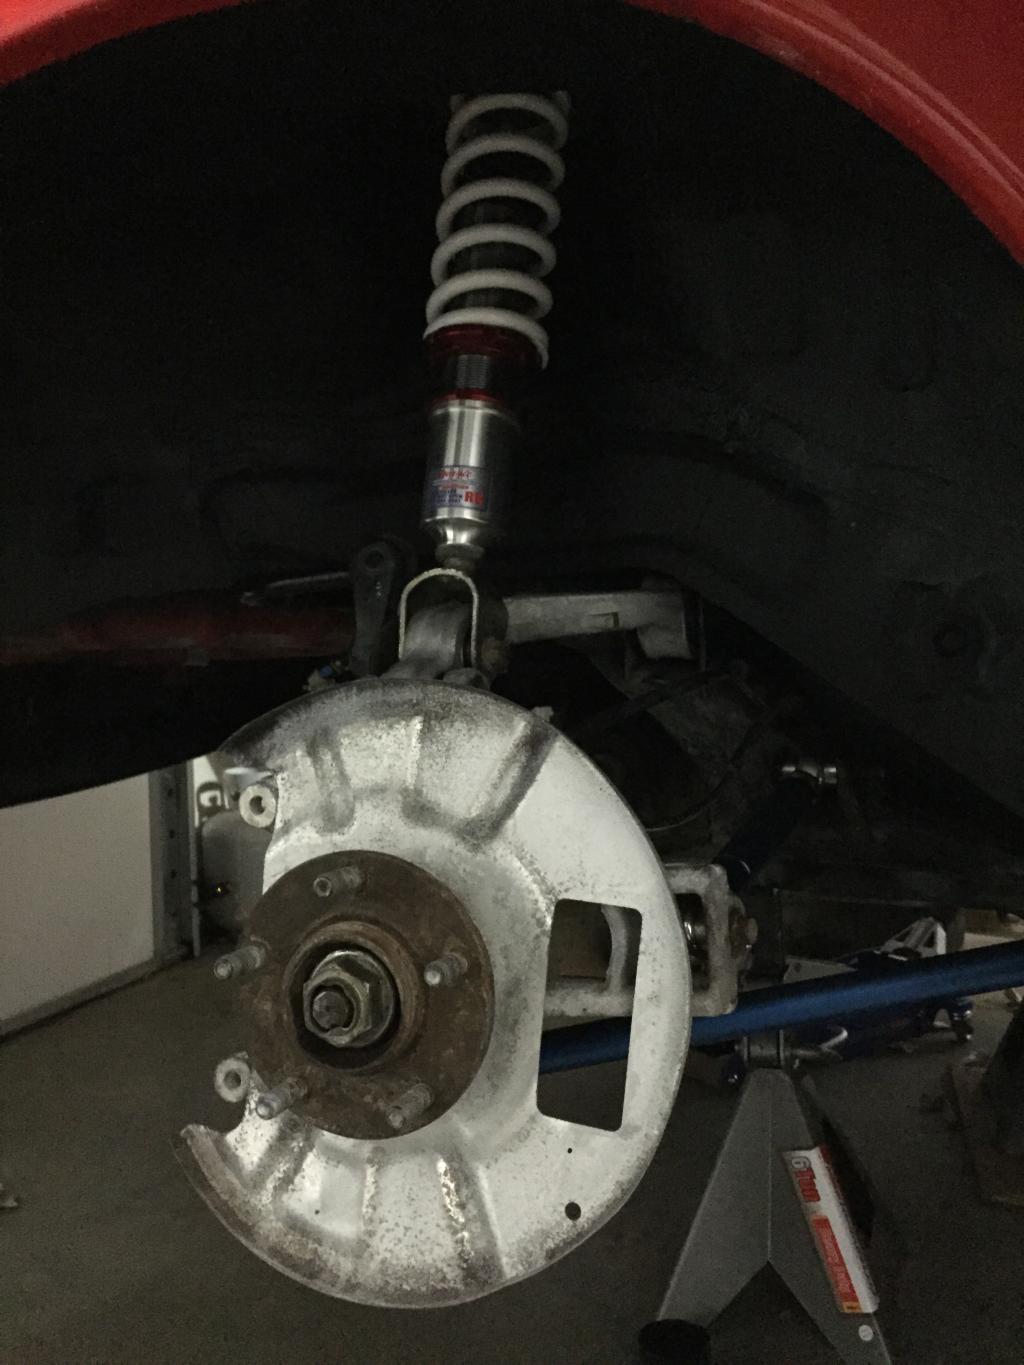
Of course when I was removing all of these arms I could not help but notice how awful the under side of my car looked. I dont think anyone washed the under side of it EVER! so I decided to go big and do it right. I removed all of the rear suspension, PPF, drive shaft, diff, rear subframe, and fuel tank. All in the name of cleaning the floor and all of the suspension! You can see in the photo the newly cleaned arms and knuckle with all new bushings:
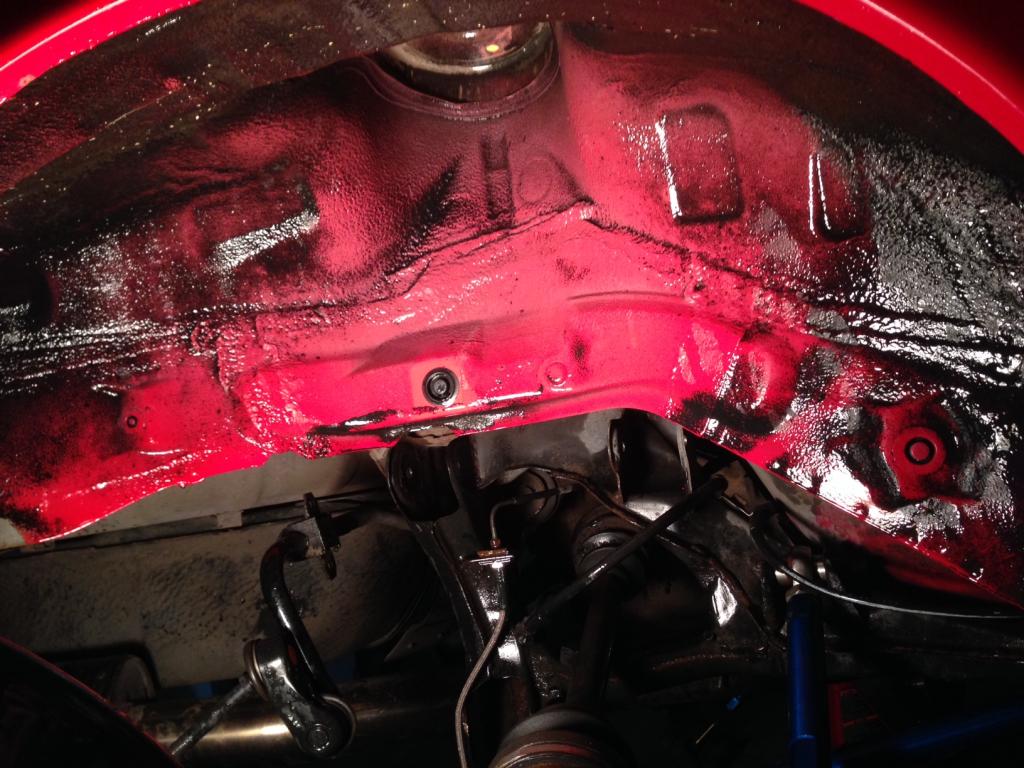
Here are some before and after shots of the under side. Keep in mind I did this on jack stands, in a rain suit, in my garage, with a gas powered power washer, when it was below 35 degrees out!
Before:
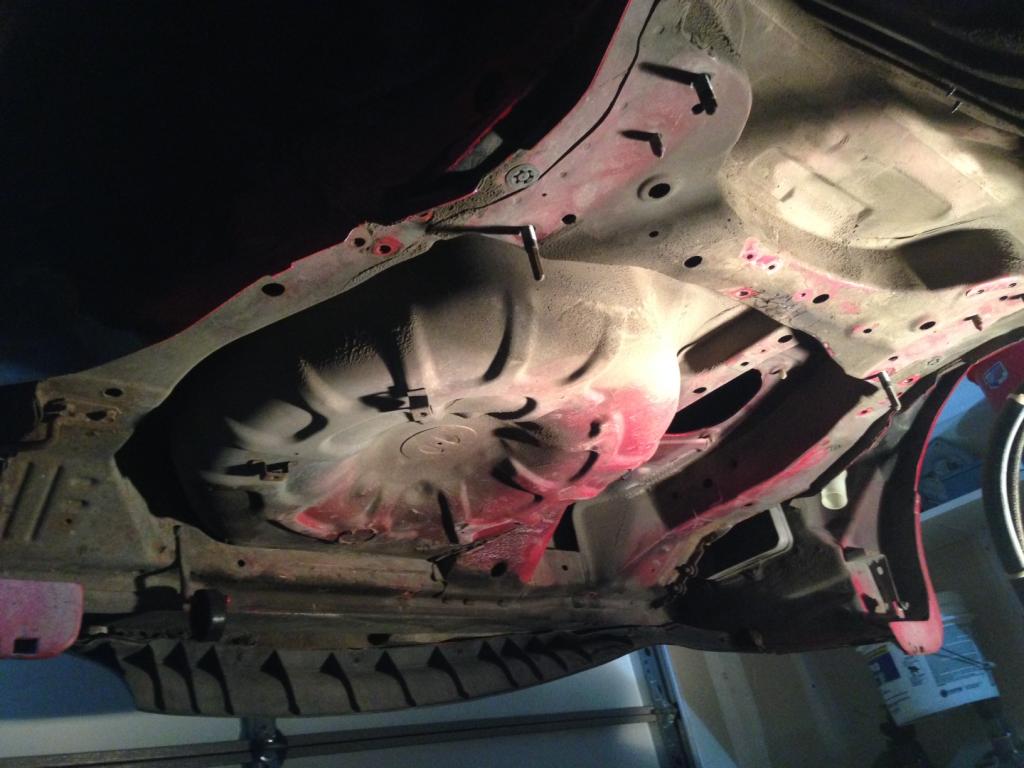
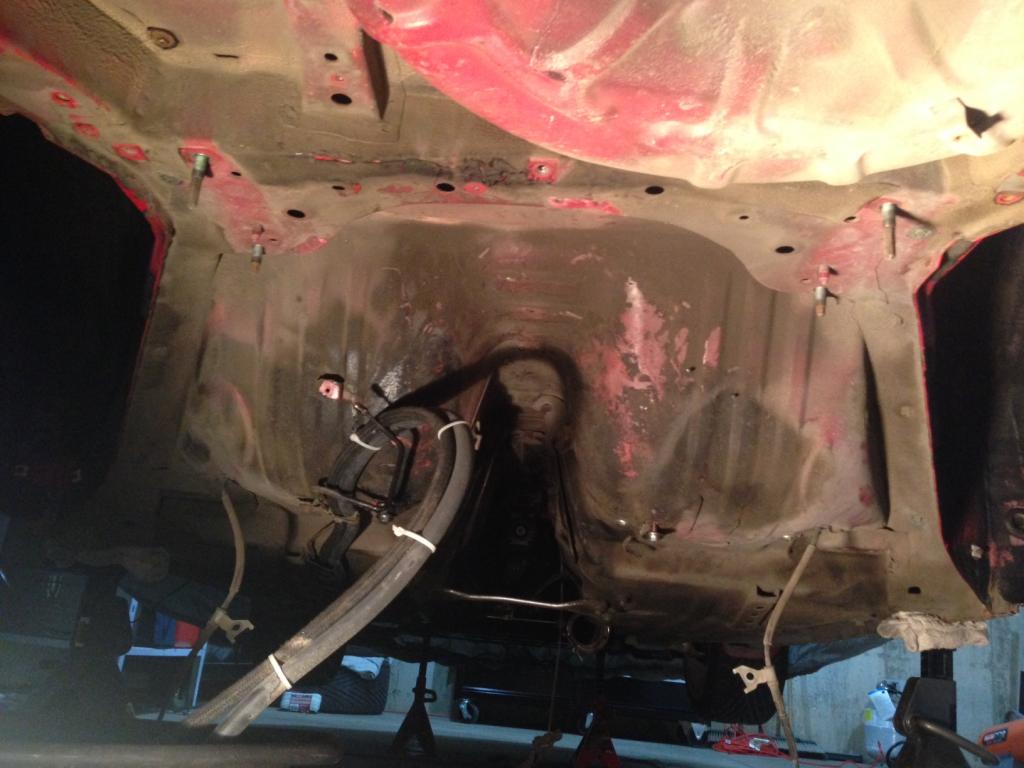
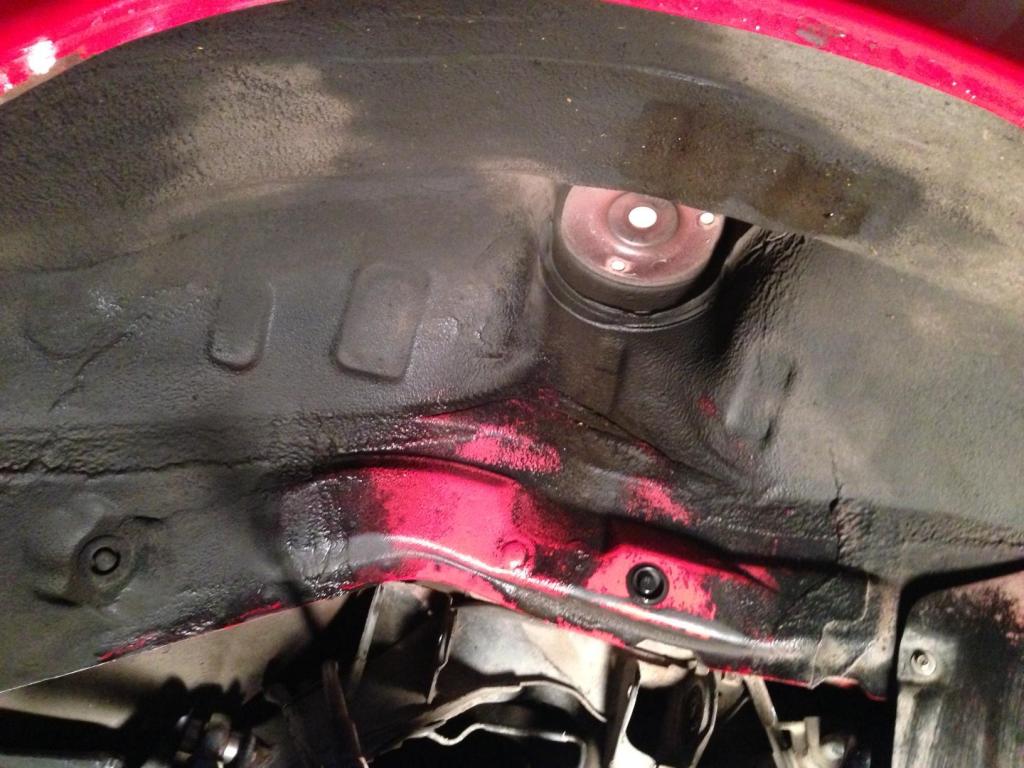
After:
I hated how loud the HKS exhaust was (My wife mainly) so I took out the mid section and made my own with a Borla center muffler. Keep in mind all I had access to was a MIG so the welds are not that great!
Original:

New:


It sounds WAY better with a nice and deep tone! (Yes I know the bottom of the car is HORRIBLY dirty, that will come later)
Next on the list was the overly clunky rear end, that meant all new bushings and Pillow *****. With managing body shops I get cost at Mazda so the price was not awful but still hurt!!! I made a sleeve out of old exhaust pipe I had laying around to make pressing the pushing easier, it worked great!


Of course when I was removing all of these arms I could not help but notice how awful the under side of my car looked. I dont think anyone washed the under side of it EVER! so I decided to go big and do it right. I removed all of the rear suspension, PPF, drive shaft, diff, rear subframe, and fuel tank. All in the name of cleaning the floor and all of the suspension! You can see in the photo the newly cleaned arms and knuckle with all new bushings:

Here are some before and after shots of the under side. Keep in mind I did this on jack stands, in a rain suit, in my garage, with a gas powered power washer, when it was below 35 degrees out!
Before:


After:


Thread Starter
Joined: Jan 2013
Posts: 1,053
Likes: 4
From: Madison, WI
Forgot the wheel well all cleaned up:
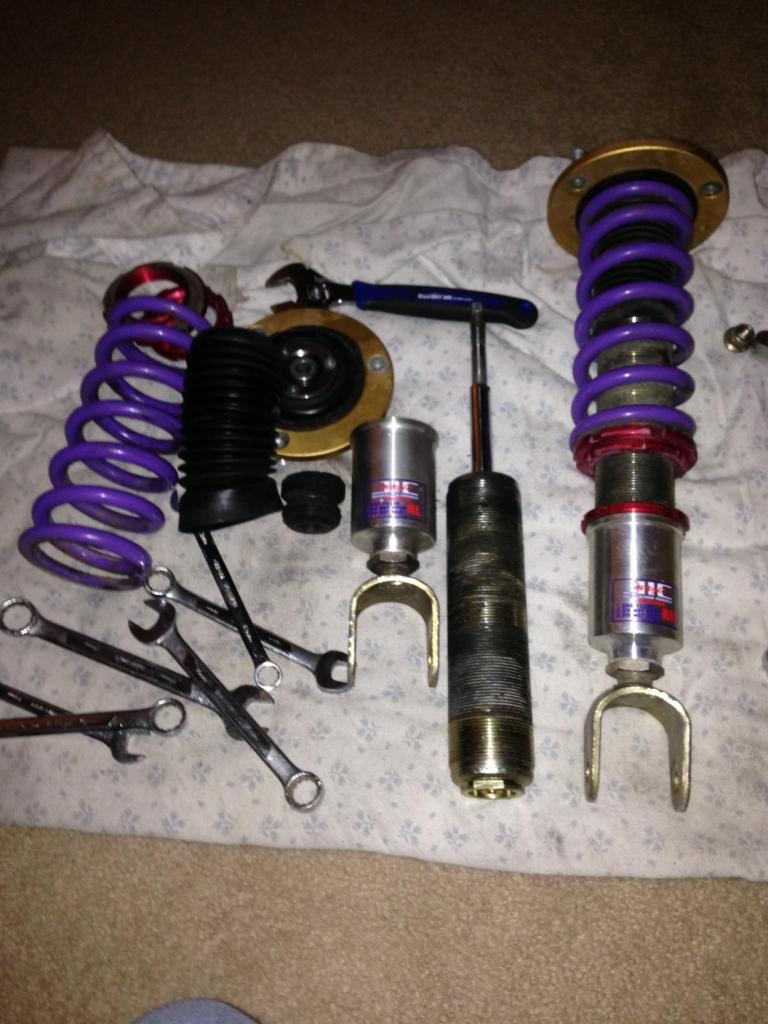
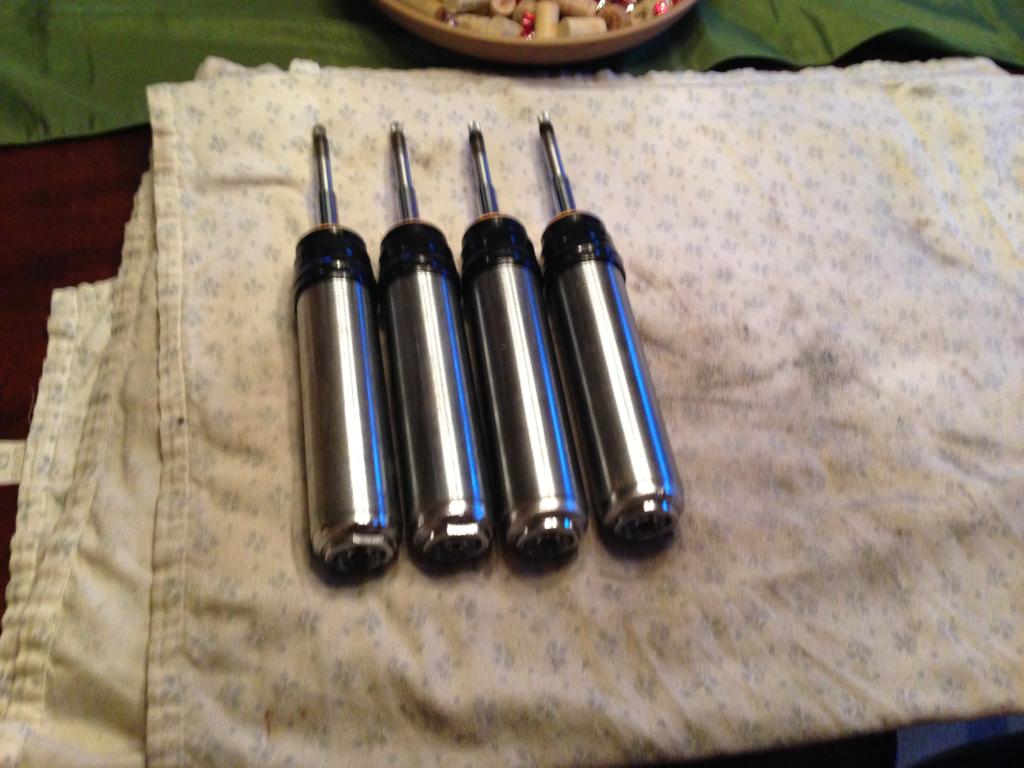
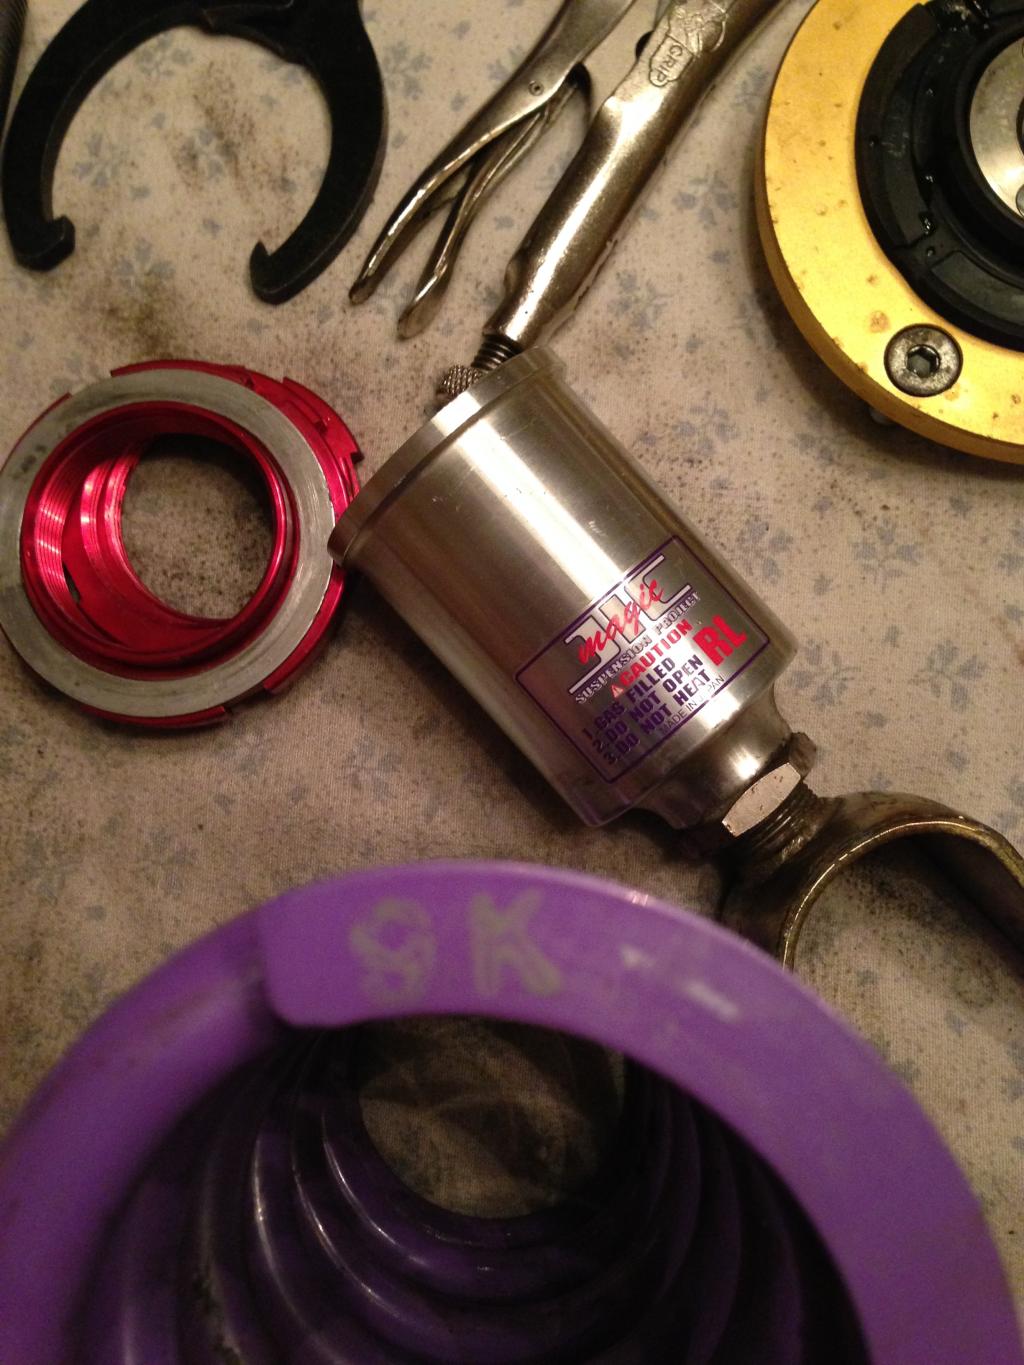
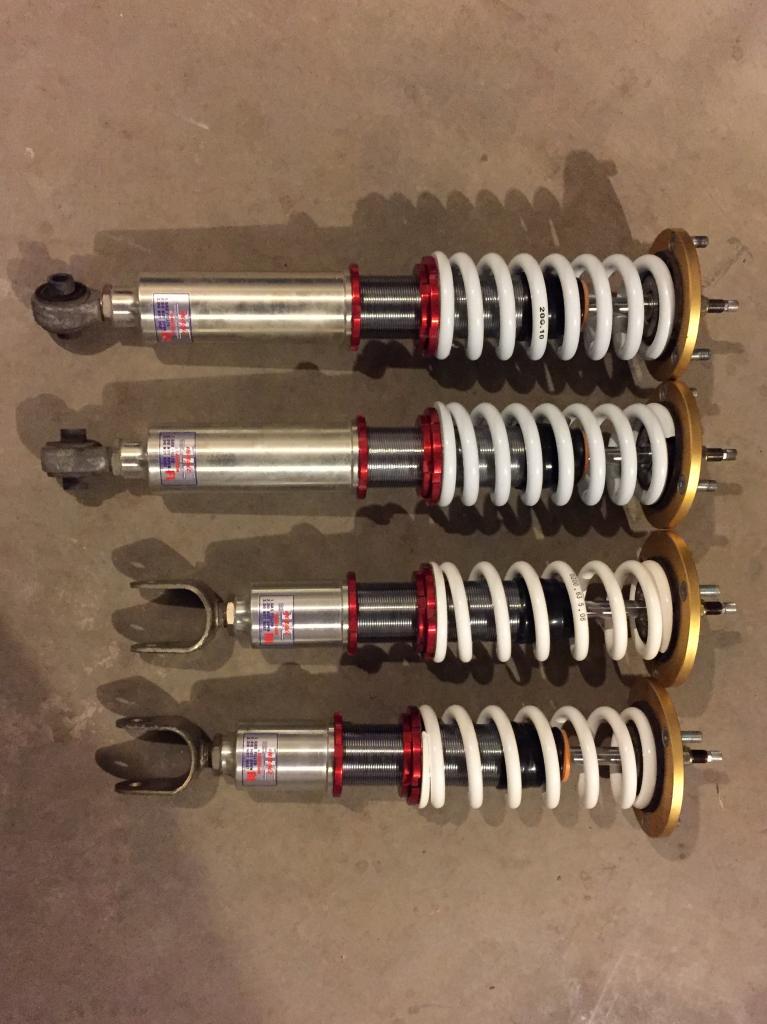
In the middle of all this work I found that my left rear coilover was blown. So I contacted JIC Magic and decided to just have all four rebuilt. I had to pull them all apart down to just the shock and mail them in. They gave me an AWESOME deal on have all 4 rebuilt!
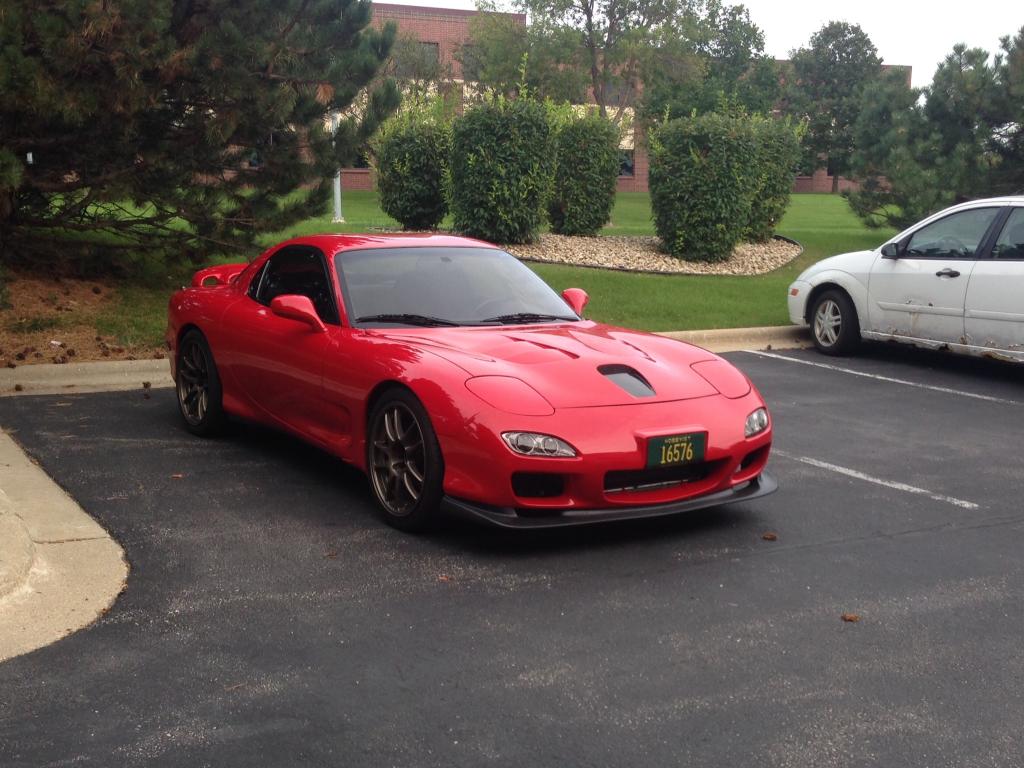
I did forget that along the way I got rid of the RE headlights and installed the factory flipups. I feel that they looks WAY cleaner then the old one. I am currently working on a custom setup where they would flip up half as high and there would be two HID projectors in the place of the huge lens.
Before:

After:

Thread Starter
Joined: Jan 2013
Posts: 1,053
Likes: 4
From: Madison, WI
There is a lot that I am missing that I have done with this car but this is just a start. The prior owner told me he had it tuned and dynoed a year before I bought it at 505 RWHP on E85... but I am not so sure. This winter I will be doing many more upgrades in hopes of hitting 550-600. The engine is the unknown, he said it was rebuilt about 6k miles ago with a street port. I did find a rebuild tag on the engine but nothing more.
Future upgrades (this winter)
4 2200cc Bosch EV14 Secondaries
1350cc Bosch EV14 Primaries
Xcessive LIM
JDM UIM
Ported Throttle Body & UIM/LIM
3.5" Down Pipe
Welded/Reinforced PPF
Replace Drives Side Floor
Pull Motor & Install New Mounts & Oil Pan Brace (leaks like crazy)
Install Second Walbro 450lph Pump
In spring I will be taking it to Beyond Redline Performance in Green Bay to be tuned.
There will be much more to come as winter moves forward and as I remember things I have already done to the car.
Trending Topics
Thread Starter
Joined: Jan 2013
Posts: 1,053
Likes: 4
From: Madison, WI
Thanks guys.
I have not. It still has the lean issue from partial to 3/4 throttle but under boost the AFR is perfect. So once I get the intake manifolds and fuel system buttoned up ill get it on the dyno.
I have not. It still has the lean issue from partial to 3/4 throttle but under boost the AFR is perfect. So once I get the intake manifolds and fuel system buttoned up ill get it on the dyno.


Thread Starter
Joined: Jan 2013
Posts: 1,053
Likes: 4
From: Madison, WI
I plan on going to some meets/shows once I get it drive-able on the street without going lean.
I forgot to mention that I was surprised the car didnt burn to the ground before I bought it. I had photos somewhere but I can find them now. The power wire going to the dual walbro 255 pumps went back through the stock connector was completely melted from the battery to the connector! There was so many things wrong with the way the fuel system was set up. The had drilled two holes through the top of the sender assm and just ran the hoses through that with no grommet. Even then they had two -6 lines feed into another -6 up to the engine. IDIOTS!
Here is the photos of what I did before I added another Walbro 450lph pump:

Thread Starter
Joined: Jan 2013
Posts: 1,053
Likes: 4
From: Madison, WI
I have a little/boring update.
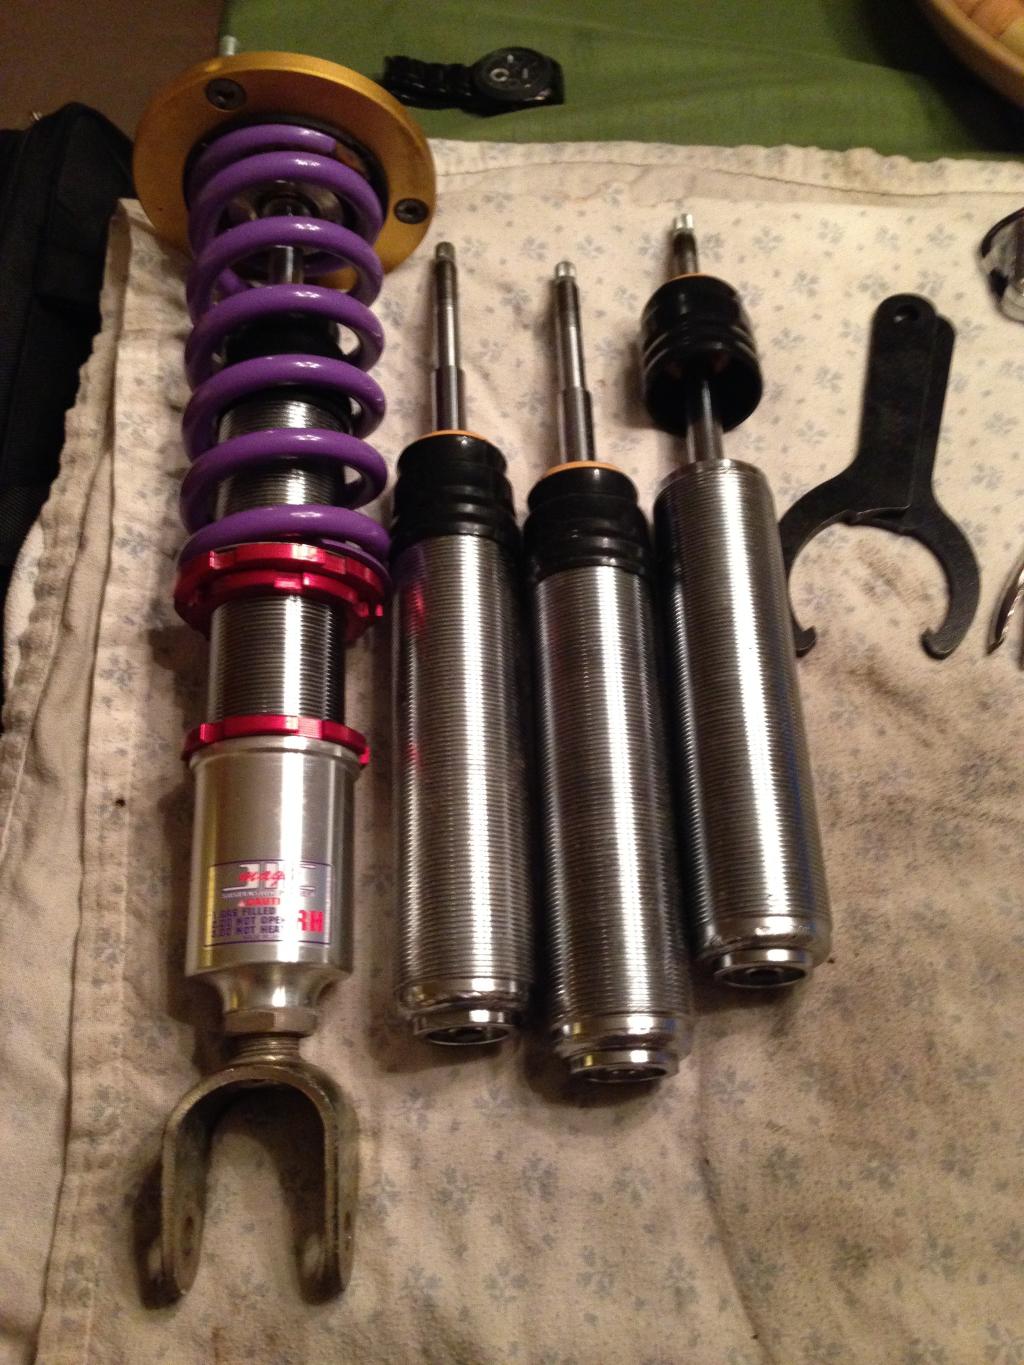
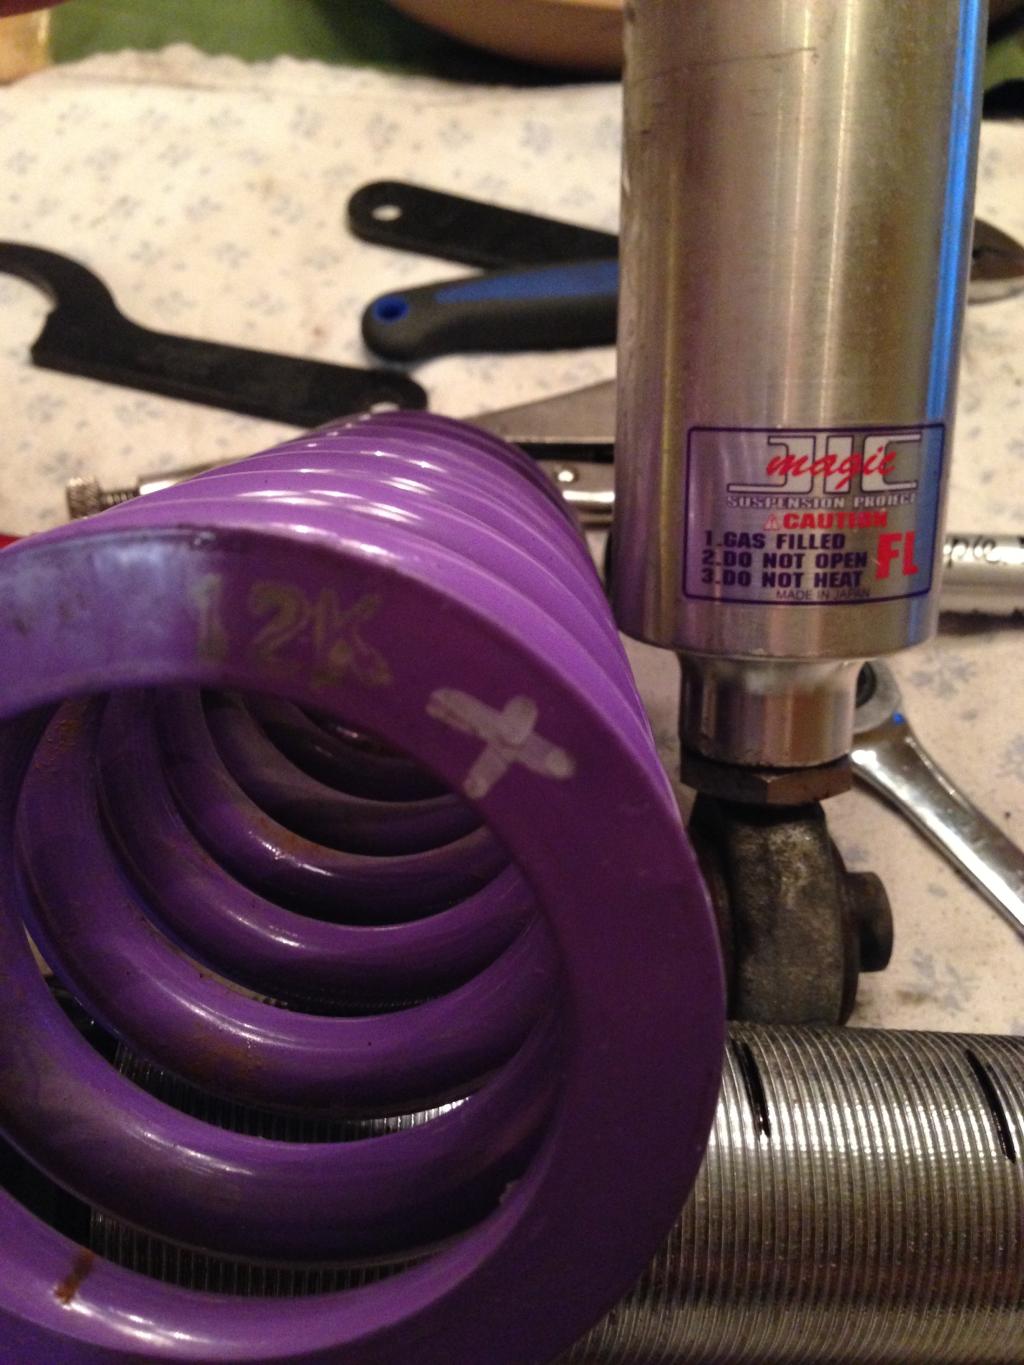
Got my shocks back from JIC-Magic. Went to put them together and noticed why this car rides like a lumber wagon... Spring Rates: Front 12k Rear 9k! So I ordered some 10k springs for the front and 8k for the rear. (After doing much research on what would fit my needs of street driving and hitting up the curvy roads).
Also got a JDM UIM so I can get rid of all those block off plates! Should be powder coated wrinkle black once I get the xcessive LIM.

Got my shocks back from JIC-Magic. Went to put them together and noticed why this car rides like a lumber wagon... Spring Rates: Front 12k Rear 9k! So I ordered some 10k springs for the front and 8k for the rear. (After doing much research on what would fit my needs of street driving and hitting up the curvy roads).


Also got a JDM UIM so I can get rid of all those block off plates! Should be powder coated wrinkle black once I get the xcessive LIM.


Thread Starter
Joined: Jan 2013
Posts: 1,053
Likes: 4
From: Madison, WI
It is messy! I bought a rain suit and put my car 3-4 feet in the air on jack stands. Then soaked it with Simple Green a couple times while scrubbing it with a brush. Finally I used a gas powered power washer and sprayed it all off. It a mess but worth it. I will be doing the main floor and engine bay when I can get it in the shop I work for on a lift.
Thread Starter
Joined: Jan 2013
Posts: 1,053
Likes: 4
From: Madison, WI
I was planning on leaving it the way it was, just clean it up. Although I did spray the wheel wells and frame rails with 3M Rubberized Undercoating 08883 for rock chip protection. It is paint able as well which will be nice when I fix the rust hole under my drives seat. I also sprayed inside the frame rails with Rust Fighter-I 08892 to add additional rust protection. Where people always go wrong is adding it to the outside of the body only.
Thread Starter
Joined: Jan 2013
Posts: 1,053
Likes: 4
From: Madison, WI
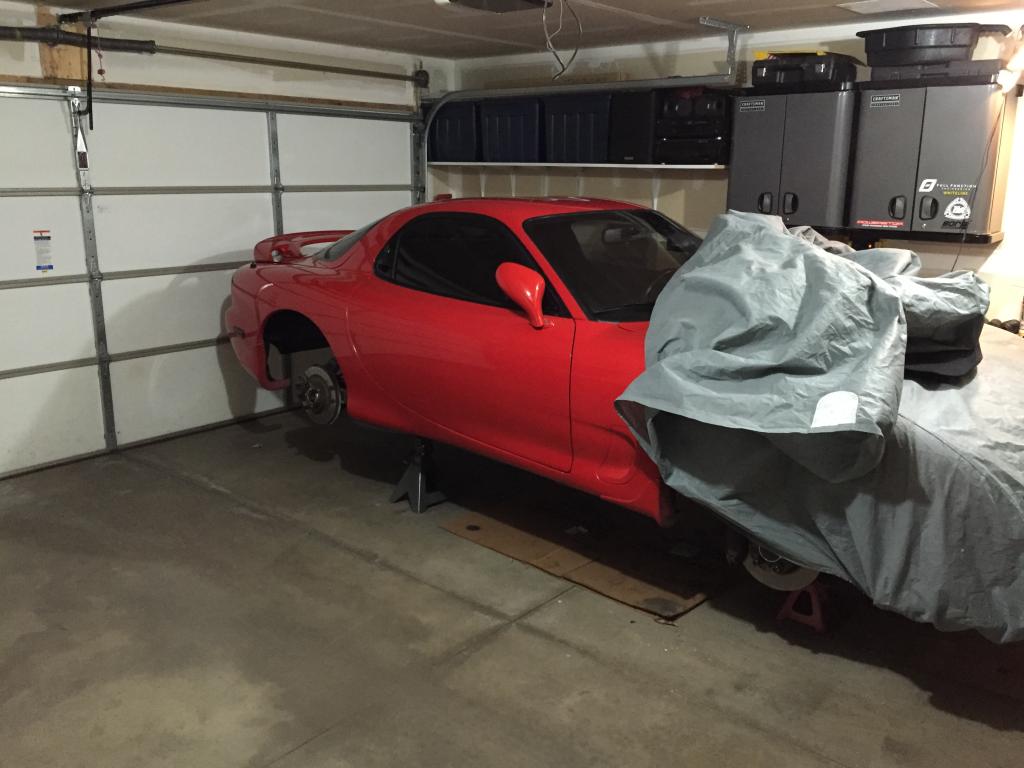
More small updates (I cant wait to get a full weekend to just tear into this thing). Here she is sleeping:
Anyway, I got the new springs put on the coilovers and installed the rear (Front suspension will be coming out for new bushings).
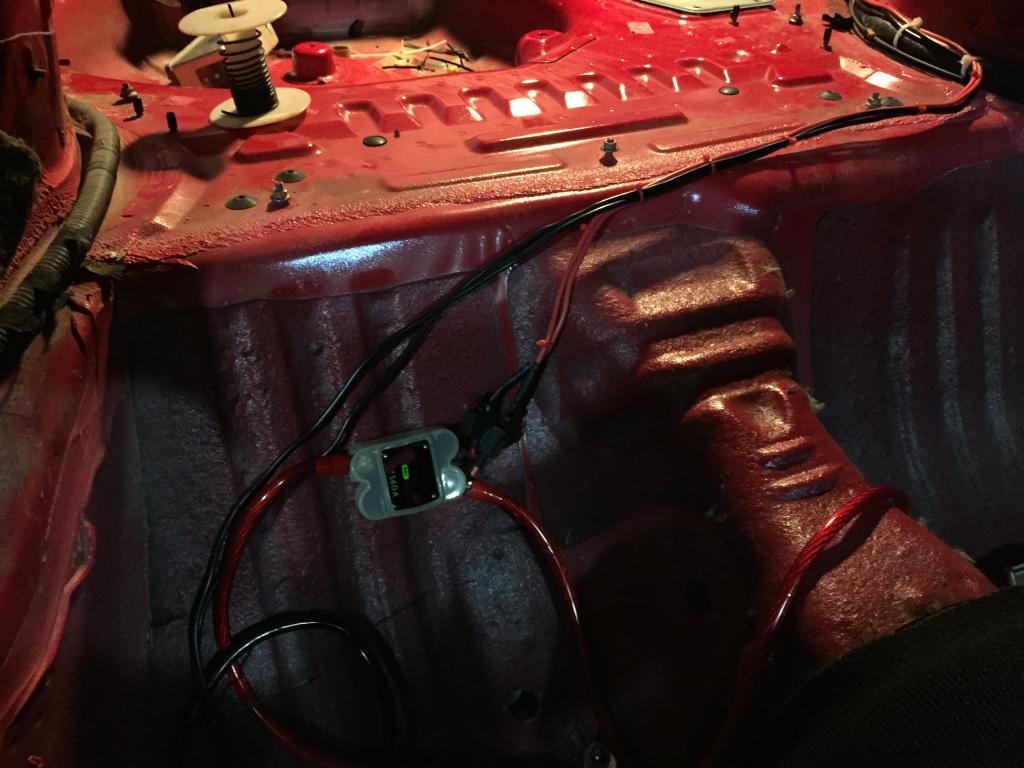
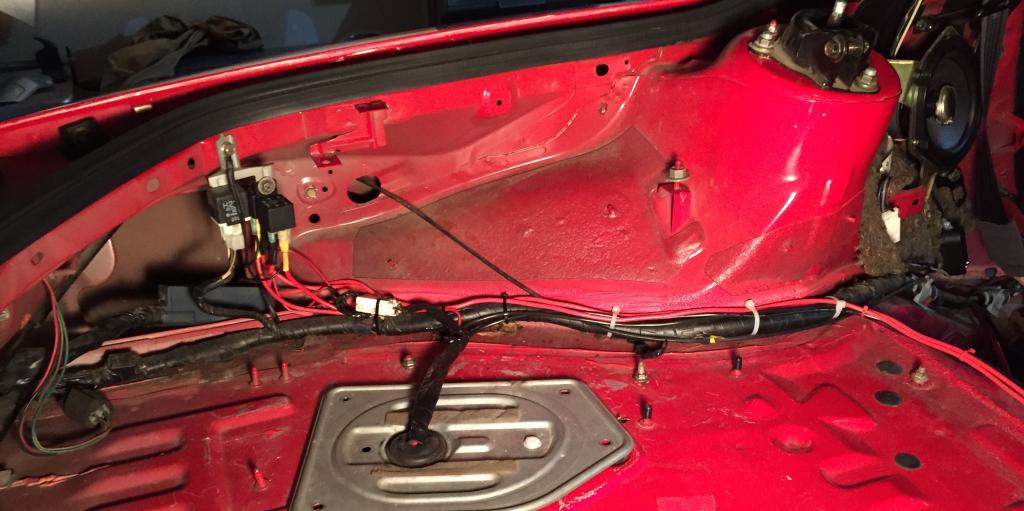
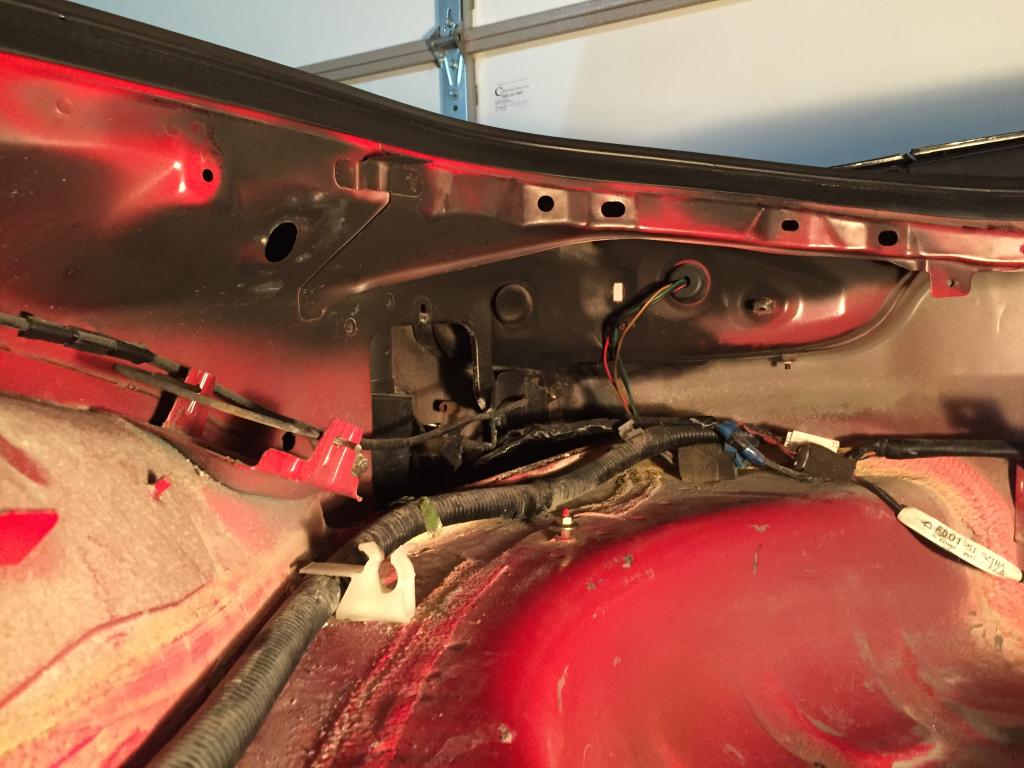
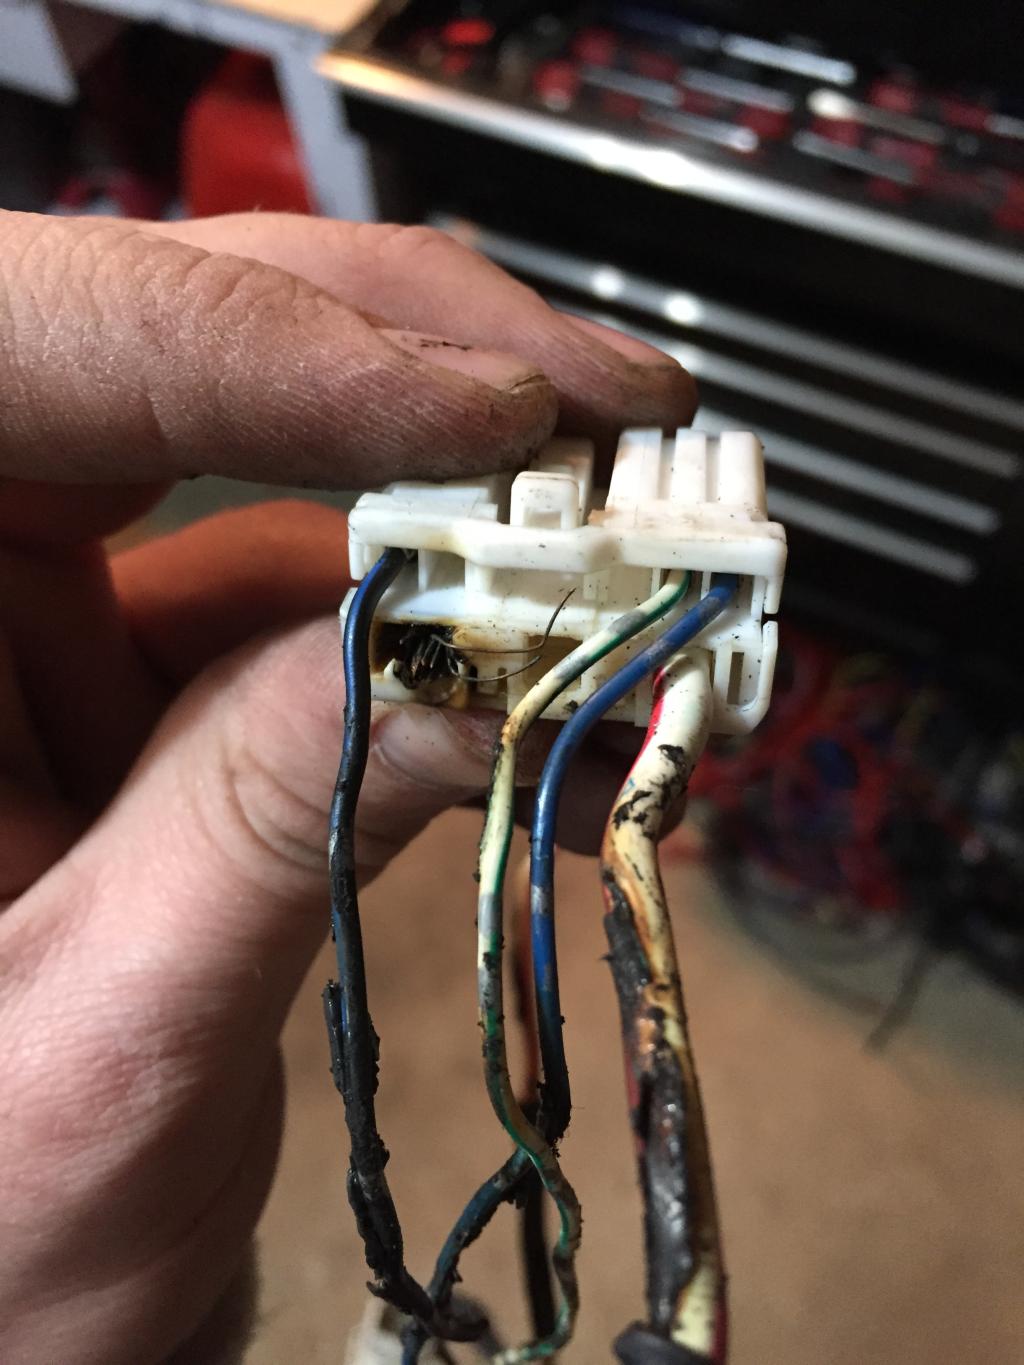
It has been bugging me since I bought the car that it once had a fire. When I wired my Walbro 455lph pump this summer I found that the OEM fuel pump harness had melted and apparently went up in flames. When I wired up my pump this summer I didn't clean up the old wires because I just wanted to get it on the road. This weekend I rewired for two Walbro 450lph pumps and completely cleaned up the old harness and pulled out the old wires.
I also fount that the area by the Antenna at one point had a fire as well... I have not looked into that fully yet but I assume it was the antenna as it does not work. There is chemical all over in that area from a fire extinguisher yet too, so I will need to address the paint and caulk that it ate through as well.

Anyway, I got the new springs put on the coilovers and installed the rear (Front suspension will be coming out for new bushings).


It has been bugging me since I bought the car that it once had a fire. When I wired my Walbro 455lph pump this summer I found that the OEM fuel pump harness had melted and apparently went up in flames. When I wired up my pump this summer I didn't clean up the old wires because I just wanted to get it on the road. This weekend I rewired for two Walbro 450lph pumps and completely cleaned up the old harness and pulled out the old wires.


I also fount that the area by the Antenna at one point had a fire as well... I have not looked into that fully yet but I assume it was the antenna as it does not work. There is chemical all over in that area from a fire extinguisher yet too, so I will need to address the paint and caulk that it ate through as well.

Thread Starter
Joined: Jan 2013
Posts: 1,053
Likes: 4
From: Madison, WI
The odd thing that I found was that the wire that melted and caught fire was the ground wire and not power... I assume it was the mistake of some *** clown switching the wire when the original 255lph pumps were put in, but ether way it was a mess to clean up!

Thread Starter
Joined: Jan 2013
Posts: 1,053
Likes: 4
From: Madison, WI
Now the next project... I have been thinking about pulling the engine to do the full ABS delete and possibly clean up my body harness. (Also have to put on an oil pan brace and new engine mounts) I have been told not to even touch the harness because it is a huge pain but there are so many unused wires/fuses/relays that it just clutter up the engine bay.
I am planning on having the A/C, ABS, and Power Steering all removed which removes a lot of crap... What I want to know is what everyone else thinks. I have read a few threads on this but was wondering if anyone can direct me to more so I can do more research.
I am planning on having the A/C, ABS, and Power Steering all removed which removes a lot of crap... What I want to know is what everyone else thinks. I have read a few threads on this but was wondering if anyone can direct me to more so I can do more research.
Now the next project... I have been thinking about pulling the engine to do the full ABS delete and possibly clean up my body harness. (Also have to put on an oil pan brace and new engine mounts) I have been told not to even touch the harness because it is a huge pain but there are so many unused wires/fuses/relays that it just clutter up the engine bay. I am planning on having the A/C, ABS, and Power Steering all removed which removes a lot of crap... What I want to know is what everyone else thinks. I have read a few threads on this but was wondering if anyone can direct me to more so I can do more research.
Once I start getting into the mess I'll help as much as I can!
In the mean time, good luck!
-Nick
what are your plans for the car?
I would definitely not remove AC, ABS, or PS. why would you?
if you're going to just cruise around in the car lightly and attend stancebro meets, then go for it, but you're removing stuff that legitimately makes the car better, so what's the point?
I feel like a lot of younger guys (maybe you're not young, I dunno) do this --I was one of them-- just to realize about 6 months later that the car is worse off than it was previously because you removed a bunch of the things that make it a livable car. also, if you ever plan to sell it, you're selling a car that has no PS, no AC (at all), and no ABS. the ABS is huge.