
Video: 13B Rotary Engine Rebuild

Thread Starter
Joined: Feb 2001
Posts: 29,798
Likes: 128
From: London, Ontario, Canada
Video: 13B Rotary Engine Rebuild
As part of my '76 Cosmo project, I just built a 6 port 13B NA engine and posted the entire process to YouTube. I then realized that the video applies to basically all 12A and 13B rotary engines, so I'm going to also post the video in the 1st, 2nd and 3rd gen forums for anyone who is building a rotary.
If you've never built an engine, or are just about to, then you want to watch this video. Covered is the entire build process of a 13B rotary including: measuring rotors, clearancing side seals, assembling all rotor seals, assembling the short block, setting eccentric shaft end play, assembling the "under the front cover" stuff and finally installing the front cover as well as torquing the front hub bolt. As far as I know, this is the only full process free rotary rebuild video out there. This video, combined with the Haynes/FSM manuals, should enable anyone to be confident in putting together their first engine. While the engine shown in this video is a hybrid engine made from both RX-5 Cosmo and GSL-SE parts, the steps covered are the same for any Mazda rotary from 12A to 13B-REW.
http://www.youtube.com/watch?v=ijJeUk_GqiI
Enjoy!
Incidentally, this is my first ever post to the 3rd gen forum. Yay for me.


Learned a lot just from watching this... there is a substantial amount of useful information that people can use if they decide to attempt a rebuild themselves. thanks for the time and effort put into this video!
Trending Topics

Thread Starter
Joined: Feb 2001
Posts: 29,798
Likes: 128
From: London, Ontario, Canada

AWESOME video!!! You make it look extremely easy. One question though. I got tough to put the Apex seals while the rotors where out and use a rubber band to keep them in place. Then install the housing first then the rotor. Once the rotor is half way in you can remove the rubber band. The reason I say this is because I was told that jamming the springs in have the potential to bending them. Is there anything wrong with this method?


Great video! Good on you sir ;-) Here is what we did to help with grinding down the side seals...
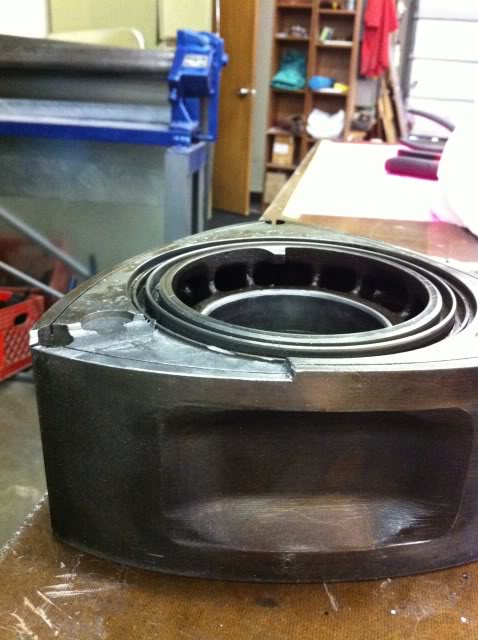
We decided to use a junk rotor to act as our jig for grinding down the side seals. This is pretty ideal considering it doesn't allow movement side to side (potentially breaking).

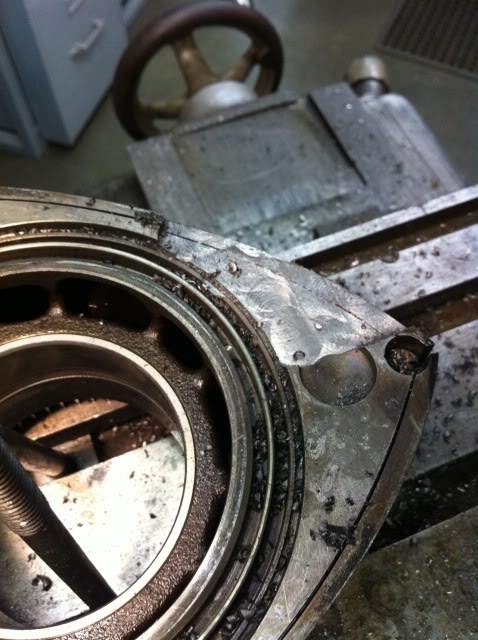
We then milled down a side of the face to allow the seal to be grabbed and pushed along it's intended location as a guide/rail.
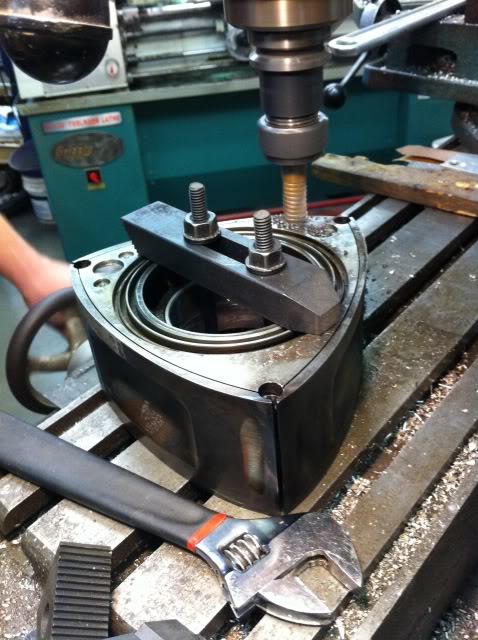
One corner was left untouched for about 3/4 of an inch and then stepped to allow the seal to be pushed down fully with one hand and guided by the other. Once the rotor was milled then it was placed in the drill press and a circular grinding stone was installed, guided inside the corner seal bore and locked into position.
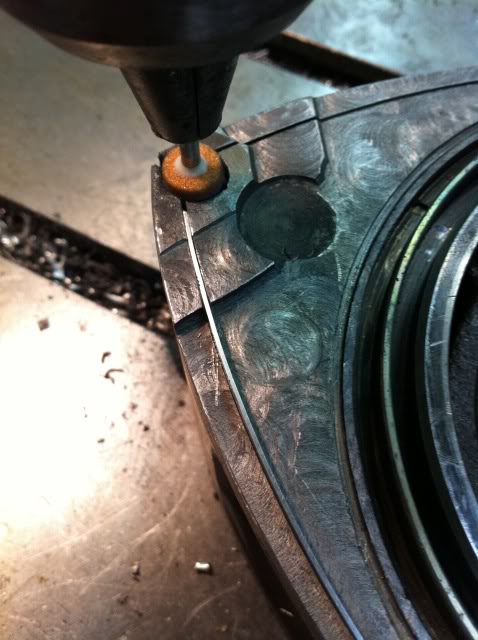

You can see the seal sitting and the rear is exposed so it can be pushed along

Everyone does things different, we just decided to give this a shot. And remember, no good rotors were harmed in the making of this jig :-)
We decided to use a junk rotor to act as our jig for grinding down the side seals. This is pretty ideal considering it doesn't allow movement side to side (potentially breaking).
We then milled down a side of the face to allow the seal to be grabbed and pushed along it's intended location as a guide/rail.
One corner was left untouched for about 3/4 of an inch and then stepped to allow the seal to be pushed down fully with one hand and guided by the other. Once the rotor was milled then it was placed in the drill press and a circular grinding stone was installed, guided inside the corner seal bore and locked into position.
You can see the seal sitting and the rear is exposed so it can be pushed along
Everyone does things different, we just decided to give this a shot. And remember, no good rotors were harmed in the making of this jig :-)
Thread Starter
Joined: Feb 2001
Posts: 29,798
Likes: 128
From: London, Ontario, Canada
AWESOME video!!! You make it look extremely easy. One question though. I got tough to put the Apex seals while the rotors where out and use a rubber band to keep them in place. Then install the housing first then the rotor. Once the rotor is half way in you can remove the rubber band. The reason I say this is because I was told that jamming the springs in have the potential to bending them. Is there anything wrong with this method?
Yeah, I've been thinking of making one of those but I just don't build engines often enough to make it worth the trouble. Having always clearanced by hand it's not too hard to keep the angle correct.
That makes sense, i'd be in the same boat too if I was in your shoes... It really didn't take much time to mill it down, of course my buddy is experienced on the mill and made it look easy.

Another great video! I'm a first time engine builder, but not mechanically stupid. I work on multi-million dollar aircraft as my job. Anyways...one question as I have mine apart waiting to get my rebuild kit here. I was wondering if the side seals and/or the corner seals can be reused if they still meet the clearance check at the corner seals? The reason I'm rebuilding the engine is there was some oil smoke that wouldn't go away when the car was up to temp and the exhaust smelled really rich. I did a compression check, which was 80 psi on both the front and rear using the 3 bounce per rotor check. I've cleaned up the engine plates, housings, and rotors. I still need to do some housing and plate measurements. I don't have any gouges in them, but I'm still going to dial gauge them to make sure they are still within limits. Thanks for any replies!