
Teardown and Rebuild

Thread Starter
Senior Member
Joined: Nov 2001
Posts: 567
Likes: 0
From: Malaysia
Teardown and Rebuild
Finally rebuilding. Problem started when i was on a long trip back home over the holidays. Radiator fan hits fuse box holder and dies on me. I was crusing pretty much 110-120kmh so my aftermarket gauge did not reveal much but as i slow down i steadily see the needle rise to approximately 90c which is where i've set it to warn. Everything is fine and dandy till i hit a strecth which jammed with holiday makers. Upon coming to a complete stop, needle goes up to 115c and i shut her down. AFter waiting for ages for the traffic to clear i managed to drive home slowly. Next morning i've got the add coolant buzzer on. Did the infamous champagne test and yup we've got bubbles.
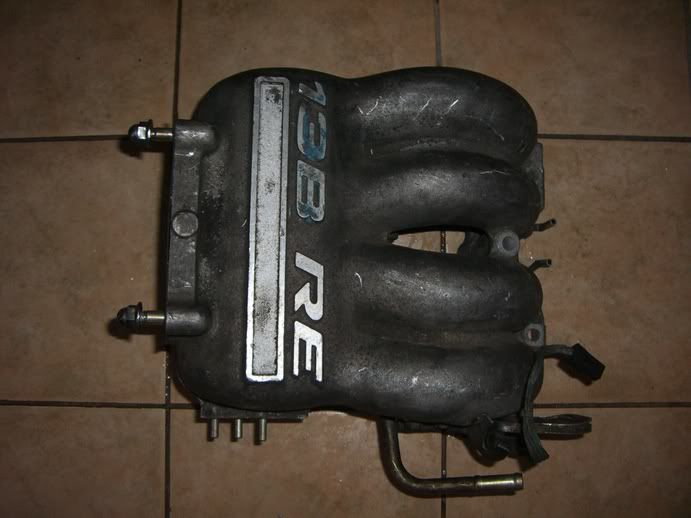
To cut the story short i'm rebuilding with RA 2pc seal kit. converting to single gt35/40. here are some pics of the teardown. I'll be running RE Upper Intake and Lower manifolds.
http://i45.photobucket.com/albums/f7...icture2394.jpg
http://i45.photobucket.com/albums/f7...icture2392.jpg
http://i45.photobucket.com/albums/f7...icture2391.jpg
http://i45.photobucket.com/albums/f7...icture2031.jpg
http://i45.photobucket.com/albums/f7...icture2029.jpg
more pics to follow


Thread Starter
Senior Member
Joined: Nov 2001
Posts: 567
Likes: 0
From: Malaysia
thank you for the word of encouragement. Couple of good firends specialize in rebuilds and i'll pretty much be the beer supplier for those long nights spent cleaning parts etc.
i've sent out the following parts for polishing
1.RE Upper and lower intakes
2.alternator
3.water pump housing
4.greddy elbow
5.turbo housing
and a couple of other things which i cant seem to remember. tomorrow hopefully i'll post up pic of intakes and turbo housing.
papsmagu- thanks mate. the colour is metallic copper
Thread Starter
Senior Member
Joined: Nov 2001
Posts: 567
Likes: 0
From: Malaysia
SOme parts have arrived. I plan to run RE cosmo UIM and LIM. Will be building a custom plate to mate FD throttle body to UIM. At the same time i will also be posting more pictures of the porting process involved to mate Cosmo LIM to FD iron housings. Should anybody need specific pictures please pm me and i'll do my best to help.
Cosmo TB

Cosmo UIM
Cosmo UIM Underside

Cosmo LIM

Cosmo TB
Cosmo UIM
Cosmo UIM Underside
Cosmo LIM
Last edited by fd3s7007; Jan 14, 2006 at 05:48 AM.
Trending Topics


Thread Starter
Senior Member
Joined: Nov 2001
Posts: 567
Likes: 0
From: Malaysia
we've used RA seals with great success here. i was slightly paranoid after the whole radiator fan incident and decided to rebuild. coincidentelly the the idea of going single turbine was already in the pipeline.
teardown pics coming soon. good news is,
1: housings are in excellent shape
2: rotors are good albeit carbon build up
Mods to go with the rebuild are:
GT3540 from Garrett
Spearco Custom IC
Tial WG
Greddy Type R B/O valve
Bosch 1600 Sec. Inj
Apexi Turbo Manifold
High Flow Fuel Pump
Street Port
teardown pics coming soon. good news is,
1: housings are in excellent shape
2: rotors are good albeit carbon build up
Mods to go with the rebuild are:
GT3540 from Garrett
Spearco Custom IC
Tial WG
Greddy Type R B/O valve
Bosch 1600 Sec. Inj
Apexi Turbo Manifold
High Flow Fuel Pump
Street Port
Thread Starter
Senior Member
Joined: Nov 2001
Posts: 567
Likes: 0
From: Malaysia
Had some time today to get started with cleaning. Was hoping to get everything pieced back together before chinese new year but parts sent out for polishing will only make their way back here late feb so here are some updates thus far.
Very Very Dirty Rotors. Once cleaned will be "spec'ed" and reuse if good

Street Port

Me trying to get rotor housing cleaned

Very Very Dirty Rotors. Once cleaned will be "spec'ed" and reuse if good
Street Port
Me trying to get rotor housing cleaned
Thread Starter
Senior Member
Joined: Nov 2001
Posts: 567
Likes: 0
From: Malaysia
cleaning parts has to be the most difficult part of the rebuilding process. Degreasing --> Industrial Cleaner--> Wet Wash. Man i'm pooped. Will resume work on thursday and hopefully get started to checking tolenrances.
Some input form you guys would help. any good tips during rebuilding?
joe13- where were you when the cleaning started!! lol
Some input form you guys would help. any good tips during rebuilding?
joe13- where were you when the cleaning started!! lol
Thread Starter
Senior Member
Joined: Nov 2001
Posts: 567
Likes: 0
From: Malaysia
Updates:
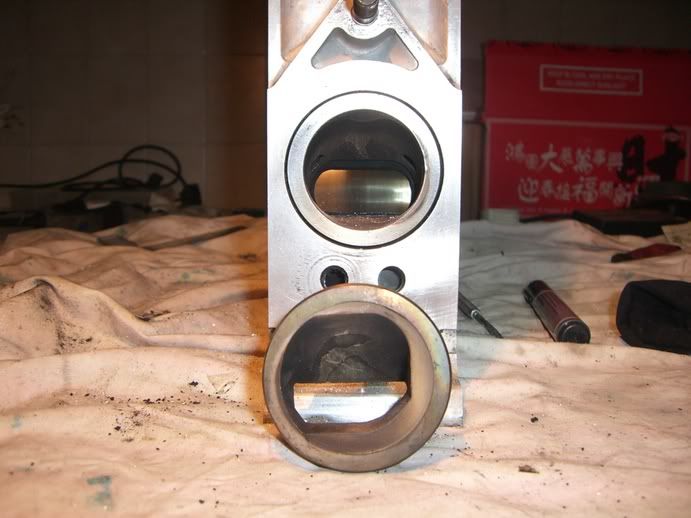
Upon cleaning the rotors we found one to be slightly damaged. Lucky for me we had a couple of good, low mile units around the house. Everything has been cleaned throughly as per bruce turrentine's (sp?) video.
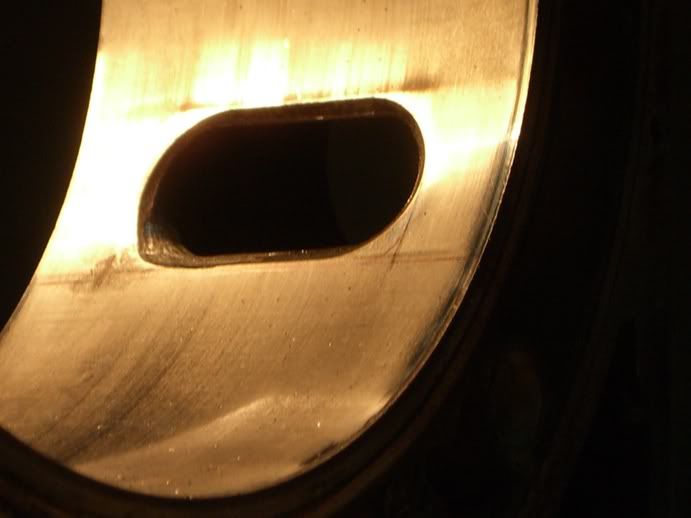
Whilst in there also decided to port down echaust ports on the rotor housings.
pics:
eccentric shaft and the good stuff to keep man going at this mad thing we call rebuilding!!

exhaust ports on rotor housing. notice markings made for port job
Difference between RE Cosmo Exhaust Sleeve and FD unit
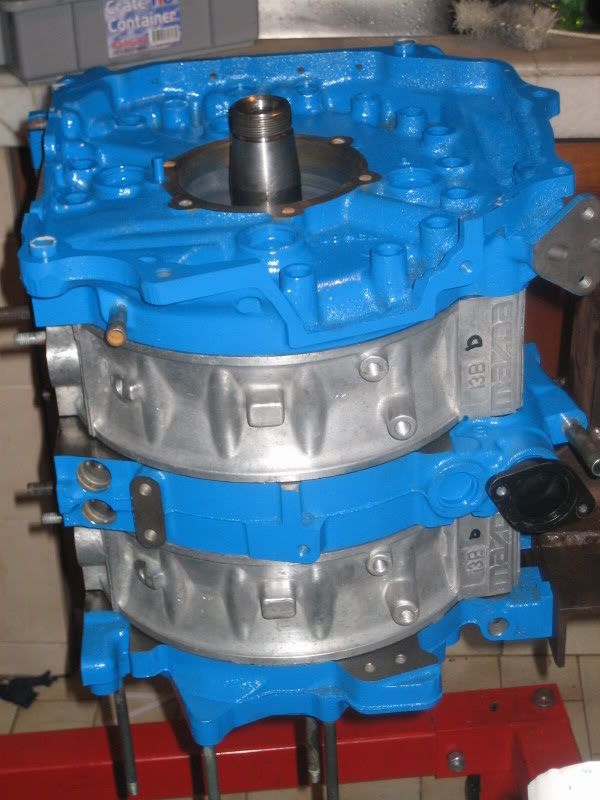
Cleaned rotors and Iron housings

Damaged rotor. Notice top left side.

Internal Parts cleaned and ready for installation

Again, should anyone require specific pictures whilst i'm under the hood please ask.
Upon cleaning the rotors we found one to be slightly damaged. Lucky for me we had a couple of good, low mile units around the house. Everything has been cleaned throughly as per bruce turrentine's (sp?) video.
Whilst in there also decided to port down echaust ports on the rotor housings.
pics:
eccentric shaft and the good stuff to keep man going at this mad thing we call rebuilding!!
exhaust ports on rotor housing. notice markings made for port job
Difference between RE Cosmo Exhaust Sleeve and FD unit
Cleaned rotors and Iron housings
Damaged rotor. Notice top left side.
Internal Parts cleaned and ready for installation
Again, should anyone require specific pictures whilst i'm under the hood please ask.
Mi Casa Yu Casa
Joined: Feb 2004
Posts: 215
Likes: 0
From: Japan Tokyo
Hope it goes back together as easy as it came apart. Good luck.
Driving a FD in Malaysia? Would be fun, you have some nice open highways there along with interesting lane splitting driving habits.
Driving a FD in Malaysia? Would be fun, you have some nice open highways there along with interesting lane splitting driving habits.
always modding
Joined: Mar 2005
Posts: 1,667
Likes: 3
From: on a tiny island in the middle of a sea
how is part availability in Malaysia?
I live in teh middle east and have no support..
always ordering from USA.... even for spark plugs...
good luck with the rebuild.. i'll be starting mine soon as well
I live in teh middle east and have no support..
always ordering from USA.... even for spark plugs...
good luck with the rebuild.. i'll be starting mine soon as well

Junior Member
Joined: May 2004
Posts: 40
Likes: 0
From: Malaysia
Originally Posted by chopstix
Driving a FD in Malaysia? Would be fun, you have some nice open highways there along with interesting lane splitting driving habits.
haha... you know it... not funny when you have to live with it daily, though...
Originally Posted by fd3s7007
joe13- where were you when the cleaning started!! lol
i was *conveniently* busy with work. heh heh... btw, you really should post the trying-to-get-flywheel-nut-off picture...

Thread Starter
Senior Member
Joined: Nov 2001
Posts: 567
Likes: 0
From: Malaysia
chopstix - driving the fd in Malaysia is super fun as the inefficient cops are always to lazy to bother when you do a 240kmh ++ run on the highway with other rotary cars in tow. lol
ottoman - we have plenty of parts considering the front clips arrive here from japan before being despatched to other countries.
joe- no comment.
ottoman - we have plenty of parts considering the front clips arrive here from japan before being despatched to other countries.
joe- no comment.


Damn, one day I would absolutely love to do what you guys are doing. Props. Kinda funny how you haev the engine stand in the kitchen  One question: how many miles on the engine when you pulled it?
One question: how many miles on the engine when you pulled it?