When you click on links to various merchants on this site and make a purchase, this can result in this site earning a commission. Affiliate programs and affiliations include, but are not limited to, the eBay Partner Network.
A while back I put 18X10 +43 wheels on my FD with 255's up front. The plan was to see how it all fit with the eventual goal of running 285's Hoosiers up front for autocross. The 255's I put on there run very wide and I already ran into some minor rub issues at the top of the wheel arch. Mostly on the front left fender during hard driving or big bumps. Camber is at -1.5 degrees all around and I will go with more before trying anything wider.
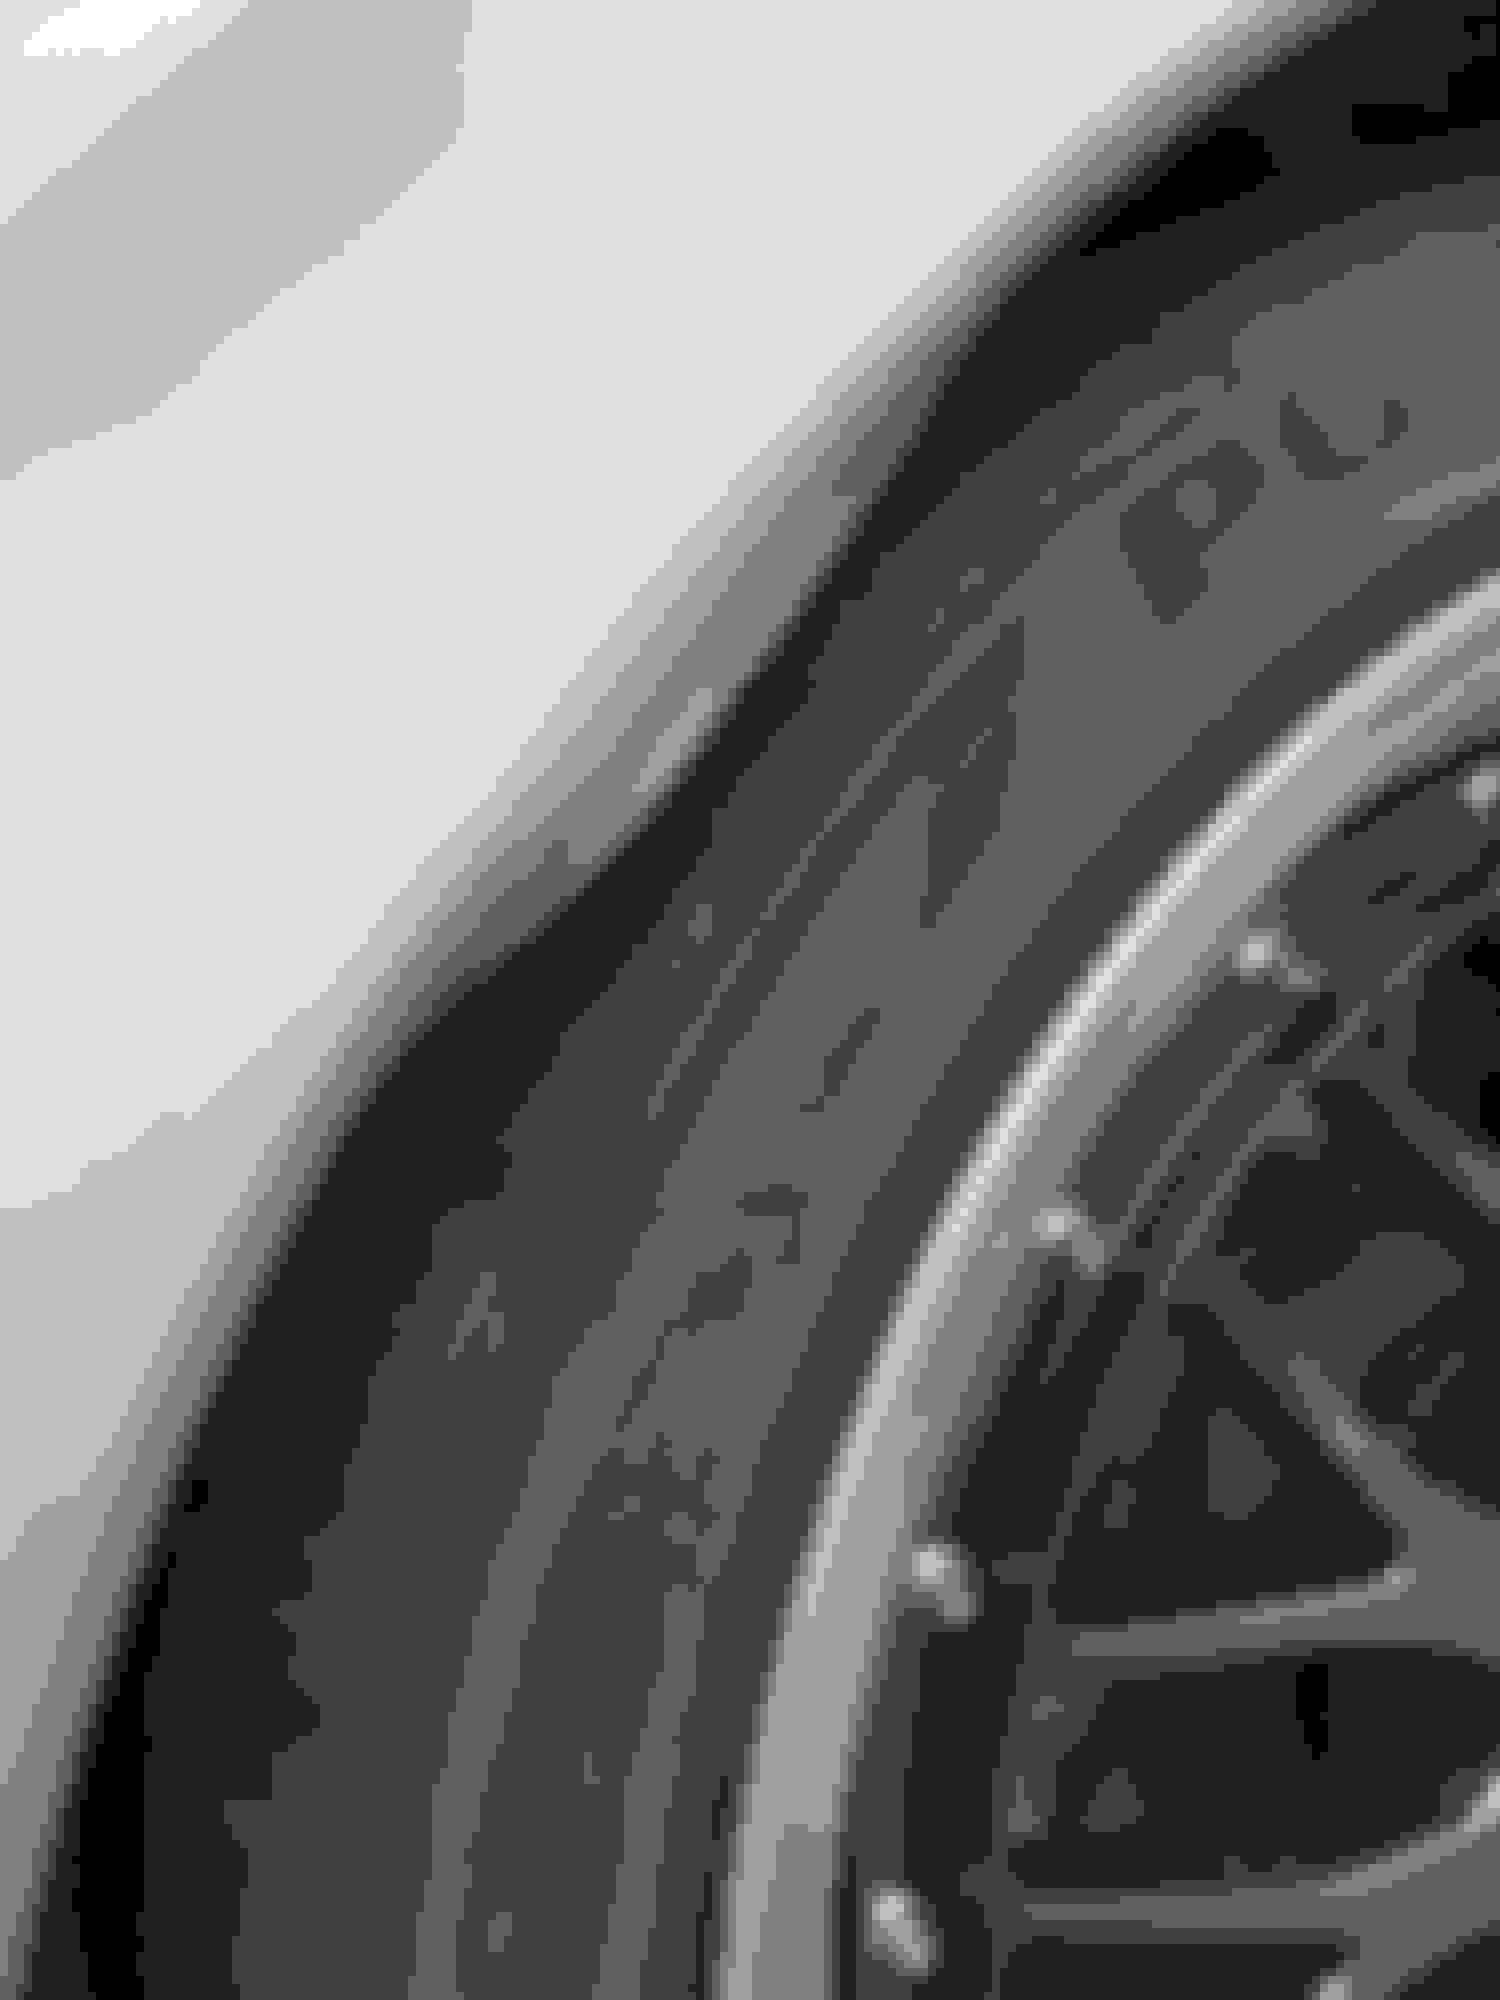
I decided to take my time with the Eastwood roller and HF heat gun. If things got too scary I would just stop and re-evaluate. I started with the left fender because it was rubbing the worst and there are already some minor paint blemishes & touch-ups on it. If I had to get it resprayed no big loss.
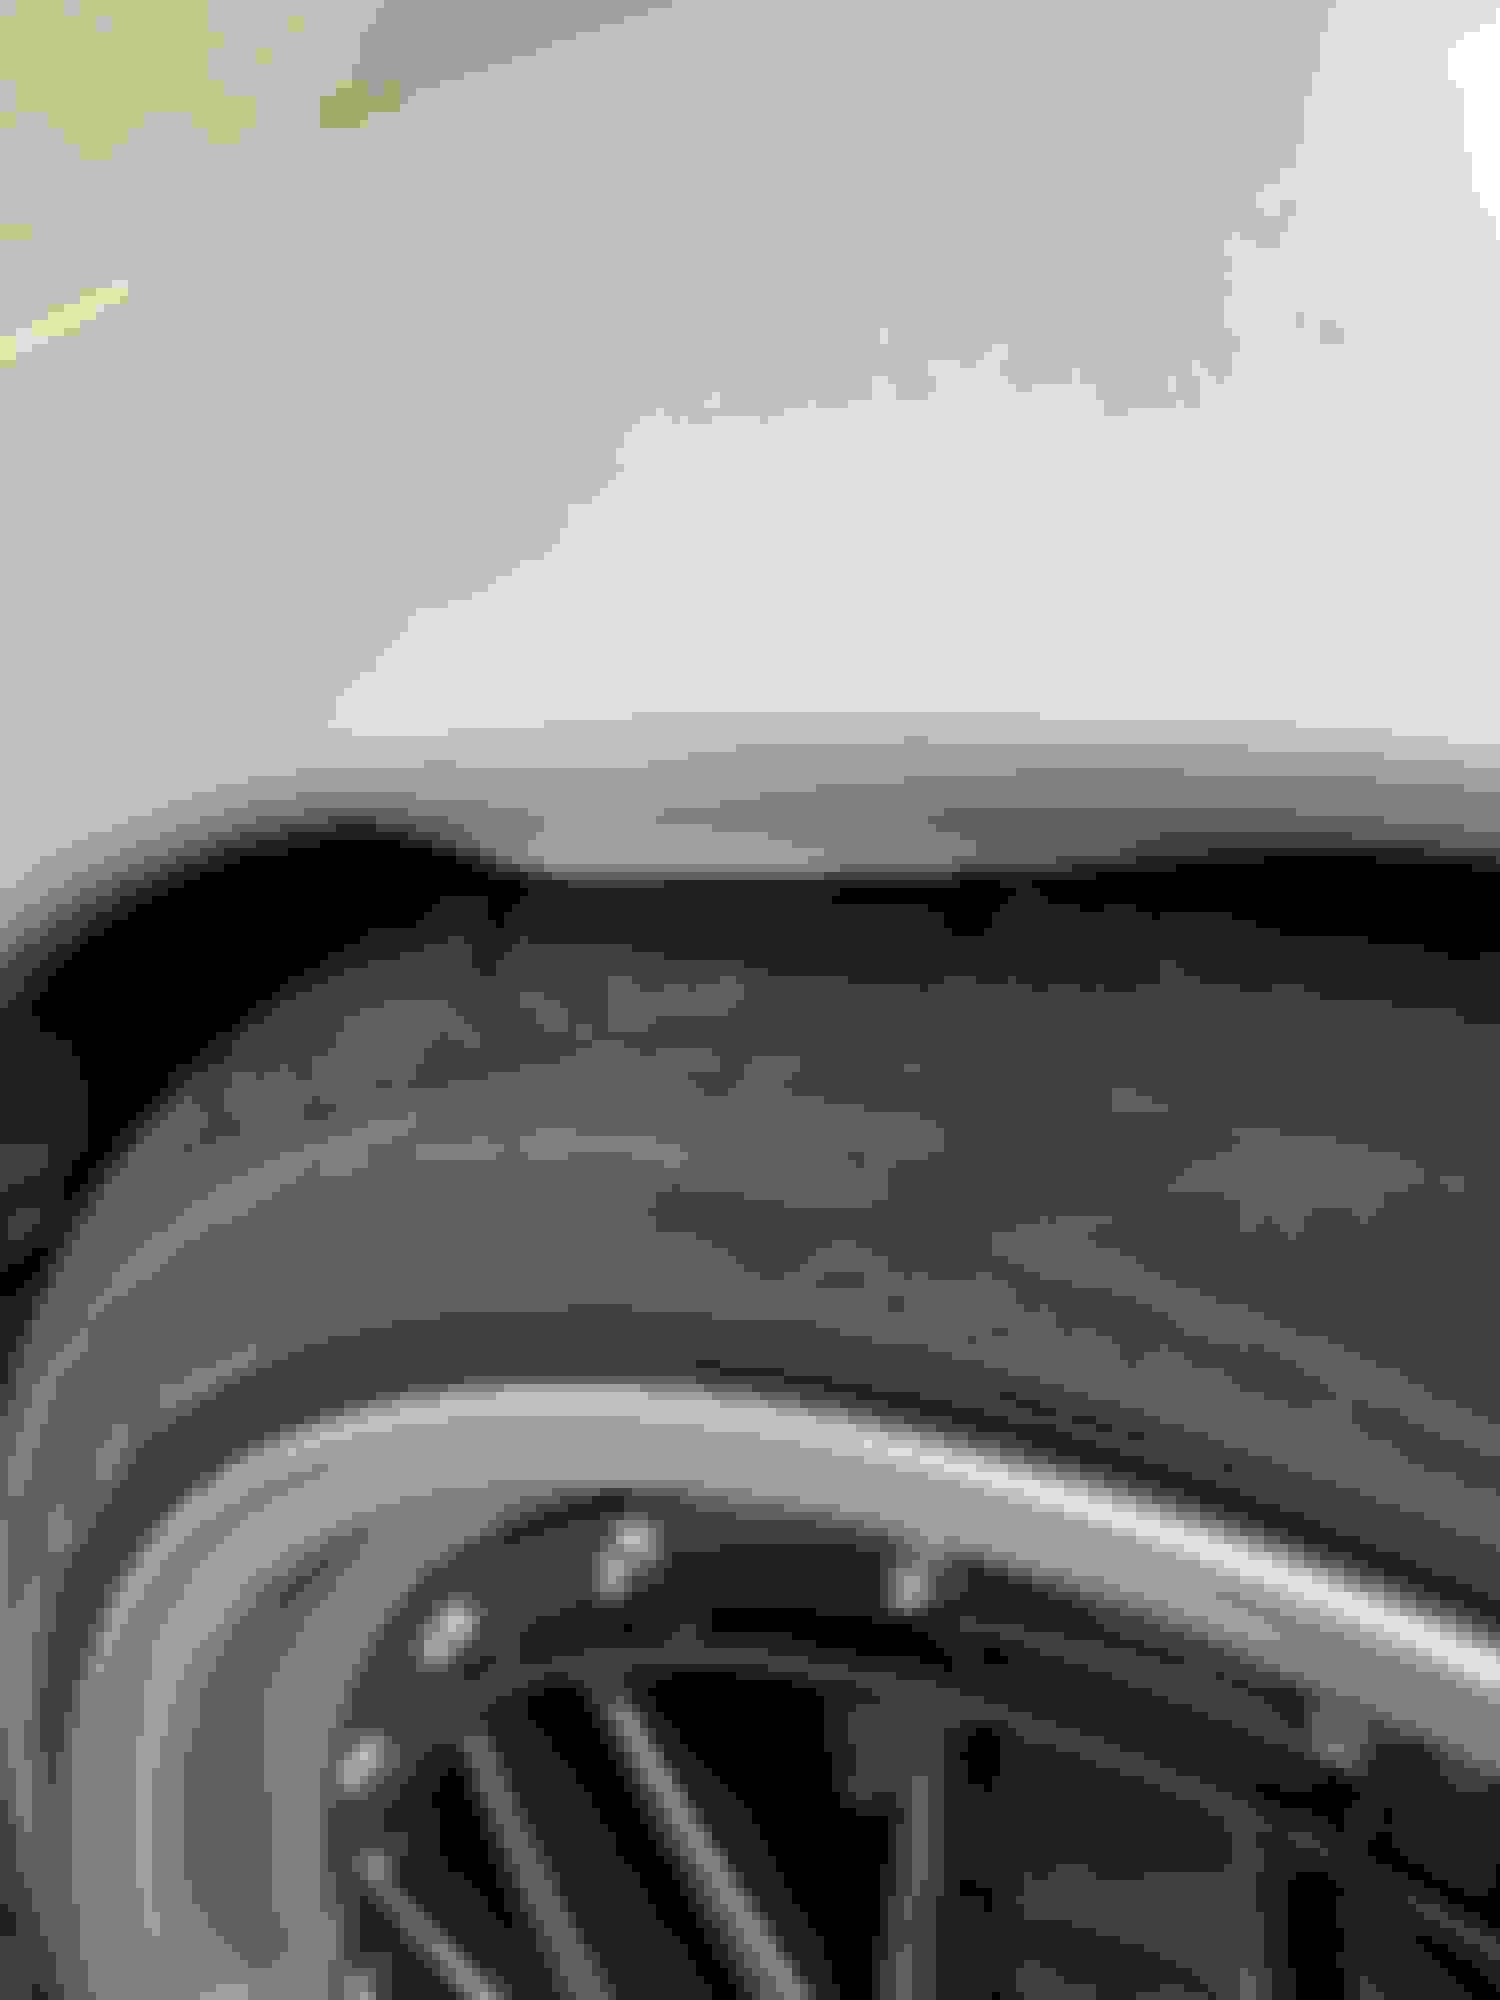
Started off rolling with the liner tabs still intact. Quickly realized why BlueTII recommended cutting these. They really prevent the lip from bending smoothly in that area. I came up with a solution to hold the fender liner up once the tabs were gone, taped off the area except the tab & cut line, and took them off.
Now that I was able to roll a bit more continuously, I placed a jack under the LCA to move the hub a little closer to the correct arc center. Still had to roll in ~3 sections, blending together between. I tried to keep the roller just a bit more angled than the surface it was rolling against.
The heat gun helped to a certain point, but the old paint eventually started to crack (it was almost like a tear from stretching it so much) at the very bottom of the bend radius - fortunately not visible from outside wheel well. Scoring it might be a good idea to keep the crack where you want it. Additionally, the fender roller could be used as a guide to help you make a straight score line.
I did not roll the lip totally flat - it started to resist further movement and I didn't want to start pipping paint off. From observing the liner gap after rolling it looks like it got a little pull as well. Should have measured before/after to see what I was really getting out of it.
To finish things off I used multiple coats of a good clear touch-up paint to seal the crack. The crack is not apparent unless you're in the wheel well.
Finally, to replace the tabs and keep the liner away from the tire I cut and drilled new tabs from some black Kydex sheet. I heated it with the gun and gave it a slight bend ~30* so that it slipped behind the newly formed lip. The hole center was marked with the tab held in place and a bit of pressure already on the liner. To mount the tabs I used some push-to expand body clips I had lying around and used the original holes in the liner. I added a 3rd top tab where there wasn't one before, which I wedged between the liner layers where they meet at the top and tucked behind the fender lip. The replacement tab idea is my main reason for sharing - some of you may be able to use this idea to keep your liners from rubbing.
I'm a little upset that the paint developed a crack despite the use of a heat gun.. but this is 25 year old, 155,000 mile, Mazda recall paint. Not that surprising. I may wait until summer to do the passenger fender so everything stays a little warmer and the chance of paint work is lower.
Nice! I rolled my fenders a while back, it doesn't take very aggressive fitment to have a tire catch on the lip. It also depends on the tire, some are fatter than others and will grab the lip no matter what.
It also looks like you have stock or stock-style suspension. The extra compliance in the stock suspension can move the wheel up farther than a coilover would. I know my stock shocks with Eibach springs would bottom out in the rear and rub the top of the fender well in the back on a bump in the road. After going to Tein coilovers I've never rubbed, even on the Dragon and leaning into the suspension hard.
It's pretty much a given the paint will crack at the very edge, even with heat. It's old paint and car body paint is more hard than flexible, it just doesn't want to bend.
Thanks! It's good to hear that I don't just suck at it I really tried to get a bunch of heat in the fender, but I suppose every material has it's limit.
I have eibachs and touring struts with new mounts and bump stops. Thinking about moving to Fortune Auto as they dyno their coilovers and are local to me. Or a used set of Ohlins if I can find them. Don't know much about Tein.
Thankful for alexdimen posting this as a resource, but pains me to have to use it. Looks like I have to roll my fenders which is something I wanted to avoid entirely. 225/40 RE-71R on an 18x8.5 +38 was conservative, they said...
Yep, that is where my tires grab as well. I had been running 255/40/17 then switched to 245s. 245s catch less.
Doesn't matter if you're running coilovers or stock type coilovers - aka shocks and springs.
Maybe if you're running stiffer than 500# springs which I never ran...
Hit a big enough woop on the road or catch a steep driveway and the tires always seem to catch on that spot...
Why didn't I think of this simple tab to keep the liner in place.
Thanks for the idea- I am totally going to give that a try!
I had a friend who has rolled many fenders do mine and we unscrewed the liners from the fenders and pushed them to the other side of the tabs then rolled the fenders. The tabs hold them in place.
My front fenders have too much "pull" so the liners can't reach the sheet metal.
I have thought about slotting the mounting holes on the liners on the inboard side so I could pivot them toward the outer fender edge and make them reach.
To fit 285/30/18 on the front, I found it necessary to remove the plastic molding and clearance the body work a bit as the tire was catching on the bodywork.
In addition there has been a bit of rubbing on the hard brake line.
Wheels are 18x10 + 45 ( 7.27 inches backspace ). There is a 6mm spacer as well ( now 7 inches backspace ) to deal with an issue with ForgeStar wheels having ridiculously wide centers on the back of the wheel. The spacer prevents the wheel contacting the bolts that attach the brake rotor.
One current project is to determine how to make 315/30/18 fit on the front. The hard brake lines will certainly have to be rerouted to avoid tire contact.
I have some junk 315/30/18 mounted on the same wheels, and the brake lines are an issue. I *think* they will only rub on the unloaded side during cornering.
What really needs to be done is put the car on stands under the wheels and turn fully left and right and see if and when there is an issue.
A while back I put 18X10 +43 wheels on my FD with 255's up front. The plan was to see how it all fit with the eventual goal of running 285's Hoosiers up front for autocross.
285 will likely require more than rolling the fender.
At least in my case the use of 285/30/18 on 18x12+45 wheels required removing the plastic guard on the rear side of the fender opening, as well as clearancing the body work work a bit.As I recall a hammer and dolly was used to bend the metal back a bit.
A current project is to determine how to put 315/30/18 on the front.
As the 285's occasionally rub the hard brake line, a little research will be in order to determine just when this is happening.
Rerouting the front brake lines inside the fender is probably going to be a requirement.
225/40 RE-71R on an 18x8.5 +38 was conservative, they said...
Owie. Should bend right back with some heat tho. That's exactly where mine caught at the first autocross on 255's. Driver side as well... passenger shows no signs of rubbing yet. I fixed it with a plastic screwdriver handle in grid cuz the paint was hot enough.
Those RE71Rs may provide more tread width than comparable tires of the same size... something to consider.
Originally Posted by GMO-RX7
I had a friend who has rolled many fenders do mine and we unscrewed the liners from the fenders and pushed them to the other side of the tabs then rolled the fenders. The tabs hold them in place.
I removed the screws and slid my liner behind the tabs before rolling because I was afraid the screw heads would catch the 255's. When I finally rolled the fender I brought the fender too far away from the liner to use the tabs or get the liner behind the lip.
Also, I don't see how you could get a good roll with the tabs still on the fender. I tried, but ultimately cut the tabs off flush. The tabs really resist any attempt to roll the lip in that area, resulting in an uneven roll.
Originally Posted by jkstill
285 will likely require more than rolling the fender.
At least in my case the use of 285/30/18 on 18x12+45 wheels required removing the plastic guard on the rear side of the fender opening, as well as clearancing the body work work a bit.As I recall a hammer and dolly was used to bend the metal back a bit.
A current project is to determine how to put 315/30/18 on the front.
As the 285's occasionally rub the hard brake line, a little research will be in order to determine just when this is happening.
Rerouting the front brake lines inside the fender is probably going to be a requirement.
Clearance front fender for 285/30/18
Hm. I thought 285/30/18 on +50 was supposed to be the ticket. With your 6mm spacers you're closer to +39 it sounds like. I'm +43. Are you doing road course?
The more I read the more it seems to me that fitting 285s up front is more of a dark art than a science. Some ppl seem to report no problems while others have to get busy in the wheel well with a hammer.
^^
I could be wrong, but I believe jkstill's car is more set-up for autox and thus has around 5 degrees of camber up front (vs ~ 3 deg for a track car?) and thus can/must operate with more positive wheel offset.
On a 25" tall tire I believe every 1 degree of camber is around 5.5mm more inward at the top of the tire from memory.
In addition, I believe he used offset bushings to shorten the upper a-arm which means the additional camber is gained by pivoting off the lower ball joint which sucks the top of the tire in a bit more than if you used offset bushings to lengthen the lower a-arm and were pushing off the upper balljoint to gain camber.
^^
I could be wrong, but I believe jkstill's car is more set-up for autox and thus has around 5 degrees of camber up front (vs ~ 3 deg for a track car?) and thus can/must operate with more positive wheel offset.
Front is at -3 degrees.
In addition, I believe he used offset bushings to shorten the upper a-arm which means the additional camber is gained by pivoting off the lower ball joint which sucks the top of the tire in a bit more than if you used offset bushings to lengthen the lower a-arm and were pushing off the upper balljoint to gain camber.
BLUE TII Quote:
In addition, I believe he used offset bushings to shorten the upper a-arm which means the additional camber is gained by pivoting off the lower ball joint which sucks the top of the tire in a bit more than if you used offset bushings to lengthen the lower a-arm and were pushing off the upper balljoint to gain camber.
jkstill
Correct, I do have offset bushings.
Sounds like jkstill has shorter upper a-arms via offset bushings and the lower arm sucked in "shorter" to closer to max positive camber range of adjustment to get back down to -3 deg camber.
So, net a narrower track width than stock- hence needs more wheel offset.


 I really tried to get a bunch of heat in the fender, but I suppose every material has it's limit.