
POR-15'd my 7


Just so we're clear, I never said it would "break down". I said it would "blush"...or fade. IMHO, it's not suitable for anything where cosmetics is a concern. Great for stuff like old iron master cylinders, battery boxes etc. I would consider it for cross members too, but just not seeing the purpose for the entire bottom of the car.
Por 15 will not break down from UV light, however it will fade. They make a paint that will go over it without all that sanding and grinding. I have used this product in a restoration and very pleased with it. Under the car where the sun cannot get at it, i would not paint over it, as the POR 15 gives off a very shiny look. It is quite hard and will protect the metal.
Right from their website "POR-15� is sensitive to UV light (sun) and must be topcoated for prolonged exposure to sunlight. "
And really most people know under the car is fine. I was talking about the fender wells as well as the engine bay. Car shows = hood up for long period of time.
I used it on a few spots on a trailer and never top coated it to see what it would do and well after a few months ( I think almost a year) I had to grind the trailer back down, reapply and then I bedlined the trailer.
I Love Cookies!
Joined: Jan 2007
Posts: 223
Likes: 0
From: E. Montpelier, VT
correct..por15 will not break down, but fade. You can solve this by also topcoating with clearcoat. The clear has the uv blockers. In this case its all hidden anyways, wheelwells and the bottom. If you want to topcoat por15, you have to spray over it when it is almost dry(still leaves a finger print when you touch it). I have sprayed basecoat -clearcoat over it, and also just clear. Even if you just leave it por15 with no topcoat, as long as i doesnt get direct light its good to go. If it dries and you later decide to topcoat, the por company sells a special etching primer. You just lightly sand(not as easy as it sounds) up the cured por15 spray on the etch primer then topcoat. This stuff is pretty amazing....but spraying it, or sanding it is definately a work out!!
I'm familiar with POR-15 from working on my antique car, it's great stuff. But I don't get the advantage of stripping the black undercoating and sound deadener and re-applying black POR-15. Did you have some rust issues to begin with?
I did not strip the sound deadener/undercoating... I cleaned it and applied over it. Nice shiny black and new.
I did not strip the sound deadener/undercoating... I cleaned it and applied over it. Nice shiny black and new.
I'm priming the car this week with DuPont ChromaSurfacer� 7704S which can have flex agent added for the shine kit I'm putting on. It's a urethane based primer (opposed to epoxy based). I have to see if I can use either over POR-15
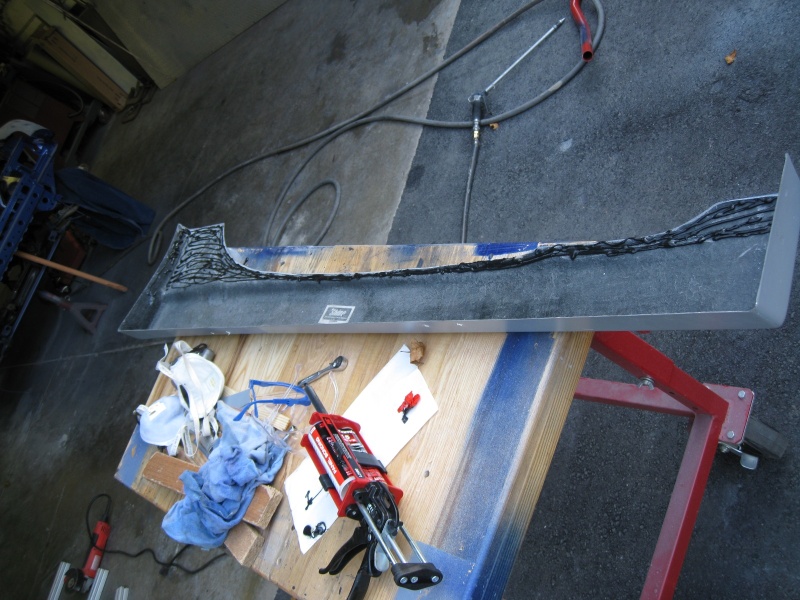
Put on the rear fenders flares (ShineAuto Burnout) with some 3M 8115 panel bond. Good stuff. 90 mins of work time. Just goop on the inside anywhere there's contact and I did some extra around the outside edges since I'll be molding/blending this all in. You can run your finger over it to smooth it out. Wipes off your hands pretty easily.
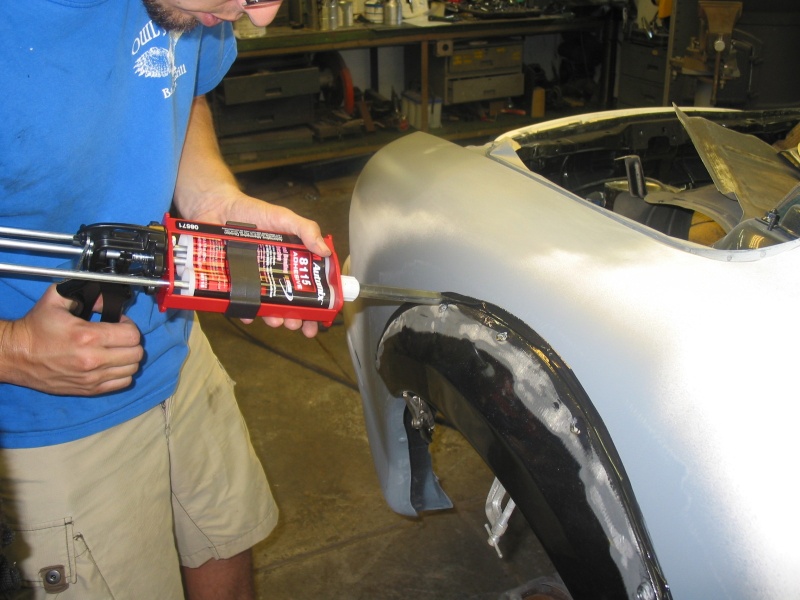

Also made some simple supports for the bottom of the skirts to give it a bit of rigity. Nothing too exciting


Other than a some sanding of some small items and a little bit of priming... that's it for today! I have to wait 24 hours for that panel bond to setup.
Also made some simple supports for the bottom of the skirts to give it a bit of rigity. Nothing too exciting
Other than a some sanding of some small items and a little bit of priming... that's it for today! I have to wait 24 hours for that panel bond to setup.

My Dad has been doing painting for 25+ years out of his garage. He the reason I dare try doing this on my own.
7-17-08
I never really posted an update here, so I'll do so now. I spend all summer trying to get this done 1 Sunday at a time. Busy schedule kept from getting to the car. But here goes...
Doing the rear flares


Doing the rear flares
7-27-08
Hand sanding

First coat primer/filler

Burnout Front Bumber from ShineAutoProject


This **** pisses me off, brand new and there's a crack right where the bumper goes under the fender. It's going have to be completely re-glassed.
There where plenty of other pits that have to be filled to on this bumper. There's going to be a lot of prep time here.
The crack, essentially its an air pocket during the manufacturing process. Just bad luck I guess.

1st round of handsanding... I was black head to toe when I finished. It still needs more work, but this was enough for the day.

First coat primer/filler
Burnout Front Bumber from ShineAutoProject
This **** pisses me off, brand new and there's a crack right where the bumper goes under the fender. It's going have to be completely re-glassed.
There where plenty of other pits that have to be filled to on this bumper. There's going to be a lot of prep time here.
The crack, essentially its an air pocket during the manufacturing process. Just bad luck I guess.
1st round of handsanding... I was black head to toe when I finished. It still needs more work, but this was enough for the day.


8-16-08
The hood's 1st coat of primer

Front Bumper 4th coat primer... might sill have some spot putting to do. Surface prep on FRP is FTL.

Sun roof 1st coat of primer

We lost count how man coats of bondo and primer to get the rear fender flares this far. I think its good to go now :thumbsup

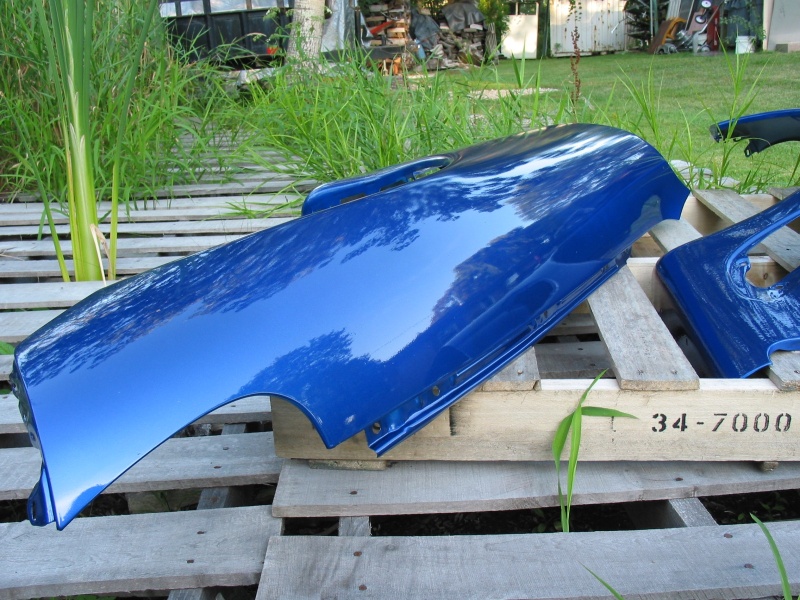
We decided to use the OEM fenders for testing paint color. This is the Lotus' Magnetic Blue (B100) using a single stage paint for testing only. We'l' be spraying a base coat/clear cost for final.


I didnt get a chance to spray the other fender, but tomorrow we will spray the other fender down with the Lexus' Ultrasonic Blue (8U1)
We shut it it down for the day... ***Garage *******


Front Bumper 4th coat primer... might sill have some spot putting to do. Surface prep on FRP is FTL.
Sun roof 1st coat of primer
We lost count how man coats of bondo and primer to get the rear fender flares this far. I think its good to go now :thumbsup
We decided to use the OEM fenders for testing paint color. This is the Lotus' Magnetic Blue (B100) using a single stage paint for testing only. We'l' be spraying a base coat/clear cost for final.
I didnt get a chance to spray the other fender, but tomorrow we will spray the other fender down with the Lexus' Ultrasonic Blue (8U1)
We shut it it down for the day... ***Garage *******
around 8-19-08
Preping the rear hatch, I had a blast taking it off the car by myself. :alcoholic


Other test fender in Ultrasonic Blue Mica (8U1)
This one might look a little flat... we ran didn't quite have enough paint to cover an entire fender

Left: Magnetic Blue (B100) - Right: Ultrasonic Blue Mica (8U1)
Look for a slight purplish pearl in the Ultrasonic Blue Mica

Bottom: Magnetic Blue (B100) - Top: Ultrasonic Blue Mica (8U1)

Left: Ultrasonic Blue Mica (8U1) - Right: Magnetic Blue (B100)

Almost like splitting hairs between these two.
The Magnetic blue is much more metallic. Lots of silver'ish flake.
Other test fender in Ultrasonic Blue Mica (8U1)
This one might look a little flat... we ran didn't quite have enough paint to cover an entire fender
Left: Magnetic Blue (B100) - Right: Ultrasonic Blue Mica (8U1)
Look for a slight purplish pearl in the Ultrasonic Blue Mica
Bottom: Magnetic Blue (B100) - Top: Ultrasonic Blue Mica (8U1)
Left: Ultrasonic Blue Mica (8U1) - Right: Magnetic Blue (B100)
Almost like splitting hairs between these two.
The Magnetic blue is much more metallic. Lots of silver'ish flake.
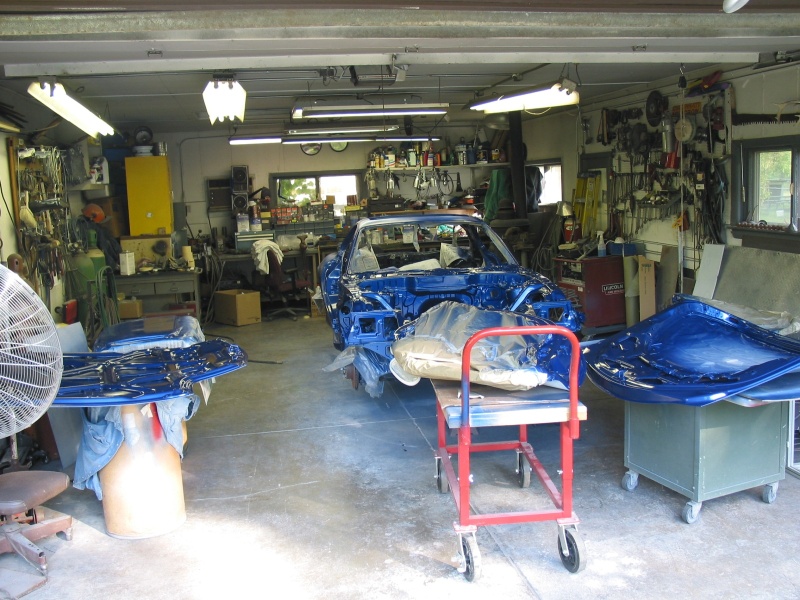
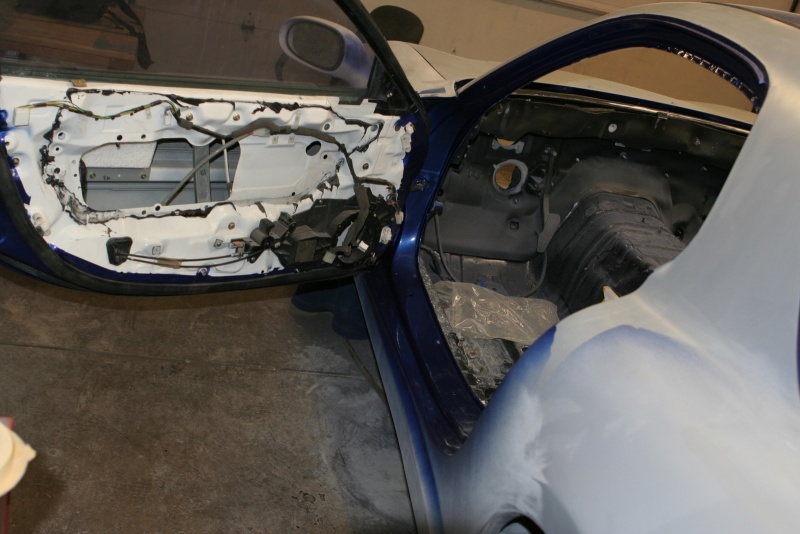
PAINT DAY! Door jams / engine bay / undersides 09-08-08
Slideshow of all pics from today
2005 Lotus Elise Magnetic Blue Metallic (B100). Martin-Senour Tec/BASE


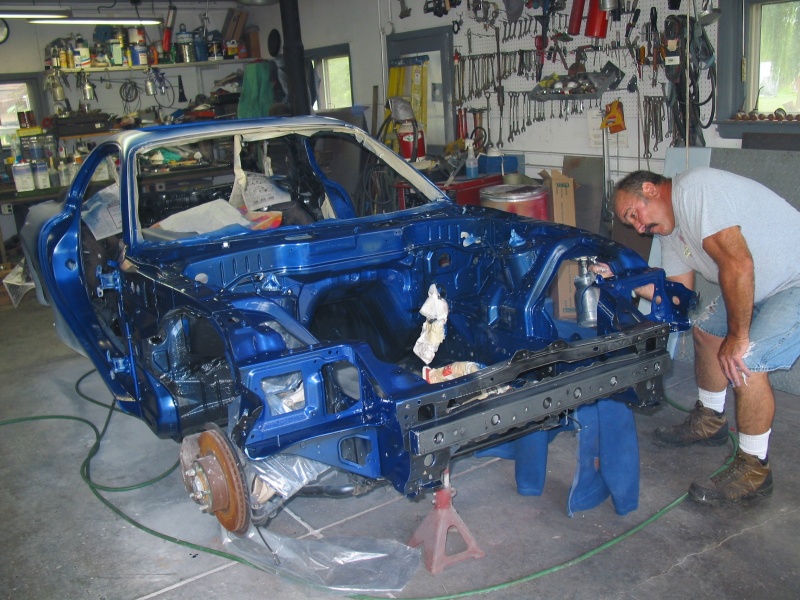
We lightly scuffed down the POR15 and color/cleared the entire engine bay.

Just base coat (no clear yet)


We were just doing door jams and what not, but I couldn't resist putting down a light coat over the fender to see how it looked.

Engine bay base and clear coated

It's got some shine to it.

Done for the day
2005 Lotus Elise Magnetic Blue Metallic (B100). Martin-Senour Tec/BASE
We lightly scuffed down the POR15 and color/cleared the entire engine bay.
Just base coat (no clear yet)
We were just doing door jams and what not, but I couldn't resist putting down a light coat over the fender to see how it looked.
Engine bay base and clear coated
It's got some shine to it.
Done for the day
9-29-08
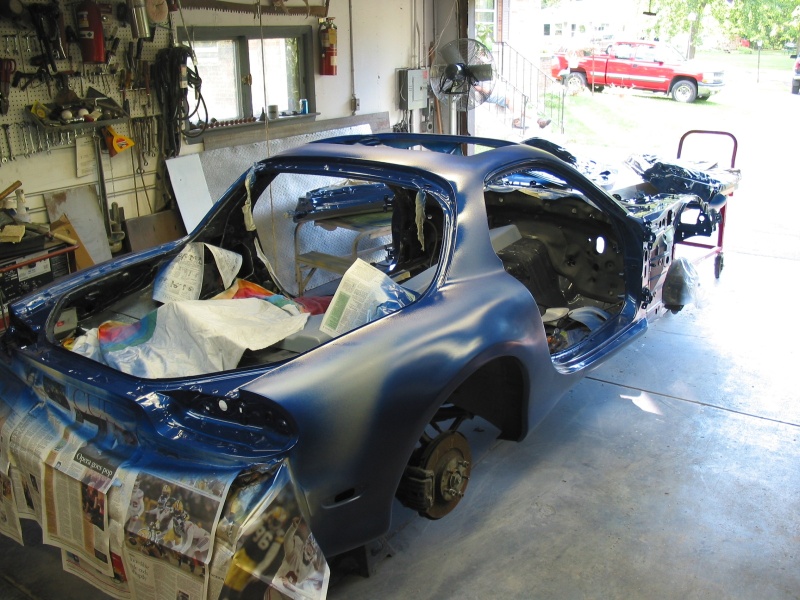
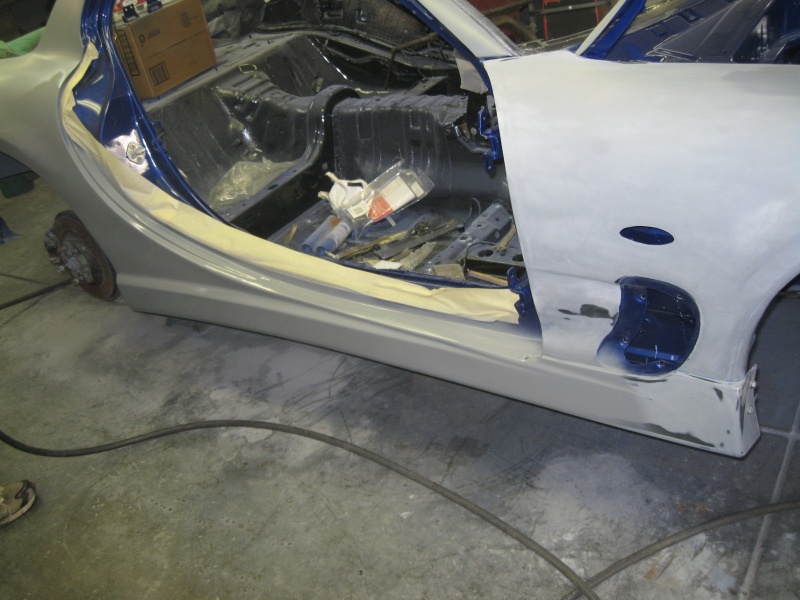
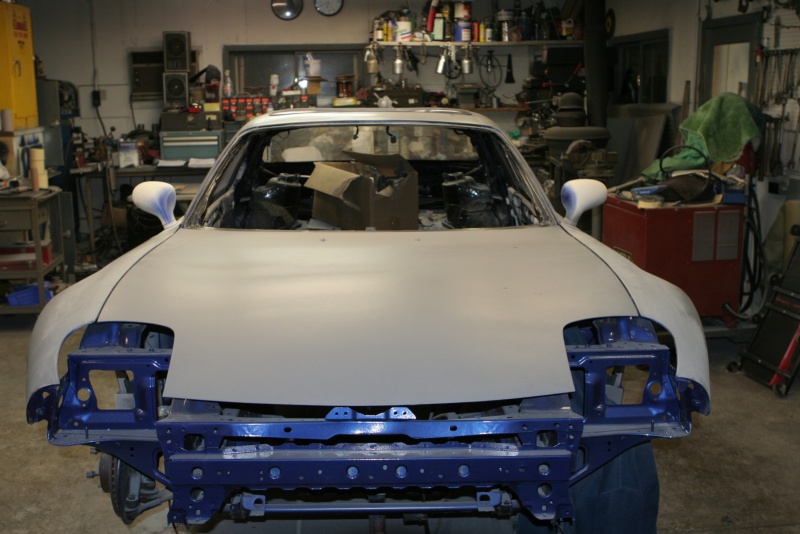
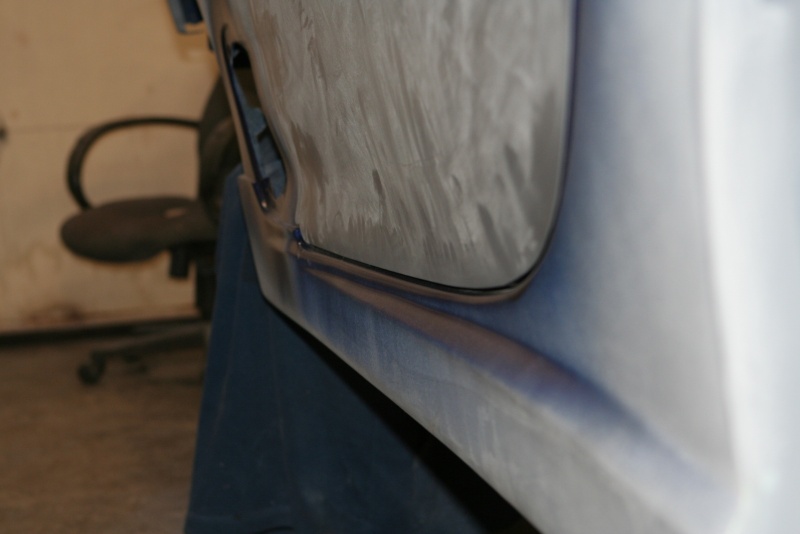
The fenders and hood are on and aligned. Sanded off the "overspray" from the doing the door jams, sunroof area, trunk, etc. Quick hit of primer again and some sanding...
The next big headache is getting these fiberglass skirts on in a way that doesn't look glued or bolted on and more OEM and part of the car. The first issue we ran into is that the skirts come with a lip that sits in the door jam. This is just a recipe for the doors grinding between the bottom of the door and the top of the skirt. Paint would be scrapping off in no time.
We cut the entire lip off and we'll be blending it in to the door's edge with fiberglass/bondo

Lip gone here:
Please disregard the overspray :goof

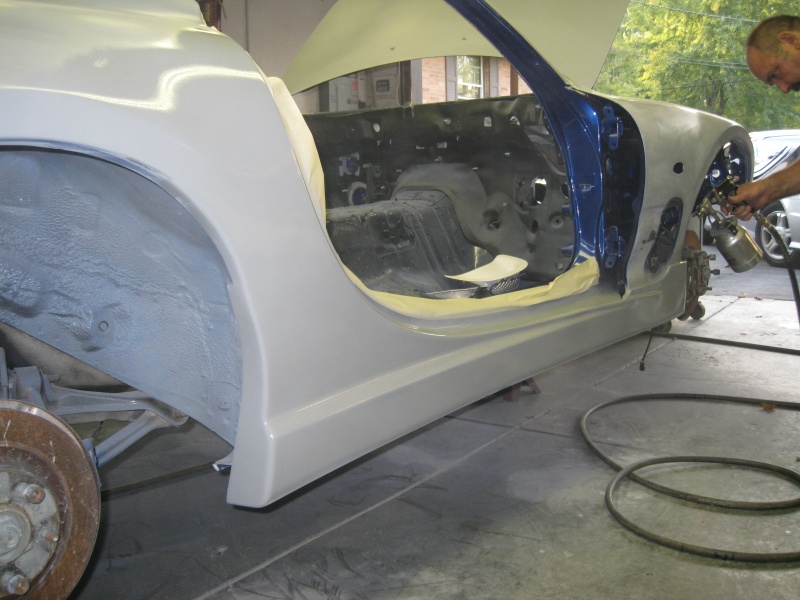
Panel bond was applied the the flat area that touches car body. We did some extra grinding to smooth out some areas

We marked off where the skirt goes before applying the 3M panel bond (same stuff I used on the fender flares) to the backside of the skirt


Could only do one side... ran out of clamps
Last shot.... I like how the white looks against the blue... The car kinda begs for some white stripes or something. We'll see what happens when I get that far.

The next big headache is getting these fiberglass skirts on in a way that doesn't look glued or bolted on and more OEM and part of the car. The first issue we ran into is that the skirts come with a lip that sits in the door jam. This is just a recipe for the doors grinding between the bottom of the door and the top of the skirt. Paint would be scrapping off in no time.
We cut the entire lip off and we'll be blending it in to the door's edge with fiberglass/bondo
Lip gone here:
Please disregard the overspray :goof
Panel bond was applied the the flat area that touches car body. We did some extra grinding to smooth out some areas
We marked off where the skirt goes before applying the 3M panel bond (same stuff I used on the fender flares) to the backside of the skirt
Could only do one side... ran out of clamps
Last shot.... I like how the white looks against the blue... The car kinda begs for some white stripes or something. We'll see what happens when I get that far.
driver side skirt
3M 8115 panel bond on the driver side skirt. Door jam lip is completely cut off. It would rub on the door.


Lots of clamps to secure it while it dries.


Passenger side skirt blended in. A coat of primer to finish it off.
So a little bit of blending on the driver side and the body work is done!
Lots of clamps to secure it while it dries.
Passenger side skirt blended in. A coat of primer to finish it off.
So a little bit of blending on the driver side and the body work is done!


awesome thread... im about to por 15 my engine bay this weekend... but correct me if im wrong, but for best results isnt it suppose to be applied on bare metal?
how is it holding up over your existing paint?
how is it holding up over your existing paint?
This is great.
I think the documents say that it's bes on rust, but I'd imagine it's better on bare metal rather than on painted one. It's UV sensitive. I tested it on a rusted metal/bare metal and baked it under the sun for a few days and it broke down. It faded, broke down and peeled off.
WHAT IS THE BEST SURFACE ON WHICH TO PAINT POR-15?
POR-15 likes rusted surfaces best. Seasoned metal and sandblasted metal are also good. POR-15 does not adhere well to smooth, shiny surfaces, but will adhere well to those surfaces with the proper preparation.
por-15.com
They're in NJ.
I like the Silver one. it has metal fillers
Looks great but I'll never understand someone's reasoning for molding in sideskirts. I mean I know it looks good, but if you ever have to remove the front fenders or if you bump the skirt on something it's a lot more work to re-do all that paint and bondo than just replacing a single panel.
This is great.
I think the documents say that it's bes on rust, but I'd imagine it's better on bare metal rather than on painted one. It's UV sensitive. I tested it on a rusted metal/bare metal and baked it under the sun for a few days and it broke down. It faded, broke down and peeled off.
WHAT IS THE BEST SURFACE ON WHICH TO PAINT POR-15?
POR-15 likes rusted surfaces best. Seasoned metal and sandblasted metal are also good. POR-15 does not adhere well to smooth, shiny surfaces, but will adhere well to those surfaces with the proper preparation.
por-15.com
They're in NJ.
I like the Silver one. it has metal fillers
I think the documents say that it's bes on rust, but I'd imagine it's better on bare metal rather than on painted one. It's UV sensitive. I tested it on a rusted metal/bare metal and baked it under the sun for a few days and it broke down. It faded, broke down and peeled off.
WHAT IS THE BEST SURFACE ON WHICH TO PAINT POR-15?
POR-15 likes rusted surfaces best. Seasoned metal and sandblasted metal are also good. POR-15 does not adhere well to smooth, shiny surfaces, but will adhere well to those surfaces with the proper preparation.
por-15.com
They're in NJ.
I like the Silver one. it has metal fillers
i know theyre in nj, picked it up at their facility last wednesday!
ps- anyone have a recomendation on what kind of abrasive to use for sand blasting the engine bay down to bare metal?

Looks great but I'll never understand someone's reasoning for molding in sideskirts. I mean I know it looks good, but if you ever have to remove the front fenders or if you bump the skirt on something it's a lot more work to re-do all that paint and bondo than just replacing a single panel.
