Pettit launch kit install
 01-13-09, 11:41 PM
#1
OG
Thread Starter
Join Date: Mar 2001
Location: St.Louis
Posts: 307
Likes: 0
Received 0 Likes
on
0 Posts
Pettit launch kit install
I got around to installing the rest of it today while sick at home. Here are the pics, went very smooth. People where saying I had to drop the whole rear end to install the Diff mounts but I diid not have to. Was able to just unbolt it and remove it and install the fresh mounts. Very easy. But after 157k mils it needed some new parts.
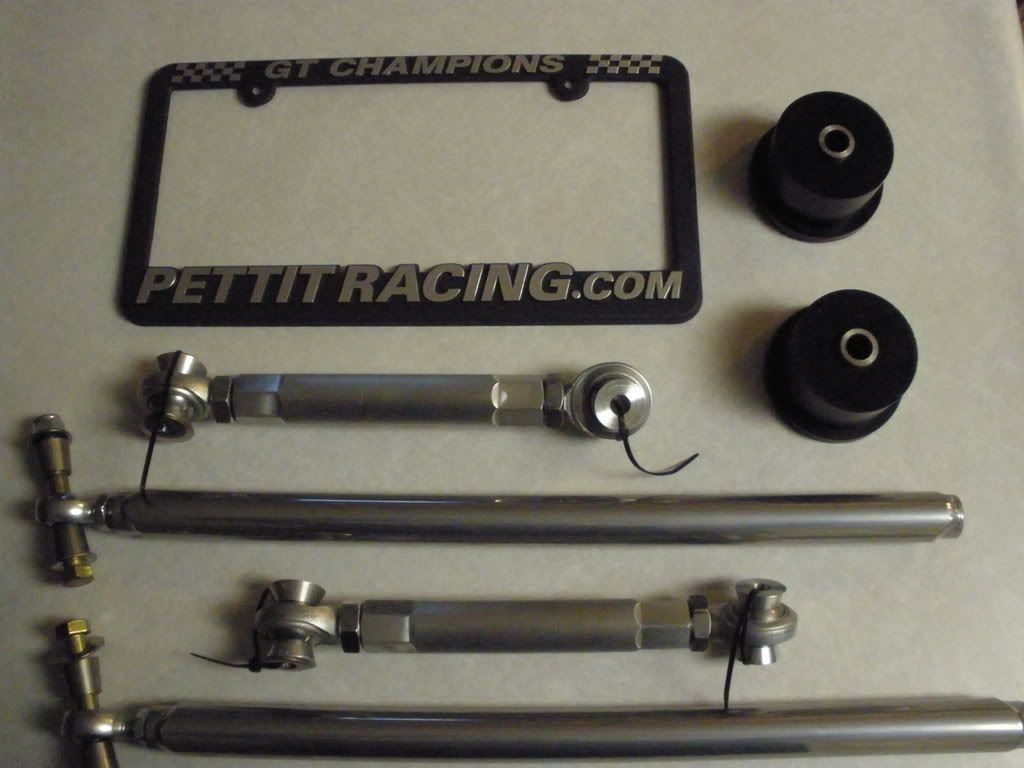
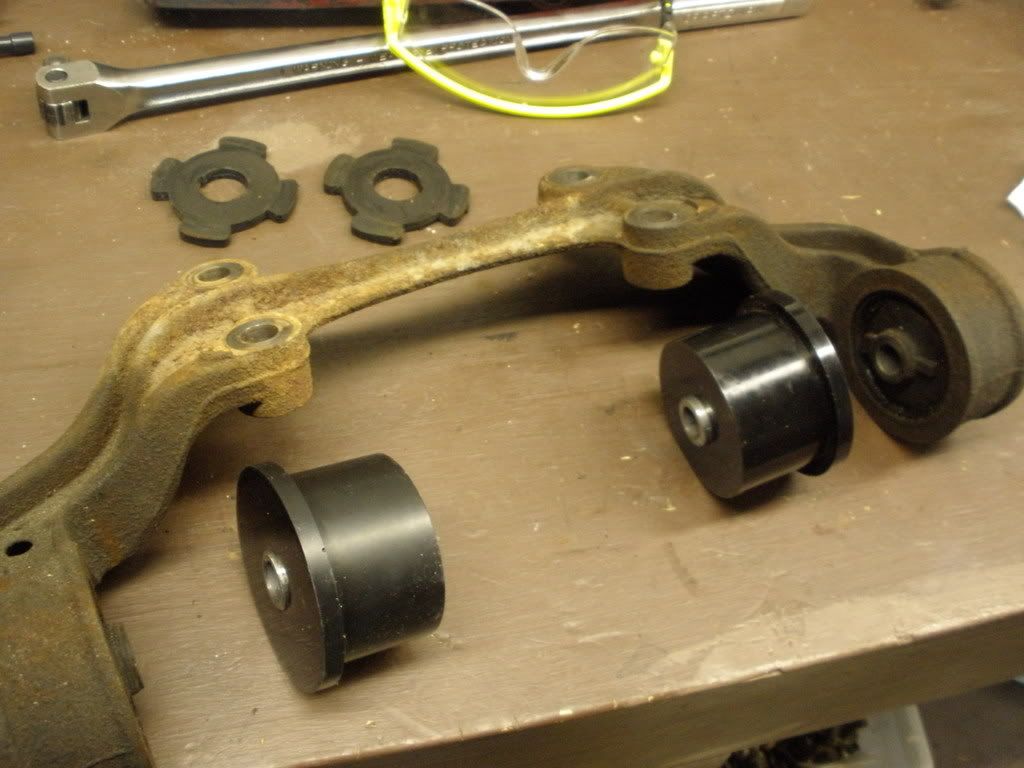
lower control arm
endlnks
LCA installed
Endlink installed
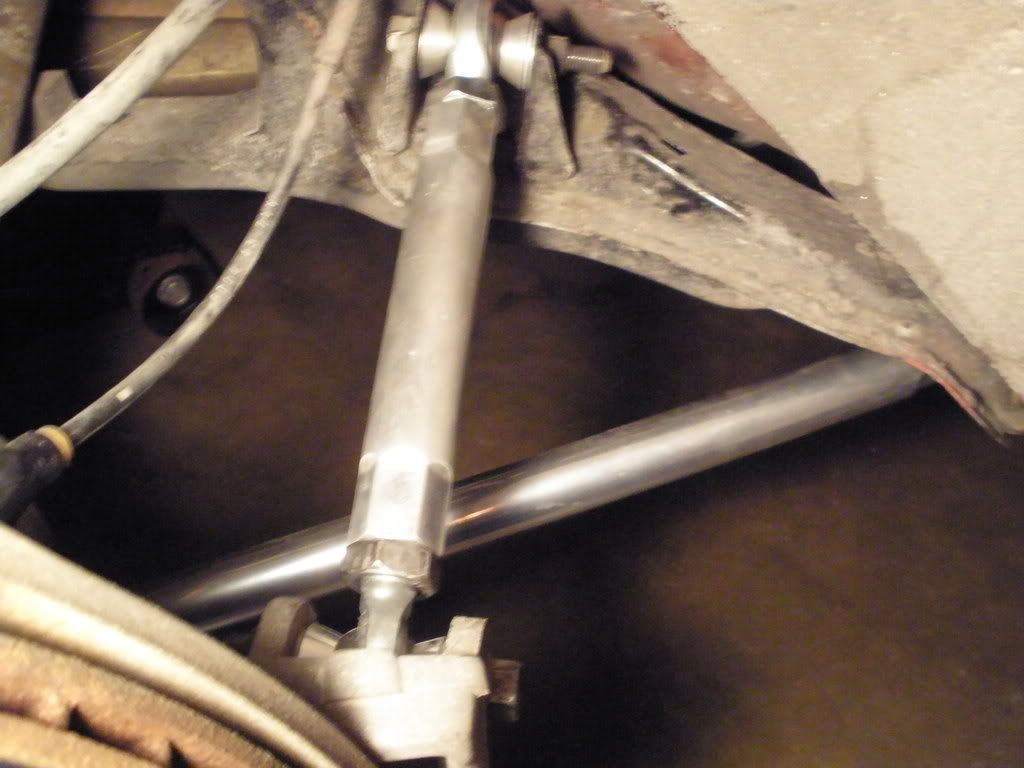
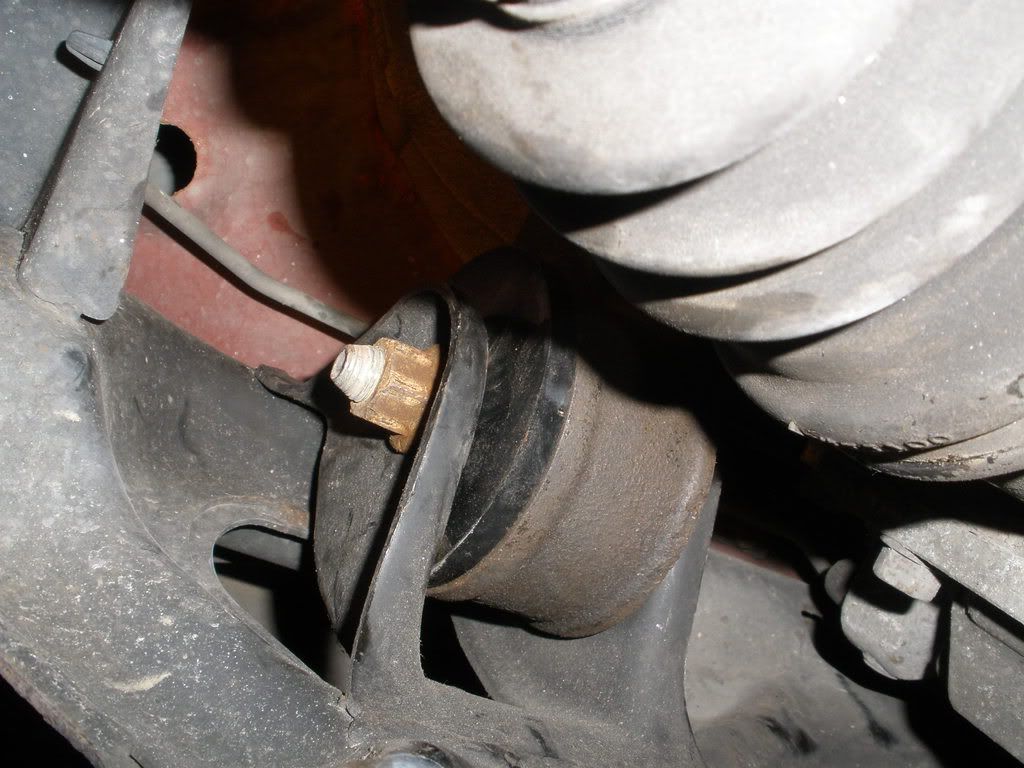
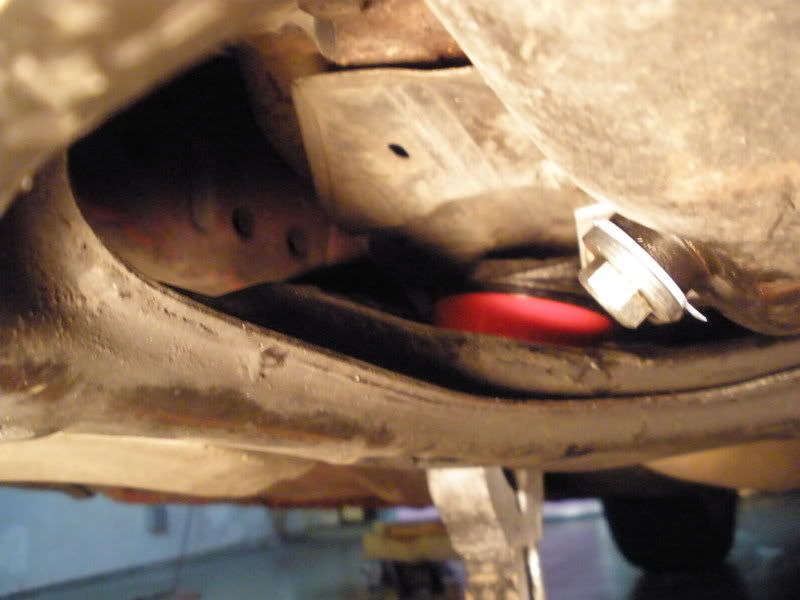
rear diff mount
Blown out liquid peice's of crap
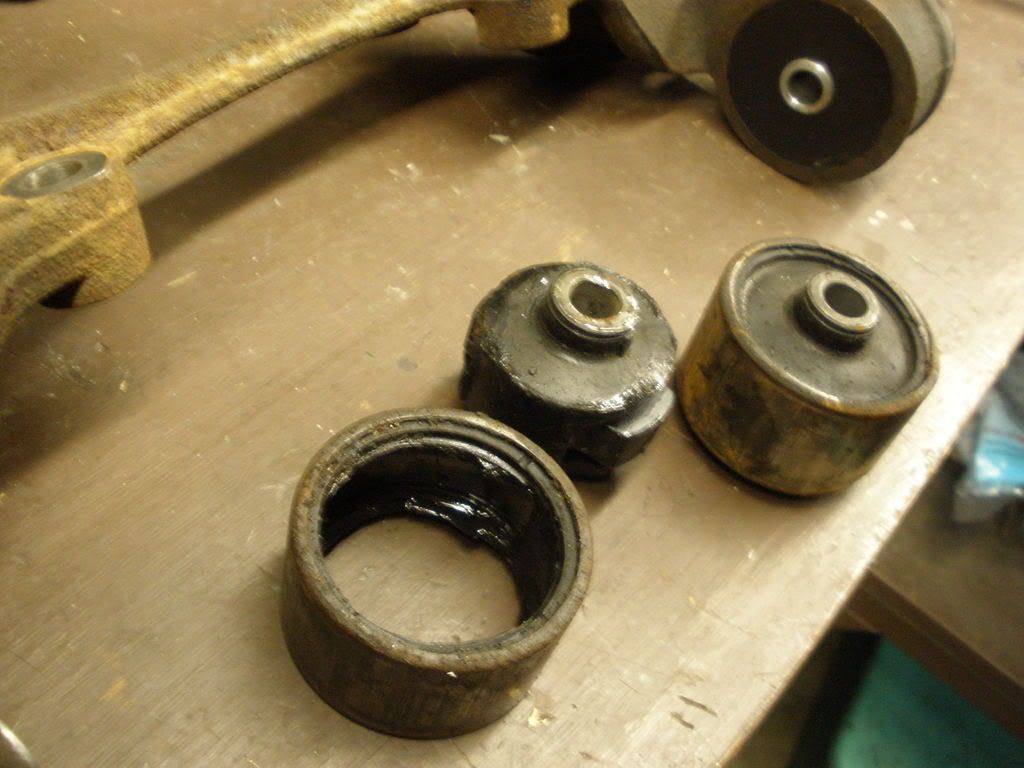
News ones installed
Cars has a little more road noise but I can live with it, just got a few more bushings to go. Going for 11's tihs year with her. Best last year was a few
lower control arm
endlnks
LCA installed
Endlink installed
rear diff mount
Blown out liquid peice's of crap
News ones installed
Cars has a little more road noise but I can live with it, just got a few more bushings to go. Going for 11's tihs year with her. Best last year was a few
 01-13-09, 11:55 PM
#2

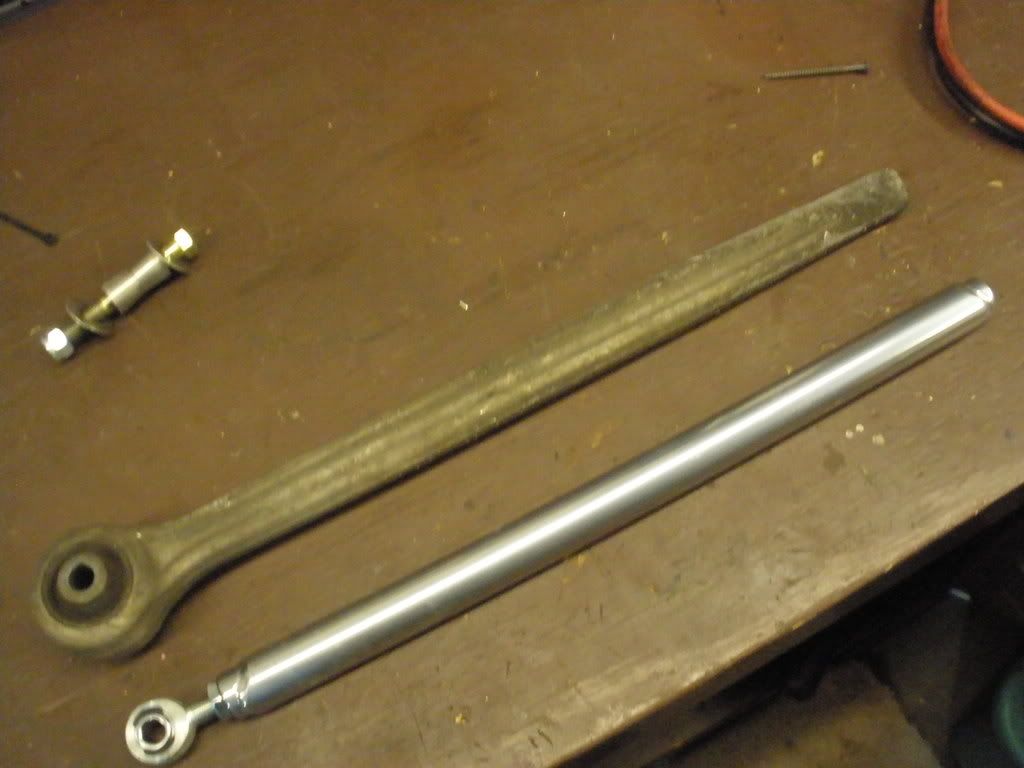
Nice work. I just did mine and also snuck the diff cradle out by just lowering the diff. Your stock diff bushings must've been frozen in there pretty good. What you call the "LCA" is actually the trailing arms. I went with different parts though, Mazdaspeed trailing arm bushings, Superpro diff and toe link bushings, and brand new pillow *****. Also have a Banzai diff brace.
Do you have any kind of diff support? I'd be worried about breaking the ppf or diff getting into 11s. Have you checked out your pillowballs also? Those wear frequently and cause noise and probably toe-in/toe-out.
Do you have any kind of diff support? I'd be worried about breaking the ppf or diff getting into 11s. Have you checked out your pillowballs also? Those wear frequently and cause noise and probably toe-in/toe-out.
Trending Topics
01-14-09, 11:30 AM
#9
OG
Thread Starter
Join Date: Mar 2001
Location: St.Louis
Posts: 307
Likes: 0
Received 0 Likes
on
0 Posts
01-14-09, 02:45 PM
#10
given i was using a 15 ton press, when i pushed on them they were kinda spongey and felt like the were flexing/bending rather then poping out.. i stopped after that getting worried if i was doing it correctly... is that how they start off? or should it be a solid push through out?
01-14-09, 04:40 PM
#12
OG
Thread Starter
Join Date: Mar 2001
Location: St.Louis
Posts: 307
Likes: 0
Received 0 Likes
on
0 Posts
given i was using a 15 ton press, when i pushed on them they were kinda spongey and felt like the were flexing/bending rather then poping out.. i stopped after that getting worried if i was doing it correctly... is that how they start off? or should it be a solid push through out?
It came with the kit, I guess I need to do a license plat instal thread

 01-14-09, 06:14 PM
#14
OG
Thread Starter
Join Date: Mar 2001
Location: St.Louis
Posts: 307
Likes: 0
Received 0 Likes
on
0 Posts
Feels better I actually felt the car lift the front end today when I got on it for a secound, it use to just squat. Shifting between grears feels better to. I still have clunking noises but thats form the Control arm bushins I need to replace next. I installed the endlinks and trailing arms last weekend before the dif bushins and I noticed the rear end did not swing out as much in corners. My car has 157k so it needs some tlc ing the suspension dept.
01-14-09, 06:40 PM
#16
I don't believe you need to tear apart the old diff bushings to get them out. If you use the right size socket or press tool, then you can take the entire bushings out of the cradle in one piece. Most are frozen pretty good inside after all the years of abuse. Try soaking the bushings in PB blaster, maybe some may seep between the cradle bore and the bushings and they may come out easier. Most likely, you're going to have to "pop" them out since they are stuck in there, then they will come out easy. Just like a bolt that's stuck on.
01-14-09, 07:19 PM
#18
Senior Member
Join Date: Nov 2006
Location: Dallas TX
Posts: 731
Likes: 0
Received 0 Likes
on
0 Posts
I put the new bushings in the freezer the night before, they pressed in easily, no binding, no problem.
01-14-09, 10:32 PM
#20
OG
Thread Starter
Join Date: Mar 2001
Location: St.Louis
Posts: 307
Likes: 0
Received 0 Likes
on
0 Posts
wow man it's not that hard. They where random sizes, the important part was they where all the same height. I used them as "stilts" to give the old bushing room to slid out. Kinda riged the whole setup.
You might also want to update your profile so we know where you live. If you where in STL I'd press them out for you.
You might also want to update your profile so we know where you live. If you where in STL I'd press them out for you.
02-22-09, 02:03 PM
#21
OG
Thread Starter
Join Date: Mar 2001
Location: St.Louis
Posts: 307
Likes: 0
Received 0 Likes
on
0 Posts
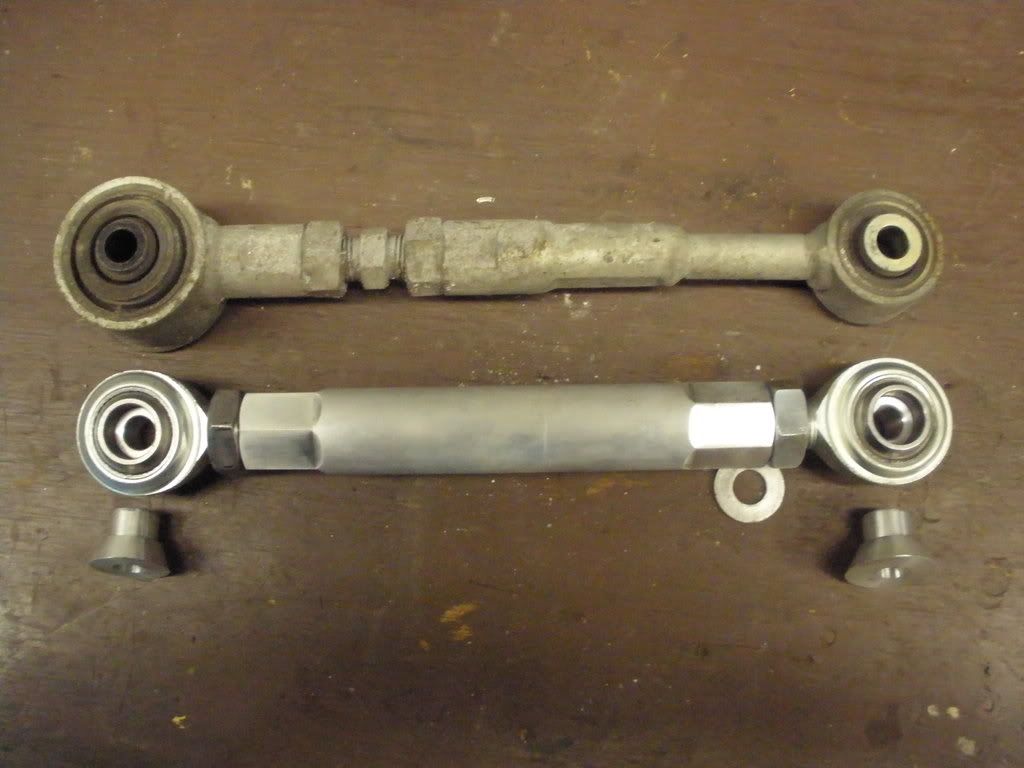
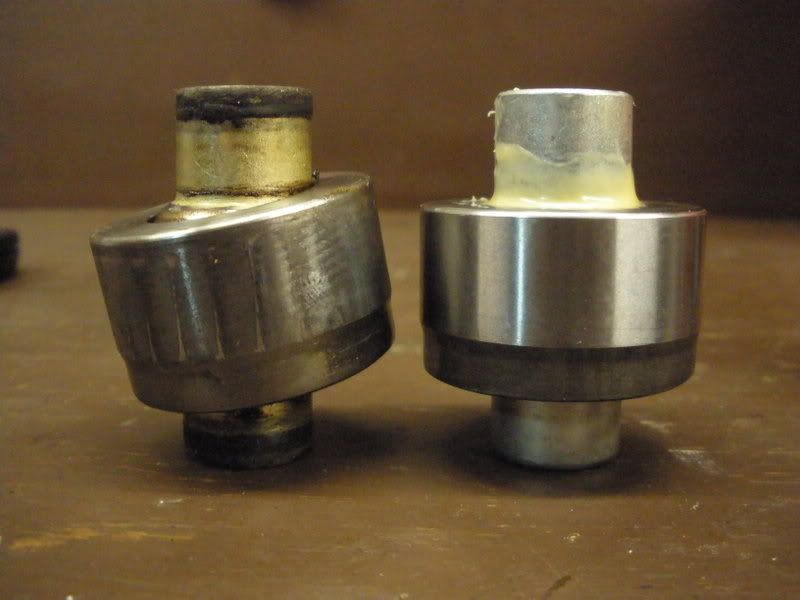
So about a month ago I added the launch hit to help with some of the bushings and toe links in my 160K FD, This did not stop my mayjor clunking noises but did help the feel of the car. This week I added six new pillow ***** to the rearend. Theses ******* are expensive, $62 a pop at cost ($100 retail). They fixed all my noise problems from taking off to slowing down. Here are a few pic's of the destroyed pillow *****. Lets just say I got about 70k more miles out of these then most people do.
I installed them in about three hours in the garage.
3 new/3 old
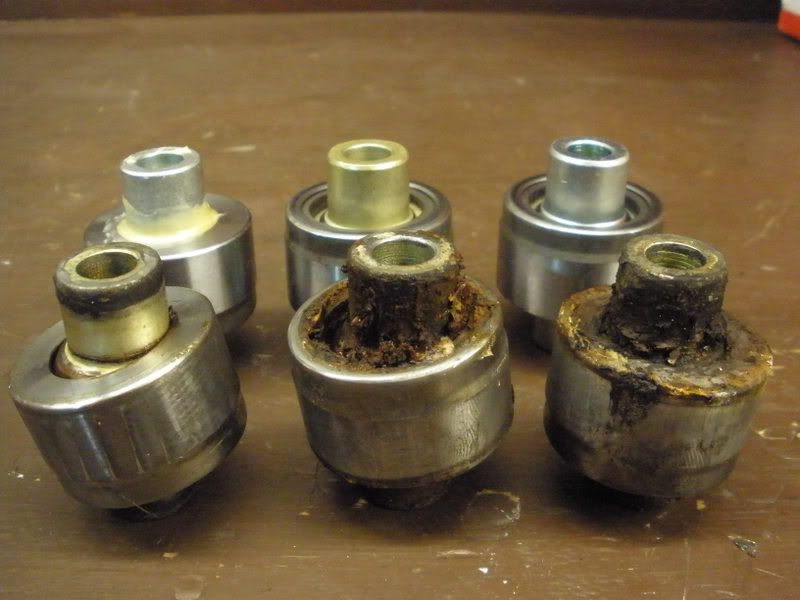
1 new/ 1 old
Next week poly motor mounts :happyguns
I installed them in about three hours in the garage.
3 new/3 old
1 new/ 1 old
Next week poly motor mounts :happyguns
02-27-09, 01:37 PM
#23
OG
Thread Starter
Join Date: Mar 2001
Location: St.Louis
Posts: 307
Likes: 0
Received 0 Likes
on
0 Posts
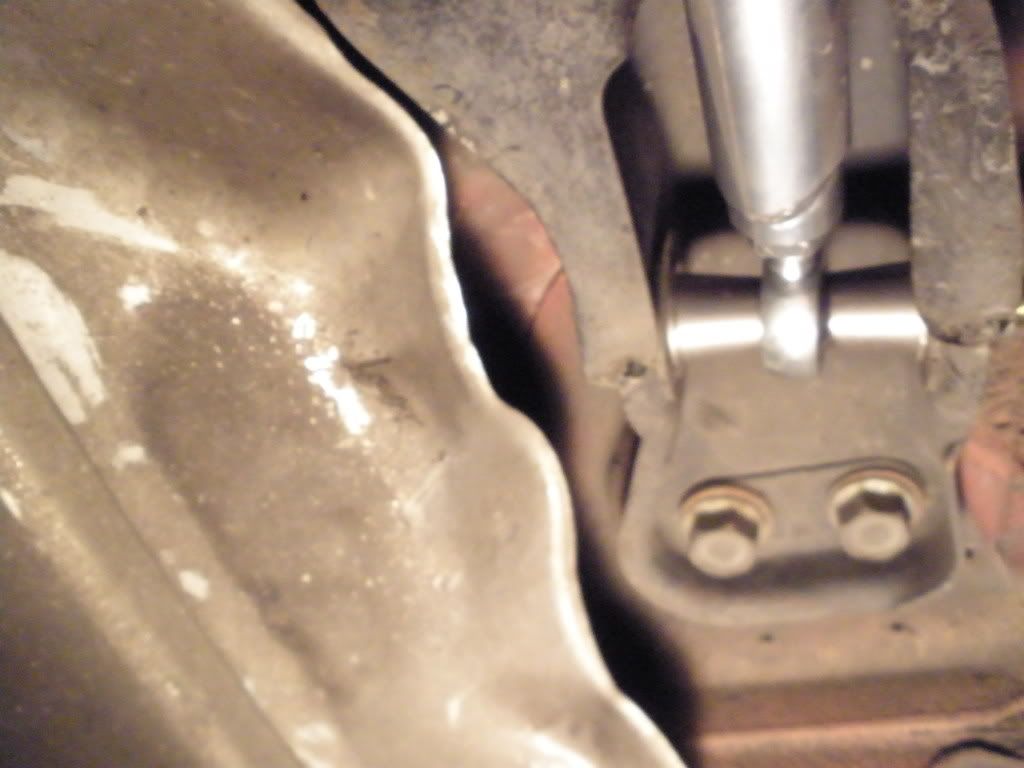
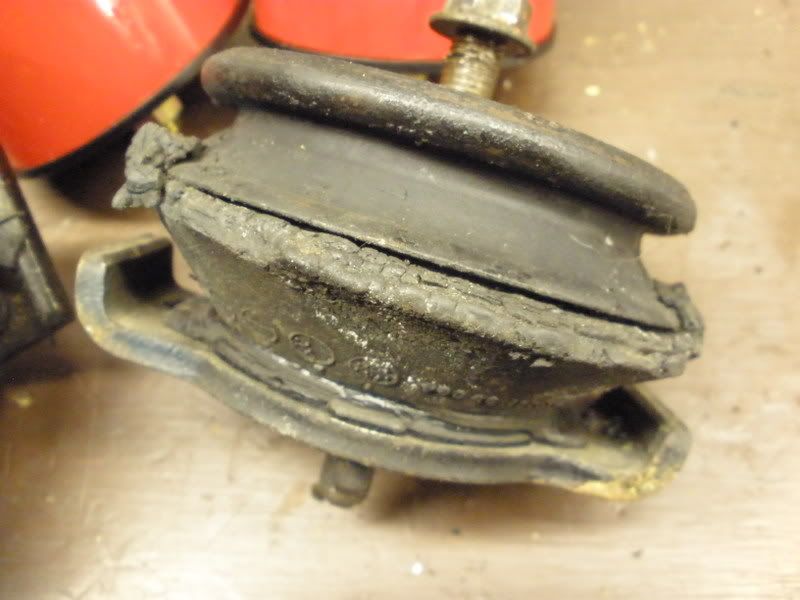
So I installed the Motor mounts last night. The car feel ALOT better. And I think I got about two inches of slop back to a nice shifting car. I hope this helps the third gear shifts, it felt like it did.
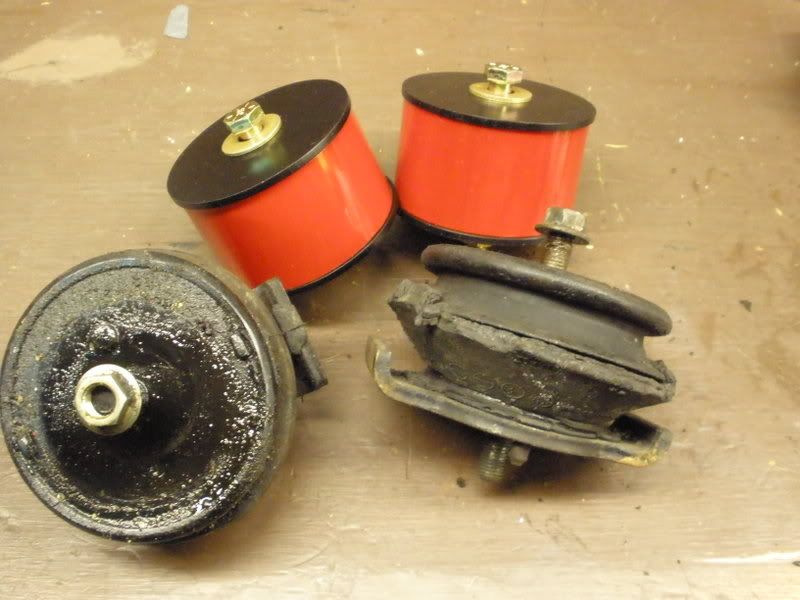

not much to look at on the car
I have alot more vibration with these but it's a good trade off for the better shifting. I'll see how they feel aftr a few thousand miles.
Thanks to Banzi Racing for getting these to me in three days. Great service.
not much to look at on the car
I have alot more vibration with these but it's a good trade off for the better shifting. I'll see how they feel aftr a few thousand miles.
Thanks to Banzi Racing for getting these to me in three days. Great service.
02-27-09, 04:47 PM
#25
F'n Newbie...
iTrader: (6)
I can't wait for mine to get in. The other week I ordered Engine Mounts from Banzai, and the Launch kit from RP.
I received the Launch kit a day or two ago, and am now just waiting on the engine mounts (big thanks to the Military Postal Service for the delay!! lol)
Your old mount was BEAT!!!
I received the Launch kit a day or two ago, and am now just waiting on the engine mounts (big thanks to the Military Postal Service for the delay!! lol)
Your old mount was BEAT!!!