Norwegian FD project.. lots of pics.


Thread Starter
Senior Member
Joined: Nov 2006
Posts: 567
Likes: 0
From: Norway
I was thinking of a 2 piece front end, but the plans change as I go...

Will make moldes of the front end and the rear when I got it painted..
So I will probably make the rear a snap off too..
Thread Starter
Senior Member
Joined: Nov 2006
Posts: 567
Likes: 0
From: Norway
Lol, u are right..
Yes it`s a power steering rack, but I will run a AtomicRex rack..
Just not got it yet, waiting for the new suspension arms up front to be developed.
Then I will get alot of parts form UK.
Supesnion arms in front, and rear, rack and the coilovers in the rear...


Thread Starter
Senior Member
Joined: Nov 2006
Posts: 567
Likes: 0
From: Norway
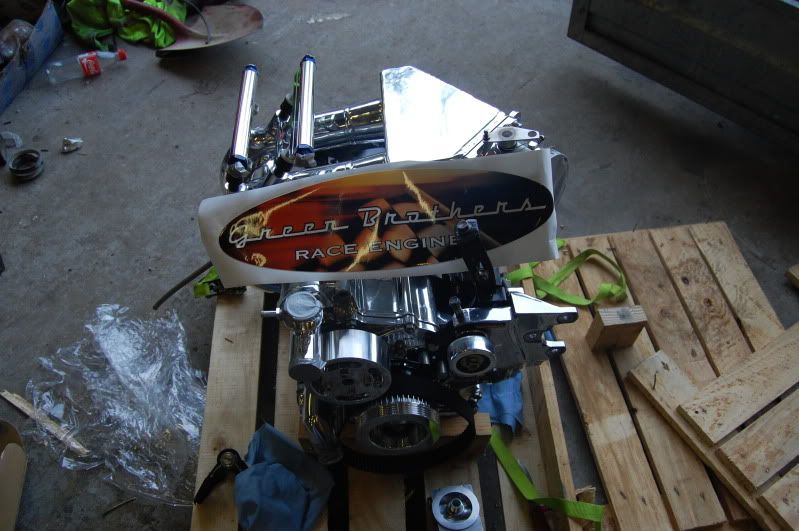
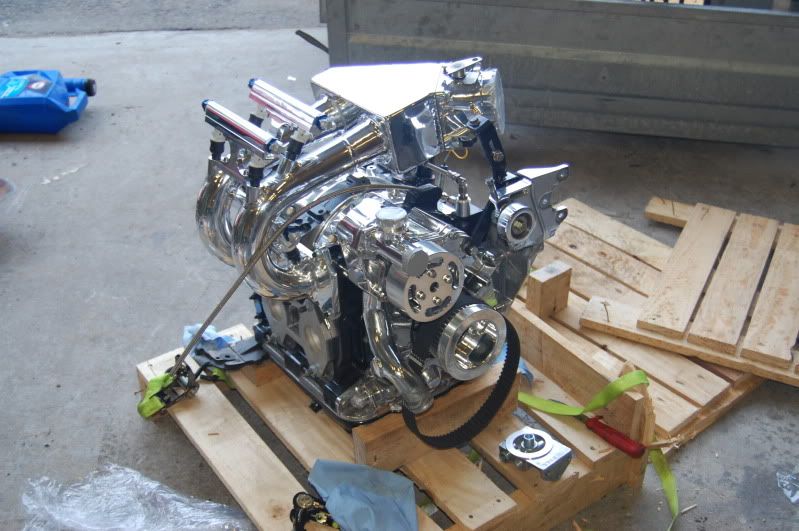
Good news!!
The engine will be picked up at Richards shop in NZ on wednesday and shipped to me..
Hopefully I will have it next week..
Then we will get the exhaust, exhaust manifold and IC tubing welded next month.
Will wire the Autronic at the same time.
The engine will be picked up at Richards shop in NZ on wednesday and shipped to me..
Hopefully I will have it next week..
Then we will get the exhaust, exhaust manifold and IC tubing welded next month.
Will wire the Autronic at the same time.
wow that is one serious build.... specially the fram for the engine bay like :O!!!!!
love what your doing to it man, keep up the good work and post pic's once you drop the baby in
love what your doing to it man, keep up the good work and post pic's once you drop the baby in
Thread Starter
Senior Member
Joined: Nov 2006
Posts: 567
Likes: 0
From: Norway
Just ordered 3 mufflers that can be rebuildt today.
We will probably make the exhaust so I can take on and off two of the mufflers...

So I can be on the limit of the noise restriction on the different tracks..

Thread Starter
Senior Member
Joined: Nov 2006
Posts: 567
Likes: 0
From: Norway

Rotary Freak
Joined: Jan 2004
Posts: 1,891
Likes: 5
From: Belgium
well, you need to grind away the gelcoat about 10cm on both sides of the split between fender and bumper. then put on a small piece of glassfiber tissue and enlarge it with every extra layer so you end up at both edges of the gelcoat. both inside and out.
It's how boat holes are fixed.
you'll only need 3 layers out and 2 inner (inside you can use a heavier glassfiber tissue as it has no visual effect.
Outside can be smoothened out by a toplayer of glassfiber fleece (20gr/m�) It will help you save time and lot's of sanding.
Thread Starter
Senior Member
Joined: Nov 2006
Posts: 567
Likes: 0
From: Norway
well, you need to grind away the gelcoat about 10cm on both sides of the split between fender and bumper. then put on a small piece of glassfiber tissue and enlarge it with every extra layer so you end up at both edges of the gelcoat. both inside and out.
It's how boat holes are fixed.
you'll only need 3 layers out and 2 inner (inside you can use a heavier glassfiber tissue as it has no visual effect.
Outside can be smoothened out by a toplayer of glassfiber fleece (20gr/m�) It will help you save time and lot's of sanding.
It's how boat holes are fixed.
you'll only need 3 layers out and 2 inner (inside you can use a heavier glassfiber tissue as it has no visual effect.
Outside can be smoothened out by a toplayer of glassfiber fleece (20gr/m�) It will help you save time and lot's of sanding.
3 layers are about two times as thick as the fenders are, and that would be hell of a job..
I would need to use filler all over the front, and that would be a hell of a sanding job..
And this isnt a boat, hope I never hit the sea with it..
For that I would actually buy a boat..


Thread Starter
Senior Member
Joined: Nov 2006
Posts: 567
Likes: 0
From: Norway
Will post pic as soon as I get the engine..
It will confirmed to get to Norway on 20th of may..
The turbo is also ordered, GT4202R with Tial housing..
Also ordered 3 mufflers 4" from Burns Stainless steel..
I hope that we can get the exhaust manifold, exhaust and the Autronic sorted next month..
It will confirmed to get to Norway on 20th of may..
The turbo is also ordered, GT4202R with Tial housing..
Also ordered 3 mufflers 4" from Burns Stainless steel..
I hope that we can get the exhaust manifold, exhaust and the Autronic sorted next month..