
New parts fabrication ideas?


Thread Starter
Joined: Aug 2002
Posts: 610
Likes: 6
From: Erie, Colorado
I'll probably mount it directly to the floor board in front of the passenger seat, but I'm still undecided on exactly where/how I want to install it. To be honest, I haven't even had the clamp inside the car yet. I'm working out of town again (as always) & when I get home I'll start looking at where I think the optimal location is, or whether or not I need to fab up anything else for it.
Last edited by cohbra; Nov 22, 2012 at 11:06 AM. Reason: grammar
Joined: Aug 2004
Posts: 4,786
Likes: 146
From: Colorado Springs, CO
In front of the passenger seat is a good spot as long as you put it somewhere that still allows you to slide the seat forward or if you don't ever slide the seat forward anymore LOL. Or you could mount it to the seat itself like SBG did with theirs. I like your clamp though, that's too cool. Maybe you could incorporate their seat attachment into your clamp design somehow. Or actually it could be mounted to the top of the rear strut bar too, that would still be accessible and easy to get to from either inside the car or reaching through the hatch and you couldn't have to get to crazy making brackets to mount it somewhere else.
Thread Starter
Joined: Aug 2002
Posts: 610
Likes: 6
From: Erie, Colorado
Yeah, I saw how they were mounting theirs to the seat, that is a good idea. I honestly don't think the seat ever gets moved forward in my car anymore unless I'm trying to vacuum under it.
Joined: Aug 2004
Posts: 4,786
Likes: 146
From: Colorado Springs, CO
Well you'd probably be alright then haha. I might be interested in one of these, especially considering I might look at some racing seats soon and theirs only works on stock seats. If you made more than one and I got one I'd look at mounting mine to the rear strut bar.
Thread Starter
Joined: Aug 2002
Posts: 610
Likes: 6
From: Erie, Colorado
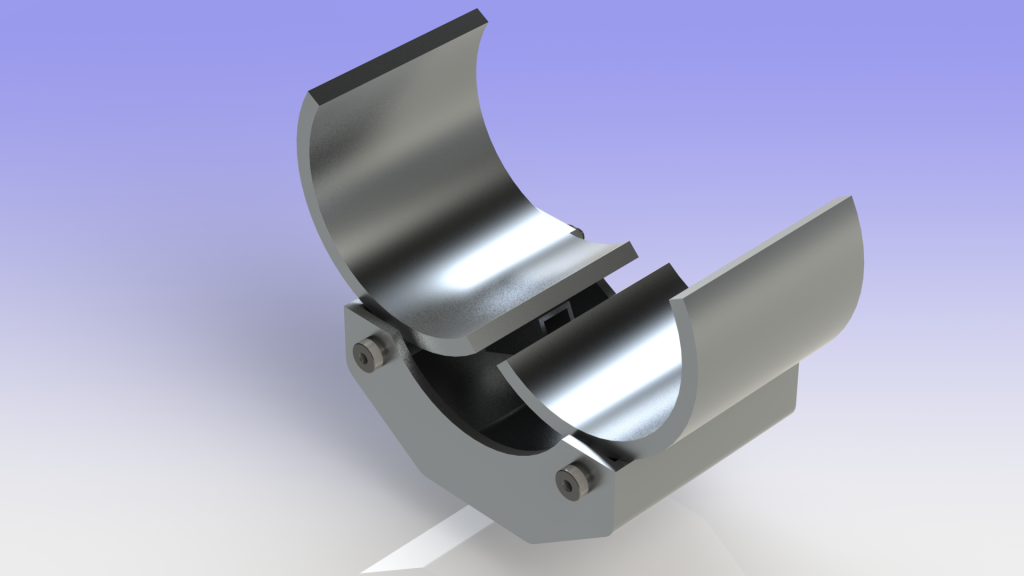
I've finished the new clamp based on the new design specifications which has a few tweaks to it. The main ones being that the clamp is now 1/4" thick with rounded ends on them making it much more durable than my initial prototype. Also, the base has a lower profile and a larger footprint to give it a more solid base when being bolted to a flat surface. Some of the other changes are very subtle and were simply to reduce the manufacturing costs as long as it didn't affect the durability or functionality of the mount.
I also visited with a spring manufacturer here in the Denver area yesterday and they were excited about helping us with designing a custom spring for the clamp. They recommended that I come down to their facility while they set up their machine to run a stainless steel spring specifically for this clamp. They want me to be there so we can tweak the parameters of the spring and test them in the clamp until we feel that we have the perfect spring for the application. I thought this was pretty cool of them, but unfortunately it will add a buck or two to the overall cost, but I think it will be worth it since the spring is the most critical piece of hardware in the clamp.
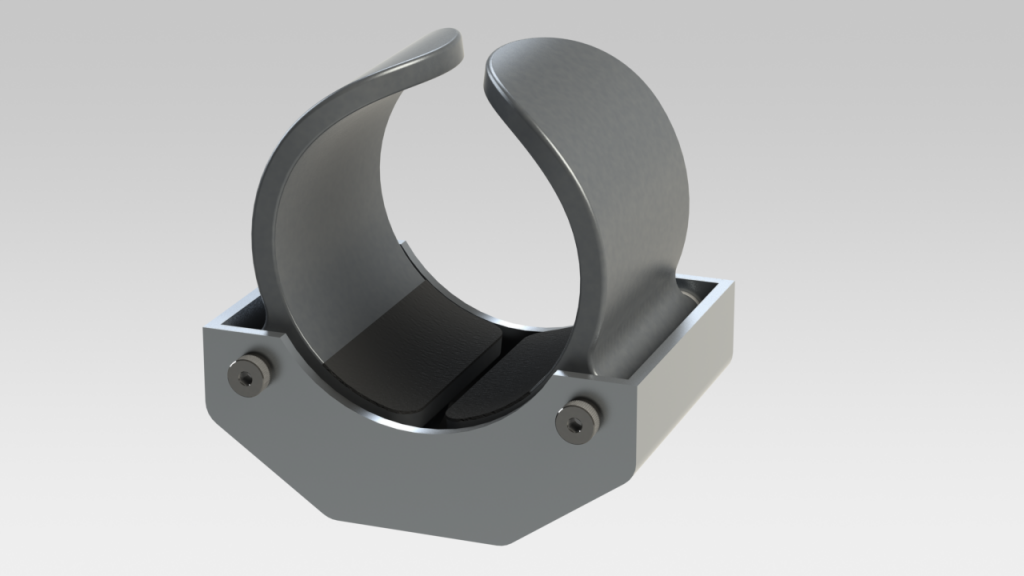
I also did some testing this evening to see how much force is required to extract the extinguisher from the clamp and found that this design requires ~29lbs of force, or ~6.5Gs. That is based on my extinguisher that I'm using which weighs about 4.5lbs. I don't have a scale that is accurate enough to get too specific, but this should give you a good idea of how well it holds onto the extinguisher. I'm hoping that we can improve on this even more with a custom spring.
Here's a couple of pics from the fabrication over the last few days as well as the finished part and another quick video of the operation. You can ignore the strap on the back of it, I just put it there to have something to hold onto when I pull the extinguisher out of the clamp.


Here's the video here:
I also visited with a spring manufacturer here in the Denver area yesterday and they were excited about helping us with designing a custom spring for the clamp. They recommended that I come down to their facility while they set up their machine to run a stainless steel spring specifically for this clamp. They want me to be there so we can tweak the parameters of the spring and test them in the clamp until we feel that we have the perfect spring for the application. I thought this was pretty cool of them, but unfortunately it will add a buck or two to the overall cost, but I think it will be worth it since the spring is the most critical piece of hardware in the clamp.
I also did some testing this evening to see how much force is required to extract the extinguisher from the clamp and found that this design requires ~29lbs of force, or ~6.5Gs. That is based on my extinguisher that I'm using which weighs about 4.5lbs. I don't have a scale that is accurate enough to get too specific, but this should give you a good idea of how well it holds onto the extinguisher. I'm hoping that we can improve on this even more with a custom spring.
Here's a couple of pics from the fabrication over the last few days as well as the finished part and another quick video of the operation. You can ignore the strap on the back of it, I just put it there to have something to hold onto when I pull the extinguisher out of the clamp.
Here's the video here:
Thread Starter
Joined: Aug 2002
Posts: 610
Likes: 6
From: Erie, Colorado
I finally finished manufacturing of my Quick Release Extinguisher mount. Since this idea began here, I thought I would post an update.
For those who aren't aware of how this began, I made a prototype of this mount to install my extinguisher in my RX7, and due to the immediate interest that everyone who saw it had, I never got around to installing it in my car. I was constantly using it to develop a production version to have manufactured, and never even got around to making the seat bracket I wanted to use with it so that it would always be in the same spot (in relation to the seat position) regardless of where the seat was adjusted to. I spent a few hours yesterday and today fabricating up the seat mount portion, and tested the fit. Next time I have some parts anodized, I'll pull it back out and anodize it black as well.
Here's the bracket, partially cleaned up.

Mounted to the seat.

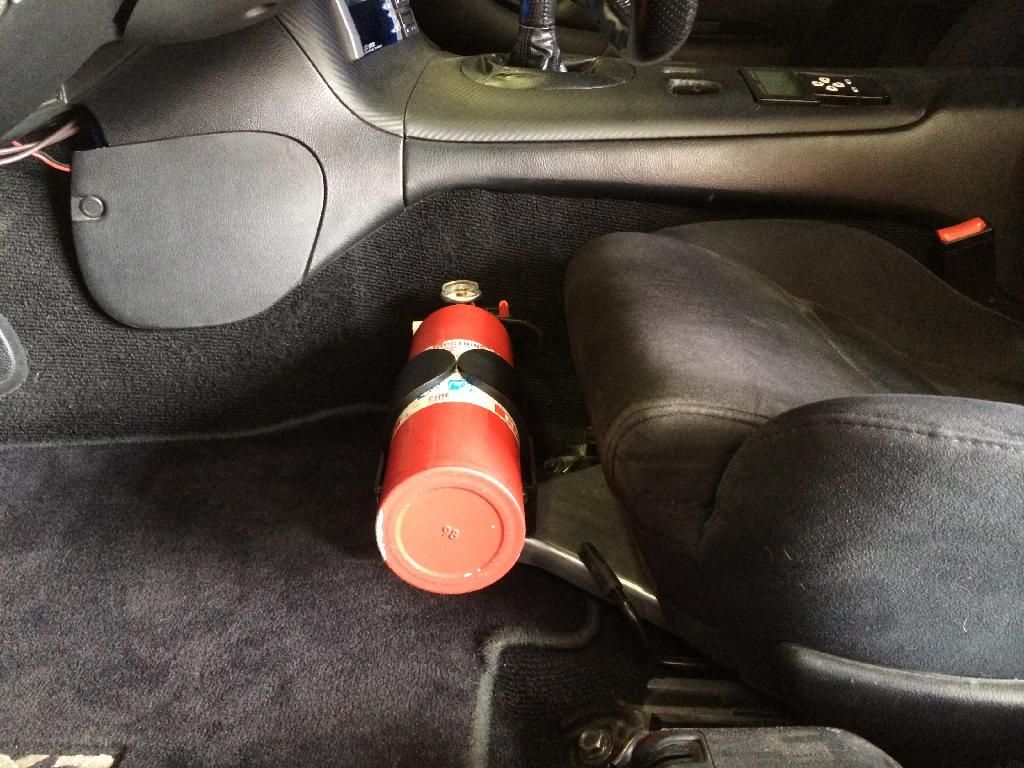
Extinguisher mount installed.


Back in the car.

Here's a shot of just the Quick Release mount by itself.

For those who aren't aware of how this began, I made a prototype of this mount to install my extinguisher in my RX7, and due to the immediate interest that everyone who saw it had, I never got around to installing it in my car. I was constantly using it to develop a production version to have manufactured, and never even got around to making the seat bracket I wanted to use with it so that it would always be in the same spot (in relation to the seat position) regardless of where the seat was adjusted to. I spent a few hours yesterday and today fabricating up the seat mount portion, and tested the fit. Next time I have some parts anodized, I'll pull it back out and anodize it black as well.
Here's the bracket, partially cleaned up.

Mounted to the seat.

Extinguisher mount installed.


Back in the car.


Here's a shot of just the Quick Release mount by itself.


Thread
Thread Starter
Forum
Replies
Last Post
KAL797
Test Area 51
0
Aug 11, 2015 03:47 PM