When you click on links to various merchants on this site and make a purchase, this can result in this site earning a commission. Affiliate programs and affiliations include, but are not limited to, the eBay Partner Network.
This was my first ever HID Retrofit. I used the DS2 projectors. I know there is another how-to on here, but the DS2 projectors have chanced since then. They are about 3/4" longer so they don't bolt into the housing without modifications. If you tried; the clear plastic cover would hit the projector lens.
A special thanks to RunYun for selling me a set of new Sonar lights and answering a ton of questions. I also have this documented on my site here: 802Projects
Step 1: Order Parts
I ordered just about everything from TheRetrofitSource. If you look hard enough online you can find a 25% off coupon. The epoxy, paint, pvc pipe I picked up at my local hardware store. The Crystal Diamond Headlights are hard to find. I think SBG buys them all I have less than $400 invested in this project.
2x Sonar headlight housings
2x DS2 Mini 3.0 Projectors (Round housings, LHD)
2x Morimoto XB35 Computers
2x Morimoto XB Igniters
2x D2S XB 5500K HID bulbs
2x Canbus Bi-Xenon H4/9003 wiring adapters
2x E55-R shrouds
1x Black RetroRubber sealant
2x 2part plastic epoxy (I used Ace Hardware brand)
Piece of PVC pipe that is 2" OD
Black RTV
Piece of aluminum tin
Rivots
Satin Black Krylon spray paint
Step 2: Bake the headlights
You need to seperate the clear plastic headlight lens using an oven. Now everyone online kept saying 220 degrees. That wouldn't get them hot enough for me. I had to do 290 degrees for 10 minutes before the glue would soften enough. Use a thin screwdriver and gently pry evenly until you get one side up. Now that I think about it, a butter knife may work even better.
Whatever you do, DO NOT DO this ha. I actually broke a piece off my innter housing This is a big reason why I ended up making mine black. I had to sand/epoxy it back on and there was no way for me to save the chrome finish.
Step 3: Cut the back off
In order for the projector to fit, the back of the headlight housing needs to be modified. It needs to be moved back. I did this by basically cutting the back portion off, flipping it around, then adding a thin pvc pipe spacer to get the depth I needed.
I used a dremel tool with a guide that screwed on the bottom that allowed me to set the depth. If you look inside the housing from the back side you'll see a ring inside the opening left over from the mold. I set the depth of the dremel to cut just below that line. Then you need to open up the inside of the housing a little bit, and bevel it so the projector fits far enough inside for the clear lens to fit over it. I used a digital caliper to make sure I had both projectors sticking through the same distance. If one was slightly off, I bored out the other side a little more. It's kind of hard to describe the process but hopefully these pictures help.
Last edited by fastfalcon94; 06-16-16 at 01:50 PM.
I did not have to modify the top part of the shroud. it cleared just fine. However the bottom portion I did need to trim some off to fit. After you are done make sure the clear lens will fit without rubbing anything.
Step 5: Remove the chrome paint
Technically you wouldn't need to do this if you managed to pull the lens apart without damaging anything. But if you did, or if you want the black look I'd recommend removing the chrome paint. Some Easy Off oven cleaner and a little cleaning with a scotch brite pad works well.
Step 6: Epoxy the backs on
Only mix up enough epoxy to do one side at a time. I used about half a tubes worth per side. I used some dumpbells to put pressure on them overnight. Since I flipped the back piece around it provided a nice flat surface on the back. So technically it could go any direction. Check the projector to see which side the high beam wiring connector is on. I'd line up the square hole with that side so it provides an easy path to feed the wring through. I also put a tiny notch inside the light so that the rubber bushing wouldn't completely pinch the 2 wires that pass through.
Step 7: Paint the housings
Probably about 5 thin coats. The first few I focused on the hard to reach spots like the groove around the edge and the very center cone section. the last few coats you can do evently over everything.
Step 8: Make aluminum light blocking plates
I noticed once testing my headlights that the E55 shrouds are not that deep. So if I stood at the front side of the car and looked at the headlights, I would be blinded as nothing was shielding the bulb. So using some aluminum tin I cutup my own plates and vivoted them to the projector housings. I would definitely recommend this.
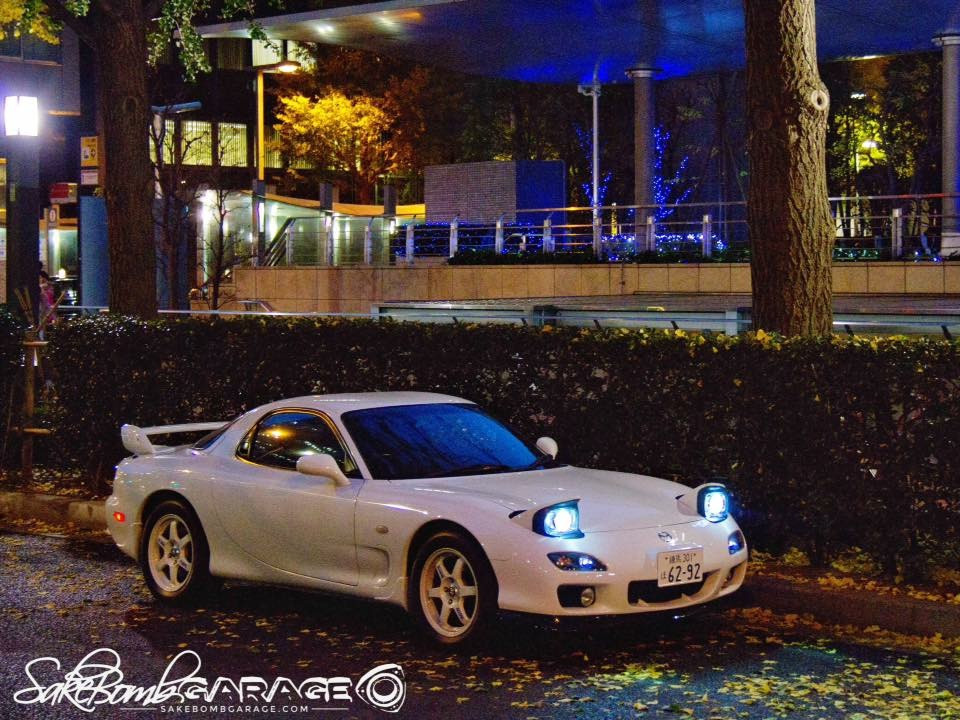
Now you can put the headlights back in the car to align them. I had to cut out a little bit of material in my popup housings to accomadate the slightly longer headlights. All I cared about at this point was making sure they were rotated correctly and that the lines were more or less horizontal. I plugged in one side at a time to make the adjustments. When you get it where you want, tighten the nut on the back side. I made it super tight as I'm not using any kind of locking ring to keep the projector from spinning. In the garage light pic you'll notice some light above the line. This is because I don't have the shrouds on.
Step 10: Assembly
Now that the projectors are where they need to be, wipe everything down with a microfiber towel. I applied a light coat of rtv around the inside of each shroud and pushed them on for good. Then use the black sealant strip and run it into the lens groove. Make sure the clear lens are fingerprint free and set them on top of the sealant. Bake in the oven at 265 degrees for 7 minutes (with bulbs removed!), then press the lens together. Let cool and you are set to install them in the car. I added some rtv to the back side of the housings to further seal stuff up and hopefully prevent the nut from ever wanting to come lose. I'll add some installed pics later.
Last edited by fastfalcon94; 06-16-16 at 01:49 PM.
How much did all the parts cost you? I did this a long time ago as well. Good work
I have less than $400 total invested . It would have been more without the 25% off coupon. Plus Eddie sold me the lights for $115. He had bought them but never took them out of the box. IDK what they cost new. I wasn't able to find a set.
Great write-up! The custom shields is a great idea to block off unnecessary glare..
When I did my retrofit - I was really impressed with the newer gen Morimoto projectors
Great write-up! The custom shields is a great idea to block off unnecessary glare..
When I did my retrofit - I was really impressed with the newer gen Morimoto projectors
Mine are sold. I built my retro-fit as I had the parts laying around (and had already ordered SBG headlights but were waiting for them to get built)
Eventually, my SBG lights came in and I ended up with 2 sets of HID lights. I had to sell one of them
Mine are sold. I built my retro-fit as I had the parts laying around (and had already ordered SBG headlights but were waiting for them to get built)
Eventually, my SBG lights came in and I ended up with 2 sets of HID lights. I had to sell one of them
Great job! I like how you mounted the projectors. I didn't even think of that.
I just completed mine as well with the square 3.0 projectors. I opened up the holes and jb welded a big *** washer to the back of the housings, and that gave me a mounting surface.
Version 4.0 of the D2S mini will be coming out in a few months. Hopefully they have a foreground limiter!
The housings are perma sealed unlike the older ones which were easy to open. The mini d2s and h1 are the easiest to retrofit the fx-r or other non bolt in projectors are a lot harder. I have done hundreds so If anyone has questions just let me know!
After doing them I'm sure you understand how much work these take. The Mini's are an easy way out but the beam pattern is not as wide and throw isn't as good as the larger projectors. Moving to larger projectors is MUCH harder as well, and I would say on average we have over 9-10 hours into each set done assembly line style. It's a nightmare to do, to be completely honest... especially now with the perma-glue in the Sonar housings.
The end effect is great but the work to make it happen is gargantuan, which few people truly understand or appreciate Nice work though! Enjoy
The projector lens does have some space away from the housing. Hopefully they won't spider crack. I'm only using the 35W bulbs and I don't have an oil cooler underneath either (v8 swapped:P) I took some more pics showing them mounted and where I mounted my ballasts. I switched out the relay system to "MotoControl Bi-Xenon: H4/9003" as well. It was only $35. This gives me one relay that runs power directly from the battery to each ballast. Before I was just using adapters that powered off the factory headlight wiring. I'd get some flickering and sometimes the passenger side wouldn't light up. This seems to have fixed that. I'll get the parts list and website updated later this week.
Also I like the washer trick above. That may even be more simple than what I did. It definitely would take away any guess work on where to cut.
So I've put about 500 miles on these HIDs. The brightness is good, but they seem to vibrate a lot. Any bump they will shake. Just having my ls engine idling I can see the cutoff vibrating on my garage door. If I drive by road signs or have a car in front of me I can see the same kind of shaking going on. Everything is tight. The projector housings are tight, the bulbs are secured tight, I checked the bushings on my popup arm arms and those are good. I adjusted the rubber stops on the popups. The little springs that attach to the headlights are present. I can't really feel a lot of wiggle in the headlights at all. If I pick up on them I can actually see the metal headlight bucket/radiator support flex a little.
Anyways it drives me nuts. Maybe it's just a flaw of having popups, a big engine, and stiff suspension? Anyone else deal with this?
I ordered another set of Sonar lights sense they appear to be everywhere now. I also got some philllips super bright h4 projectors. I put them in tonight but it was too late to let my car idle while I adjusted them. I'm going to give these a try for now. Chances are I won't be happy with the light output.
I really appreciate the effort you put into doing this. I made custom spherical HID projectors for another car of mine (an Australian GM vehicle) which originally had crappy halogens. I know the struggles of what you went through, and you did really well.
I'm looking at doing an HID retrofit to my FD next, because the standard halogen lights are just utterly terribly woeful at night. But here in Australia we don't have access to Morimoto this or that, or DS2 things or Sonar anything exotic like you have in the US. And the postage to get all those items here would be in the hundreds if not thousands of Aussie dollars all up. The best we can honestly do is just hamfistedly throw HIDs into the stock reflector housings (not good for glare and awful beam formation I know) but its what the vast majority of Aussie FD owners are doing, so I've resigned myself to reluctantly having to do it too.
I have shipped retrofitted lights to Australia before it was about $80 USD for shipping.
MIne was also difficult to pry loose. but 300F for 10 mins helped. I also read that gasoline is a proper solvent for this glue, and that putting them in gasoline for a while will remove it without issues
Looks great! Is this setup spaced so as not to spider the lenses?
As far as the SBG lights go, yes, we've got a few mm of clearance. The bigger projectors are leaps and bounds better than the tiny cheap Chinese ones but the work to fit them is extremely labor intensive.
If anyone is looking for a set (I know this thread is about making your own HID's) shoot us a message, we're putting together another group buy with some competitive pricing (PM or email info@sakebombgarage.com ). With jigs and everything it still takes us around 10 hours each to complete each set assembly line style... to make something similar from scratch totally free hand is a large undertaking, I can't tell you how many customer emails we get asking to purchase a set after attempting their own retrofit... two sets of housings later and hundreds of dollars lost.
For the record though, we totally support DIY'ers that's why we're all here, and are happy to assist with parts and components if you guys need anything. We just offer the finished product for guys that want to have a box show up in the mail and pop them in the car.
The bigger projectors are leaps and bounds better than the tiny cheap Chinese ones but the work to fit them is extremely labor intensive.
This is very true. I've had a set I believe was made by someone here and to be honest, I regretted buying them at the time. They were much better than stock and definitely good enough but after using the SBG ones, they felt a bit underwhelming. The extra money for the SBG ones was not wasted.
As far as the SBG lights go, yes, we've got a few mm of clearance. The bigger projectors are leaps and bounds better than the tiny cheap Chinese ones but the work to fit them is extremely labor intensive.
If anyone is looking for a set (I know this thread is about making your own HID's) shoot us a message, we're putting together another group buy with some competitive pricing (PM or email info@sakebombgarage.com ). With jigs and everything it still takes us around 10 hours each to complete each set assembly line style... to make something similar from scratch totally free hand is a large undertaking, I can't tell you how many customer emails we get asking to purchase a set after attempting their own retrofit... two sets of housings later and hundreds of dollars lost.
For the record though, we totally support DIY'ers that's why we're all here, and are happy to assist with parts and components if you guys need anything. We just offer the finished product for guys that want to have a box show up in the mail and pop them in the car.
I would normaly go to lengths to keep people like you guys in business by buying the stuff you are making. If nobody buys, then the platform support dies. In this case however, i need the "retrofit" training before i go on to my daily driver project, since thats a bit more advanced. Otherwise the Sakebomb headlights would be my first choise
(And i also think its fun making things myself, even if i fail )
Hey, everyone at SBG is a DIY'er! No one made a decent oil cooler kit back in the day, so Dan and I made our own. Proper racing brake kits... didn't really exist for the FD (nor a good rear brake solution) so we made them out of necessity for our own cars... these only became "products" because we needed/wanted these parts for our own cars
We take nearly all of the profits from SBG (for better or worse) and re-invest back into R/D for the FD. There's a reason there's only a small handful of companies developing parts for the FD (we've got quite a few new parts coming out this year)... it's not a "business" for us, it's a passion
 06-16-16, 01:27 PM

 I have less than $400 invested in this project.
 This is a big reason why I ended up making mine black. I had to sand/epoxy it back on and there was no way for me to save the chrome finish.


 )
)
