When you click on links to various merchants on this site and make a purchase, this can result in this site earning a commission. Affiliate programs and affiliations include, but are not limited to, the eBay Partner Network.
For years I have seen threads about Koyo install issues. We have been installing them for 15+ years without any issues, so I figured we would snap a few pics of the most recent installation and the things we do to make for a pain free installation.
For the point of this thread we are going to assume the installer has the capabilities required to removed and install a stock radiator.
Lay both radiators next to each other.
Install the fans, rubber grommets and brackets from the original radiator on the Koyo, everything mounts exactly the same way. DO NOT MOUNT THE BRACKETS UPSIDE DOWN, this is bad information that has been handed out on this forum for over a decade. Inspect the fan motors, to insure they spin freely and that the blade assemblies are not broken. Do not try to glue them back together.
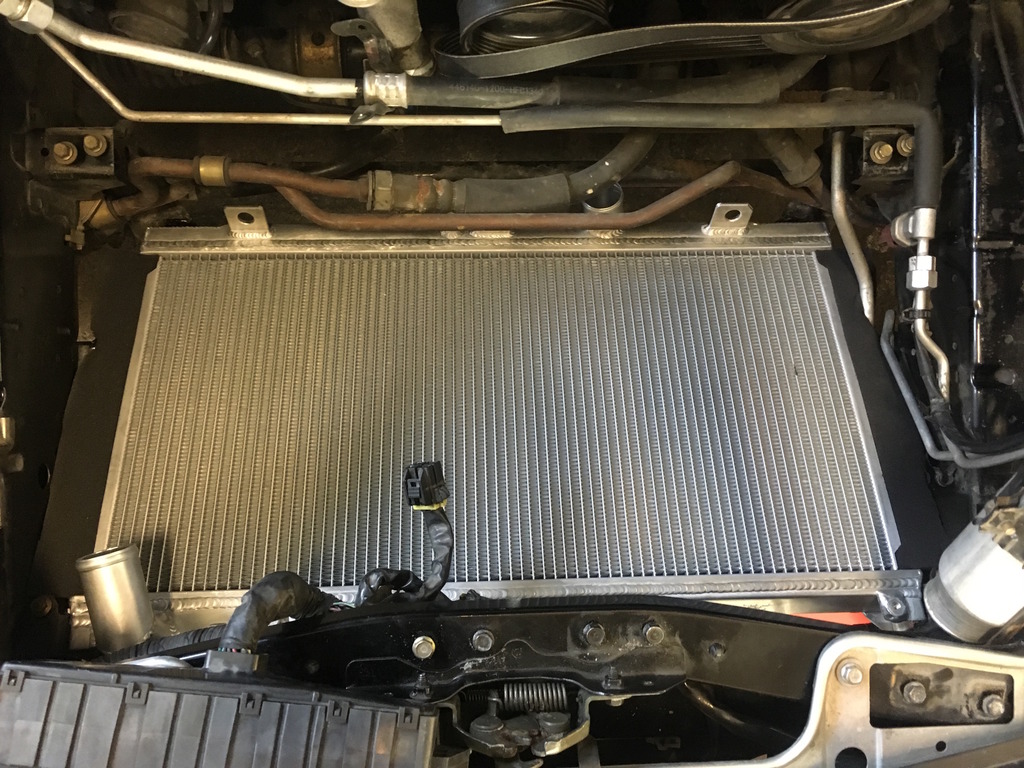
Next that car needs to be prepared for the installation. This is the bracket that causes the largest problem, it is the right side upper A/C condenser bracket. If you have removed your A/C then skip ahead.
This bracket needs to be flipped over or removed. Once it is flipped over it allows the radiator to drop right in.
Next both the radiator bottom supports need to be bent slightly to accommodate the thicker radiator.
The brackets also need to be inspected for damage, we have seen countless bent brackets. As you can see this will raise the radiator, causing fitment issues. The good news is they are inexpensive from Mazda.
This is a great time to install new hoses and an upgraded AST. Now just put the car back together and fill with coolant. Remember to burp the system properly.
Last edited by Banzai-Racing; Nov 4, 2016 at 12:06 PM.
^ only way it would go in without altering/removing the bracket is to damage the side of the radiator, which is something I prefer not to do when it only takes 5 minutes extra to install correctly.
Good info. I'll add that I usually get rid of the stock rubber lord mounts. This will allow the radiator to drop down even further and helps fitment if you have a stock intake and intercooler.
Thanks for doing this I might take a look at my fluidyne and see if I need to adjust anything futher. It's hard mounted without the rubber isolator bushings and the upper radiator hose still seems to push up on the stock intake.
The Koyo radiator is nearly twice as thick as the Mishimito. Mishimoto is easier to fit but often the mounting holes for the fans are often off and need to be drilled out. The bypass hose nipple is also the wrong size requiring an reducer. Mishimoto isn't known for quality. There is always some issue, though usually minor, that needs to be corrected.
Last edited by IRPerformance; Nov 10, 2016 at 04:16 PM.
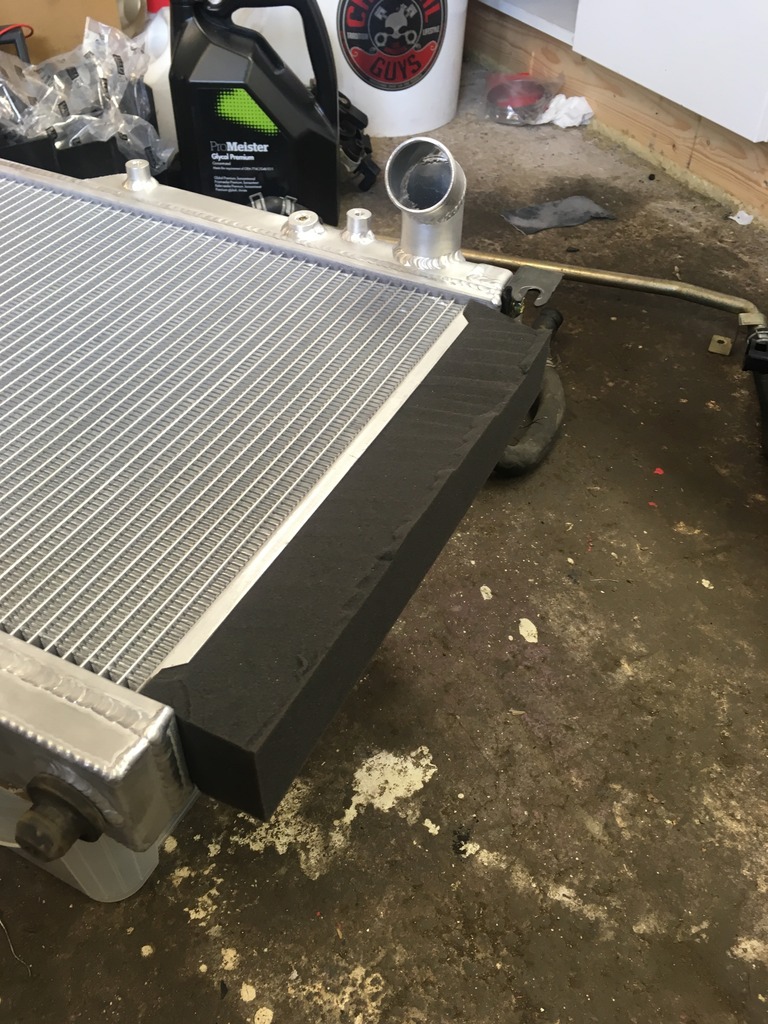
One thing that i dont think you mentioned, is that the OEM radiator has foam on the sides, to stop air flowing around the radiator. I bought some soft but dense foam to make sure as much air as possible go where it should.
This is if you dont have any intake mods who pull air from this location.
I had some rubbing issues with Koyo radiator and my Greddy FMIC piping. The Greddy brackets are meant for the stock rad which is smaller. To address this i could have a made some new brackets to accommodate the bigger Koyo rad and try to drop it lower down. Instead I took the intercooler pipe it was rubbing against to the vise and a big hammer and made a few nonchalant dents in the right spots. The goal is to not crack or perforate the pipe, so take your time.
GL!
Outstanding, thanks. I have a Koyo sitting here ready to replace a leaking Fluidyne (not the Fluidyne's fault) and aside from being busy I've been noodling over how to make it fit with my stock airbox/Blitz SMIC/AC condenser. This thread confirms it's good to be a procrastinator sometimes.
I think between these tips and the possibility of adding spacers to the AC condenser, I should have things in order. For those that have lowered their assembly, did you have issues with the stock undertray pressing on things?
My radiator measured 58mm wide and I ran into the problem of it not going down far enough onto the mounting bolts because the mounting bracket on the rad is hitting the mounting bracket that's on the car.
I can see why some people turn those tabs upside down but that would prob raise the radiator and my stock plastics won't fit back up.
I'm just going to take the mounting brackets to work tomorrow and put them in the vertical band saw. It should clear after I take some metal out of them.
Just thought giving some heads up to other people with thicker cores. I believe other cores measure out around 48-53mm or so.
Last edited by 12abridgeport; Feb 24, 2019 at 05:51 PM.
anyone have the part number for the two mounting brackets? Car came with a very old Fludyne Rad that has the brackets built in so I�m bracketless.
thank you
Originally Posted by Zepticon
One thing that i dont think you mentioned, is that the OEM radiator has foam on the sides, to stop air flowing around the radiator. I bought some soft but dense foam to make sure as much air as possible go where it should.
This is if you dont have any intake mods who pull air from this location.


 But this guide should be sticky!
 I might take a look at my fluidyne and see if I need to adjust anything futher. It's hard mounted without the rubber isolator bushings and the upper radiator hose still seems to push up on the stock intake.