
How do my housings look? :)

A few things I want to get out of this:
- someone point out the proper starting point for measurements of housing warpage (I know where to measure, just not where to start)
- your thoughts on the condition of my housings. Pretty borderline to me.
- Rotors have no dents or dings, but I will be measuring apex seal widths to ensure they are not warped, and reinspecting the seals for uneven wear tonight.
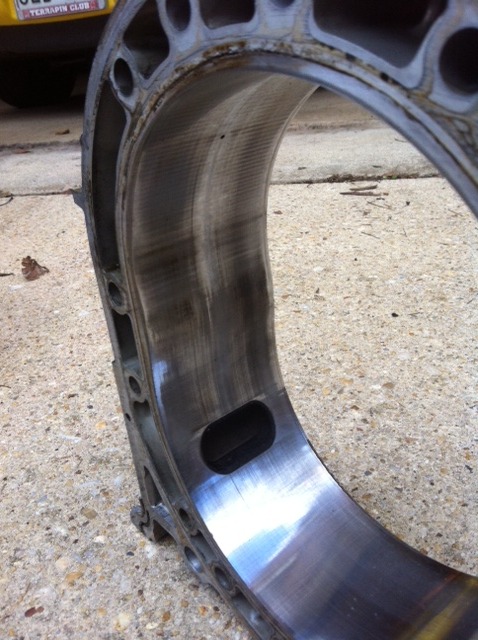
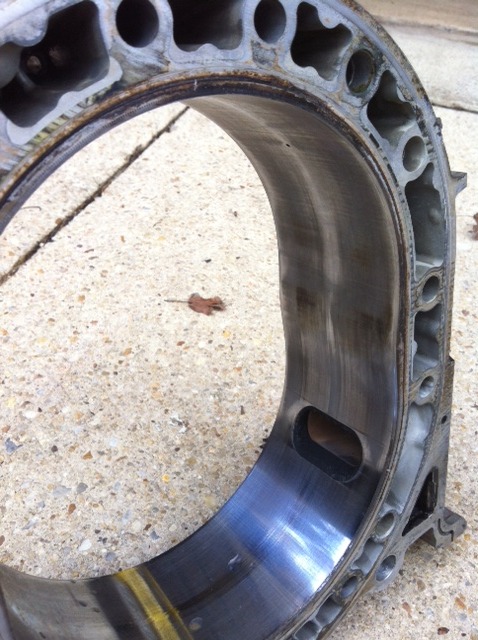
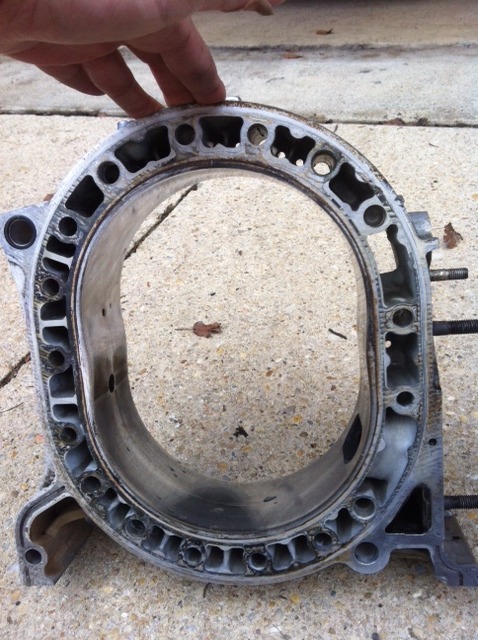
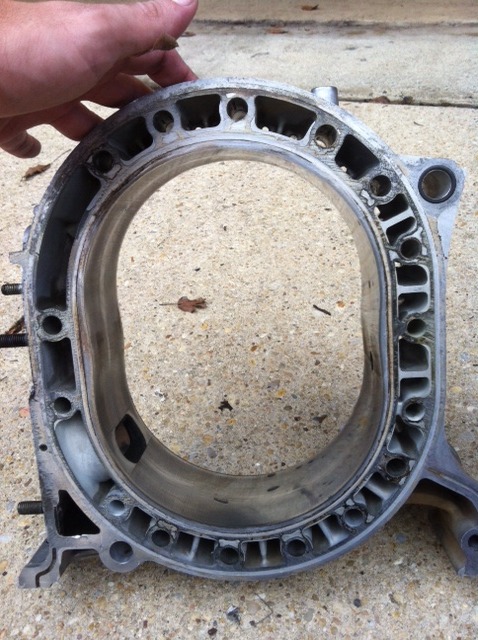
Condition: no pitting or chipping of the chrome. Some small scores on the non-injector side on the upper portion of one of the housings ( (i can fell them with my finger). Some staining around the injector port making me think there was a slipping or skipping apex seal. Some staining above the gas outlet on one of the housings.
Pics below. Thoughts?
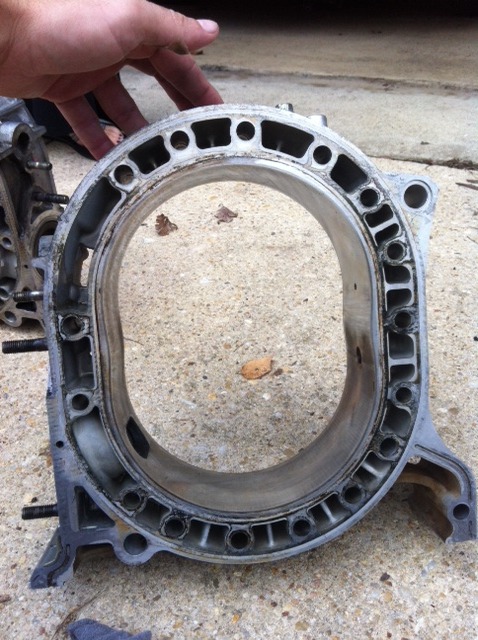
Front:
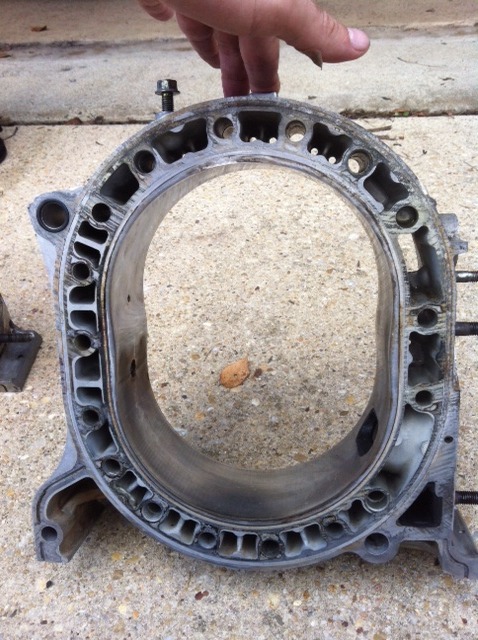
Rear:

- someone point out the proper starting point for measurements of housing warpage (I know where to measure, just not where to start)
- your thoughts on the condition of my housings. Pretty borderline to me.
- Rotors have no dents or dings, but I will be measuring apex seal widths to ensure they are not warped, and reinspecting the seals for uneven wear tonight.
Condition: no pitting or chipping of the chrome. Some small scores on the non-injector side on the upper portion of one of the housings ( (i can fell them with my finger). Some staining around the injector port making me think there was a slipping or skipping apex seal. Some staining above the gas outlet on one of the housings.
Pics below. Thoughts?
Front:
Rear:
We can't really tell from far away pictures. Look for corner piece wear, chipping of the chrome, and any unusual worn areas you might want to take pictures of and we can give you opinions. We can machine the insides of the rotor housings and we just developed a way to remove warping if it's not too bad. Post more pictures and or pm me if I can be of anymore help...
take thickness measurements of the housings from the inside edge, take about 4-5 measurements in equal distance spots from one another. particularly around the leading spark plug area as this is usually where the housings are warped the most. warpage will be the highest number subtracted from your lowest number, not one spot to the next. you will need to scrub down the sides of the housings before bothering with this measurement, even a sanding block lightly run over it will give you a good starting point to check the thicknesses. calcium, carbon, other deposits and old seal material will skew results in the condition they are currently in.
take pictures of any chrome wear spots, the pictures here give no detail in that respect.
take pictures of any chrome wear spots, the pictures here give no detail in that respect.
Last edited by RotaryEvolution; Oct 2, 2012 at 01:32 PM.
i'll get more detailed pics up tonight!
Yes the inside edge of the housing, but to where? the guide says to the o-ring area but not sure where that is as there is no groove... man i sound like an idiot...
Yes the inside edge of the housing, but to where? the guide says to the o-ring area but not sure where that is as there is no groove... man i sound like an idiot...
Thats exactly what i tried! But we're dealing with .00x of an inch here - any discrepancy between where the micrometer is set and the housing can cause the housing to be out of spec (potentially falsely)! Add to that the grime/stains accumulated from 55k of use and its hard to imagine any measurement being THAT exact.
Crazy that mazda didn't think of a better way to do this...
At least its easy to measure the irons for wear...
Crazy that mazda didn't think of a better way to do this...
At least its easy to measure the irons for wear...

Junior Member
Joined: Sep 2012
Posts: 24
Likes: 0
From: San Francisco Bay Area
Thats exactly what i tried! But we're dealing with .00x of an inch here - any discrepancy between where the caliper is set and the housing can cause the housing to be out of spec (potentially falsely)! Add to that the grime/stains accumulated from 55k of use and its hard to imagine any measurement being THAT exact.
Crazy that mazda didn't think of a better way to do this...
At least its easy to measure the irons for wear...
Crazy that mazda didn't think of a better way to do this...
At least its easy to measure the irons for wear...
Trending Topics
LOL - i love the edit feature I did say micrometer - just look for yourself.
And yes, I've tried just about every cleaning agent there is short of media blasting (kerosene, mineral spirits, biodegradable degreaser, etc). Trying carb cleaner tonight as a last hope.
I'll start with the updated pictures and go from there.
I did say micrometer - just look for yourself. And yes, I've tried just about every cleaning agent there is short of media blasting (kerosene, mineral spirits, biodegradable degreaser, etc). Trying carb cleaner tonight as a last hope.
I'll start with the updated pictures and go from there.
yes, i revised my original post. the housings have to be cleaned off thoroughly before measurements can be taken. don't be scared of cleaning them with a block sander, so long as you don't go nuts trying to make it look perfectly clean, point is to get the surface even and clean of debris.
in most cases unless the engine has been severely overheated or the housings cleaned numerous times then they almost always are fine.
in most cases unless the engine has been severely overheated or the housings cleaned numerous times then they almost always are fine.
Last edited by RotaryEvolution; Oct 2, 2012 at 01:54 PM.
Junior Member
Joined: Sep 2012
Posts: 24
Likes: 0
From: San Francisco Bay Area
Sorry, no offense intended, I saw the word caliper in there somewhere.
Rotary Evolution, I recall the exhaust port area being another spot for warpage, but that was back in the original 70 to 73 12A era, maybe not applicable to 74 and later engine design?
Rotary Evolution, I recall the exhaust port area being another spot for warpage, but that was back in the original 70 to 73 12A era, maybe not applicable to 74 and later engine design?
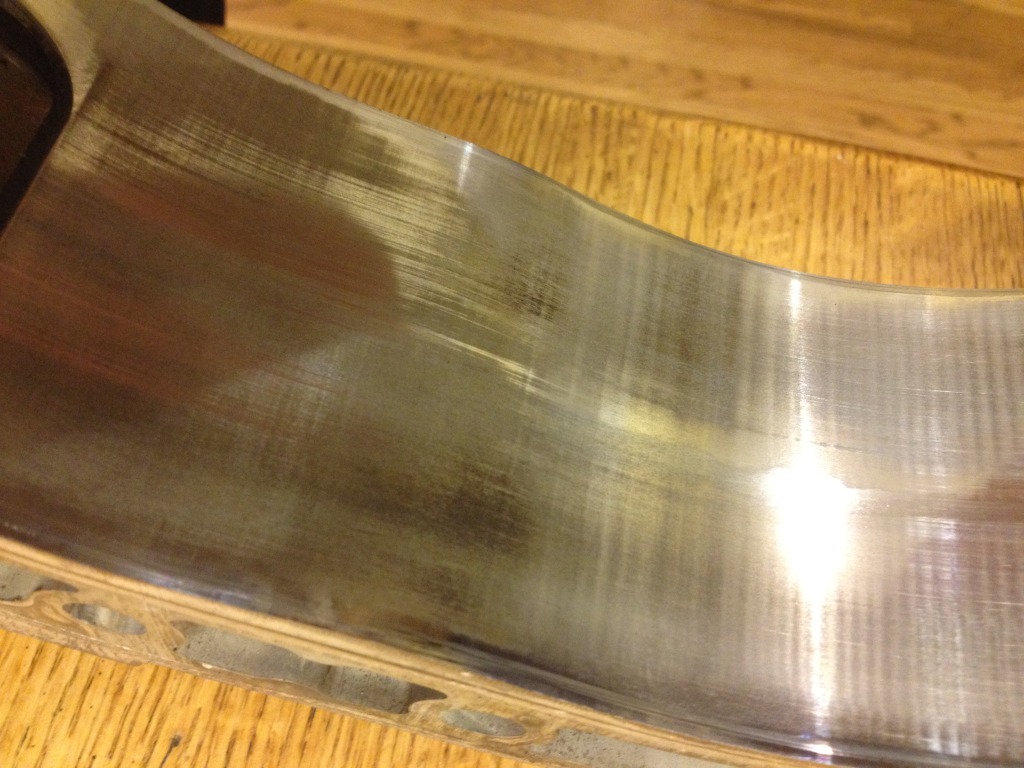
New Images!
I read that the carbon stains represent a skipping seal. Could that be the cause of the low compression? Also, it looks like the housings are in spec with regards to warpage if I measured it correctly.
Rear (finger is pointing at some light scoring at the OMP hole)
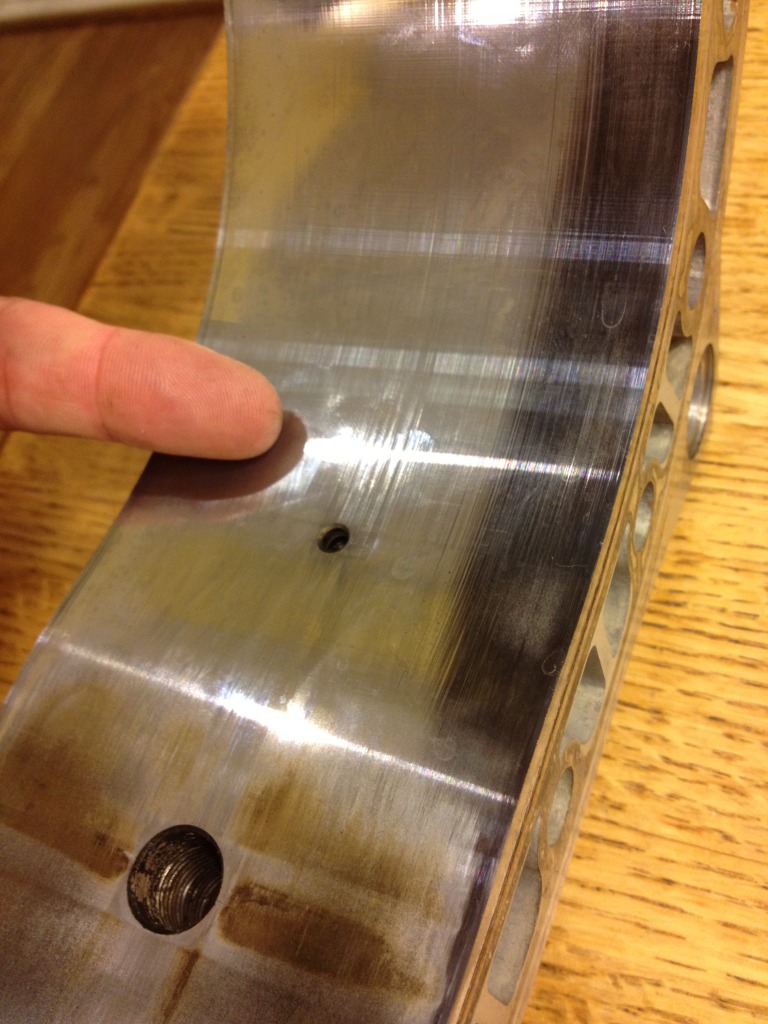
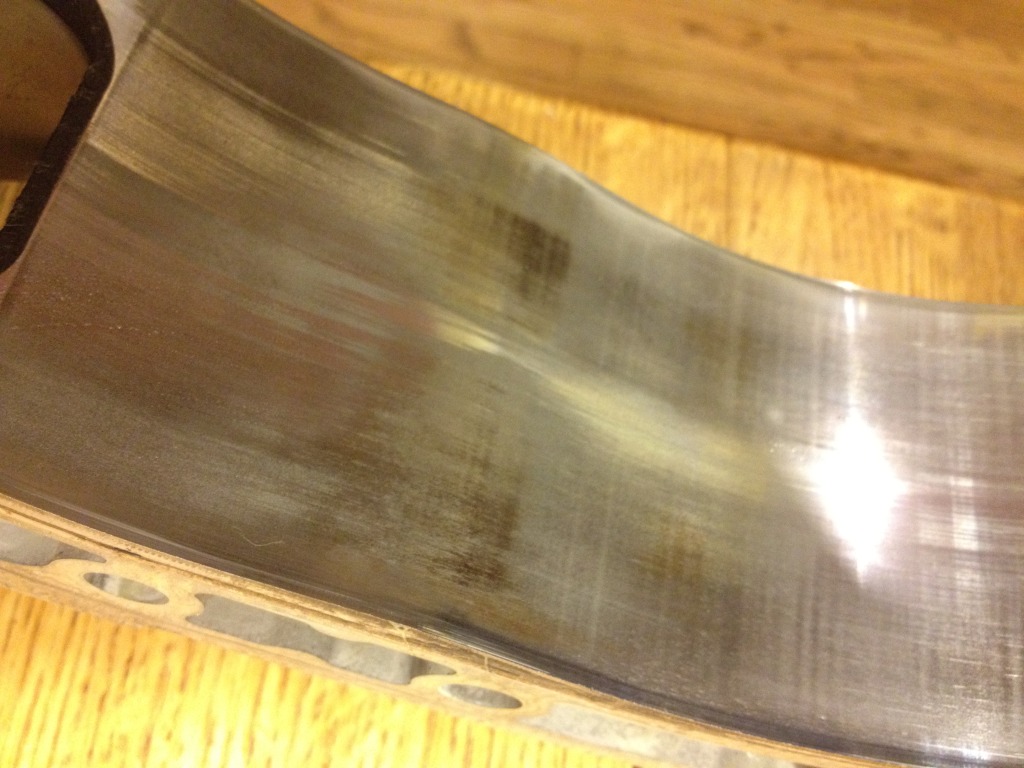
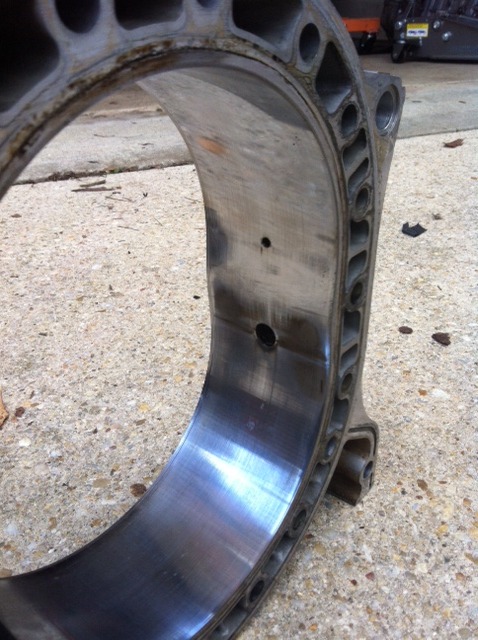
Front (the spark port is in better shape than the rear)
I read that the carbon stains represent a skipping seal. Could that be the cause of the low compression? Also, it looks like the housings are in spec with regards to warpage if I measured it correctly.
Rear (finger is pointing at some light scoring at the OMP hole)
Front (the spark port is in better shape than the rear)
they don't look too bad, reusable but wouldn't give ideal results. can see some wear from the apex assist piece digging into the edge of the housing but not all the way through the chrome yet. once that valley has been placed it will only exacerbate itself even with brand new seals once they seat in.
consider some other better used housings or resurface those for better results.
apex seal skipping over the plugs and exhaust ports is perfectly normal. the pockets represent a space for back pressure to lift the seals off the surface. it's also why surface discharge plugs are important or at least the correct reach on race plugs to minimize the lift off the surface. increased apex seal tension will help alleviate that issue in high horsepower builds at the cost of friction and wear.
Thanks! I think you just made up my mind for me on whether to buy an engine from Ray or rebuild one. Needing 2 housings either resurfaced or finding used ones makes the costs close enough to be able to justify buying a new motor versus possibly messing something up
Think I'll just trade in my core to Ray. Man - all that cleaning for nothing!
Think I'll just trade in my core to Ray. Man - all that cleaning for nothing!

Senior Member


Joined: Aug 2010
Posts: 415
Likes: 8
From: Treasure coast
PS - Ben recently did his magic on my housings and they are beautiful. Mine were chewed along the edge quite a bit by the apex side piece but now much improved. I'm currently debating using a one piece ferrous apex (I will reveal the source at a later time upon results and permission by the supplier) to eliminate completely any chance of a side piece further eating away at the rotor housing.
My measurements on the now clean housings using a caliper type micrometer placed by every bolt hole are 3.149" +/- 0.001".
My measurements on the now clean housings using a caliper type micrometer placed by every bolt hole are 3.149" +/- 0.001".
Last edited by Clubuser; Oct 3, 2012 at 02:13 PM.
i charge $125 per housing for bead blasting and resurfacing the wear surface on the chrome liners. price doesn't include shipping or return shipping which is additional, usually about $20-25 each way for 2 housings within the continental US. turnaround is usually about a business week(5 business weekdays give or take not including shipping times). Goopy is a little closer to you and probably could have them done in a business day or 2 but is a little more expensive @$300 per pair but give discounts with seal set purchase, which i think they just lowered from $350/pair after he saw my price sheet at sevenstock.
Last edited by RotaryEvolution; Oct 3, 2012 at 02:42 PM.
most husings have pretty deep grooving in the center of the housing starting at the oil injector hole and increasing in depth/width up to the trailing spark plug and then gradually decreasing again from there.
for somewhat of an idea run a piece of 120grit sandpaper across the face shortwise, it will expose every defect in the surface.
Last edited by RotaryEvolution; Oct 3, 2012 at 09:26 PM.

Thread
Thread Starter
Forum
Replies
Last Post