
Greddy elbow and greddy bov

Thread Starter
Full Member
Joined: Sep 2012
Posts: 73
Likes: 0
From: Chicago Il
Greddy elbow and greddy bov
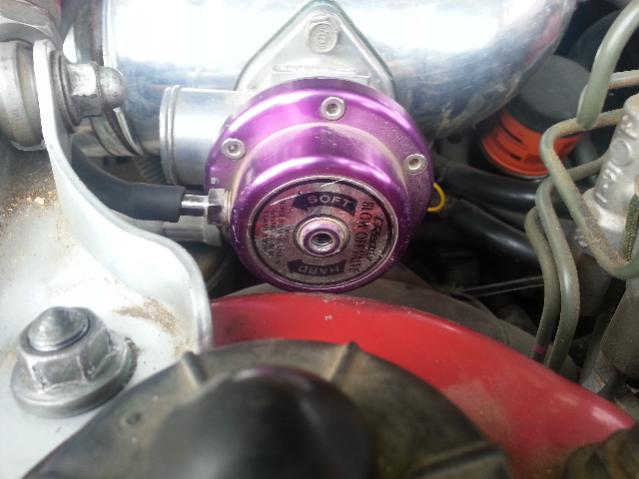
I need information and pictures about how to install bov because I have no idea what vacuum lines run to it. It has stock airbox. The bov is missing adjustment screw on top and has 2 parts in which you can attach a vacuum line. Any pictures would be great.
http://api.viglink.com/api/click?for...13773207263208
https://www.rx7club.com/3rd-generati...rbo-fd-986757/
https://www.rx7club.com/3rd-generati...rbo-fd-986757/
Last edited by red_devil7; Aug 24, 2013 at 12:08 AM. Reason: missing info


Some said it makes a whistle sound if you line up the port with one of the 4 holes inside and leave it open, but what it really for is help lift the valve up.
Q: What is the 2nd bottom port for?
A: The 2nd port can be used to help lift up the diaphragm under low vacuum conditions. If you are experiencing surge before your pressure release, hook up the 2nd port to your turbo pressure line. The vaccum at the top of the diaphragm and the boost pressure under the diaphragm will help it open faster. Keep in mind that the valve will not stay open as long using this method, so the sound will not be as loud.
Trending Topics
Thread Starter
Full Member
Joined: Sep 2012
Posts: 73
Likes: 0
From: Chicago Il
The greddy website tells me to take hose off charge side of stock airbox and plug it. How can I tell which is charge and which is relief hose? Also is there a way of testing bov function? How can you tell if it's bad? Does it stick open or closed? My old turbo charged car had a hard pipe to throttle body with only one notch to vacuum line to intake manifold.
The lower port of the 2 is the charge if you are still running the stock airbox.
You can test the bov with a vacuum pump and gauge, or test it on the car but you'll have to do the single spring mod, then adjust the screw and you should see it open and close.
You can test the bov with a vacuum pump and gauge, or test it on the car but you'll have to do the single spring mod, then adjust the screw and you should see it open and close.
Thread Starter
Full Member
Joined: Sep 2012
Posts: 73
Likes: 0
From: Chicago Il
Ok from what I see the 2 lines that go to stock airbox have been switched around and what I believe to be the charge valve has a notch but no vacuum line connected to it. Do I run a line from that to the bottom of the blow off valve notch?
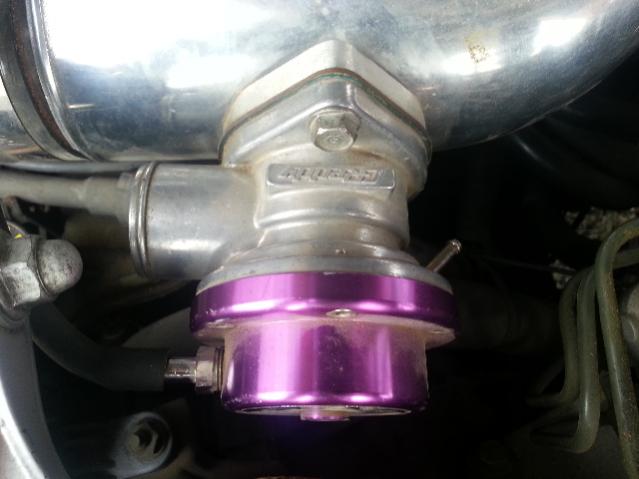
Yup looks like yours is connected to the top port, you need to remove the stock valve and plug the tubing to the Y-pipe, then connect a vacuum line from the BOV top port to your UIM.
Thread Starter
Full Member
Joined: Sep 2012
Posts: 73
Likes: 0
From: Chicago Il
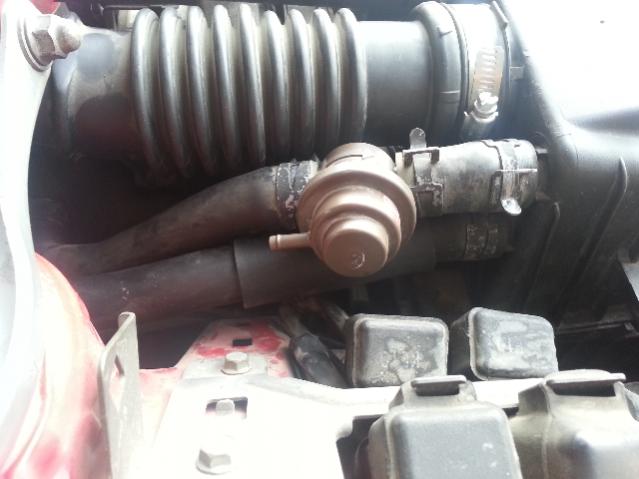
There are 2 valves that connect to stock airbox. The one in picture isn't connected to vacuum. Theres another valve that looks similar connected to the other line running to airbox. That one is connected to vacuum. Do I remove the valve from picture or other one? Are the lines connected to the airbox in the right order from what you see in picture? At bov is vacuum line connected to the right port or do I switch it to other? What do you mean by uim? Thanks again I'm really confused. Lol
No specific order on which port they should go to on the airbox. The valve in the last picture is the one you want to remove, remove that valve and the tube going to the airbox, then plug the tube coming out of the Y-pipe and the opening on the airbox, connect the nipple coming out of purple part of the BOV to your UIM (upper intake manifold).
Thread Starter
Full Member
Joined: Sep 2012
Posts: 73
Likes: 0
From: Chicago Il
Do they sell the plugs online? Or do I just rig something together? To review what I have to do is completely remove rubber line/valve and plug airbox and y pipe. Connect vacuum line from uim to bov. Thanks for sharing your information with me. I'm clueless.
I haven't try looking for them online or from any local part store, I know there is a cap on the radiator of some late 90's early 2000 model 626 that will fit perfect to cap these intake hose, and that's what I use. You can find them in the yard or find out the part # and give Ray at Malloy a call.

Thread
Thread Starter
Forum
Replies
Last Post
Turblown
Vendor Classifieds
12
Oct 17, 2020 03:25 PM
eplusz
General Rotary Tech Support
15
Oct 7, 2015 04:04 PM