
Downpipe help!

Thread Starter
Eats, Sleeps, Dreams Rotary
Joined: Aug 2002
Posts: 3,118
Likes: 0
From: Dallas, TX
Hi All,
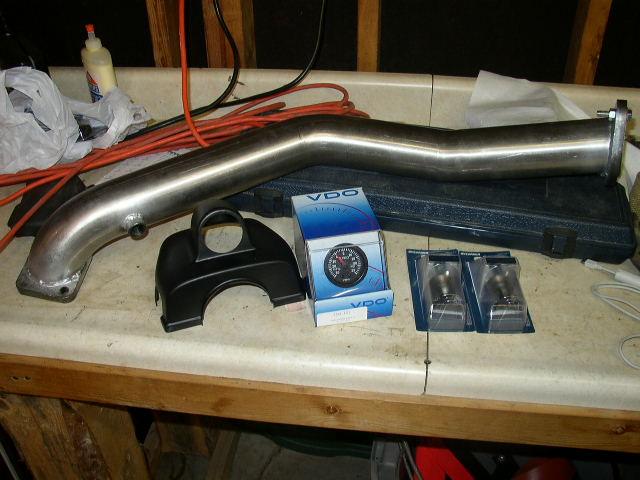
Ok, I bought a stainless downpipe from someone on the forum, said it was an M2 model. Got the precat off with no problem, all the studs came out when getting the nuts off.
Taped the gasket to the pipe, threaded one stud in, but then couldn't thread the 2nd lower stud in while the pipe was on. Tried like hell then decided to take the pipe back off. Threaded in the 2 lower studs in, but then the pipe wouldn't go on, clearance issues with the studs against the chassis.
Tried again to thread in one, then put the pipe back on, FINALLY got the 2nd stud threaded all the way in with the pipe on, but when attempting to put the nuts on, they wouldn't fit! They were hitting the side of the pipe.
Went to Pep Boys who didn't have anything, and Home Depot didn't have anything that would withstand the heat. What should I try next? Should I try to find some stainless bolts with hex heads, or shorter studs, or what? Spent the past half hour reading all threads on downpipes, but couldn't find anything that had to do with this kind of fitment issue.
Thanks!
Cavell
The factory OEM nuts are very narrow, and should work. I would check to make sure that you have the correct nuts.
If that doesn't help, you could take the downpipe to a muffler shop. They could probably bend in the spots where you have a problem. Or, just take a hammer to it yourself. It probably doesnt need much.
If that doesn't help, you could take the downpipe to a muffler shop. They could probably bend in the spots where you have a problem. Or, just take a hammer to it yourself. It probably doesnt need much.
Thread Starter
Eats, Sleeps, Dreams Rotary
Joined: Aug 2002
Posts: 3,118
Likes: 0
From: Dallas, TX
I'm positive they're the right nuts, only one place they could come off of. I'd try to not hammer it in if at all possible. But at this point anything to get the car back on the road.

Full Member
Joined: Jan 2002
Posts: 246
Likes: 0
From: south jersey
i had the same problem. when putting the nuts on i wasn't able to tighten them all the way down, they kept hitting the dp. what i did was i grinded the flange on the nut down so it was basically a nut. then i was able to tighten the nuts all the way.
be careful and only grind down a little at a time. it might be tedious but you depending on the dp you don't have to grind the whole flange of the nut off.
nick
be careful and only grind down a little at a time. it might be tedious but you depending on the dp you don't have to grind the whole flange of the nut off.
nick
Thread Starter
Eats, Sleeps, Dreams Rotary
Joined: Aug 2002
Posts: 3,118
Likes: 0
From: Dallas, TX
I didn't buy it new, just came with the pipe and that's it. I'm using the same studs that held the pre cat in. Working the 2nd stud in I at least could wiggle the pipe around to screw it in tighter by hand, now I'm scared to even go to the top 2 studs, since I probly won't have any extra room to move and twist the pipe back and forth to get those in. I really hope those are lined up enough to go in smoothly.
fart on a friends head!!!
Joined: Mar 2002
Posts: 4,104
Likes: 2
From: sheppard AFB, TX
dude, id find out what kind of metal the stock studs are made of. i used stainless nuts and bolts on my NA exhaust and found that the had already "bonded" together after a week. i absolutely HAD to use some PB Blaster to get the rest off without beating them to death (if there is a death for nuts and bolts).
i would absolutely LOOOOOOOOOOOVE to change them out to hex headed bolts. . . i love a nice "hexed" look. haha, but you have to then buy an adapter and kit for your socket wrench.
paul
i would absolutely LOOOOOOOOOOOVE to change them out to hex headed bolts. . . i love a nice "hexed" look. haha, but you have to then buy an adapter and kit for your socket wrench.
paul
Trending Topics
Full Member
Joined: Jan 2002
Posts: 246
Likes: 0
From: south jersey
i ended up buying mine used too, and instead of coming w/ new nuts or studs, i just got the pipe. if you can't wiggle it around and get the nuts on, grind them down. you'll be able to tighten the nuts all the way down w/ no problems.
Thread Starter
Eats, Sleeps, Dreams Rotary
Joined: Aug 2002
Posts: 3,118
Likes: 0
From: Dallas, TX
That's what I've been thinkin, since I've started having all these troubles.. I heard m2 and HKS were the easiest fitting, but I wanted stainless, that's why I bought this one.
Thread Starter
Eats, Sleeps, Dreams Rotary
Joined: Aug 2002
Posts: 3,118
Likes: 0
From: Dallas, TX
Tryin to get ahold of m2 to see what the dimensions of the studs theirs come with is. Then see if RP has 'em. Since the auto stores I've been to around here are useless.
Rotary Enthusiast
Joined: Oct 2002
Posts: 1,045
Likes: 1
From: Plano, TX
Dude - I bought galvanized steel nuts & bolts from HD and they fit no problem.
I bought the 35mm length ones with locking nuts.
I'm really not concerned with not being able to get them off from the heat....
Should I though????????
I bought the 35mm length ones with locking nuts.
I'm really not concerned with not being able to get them off from the heat....
Should I though????????
Thread Starter
Eats, Sleeps, Dreams Rotary
Joined: Aug 2002
Posts: 3,118
Likes: 0
From: Dallas, TX
m2 said that they use the OEM studs, which if that's the case, is more and more leading me to belive it's not actually a m2. looks just like it tho.
Hopefully the nuts w/o flanges will work alright.
Hopefully the nuts w/o flanges will work alright.
Joined: Oct 2001
Posts: 4,772
Likes: 2
From: My 350Z Roadster kicks my RX7's butt
If someone can post a picture of the M2's flange, you could easily tell. The location of the O2 sensor bunge could be a give away as well.
Mazda OEM part #'s
stud = 9YA9-01-002 @$4.20ea
nut = JE10-40-355 @$5.60ea
Mazda OEM part #'s
stud = 9YA9-01-002 @$4.20ea
nut = JE10-40-355 @$5.60ea

here's part of what I needed to do to install a Pettit downpipe...these comments are from my notes when I installed.....
in order to install the downpipe the bottom bolt closest to the firewall needs to be installed first
the reason for this is the bend in the downpipe will not allow a bolt/allen to be screwed in while the downpipe is flush with the manifold, the bend interferes with the head of the bolt, not allowing the bolt to be perpendicular to the hole
to accomplish this I placed one of the studs (without nut) in the top (closest to front of car) manifold hole
then while resting on the stud you can rotate the downpipe to start threading in the lower bottom bolt (closest to firewall)
The Power of 1.3
Joined: Aug 2001
Posts: 2,835
Likes: 0
From: Shrewsbury, Massachusetts
This sounds like a ridiculously simple answer, and maybe i missed something in the above discussion, but you all seem to be using and have used socket wrenches. I used a box end wrench on the bottom bolts, and had no clearance issues. That way you don't have the depth of socket and wrench between the end of the bolt and the dp.
Joined: Oct 2001
Posts: 4,772
Likes: 2
From: My 350Z Roadster kicks my RX7's butt
Sweet, thanks JimmyJimboJet 
You wouldn't happen to have a pic of the other side, would ya? I beleive it is the other side (but lower, by O2 bunge) that is where the stud hits the pipe (on other brands). Cool, M2 has 3 bends and thick flanges (thought that was Pettit)?
You wouldn't happen to have a pic of the other side, would ya? I beleive it is the other side (but lower, by O2 bunge) that is where the stud hits the pipe (on other brands). Cool, M2 has 3 bends and thick flanges (thought that was Pettit)?
Last edited by GoRacer; Jan 3, 2003 at 11:22 PM.
Senior Member
Joined: Feb 2001
Posts: 464
Likes: 0
From: Was SoCal
Hmmm, that does not look like my M2 DP. Mine looked just like the one on the M2 website (before I had it coated). It looks like yours has another bend.
Back to fitment though-- mine fit fine using stock studs & nuts. It was tough to tighten them, but I didn't have any interference issues.
Back to fitment though-- mine fit fine using stock studs & nuts. It was tough to tighten them, but I didn't have any interference issues.
Last edited by artowar2; Jan 4, 2003 at 01:24 AM.
Joined: Oct 2001
Posts: 4,772
Likes: 2
From: My 350Z Roadster kicks my RX7's butt
Ack, crap ...will the real M2 please stand up, please stand up. Will the real M2 please stand up.
 Hmm, notice a trapazoid flange and the O2 bunge further down the pipe? Oh and two bends, not three.
Hmm, notice a trapazoid flange and the O2 bunge further down the pipe? Oh and two bends, not three.
Last edited by GoRacer; Jan 4, 2003 at 01:38 AM.

Full Member
Joined: Feb 2002
Posts: 238
Likes: 0
From: snohomish,Wa
I think books has it right. I just put my M2 downpipe on, only I could'nt get any of the nuts off the studs. So I re-installed them as if they were bolts. Used every foul
word I knew to get them all started.
Eric
word I knew to get them all started.
Eric


Full Member
Joined: Feb 2001
Posts: 59
Likes: 0
From: Bay Area
JimmyJimboJet- That does not look like a M2 DP... I have never seen an extra bend in the pipe as shown in picture "pc130001.jpg" which you posted.
As for studs... use the shorter studs that are used to hold the turbo manifold down. _DO_ _NOT_ _USE_ _BOLTS, and only use Mazda studs.
1) Mazda had problems w/ studs breaking and corrected it.
2) When unbolting the DP if any of the studs are seized in to the turbo manifold... at least you have a chance that the nut will come off.
Remember do the job properly or suffer later on down the line.
-M
Thread Starter
Eats, Sleeps, Dreams Rotary
Joined: Aug 2002
Posts: 3,118
Likes: 0
From: Dallas, TX
Mine looks just like silvr94r2's, except the o2 bunge doesn't stick out that far at all. It's almost completely flush with the pipe. Shoulda put in the sensor before I put the pipe on, so far am unable to get it on now from under the car. I'll take off the intake hoses and crap to see if I can get it screwed in from the top.
As far as the fitment goes, used the original nuts/studs, got the lower 2 studs in while holding the pipe up to the turbo. Then had to wiggle the pipe back and forth in order to get the upper 2 studs to thread in right. That was a bitch and a half to do, as it was super tight, and only could get in maybe 1/4 turn every time I'd move the pipe back and forth.
As far as the fitment goes, used the original nuts/studs, got the lower 2 studs in while holding the pipe up to the turbo. Then had to wiggle the pipe back and forth in order to get the upper 2 studs to thread in right. That was a bitch and a half to do, as it was super tight, and only could get in maybe 1/4 turn every time I'd move the pipe back and forth.