
Cracking Trans Tunnel Cover Fix

Thread Starter
Joined: Oct 2002
Posts: 802
Likes: 10
From: Chatsworth, CA
Cracking Trans Tunnel Cover Fix
Hello all,
I've been pouring time into my engine lately. The majority of it has been spent pulling the turbos and oil pan to knock out an oil leak. I've had enough of being greasy ... time to attack something in the cockpit.
So, how do you get into and out of your car? Specifically how do you avoid dragging your legs and rear end across the seat bolsters and / or synthetic suede? You know ... as you try to make your stock seats last just a bit longer or that tear not grow any larger?
I put my elbow on the trans tunnel cover and use this point to lift myself into the car. Both of my FDs had a crack in the plastic here, under the upholstery. Is this common? It would surprise me if it isn't. My 93 r1 was bad enough that I'm guessing the covering (leather) wasn't far from tearing.
Anyway, here's the fix. Let's start with the take it apart portion:
1) Remove the ash tray and unscrew the shift ****.
2) Gently pull up on the edges of the shift boot where it attaches to the trans tunnel plastic. Don't pull on the shift boot, pull on the plastic edges. The plastic that holds your rear defogger, fog light and / or rear wiper switch will come right out.
3) Unplug the switches, warning lights and ash tray light.
4) Set the plastic aside.
5) Remove five philips screws that are under the plastic from the above step.
6) Pull both seats forward, fold the seat backs forward and finally locate / remove two more screws.
Now, the fix:
- Turn over the trans tunnel cover. Check that it's made out of ABS plastic. Mine had the letters "ABS" molded right into it. If you're not sure, experiment with a small amount of the supplies that you're about to purchase (below) before committing too much effort to this. The "ABS" cement dissolves the plastic that it is squeezed in between, dries and effectively creates one new piece of plastic from two. At least this is how I understand it. Bottom line though, if you don't have the correct plastic it won't work.
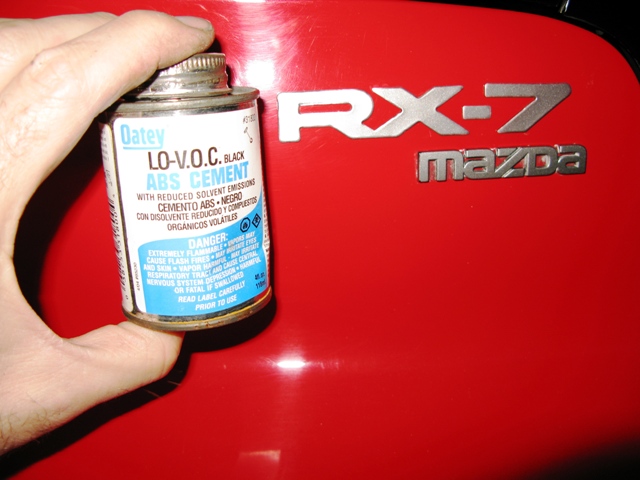
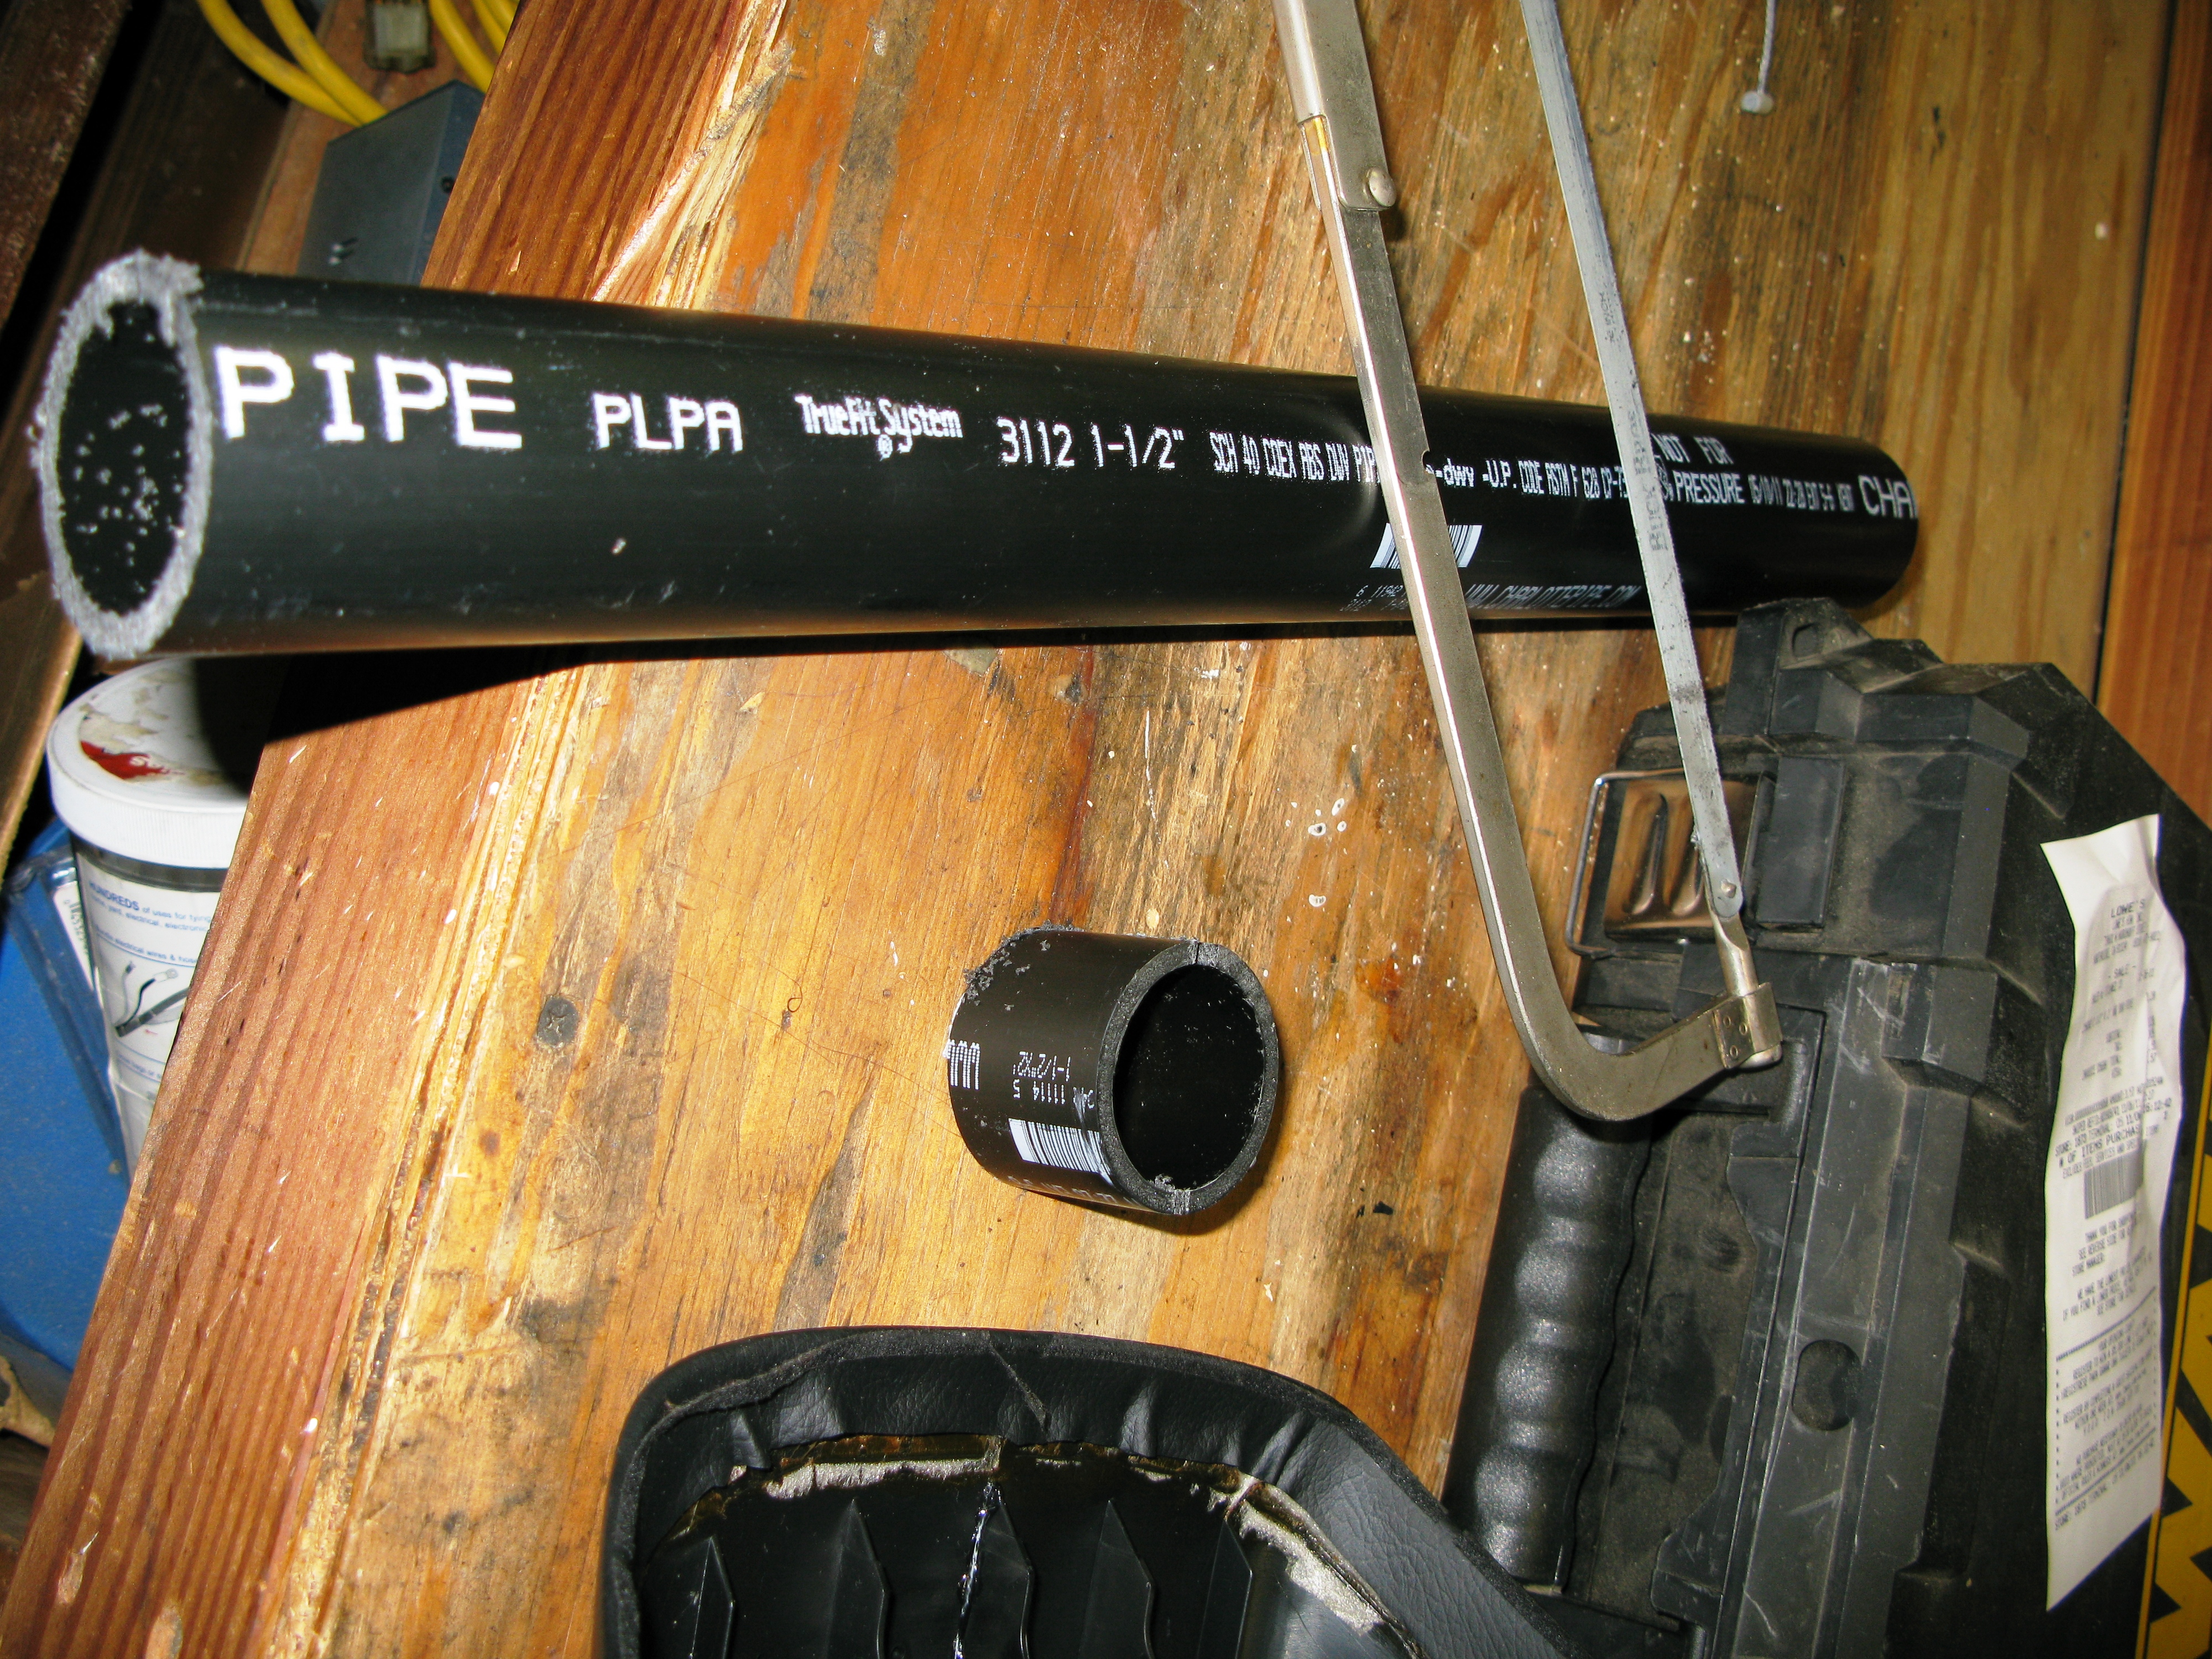
- Pick up some ABS plastic pipe at Lows, Home Depot, etc. The picture below is drain pipe. I believe that plastic electrical conduit is ABS as well. It's important that the plastic is ABS. PVC sprinkler pipe won't work, for example.

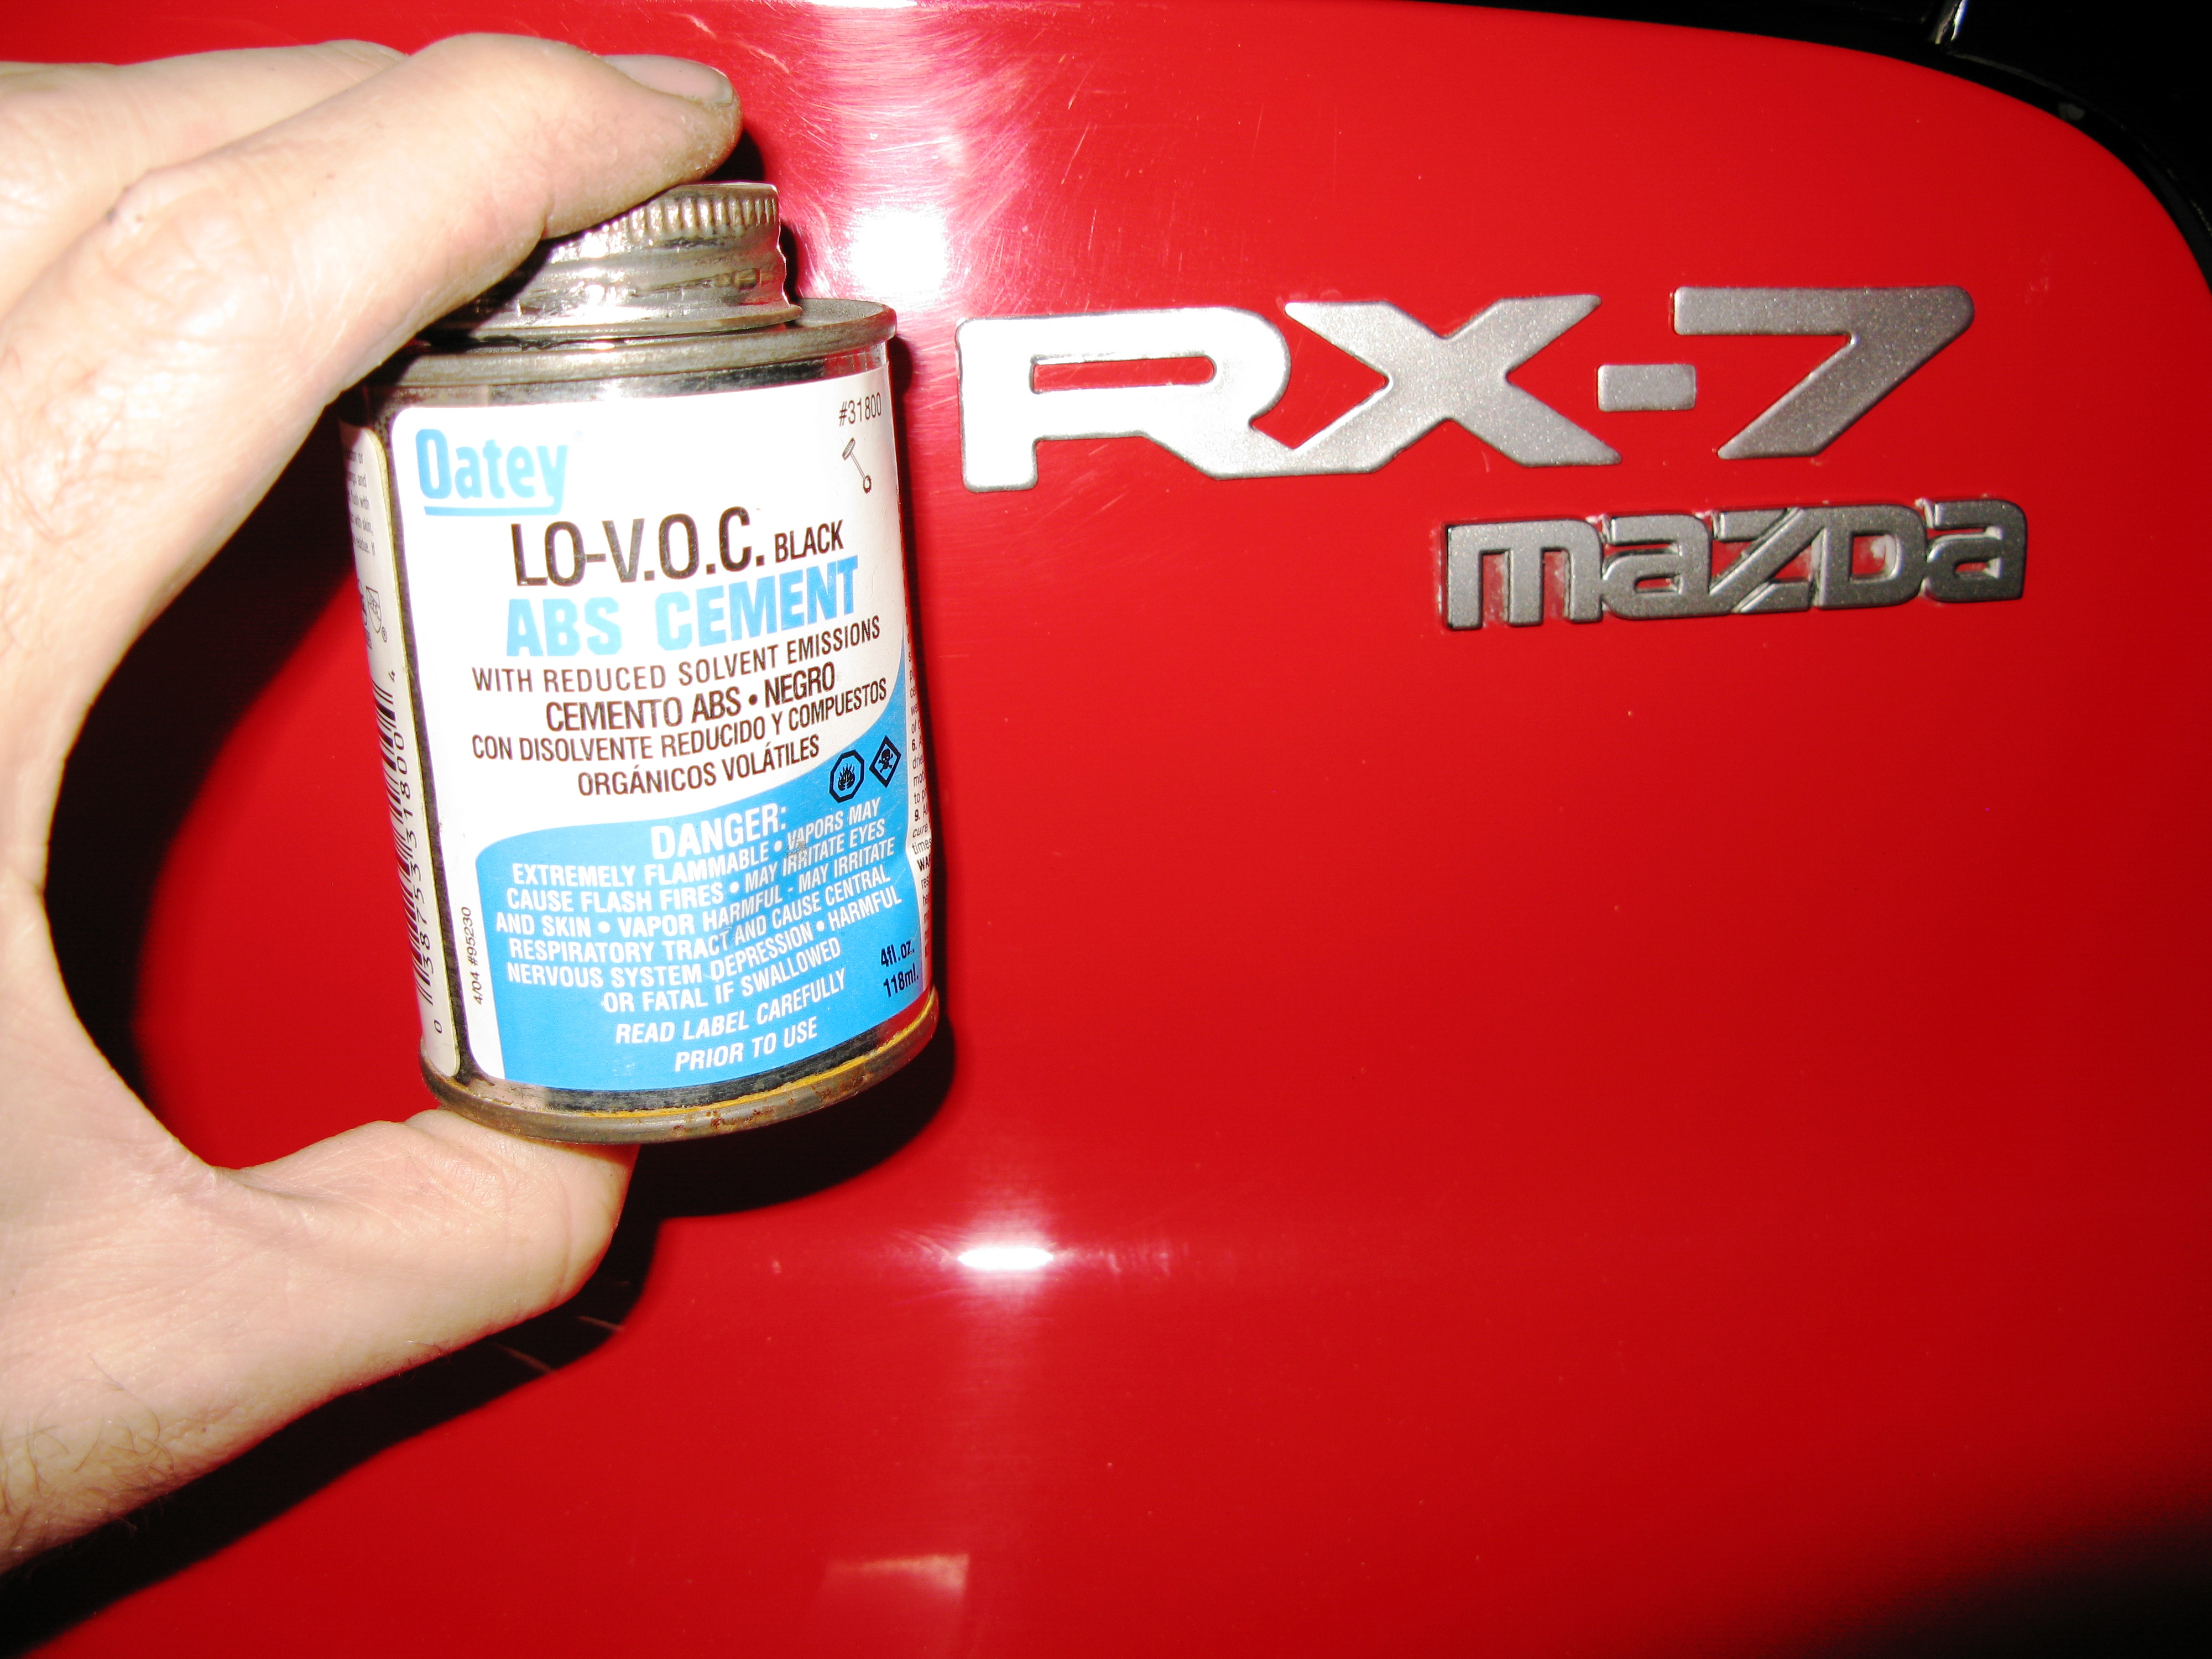
- Before you leave the hardware store, pick up some ABS solvent cement. Again, this isn't the stuff that you already have in your garage to fix your PVC sprinkler pipes. In my Lows and Home Depot it was in the same area / shelf though.
- You have a hack saw, right? If not pick one up. A power miter saw would be a better option ... my brother in law has mine at the moment ... the last four months of moments.
- Use the ABS cement to repair the existing cracks in the plastic. The part where you put your elbow, screw holes, everything. Just pry the crack open, place a little in (a small screw driver works well) and apply pressure. I used a piece of scrap 2x4 to hold the trans tunnel open while applying glue. After this, apply pressure. I laid my tunnel on it's side and set a pair of large vice grips (as a weight) on it. After about an hour move on to the next part.
- Measure from below the ribs on the underside of the trans tunnel to the top of the two plastic (bear bottle like) legs. Add about 1/4", measure and cut a piece of ABS pipe. Why add the 1/4"? The two crews that are behind the seats hold the beer legs about a 1/4" off of the carpet. This is likely why the tunnel is prone to cracking.
- Choose where you want to place the cut pipe. I placed four on the bottom of my trans tunnel cover. Two in front of the "beer bottle" legs and two behind. Anyway, once you know where the pipe piece will go, mark and cut out a 1/8" pieces so that the pipe is able to clear the plastic ribs and contact the bottom of the trans tunnel cover. I made two cuts on each side of the pipe and then used a needle nose pliers to snap out the plastic. Yep, at least one pipe piece will cross over multiple ribs requiring additional cuts.
- Apply a bit if glue and press the piece into place. A 5lb sledge hammer is great to apply gravity pressure while the glue dries. If you didn't use too much glue, 15 minutes will do the trick. Don't pull on the freshly glued pipe just yet ... let it cure completely first ... I left mine for 24 hours. Well, an hour will probably do the trick. I left it for 24 so that I didn't bring the smell of the glue into my car.
- Repeat this with another three pipe pieces.
- Use a few small slivers of pipe to extend the beer bottle legs to the same height as the pipe pieces that you just glued on.
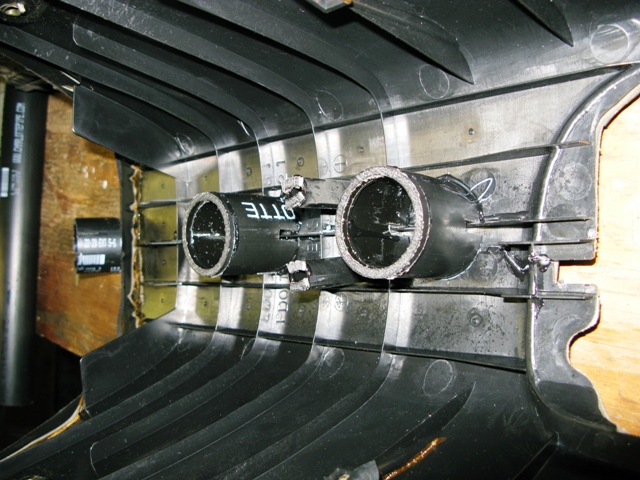
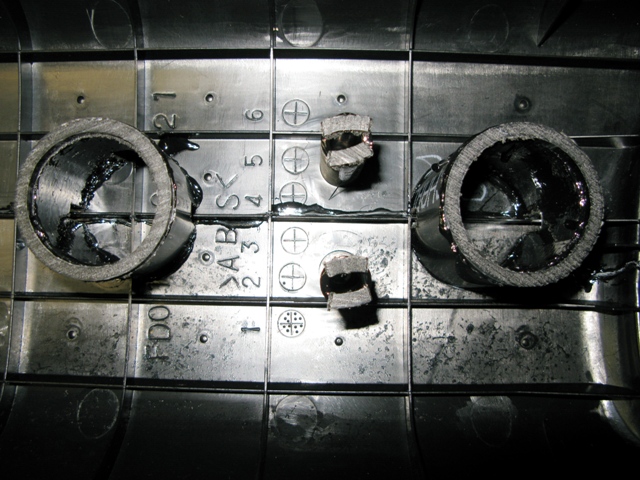
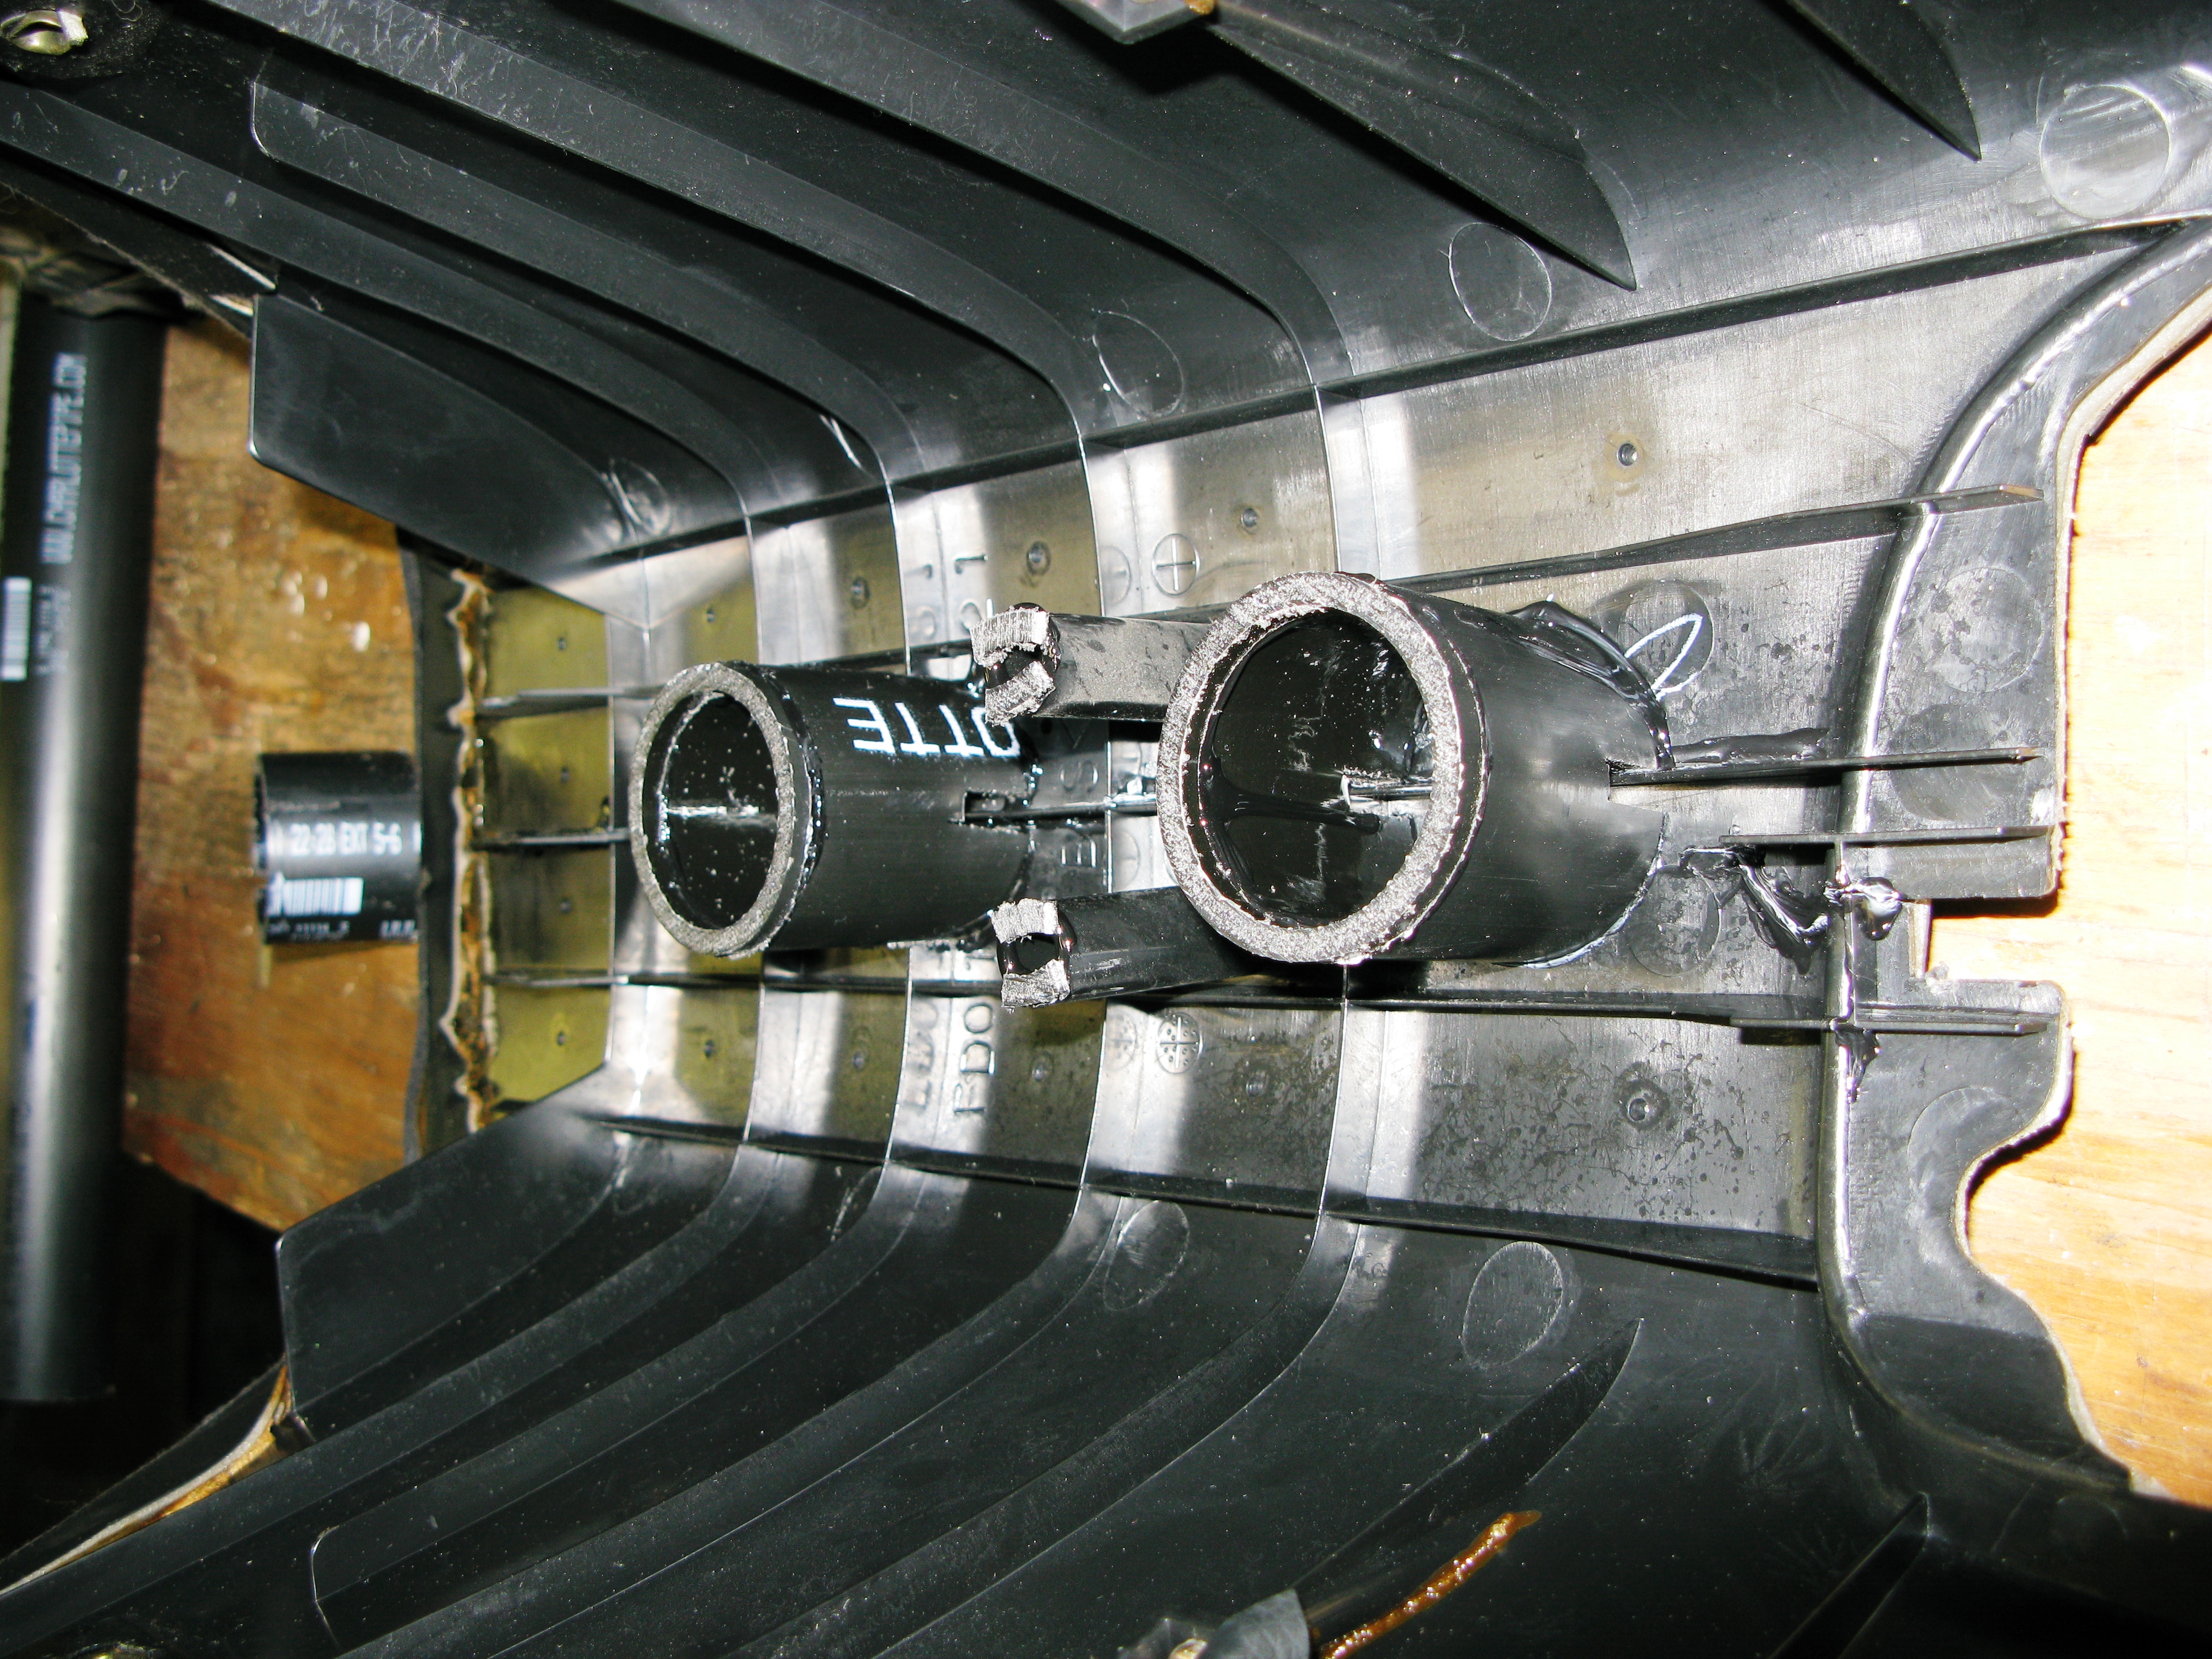
Here are some pictures, two pipe pieces into the project:
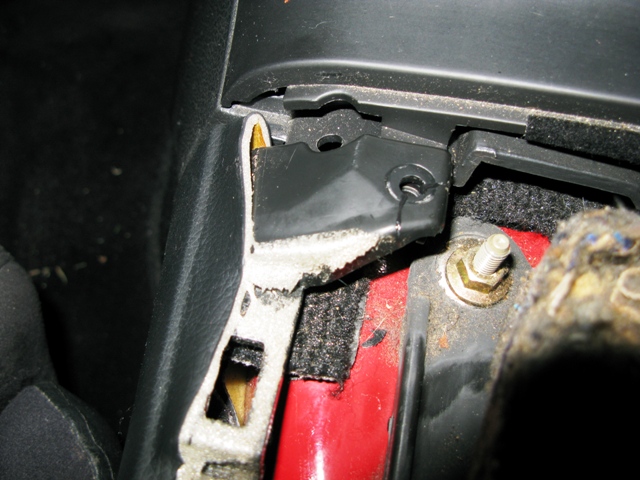
Here's a shot of the tunnel when installed in the car. My camera's macro mode can't quite focus at this distance ...
You can see that I had to pull the tunnel cover out and add another 1/4" of pipe to the pieces that I had already installed. I didn't notice that the two behind-the-seat-screws held the cover 1/4" up until I re-installed them.
Now ... just reverse the "take it apart portion" and you're good to go. My cover is very solid and doesn't creak when I use it to swing into my drivers seat.
Hmm ... a bit of an afterthought ... Once this glue sets it's very strong. You may want to test fitment with a single piece of pipe and no glue before commuting. It's possible that different model years, trims, etc. require different measurements.
James
I've been pouring time into my engine lately. The majority of it has been spent pulling the turbos and oil pan to knock out an oil leak. I've had enough of being greasy ... time to attack something in the cockpit.
So, how do you get into and out of your car? Specifically how do you avoid dragging your legs and rear end across the seat bolsters and / or synthetic suede? You know ... as you try to make your stock seats last just a bit longer or that tear not grow any larger?
I put my elbow on the trans tunnel cover and use this point to lift myself into the car. Both of my FDs had a crack in the plastic here, under the upholstery. Is this common? It would surprise me if it isn't. My 93 r1 was bad enough that I'm guessing the covering (leather) wasn't far from tearing.
Anyway, here's the fix. Let's start with the take it apart portion:
1) Remove the ash tray and unscrew the shift ****.
2) Gently pull up on the edges of the shift boot where it attaches to the trans tunnel plastic. Don't pull on the shift boot, pull on the plastic edges. The plastic that holds your rear defogger, fog light and / or rear wiper switch will come right out.
3) Unplug the switches, warning lights and ash tray light.
4) Set the plastic aside.
5) Remove five philips screws that are under the plastic from the above step.
6) Pull both seats forward, fold the seat backs forward and finally locate / remove two more screws.
Now, the fix:
- Turn over the trans tunnel cover. Check that it's made out of ABS plastic. Mine had the letters "ABS" molded right into it. If you're not sure, experiment with a small amount of the supplies that you're about to purchase (below) before committing too much effort to this. The "ABS" cement dissolves the plastic that it is squeezed in between, dries and effectively creates one new piece of plastic from two. At least this is how I understand it. Bottom line though, if you don't have the correct plastic it won't work.
- Pick up some ABS plastic pipe at Lows, Home Depot, etc. The picture below is drain pipe. I believe that plastic electrical conduit is ABS as well. It's important that the plastic is ABS. PVC sprinkler pipe won't work, for example.
- Before you leave the hardware store, pick up some ABS solvent cement. Again, this isn't the stuff that you already have in your garage to fix your PVC sprinkler pipes. In my Lows and Home Depot it was in the same area / shelf though.
- You have a hack saw, right? If not pick one up. A power miter saw would be a better option ... my brother in law has mine at the moment ... the last four months of moments.
- Use the ABS cement to repair the existing cracks in the plastic. The part where you put your elbow, screw holes, everything. Just pry the crack open, place a little in (a small screw driver works well) and apply pressure. I used a piece of scrap 2x4 to hold the trans tunnel open while applying glue. After this, apply pressure. I laid my tunnel on it's side and set a pair of large vice grips (as a weight) on it. After about an hour move on to the next part.

- Measure from below the ribs on the underside of the trans tunnel to the top of the two plastic (bear bottle like) legs. Add about 1/4", measure and cut a piece of ABS pipe. Why add the 1/4"? The two crews that are behind the seats hold the beer legs about a 1/4" off of the carpet. This is likely why the tunnel is prone to cracking.
- Choose where you want to place the cut pipe. I placed four on the bottom of my trans tunnel cover. Two in front of the "beer bottle" legs and two behind. Anyway, once you know where the pipe piece will go, mark and cut out a 1/8" pieces so that the pipe is able to clear the plastic ribs and contact the bottom of the trans tunnel cover. I made two cuts on each side of the pipe and then used a needle nose pliers to snap out the plastic. Yep, at least one pipe piece will cross over multiple ribs requiring additional cuts.
- Apply a bit if glue and press the piece into place. A 5lb sledge hammer is great to apply gravity pressure while the glue dries. If you didn't use too much glue, 15 minutes will do the trick. Don't pull on the freshly glued pipe just yet ... let it cure completely first ... I left mine for 24 hours. Well, an hour will probably do the trick. I left it for 24 so that I didn't bring the smell of the glue into my car.
- Repeat this with another three pipe pieces.
- Use a few small slivers of pipe to extend the beer bottle legs to the same height as the pipe pieces that you just glued on.
Here are some pictures, two pipe pieces into the project:
Here's a shot of the tunnel when installed in the car. My camera's macro mode can't quite focus at this distance ...
You can see that I had to pull the tunnel cover out and add another 1/4" of pipe to the pieces that I had already installed. I didn't notice that the two behind-the-seat-screws held the cover 1/4" up until I re-installed them.
Now ... just reverse the "take it apart portion" and you're good to go. My cover is very solid and doesn't creak when I use it to swing into my drivers seat.
Hmm ... a bit of an afterthought ... Once this glue sets it's very strong. You may want to test fitment with a single piece of pipe and no glue before commuting. It's possible that different model years, trims, etc. require different measurements.
James


EXCELLENT job! Anything to help the interior of the FD is great, there's SO many problems there.
Another small trick - the metal clips on the shifter surround that hold it to the trans cover are frequently missing. They're available relatively cheaply from Mazda and that makes a big difference when it's popped in there securely.
Harbor Freight also sells a plastic welding kit that's kind of a soldering iron with filler rod in different materials (such as ABS). This could be used to build up areas that have broken off and are missing. I haven't tried it personally but the theory is sound.
Great job and thanks again!
Dale
Thread Starter
Joined: Oct 2002
Posts: 802
Likes: 10
From: Chatsworth, CA
I'm glad to see that this will help folks!
I've driven the car a bit since installing this fix. What a difference. The trans tunnel cover feels like it's a solid part of the car rather than a fragile piece of plastic ... floating above the carpet.
Dale, the only problem with Harbor Freight is that there are so many things in that store that I "might need". I have to focus in order to make it to the register with only one item. :-p

Thread
Thread Starter
Forum
Replies
Last Post