
Coolant leak...started tearing things apart need help!

Thread Starter
Joined: Jun 2007
Posts: 1,114
Likes: 0
From: California
Coolant leak...started tearing things apart need help!
Ok I made a bold move today, and that was to fix the coolant leak coming from the turbo's myself. I started tearing things apart and I realized I need to replace a LOT more then I thought but thing were going smoothly, until..... I had to remove the bolts for the catalytic conveter. I had a brand new mid-cat installed a few months ago, with BRAND NEW bolts, and when I tried taking the bolts apart, it started loosening up, BUT then they got tighter and TIGHTER, then it stopped, and now its stuck!!!! how is this happening to BRAND NEW bolts wtf???? I dont care about the bolts they can be replaced, but I dont understand how this is even happening with new bolts!! Anyway, does anybody know the best/easiest way to BREAK these catalytic conveter bolts off? This is where im stuck now 

Junior Member
Joined: Aug 2008
Posts: 12
Likes: 0
From: montreal
there is two way to do it.The first one,i don't think that you have torches at home so forget about this. second one,me i cut them with a grinder or a cuting wheel.Take care to do not cut exhaust or cat.
you can try to put loose nut on it for 1h but put alot and try to break it with an impact gun
The exhaust is going very hot to cold often so it make bolt rusting faster
you can try to put loose nut on it for 1h but put alot and try to break it with an impact gun
The exhaust is going very hot to cold often so it make bolt rusting faster
Huh?
Joined: Jul 2004
Posts: 670
Likes: 0
From: Baltimore, Maryland
Soak the bolts in PB Blaster overnight. After they have soaked for a bit, you need to loosen them until they stop, then tighten, then loosen again. Keep doing this until the bolts come off. You can also heat up the bolts with a torch, but be careful where you aim the flame. If all else fails, find a friend with some air tools. A good impact wrench will zip those suckers off in a second.
If you haven't done so already, now would be an ideal time to replace the pre-cat.
If you haven't done so already, now would be an ideal time to replace the pre-cat.

Thread Starter
Joined: Jun 2007
Posts: 1,114
Likes: 0
From: California
I like the idea of the cutting wheel, I think this is the cheapest solution? I know air tools will be expensive. Maby the reason why the bolts are like this is because they didnt use antiseize, how long does antiseize last?
Thread Starter
Joined: Jun 2007
Posts: 1,114
Likes: 0
From: California
Is this here the kinda tool I need to break it off? http://www.sears.com/shc/s/p_10153_1...1510000P?mv=rr

Is this here the kinda tool I need to break it off? http://www.sears.com/shc/s/p_10153_1...1510000P?mv=rr
Trending Topics
Thread Starter
Joined: Jun 2007
Posts: 1,114
Likes: 0
From: California
Well, my brother actually helped me to break these bolts off today with a breaker bar, So tommorow I work, and Ill be back on this project on thursday. The strange thing is that when they broke, I noticed they were in PERFECT condition, no rust or anything? I think they may have been "Lock Bolts" I never want this to happen again! Does anyone know if factory Mazda bolts are regular type and NOT lock type?
Last edited by Ernesto13B; Aug 13, 2008 at 03:05 AM.


Racecar - Formula 2000
Joined: Sep 2002
Posts: 4,035
Likes: 371
From: Bath, OH
Well, my brother actually helped me to break these bolts off today with a breaker bar, So tommorow I work, and Ill be back on this project on thursday. The strange thing is that when they broke, I noticed they were in PERFECT condition, no rust or anything? I think they may have been "Lock Bolts" I never want this to happen again! Does anyone know if factory Mazda bolts are regular type and NOT lock type?
Thread Starter
Joined: Jun 2007
Posts: 1,114
Likes: 0
From: California
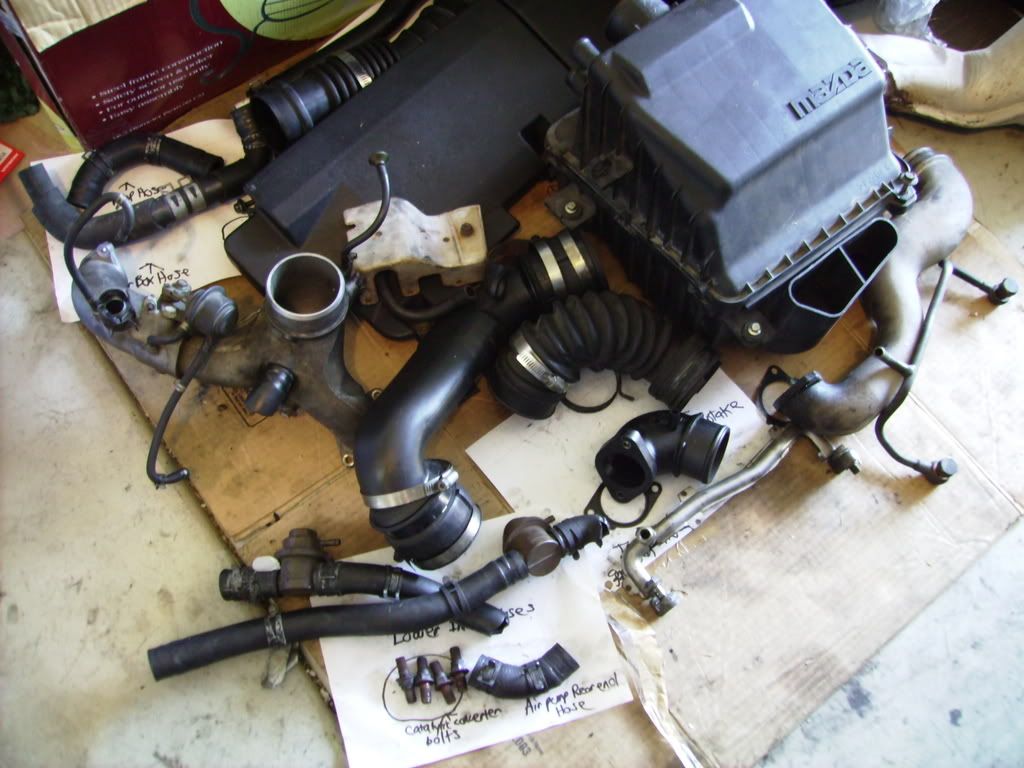
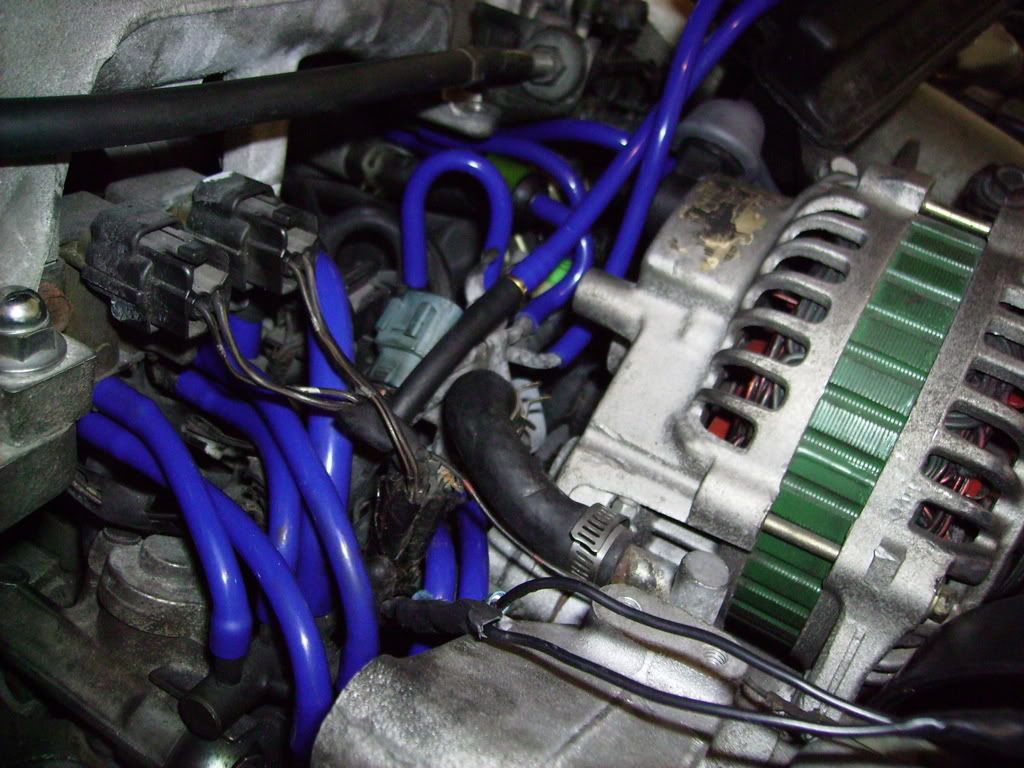
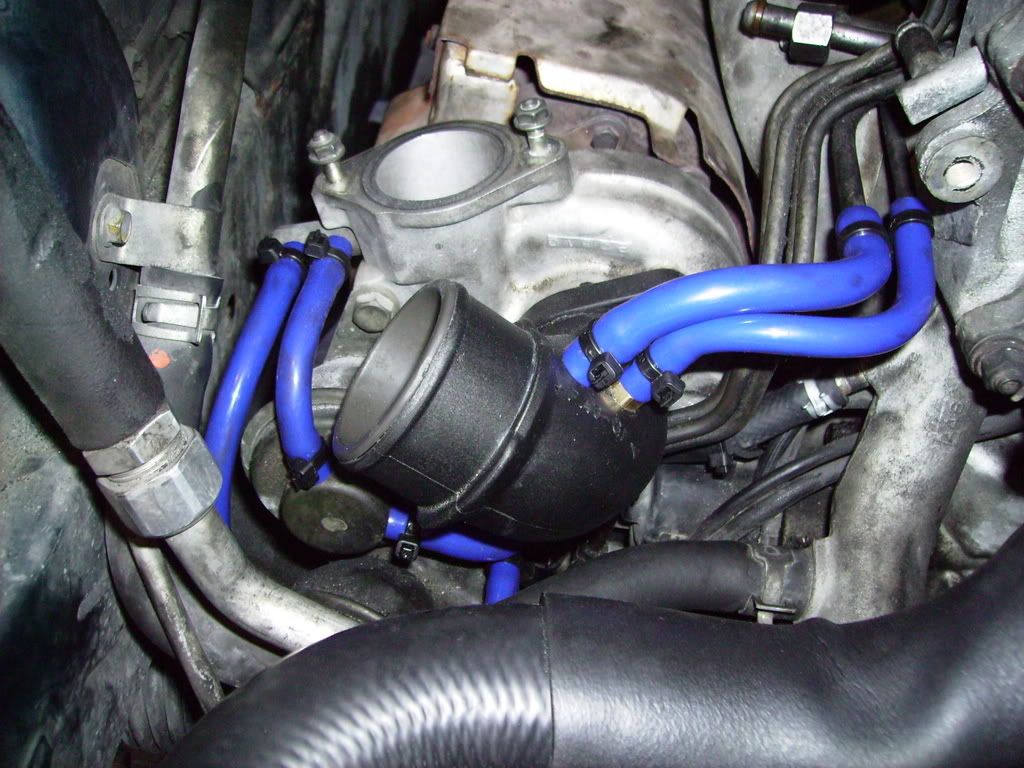
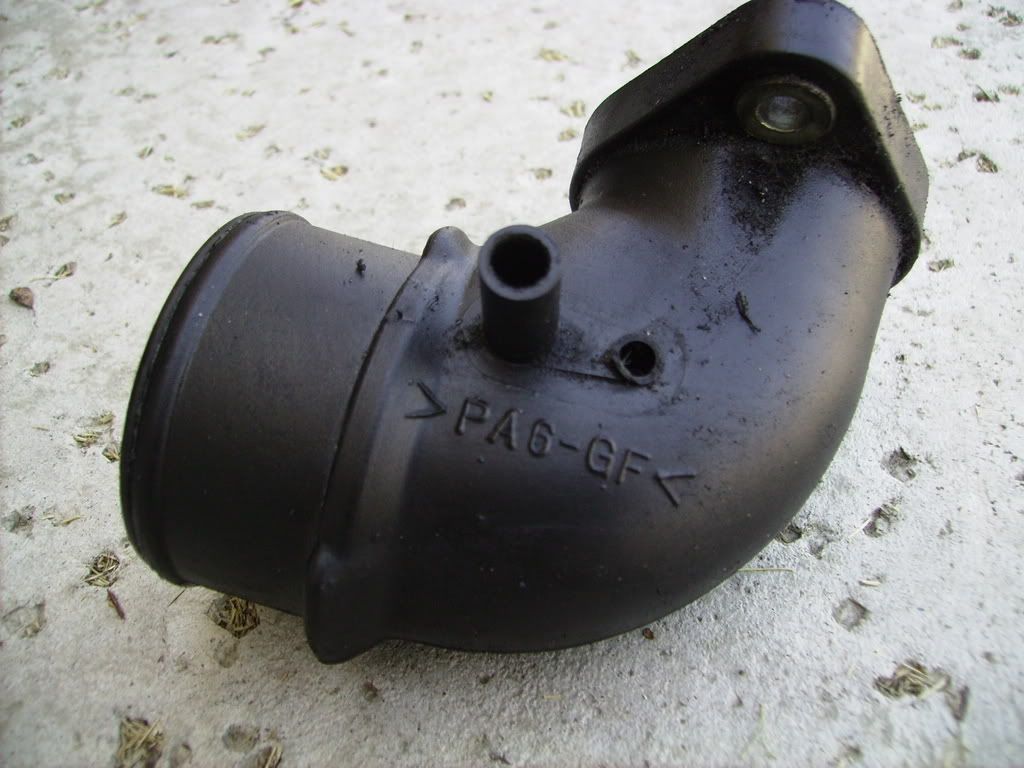
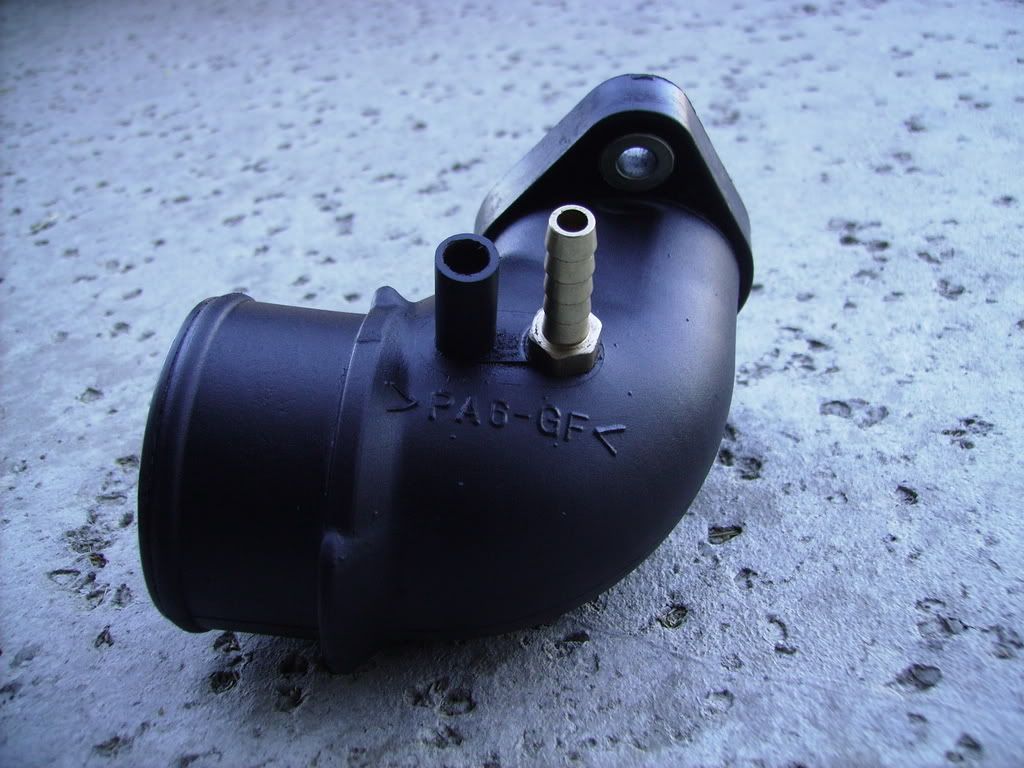
Hey guys, I took some more parts apart today but I need some more help... There were 3 of those small little vaccum hoses attached to these air intake hoses here in the 2 pictures, and like an idiot I forgot where they all 3 of them go. Is there some kind of a diagram I can follow?? or does somebody have any pictures of their car with these hoses attached, so I can figure out where they go? Here are 2 pictures to hopefully clerlify what I need help with... any help is GREATLYT appreciated!!
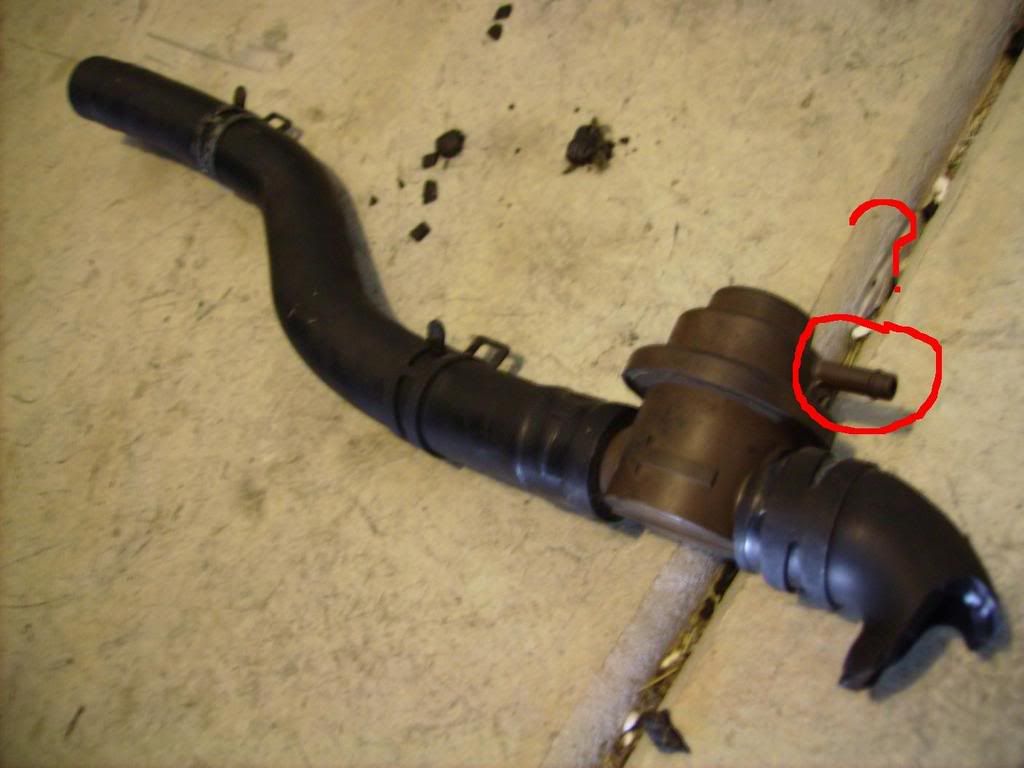


does it matter which vaccum nipple each one plugs into?
does it matter which vaccum nipple each one plugs into?
Huh?
Joined: Jul 2004
Posts: 670
Likes: 0
From: Baltimore, Maryland
That is good advice. Make sure you pop for a good quality silicone hose. The blue and red colored silicon hose at your corner Autozone gets very soft and collapses after just a few heat cycles (not good). 4mm is the size you need.
Thread Starter
Joined: Jun 2007
Posts: 1,114
Likes: 0
From: California
Ok now im a little more then 50% done with all of this this but im stuck again now. Is there some special way to install the factory Y-Pipe? it was a little hard getting apart but it seems like the Y-Pipe ends dont line up to the turbos properly, could they be adjusted somehow?

Thread Starter
Joined: Jun 2007
Posts: 1,114
Likes: 0
From: California
Im replacing almost all of the vacuum hoses with silicone in the rats nest. The only ones Im not replacing are the ones under the extension manifold, because I dont feel like taking that apart lol plus, the previous owner already had all the vacuum hoses replaced, so they are still some what flexible. Here's the list of every thats being done to it:
---Replace both turbo coolant hoses
---Replace vacuum hoses with Hose Techniques Silicone
---Replace 2 Pre-cat to Mid-cat exhaust bolts
---Replace 1 Air Pipe gasket
---Repair Turbo AirPipe nipple ( Im not spending $85 to replace it!)
---Replace 4 crushwashers for oil feed pipes
---Replace 2 bolts and 4 crushwashers for coolant hardlines
---Replace Air Cleaner assembly (used)
---Replace Air Pump (used) , and repair connectors and wiring
---Clean EGR valve, and replace gasket
---Replace worn intake hose rubber ends with silicone (X2)
---Replace upper water pump coolant hose with new clamps
---Replace 2 air hoses that attach to the factory Air Cleaner
---Replace 6 Intake hose clamps with T-Bolt style
---Replace 4 Radiator hose clamps with T-Bolt style
---Replace upper and lower radiator hoses and clean up corrosion
---Repair ANOTHER small broken plasitc nipple
---Replace factory AST with Fighters Garage unit
---Replace all coolant hoses attached to AST
---Replace SEVERAL miscellaneous hose clamps
---Clean corrosion off of radiator
---And im sure im forgetting a few things! lol
and to think im replacing all these things, when the only problem I had, was 1 bad turbo coolant hose. Im doing this now, because I dont wanna have to do this again for a long time!
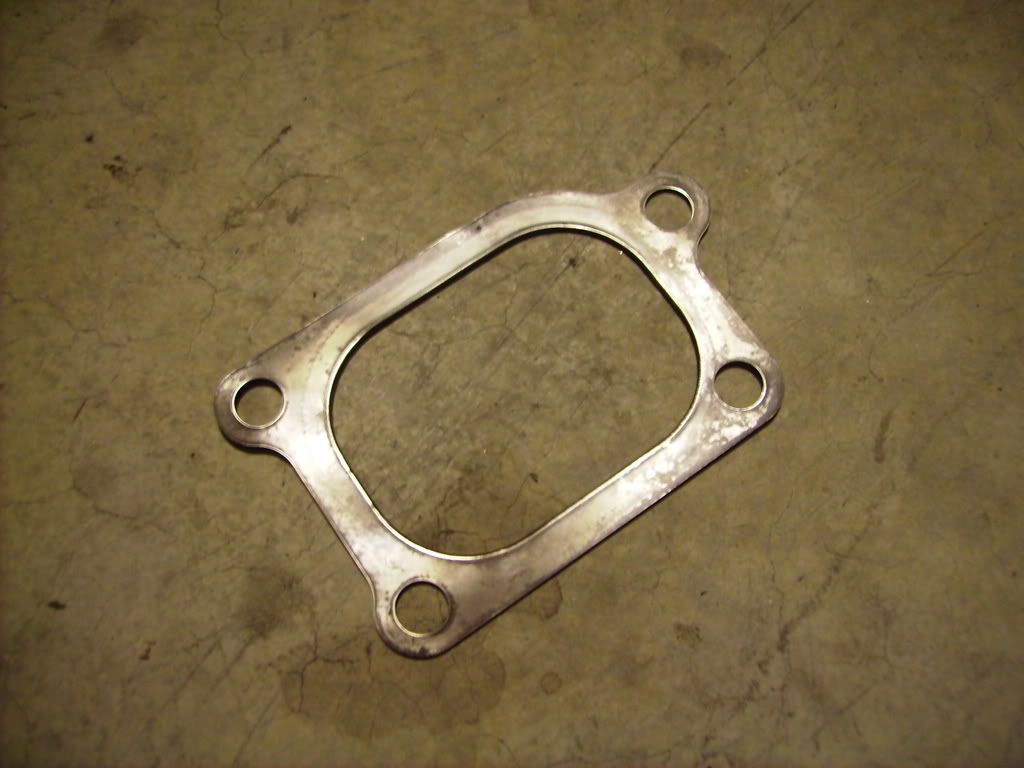
Heres some pics from the project so far
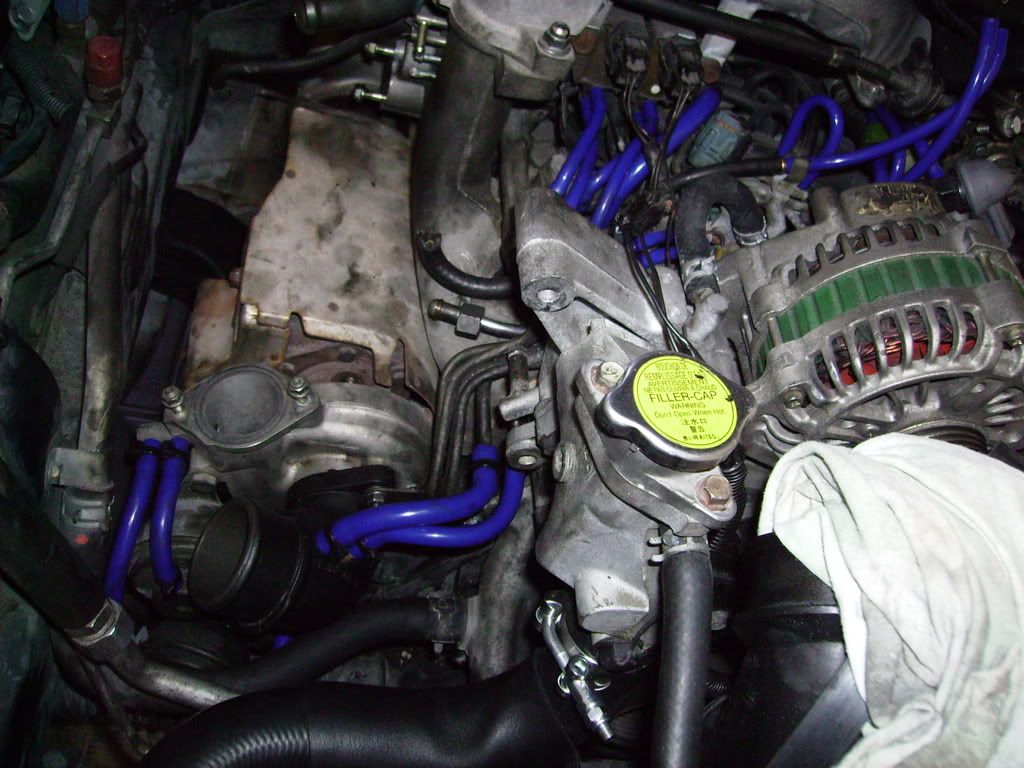
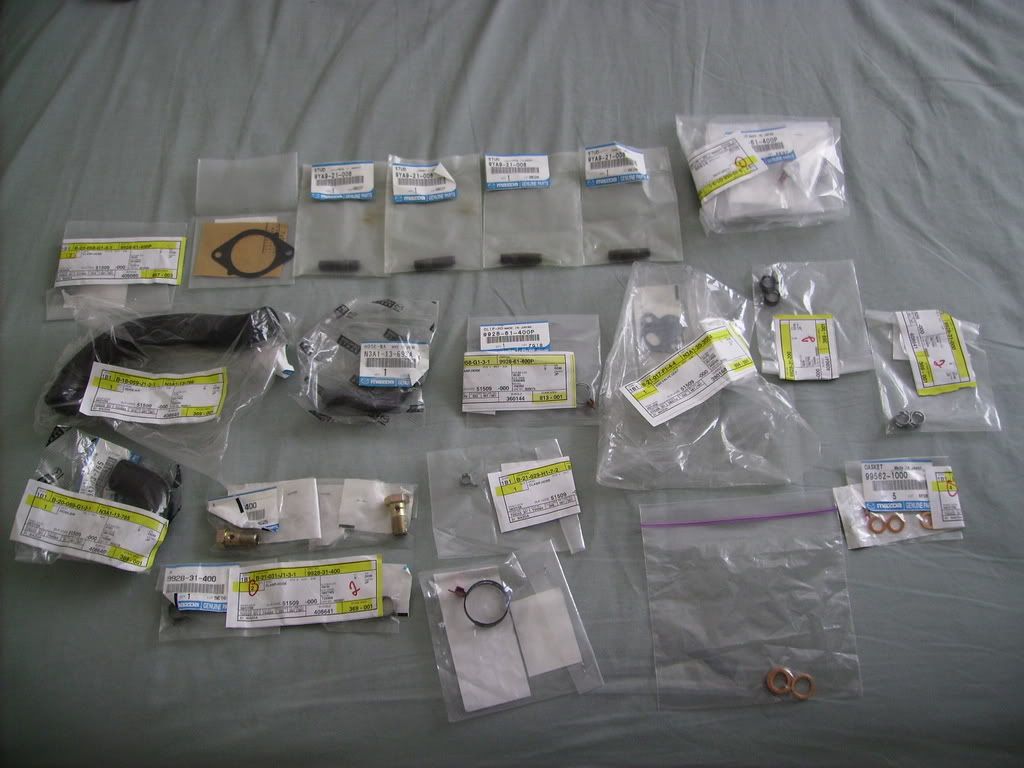

This is "refinished"
---Replace both turbo coolant hoses
---Replace vacuum hoses with Hose Techniques Silicone
---Replace 2 Pre-cat to Mid-cat exhaust bolts
---Replace 1 Air Pipe gasket
---Repair Turbo AirPipe nipple ( Im not spending $85 to replace it!)
---Replace 4 crushwashers for oil feed pipes
---Replace 2 bolts and 4 crushwashers for coolant hardlines
---Replace Air Cleaner assembly (used)
---Replace Air Pump (used) , and repair connectors and wiring
---Clean EGR valve, and replace gasket
---Replace worn intake hose rubber ends with silicone (X2)
---Replace upper water pump coolant hose with new clamps
---Replace 2 air hoses that attach to the factory Air Cleaner
---Replace 6 Intake hose clamps with T-Bolt style
---Replace 4 Radiator hose clamps with T-Bolt style
---Replace upper and lower radiator hoses and clean up corrosion
---Repair ANOTHER small broken plasitc nipple
---Replace factory AST with Fighters Garage unit
---Replace all coolant hoses attached to AST
---Replace SEVERAL miscellaneous hose clamps
---Clean corrosion off of radiator
---And im sure im forgetting a few things! lol
and to think im replacing all these things, when the only problem I had, was 1 bad turbo coolant hose. Im doing this now, because I dont wanna have to do this again for a long time!
Heres some pics from the project so far
This is "refinished"
Thread Starter
Joined: Jun 2007
Posts: 1,114
Likes: 0
From: California
So far today I finished putting all the parts together and started the car today for the first time in a month ( I already added coolant), and everything sounds ok, no strange sounds, but after the car was running for only about 30 seconds I see a white smoke coming from the turbos and it smells like somthing is burning, No leaks, just smoke.
Im ******* pissed that now I gotta take all the ****** bullshit apart again to find out what the **** is going on. Could it be that I had some grease stains on the turbo heat shield? besides that I cant think of anything else??? I cant do anything now cause its too hot, but later ill check it out. what do you guys think?
Im ******* pissed that now I gotta take all the ****** bullshit apart again to find out what the **** is going on. Could it be that I had some grease stains on the turbo heat shield? besides that I cant think of anything else??? I cant do anything now cause its too hot, but later ill check it out. what do you guys think?
Let it warm up and see if the smoke goes away after a time. If nothing is hitting the ground, or spraying up and your water temperature is normal then it could be oil residue left over. Don't freak out.....just yet Ernesto.
Later
Later