Carbon Fiber Lip Repair

Thread Starter
Joined: Sep 2001
Posts: 454
Likes: 18
From: Plainfield, IL
Carbon Fiber Lip Repair
So I have this really cool carbon fiber lip on my car and last week I ran into a parking block with it. The lip is in one peice, however I have a dime sized area where the gel coat has been chipped away. I am pretty sure I can fill it with epoxy resin, sand it down and polish it. Can anyone recommend an epoxy resin that dries clear and would be good for this repair?
I was at the store the other day and they had some stuff that dries light yellow (which I don't want).
I was at the store the other day and they had some stuff that dries light yellow (which I don't want).

Full Member
Joined: Jun 2005
Posts: 229
Likes: 0
From: san antonio , tx
go to hobby lobby etc, they sell relativley quick drying clear expoy, you have to buy it in multiple stages though its not a open the can slather it on and go process but it dries really hard and clear =D
Thread Starter
Joined: Sep 2001
Posts: 454
Likes: 18
From: Plainfield, IL
Originally Posted by FDeez
Don't forget to clear coat the epoxy of your repair...otherwise, the epoxy will turn yellow from UV breakdown.
1. Fill the damaged area with epoxy resin till it is even with the rest of the surface of the gel coat.
2. Sand area with fine sand paper (1000-1500 grit).
3. Polish area
3. Add a clear coat (clear paint) to area.
What should I use to polish the new epoxy to get it to look glossy? I was thinking polishing compound and/or rubbing compound and then a polish. Any suggestions?
Trending Topics

Senior Member
Joined: Jul 2001
Posts: 734
Likes: 1
From: Oakland, CA
I got it at my local plastics store, "Tap Plastics." Though, I think they only exist on the west coast. They might still ship to you. Otherwise, check out Novus' website.
www.tapplastics.com
www.novuspolish.com
www.tapplastics.com
www.novuspolish.com
Thread Starter
Joined: Sep 2001
Posts: 454
Likes: 18
From: Plainfield, IL
Originally Posted by Farhan
Hey CBlake3, please keep us updated on how the repair turned out. I have a CF wing insert that I need to have repaired as well.
Thanks for the input guys!

Thread Starter
Joined: Sep 2001
Posts: 454
Likes: 18
From: Plainfield, IL
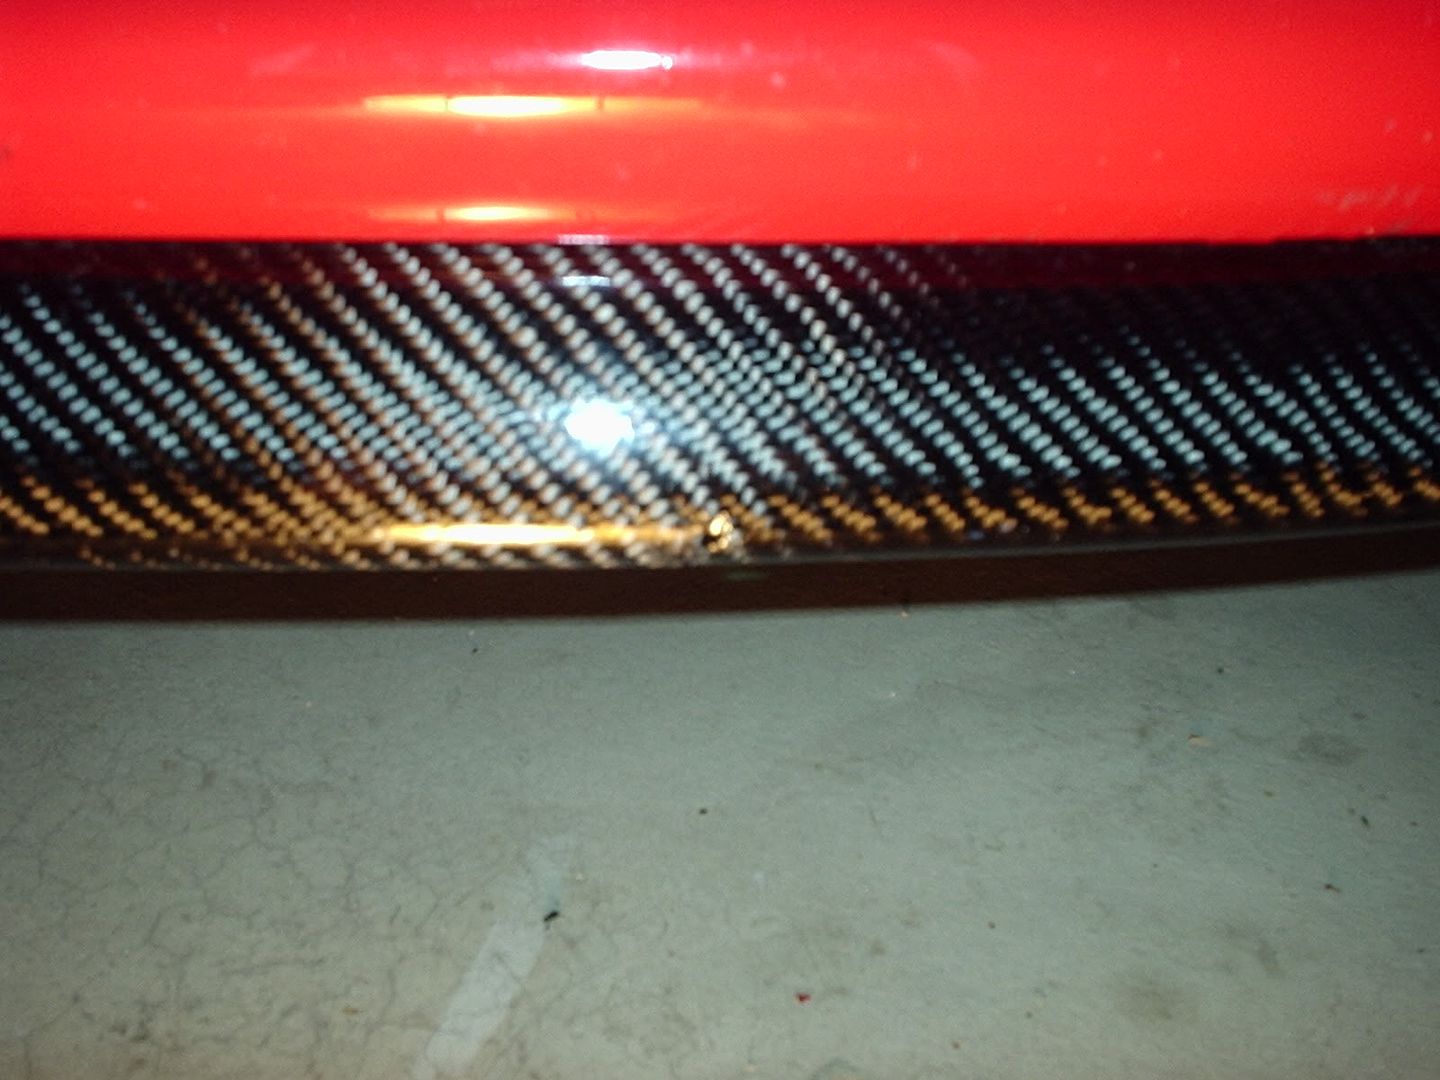
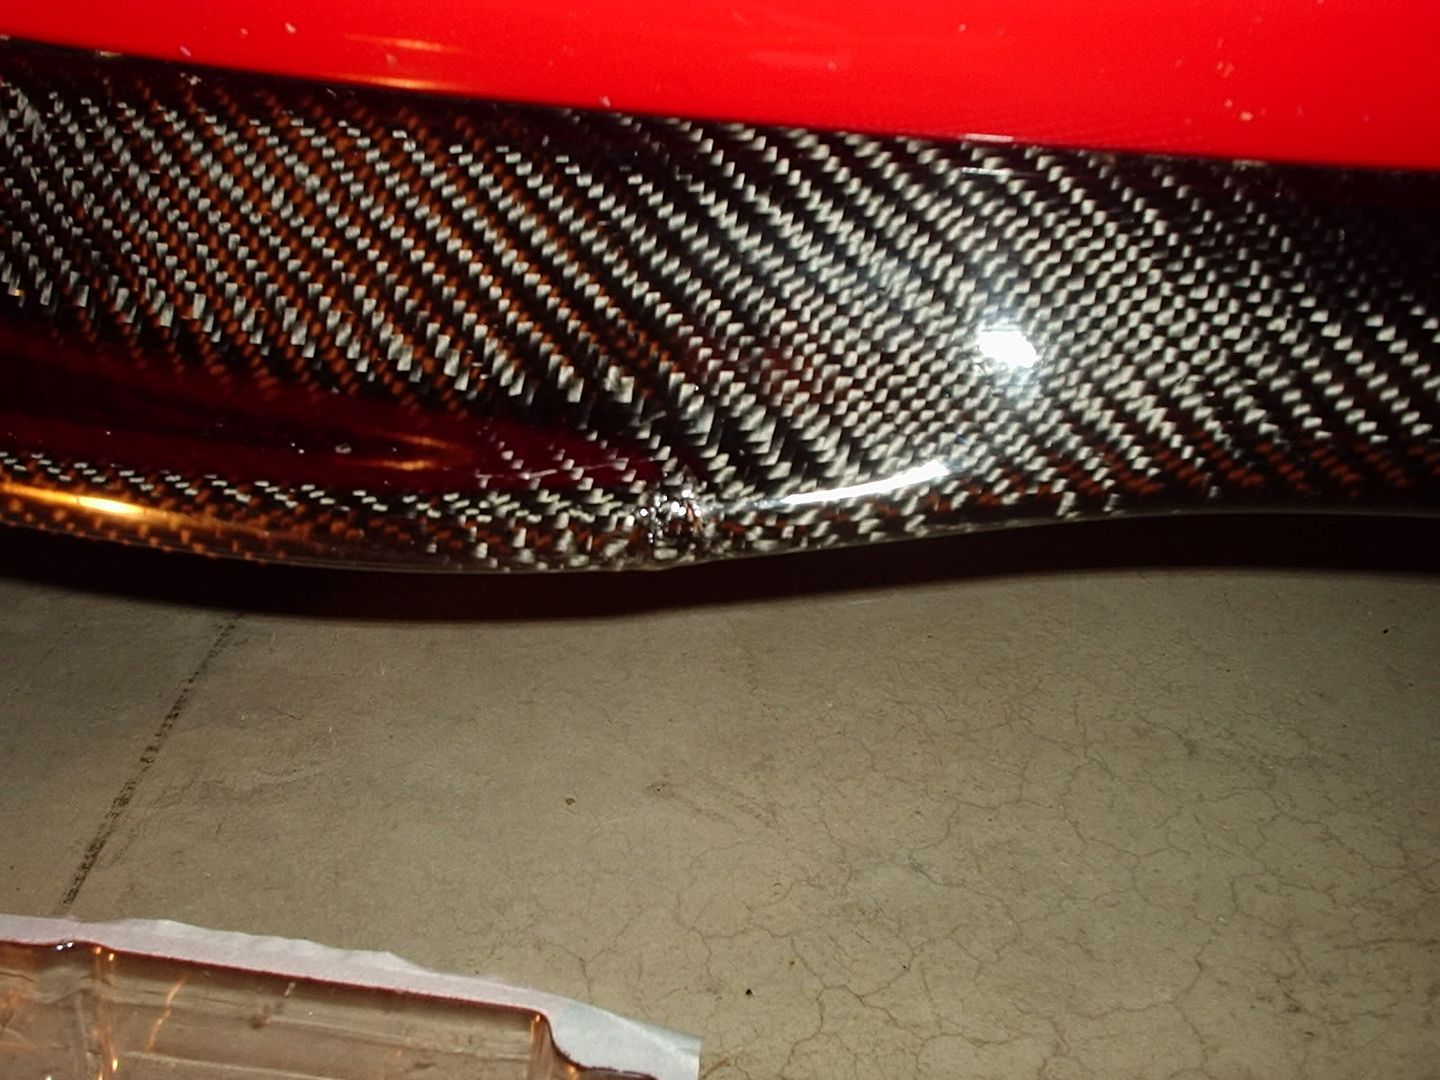
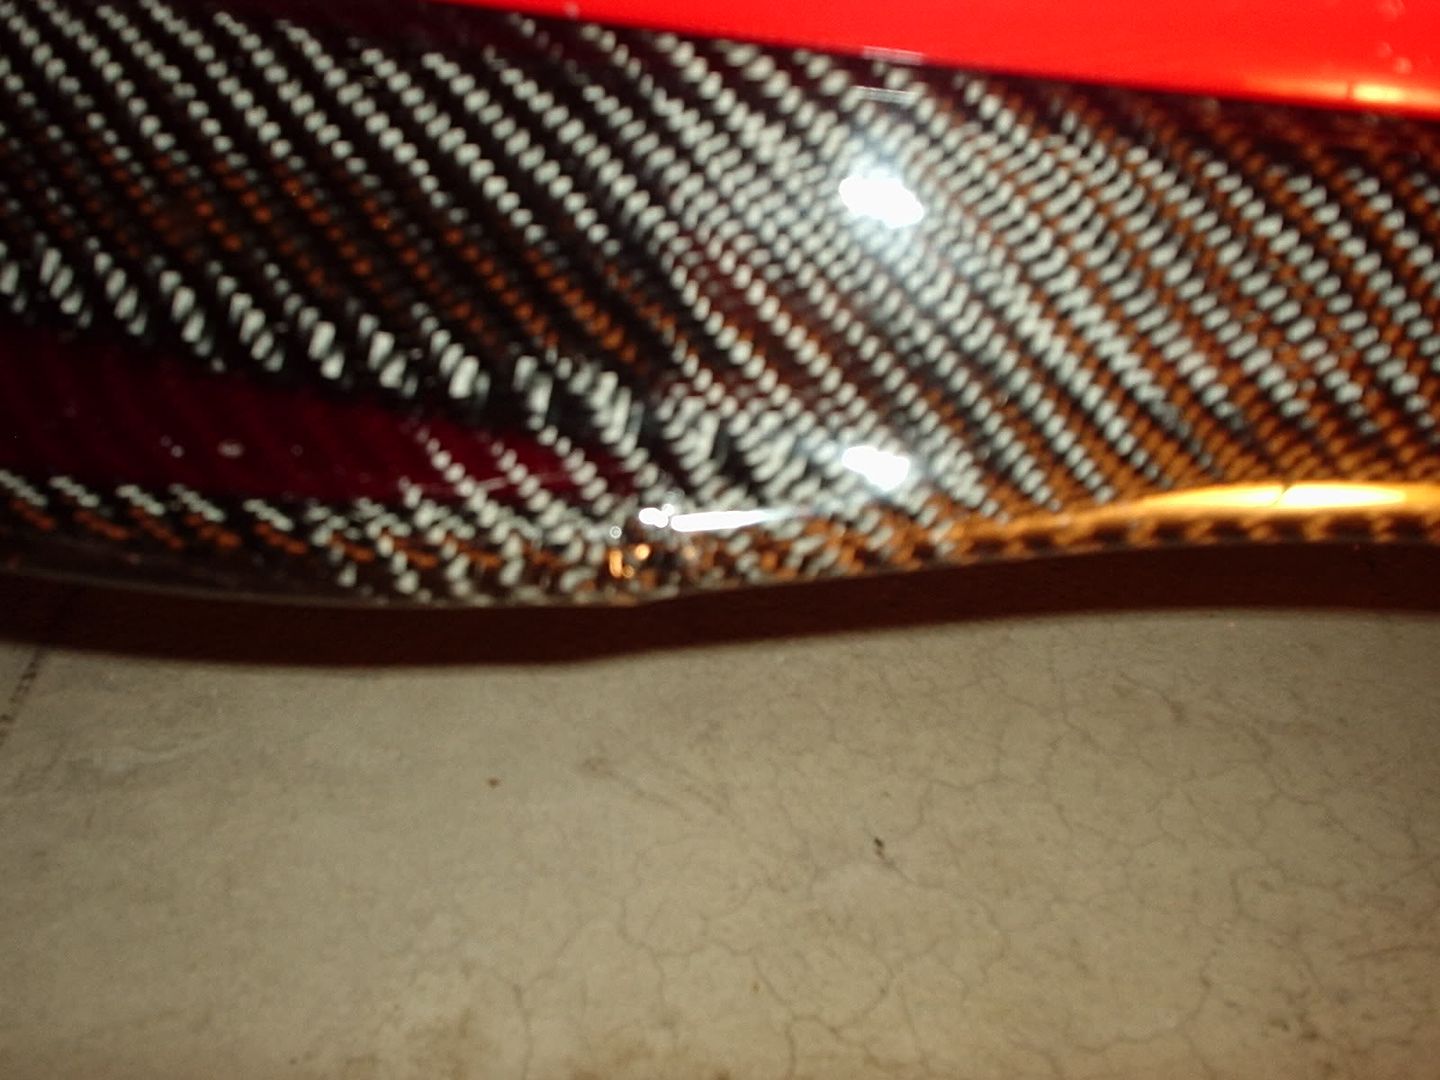
I started to repair the lip. There were 2 areas on the lip that were damaged. One area where the gel coat was still intact, but had pulled away from the carbon fiber and one where a portion of the gel coat had completely cracked off. Keep in mind that both damaged areas are about the size of a dime.
I found some clear drying (slow setting) epoxy at the local Menard's home center. I would imagine that any large home center will have similar products (Home Depot, Lowe's, etc.)
I began with the area that still had the gel coat intact. The problem I had with that was that I had to get epoxy between the gel coat and the carbon fiber. I filled a syringe with epoxy and was able to fit it under a crack in the gel coat to push epoxy into the cavity. It turned out great.
The second area has been a bit more work since the gel coat is missing. I have put 2 coats of epoxy on that particular area. What I have to do is fill the area with layers of epoxy until it is even with the remaining gel coat and then sand and polish it.
At this point, the lip looks much better. Before I started to repair the lip, you could tell that it had damage standing across a street. Now you have to know where the damage in the lip is to tell that it has actually been damaged. It is not glaringly obvious anymore.
The car is not a daily driver, and I have a busy schedule with 3 kids and 1 more on the way, so it may take me a while to complete the repair. I will try to post some before and after pics soon. I took some, but wish I had waited to take them in the daylight for a better illustration.