When you click on links to various merchants on this site and make a purchase, this can result in this site earning a commission. Affiliate programs and affiliations include, but are not limited to, the eBay Partner Network.
Does anyone know how to remove scratches from the "rubberized" plastic pieces in the interior of the 93 cars? Or at least what to use to clean it?
I've tried a search in the 3rd gen section but the results are full of 1st and 2nd gen parts for sale etc etc.
I've also heard that Mazda replaced the rubberized stuff with plastic after 93.
Any help appreciated.
Not the console plastic, but I sanded other panels with (IIRC) 100 grit to get the old finish off then 220 to smooth. Enamel reducer...or in a pinch brake cleaner to clean oil and any trace silicone. Then PLASTI DIP. http://www.lowes.com/pd/Plasti-Dip-B...2-91fba6f2267b
Been several years now. Matches VERY well and you could play Rugby on it. Has a nice feel too. Panels first removed from car of course.
If when you say clean you mean strip the finish, rubbing alcohol will dissolve it pretty easily. I stripped all my panels in the last year and use SEM prep and paint to refinish.
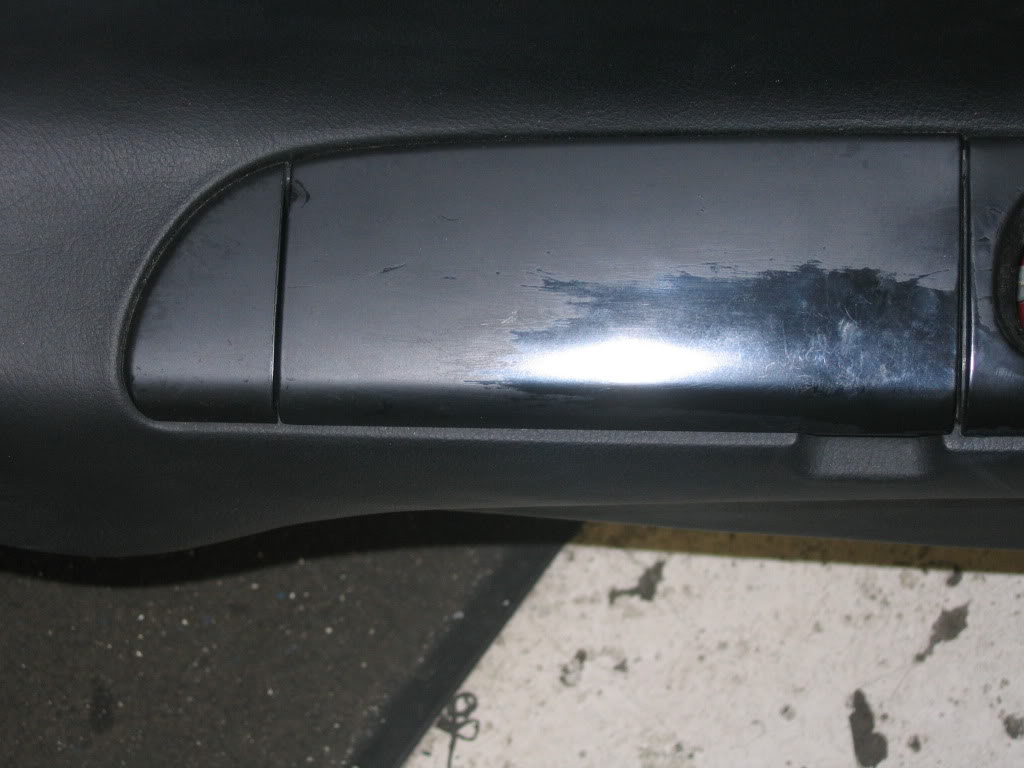
Before
During-Stripped of the original finish.
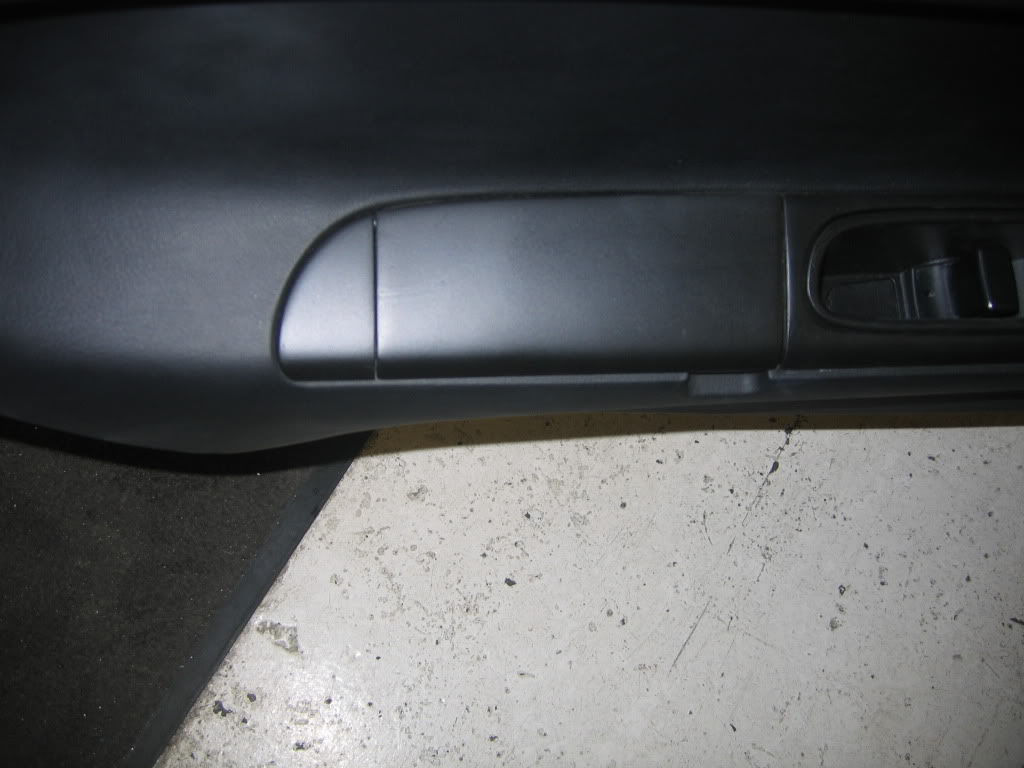
After
Its not perfect, but a lot better than it was and it doesn't come off on your hands. Investment, hours plus maybe $60 in paint and supplies.
Actually I was asking what to use to remove dirt and gunk from the finish. But its nice to have two alternate ways to go if I decide to remove the finish.
Actually I was asking what to use to remove dirt and gunk from the finish. But its nice to have two alternate ways to go if I decide to remove the finish.
Yeah, that's tough. Mine was so sticky there was really no way of cleaning it. The dirt was almost embedded. And I tried cleaning it like 3 or 4 times, nothing worked. So I stripped it.
At that point when nothing is really cleaning it the way you want... it's so easy to sand smooth and plasti-dip.
I did the same thing to my center console and it looks (and feels) amazing. Perfect color match and texture really. I think the soft rubbery texture feels quality too.
^ Thought I was the only one who liked the feel.
And I don't know if others had any issues but I do recommend that final cleaning with reducer just in case. Silicone has a half-life of about 10 bazillion years and it will screw a finish. Just takes a minute to do.
Has anyone done a piano black finish? Im planning on reconditioning my interior and would love to do a glossy piano black but Im afraid the paint might easily chip and crack, or maybe just not adhere to the panel.
I also used plasti dip to refurbish my interior plastic. It's not 100% perfect but it's much better than it was before. Here's an after pic (I didn't take any before pics).
I did the cluster face, AC panel, and centre console plastic.
How did you guys manage to get the plasti-dip to go on smooth and flat? I tried plasti-dip on interior pieces on a previous car and always ended up with some small craters from bubbling or glops from the rattle can. Also, though it was generally a matte finish, it has a kind of oily sheen in direct sunlight that I didn't like. I still might try it again, though.
What was your technique? How many coats, how thick, how long between coats, how far away, spraying sideways or down from above, etc?
OEM soft-touch rubberized finishes like on the '93 are great, especially on parts you touch a lot. I've never found a good DIY (or even pro aftermarket) solution for refinishing though. Interestingly, a lot of 90's Ferraris suffer from what sounds like exactly the same issue - sticky, peeling soft-touch interior panels. I found it telling that, when I looked into it, even the companies that do high-dollar refurbs of that stuff use a hard-touch finish.
By the way, i spent $texas at Mazda Motorsports to buy new OEM shifter/stereo/gauge plastics and it was pointless. They changed the finish so many times that my new stereo and shifter plastics are a completely different color and finish from the gauge cluster. None of them match the old stock door panel trim. The contrast drives me nuts.
How did you guys manage to get the plasti-dip to go on smooth and flat? I tried plasti-dip on interior pieces on a previous car and always ended up with some small craters from bubbling or glops from the rattle can. Also, though it was generally a matte finish, it has a kind of oily sheen in direct sunlight that I didn't like. I still might try it again, though.
What was your technique? How many coats, how thick, how long between coats, how far away, spraying sideways or down from above, etc?
OEM soft-touch rubberized finishes like on the '93 are great, especially on parts you touch a lot. I've never found a good DIY (or even pro aftermarket) solution for refinishing though. Interestingly, a lot of 90's Ferraris suffer from what sounds like exactly the same issue - sticky, peeling soft-touch interior panels. I found it telling that, when I looked into it, even the companies that do high-dollar refurbs of that stuff use a hard-touch finish.
I just sanded the part by hand until the surface was uniformly matte. Clean all the dust and shavings off the surface.
You need to warm the plasti-dip in the can to lower the viscosity.
Soak the can in hot water. ~100�F is really all you need for about 5-8mins.
Warming plast-dip creates a much smoother and finer spray pattern.
I sprayed the center console vertically and overlapped by about 50% each pass.
I can't remember how many coats I did.
Possibly 3-4.
Allow to cure fully. (In my case, I allowed it to cure for almost a week.)
That's such a great idea to warm the plasti-dip before use, I never thought of that. I've only used it one time and it was on some wheels. Turned out horrible!!
I've had really good luck with SEM products. Done many interior trim pieces and even full door panels with it


 Thought I was the only one who liked the feel.


