When you click on links to various merchants on this site and make a purchase, this can result in this site earning a commission. Affiliate programs and affiliations include, but are not limited to, the eBay Partner Network.
Started on my little project to convert the 93-95 tail lights to more modern LED Ring style and stay close to 99spec style. It will require 3D printed bracket to mount the light. Best part is, No drilling, No cutting of the Housing what so ever. Should be Completely reversible to stock if you choose to later on. Bad part is that the bulbs are not replaceable without taking apart the housing again, but I assume most of the aftermarket lights are the same.
Can some of you chime in as to which is more desirable?
A. LED lights placed behind the original red/orange lens. Able to use inner lights for Brake Light. Yellow Ring will stay lit w the red rings, inner light will Blink.
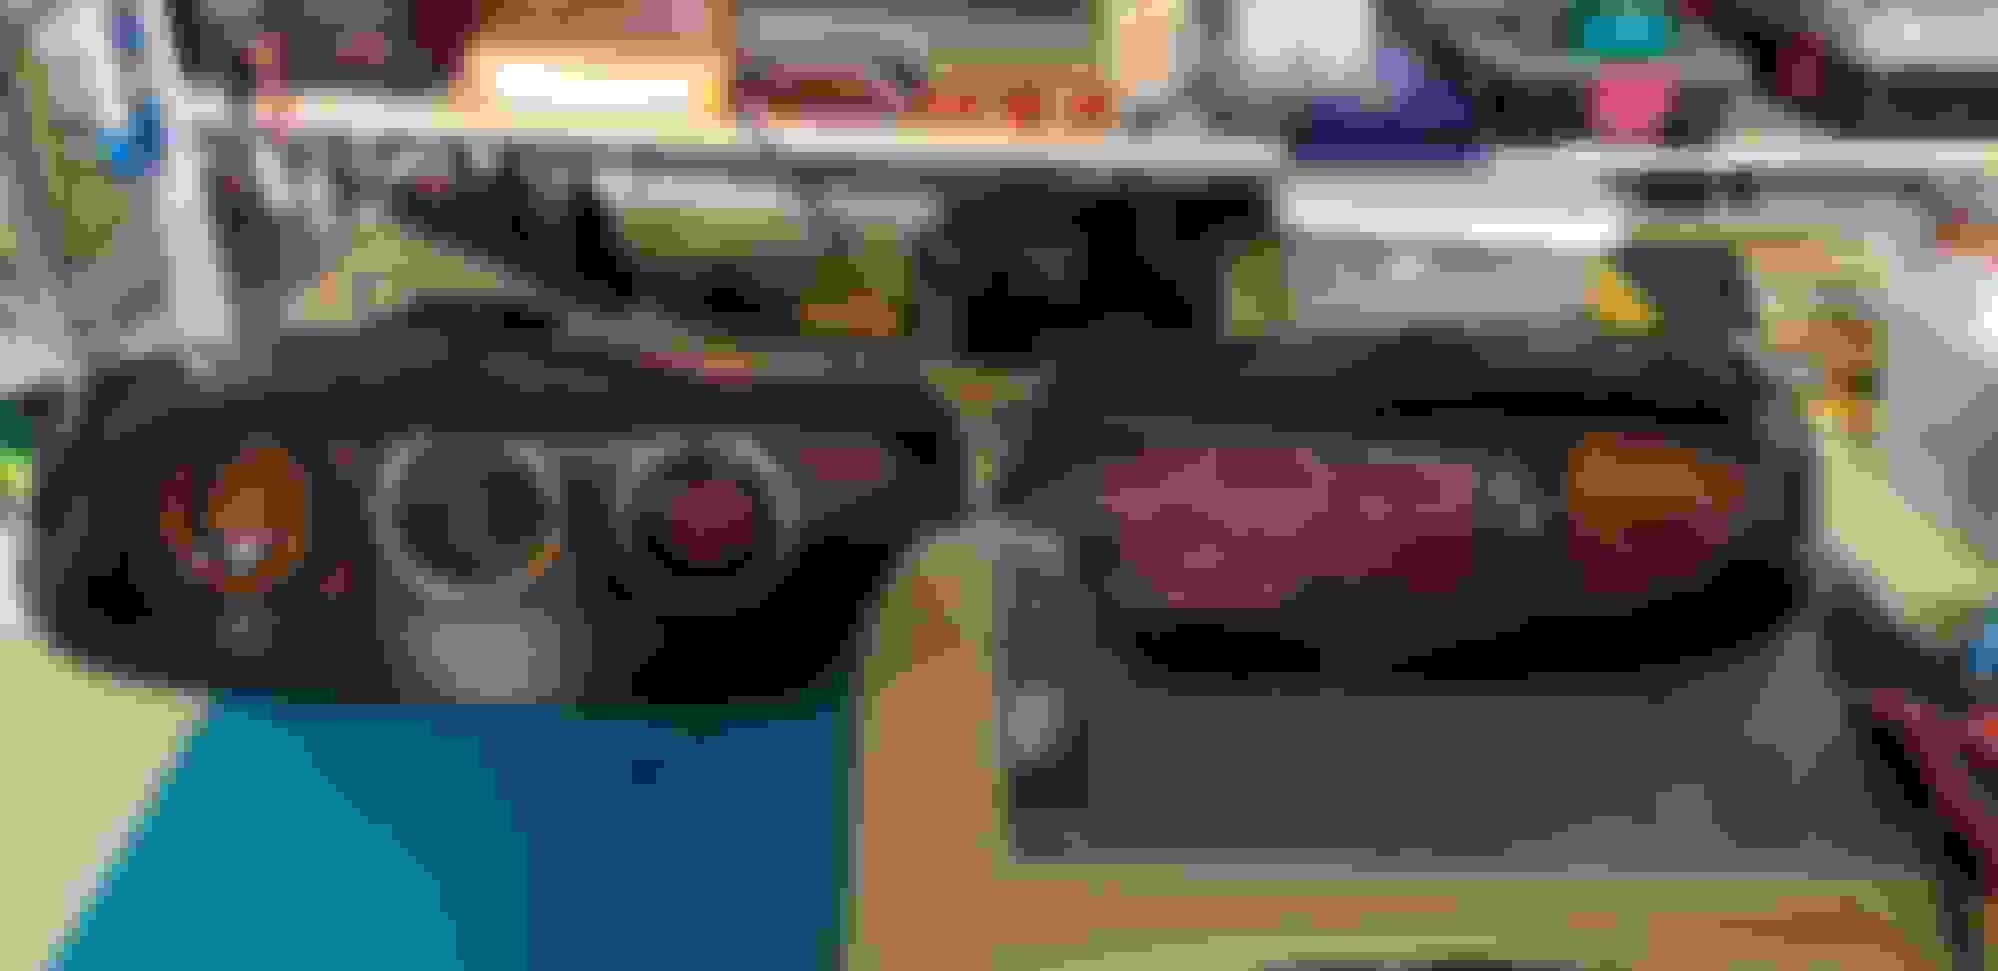
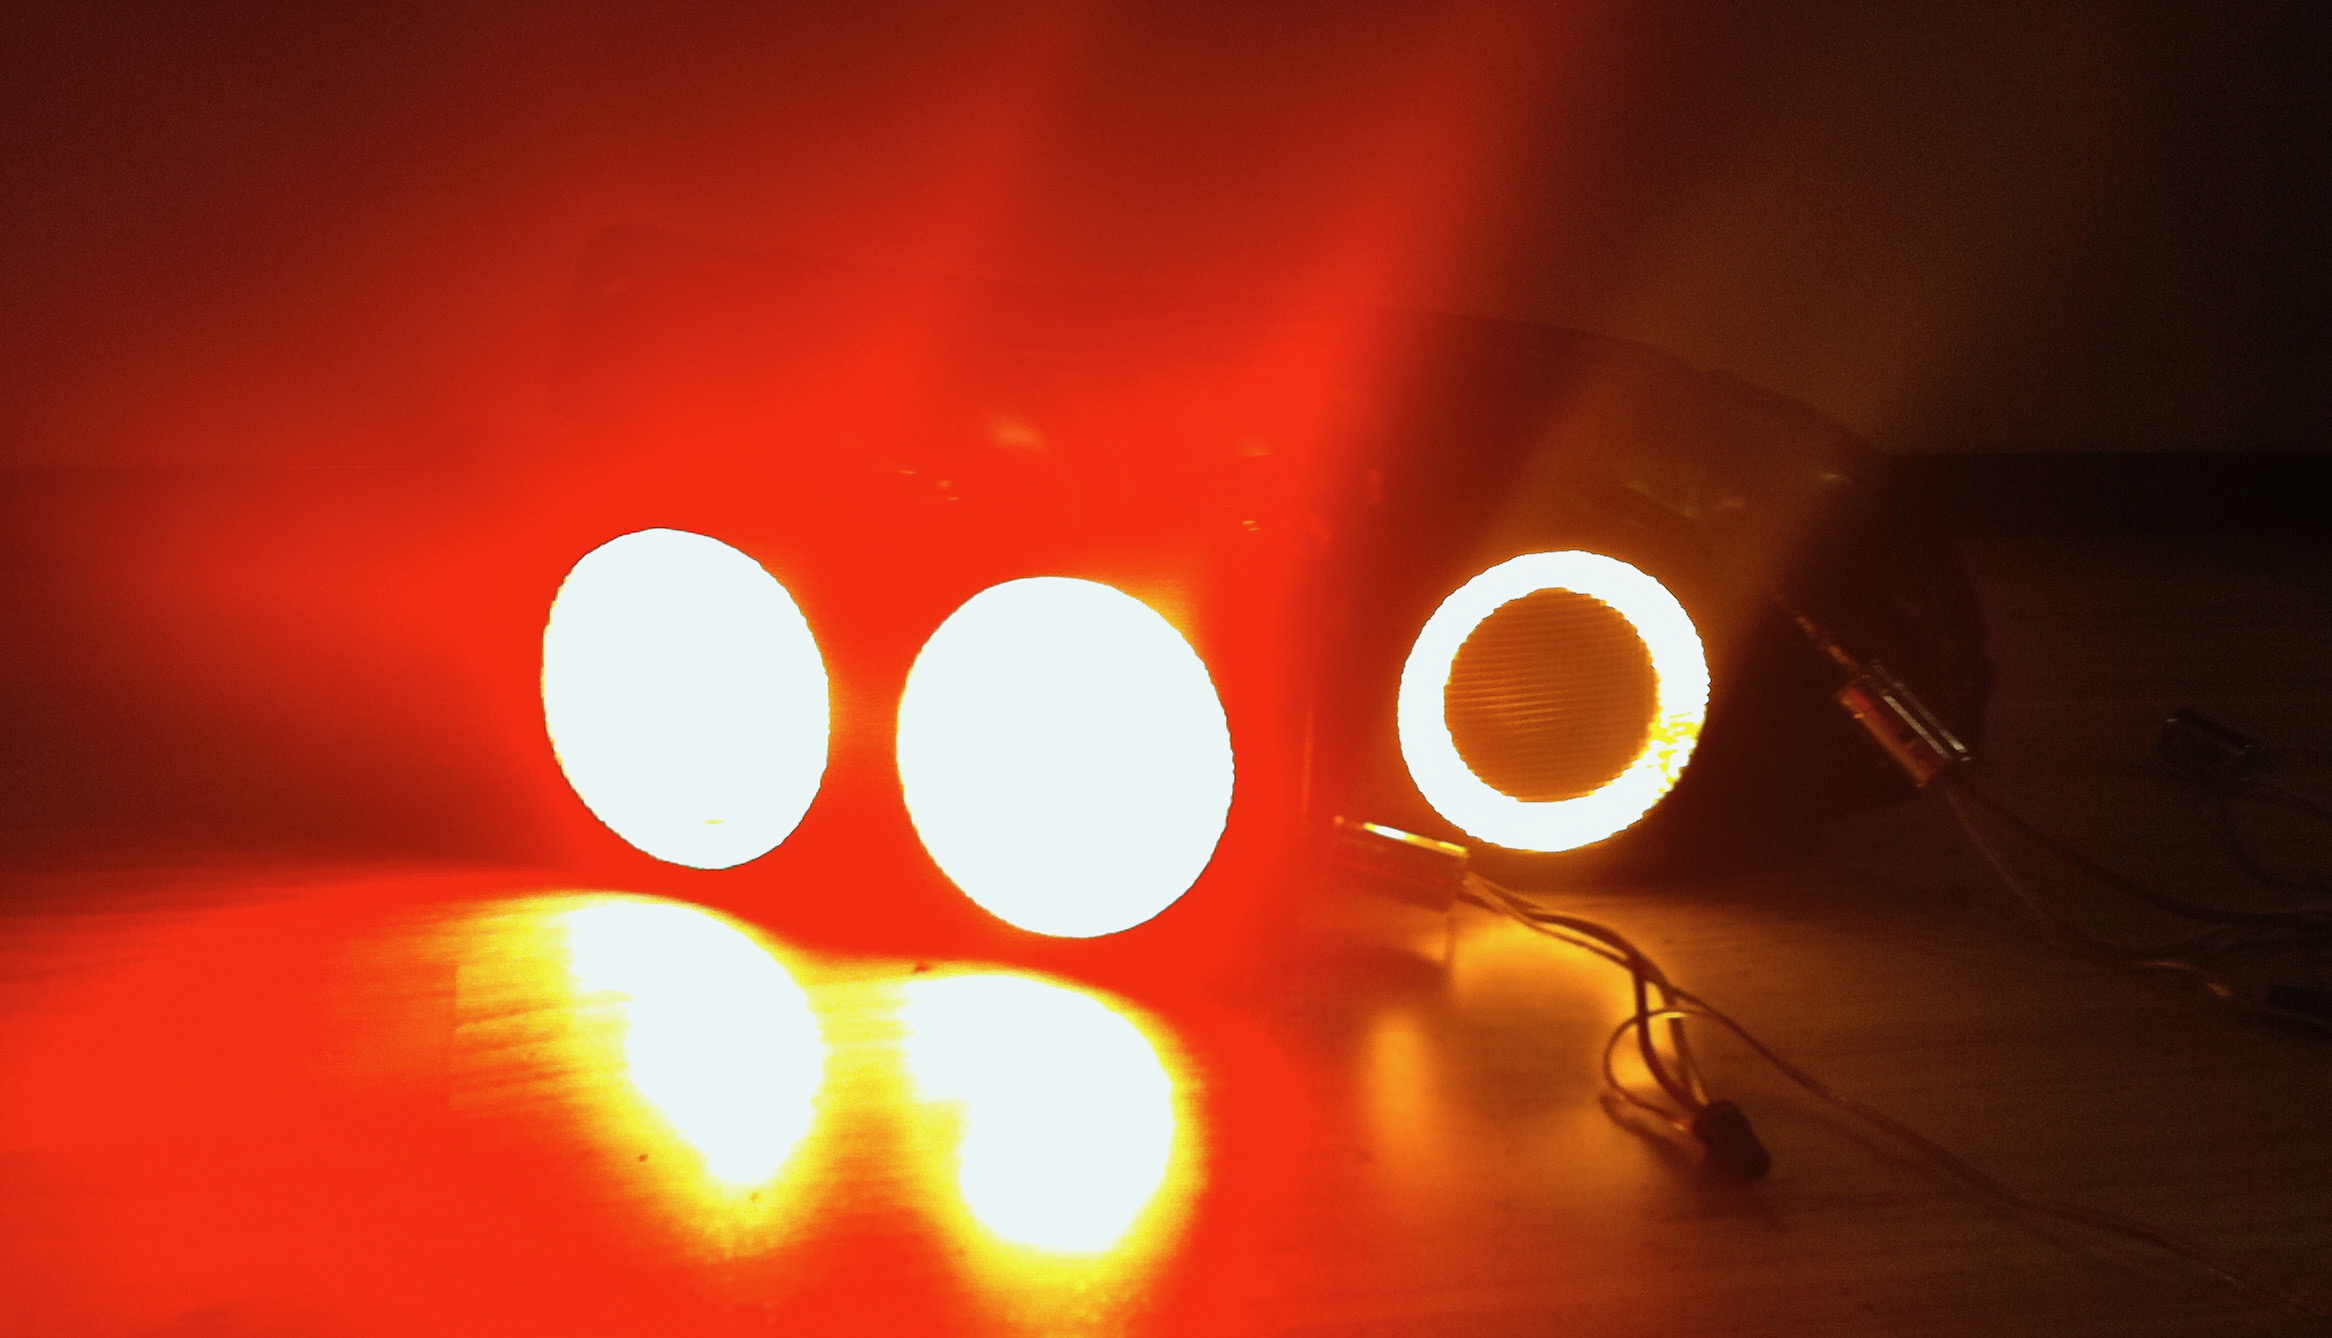
B. LED Ring with No OEM color Lens. Use inner light for Brakes or Reverse (choose one). Ring is much more defined and very red in person. Unlit Ring can be seen during the day for more modern look. Still waiting on Yellow LED light, so yellow is still behind the lens in these pictures.
Painting the lenses black with circles look the best to mimic stock 99 spec. The lights will look more crisp.
As far as I know yellow as a running light is illegal at least in my state.
Last is find better led rings. Those look like cob rings with the white rubber coating on them. They are no where near as bright I have had multiple people wanting me to remake their lights that were using those because they bought from someone who could do it "cheaper".
Thanks for the Tip. Yes these are COB rings, but they are really bright. I thought I had to darken the lens so it doesn't blind other drivers.
Good tip about painting a circle to look 99 spec, but that would be disrespectful to our Rotary gods
It took a while trying to perfect the 3D mounting panel to fit in the housing. Almost finished and looking really good. Once It's done, I will probably swap out my 99 Spec for these. Then start working on the center piece...
Originally Posted by turboIIrotary
Painting the lenses black with circles look the best to mimic stock 99 spec. The lights will look more crisp.
As far as I know yellow as a running light is illegal at least in my state.
Last is find better led rings. Those look like cob rings with the white rubber coating on them. They are no where near as bright I have had multiple people wanting me to remake their lights that were using those because they bought from someone who could do it "cheaper".
Looks good so far. Definitely like the clear lens better then the OEM... Where did you find the clear covers anyway? Been looking for a set to try some LEDs of my own
Which Clear covers are you referring to?
The lights are sold as a unit, halo ring with inner light.
Search Amazon for "Car LED Fog Lights,Diaoaokiss Driving Fog Light Angel Eyes Halo Ring DRL". These are generic lights from china that is sold under multiple names. Some are priced lower, but likely same thing.
I am using 3" Amber (not Amber enough for signal light, so I am making a lens cover), and 3.5" Red for main tail lights. With some customization, stay tuned
Originally Posted by Mikelivi91
Looks good so far. Definitely like the clear lens better then the OEM... Where did you find the clear covers anyway? Been looking for a set to try some LEDs of my own
I see two issues in using those LED lights. First, the middle section (projector) on all of the units, regardless of angle eye color, is white. So, when you apply the brakes or turn signals, you are going to get white instead of red (for brakes) or amber (for turn signal). So, your idea of not using the stock lens can't be done as you can't have white brakes or turn signals. Maybe you could color the inner sections? Second, the angel eye components look way too dim to be used in a brake light assembly. Maybe you could use them without the OEM lens cover (the clear option as you call it) but I'd say you'd need to measure the output and compare it with the OEM output. Who knows, maybe it will work, but because of the middle white light problem, I'd say this is a no go anyway. An option, if you are going to use these lights, is to remove the angel eye covers and expose the leds, especially if you choose to retain the OEM lens covers.
In any event, there are much better ways to do the conversion. Search for what turboIIrotary has done or look for my DIY thread on this. You'll end up with much better results. Good luck.
Projector will have inside combination of Red lens for color and opaque lens to diffuse the light so you get a nice even circle, not a square led shaped light. This will be the brake light. I already tested it and it looks pretty awesome. Red rings will be running lights. Projector for Amber Ring(blinker) may be wired as reverse light to provide much needed light when backing up. Or I might just make both blink. Once again, it will have Amber lens inside the projector. There will be no coloring or painting to change the colors since I'm using colored lens. This makes it look much cleaner and simpler.
I have all the 3D parts, fitment and light issues worked out, so I may be able to put it together and compare w my 99 Spec. I will post more pics when I get to work on it this weekend.
I am looking to make this a very simple conversion for anyone, by using already made lights, 3d printed parts (just a matter of printing them). All one has to do is to open up the housing, fit and glue in the parts, close the housing. I have been testing things out in my garage, and I compared the brightness to my Prius tail lights inside my garage (FD is banned from being stored inside the garage due to smell) and the lights appear to be just as bright. So I have high hopes for this conversion.
I will see if I can mount one side this weekend to compare...
Originally Posted by David Hayes
I see two issues in using those LED lights. First, the middle section (projector) on all of the units, regardless of angle eye color, is white. So, when you apply the brakes or turn signals, you are going to get white instead of red (for brakes) or amber (for turn signal). So, your idea of not using the stock lens can't be done as you can't have white brakes or turn signals. Maybe you could color the inner sections? Second, the angel eye components look way too dim to be used in a brake light assembly. Maybe you could use them without the OEM lens cover (the clear option as you call it) but I'd say you'd need to measure the output and compare it with the OEM output. Who knows, maybe it will work, but because of the middle white light problem, I'd say this is a no go anyway. An option, if you are going to use these lights, is to remove the angel eye covers and expose the leds, especially if you choose to retain the OEM lens covers.
In any event, there are much better ways to do the conversion. Search for what turboIIrotary has done or look for my DIY thread on this. You'll end up with much better results. Good luck.
Projector will have inside combination of Red lens for color and opaque lens to diffuse the light so you get a nice even circle, not a square led shaped light. This will be the brake light. I already tested it and it looks pretty awesome. Red rings will be running lights. Projector for Amber Ring(blinker) may be wired as reverse light to provide much needed light when backing up. Or I might just make both blink. Once again, it will have Amber lens inside the projector. There will be no coloring or painting to change the colors since I'm using colored lens. This makes it look much cleaner and simpler.
I have all the 3D parts, fitment and light issues worked out, so I may be able to put it together and compare w my 99 Spec. I will post more pics when I get to work on it this weekend.
I am looking to make this a very simple conversion for anyone, by using already made lights, 3d printed parts (just a matter of printing them). All one has to do is to open up the housing, fit and glue in the parts, close the housing. I have been testing things out in my garage, and I compared the brightness to my Prius tail lights inside my garage (FD is banned from being stored inside the garage due to smell) and the lights appear to be just as bright. So I have high hopes for this conversion.
I will see if I can mount one side this weekend to compare...
Just make sure they look "awesome" in the light of day with sunshine on them.
David has learned and forgot more than most on this subject. He's not trying to poo-poo your project or insult your intelligence / ideas - he's trying to help you learn from his mistakes.
Didn't take it as a Poo-poo on my project, but constructive advice. I appreciate it when given
I will have a good picture of how "awesome" it is this weekend. I will wire it up side byvside with the stock tail and see. I assume if these lights are brighter than stock, I should be good to go...
Originally Posted by MattGold
Just make sure they look "awesome" in the light of day with sunshine on them.
David has learned and forgot more than most on this subject. He's not trying to poo-poo your project or insult your intelligence / ideas - he's trying to help you learn from his mistakes.
Looks like it has plenty of light output. Curious tho, how did you get everything to stay in place as far as the projectors and LED rings? Glue?
I tried my hand at LED fog lights and couldn�t find a real good solution for mounting my rings besides using glue which turned out horrible. Housings heated up and glue became soft... Outcome was shifted LED rings
I made a custom 3D printed PLA (plastic) mounting plate that fits perfectly inside the housing, No mods to the housing and completely reversible. The lights fit tight into the circle I have in that plate. (See image in the above post) I will eventually glue the plate to the housing and check to see if heat becomes an issue with the PLA plate. My guess is that since the projectors are used only for Brakes and blinkers, they would not build up too much heat. Rings seam to stay relatively cool. I will let you know how hot rings get when left on for few hours.
Originally Posted by Mikelivi91
Looks like it has plenty of light output. Curious tho, how did you get everything to stay in place as far as the projectors and LED rings? Glue?
I tried my hand at LED fog lights and couldn�t find a real good solution for mounting my rings besides using glue which turned out horrible. Housings heated up and glue became soft... Outcome was shifted LED rings
Couple of things for you. First, I applaud you for trying to put something together like this. It's a lot of work so kudos on that.
Now for the things for you to think about. When you are doing brake lights, outside of the style/coolness factor, the objective is to have lights the can be seen by the drivers behind you. When you hit the brakes, you want to ensure you don't get rear-ended. So, you need to ensure the light output is equal to or greater than with what you started. Instead of guessing at it, go buy a light meter and actually test the light output. Here is an inexpensive one to consider:
You can build a lightbox (I used a modified shoebox for my testing). Follow these instructions provided by http://www.flashlightreviews.com/fea...box_output.htm. In short, I built a box that encompasses one taillight assembly, covering the inside with white and placing the light meter on the side, both to ensure the light didn’t directly strike the meter and that the measurements reflected total light intensity. It's really easy to do and you will get a definitive answer to whether the light output is acceptable. From what I can tell, it won't be. Go to this thread (https://www.rx7club.com/shops-part-s...mation-976420/) for info on testing and the results of another vendor that claimed "equal to or greater that OEM light output". The eye can be very deceiving so measure and be confident.
Second, do some research on how LEDs work. In short, white LEDs (like the ones you are trying to use for the brake light sections) are not actually white. They are made of several spectrums of colors merged together to fool the eye into seeing white. Here is a good article for you:
Why does this matter? You mention you are going to use a red/amber lens to make the white light the color you want (red or amber). When you do this, the lens will act as a filter and will only allow one spectrum of light to pass through it. So, in the pics you posted, I'd guess you haven't used the colored lenses yet, but once you do (or if you use the original OEM lens material) the only part of the light spectrum that will pass through the lens will be the whatever the color the lens is, meaning you will lose over 80% of the light output/brightness. Test this assumption by placing your LED units behind the OEM lens material and see what happens. If you have a light meter, you can capture the actual loss by taking one measurement without the lens and one with it. You'll actually lose more than 80% of the output because red/amber spectrums generally represent less than 20% each of the total LED light. But don't believe me, test it for yourself or go back to the thread I linked where I think I posted up results. In that thread, the maker of the taillights had used white LEDs like you are doing and the loss of light output was very large.
Finally, you mention using an opaque lens to "diffuse" the light. While this is a good idea to get a nice uniform output, you will again seriously degrade the light output due to the above reasons. However, Luminit makes a really nice, high performing diffuser film:
The film allows the majority of LED light to pass thru. It doesn't come in red though, so for my center brakes, I used 3M taillight repair tape to cover up the Luminit film. However, I was using red LEDs so this worked for me. Because you are using white, this will be a problem.
David, I never met you, but you sir are one seriously dedicated rotary head and I am amazed at what you've done on your FD. I agree that you would be The LED expert on this community and I really appreciate your advice.
I just ordered light meter, so I will see how these lights hold up to OEM.
My goal is to come up with a simple solution to modding the non-99 spec lights using 3d printied mounts and using readily available inexpensive lights to simplify the conversion. I do have 99 spec tails, but didn't want to mess with them until I get more experience.
I hope the light output will be equal or greater than OEM, but we will find out soon enough.
Next up, front signal lights )
Then 3d printed map pocket leather covered arm rest mod, ashtray arm rest mod, tablet mount brackets (to display digital gauges on my tablet)...
Let me know if you have any other 3d printed mod ideas.
Originally Posted by David Hayes
Couple of things for you. First, I applaud you for trying to put something together like this. It's a lot of work so kudos on that.
Now for the things for you to think about. When you are doing brake lights, outside of the style/coolness factor, the objective is to have lights the can be seen by the drivers behind you. When you hit the brakes, you want to ensure you don't get rear-ended. So, you need to ensure the light output is equal to or greater than with what you started. Instead of guessing at it, go buy a light meter and actually test the light output. Here is an inexpensive one to consider:
You can build a lightbox (I used a modified shoebox for my testing). Follow these instructions provided by http://www.flashlightreviews.com/fea...box_output.htm. In short, I built a box that encompasses one taillight assembly, covering the inside with white and placing the light meter on the side, both to ensure the light didn�t directly strike the meter and that the measurements reflected total light intensity. It's really easy to do and you will get a definitive answer to whether the light output is acceptable. From what I can tell, it won't be. Go to this thread (https://www.rx7club.com/shops-part-s...mation-976420/) for info on testing and the results of another vendor that claimed "equal to or greater that OEM light output". The eye can be very deceiving so measure and be confident.
Second, do some research on how LEDs work. In short, white LEDs (like the ones you are trying to use for the brake light sections) are not actually white. They are made of several spectrums of colors merged together to fool the eye into seeing white. Here is a good article for you:
Why does this matter? You mention you are going to use a red/amber lens to make the white light the color you want (red or amber). When you do this, the lens will act as a filter and will only allow one spectrum of light to pass through it. So, in the pics you posted, I'd guess you haven't used the colored lenses yet, but once you do (or if you use the original OEM lens material) the only part of the light spectrum that will pass through the lens will be the whatever the color the lens is, meaning you will lose over 80% of the light output/brightness. Test this assumption by placing your LED units behind the OEM lens material and see what happens. If you have a light meter, you can capture the actual loss by taking one measurement without the lens and one with it. You'll actually lose more than 80% of the output because red/amber spectrums generally represent less than 20% each of the total LED light. But don't believe me, test it for yourself or go back to the thread I linked where I think I posted up results. In that thread, the maker of the taillights had used white LEDs like you are doing and the loss of light output was very large.
Finally, you mention using an opaque lens to "diffuse" the light. While this is a good idea to get a nice uniform output, you will again seriously degrade the light output due to the above reasons. However, Luminit makes a really nice, high performing diffuser film:
The film allows the majority of LED light to pass thru. It doesn't come in red though, so for my center brakes, I used 3M taillight repair tape to cover up the Luminit film. However, I was using red LEDs so this worked for me. Because you are using white, this will be a problem.
I made a custom 3D printed PLA (plastic) mounting plate that fits perfectly inside the housing, No mods to the housing and completely reversible. The lights fit tight into the circle I have in that plate. (See image in the above post) I will eventually glue the plate to the housing and check to see if heat becomes an issue with the PLA plate. My guess is that since the projectors are used only for Brakes and blinkers, they would not build up too much heat. Rings seam to stay relatively cool. I will let you know how hot rings get when left on for few hours.
What program did you use? Would you care to share the file so I can attempt to replicate it for personal use?
Thanks for your interest, but I do not share my files, especially something I spent so much time working on. I might share some in the future for simpler items, like an Efini logo emblem I modeled for 3d print.
I might consider making a kit, but its still too early for that considering I am still in Testing phase. Stay in touch and I might print some and ship it to some members for a nominal fee to cover shipping and related costs
Update.
Finally to got around to working on these tails.
I switched to PETG filament for the 3d panels since they would hold its shape better in the summer heat. Last thing I want is to have these things get soft and get mis-shapen...
PETG is more pain to work with than PLA for sure, but better safe than sorry...
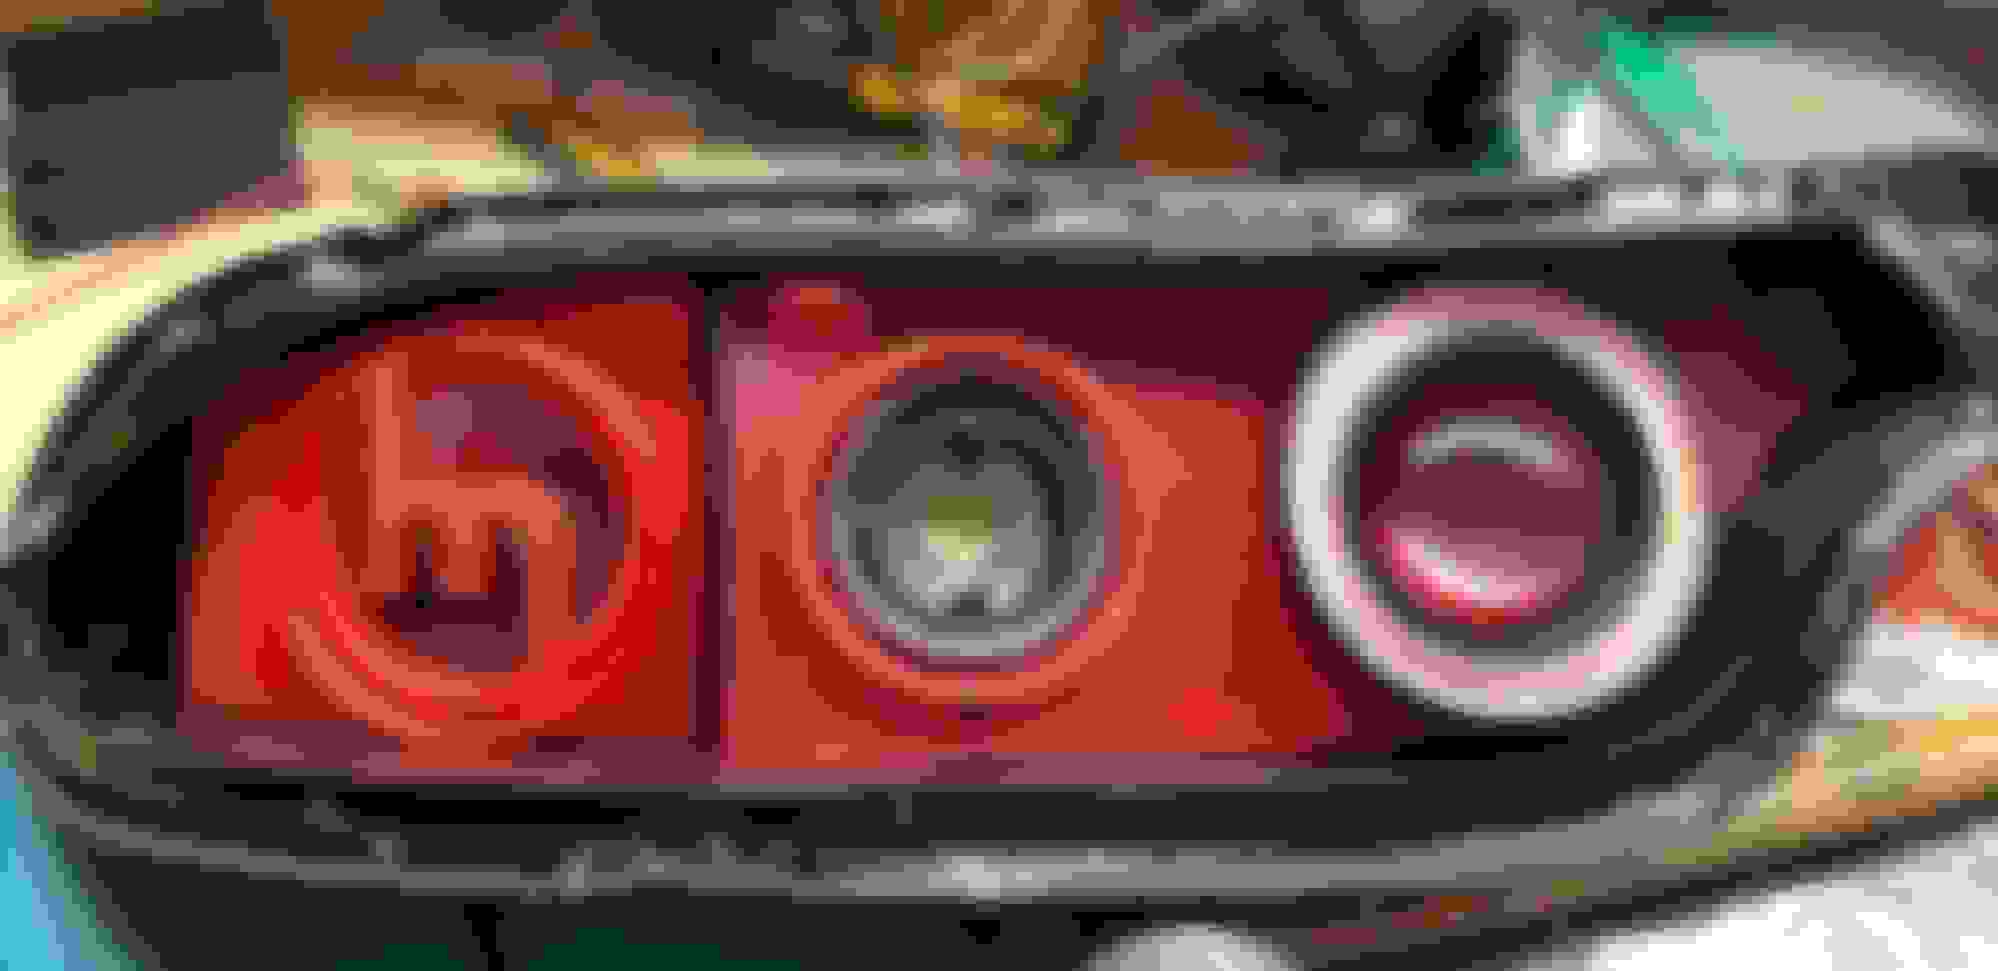
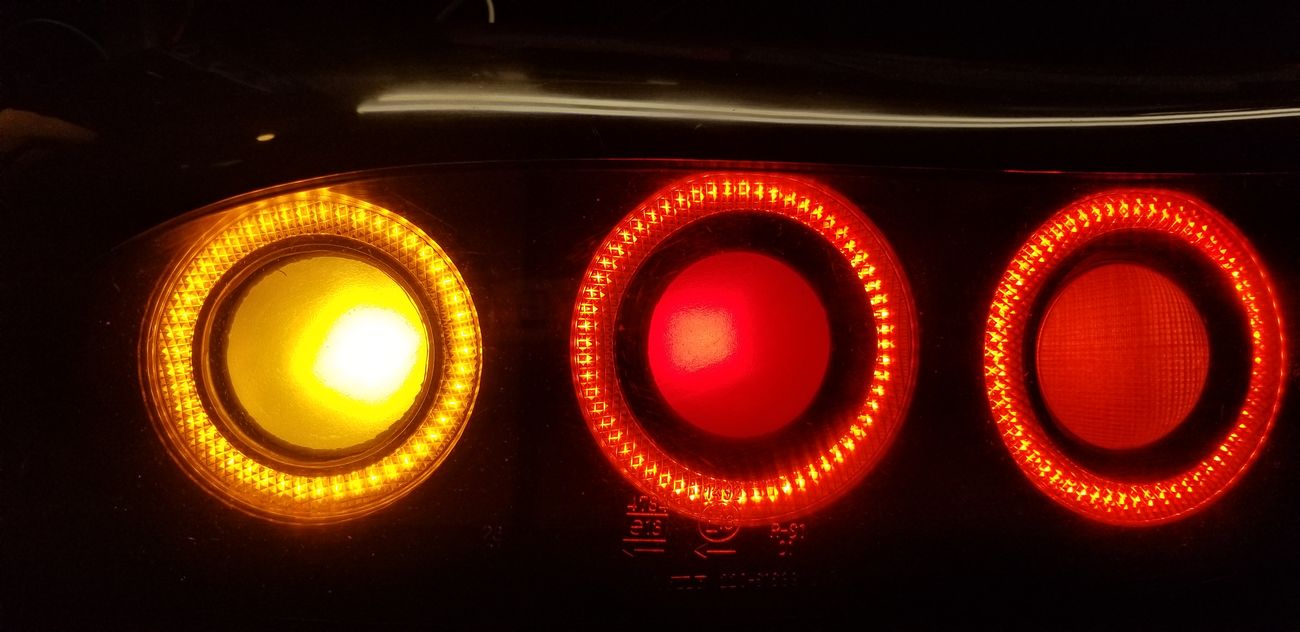
Getting things fitted again. I also printed a Red Lens insert (right side). Bit more brighter, but doesn't look as pretty. Tested w Lux meter and it appears to be on par w the OEM lights.
I think it's time to put things back together and mount them on my FD, this weekend...
Last edited by Singlo99; Mar 22, 2018 at 08:11 PM.
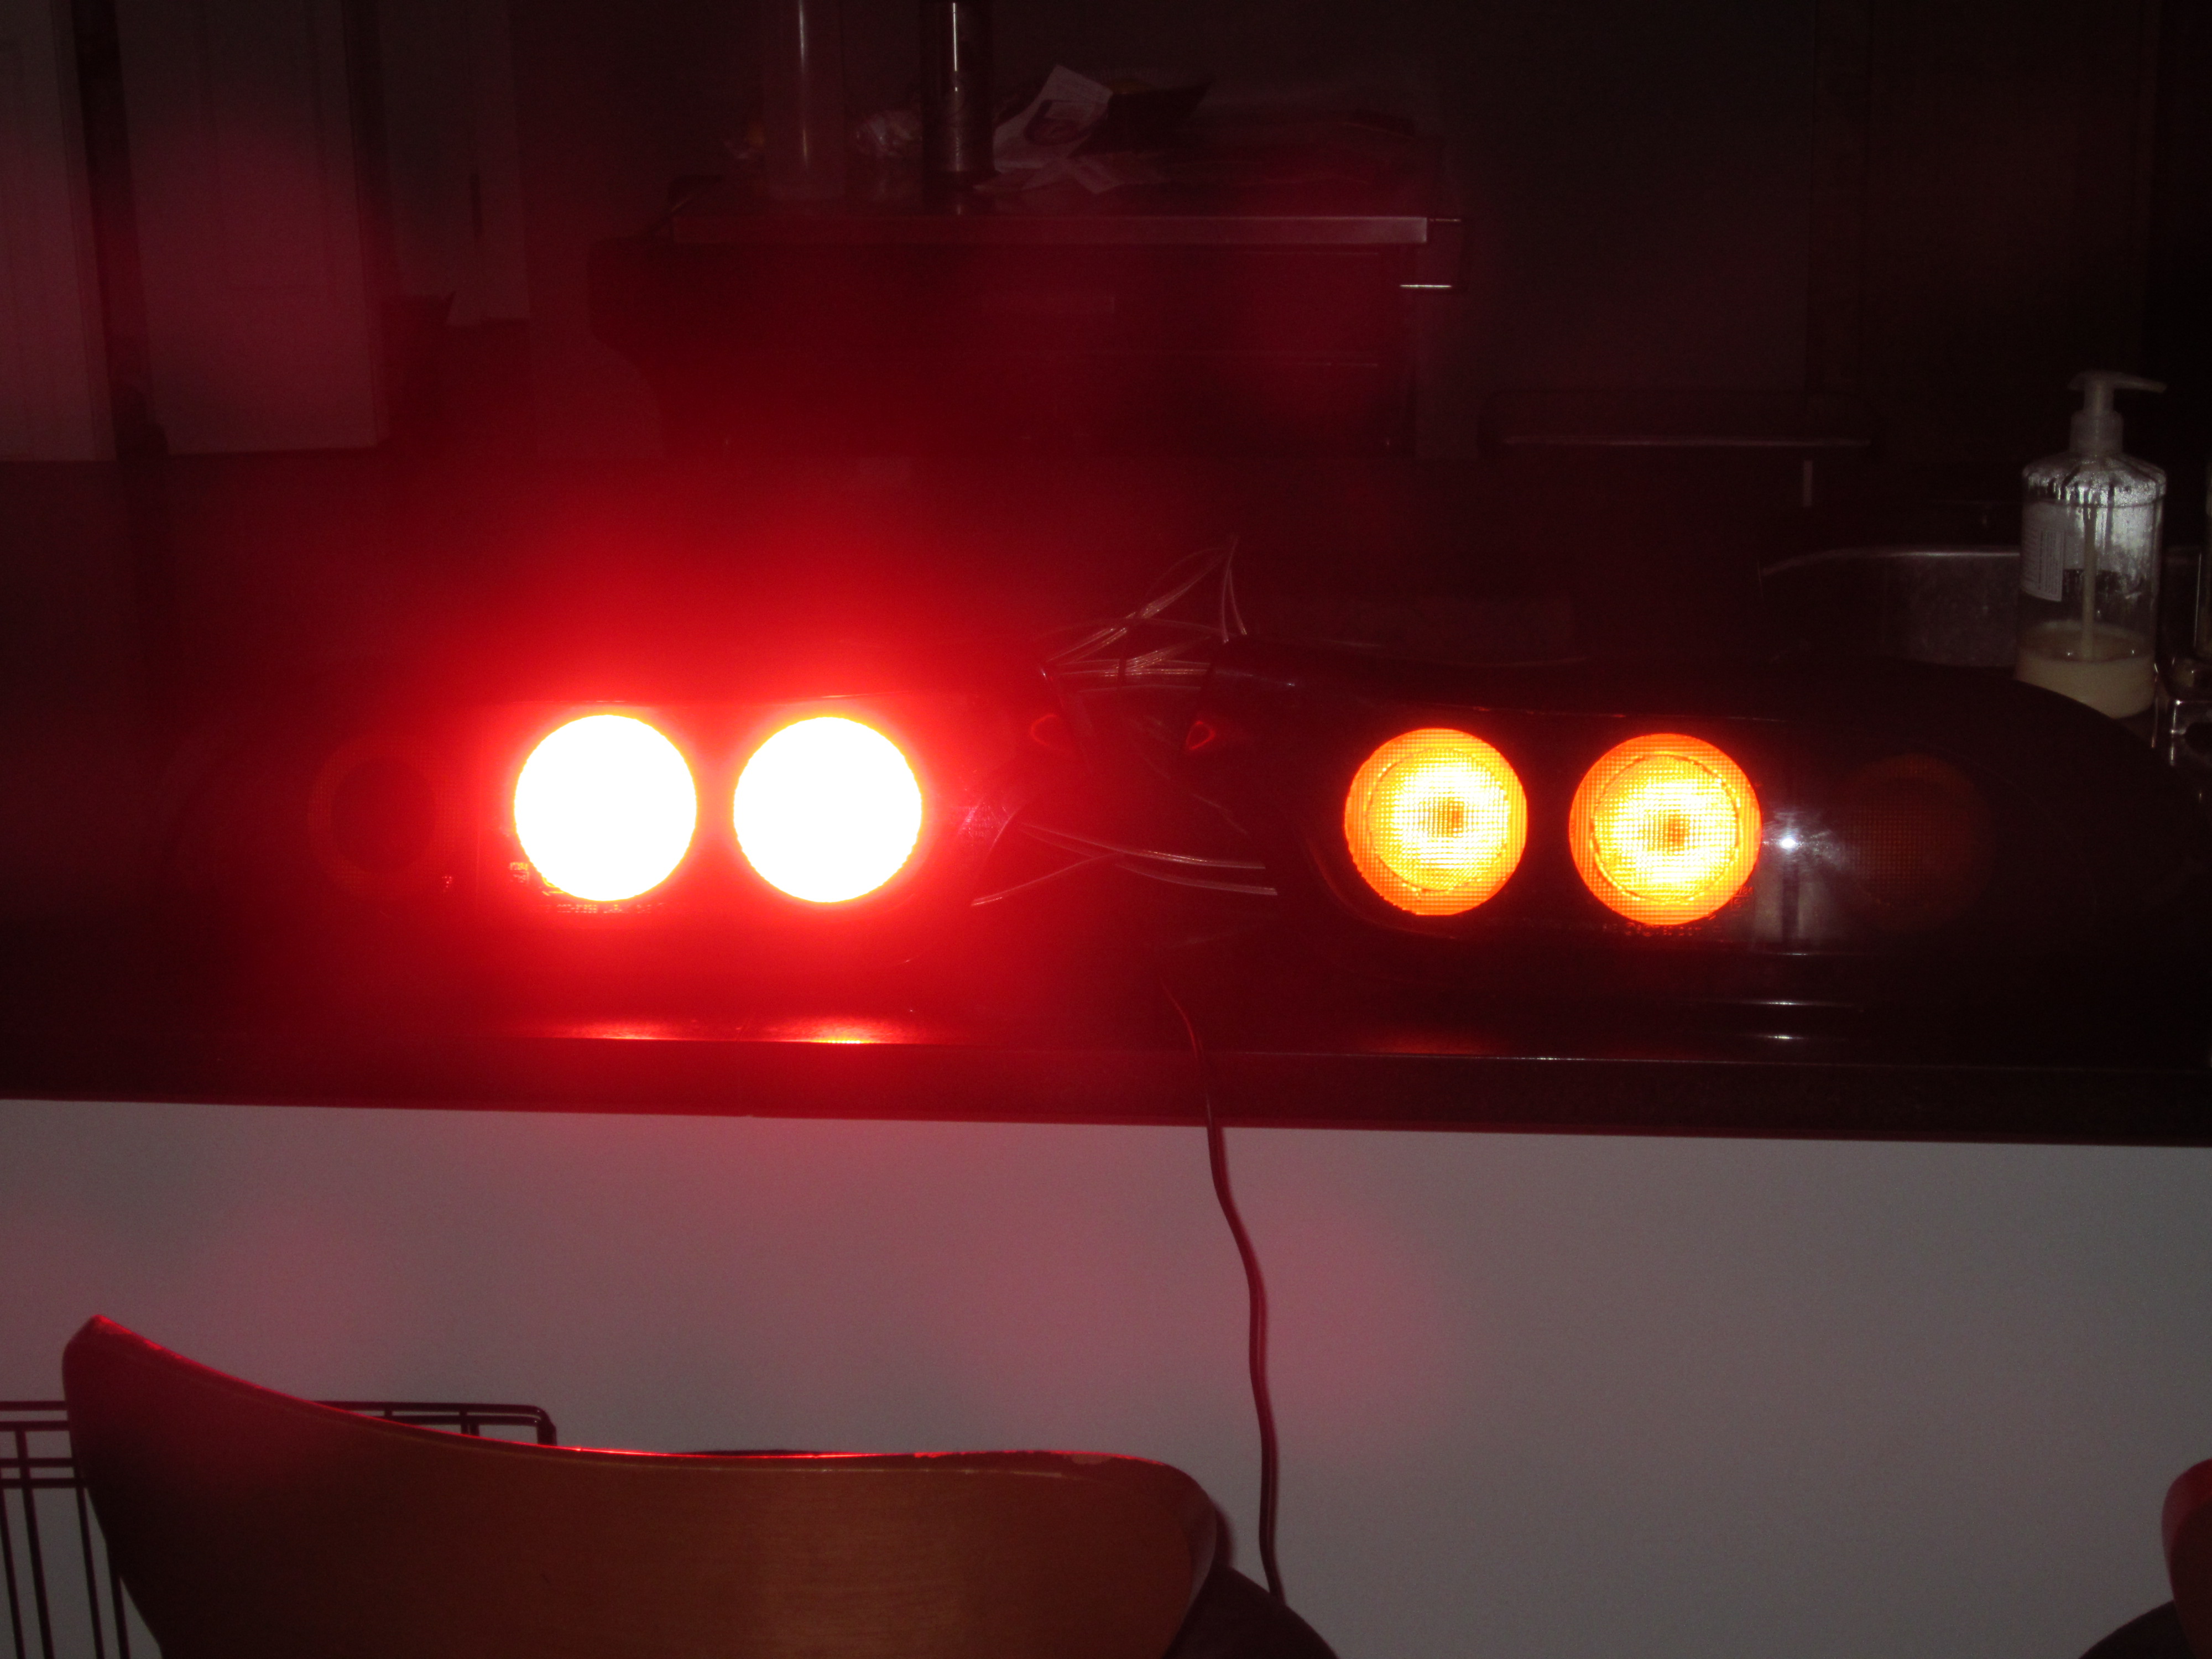
Especially like the retro "M" on the turn signals. Not quite for an FD but cool. To beat a dead horse, when you say the brightness "appears to be on par with the OEM lights," what were the measurement results? Did you build a light box like the one I linked for you? If not, the results will not be accurate. My guess continues to be these are not at the brightness level you want for brake lights.
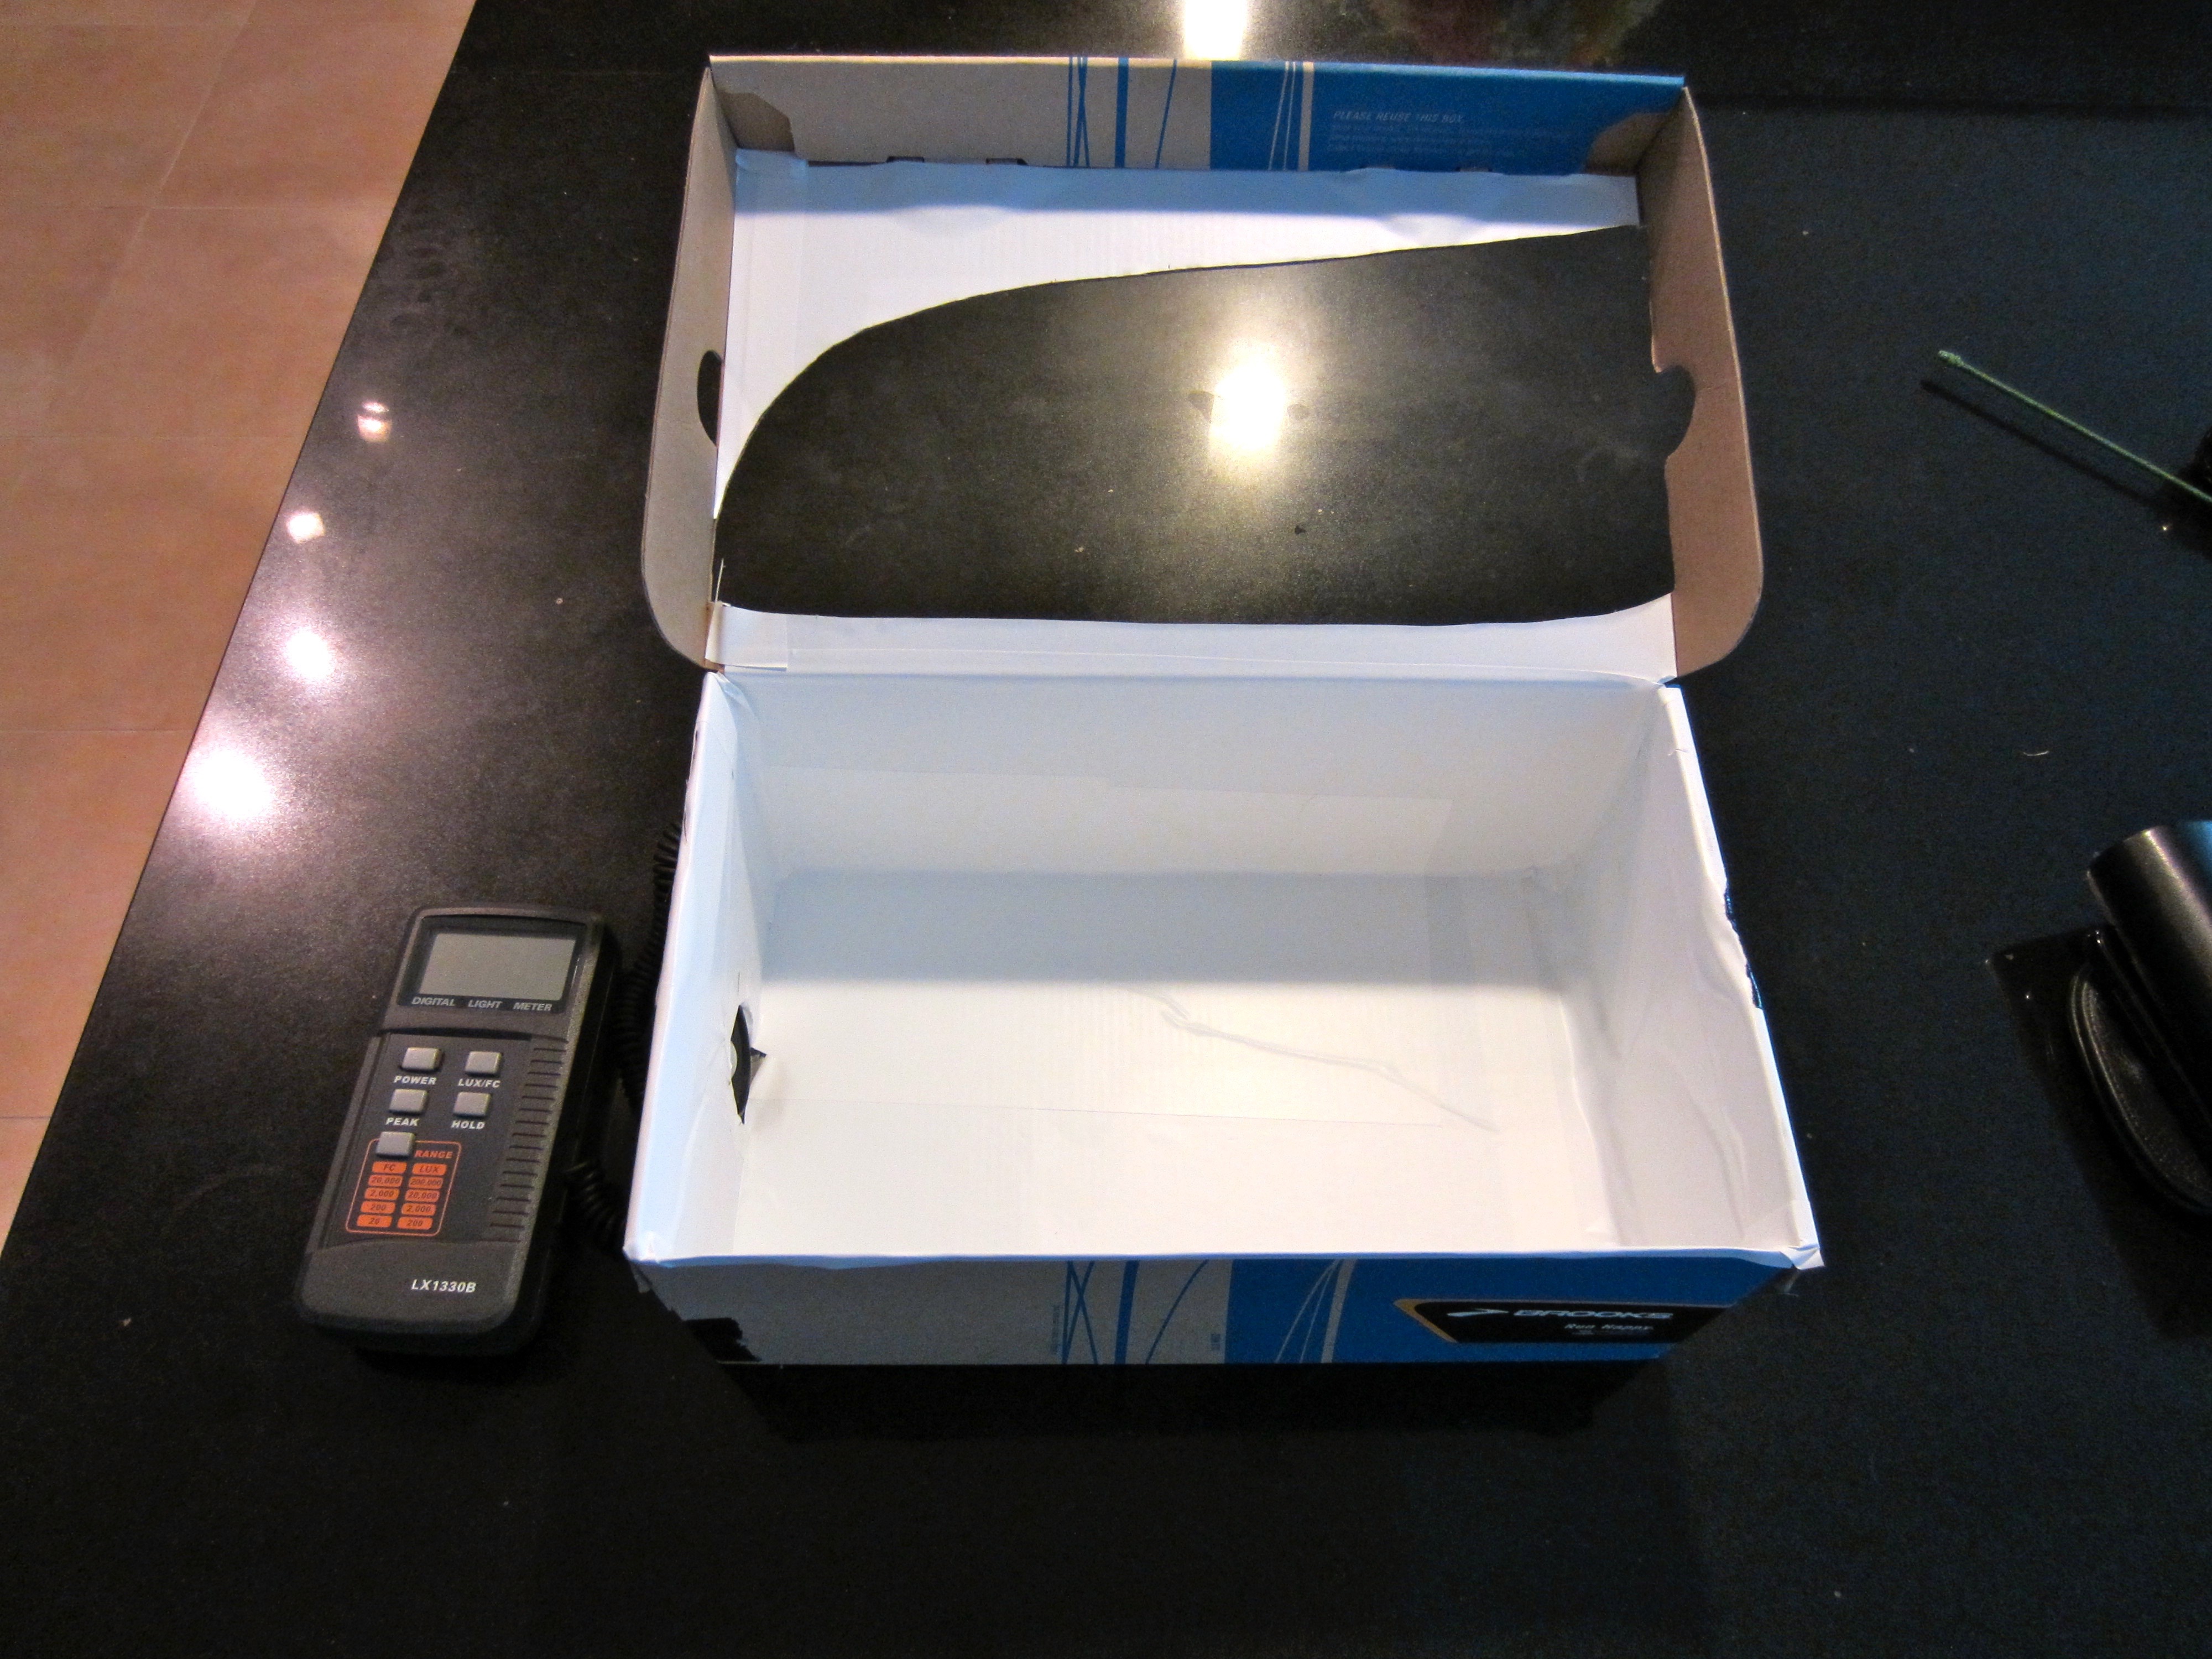
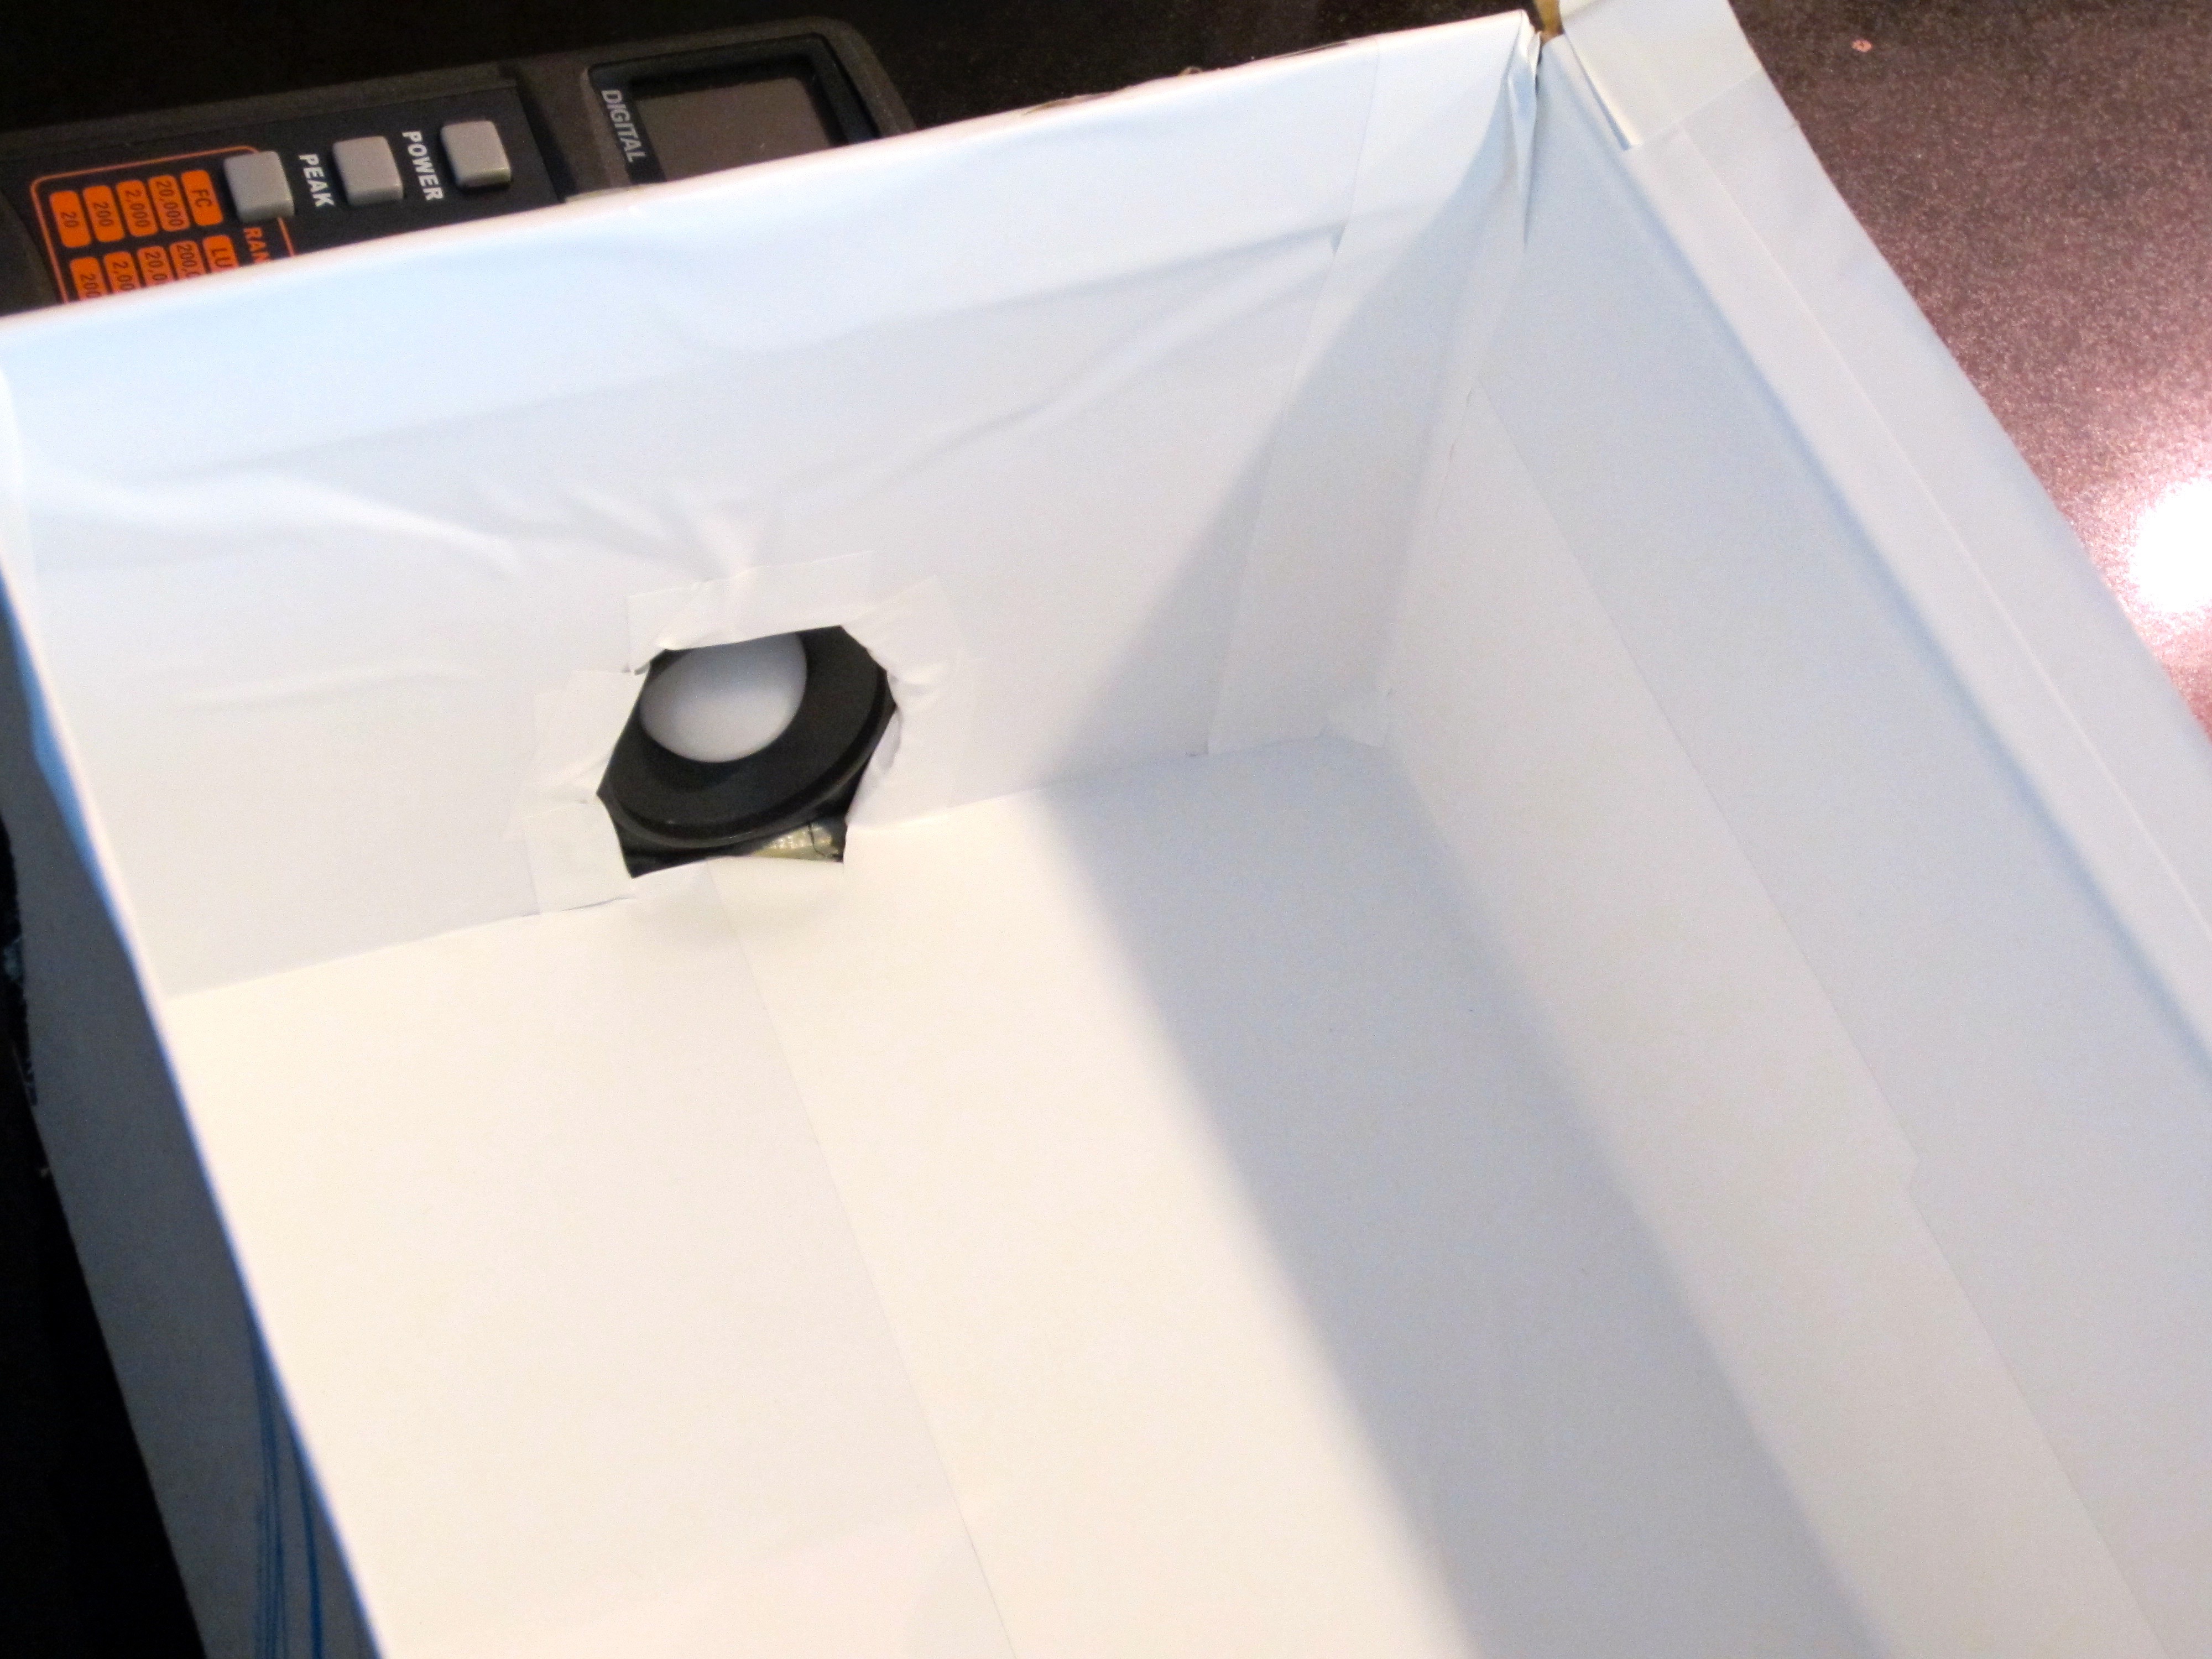
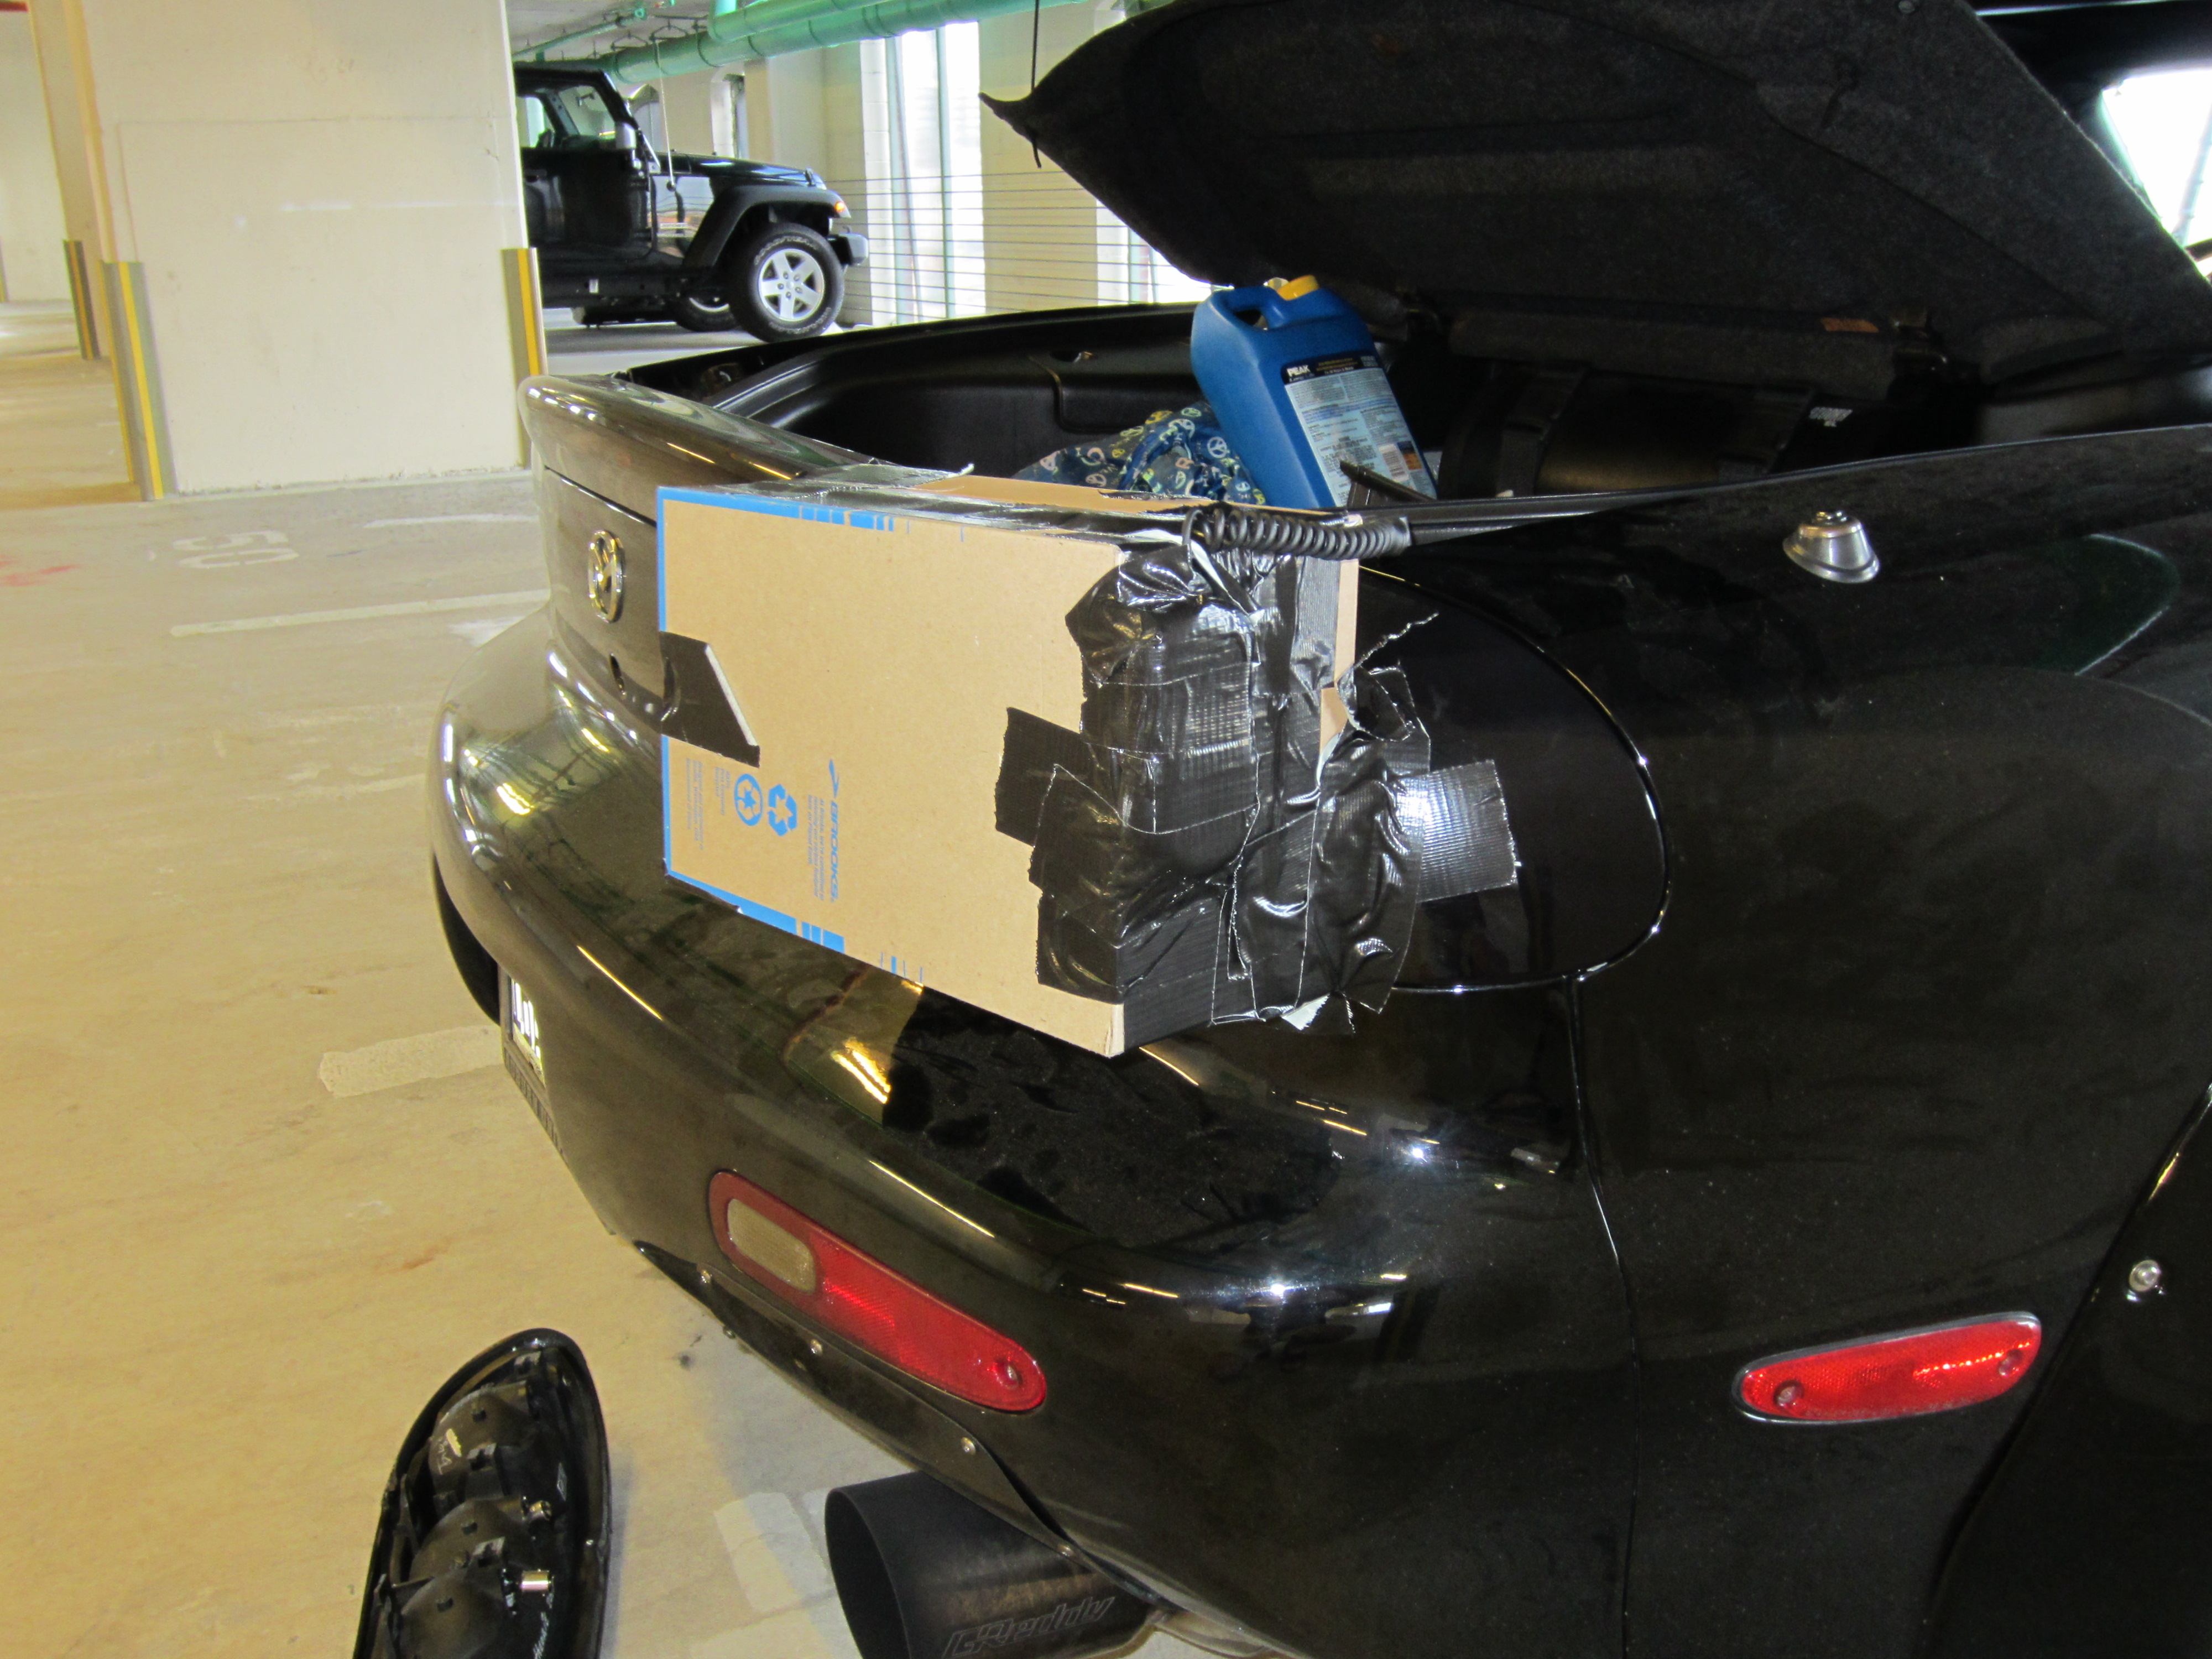
Here are some pics of the lightbox I built and used for my testing. It's just a shoebox with white matte adhesive shelf lining paper in it with a hole cutout on the top that mirrors the shape of the taillight lens, and with the light meter sensor installed on the side of the box so total output is captured.
And I sealed it to the car with duct tape so no outside light could get in.
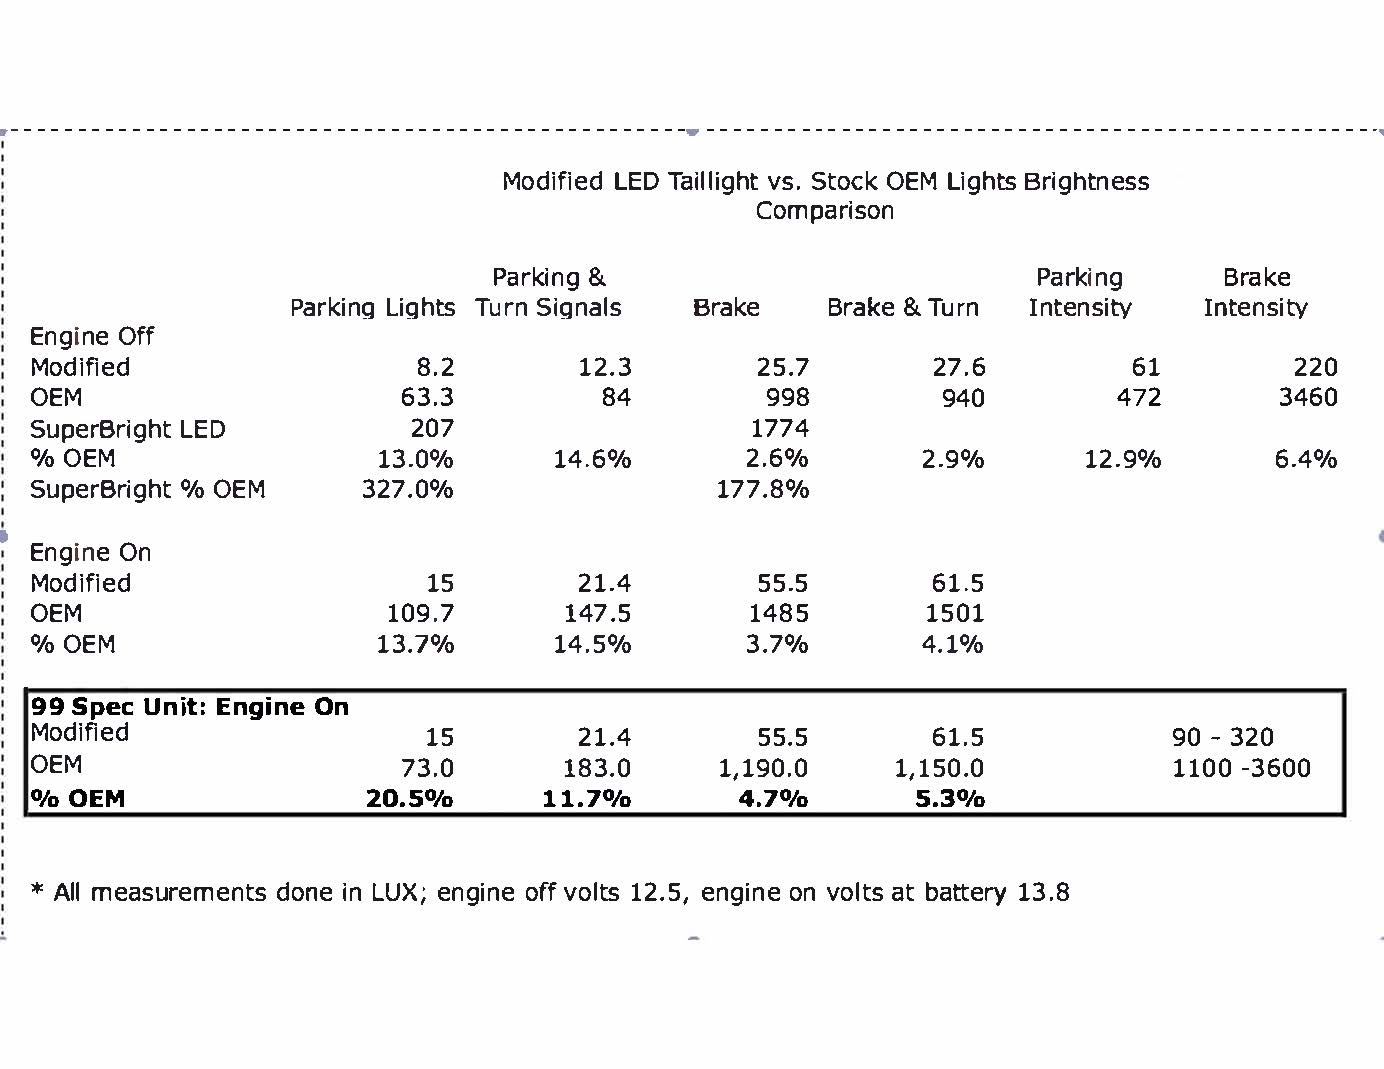
And here are the measurement results:
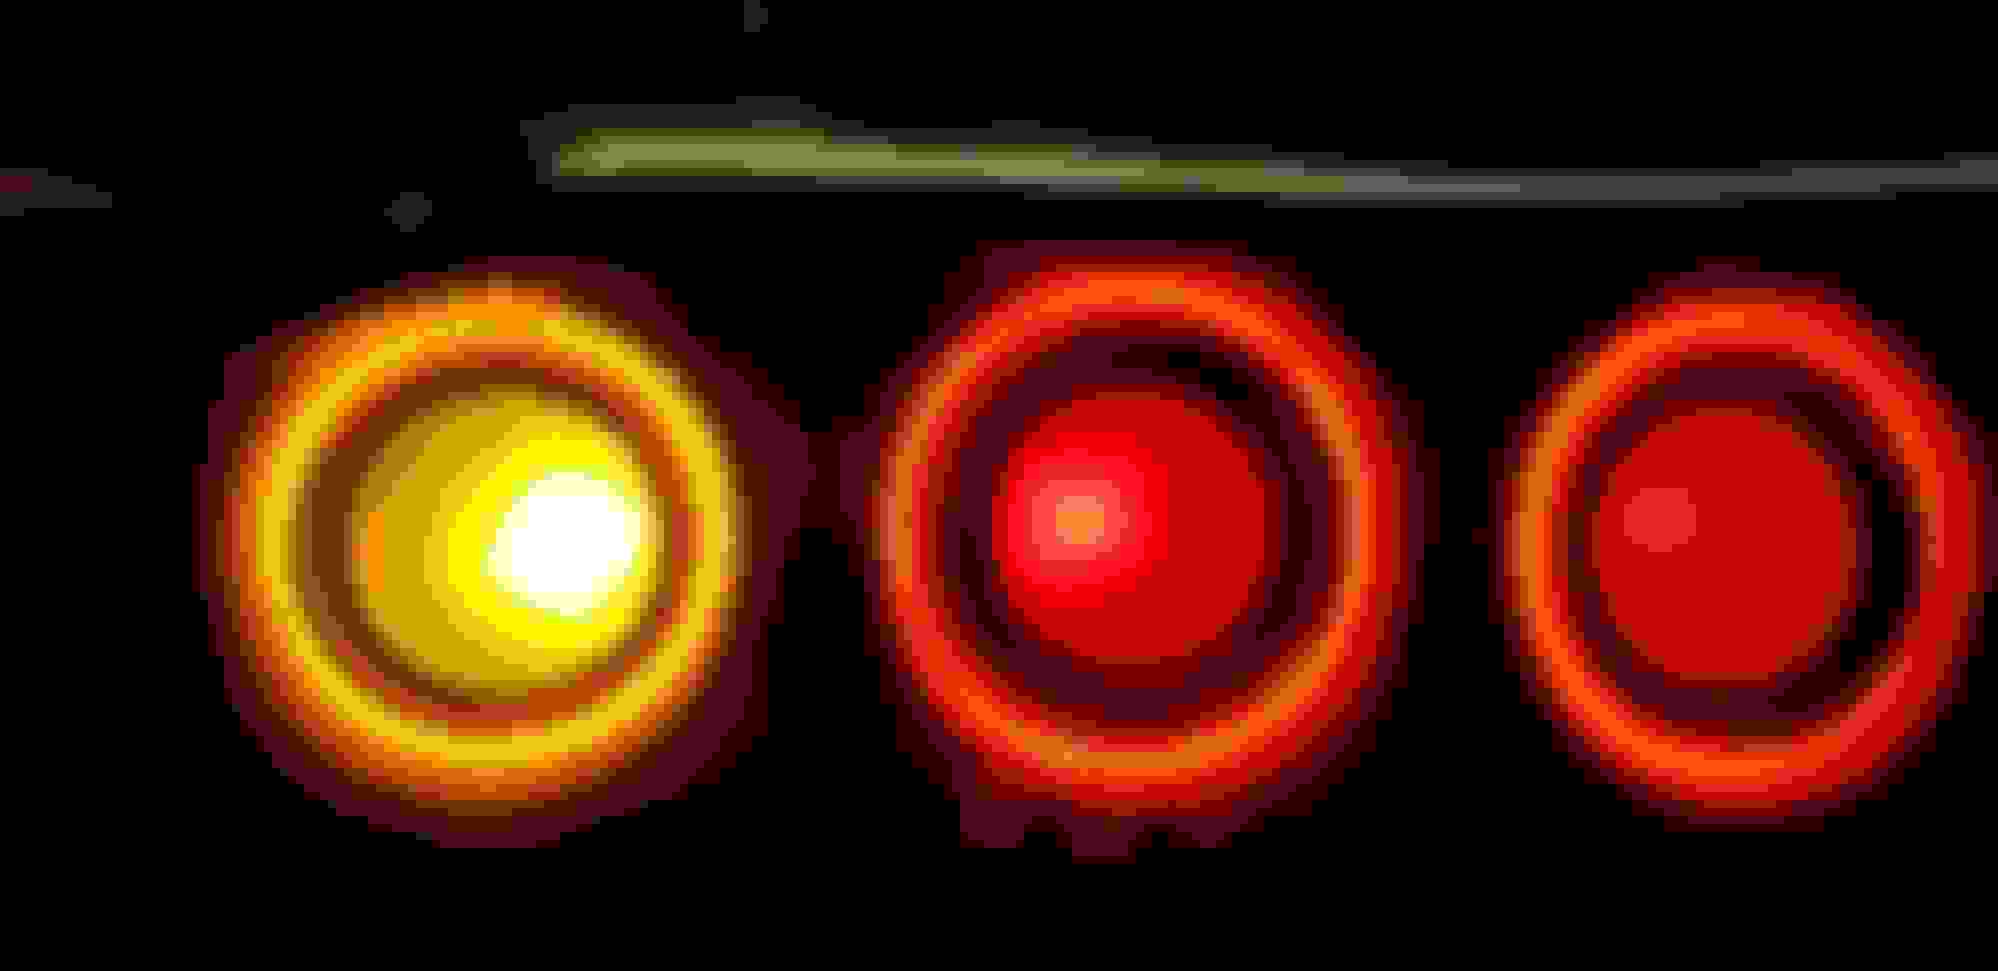
You can use these to compare your taillight results to ensure you have a product that is safe. Why am I posting on this? Look at the difference in your light output:
versus the mods I did:
I think the difference is pretty clear. Your mods seem to be on par with the units shown on the right, or the ones that are labeled "Modified" on the results spreadsheet.
PM me if you'd like to discuss. Happy to help and good luck.