
Writeup: S4 tail refinishing


Thread Starter
Hopeful Future
Joined: Oct 2005
Posts: 791
Likes: 0
From: Orlando, FL
Writeup: S4 tail refinishing
Alright, So when I got my S4 awhile ago, I noticed there was fading on the black trim around the tail lights. Normal for its age, and the florida sun beating down on it every day.
The fading wasnt intense, but it was noticable, with the black trim in spots fading almost to a white.
I solved this problem for under $7.00, and it was done rather quickly.
You will need:
3M tearable tape
Dupli-Color Acrylic Enamel (Flat Black in my case. I chose this paint because it held up well and feels factory finish to the touch.)
Simple directions, Tape off a good 4-5 inches around the body where the trim is located, overspray is a bitch, and it WILL reach that far. trust me. Taping over the lights and other areas you do not want to be painted.
Run over the area with a damp cloth (not very damp, but slightly moist) as to remove any dust or particles that may have settled on the surface.
Afterthat, I just evenly began applying the paint at a distance of probabily 5-7 inches evenly over the surface area. One to two coats served nicely.
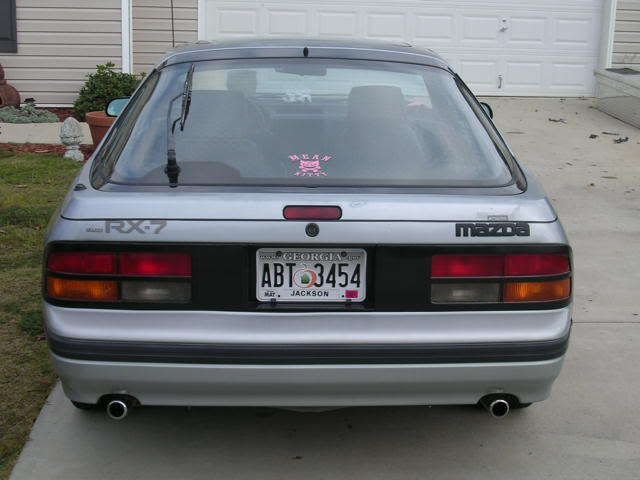
Before and After pics, Notice the fading on the before shot.

After:


The fading wasnt intense, but it was noticable, with the black trim in spots fading almost to a white.
I solved this problem for under $7.00, and it was done rather quickly.
You will need:
3M tearable tape
Dupli-Color Acrylic Enamel (Flat Black in my case. I chose this paint because it held up well and feels factory finish to the touch.)
Simple directions, Tape off a good 4-5 inches around the body where the trim is located, overspray is a bitch, and it WILL reach that far. trust me. Taping over the lights and other areas you do not want to be painted.
Run over the area with a damp cloth (not very damp, but slightly moist) as to remove any dust or particles that may have settled on the surface.
Afterthat, I just evenly began applying the paint at a distance of probabily 5-7 inches evenly over the surface area. One to two coats served nicely.
Before and After pics, Notice the fading on the before shot.
After:
Last edited by Tyblat; Oct 9, 2006 at 11:13 AM.
Thread Starter
Hopeful Future
Joined: Oct 2005
Posts: 791
Likes: 0
From: Orlando, FL
Originally Posted by My5ABaby
Archive imo
+4 for the job
-1 for the flat black
+3 overall
+4 for the job
-1 for the flat black
+3 overall
Lol, I thought the black brought out the tail lights color =)
anyway, thanks for the props.


Full Member
Joined: Sep 2006
Posts: 232
Likes: 0
From:
The fix for this has been covered multiple times.
And I would not recommend flat black, OR painting the tails with them still on. Overspray *IS* a bitch and it'll reach more than a 5 inch perimeter if there's even the slightest breeze or if you get sloppy.
This was done on an S4 GXL:
Pop open your hatch, unlatch the two plastic locking tabs that hold the trim carpeting over the spare tire. Find the plastic trim clips, there are two, that hold the carpet to the side of the spare tire carpet, and pry them out. Put them somewhere safe, you'll need them later.
It's pretty simple to remove the bulbs. Twist them about a 1/4 turn and they pull out. If you think you'll forget which bulb is which, or if it's an upper or lower bulb, mark them with something like colored sticker dots. Move the bulbs out of the way..
Find the eight 10mm bolts. Four across the top, four across the bottom. They shouldn't be too tight, and they're intuitively spaced - You shouldn't have a problem finding the eight correct ones. All the same size, just put them anywhere and gently push the tail housings from the inside until you can pry them out of their mounts.
Wipe everything down with the mentioned 'damp but not really damp, moist cloth'. Mask off the lenses with blue painters tape. The trick to making this go quicky is to lay the strips of tape over the lenses, then use a razor blade to trim the lenses perfectly. It's quick and easy, then you're done with it.
Buy the Dupli-Color Acrylic Enamel in GLOSS black. Flat isn't anywhere near glossy enough to look factory. You may prefer to use it, but the best results will obviously be the highest gloss.
Spray in even, overlapping lines about five or so inches from the surface of the lights. Remember...you can always add more, but you can't really take it off. Go slow...let the paint become touchable between coats, it only takes a few minutes with this stuff. I did about five thin coats of paint on each tail housing.
Installation (After letting the tails dry overnight) is the reverse procedure of removal. Chances are the recessed bays where the tails sit is going to be quite dirty, so take a few seconds to wipe it down with a 'damp but not really damp, moist cloth'.
This is the result I got. Applying a few coats of rattle can clear would probably increase the shine factor.

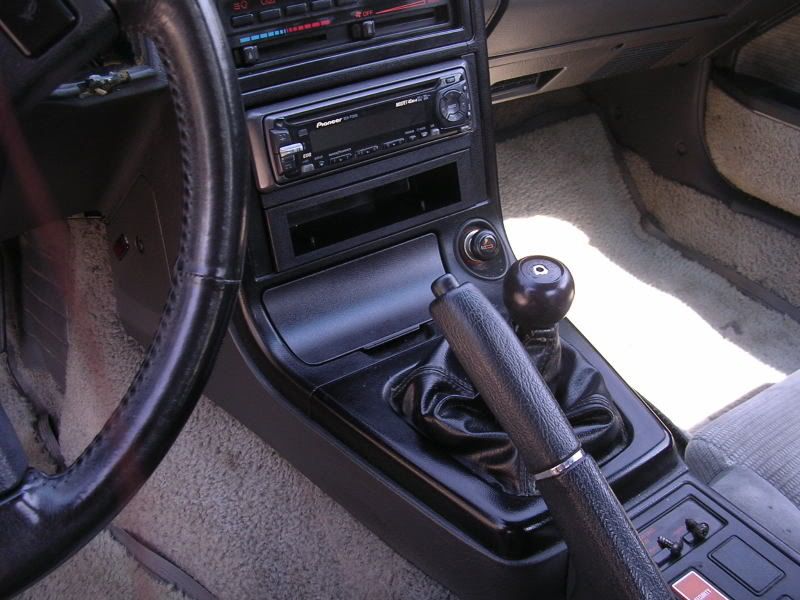
The paint, if you've got any left over, will work wonders on the ashtray. Just wipe it off with a DRY cloth so there's no dust on it, and spray a few light coats. Here's a pic of that.
And I would not recommend flat black, OR painting the tails with them still on. Overspray *IS* a bitch and it'll reach more than a 5 inch perimeter if there's even the slightest breeze or if you get sloppy.
This was done on an S4 GXL:
Pop open your hatch, unlatch the two plastic locking tabs that hold the trim carpeting over the spare tire. Find the plastic trim clips, there are two, that hold the carpet to the side of the spare tire carpet, and pry them out. Put them somewhere safe, you'll need them later.
It's pretty simple to remove the bulbs. Twist them about a 1/4 turn and they pull out. If you think you'll forget which bulb is which, or if it's an upper or lower bulb, mark them with something like colored sticker dots. Move the bulbs out of the way..
Find the eight 10mm bolts. Four across the top, four across the bottom. They shouldn't be too tight, and they're intuitively spaced - You shouldn't have a problem finding the eight correct ones. All the same size, just put them anywhere and gently push the tail housings from the inside until you can pry them out of their mounts.
Wipe everything down with the mentioned 'damp but not really damp, moist cloth'. Mask off the lenses with blue painters tape. The trick to making this go quicky is to lay the strips of tape over the lenses, then use a razor blade to trim the lenses perfectly. It's quick and easy, then you're done with it.
Buy the Dupli-Color Acrylic Enamel in GLOSS black. Flat isn't anywhere near glossy enough to look factory. You may prefer to use it, but the best results will obviously be the highest gloss.
Spray in even, overlapping lines about five or so inches from the surface of the lights. Remember...you can always add more, but you can't really take it off. Go slow...let the paint become touchable between coats, it only takes a few minutes with this stuff. I did about five thin coats of paint on each tail housing.
Installation (After letting the tails dry overnight) is the reverse procedure of removal. Chances are the recessed bays where the tails sit is going to be quite dirty, so take a few seconds to wipe it down with a 'damp but not really damp, moist cloth'.
This is the result I got. Applying a few coats of rattle can clear would probably increase the shine factor.
The paint, if you've got any left over, will work wonders on the ashtray. Just wipe it off with a DRY cloth so there's no dust on it, and spray a few light coats. Here's a pic of that.