
She Followed Me Home, Honest

And another junkyard perambulation, as it turns out.
This weatherstrip situation is harder than it looks.
On the one hand I feel like I should apologize for wallowing so long in such a trivial area (and NO pictures, goddammit!) but on the other, I'm finding it oddly fascinating.
I really am curious about how manufacturers develop the "seal package" on a car, new cars are so much more elegantly dressed compared to my ancient, leaky POS.
I had three examples of junkyard culled weatherstrip to experiment with and learned a lot from doing so.
The main issue is the door construction itself, specifically, the removable upper window frame. Not only is it flimsily mounted (compared to a one-piece door like the FC) but it's a completely different profile from the sealing surface of the door body.
A seal that contacts the main door nicely doesn't even touch the upper frame.
A seal thick enough to work on the upper is too thick for the lower section, the door won't close.
This is why the original setup has SEVEN different rubber bits on/around the door, attempting to seal it. Some are generic (like the glass seal in the upper frame) but some are very specific molded rubber bits and thus, quite expensive.
And even with all the seals installed, the car is a leaky, wind noise plagued rattletrap.
I want to do better.
Anyways, one of the seals was an excellent candidate for the hatch seal and after some trimming/fitting, that has now been finalized.
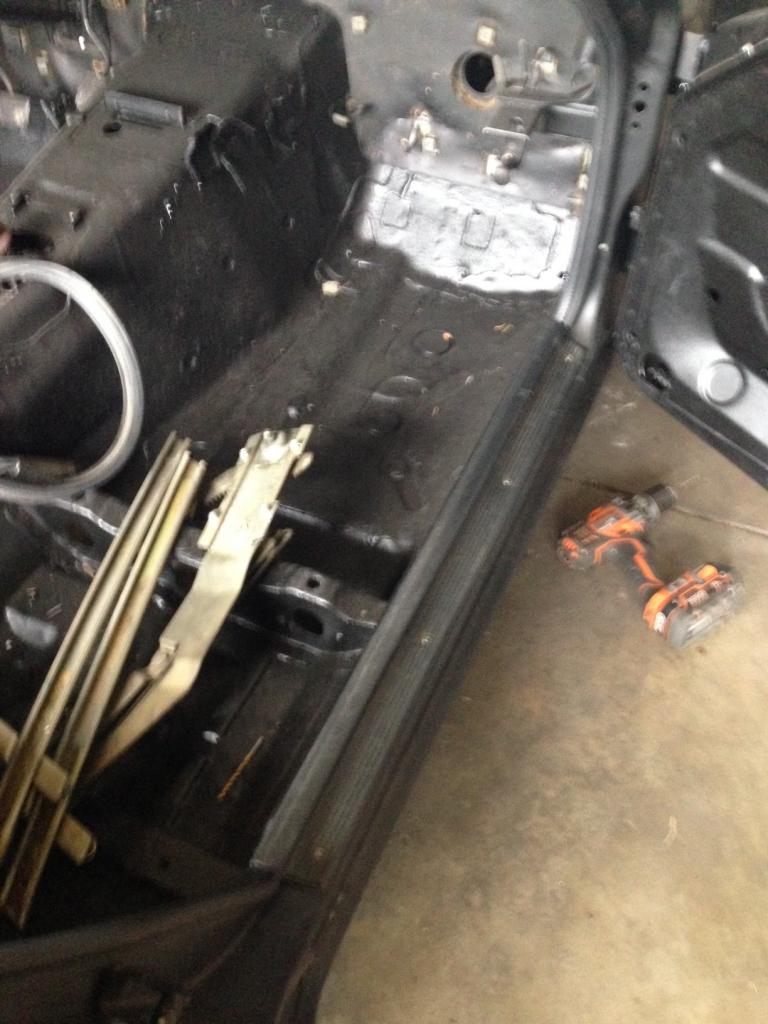
In other news, I finally got around to bedlinering the inner door panels, so that's done.
I also spent time trimming/fitting the Eclipse window trim and those are going to work beautifully, I think.
The adventure continues.
This weatherstrip situation is harder than it looks.
On the one hand I feel like I should apologize for wallowing so long in such a trivial area (and NO pictures, goddammit!) but on the other, I'm finding it oddly fascinating.
I really am curious about how manufacturers develop the "seal package" on a car, new cars are so much more elegantly dressed compared to my ancient, leaky POS.
I had three examples of junkyard culled weatherstrip to experiment with and learned a lot from doing so.
The main issue is the door construction itself, specifically, the removable upper window frame. Not only is it flimsily mounted (compared to a one-piece door like the FC) but it's a completely different profile from the sealing surface of the door body.
A seal that contacts the main door nicely doesn't even touch the upper frame.
A seal thick enough to work on the upper is too thick for the lower section, the door won't close.
This is why the original setup has SEVEN different rubber bits on/around the door, attempting to seal it. Some are generic (like the glass seal in the upper frame) but some are very specific molded rubber bits and thus, quite expensive.
And even with all the seals installed, the car is a leaky, wind noise plagued rattletrap.
I want to do better.
Anyways, one of the seals was an excellent candidate for the hatch seal and after some trimming/fitting, that has now been finalized.
In other news, I finally got around to bedlinering the inner door panels, so that's done.
I also spent time trimming/fitting the Eclipse window trim and those are going to work beautifully, I think.
The adventure continues.
If you look at new(ish) cars with a focus on weatherstrip, you'll see that most avoid sharp corners and the seals all follow radiused turns...but not the old Z, it has a very hard 90� corner at the rear top of the door.
I hadn't thought much about it but soon realized that I'd probably have to cut/miter that section of trim unless I could find a suitable donor with a pre-molded corner.
Enter the Chrysler minivan.
Not only do they have the corner I wanted but it turns out the sample I'd culled months ago and just used on the hatch came from one of these vehicles, so if I could find a matched set for the doors, we'd be consistent all the way round.
All of the seals fail in the same place on a Chrysler van and I had to strip maybe 20 donors to find an intact pair, but I did it.
Of course, I have no idea if they'll work but they'll be beautiful failures if not.
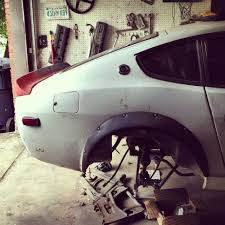
As an example of the evolutionary nature of the modding process, I'll offer up the hatch strut mount bracket because I think I found the final version.
I'll bet that none of you, myself included, has ever thought much about the geometry of the strut install but I was forced to begin understanding when I decided to use a different part and veer from stock.
Originally we modified the stock bracket but it had structural flaws that made it a bad choice.
Then modified a different bracket which solved the first set of problems but looked ugly. Using dimensions derived from the second part, I'd sketched out a simple drawing and had even gone so far as to root through my raw material looking for suitable stock.
Because I'd gone through the two iterations and better grasped the requirements, my eye was much more finely attuned and I found- almost without effort- exactly what I wanted in the junkyard.
Practice does make perfect.
Today I'm back at the yard, mainly looking for a nice set of sillplates.
Another seemingly simple piece that probably hides a world of nuance I'd never considered before.


Joined: Mar 2001
Posts: 31,863
Likes: 3,245
From: https://www2.mazda.com/en/100th/
the 1st gen Rx7's also make a sharp bend at the top rear of the door, and the wether strip is just cut and glued together...
it isn't the best way, as this is usually where it fails, but it does work.
it isn't the best way, as this is usually where it fails, but it does work.
I'm trying to avoid making my own joint there at the corner, the Chrysler pieces are nicely molded and should fit fine.
We get snow again tomorrow, so I squeezed in my fourth junkyard trip this week today, before it gets messy for a while.
My primary focus was on sill plates and I think the pair I nabbed from a '91 Prelude will do the trick.
Of course, I'm just going by memory, so it'll be interesting to see how close I came.
On the way out I took a little detour and found a previously unseen bunch of Mustangs, one of which gave up it's door trim. They may fit even better than the Eclipse pieces I found last week.
If it really is crappy I doubt we'll get too much done tomorrow but at least I can test fit this stuff and go from there.
Well, the weather was pretty crummy, increasingly so as the day wore on.
Fortunately, the main jobs went off without a hitch, my junkyard parts are going to work better than I'd hoped.
After trimming to a suitable length, the minivan doorseals installed perfectly, a much better solution than Datsun ever used. We have good, consistent contact with all the seal surfaces and the door closes properly.
Again with little trimmage, the Honda Prelude sill trim went right on and again, looks better than the original.
Here is an awful pic that almost kinda shows what we did:
I'm well chuffed, it's nice and complete and doesn't look remotely custom...a normal person would assume it's stock.
This completes the main cabin custom sealing work. The hatch, doors and quarter windows are all basically weatherproof (there are still a few trim pieces left for the doors) and all three panels open and close properly.
Thus ends my temporary obsession with rubber sealing profiles, hope you enjoyed it as much as I.
The new strut mount bracket bolted on and worked fine...we're done here too.
We then moved to the mirrors, a project that will probably go through several iterations.
First step was to get then in position, make sure they were reasonably useful and then start bueskying ways to actually make it real.
Sadly, the low grey ambient light makes these pics but a suggestion...they'll have to do till next weekend's sunny weather:
Although this is almost certainly nothing like the final version will be, it serves to solidify the spaces/angles/offsets we're dealing with and is a place to begin.
Next week I should complete assembly of the doors so the glass will be in also...the final obstacle we must work around while mounting the mirrors.
That project will percolate till a solution occurs to one of us.
I am hopeful we'll be watertight by end of April and wired by end of May.
Up until recently, most of the work has been quite straightforward- remove>refurbish>replace.
Dirty, uncomfortable work (sometimes) but not very creative or mentally taxing.
Now we're in somewhat uncharted waters as we try to recreate (or improve) on things that were not present in our car...like doorseals and various trim pieces.
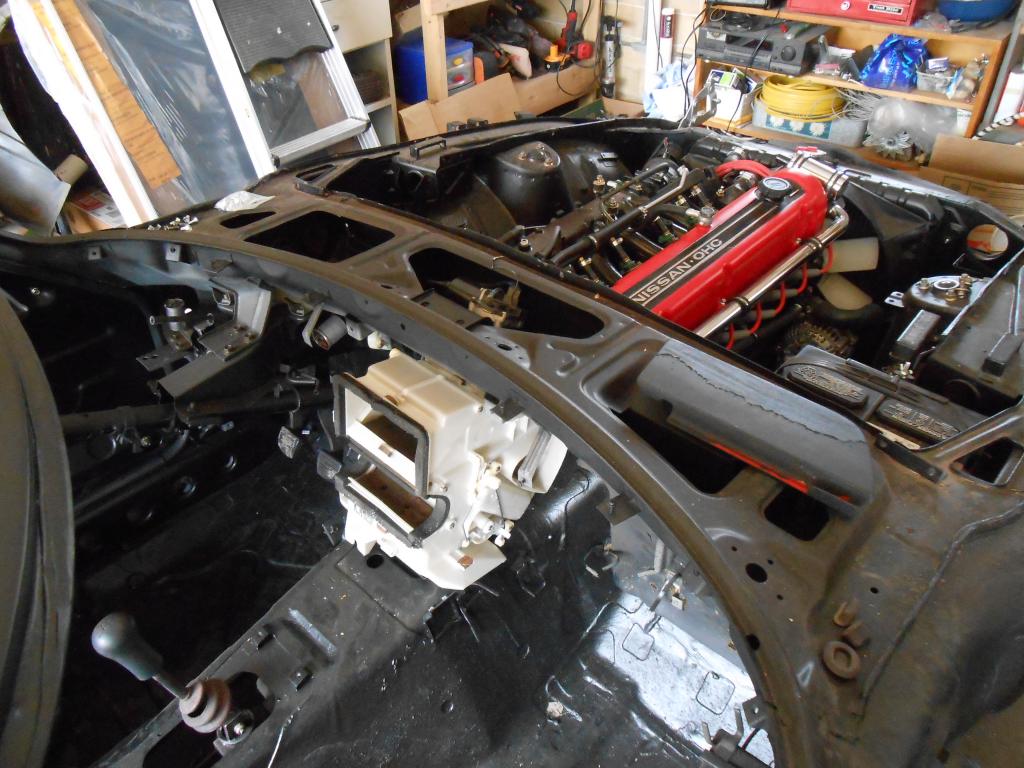
That sort of finish work will continue on a parallel track as my primary focus turns to the electrical system, which, as has been typical for me lately, will utilize little to nothing of the original layout or components.
I've already obtained most of what I need, the remaining, and largest, component left to find is a HVAC system/controls. That will be interesting.
Dirty, uncomfortable work (sometimes) but not very creative or mentally taxing.
Now we're in somewhat uncharted waters as we try to recreate (or improve) on things that were not present in our car...like doorseals and various trim pieces.
That sort of finish work will continue on a parallel track as my primary focus turns to the electrical system, which, as has been typical for me lately, will utilize little to nothing of the original layout or components.
I've already obtained most of what I need, the remaining, and largest, component left to find is a HVAC system/controls. That will be interesting.
We had a good day...no, we had a very good day.
Even the weather cooperated and the rain, predicted for @ noon, held off till 5pm.
Where to start, hmmm.
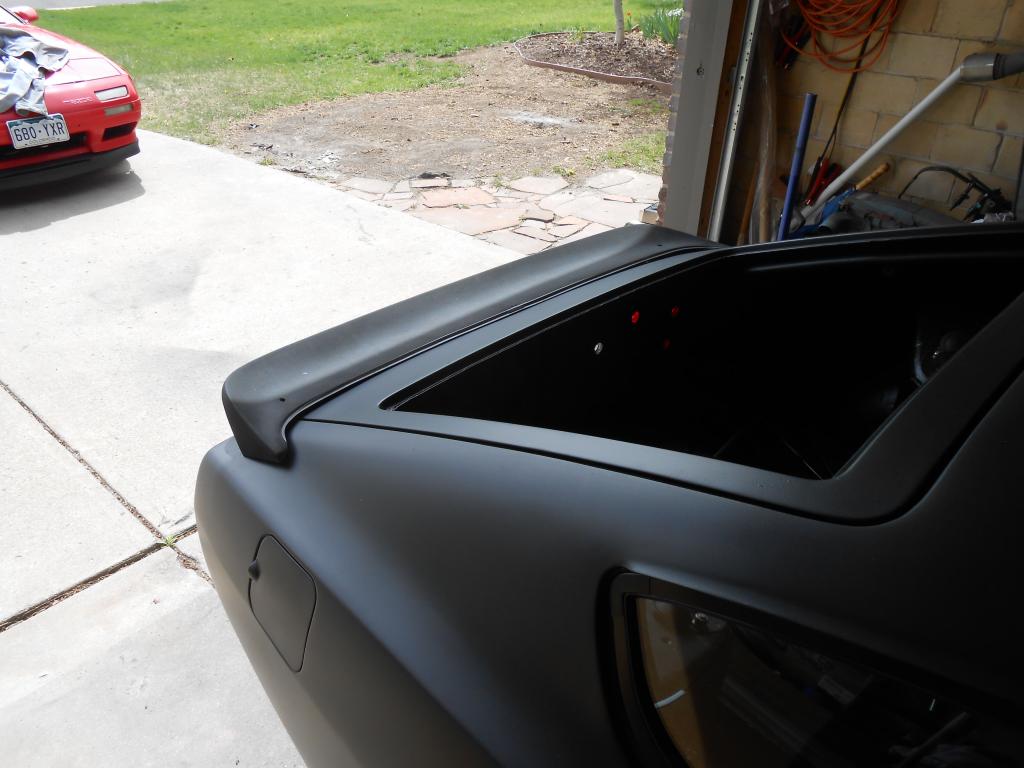
Well, the hatch got painted:
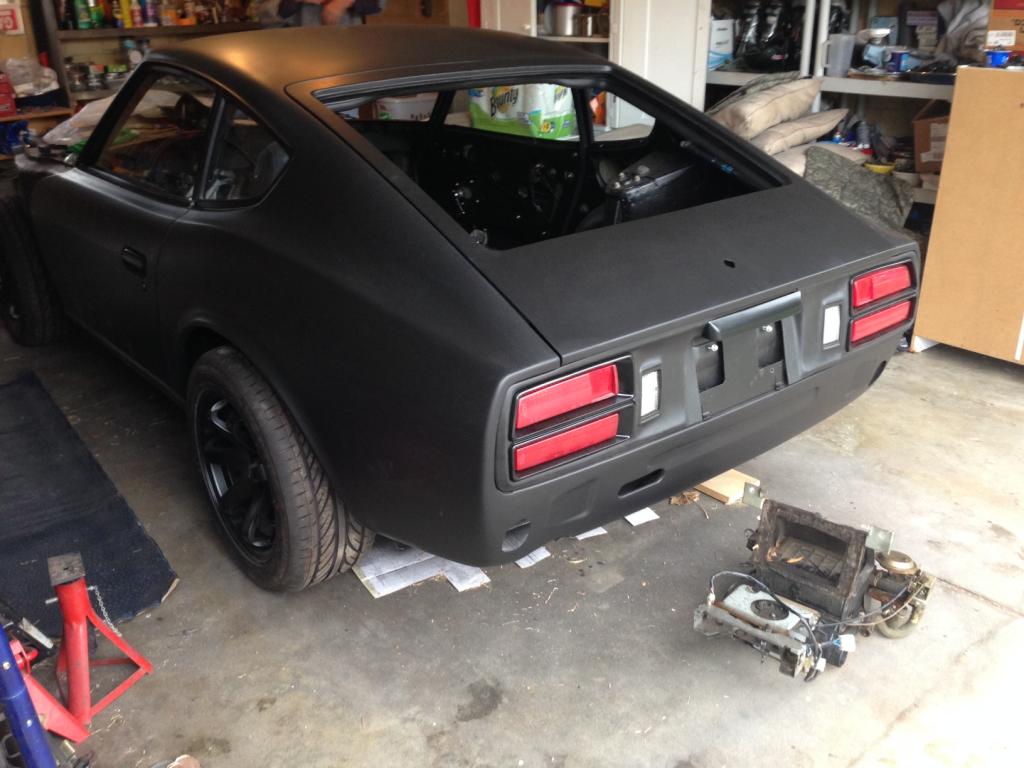
The new HVLP spray set was worlds better than the pos Harbor Freight unit and the painting went pretty quickly. The hatch is now installed with all the bumpers/stops and awaits glass.
This was weird...
We've been ready to assemble the doors for a while now but have been bottlenecked by the door locks, which go in first.
I had tried to get the ignition/doorlocks rekeyed but was put off by the uncooperative locksmith and had turned it over to Sigfrid.
So, this morning I bring it up and he says "Oh, don't worry, I'm going to rekey them now".
"Umm, what do you mean by "I", when did you become a locksmith?"
"Done it before, give me an hour".
Sure as ****, he did it.
Ignition and doors now operate- very smoothly and solidly, I might add- with one key.
Why the hell he waited so long to pull off this apparently simple feat is beyond me, but there you have it.
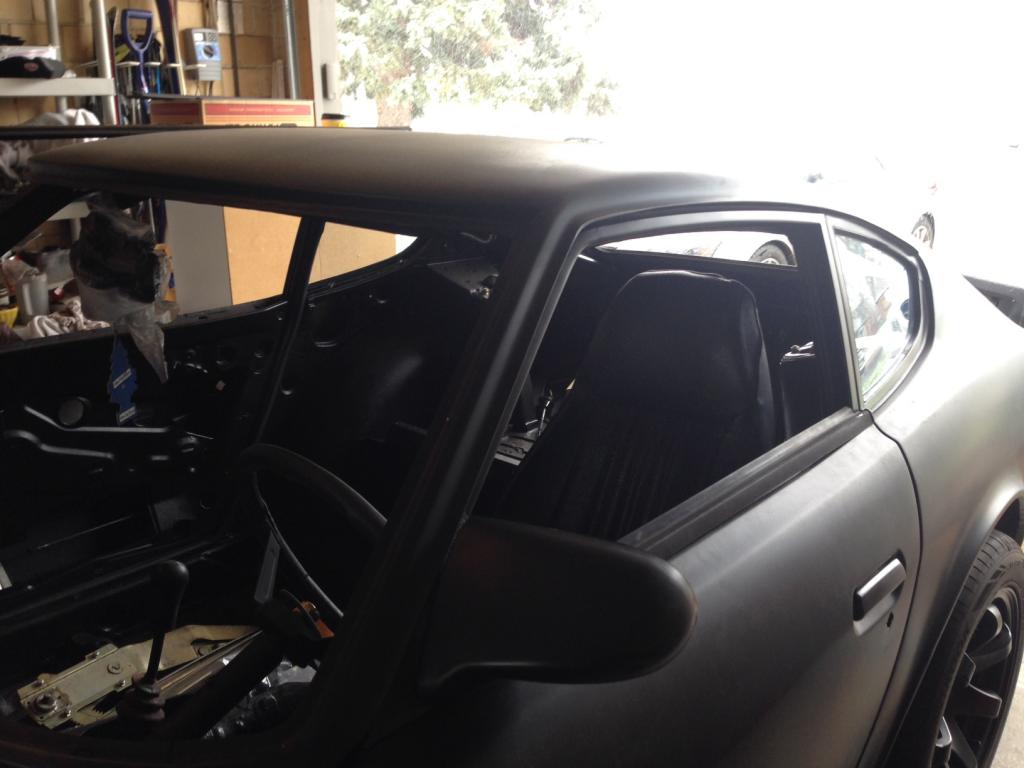
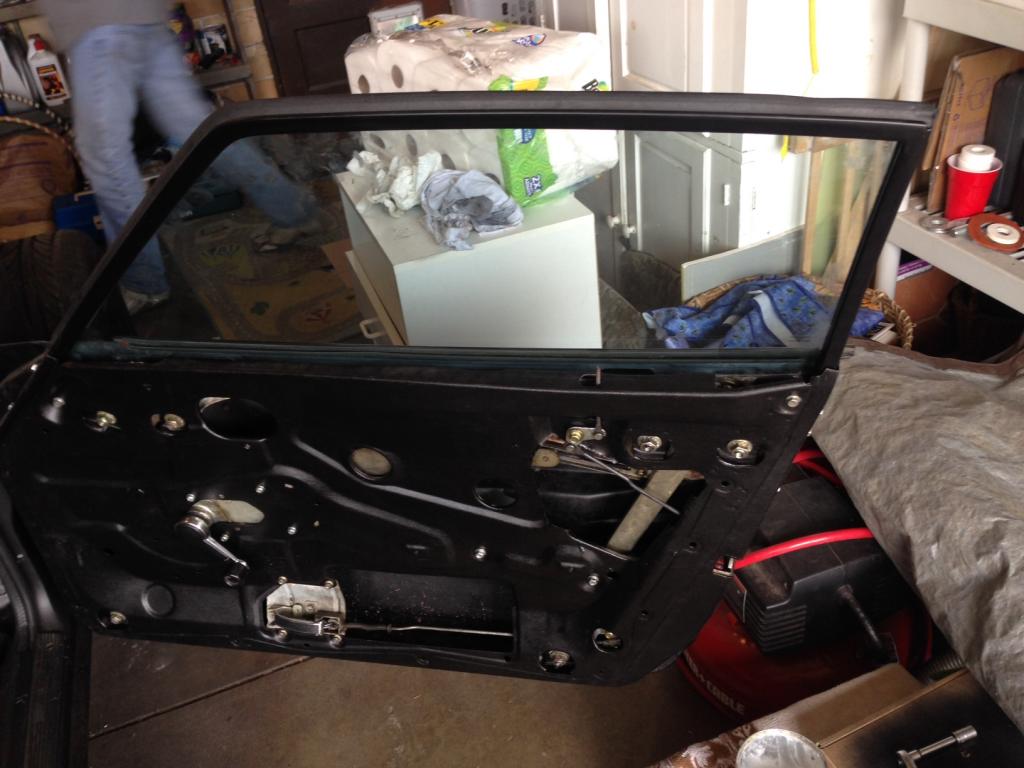
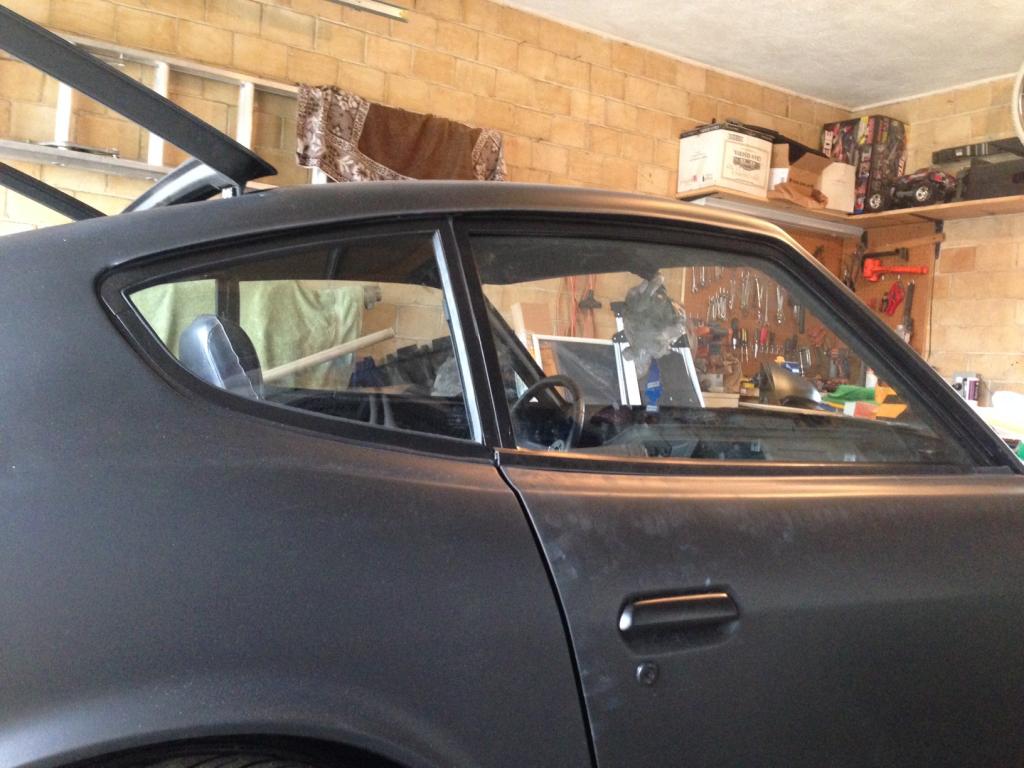
So the lock were installed, followed by the window regulator(s) and tracks and finally, the glass.
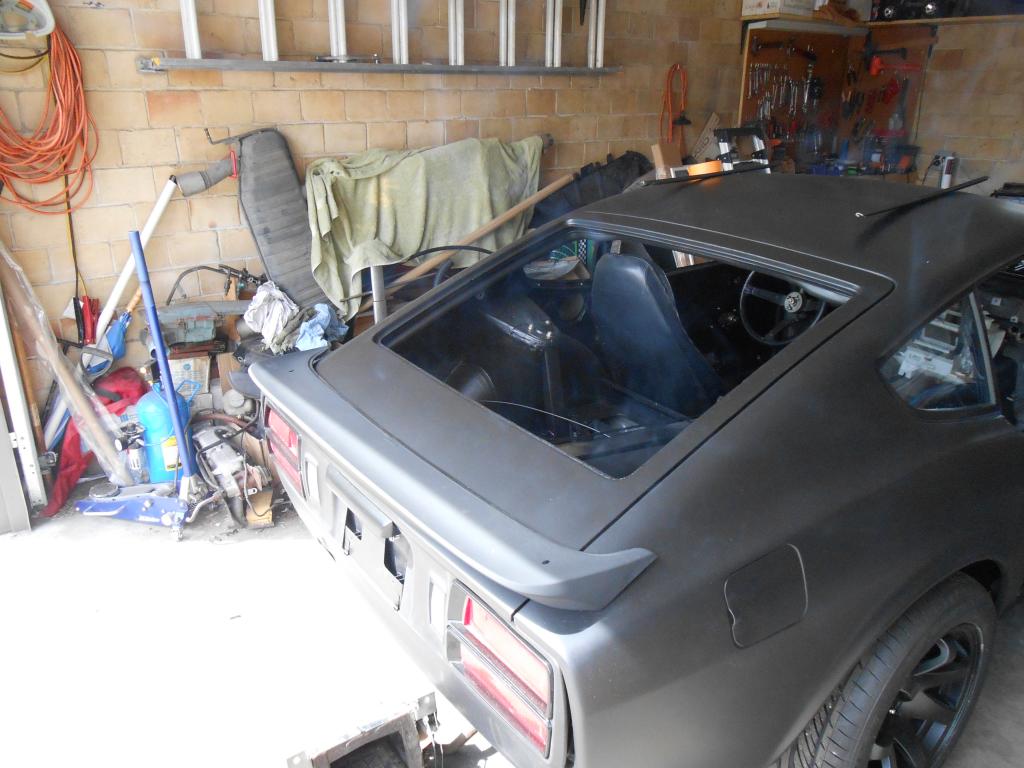
The doors are functionally complete:
Sigfrid spent about an hour per side adjusting the upper frames and the glass.
It was tedious but he got as good a fit as we could hope for. The glass moves nicely and seats in the upper seal perfectly.
We spent time bending the flange that the outer window seal clips on and got great contact between the rubber wiper and the glass.
I had snagged yet another set of trim which has the necessary arc and it fits as though factory.
I have an idea for some final detail trim but it's not critical and can wait.
There are also some additional door seals but we don't have them in hand as yet.
Next workday we install the windshield and hatch glass and the cabin is weathertight.
That is a big milestone.
The doors were much like swapping the diff in my FC...my research made me fear the job disproportionate to how hard it actually turned out to be.
The door assembly might have been the last (kinda) large purely mechanical job left and I'm thrilled it's done and turned out so well.
She's finally starting to look like a car...more has been finished than remains to be done.
Not to minimize the jobs I have left but I can see an end.
Hazily.
Even the weather cooperated and the rain, predicted for @ noon, held off till 5pm.
Where to start, hmmm.
Well, the hatch got painted:
The new HVLP spray set was worlds better than the pos Harbor Freight unit and the painting went pretty quickly. The hatch is now installed with all the bumpers/stops and awaits glass.
This was weird...
We've been ready to assemble the doors for a while now but have been bottlenecked by the door locks, which go in first.
I had tried to get the ignition/doorlocks rekeyed but was put off by the uncooperative locksmith and had turned it over to Sigfrid.
So, this morning I bring it up and he says "Oh, don't worry, I'm going to rekey them now".
"Umm, what do you mean by "I", when did you become a locksmith?"
"Done it before, give me an hour".
Sure as ****, he did it.
Ignition and doors now operate- very smoothly and solidly, I might add- with one key.
Why the hell he waited so long to pull off this apparently simple feat is beyond me, but there you have it.
So the lock were installed, followed by the window regulator(s) and tracks and finally, the glass.
The doors are functionally complete:
Sigfrid spent about an hour per side adjusting the upper frames and the glass.
It was tedious but he got as good a fit as we could hope for. The glass moves nicely and seats in the upper seal perfectly.
We spent time bending the flange that the outer window seal clips on and got great contact between the rubber wiper and the glass.
I had snagged yet another set of trim which has the necessary arc and it fits as though factory.
I have an idea for some final detail trim but it's not critical and can wait.
There are also some additional door seals but we don't have them in hand as yet.
Next workday we install the windshield and hatch glass and the cabin is weathertight.
That is a big milestone.
The doors were much like swapping the diff in my FC...my research made me fear the job disproportionate to how hard it actually turned out to be.
The door assembly might have been the last (kinda) large purely mechanical job left and I'm thrilled it's done and turned out so well.
She's finally starting to look like a car...more has been finished than remains to be done.
Not to minimize the jobs I have left but I can see an end.
Hazily.
Thanks, this is by far my most favorite part of the project and to be honest, my strongest suit.
I'm sorry for those without access to a pick-n-pull yard, they are simultaneously universities of car design and a combination of McMaster-Carr and Summit.
I go to see how manufacturers have solved issues I face and to snag/repurpose the myriad widgets created in the process.
You can trace the advances in steel formulation and stamping technology by comparing old cars to new, an issue that became directly relevant as I explored seal/weatherstrip options last week(s).
Nobody makes doors with separate window frames anymore and non-moveable glass is typically glued in, not framed/gasketed/screwed.
Modern cars don't face the same sealing challenges as the Z does, so their gaskets are very different.
I spent four hours at the yard today.
Picked up some really trick window cranks from a Passat and inner doorlock pulls (from something).
Hope they fit.
As I've dealt with the side windows (door and quarter), one design flaw has increasingly bothered me and last Saturday an idea began to form. Today I explored the concept and may have found an option worth trying.
If it pans out, you'll see it.
If not, move along, nothing to see here.
Much like the above parts, I also succombed to the lure of a rear wing I'd spotted last week.
I lacked the required Torx bits to remove it then but it's been gnawing at me all week and today I gave in.
I've already tried this wing business with the VW part from a few weeks ago but this one is a much better fit I think.
Can't wait to try it out.
The look we're going for is the classic BRE wing (this is NOT our car):
The wing I pulled is from an early Saab 900 Turbo.
Five hours I spent- five hot hours*- and ended up walking out with two alternate lock pull *****.
I murdered two cars, a Sentra and an Outback, in the hunt for a HVAC system.
I'm normally very respectful of yard cars, just cause I don't want a part doesn't mean I can destroy it if it's in the way but the Outback had already been attacked and I just carried on.
The Sentra suffered just because I was hot and irritated...wrong place, wrong time, I am not proud of myself.
I'm beginning to see a problem and I'm not sure it can be easily overcome with another OEM unit.
Ultimately, Sigfrid wants a Vintage Air heat/AC unit (Like Aaron is using in his Cosmo) but that's $1000 we're holding towards the probable new drivetrain. My efforts now are a mere placeholder but I'd like to get as much functionality as possible and make it look good.
In short, the iconic center gauge cluster in the Z is right where most econoboxes now have their center vents. Our original box is short and pushes air from the front, the newer stuff is altogether different.
Before submitting entirely to despair, I'm going to scale back the scope and concentrate on melding nicer, more sensible controls to our original fan and vents.
Beyond that I'm temporarily out of ideas.
A solution- of one sort or another- will percolate through this miasma eventually.
I also shed my first junkyard blood, twice, actually, and lost a tool.
Since many of my tools came from the junkyard, after a brief period of mourning I now feel like I repatriated it to the great circle of life and some other lucky soul will happen upon it and be pleased or it will get crushed and reformulated into a new Geeley...in any case, c'est la vie.
As Sigfrid would (never) say.
*It's not even May and I'm already bitching about the heat.
You just can't please old people.
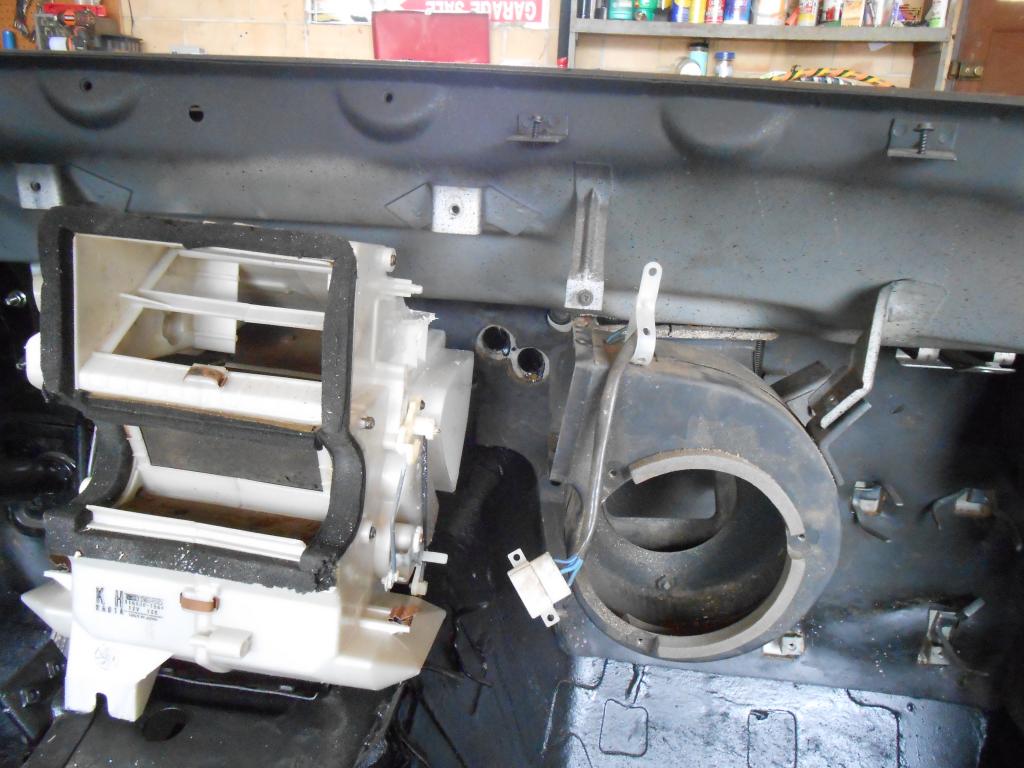
Pulled the main heater box and controls from a '91 MX-5 this morning.
It's in pieces now, getting cleaned up and ready to refoam all the flapper doors.
It's an FD style system, there is no water valve; the core is always hot and the air is directed to modulate temp.
Very slick and all self contained.
It is semi-similar in layout to the original Z part, I hope close enough to be feasible.
I'll have it refurbed and assembled, ready to try this weekend.
Sigfrid will not be disappointed in a vintage air setup. They are quality and compact units. We had one in a '40 Ford, and it cooled that much larger than Z car cabin to the point of feeling frigid if you wanted to.
Who knows if he will end up with one though post Miata HVAC installation. Your resourcefulness in the junk yard is commendable. I've never had much luck with them other than with a Taurus fan.
Who knows if he will end up with one though post Miata HVAC installation. Your resourcefulness in the junk yard is commendable. I've never had much luck with them other than with a Taurus fan.
I began by excising the unneeded mounting structure from the Miata center box. It was nowhere near the Z mount points and kept the unit from sitting properly, so twenty minutes with a hacksaw and Dremel got it in shape. It now sits very much as the original but that could be deceptive.
I also dragged out the stock blower housing and loosely bolted it in, just to see how the two units related.
Not great.
Now that I have parts in place(ish) and can grasp the spatial relationships a bit better, I'll return to the yard and see what I can find.
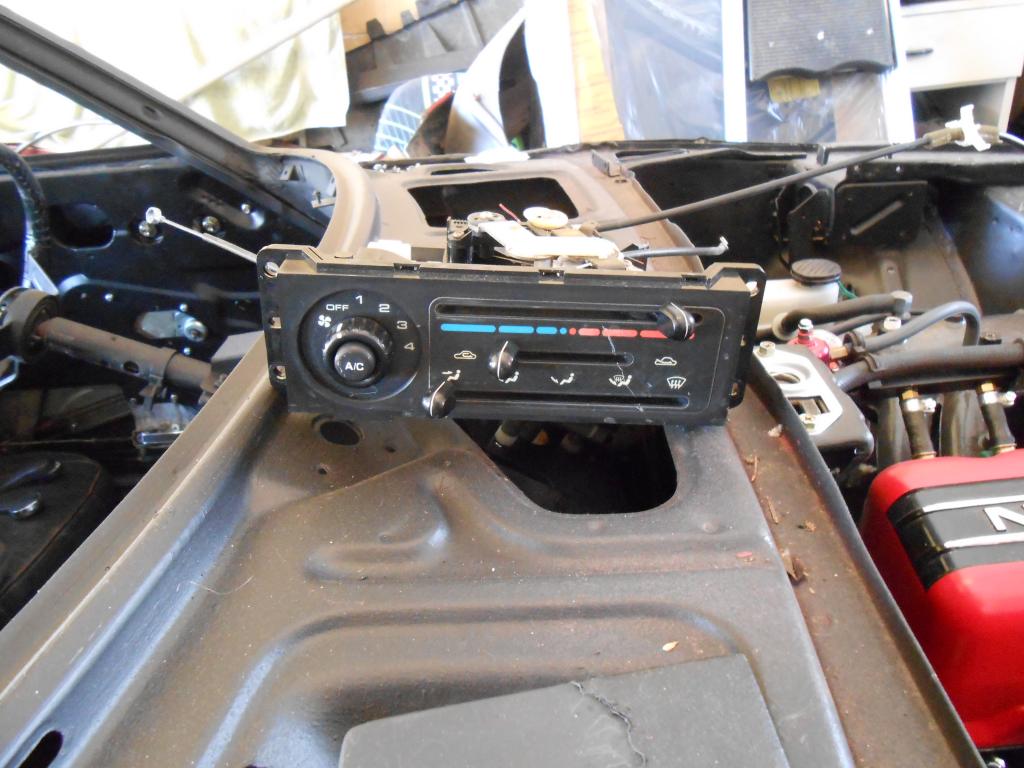
The control panel is nothing special but here it is anyway:
This is the Saab wing loosely sitting on the hatch:
It's some sort of molded foam, not sure what but it's flexible enough I'm sure it will lay flat and straight with a little persuasion.
Have to see what Sigfrid thinks.
Finally my bluest-sky mod of the week...the side window trim.
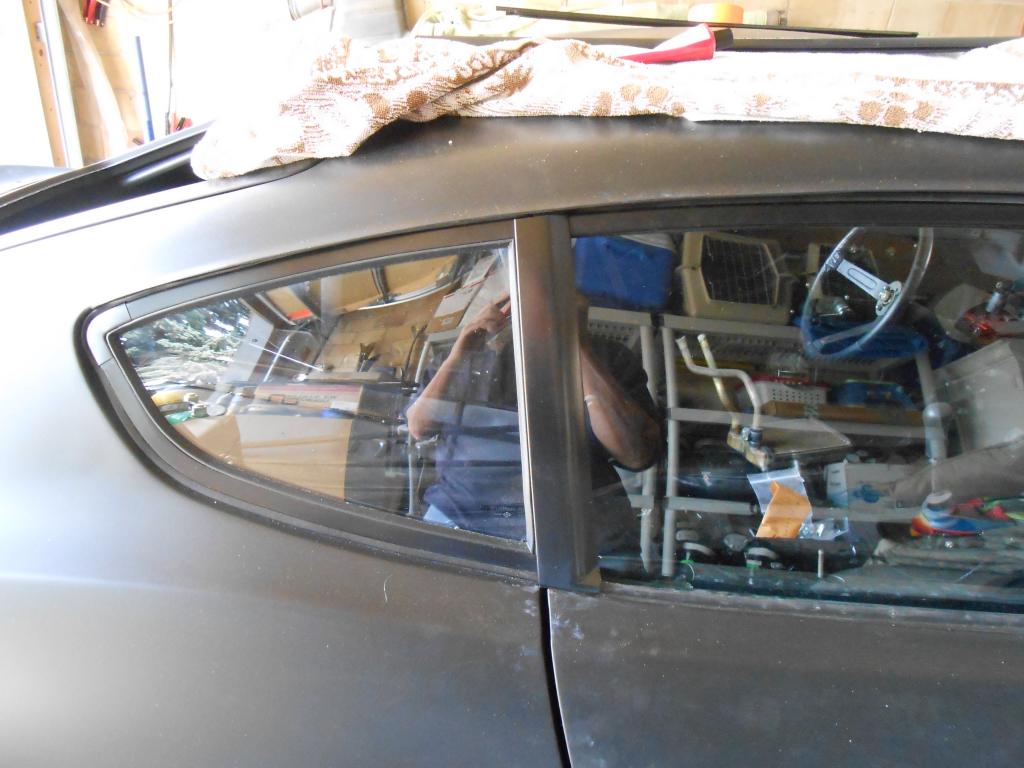
Compare to a similar pic from a post above and you'll see what I did.
This is just the first "proof of concept" iteration but I think it deserves further work...I like the effect.
Neither the window cranks or the lock ***** fit.
Oh well.
And, just because, there's this:
Back to the yard today, gearing up for a session on Monday.
Picked up a second Saab wing and the blower motor assembly from the Miata.
The motor housing is a real "maybe" fit in the Z, no way to know till I can offer it up to the car and see. It's "generally" right but that is rarely the same as actually being workable.
Sure would be sweet though.
Sigfrid likes the wing and we are go to install it.
That's why I bought the second one.
There is no way of knowing how the overhanging ends will sit on the car until I screw the center down on the hatch. In a perfect world they'll be great and I'm done but I'm not counting on it.
This style wing on the Z was typically three pieces, the two ends bolted to the body, the center to the hatch and I'm afraid that's what we'll need to do.
I feel that if we just cut the piece into the required three segments the ends will be too short.
Now we can cut the center from one and the two ends, of whatever length we want, from the other.
And with luck, make it look good.
The important thing Monday is that I decide if this Miata HVAC setup is feasible/likely to work.
Going from "Yeah, that looks close" to "Finished!" will require multiple steps, most of which will involve fab work and ingenuity and so, take some time.
I don't actually need it installed and done, I just need to finalize the electrical requirements so I can proceed to the chassis harness, which is what I really should be doing, not dinking around with a wing.
The wing is fun though and I'm treating myself.
This is a bit out of left field but as I performed my nightly CL search, these popped up:
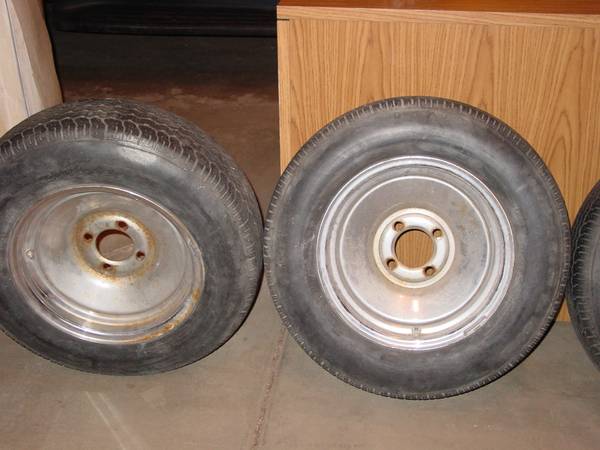
It was love at first sight.
Paint 'em gloss black and put mini Moons in the center.
Gangsta as ****.
It was love at first sight.
Paint 'em gloss black and put mini Moons in the center.
Gangsta as ****.

I began the wing install today and I'll admit it was trickier than I'd thought.
For reference, here is a "Victory" wing:
This was a homologated Datsun racing part available through dealers.
This Saab wing looks almost identical:

It's going to require some 3M body tape to hold it down properly but it's very close.
I hacked away the stock mounts on the Miata blower assembly and gave it a few trial fits as well.
It's "kinda" close.
Not sure yet if that will be good enough.
It's an ongoing project.
For reference, here is a "Victory" wing:
This was a homologated Datsun racing part available through dealers.
This Saab wing looks almost identical:
It's going to require some 3M body tape to hold it down properly but it's very close.
I hacked away the stock mounts on the Miata blower assembly and gave it a few trial fits as well.
It's "kinda" close.
Not sure yet if that will be good enough.
It's an ongoing project.
NA-BOOSTIN
Joined: Oct 2004
Posts: 1,200
Likes: 2
From: austin,tx
Hey brotha what Saab is that off of by chance . I'd been lookin for awhile for a z aftermarket spoiler or something similar in style. . The wheels will look clean I think . Maybe a beauty ring ?
"80's Saab 900 Turbo.
I was thinking a thin single white pinstripe instead of a beauty ring but even that might be too zoot.
The multiple lips will create quite a bit of depth without added distraction.
I was thinking a thin single white pinstripe instead of a beauty ring but even that might be too zoot.
The multiple lips will create quite a bit of depth without added distraction.
NA-BOOSTIN
Joined: Oct 2004
Posts: 1,200
Likes: 2
From: austin,tx
I think the pin stripe would look better . Only said beauty rings cause you said something bout moonies  as for the pin stripe , you could grab a set for motorcycles and multi colors if need be to see what looks good . I know flea bay has them for cheap . White or creme would look clean . So did you even get the wheels I forgot lol
as for the pin stripe , you could grab a set for motorcycles and multi colors if need be to see what looks good . I know flea bay has them for cheap . White or creme would look clean . So did you even get the wheels I forgot lol
Joined: Mar 2001
Posts: 31,863
Likes: 3,245
From: https://www2.mazda.com/en/100th/
notice that the car with the "victory" wing has miata seats?
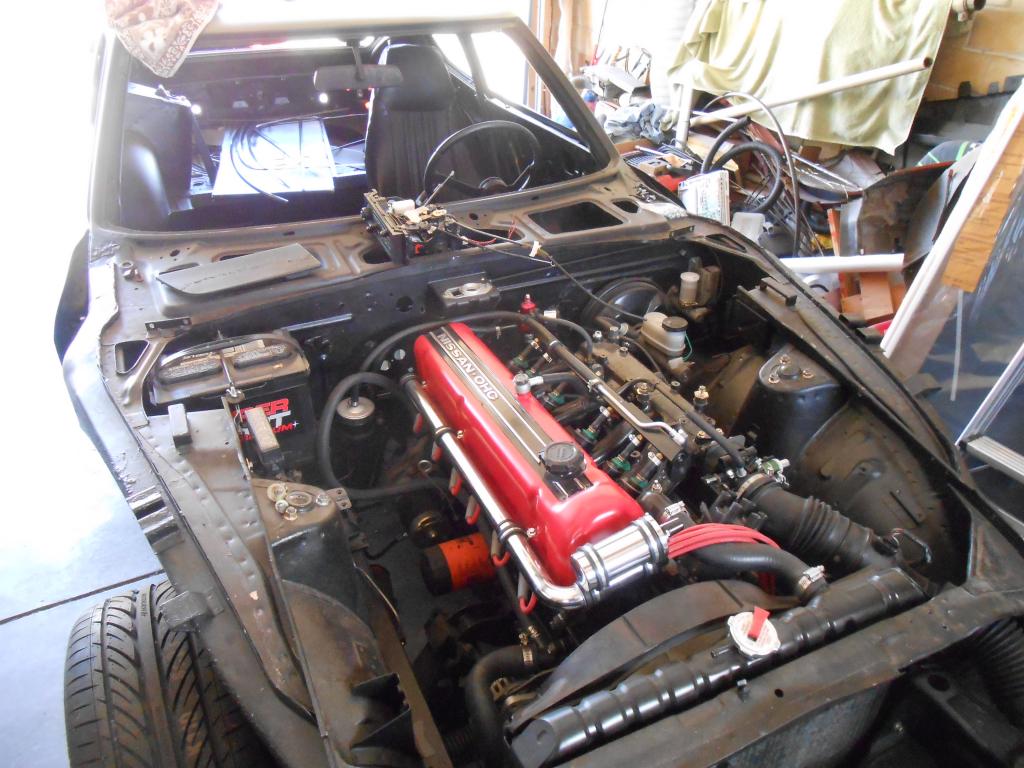
and B, i know this is like, way after the fact*, but with the hood off, it seems like the ignition coil is featured in the engine bay, i think it would look cleaner if it wasn't there....
*i'm from CA, so if we were like talking, there would be a dude in that sentence.
and B, i know this is like, way after the fact*, but with the hood off, it seems like the ignition coil is featured in the engine bay, i think it would look cleaner if it wasn't there....
*i'm from CA, so if we were like talking, there would be a dude in that sentence.
That grey car has a lot of interesting parts on it.
Until the coil is wired, it's position can be moved.
I put it where it is because it makes the HT lead very short and puts the coil wiring in with the rest of the engine harness.
It could yet be moved for a good enough reason.
Until the coil is wired, it's position can be moved.
I put it where it is because it makes the HT lead very short and puts the coil wiring in with the rest of the engine harness.
It could yet be moved for a good enough reason.
Oh, unek...
No, those wheels were only 14 x 5.5, not really workable.
In a perfect world, I think 17 x 8 is what we'd want but it's very hard to tell and our four bolt lug pattern really limits our easy choices.
I'm beginning to think though that 16's with higher sidewalls might fit the arches better.
The Z sits quite high and the stock ride height leaves a wheel gap that looks odd today.
Toss in modern "airy" wheels with lower profile tires and the "odd/wrong" factor goes up exponentially.
Fatter, old-timey wheels/tires look more comfortable in a generous wheel well.
I need to look into Federals or something...

