
My custom air duct.

Thread Starter
Joined: Jan 2006
Posts: 2,744
Likes: 0
From: WA
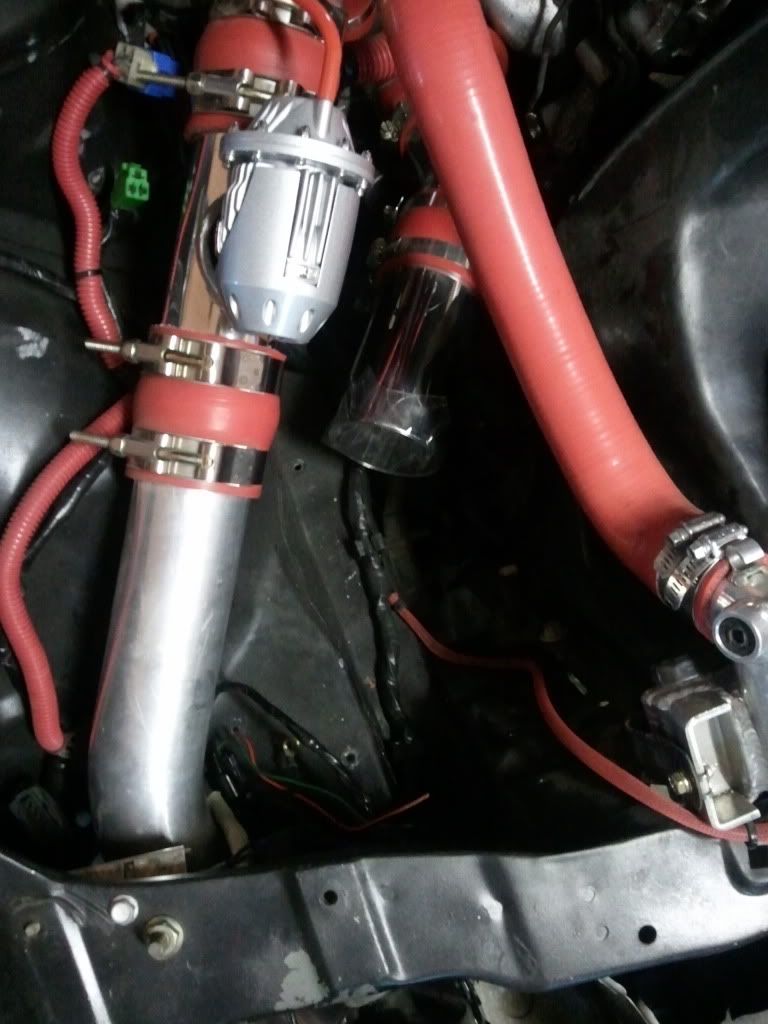
I did this in hope of seeing slightly lower air intake temps. I plan to eventually extend the TID, section off the cone filter, and wrap the TID with some ducting insulation.
I found mostly all of these materials at Auto Zone.
- MAF adapter (for cone filter)
- Spectre ducting w/couplers
- A little bit of screen. (roughly 4"x4")
- Adhesive (I used some RTV silicone.)
- Screw/band hose clamp
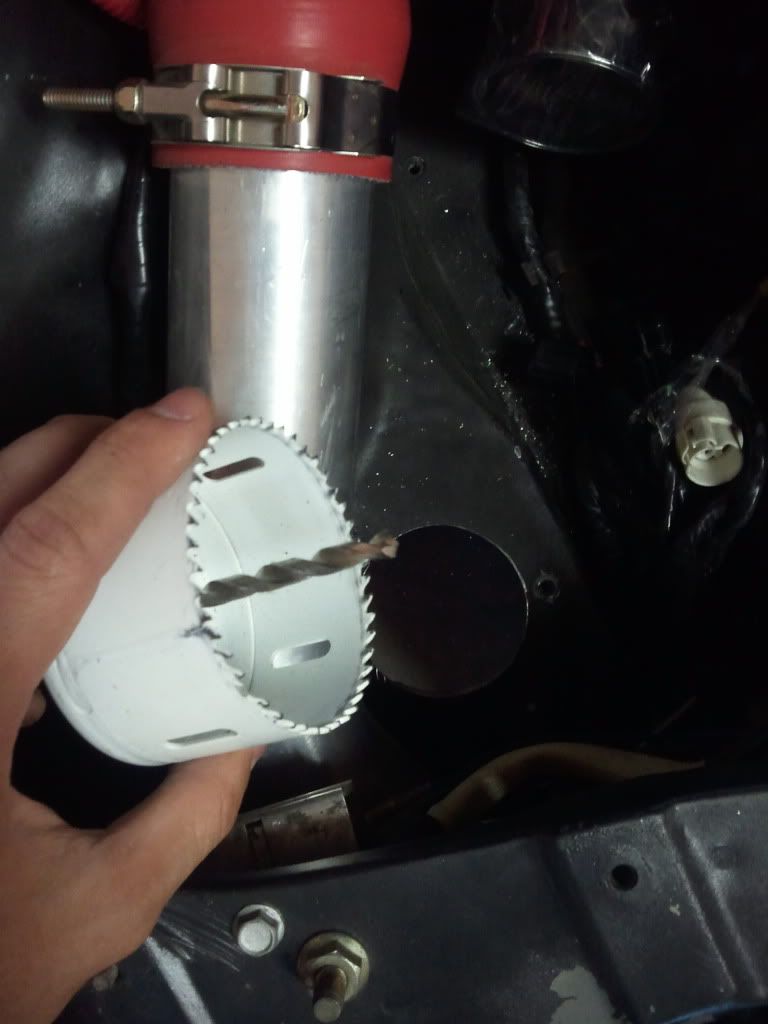
Tools: Ratchet socket wrench, 10mm socket, screw driver, 3" hole saw with 1/4" pilot bit, and cordless drill.
Before I cut the hole for the MAF adapter and duct, I removed the cone filter from the TID. I was sure to seal the TID with tape, for safety measures.
After cutting the hole.
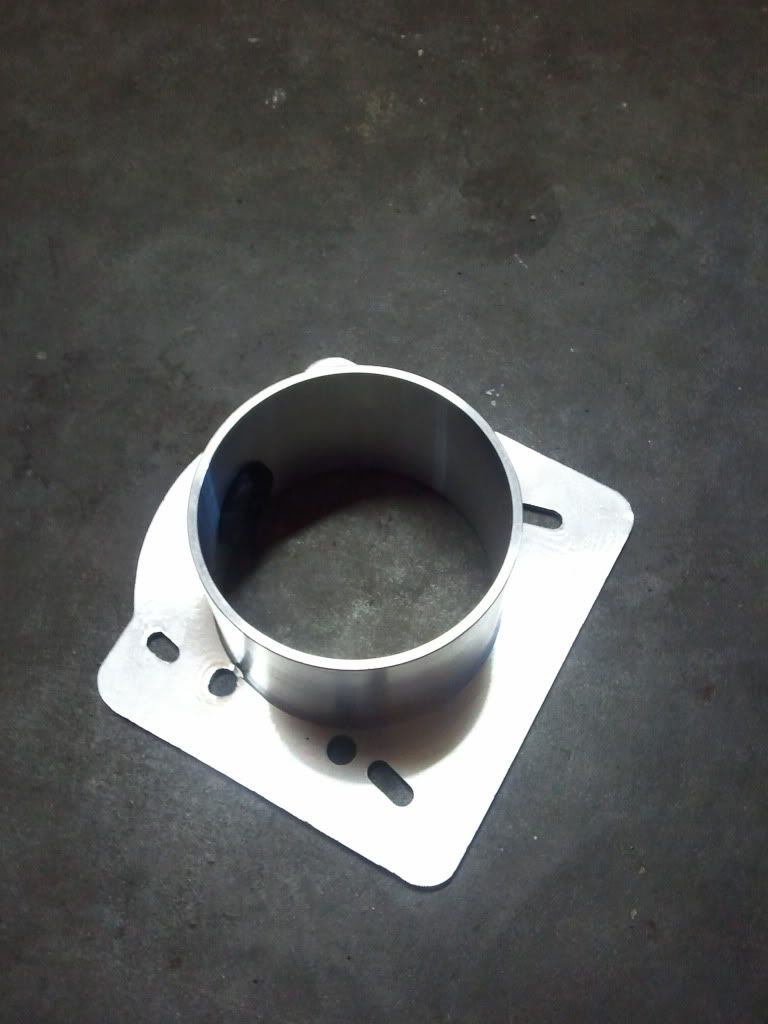
This is the MAF adapter that I used.
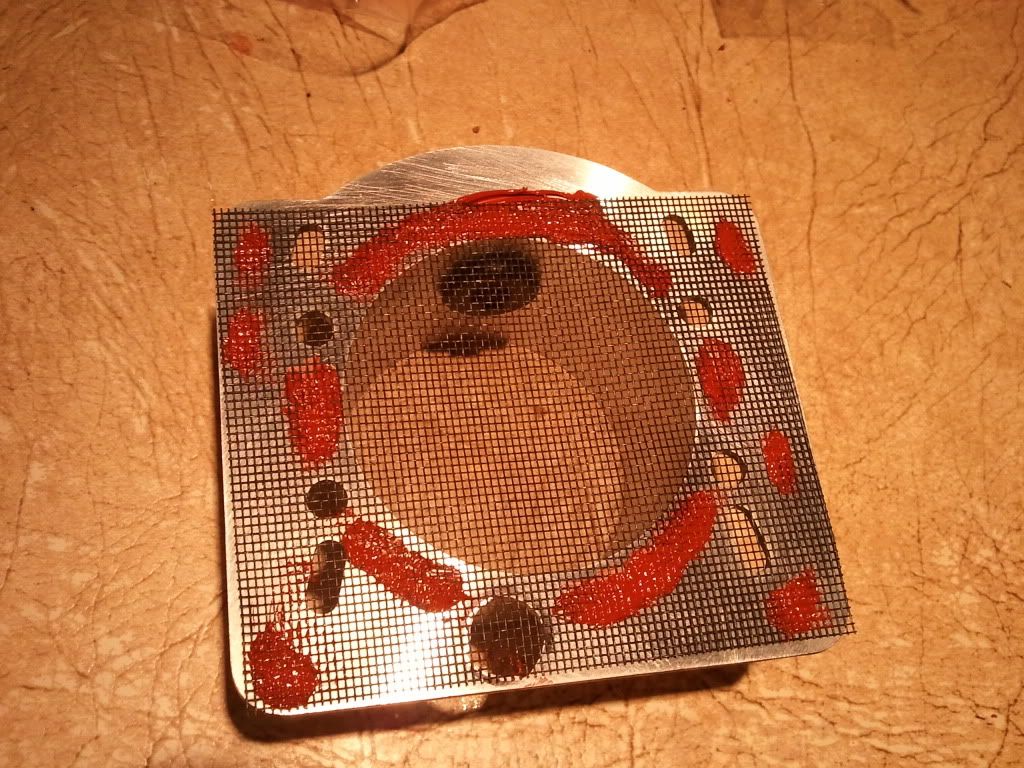
I've cut my screen to size.
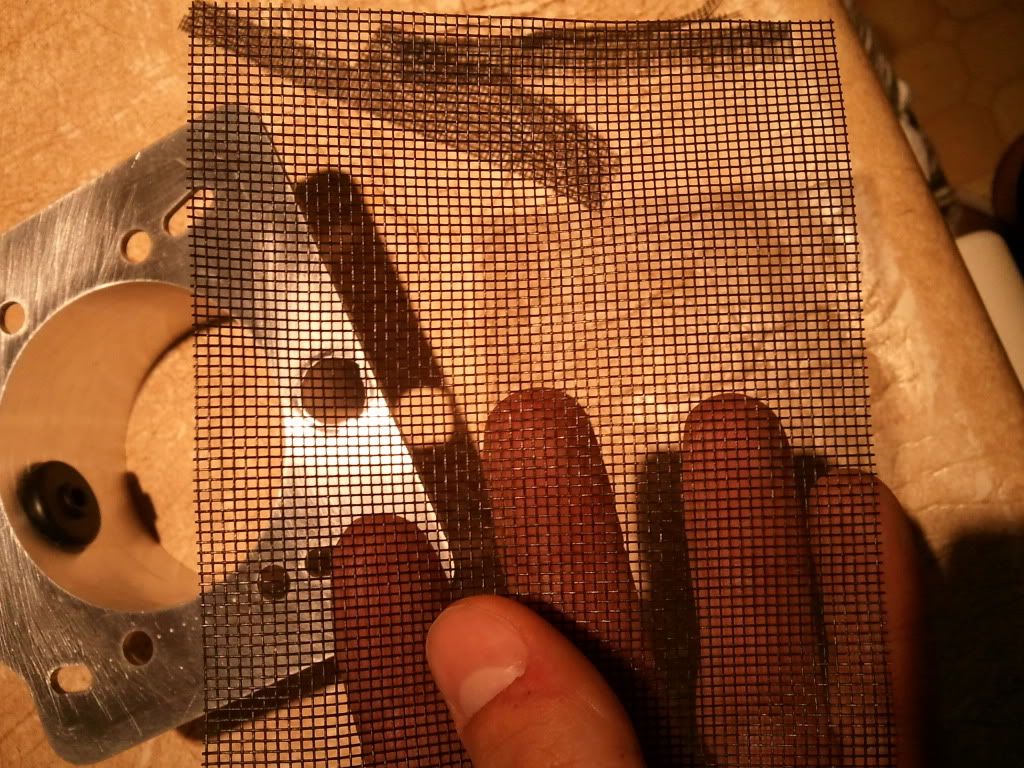
I've applied some of the silicone to the MAF adapter. I then placed the screening on top, gently pressing it into the silicone.
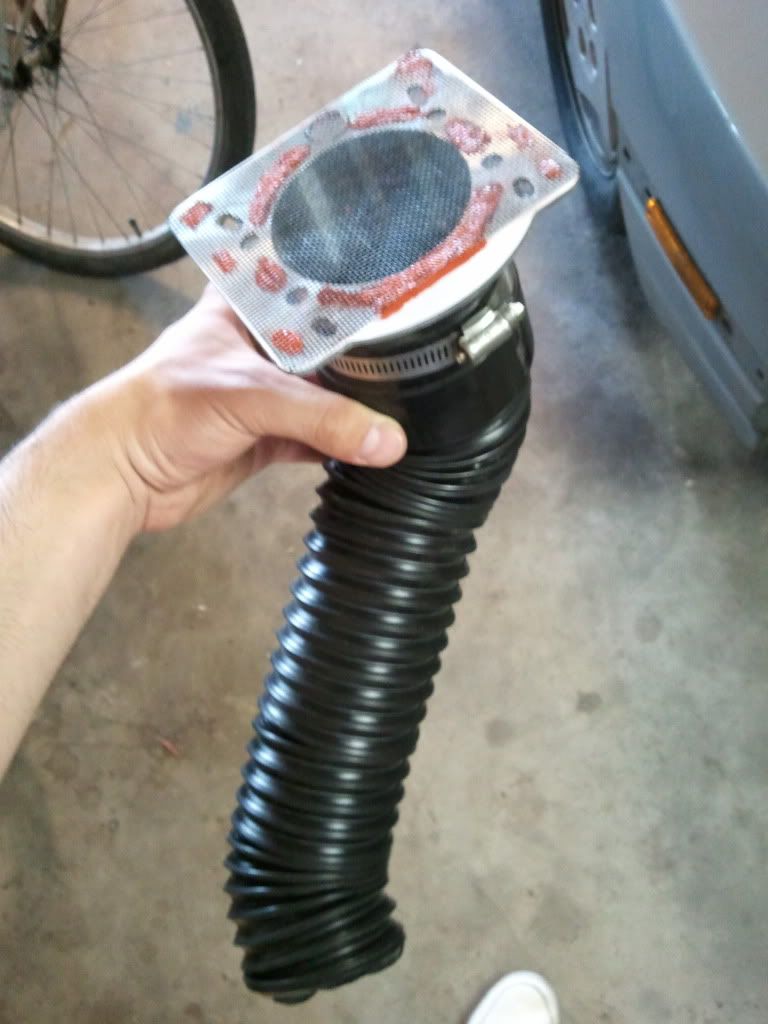
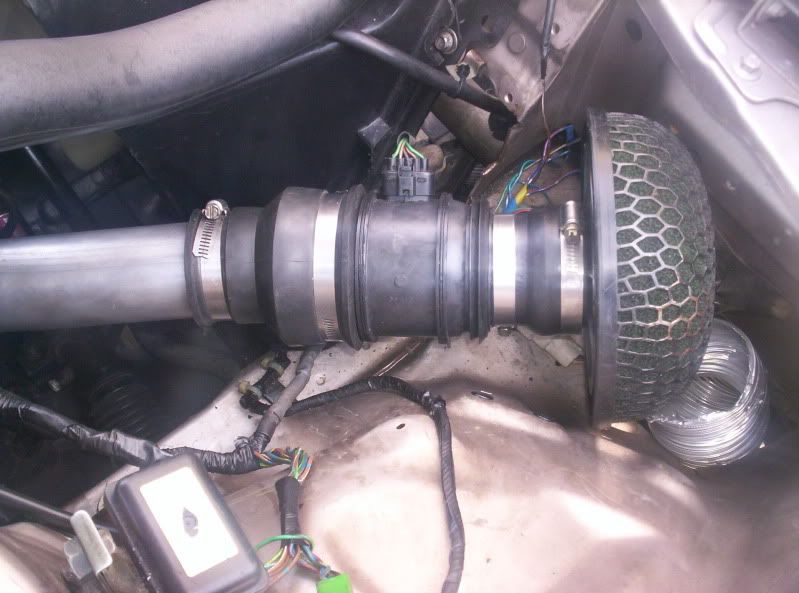
I then attached the coupler, hose clamp, and ducting to the MAF adapter.
I drilled the holes and then bolted the MAF adapter to the car.
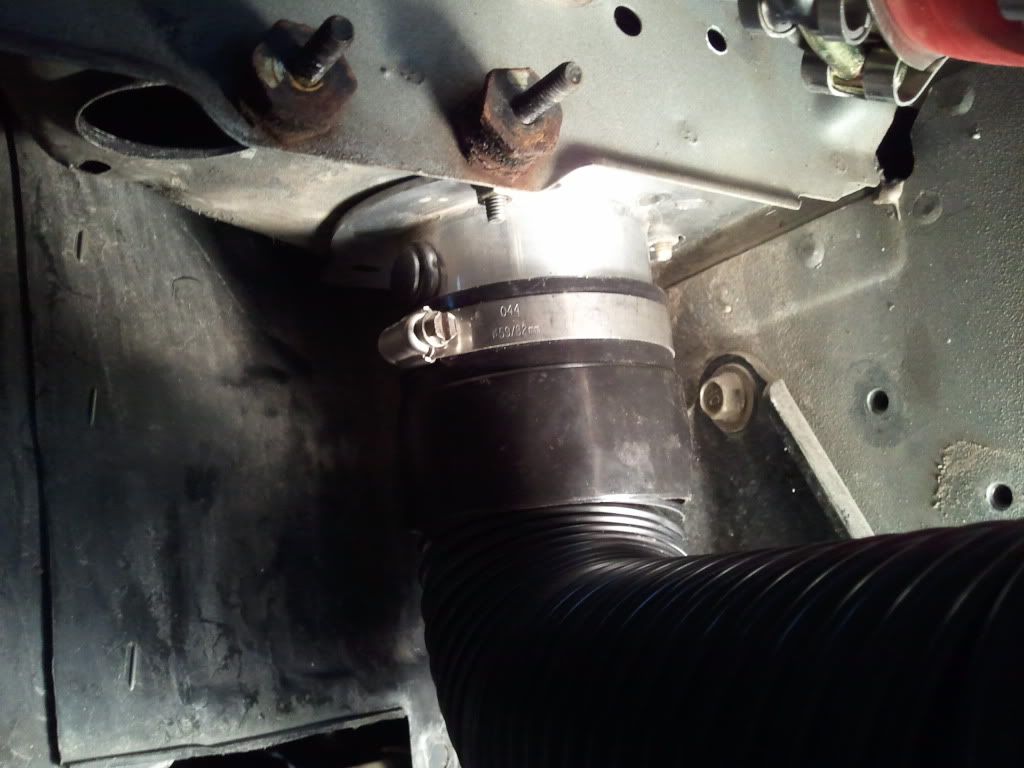
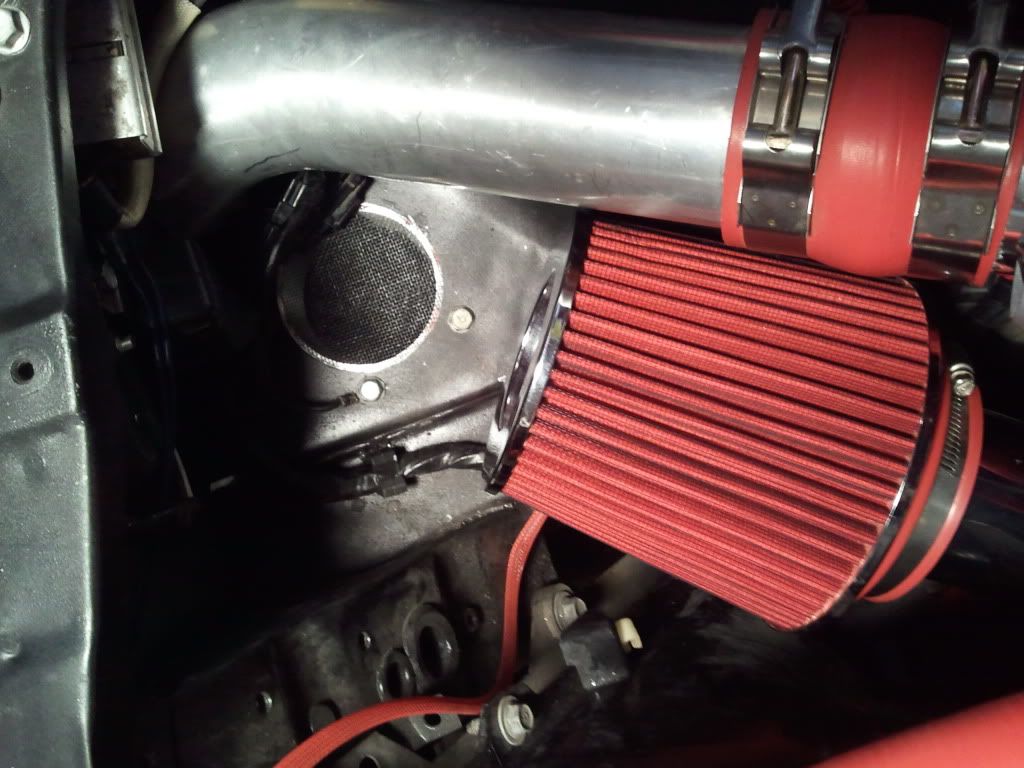
This is the general area where the duct will be.
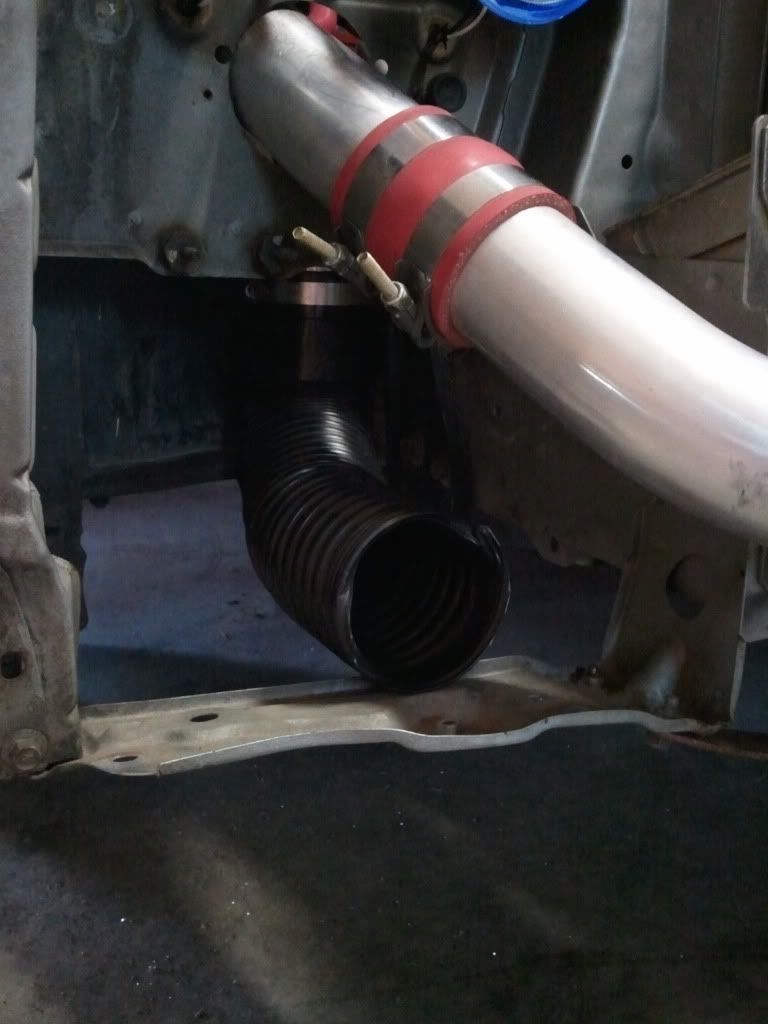
Here is view from above.
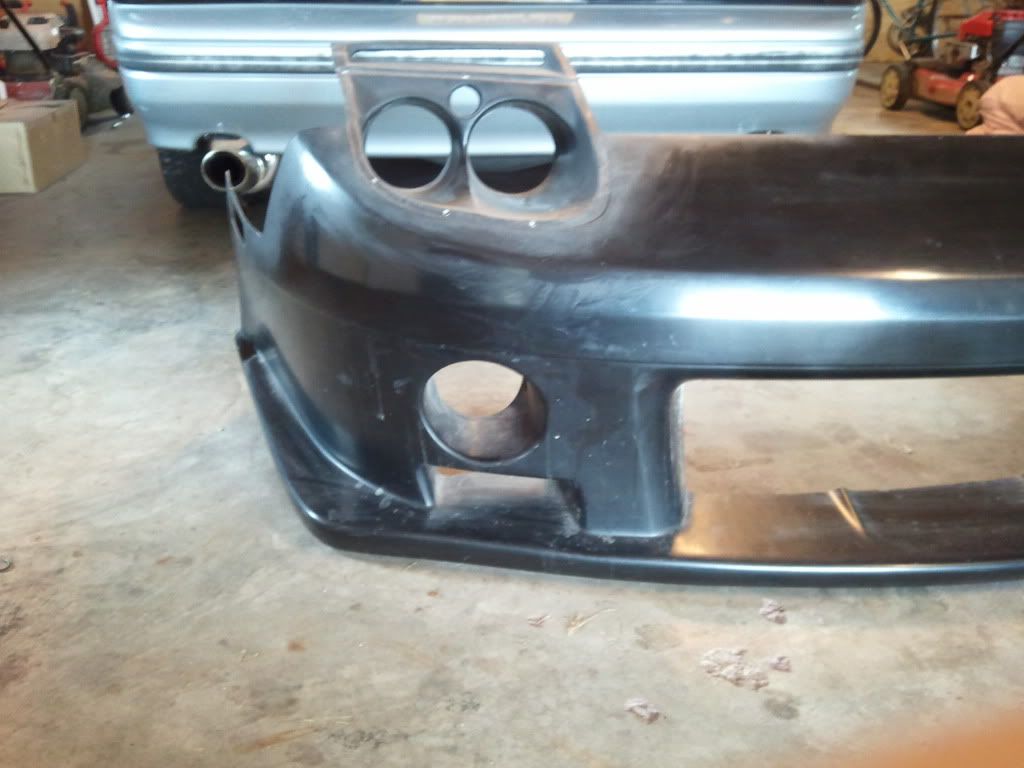
Here is my FC2000 replica front end from Shine Auto Project. I plan for the duct to come out of that lower round opening on the left. (An obvious spot.)
I found mostly all of these materials at Auto Zone.
- MAF adapter (for cone filter)
- Spectre ducting w/couplers
- A little bit of screen. (roughly 4"x4")
- Adhesive (I used some RTV silicone.)
- Screw/band hose clamp
Tools: Ratchet socket wrench, 10mm socket, screw driver, 3" hole saw with 1/4" pilot bit, and cordless drill.
Before I cut the hole for the MAF adapter and duct, I removed the cone filter from the TID. I was sure to seal the TID with tape, for safety measures.
After cutting the hole.
This is the MAF adapter that I used.
I've cut my screen to size.
I've applied some of the silicone to the MAF adapter. I then placed the screening on top, gently pressing it into the silicone.
I then attached the coupler, hose clamp, and ducting to the MAF adapter.
I drilled the holes and then bolted the MAF adapter to the car.
This is the general area where the duct will be.
Here is view from above.
Here is my FC2000 replica front end from Shine Auto Project. I plan for the duct to come out of that lower round opening on the left. (An obvious spot.)
Trending Topics

Excellent idea to use the MAF adapter, though I think the screen is a bit much since I don't see any large solid objects flying into the air filter with the two bends.
I have a more basic duct with some 3" dryer ducting from ACE hardware shoved into the hole and ziptied above the rectangular factory brake duct.
Looks like this:
I have a more basic duct with some 3" dryer ducting from ACE hardware shoved into the hole and ziptied above the rectangular factory brake duct.
Looks like this:
I don't have any datalogging equipment so no temps, maybe after I finally get a standalone. I agree that ducting is an excellent idea and along with heat shielding is often overlooked. Even a few degrees in lowered intake temps makes it worthwhile given the relatively low cost of the setup.
i did same as KhanArtisT
got the duct next to the license plate
http://a3.sphotos.ak.fbcdn.net/hphot...0_852265_n.jpg
got the duct next to the license plate
http://a3.sphotos.ak.fbcdn.net/hphot...0_852265_n.jpg
I do agree that ducting is a great idea and important as well. But with an FC2000 front bumper it can be made much simpler. But a bit more expensive. RE-Amemiya makes an air duct specially for the FC2000 body kit. Click here: http://www.rhdjapan.com/re-amemiya-a...kit-fc3s-51079.
Your idea is still great, no doubt!
I'll just give you my opinion/idea. Seeing where your air filter is on these pics, it's seems perfect for it. You have a hole saw and you have all the other parts needed. Making another hole is something not everyone wants to do or can live with. But if done, you will definitely have very sufficient air going through that duct AND that gap above the holes for the head lamps.
But remember this. You are removing one head lamp. And this item says for race applications only. If you dont care about your ride being street legal where you live, this would great for you.

Thread
Thread Starter
Forum
Replies
Last Post
Jeff20B
1st Generation Specific (1979-1985)
73
Sep 16, 2018 07:16 PM
SakeBomb Garage
Group Buy & Product Dev. FD RX-7
8
Oct 9, 2015 10:05 PM