When you click on links to various merchants on this site and make a purchase, this can result in this site earning a commission. Affiliate programs and affiliations include, but are not limited to, the eBay Partner Network.
So im taking the plunge... inspired by Aaron Cake i noticed he had shaved his lower intake manifold... so i am planning on doing the same thing... taking a close look at the manifold and all the ugly casting... i am removing the acv, egr, coolant and anything unrelated to the actual intake ports i am than going to get a either a plate fabricated or buy a phenolic sheet that will go between the block and manifold... which blocks off the EGR/ACV/Coolant port and allows for removal of the casted ports carefully using a cutoff wheel... carbide bits... and than do the finishing with dremel...
If it doesnt work what have i lost??? an s4 lower intake manifold... whats to gain...
MAJOR visual enhancment... performance gain from heat insulation and deletion of coolant port... im planning on using a borg warner s363 so coolant will not be needed for my build and im upgrading fuel system and running haltech ps1000... any opinion on strength losses? im not an expert on metalogy so any input on that would be great
You could shave off those emissions related castings and weld them shut. If you don't know how to weld yourself, don't even bother. Just get the Rising RPM block off plate kit thats anodized to look good and call it a day. I doubt you will gain any hp. If anything, leaving the castings I assume would help radiate heat the ever so slightest if measurable amount.
Awesome tip on the coolant passage I was wondering how I was going to block it off, I work with welders who have access to tig machine so no worries there, I just wanted to stay away from welding in fear of warpage and this upgrade is going to cost me a lot less than those block off plates in fact I'm working on the manifold at work on my spare time so I'm getting paid to play, win win, and i disagree with the extra casting radiating heat away, with the tubes exposed they get cooled more by airflow also I can build seperate heat shielding I have some pics ill post some progress tommorow
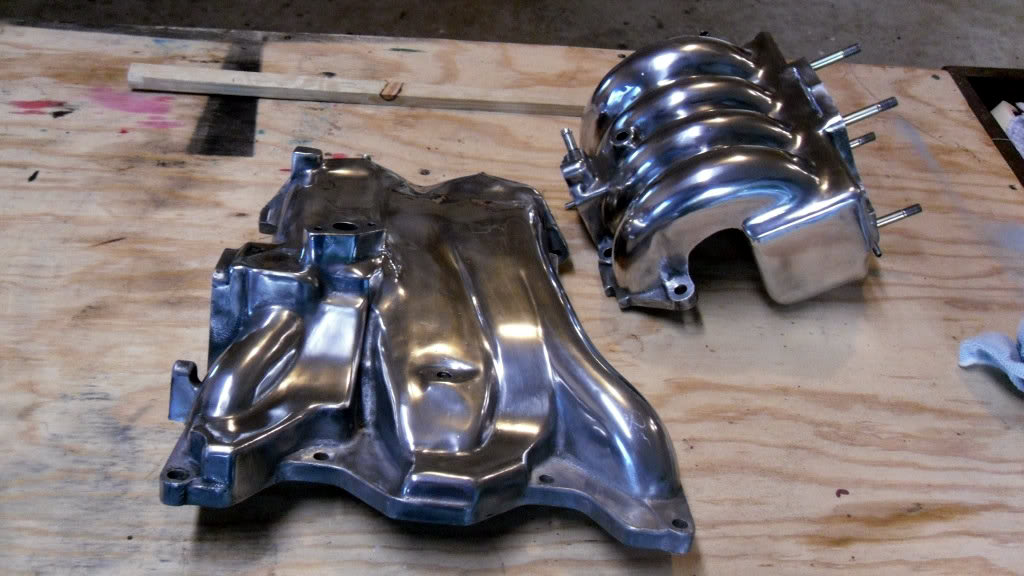
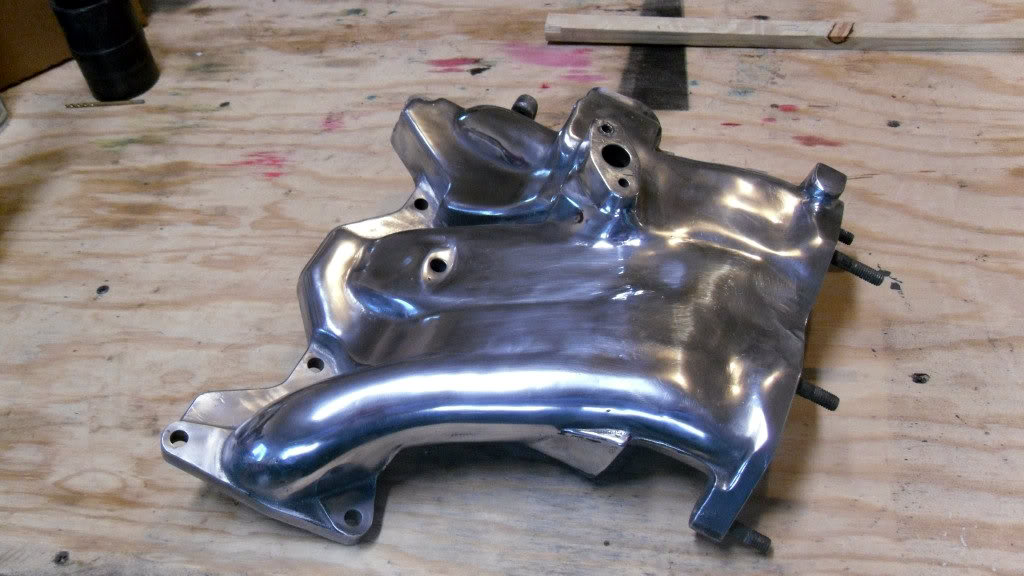
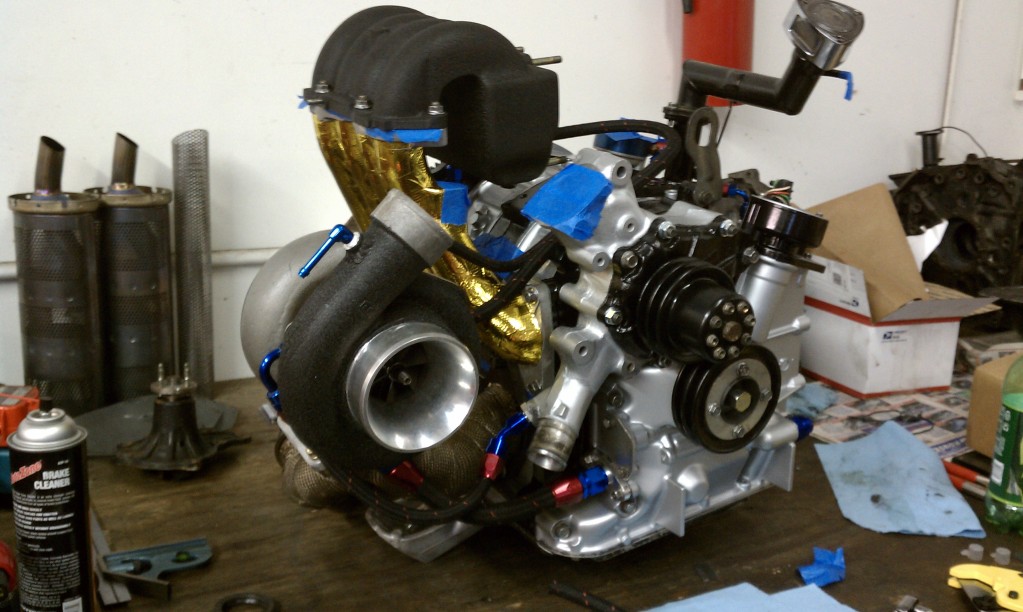
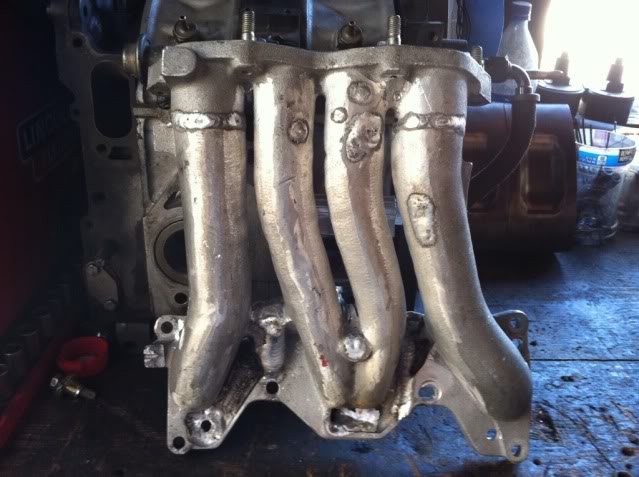
I had mine shaved down, with the exception of the turbo water feed, and whatever port that is on the back of the manifold, can't recall right now, lol.
For what its worth, here's pics on how mine turned out. I was a bit nervous about having all of that shaved off that it might be too weak, considering the upper intake and throttle body are hanging off the side of it, so I had mine built up a bit just for piece of mind...
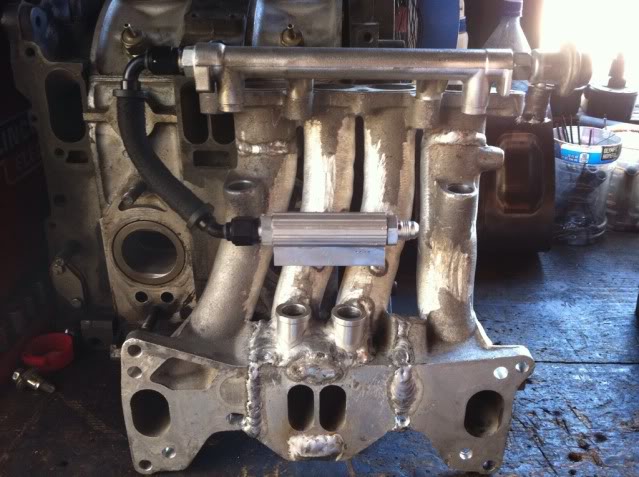
That looks awesome nate, so i talked to the welder at work last night he said he can tig up the manifold wherever needed and warpage wont be an issue so thats awesome because as you can see there is some holes to fill now... those frost plugs im curious would it be best to use brass due to it being in the rotor housing or do they make aluminum frost plugs... i know steel can react badly with the aluminum
my bad you cant see, apparently the picture i took was to big to attach bare with me
Last edited by Chrispytater; Jan 15, 2013 at 08:50 AM.
Reason: 2nd picture failed to attach
Alright ladies and gents....
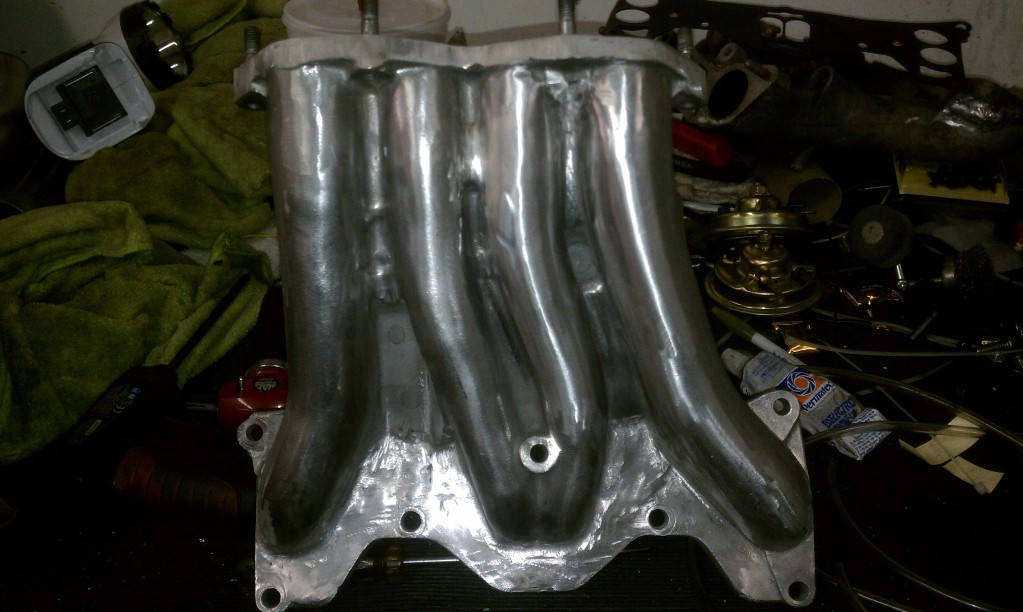
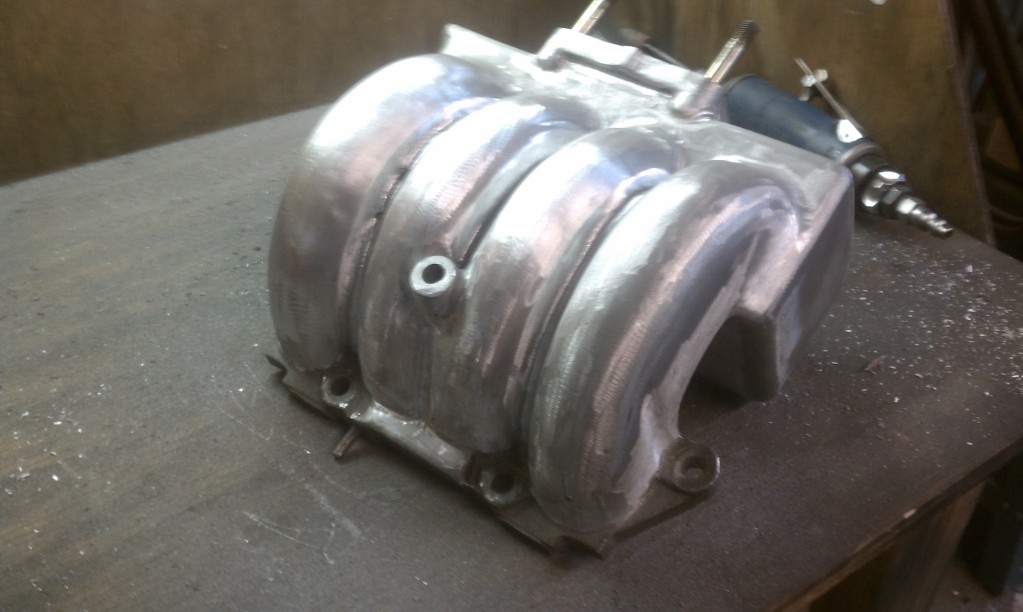
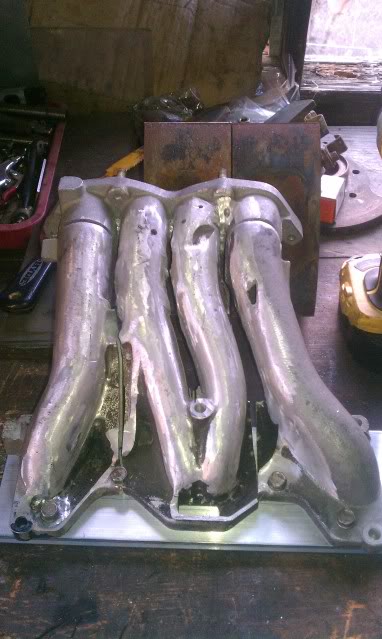
I had a lot of time on my hands at work last night.... so i finished the bulk of the shaving... my welder friend at work after watching me struggle for hours with cutting wheel and carbide bits that were designed for steel apparently... decided he would give me his aluminum designed stuff... what a major difference with a 5" grinder and aluminum grinding disc and cutoff wheel and die grinder with aluminum carbide bits could get to this point within a matter of a few hours rather than the 12 hours it took me to do this amount
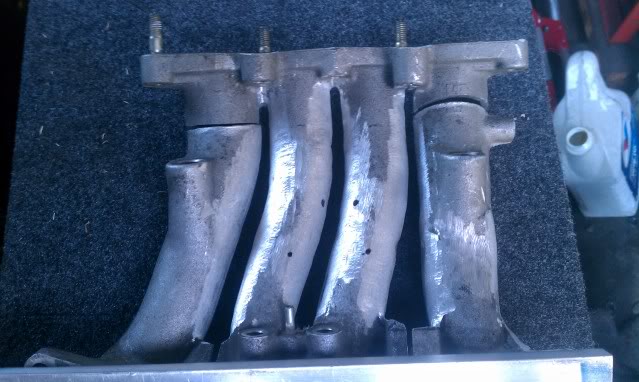
i also used belzona 1311 to fill the vacuum holes... and the ports on the bottom flange... i still need to do atleast another coat... also notice i filled the area behind where the ACV used to be in order to port the front primary to match the rear... this belzona is amazing stuff i use it at work for block resurfacing to other random repairs involving cast aluminum to tanks to w.e so i decided to use it over tig due to my paranoia with warpage i know it may not be pretty but its getting painted anyways and this stuff is easy to work with
i still need to do atleast another layer for the porting and the flange ports i blocked off...
im sitting on the fence about cutting out the gaps between the ports and also cutting out the coolant passage due to structural integrity... Any input would be great... if i choose not to cut ill block holes with more belzona and blend it in nice
roughly how long does it take to grind off the ACV and other major ports? What is the best style tip to use? I have a cheapy air grinder I picked up from lowes - I just need to know what stone or carbide tip to use.
It takes quite a while but mostly depends on how nice you want it to look, also use aluminum specific carbide bits/ grinding discs/ cutting discs and it will make it a lot easier, also for a better finish if you have access to a tig welder get your leftover holes filled in and than you can have a nice polished yet factory looking product but just to hack off all the excess stuff took me about 12 hours and the finishing is still ongoing but I'm almost there
Hey this thread has most likely been dead for ages, but im just about to dive into a shave/pilish of my uim and i was wondering what you guys have done with your bac valves on the uim? i'm running megasquirt and the aaroncake how to warned agaist deleting it. have you guys just blocked it off or relocated it? it would stick out horribly on a nicely polished intake any thoughts? -cheers!
I did a mod like this a couple months back. I turned out pretty nice.
Did you do any major welding, I noticed the lowest part of the manifold was welded, booster vacuum port was welded. Got any pics of it before, during cutting, and after all side by side?
That heat reflective tape really makes it look nice. I was afraid the minor imperfections of grinding off the aluminum would show a little much for my taste, but I really like that job!
No offense, just my personal preference, but I'm not too into that first pic of the polished one. I know a lot of work got put into it, but after polishing you can see where the surface has been grinded. Maybe that heat reflective tape would hide those imperfections also!
So ya heres a noob question.I have an s4 in my car now,would a s5 lower manifold work without a ton of modification.if so then i could pick up an fd throttle body to accompany it correct?
I�ve managed to go every thing shaved, it took a lot of work and on my first one I managed to shrink it. So in the second attempt I bolted it down to a plate of steel to avoid shrinkage.
I had mine shaved down, with the exception of the turbo water feed, and whatever port that is on the back of the manifold, can't recall right now, lol.
For what its worth, here's pics on how mine turned out. I was a bit nervous about having all of that shaved off that it might be too weak, considering the upper intake and throttle body are hanging off the side of it, so I had mine built up a bit just for piece of mind...