
HOW-TO: Build a custom subwoofer enclosure for a 'vert.

Thread Starter
Joined: Sep 2002
Posts: 2,932
Likes: 6
From: Surrounded by Sebey parts, Rhode Island
HOW-TO: Build a custom subwoofer enclosure for a 'vert.
DISCLAIMER:
This is how I did it. Maybe you'll do it differently. Maybe you have better skills than I do. Maybe you don't have the skills I have. Maybe you have better tools. Maybe you don't. Bottom line, this is how I did the enclosure for my 'vert, and there ya go. I'm not responsible for you ******* up your car if you try to duplicate this. That's on you.
Tool list:
Circular saw
Jigsaw
4 foot straightedge/ruler
Tape measure
Pencil
Trimmer/Router
Drill
Compass
All my stuff is Ryobi One+ 18 volt. It's a nice system to have. Cordless rules. The only corded tool I used was my circular saw.
The story:
My 'vert originally had a pair of 10" Kenwood subs in a pre-fab box. It sucked for several reasons: It slid around constantly, it killed what little trunk space I had, and it looked like ****.
I've been brainstorming how to do an enclosure for quite some time. I've watched a LOT of Overhaulin', Pimp My Shitbox, err, Ride, Rides, etc. I also own a DVD set of "how to do fiberglass enclosures", so I have lots of ideas. (Anyone wants copies of those, let me know. I'll do 'em for you cheap.)
My trunk is missing almost all the plastics, so one bonus of this is that I don't really have to worry about the plastics now.
The first thing I did was cut a back piece:
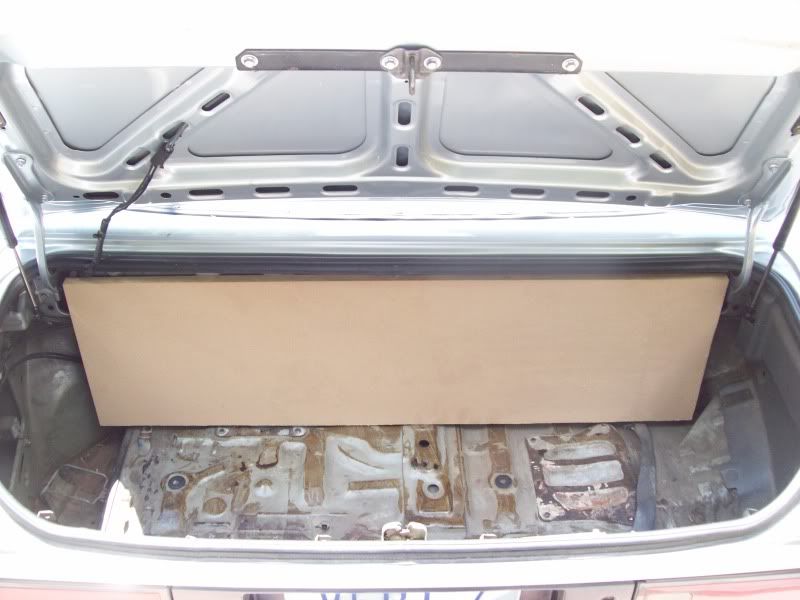
Then I cut a bottom piece. Note the hole trimmed out on the right to allow for the piece where the gas filler goes into the gas tank.
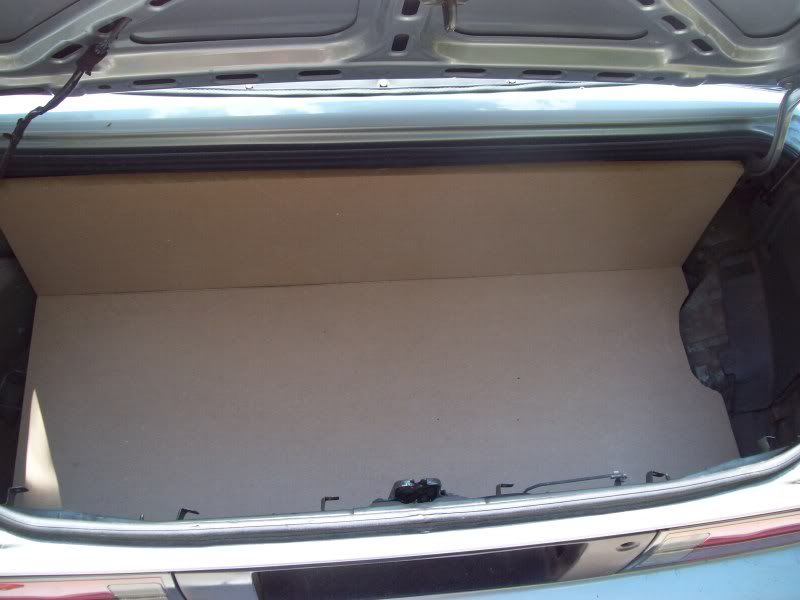
Then, I cut the pieces into three parts. The center piece is measured off my amplifier, the other two pieces are equal to each other for the subs. Why? Because I made it as big as I could, meaning it would leave me maximum volume and maximum trunk space. It will also be a lot more difficult to steal once it's assembled in the car and bolted back into one piece.
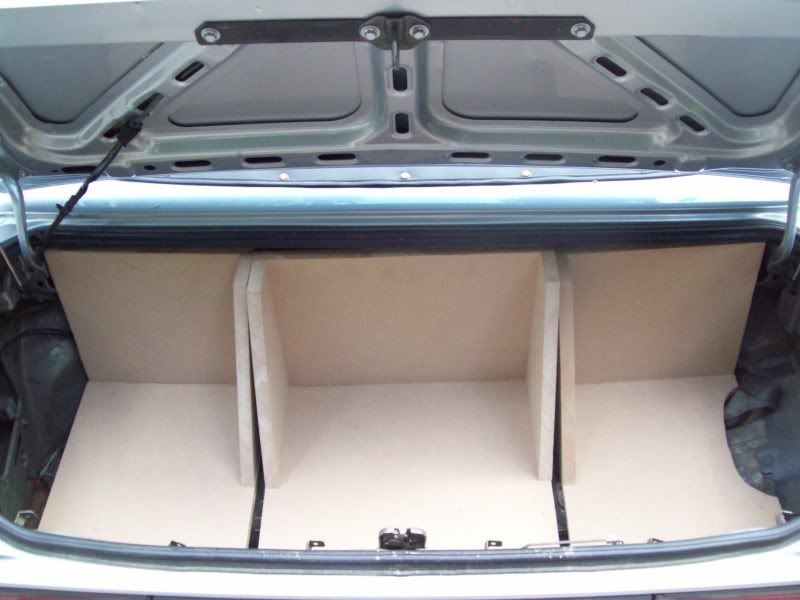
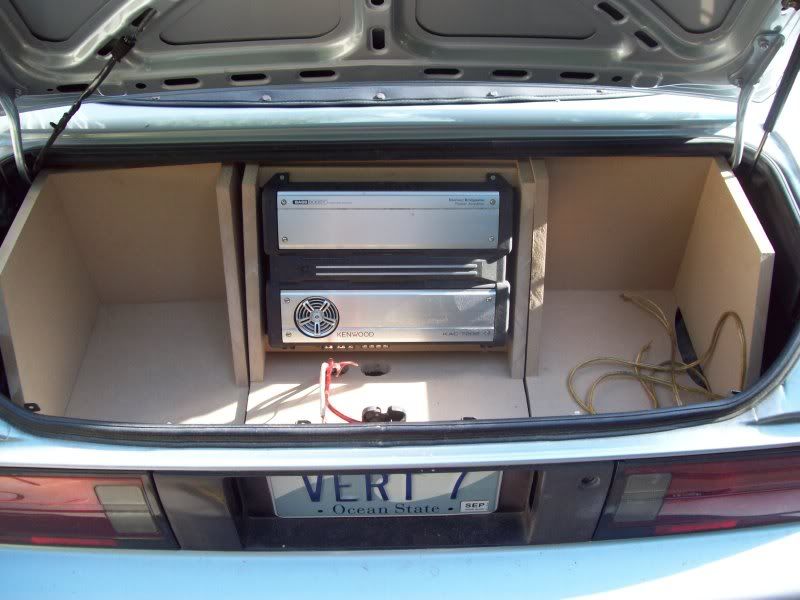
Here's a quick mock-up in the trunk after I made some side pieces.
Here's a test fit of the amp:
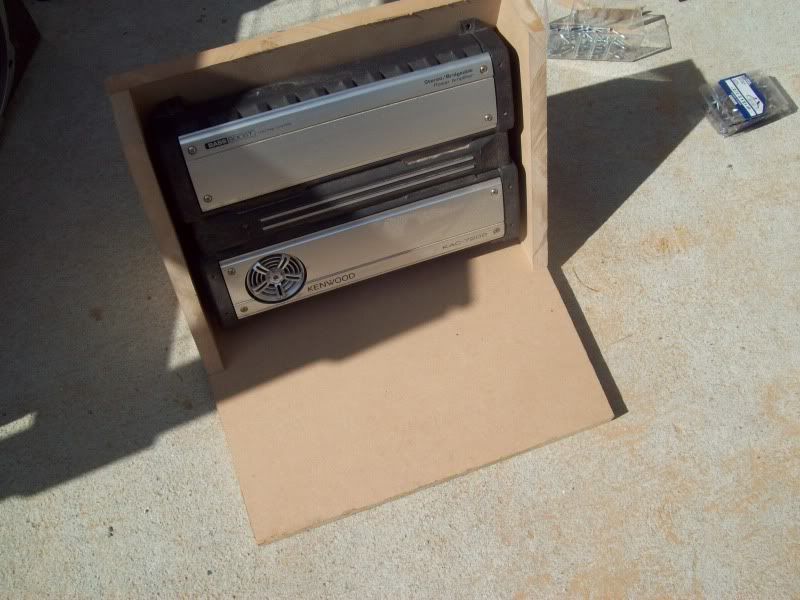
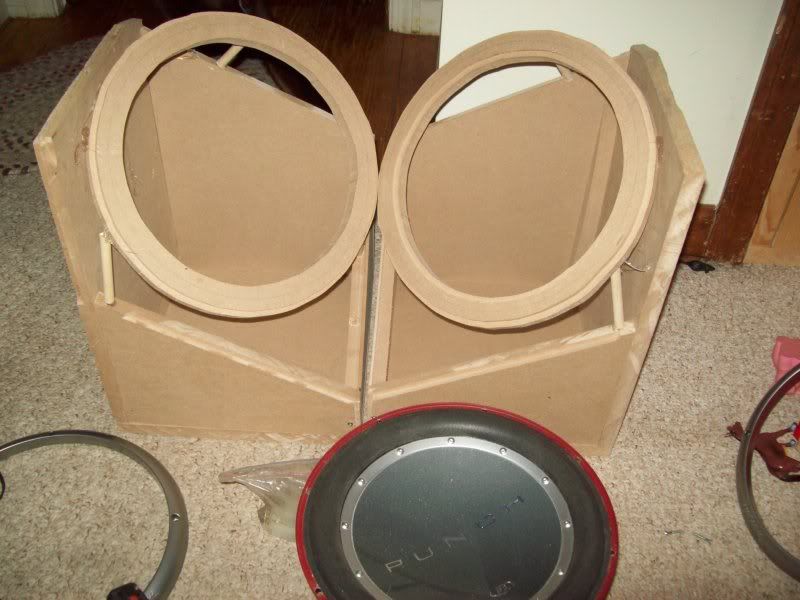
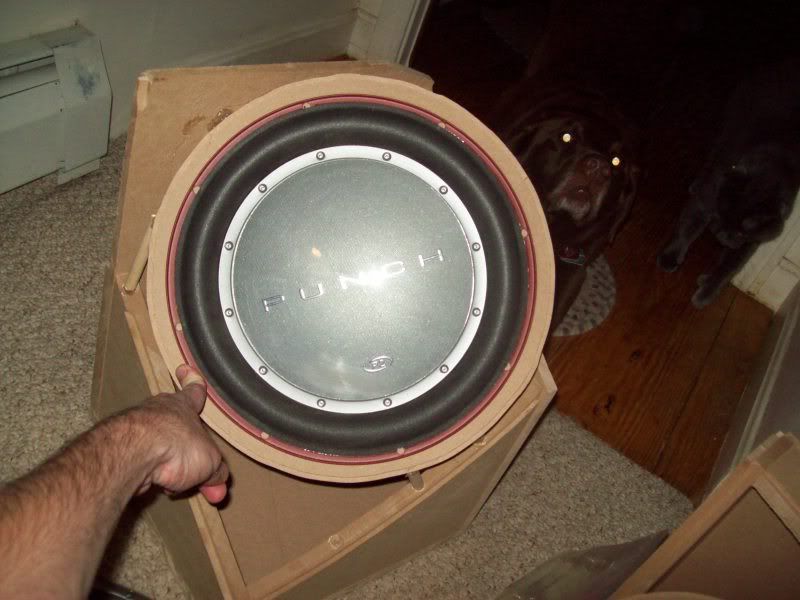
Here's the outsides built, and the subs just laid in place to give an idea what it will look like:
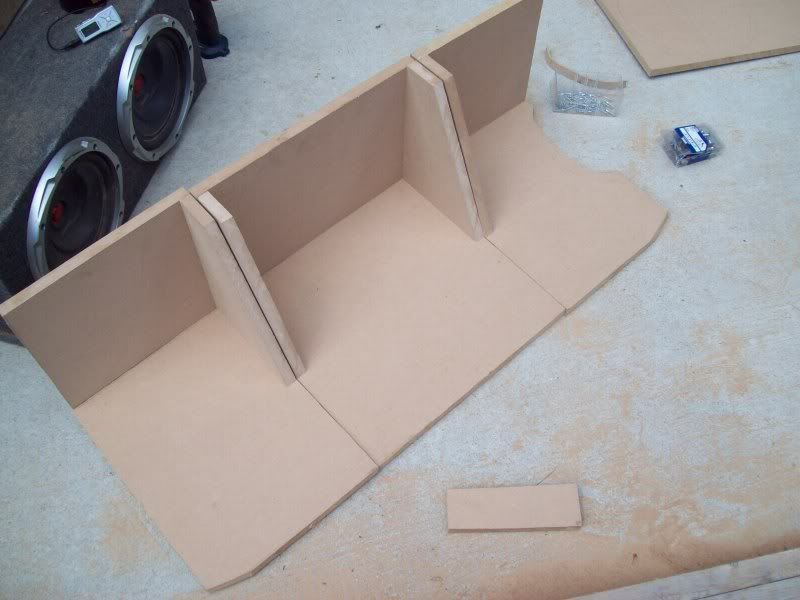
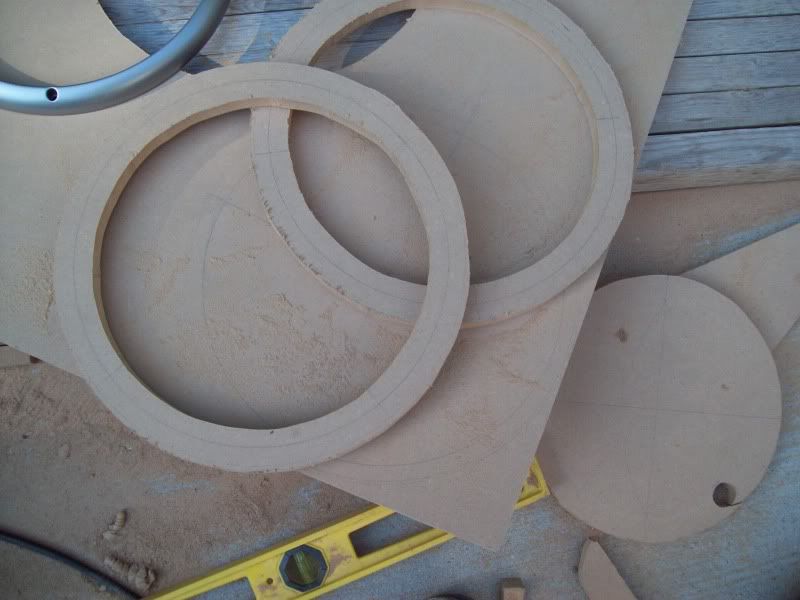
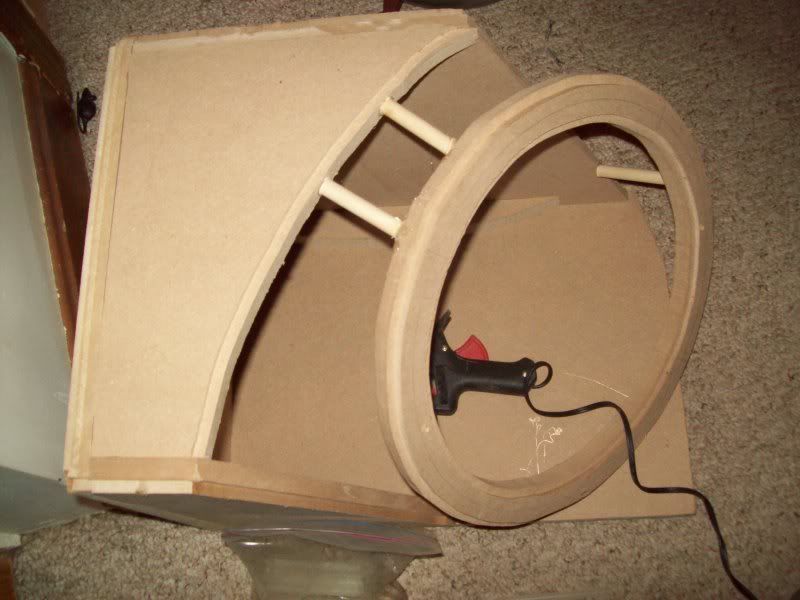
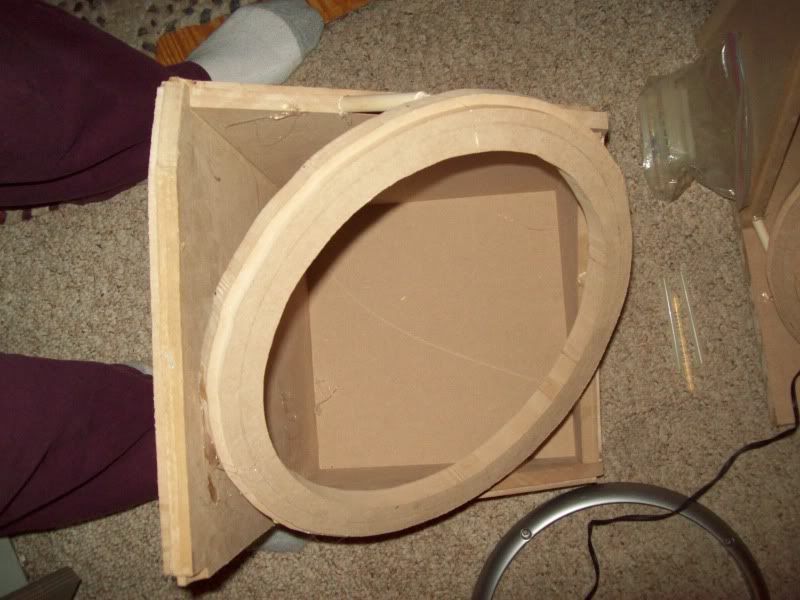
Then I cut out rings to hold the subs. Because the front of the enclosure will be made from fiberglass, I just made rings.
I then used my trimmer/router to rabbit the edges of the rings. This is the rabbit head:
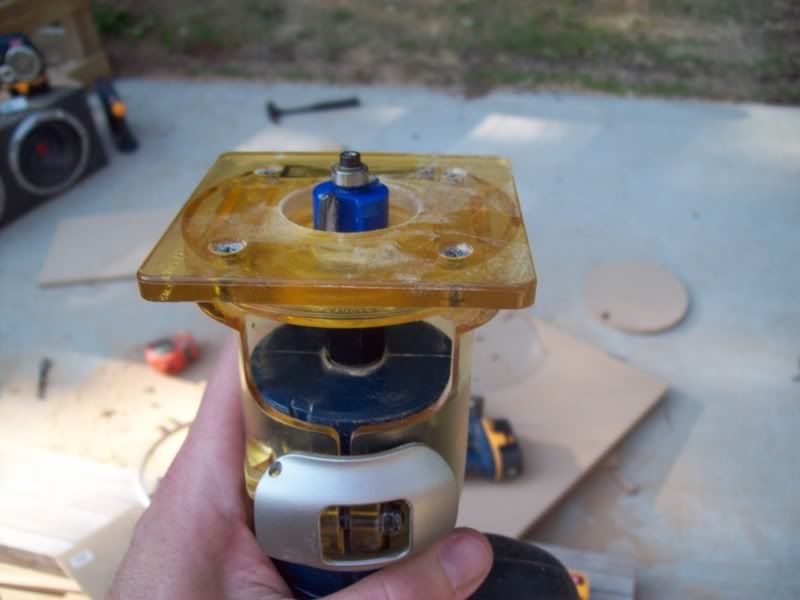
This is the groove that was made:

This is all for today. I'll post the rest tomorrow.
This is how I did it. Maybe you'll do it differently. Maybe you have better skills than I do. Maybe you don't have the skills I have. Maybe you have better tools. Maybe you don't. Bottom line, this is how I did the enclosure for my 'vert, and there ya go. I'm not responsible for you ******* up your car if you try to duplicate this. That's on you.
Tool list:
Circular saw
Jigsaw
4 foot straightedge/ruler
Tape measure
Pencil
Trimmer/Router
Drill
Compass
All my stuff is Ryobi One+ 18 volt. It's a nice system to have. Cordless rules. The only corded tool I used was my circular saw.
The story:
My 'vert originally had a pair of 10" Kenwood subs in a pre-fab box. It sucked for several reasons: It slid around constantly, it killed what little trunk space I had, and it looked like ****.
I've been brainstorming how to do an enclosure for quite some time. I've watched a LOT of Overhaulin', Pimp My Shitbox, err, Ride, Rides, etc. I also own a DVD set of "how to do fiberglass enclosures", so I have lots of ideas. (Anyone wants copies of those, let me know. I'll do 'em for you cheap.)
My trunk is missing almost all the plastics, so one bonus of this is that I don't really have to worry about the plastics now.
The first thing I did was cut a back piece:
Then I cut a bottom piece. Note the hole trimmed out on the right to allow for the piece where the gas filler goes into the gas tank.
Then, I cut the pieces into three parts. The center piece is measured off my amplifier, the other two pieces are equal to each other for the subs. Why? Because I made it as big as I could, meaning it would leave me maximum volume and maximum trunk space. It will also be a lot more difficult to steal once it's assembled in the car and bolted back into one piece.
Here's a quick mock-up in the trunk after I made some side pieces.
Here's a test fit of the amp:
Here's the outsides built, and the subs just laid in place to give an idea what it will look like:
Then I cut out rings to hold the subs. Because the front of the enclosure will be made from fiberglass, I just made rings.
I then used my trimmer/router to rabbit the edges of the rings. This is the rabbit head:
This is the groove that was made:
This is all for today. I'll post the rest tomorrow.
Full Member
Joined: Apr 2009
Posts: 76
Likes: 0
From: Mercedes, TX
Then, I cut the pieces into three parts. The center piece is measured off my amplifier, the other two pieces are equal to each other for the subs. Why? Because I made it as big as I could, meaning it would leave me maximum volume and maximum trunk space. It will also be a lot more difficult to steal once it's assembled in the car and bolted back into one piece.
Thread Starter
Joined: Sep 2002
Posts: 2,932
Likes: 6
From: Surrounded by Sebey parts, Rhode Island
Thread Starter
Joined: Sep 2002
Posts: 2,932
Likes: 6
From: Surrounded by Sebey parts, Rhode Island
Alright, little update. I did this during the Magic's ***-whooping of the Cavs.
Basically, I took a hot glue gun and some wooden dowels I had around, cut them to the length I wanted, and glued the rings in place.
Mayhem says, "I like it, I love it, I want some more of it!"
That's all I can do tonight. I need to go buy some fleece to cover them, then 'glass 'em in, and that's that.
Trending Topics
Thread Starter
Joined: Sep 2002
Posts: 2,932
Likes: 6
From: Surrounded by Sebey parts, Rhode Island
When you see the finished enclosure, you'll see there's plenty of room to have a battery back there, just depends where you put it.
Personally, I'd put the battery behind the seats rather than all the way in the trunk, but that's just me.
Thread Starter
Joined: Sep 2002
Posts: 2,932
Likes: 6
From: Surrounded by Sebey parts, Rhode Island
Thread Starter
Joined: Sep 2002
Posts: 2,932
Likes: 6
From: Surrounded by Sebey parts, Rhode Island
I did that today. All that's left is a little bondo, some sanding, then to paint 'em. I haven't figured out what to cover them with, either fabric or fake leather or something. My wife and I will go to the fabric store next weekend to figure that out. For now, it will just be a quick spray paint job.
Full Member
Joined: Apr 2009
Posts: 76
Likes: 0
From: Mercedes, TX
Thread Starter
Joined: Sep 2002
Posts: 2,932
Likes: 6
From: Surrounded by Sebey parts, Rhode Island
Like I said, cheesy paint and unfinished because I'm thinking of making some slight modifications before I cover them for good.
Here's how it turned out:


Here's how it turned out:


Thread
Thread Starter
Forum
Replies
Last Post
[For Sale] Scratch & Dent, Used, and Open-Box Sale!
SakeBomb Garage
Vendor Classifieds
5
Aug 9, 2018 05:54 PM
SakeBomb Garage
Group Buy & Product Dev. FD RX-7
8
Oct 9, 2015 10:05 PM