2nd Generation Specific (1986-1992) 1986-1992 Discussion including performance modifications and technical support sections.
Sponsored by:

FC Rear Diffuser

Thread Tools
 
Search this Thread
 
Old 04-02-17, 12:01 PM
  #1  
(Terraplane)

Thread Starter
 
TRRAPLN's Avatar
 
Join Date: Apr 2005
Location: Arizona desert, where the terraplanes roam.
Posts: 345
Received 13 Likes on 9 Posts
AZ FC Rear Diffuser

I recently designed a Custom FC Rear Diffuser for my S4 FC.


I made a mock up of the finished product in foam core.


This is a MOCK UP so bend angles and deflection are a result of weak foam core material.

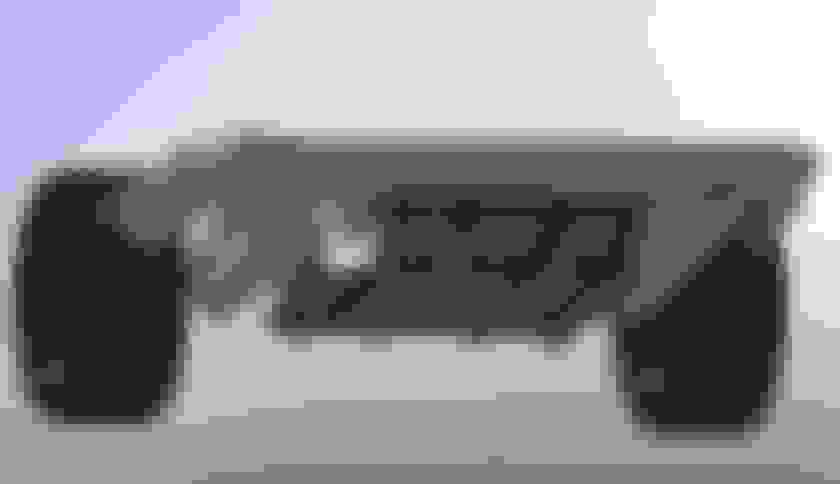
MOCK UP installed on car.


Sorry pictures aren’t better. It’s hard to get the underneath of the car lighted.


I plan to make this from Aluminum sheet, laser cut and CNC press brake form then assemble using custom Mounting Brackets, aftermarket Struts and Pop Rivets.
I’ll paint it after assembly.

Installation is simple. Attach front brackets to Muffler Shroud bolts toward front of gas tank on the sides. Attach rear Mounting Brackets to the two bottom bolts under the rear OEM tow/tie down hooks. Assemble Struts to Brackets and side holes in Diffuser. Adjust for level/height.

This is designed to provide approximately 5 ½ inch ground clearance. My FC is 25 ¾ inches at the rear wheel arches. It fits my Borla cat back exhaust and covers the bottom of the gas tank and spare tire well.

Constructive comments/questions/suggestions are welcome. PM’s Welcome.

What do you think?
Old 04-02-17, 08:20 PM
  #2  
Sharp Claws

iTrader: (30)
 
RotaryEvolution's Avatar
 
Join Date: Oct 2003
Location: Central Florida
Posts: 5,107
Likes: 0
Received 41 Likes on 40 Posts
i never much cared for the rear diffusers, the only way you can get them to look decent is by wrapping them under the exhaust as well and then they take up the whole bottom half of the car.
Old 04-02-17, 11:08 PM
  #3  
Fistful of steel

iTrader: (7)
 
LargeOrangeFont's Avatar
 
Join Date: Nov 2008
Location: OC, So Cal
Posts: 2,202
Received 27 Likes on 26 Posts
Looks pretty good. If you are willing to make 2 PM me, I'll give it a go.

Any pics of it off the ground so we can get a better perspective of the fit mounting points?
Old 04-03-17, 02:50 PM
  #4  
(Terraplane)

Thread Starter
 
TRRAPLN's Avatar
 
Join Date: Apr 2005
Location: Arizona desert, where the terraplanes roam.
Posts: 345
Received 13 Likes on 9 Posts
Originally Posted by RotaryEvolution
i never much cared for the rear diffusers, the only way you can get them to look decent is by wrapping them under the exhaust as well and then they take up the whole bottom half of the car.

I considered a full muffler covered diffuser but didn't like all the clutter. Those winglets are just too much for me.

To each their own.

It could be an add on.


Old 04-03-17, 03:00 PM
  #5  
(Terraplane)

Thread Starter
 
TRRAPLN's Avatar
 
Join Date: Apr 2005
Location: Arizona desert, where the terraplanes roam.
Posts: 345
Received 13 Likes on 9 Posts
Originally Posted by LargeOrangeFont
Looks pretty good. If you are willing to make 2 PM me, I'll give it a go.

Any pics of it off the ground so we can get a better perspective of the fit mounting points?
"Attach front brackets to Muffler Shroud bolts toward front of gas tank on the sides. Attach rear Mounting Brackets to the two bottom bolts under the rear OEM tow/tie down hooks. Assemble Struts to Brackets and side holes in Diffuser. Adjust for level/height."

Look under your car at the single bolts on each side that hold the aluminum shields around the gas tank next to the muffler. The front mounts to that and the rear is held up by the splitter struts.


Old 04-13-17, 12:22 PM
  #6  
(Terraplane)

Thread Starter
 
TRRAPLN's Avatar
 
Join Date: Apr 2005
Location: Arizona desert, where the terraplanes roam.
Posts: 345
Received 13 Likes on 9 Posts
Diffuser mounting bolt.

"Any pics of it off the ground so we can get a better perspective of the fit mounting points?"

This shows the right front mounting bolt for the front on the diffuser.
Old 04-17-17, 03:06 PM
  #7  
Rotary Enthusiast
iTrader: (8)
 
Gregory Casimir's Avatar
 
Join Date: Jun 2004
Location: Miami , Florida
Posts: 1,388
Received 8 Likes on 8 Posts
this is pretty neat! Are you planning on selling this or a DIY project with all the measurements?
Old 04-17-17, 05:59 PM
  #8  
(Terraplane)

Thread Starter
 
TRRAPLN's Avatar
 
Join Date: Apr 2005
Location: Arizona desert, where the terraplanes roam.
Posts: 345
Received 13 Likes on 9 Posts
Thanks.

Right now I plan on making several, one for me and remainder for first come first serve.

I'll post pics of the final product mounted on my car. Probably in 4-6 weeks.
Old 04-18-17, 09:02 PM
  #9  
Do you feel lucky punk!!!

 
Nitrometano's Avatar
 
Join Date: Oct 2005
Location: Puerto Rico
Posts: 356
Likes: 0
Received 0 Likes on 0 Posts
looks great!
Old 04-23-17, 11:15 PM
  #10  
Rotary Enthusiast

iTrader: (6)
 
brian_skotch's Avatar
 
Join Date: Dec 2008
Location: ABQ, NM
Posts: 954
Received 16 Likes on 10 Posts
Very cool man! Kudos for taking the leap.
Old 05-01-17, 09:15 AM
  #11  
Rotary Enthusiast

iTrader: (5)
 
djSL's Avatar
 
Join Date: Feb 2012
Location: Vancouver, WA
Posts: 1,038
Received 63 Likes on 44 Posts
Depending on cost and if the side portions are made/available, I'd be interested. IMO, I think it looks better having the diffuser go under and around the exhaust like shine auto's rep.
Old 05-01-17, 11:48 AM
  #12  
Full Member
iTrader: (1)
 
Akaviri's Avatar
 
Join Date: Aug 2015
Location: Philadelphia
Posts: 196
Received 10 Likes on 10 Posts
This will be great if it is a pure bolt-on diffuser. Nobody likes drilling holes in their car.
Old 05-01-17, 12:25 PM
  #13  
(Terraplane)

Thread Starter
 
TRRAPLN's Avatar
 
Join Date: Apr 2005
Location: Arizona desert, where the terraplanes roam.
Posts: 345
Received 13 Likes on 9 Posts
This is a bolt up design. No drilling holes.

Even If I did the muffler covers, I would use an internal bracket just inside the rear body to mount to.

Right now I'm making three diffuser units. No plans for the muffler covers. I'll have to see after the main diffuser is in place.

Thanks for the comments.
Old 05-26-17, 11:32 AM
  #14  
(Terraplane)

Thread Starter
 
TRRAPLN's Avatar
 
Join Date: Apr 2005
Location: Arizona desert, where the terraplanes roam.
Posts: 345
Received 13 Likes on 9 Posts
Parts are in!

Parts have arrived from fab.

Test fitting looks good.

I need to prep, paint, assemble and install.

Should be done this weekend.

Pics of finished product to follow.

This is going to be cool.


Old 05-26-17, 01:06 PM
  #15  
Full Member
iTrader: (1)
 
Akaviri's Avatar
 
Join Date: Aug 2015
Location: Philadelphia
Posts: 196
Received 10 Likes on 10 Posts
Estimated cost for one of these?
Old 05-26-17, 11:07 PM
  #16  
Rotary Enthusiast

iTrader: (9)
 
R-X-R's Avatar
 
Join Date: Jun 2011
Location: Syracuse,NY
Posts: 805
Received 4 Likes on 4 Posts
i wonder if it clears an apexi dual catback.
Old 05-27-17, 03:21 AM
  #17  
Senior Member

 
psyaddict's Avatar
 
Join Date: Oct 2012
Location: Tallinn, Estonia
Posts: 460
Received 4 Likes on 4 Posts
nice
Old 05-29-17, 10:58 AM
  #18  
(Terraplane)

Thread Starter
 
TRRAPLN's Avatar
 
Join Date: Apr 2005
Location: Arizona desert, where the terraplanes roam.
Posts: 345
Received 13 Likes on 9 Posts
I'm working on packaging this week.
Old 06-04-17, 06:41 PM
  #19  
(Terraplane)

Thread Starter
 
TRRAPLN's Avatar
 
Join Date: Apr 2005
Location: Arizona desert, where the terraplanes roam.
Posts: 345
Received 13 Likes on 9 Posts
Originally Posted by R-X-R
i wonder if it clears an apexi dual catback.
I don't know anything about Apexi dual catback.

It fits my Borla dual catback fine.
Old 06-04-17, 07:04 PM
  #20  
Super-Pinoy

iTrader: (3)
 
PnoyRx7's Avatar
 
Join Date: Jul 2009
Location: Hamilton, Ontario
Posts: 1,725
Received 16 Likes on 16 Posts
damn it would be a bitch to ship to Canada i would assume .... too bad you couldn't do an "ikea" version and i can put it together here as it would take up less packaging lol
Old 06-05-17, 01:53 PM
  #21  
(Terraplane)

Thread Starter
 
TRRAPLN's Avatar
 
Join Date: Apr 2005
Location: Arizona desert, where the terraplanes roam.
Posts: 345
Received 13 Likes on 9 Posts
Ready to ship

Originally Posted by Akaviri
Estimated cost for one of these?
The first unit is complete and installed on my FC.


The product looks like this assembled.


Two units are ready to ship.

$339.00 + Shipping

Please PM me for purchase details.
Old 06-05-17, 04:32 PM
  #22  
Spin 2 Win

iTrader: (3)
 
Lavitzlegend's Avatar
 
Join Date: Jul 2013
Location: Iowa
Posts: 318
Received 8 Likes on 8 Posts
Nice bit of DIY and certainly looks waaaaay better than having to stare at the darn spare tire well... A bit of constructive criticism though. Not sure whether this is actually going to improve rear grip given that design. Doesn't look like hardly any incline until it gets to the back and then a very abrupt angle change. General rule of thumb for high velocity air is to not exceed a 7 degree change from the previous plane to avoid separation. The way it is setup now you might actually be introducing only drag and pretty much no downforce... Your smooth bends on the foam were more promising. I've been thinking about doing something relatively similar out of alumalite at the same time I make my front splitter. A constant angle of attack of 5 to 7 degrees moving backwards and potentially removing part of the bumper and protruding beyond the rear of the vehicle. Just some food for thought here. Good work so far!
Old 06-05-17, 05:24 PM
  #23  
(Terraplane)

Thread Starter
 
TRRAPLN's Avatar
 
Join Date: Apr 2005
Location: Arizona desert, where the terraplanes roam.
Posts: 345
Received 13 Likes on 9 Posts
The difference between my "street" diffuser and race car down draft designs is certainly the angle that creates the theoretical venturi. Agreed, I decided to cover that spare tire well rather than use the 5 to 7 degree rule. I think it visually fills the naked space of the FC rear better.

Also race cars run the diffuser strakes 1-2" off the ground, along with the complete under-body of the car covered. The velocity change of the trapped air exiting the venturi is where the down force comes from.

Not practical for something run on the street. That's why this is approximately 5 1/2" off the ground. It might induce some down draft and air flow smoothing but not like a "race car".

I call it a GT Street Diffuser.
Old 06-06-17, 10:51 AM
  #24  
Spin 2 Win

iTrader: (3)
 
Lavitzlegend's Avatar
 
Join Date: Jul 2013
Location: Iowa
Posts: 318
Received 8 Likes on 8 Posts
I think a well designed diffuser could still have a good effect on a street car and track day car without requiring super low ground clearance or flat belly pan under the entire car. I will be doing a track day next month with no aero and hopefully again at the same track later this year with front splitter and diffuser. Will be interesting to see the results
Old 06-06-17, 11:53 AM
  #25  
(Terraplane)

Thread Starter
 
TRRAPLN's Avatar
 
Join Date: Apr 2005
Location: Arizona desert, where the terraplanes roam.
Posts: 345
Received 13 Likes on 9 Posts
Originally Posted by Lavitzlegend
I think a well designed diffuser could still have a good effect on a street car and track day car without requiring super low ground clearance or flat belly pan under the entire car.
Thanks, that's what I hoped to accomplish with this design.

Buy my GT Street Diffuser!

PM ME FOR PRICE!!!

Last edited by misterstyx69; 06-06-17 at 11:54 PM. Reason: Section is not to be used for Selling


All times are GMT -5. The time now is 05:50 PM.