
Center Panel Fiberglassing for Custom FC Dash - Please give feedback

Center Panel Fiberglassing for Custom FC Dash - Please give feedback
hey guys,
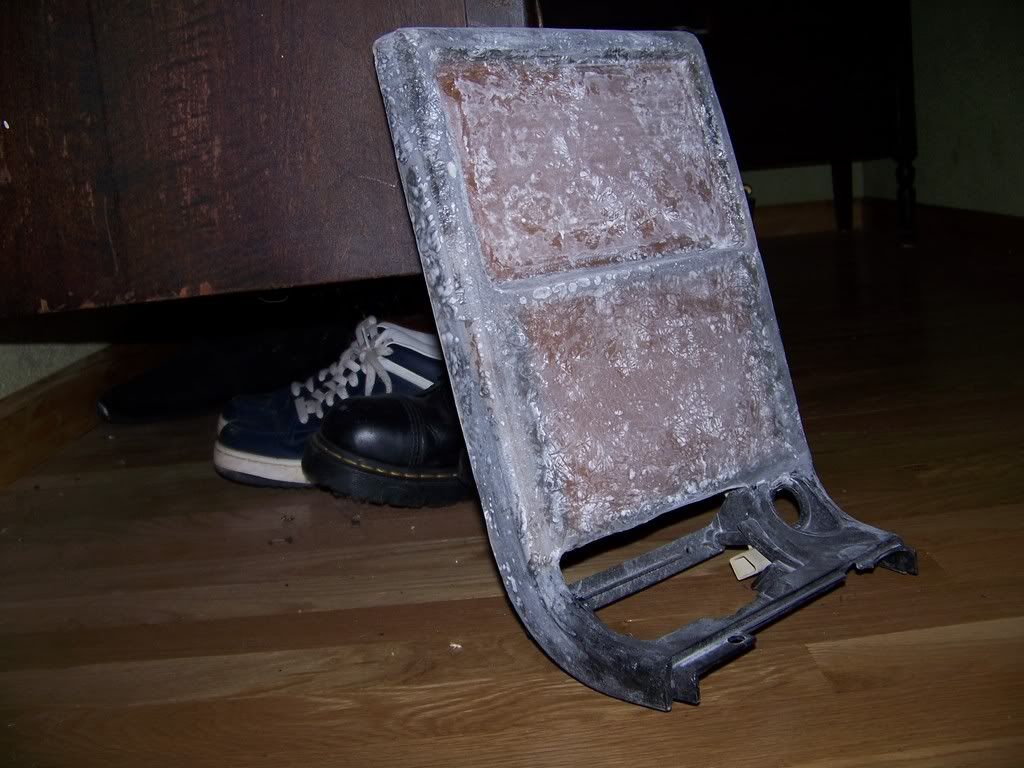
This is my first attempt at fiber glassing anything other than a dirtbike fender so I figured I would post the progress and pics in case anyone had some advice or pointers. Any hints, tips or tricks are welcome as I am a complete fiberglass noob.
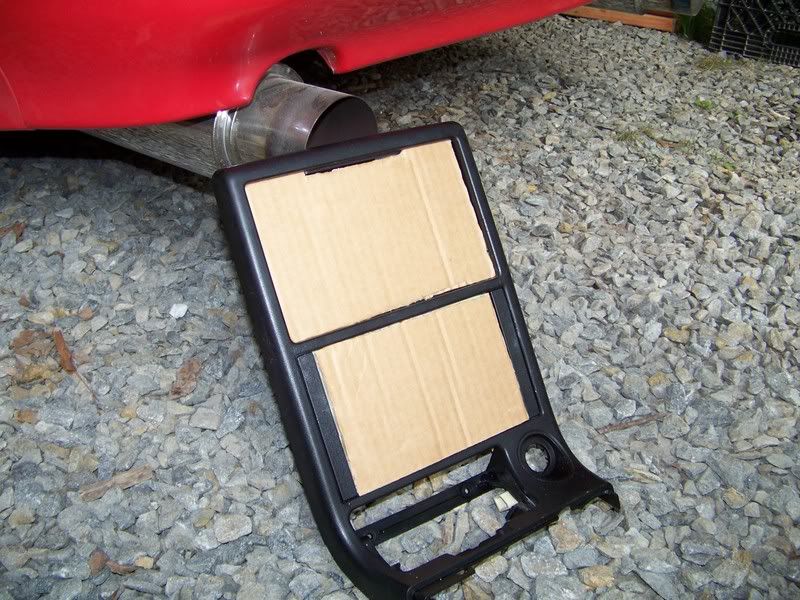
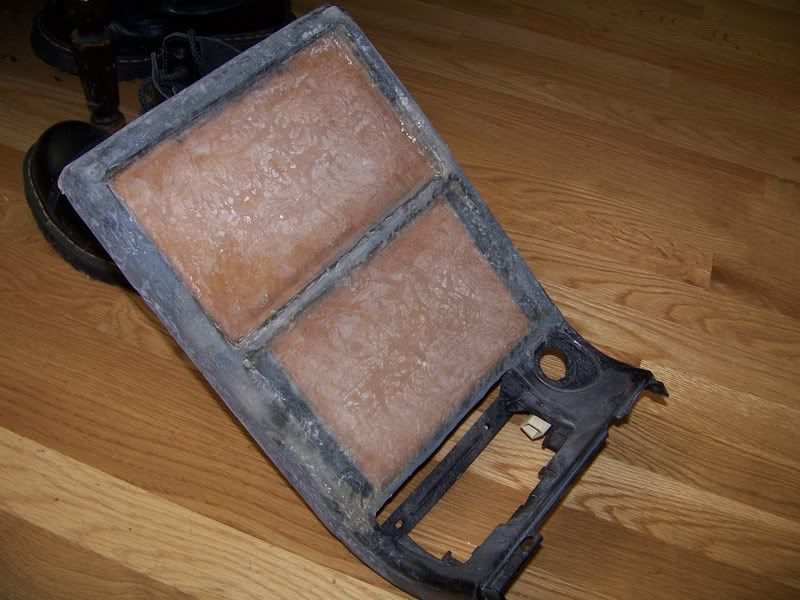
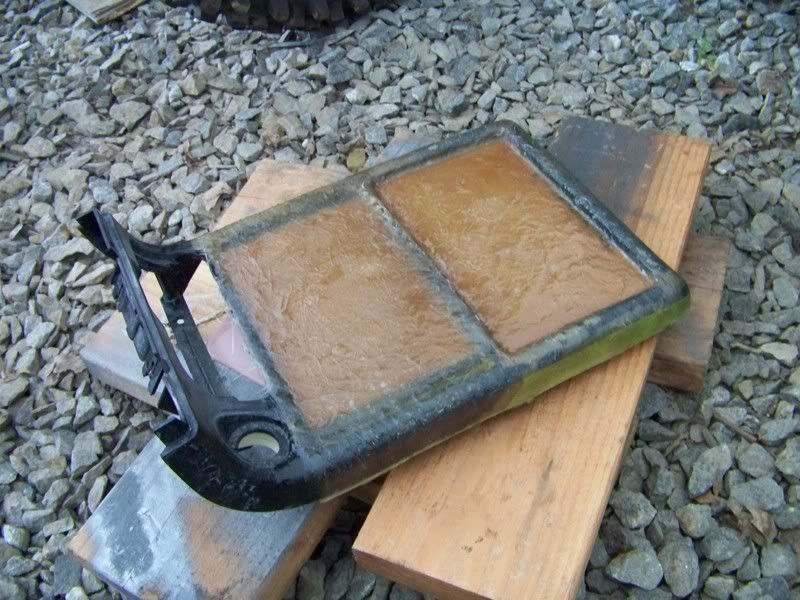
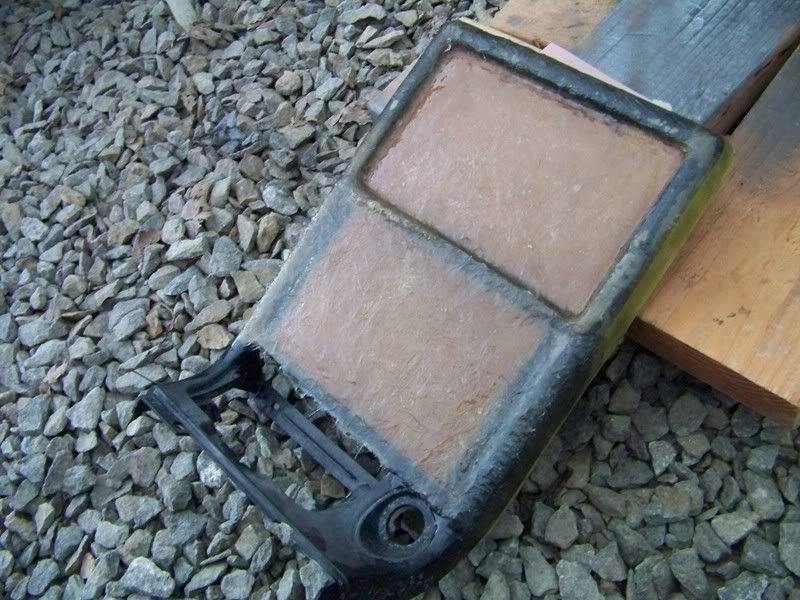
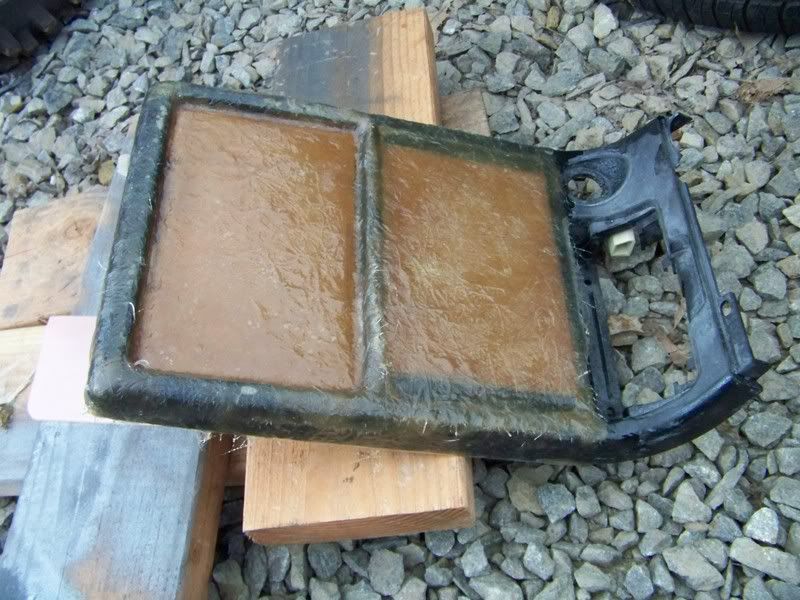
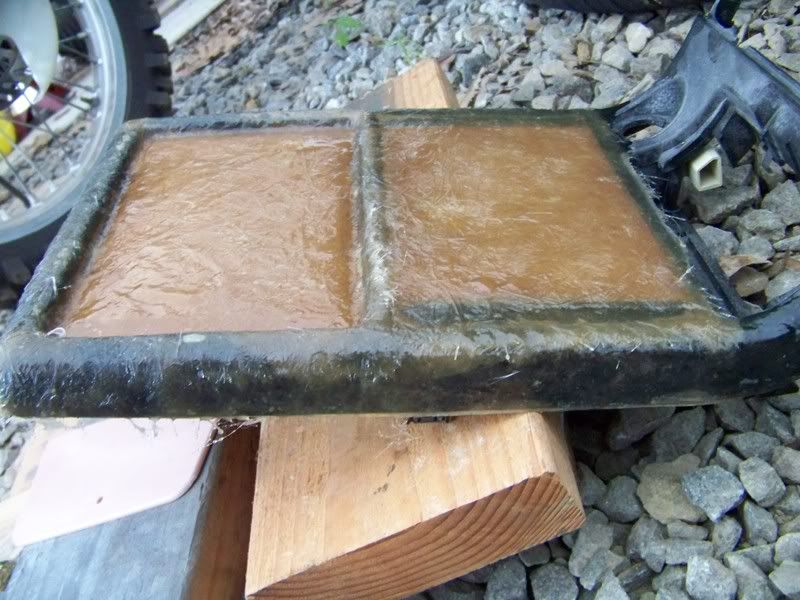
I don't have heat or a/c so I figured the center panel would be a great place to mount the boost, oil and water temp gauges as well as the boost controller. I was originally planning to make plastic panels that would house the gauges but decided to try fiber glassing.
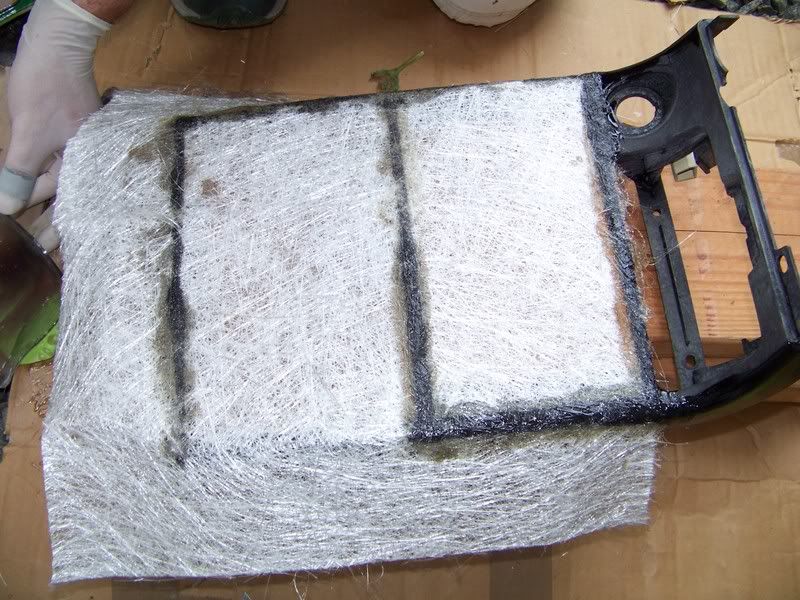
I cleaned the panel with acetone and then sanded lightly, cleaned with acetone again and then applied the resin and fiberglass. I have only done one layer so far but it seems to be working out okay.
This is my first attempt at fiber glassing anything other than a dirtbike fender so I figured I would post the progress and pics in case anyone had some advice or pointers. Any hints, tips or tricks are welcome as I am a complete fiberglass noob.
I don't have heat or a/c so I figured the center panel would be a great place to mount the boost, oil and water temp gauges as well as the boost controller. I was originally planning to make plastic panels that would house the gauges but decided to try fiber glassing.
I cleaned the panel with acetone and then sanded lightly, cleaned with acetone again and then applied the resin and fiberglass. I have only done one layer so far but it seems to be working out okay.

Full Member
Joined: Jul 2006
Posts: 89
Likes: 0
From: Canada
Would have been far easier to glue in a couple pieces of ABS plastic in the holes then bondo up any gaps, then just a quick sand and paint.
No matter what you do with that now it'll never line up to the bottom properly.
No matter what you do with that now it'll never line up to the bottom properly.
Yeah I was going to use plastic panels but wanted to try the fiberglass as an experiment.
What do you mean "it'll never line up to the bottom properly" ?
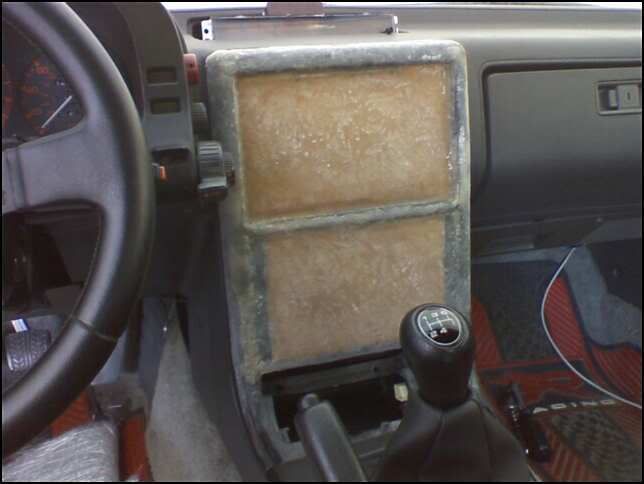
It retains the stock mounting point and still installs just like it used to.
What do you mean "it'll never line up to the bottom properly" ?
It retains the stock mounting point and still installs just like it used to.
Trending Topics
Thanks man. Mine was all one piece until a few weeks ago when I accidentally cracked it. I have a couple of gauges that I wanted to install and I want to use fiberglass in the near future for some other things so I figured I would try on something simple like this.
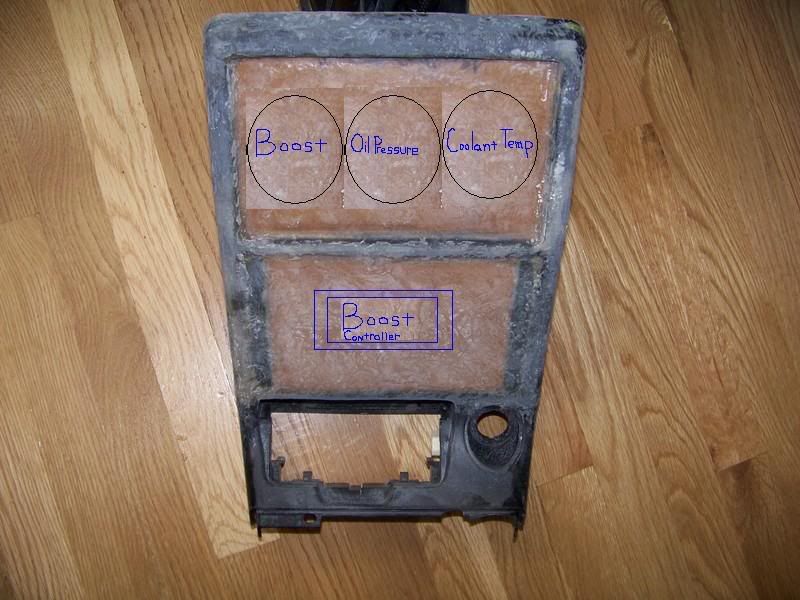
Something like that anyways, the gauges are all 2 1/16" so there will probably be room for the Greddy Profec B on the top panel under the three autometer carbon fiber gauges. The bottom panel might hold a radio or the new Palm Pilot...
Something like that anyways, the gauges are all 2 1/16" so there will probably be room for the Greddy Profec B on the top panel under the three autometer carbon fiber gauges. The bottom panel might hold a radio or the new Palm Pilot...


Junior Member
Joined: Oct 2005
Posts: 28
Likes: 0
From: Hartford, Michigan
Nice.
To "finish" the surface, don't use straight up body filler.
Use a mixture of 50/50 resin + bodyfiller. Then add MEKP + Filler Hardener equal to the amounts you added. This will create a diluted body filler than will adhere, but be self-adhering. It's a little tougher to work with, but you'll spend less time sanding.
-Richard-

Hey thanks Aaron.
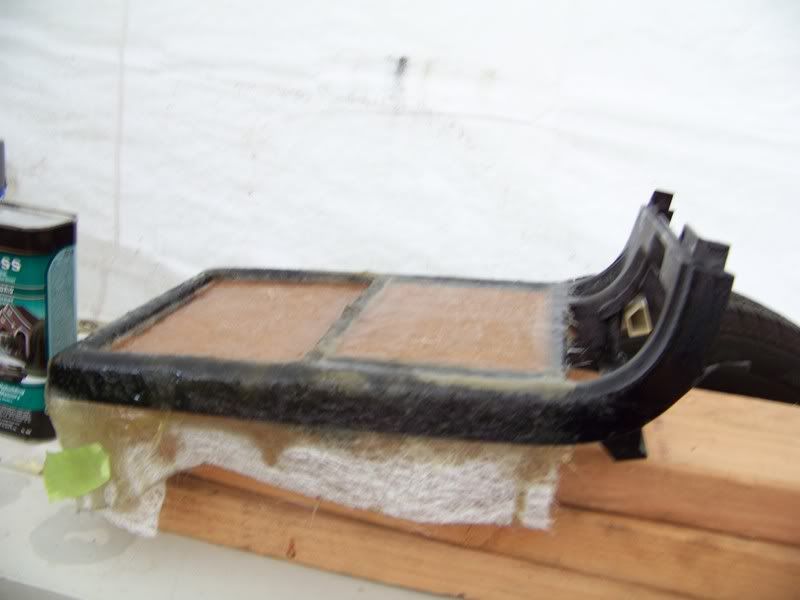
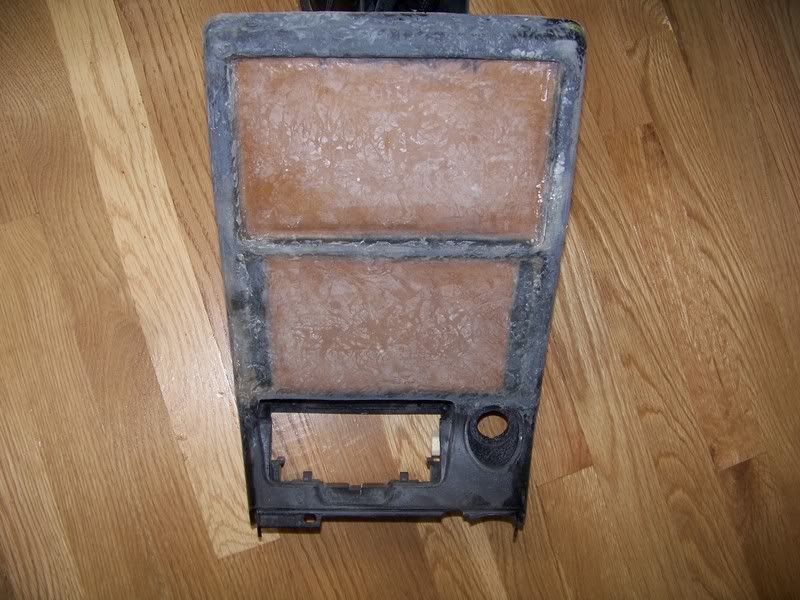
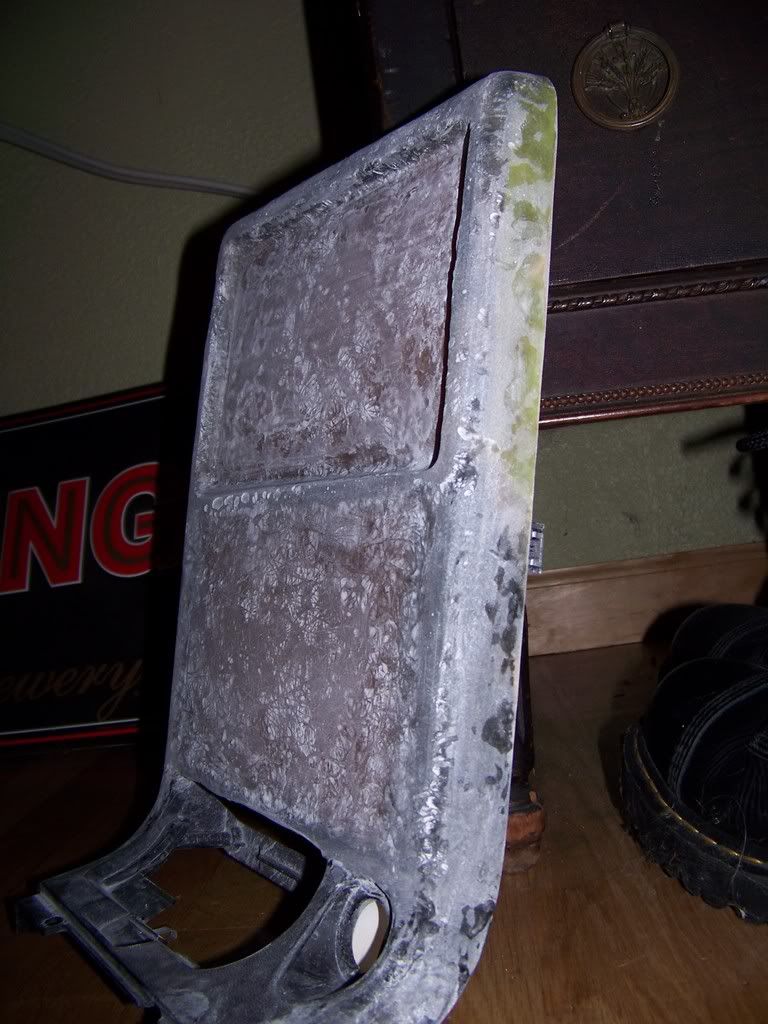
The top mounting points are broken right now, I was planning on trying to rig something up but rely mostly on the bottom and side mounts to hold it in place. I added more fiberglass today. One more layer on the top part and a total of 3 layers on the bottom to keep it flush. I'll give it some sanding tomorrow and see from there.

The top mounting points are broken right now, I was planning on trying to rig something up but rely mostly on the bottom and side mounts to hold it in place. I added more fiberglass today. One more layer on the top part and a total of 3 layers on the bottom to keep it flush. I'll give it some sanding tomorrow and see from there.

DONT FEED THE NOOBS
Joined: Mar 2001
Posts: 1,270
Likes: 0
From: land of slow hondas .... TULSA, OK
thats actually a really good idea and looks like a cheap fix to an already broken surround. cant believe i didn't think of that. thinking has never been my strong point.
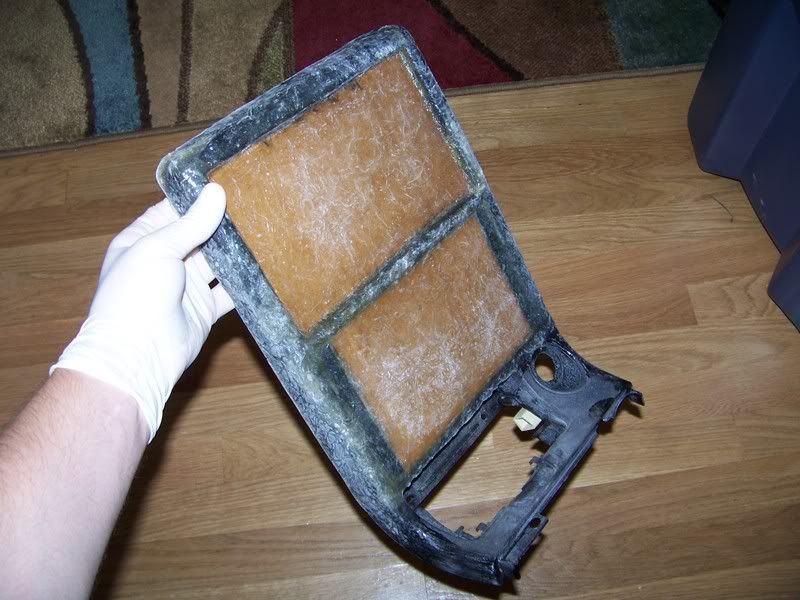
As far as the sanding goes, based on the first layer I don't expect it to be that difficult. I used an orbital palm sander with 150 grit to knock down the big lumps and stuff and was really surprised by how easily it leveled off. The big surface of the sanding disk seemed to prevent eating away at any one spot while making it easy to get the side and other areas nice and flat. I was going to use blocks of wood with sandpaper wrapped around it for the little stuff and corners.
I am curious about finishing it though, people have been talking about putting a thin layer of bondo, or 50/50 bondo and resin over it at the end and sanding one least time before paint. Would anyone care to elaborate just a bit on this. is it really necessary if the FG is perfectly level or is it just that it's easier to sand than FG? What grit should I be finishing with prior to painting and is this anything I should know before I paint it? I was just gong to use duplicolor ceramic engine bay primer and spray paint as I have plenty of it left over and it seems like really nice paint.
Thanks guys.
Last edited by NJGreenBudd; Sep 1, 2008 at 11:19 PM.
Those look more like cloth than what I used right? They had two kinds at Sears, a woven cloth type and this looser mesh type. I just got the looser stuff thinking it would be easier on the corners but I have no real knowledge about FG.
What benefits would there be to using the woven or bi axial in this case?
Sanded a bit after the last layers-
And I am open to any hints for the bondo part coming up.
Thanks!
What benefits would there be to using the woven or bi axial in this case?
Sanded a bit after the last layers-
And I am open to any hints for the bondo part coming up.
Thanks!
Last edited by NJGreenBudd; Sep 2, 2008 at 10:13 PM.
Banned. I got OWNED!!!
Joined: Mar 2006
Posts: 1,970
Likes: 1
From: Connecticut
I think roven is easier to work with and there is no mat stronger than bi-axial. With a little cutting and finessing the roven takes corners better than the mess in my not so humble regarding fg opinion. See here - http://forum.teamfc3s.org./showthread.php?t=51432