87' turbo build.
 11-30-10, 10:46 PM
#1
Make It Happen!
Thread Starter
iTrader: (11)
Join Date: Jun 2010
Location: Ontario, Canada
Posts: 522
Likes: 0
Received 0 Likes
on
0 Posts
This is my first year owning my Rx7and I must store it for the winter. I have decided to drop a bit of doh into it.

Ever since i bought it in July, I could not believe the handling. Once I got used to it I noticed that it doesn't feel the way it "should". I decided to drop the subframe and rebuild since It's probably the only part of the car that has not been changed or rebuilt yet. Also power upgrade is on the list.
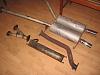
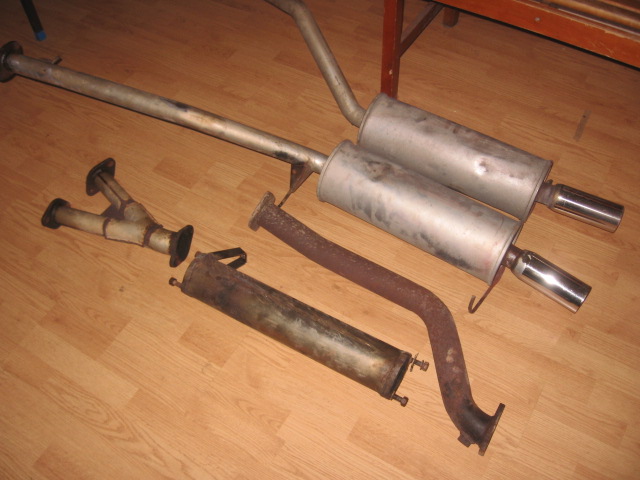
First to come off is the exhaust. Downpipe and resonator is Racing Beat "I believe" aft of that I do not know. This exhaust is in great shape other than a little surface corrosion. It will get sandblasted off and protected with ceramic heat paint. Downpipe will also get heat wrapped.
Subframe dropped (carefully of course)
Subframe bagged and tagged


Ever since i bought it in July, I could not believe the handling. Once I got used to it I noticed that it doesn't feel the way it "should". I decided to drop the subframe and rebuild since It's probably the only part of the car that has not been changed or rebuilt yet. Also power upgrade is on the list.
First to come off is the exhaust. Downpipe and resonator is Racing Beat "I believe" aft of that I do not know. This exhaust is in great shape other than a little surface corrosion. It will get sandblasted off and protected with ceramic heat paint. Downpipe will also get heat wrapped.
Subframe dropped (carefully of course)
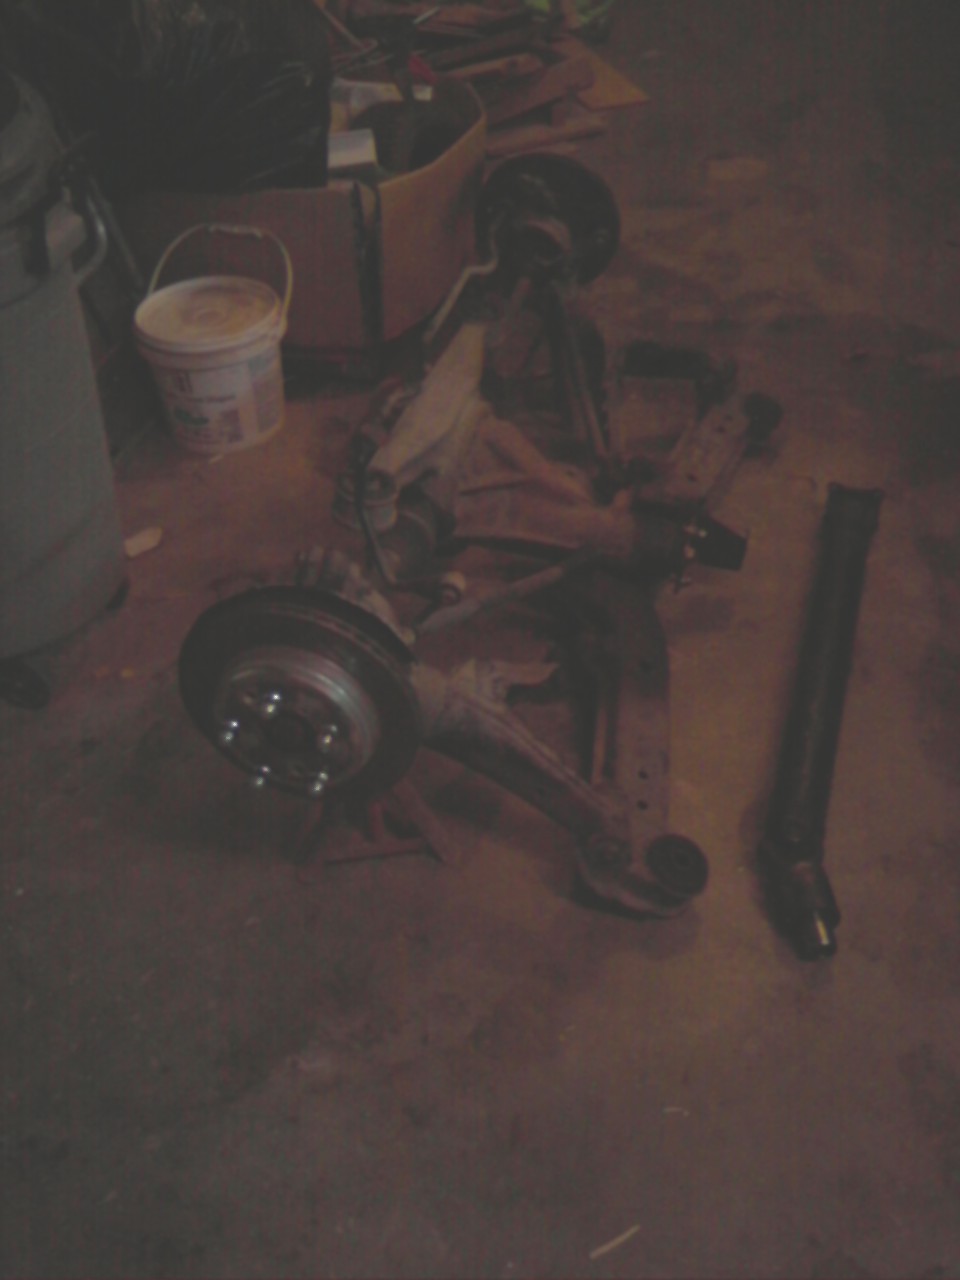
Subframe bagged and tagged

 11-30-10, 11:17 PM
#2
Make It Happen!
Thread Starter
iTrader: (11)
Join Date: Jun 2010
Location: Ontario, Canada
Posts: 522
Likes: 0
Received 0 Likes
on
0 Posts
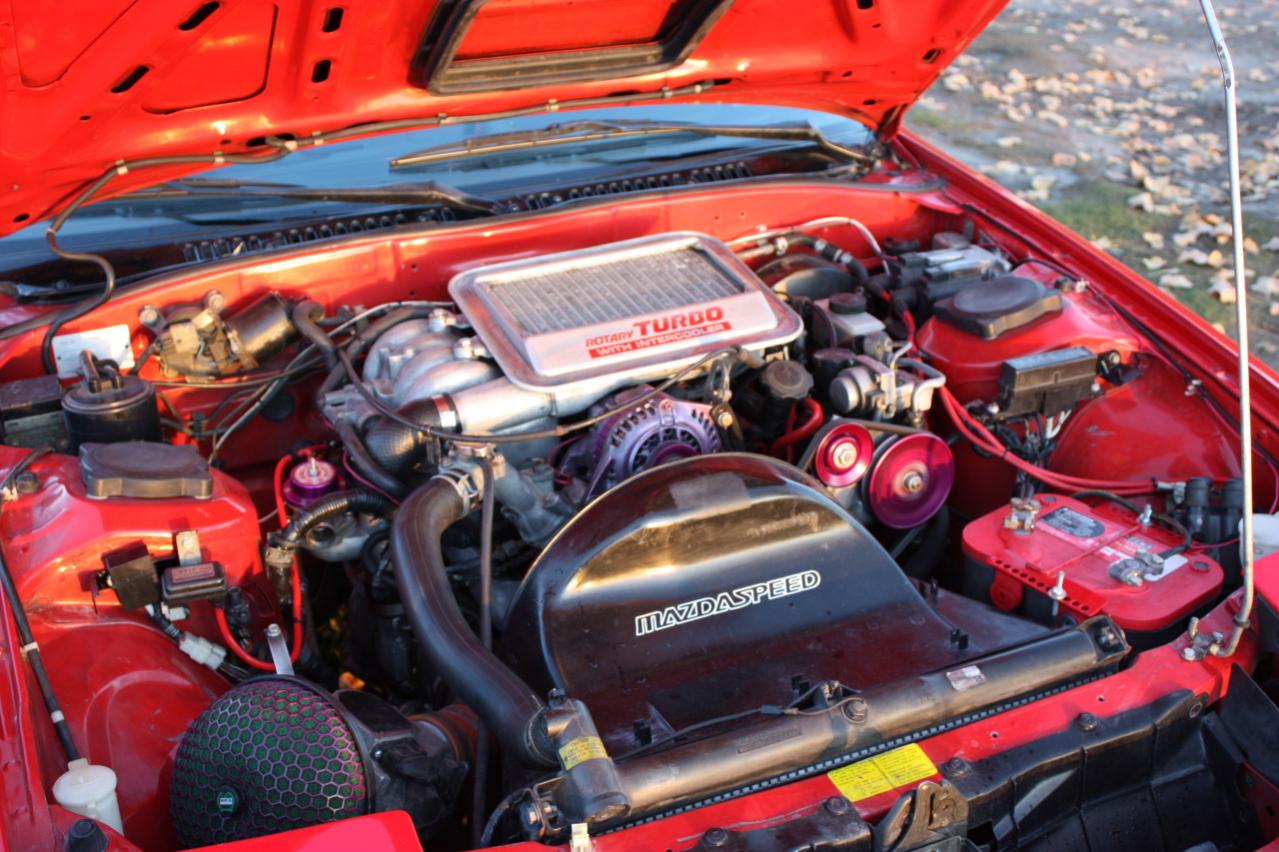
under the hood...I'm going with an "anodized" purple accented engine bay.
I currently have an s5 turbo on the car. I have a spare s4 turbo that I have decided to rebuild and use as a temporary, while I rip out the s5 turbo to convert to a hybrid.
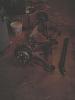
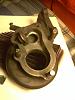
The P.O. gave me a box with spares in it. this is what the s4 turbo looked like

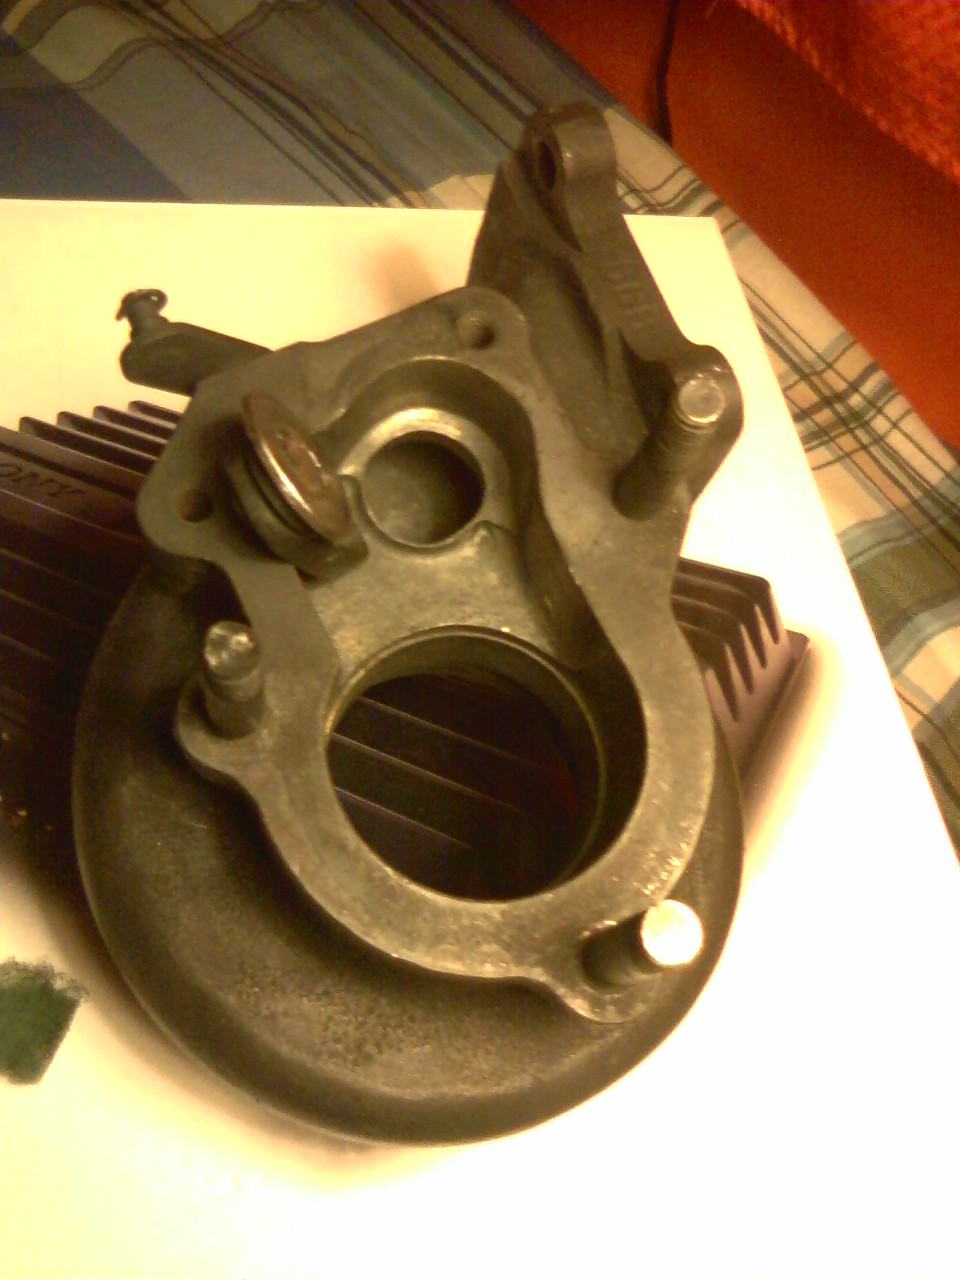
Once I had cleaned it all up and inspected the turbo, internally and externally it's in great shape, definitely not too many kms (or miles) on it. It is in way better shape than the s5 one currently on my car. The problem is the puny hole shamefully used as a wastegate.
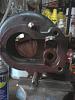
All ported out. I managed to get it to about 28-30mm. any bigger and I will need special tools.
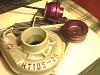
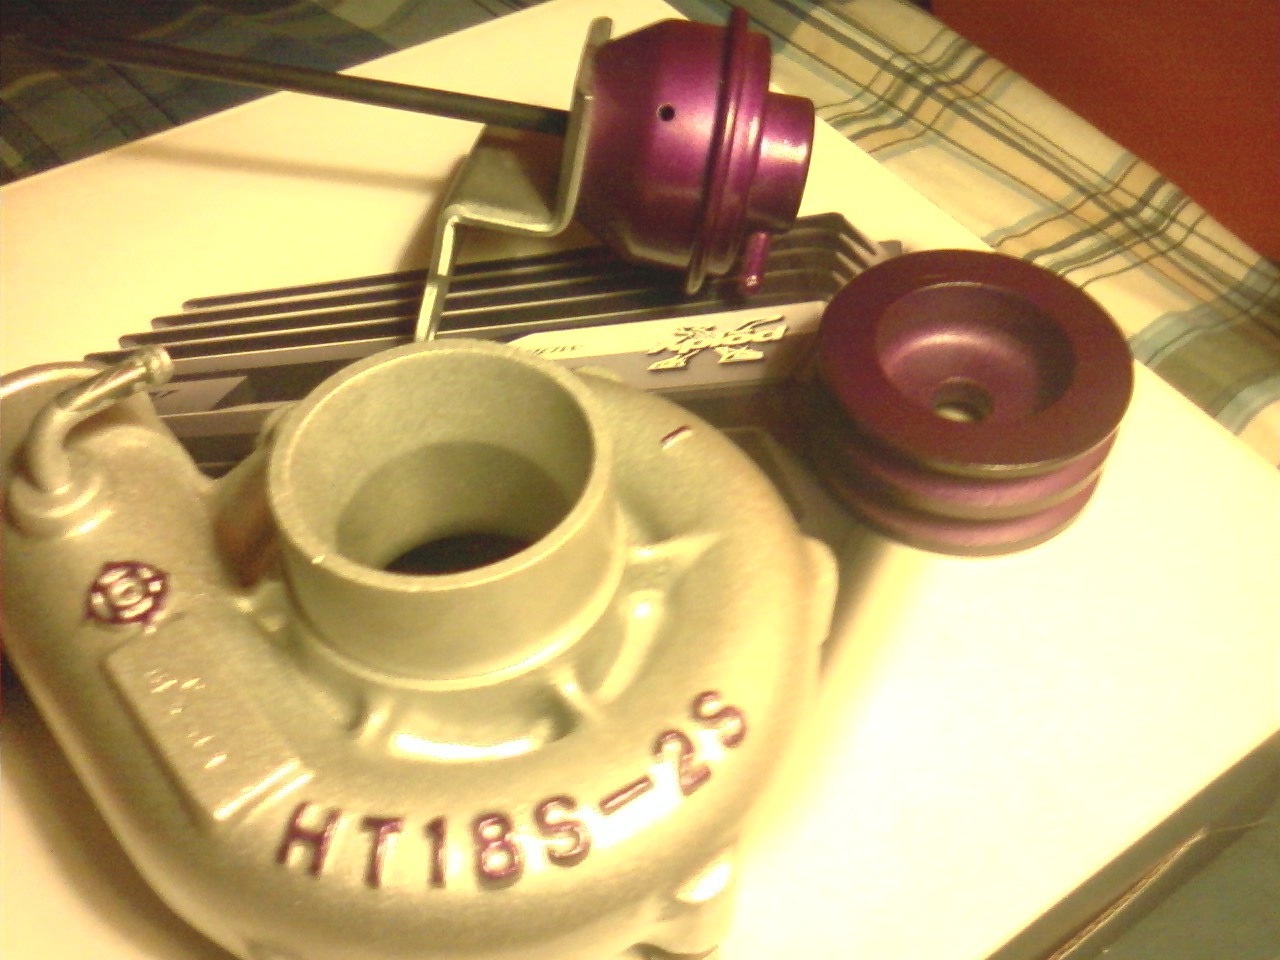
Here's a little shot of the compressor housing, wastegate and a dual belt alternator pulley from mazdatrix. I used duplicolor metalcast.
I currently have an s5 turbo on the car. I have a spare s4 turbo that I have decided to rebuild and use as a temporary, while I rip out the s5 turbo to convert to a hybrid.
The P.O. gave me a box with spares in it. this is what the s4 turbo looked like
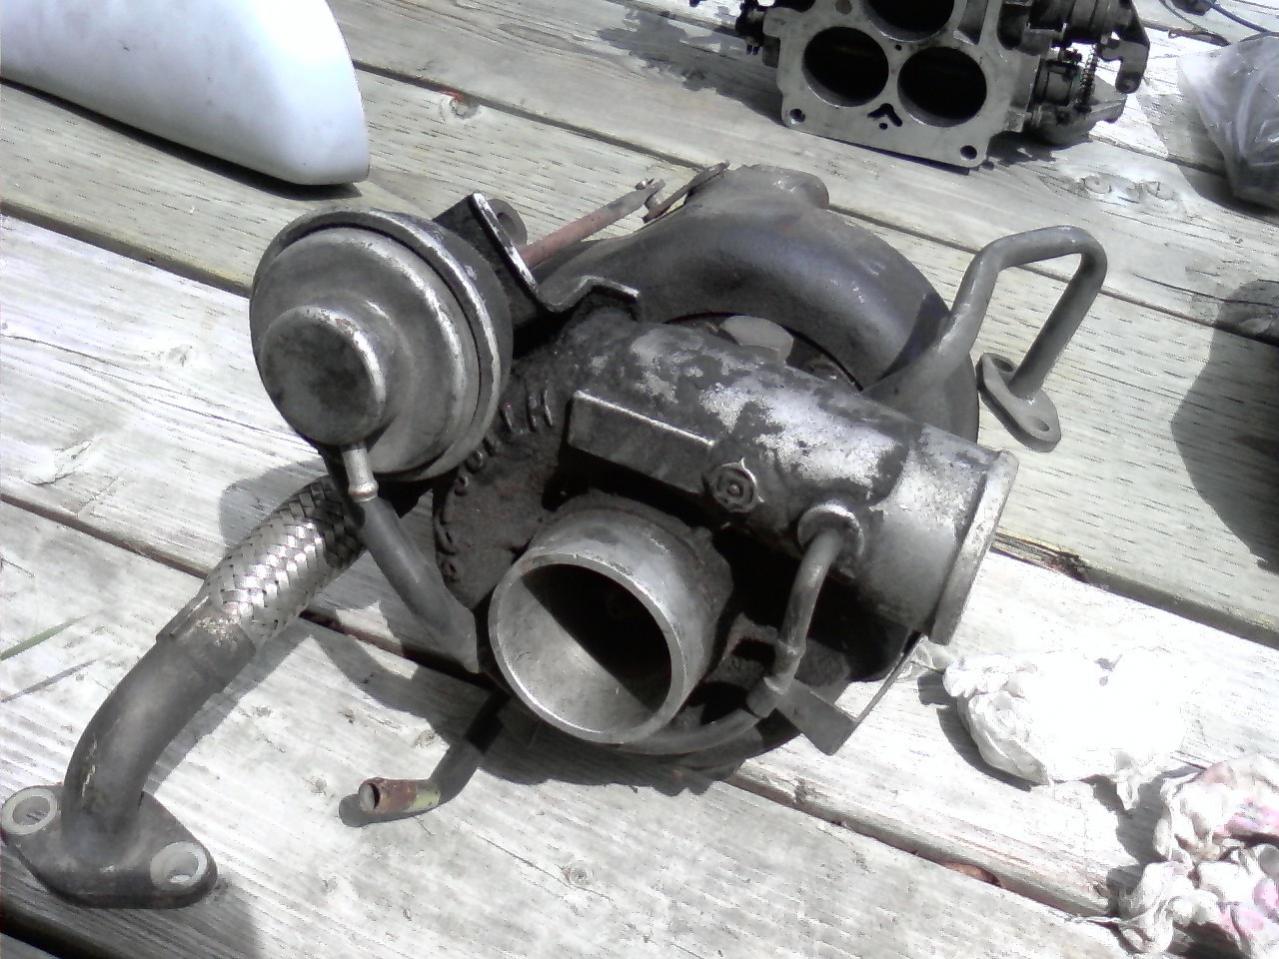
Once I had cleaned it all up and inspected the turbo, internally and externally it's in great shape, definitely not too many kms (or miles) on it. It is in way better shape than the s5 one currently on my car. The problem is the puny hole shamefully used as a wastegate.

All ported out. I managed to get it to about 28-30mm. any bigger and I will need special tools.
Here's a little shot of the compressor housing, wastegate and a dual belt alternator pulley from mazdatrix. I used duplicolor metalcast.
 12-02-10, 10:26 AM
#6
Make It Happen!
Thread Starter
iTrader: (11)
Join Date: Jun 2010
Location: Ontario, Canada
Posts: 522
Likes: 0
Received 0 Likes
on
0 Posts
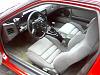
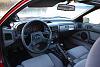
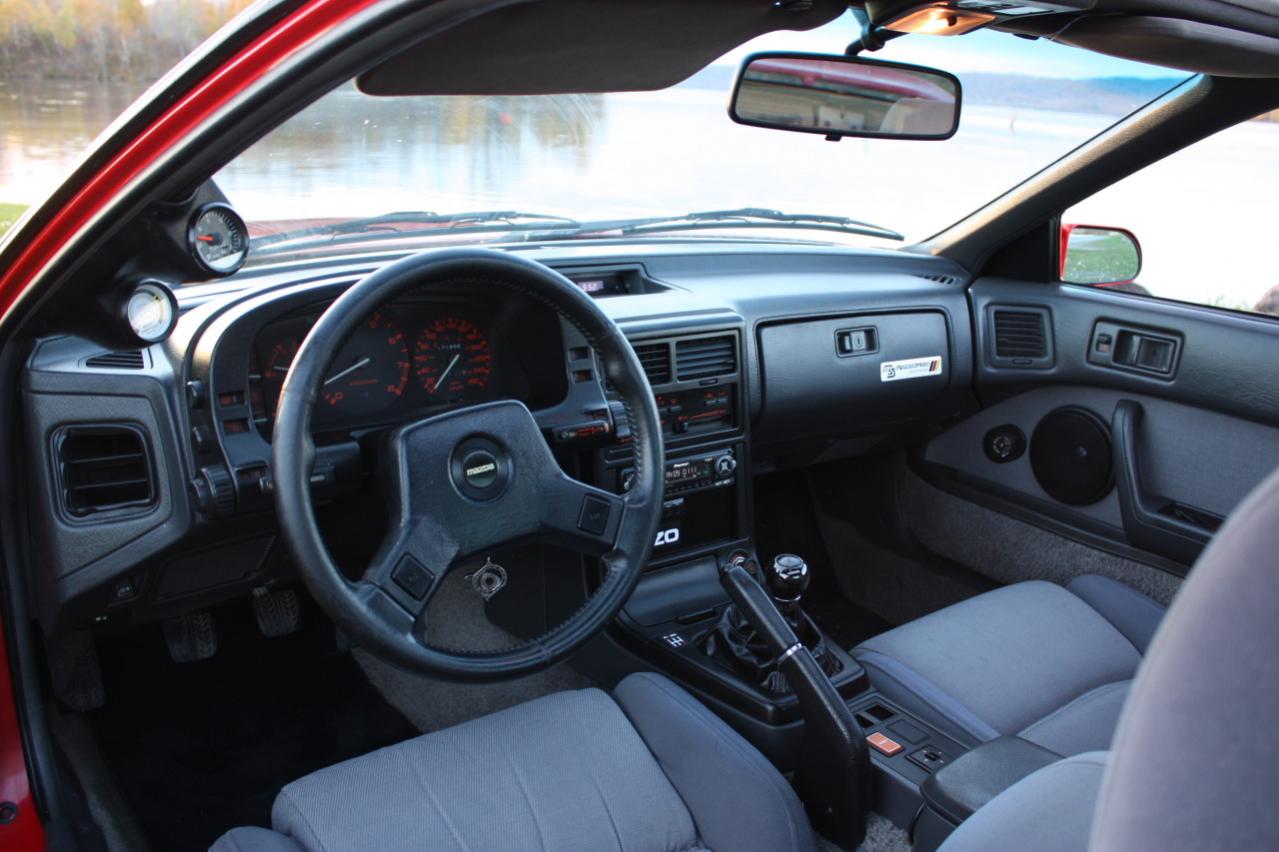
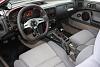
When I purchased the car the interior was in great "stock" condition except for the radio, which was swapped for pioneer, the stock floor carpets worn and the rear speaker covers were cracked.
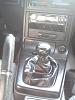
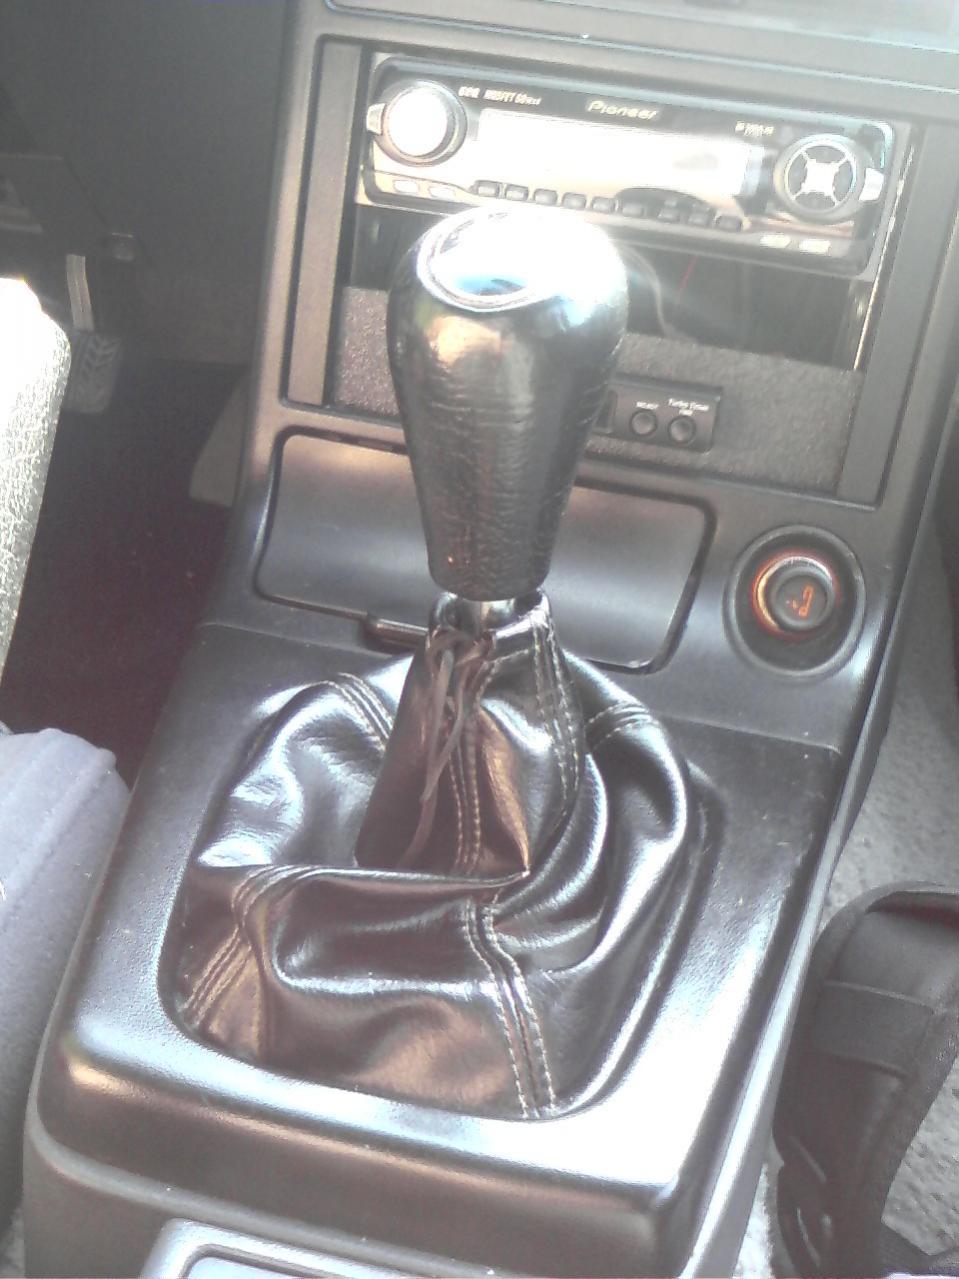
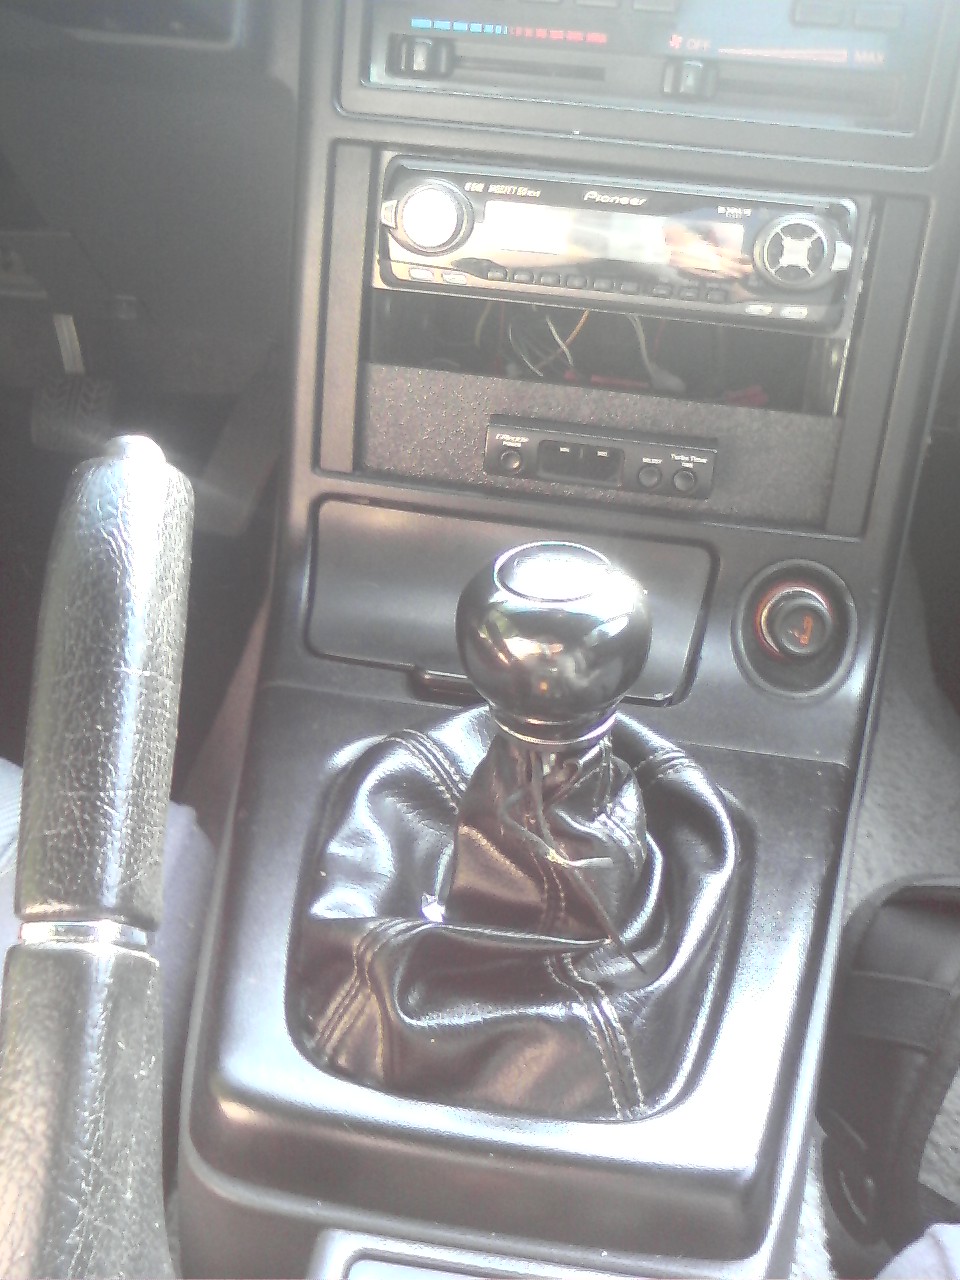
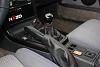
First thing I wanted to swap was the shifter, the stock one sits too high IMO.
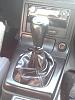
I bought a Razo ultra-low, weighted ****. It sits 2mm above the top of the shifter. The weight of it also gives firm positive shifts with a great amount of feel over stock. This is a great alternative to the short throw shifters.
After building a new backing plate for the radio, some new floor mats and a crazy good detailing job, this is where I am now.
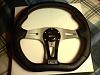
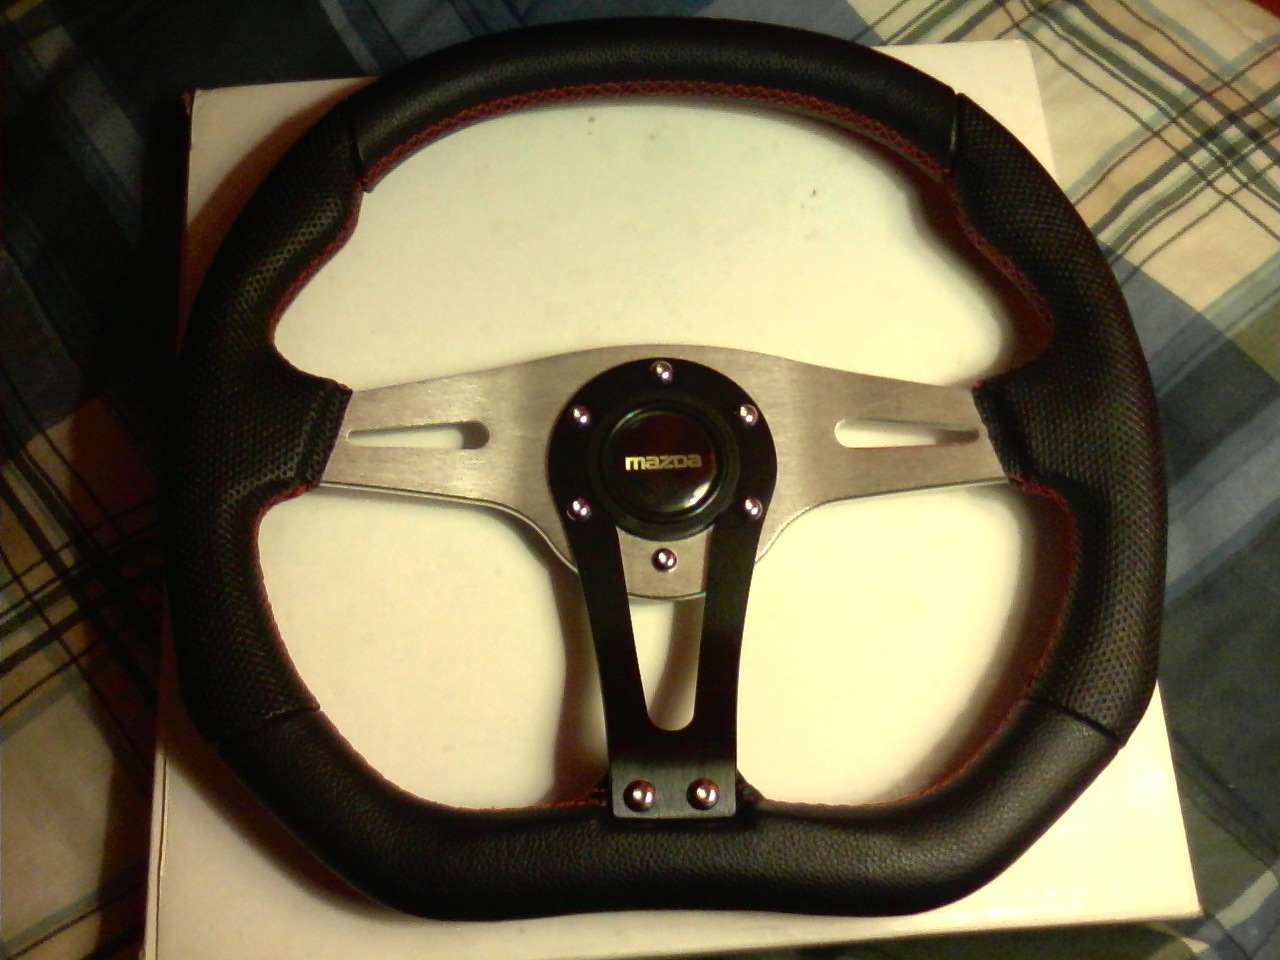
Just purchased, I am waiting on an adapter hub in the mail. The stock one may have been nice in the 80's but It's an eyesore to me.
First thing I wanted to swap was the shifter, the stock one sits too high IMO.
I bought a Razo ultra-low, weighted ****. It sits 2mm above the top of the shifter. The weight of it also gives firm positive shifts with a great amount of feel over stock. This is a great alternative to the short throw shifters.
After building a new backing plate for the radio, some new floor mats and a crazy good detailing job, this is where I am now.
Just purchased, I am waiting on an adapter hub in the mail. The stock one may have been nice in the 80's but It's an eyesore to me.
 12-16-10, 01:18 PM
#7
Make It Happen!
Thread Starter
iTrader: (11)
Join Date: Jun 2010
Location: Ontario, Canada
Posts: 522
Likes: 0
Received 0 Likes
on
0 Posts
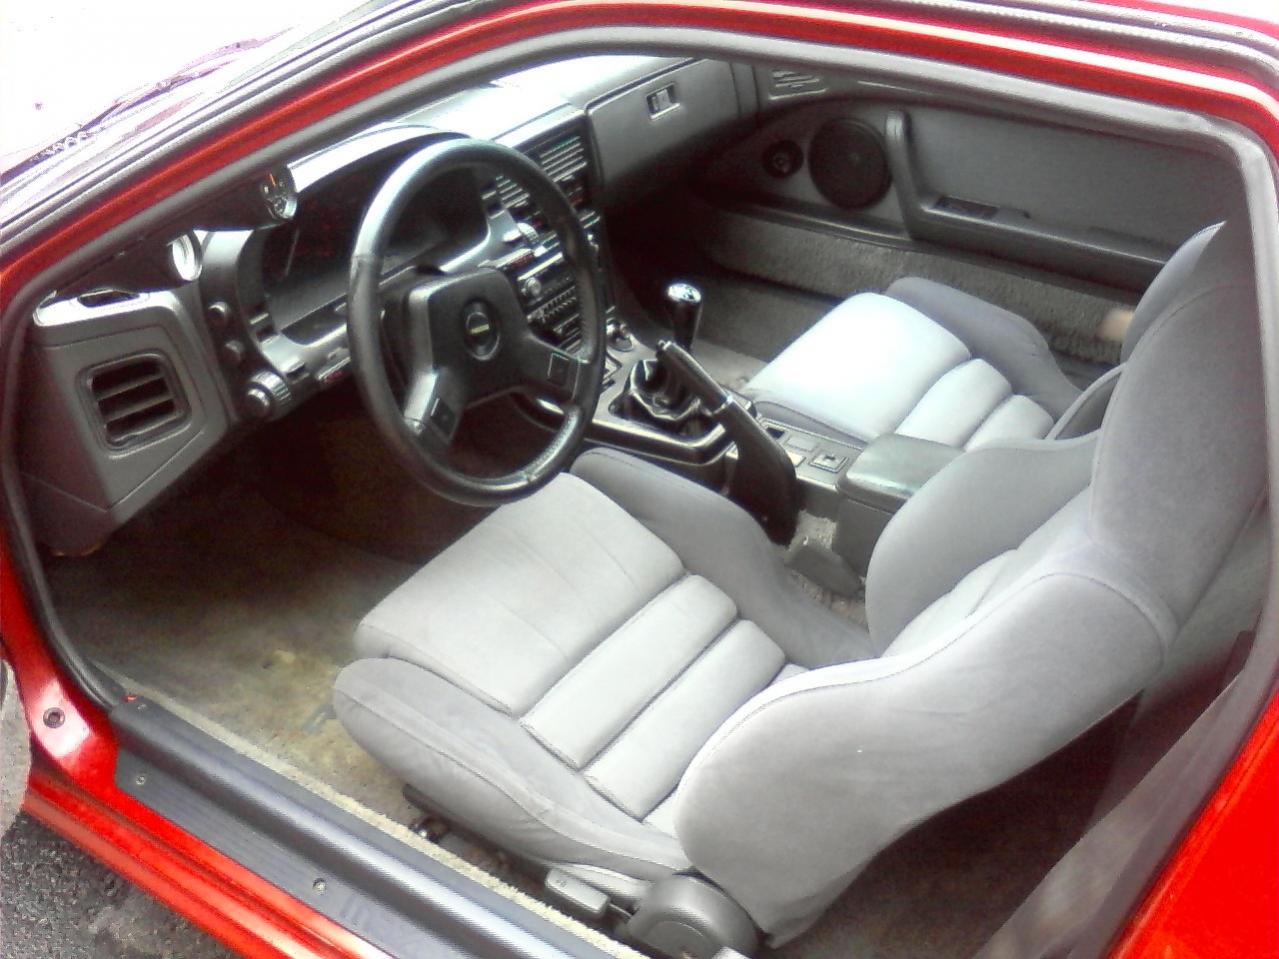
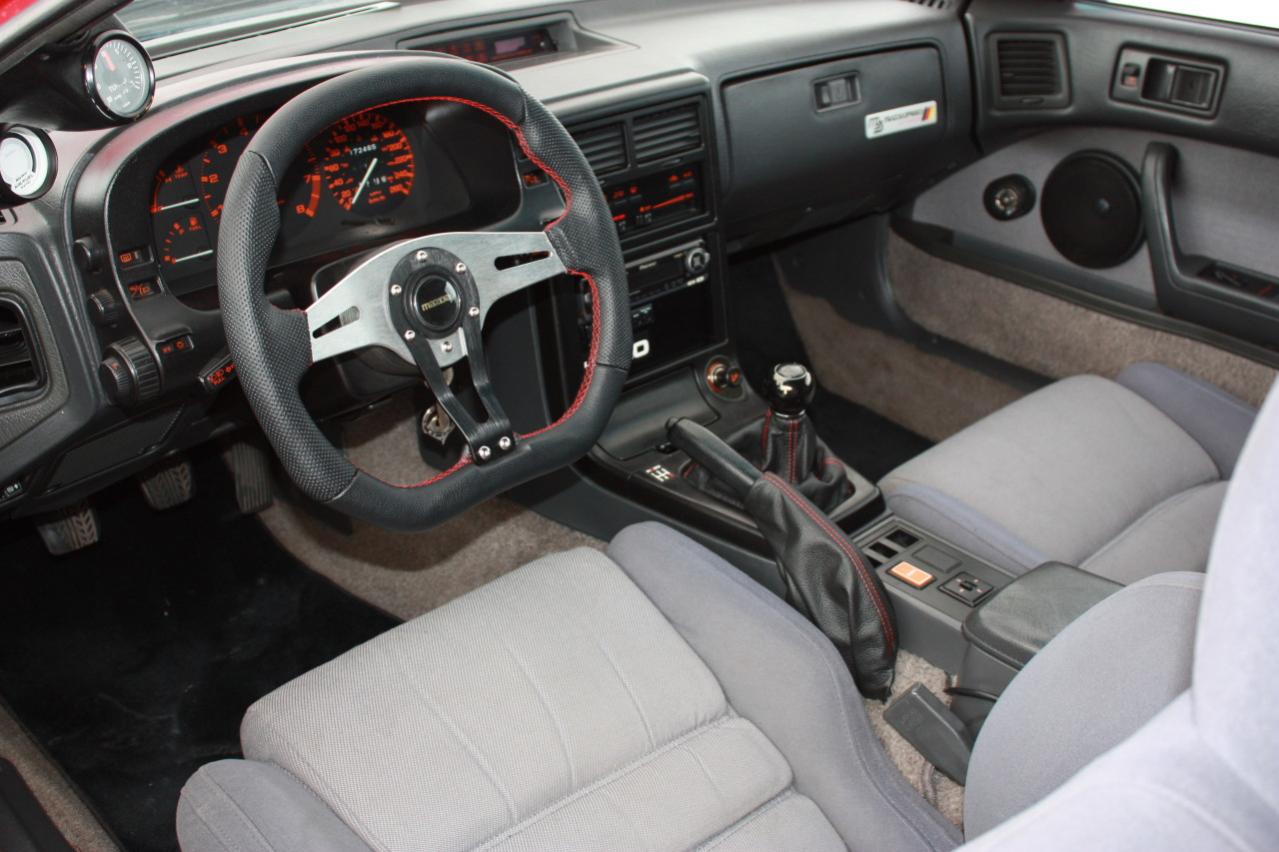
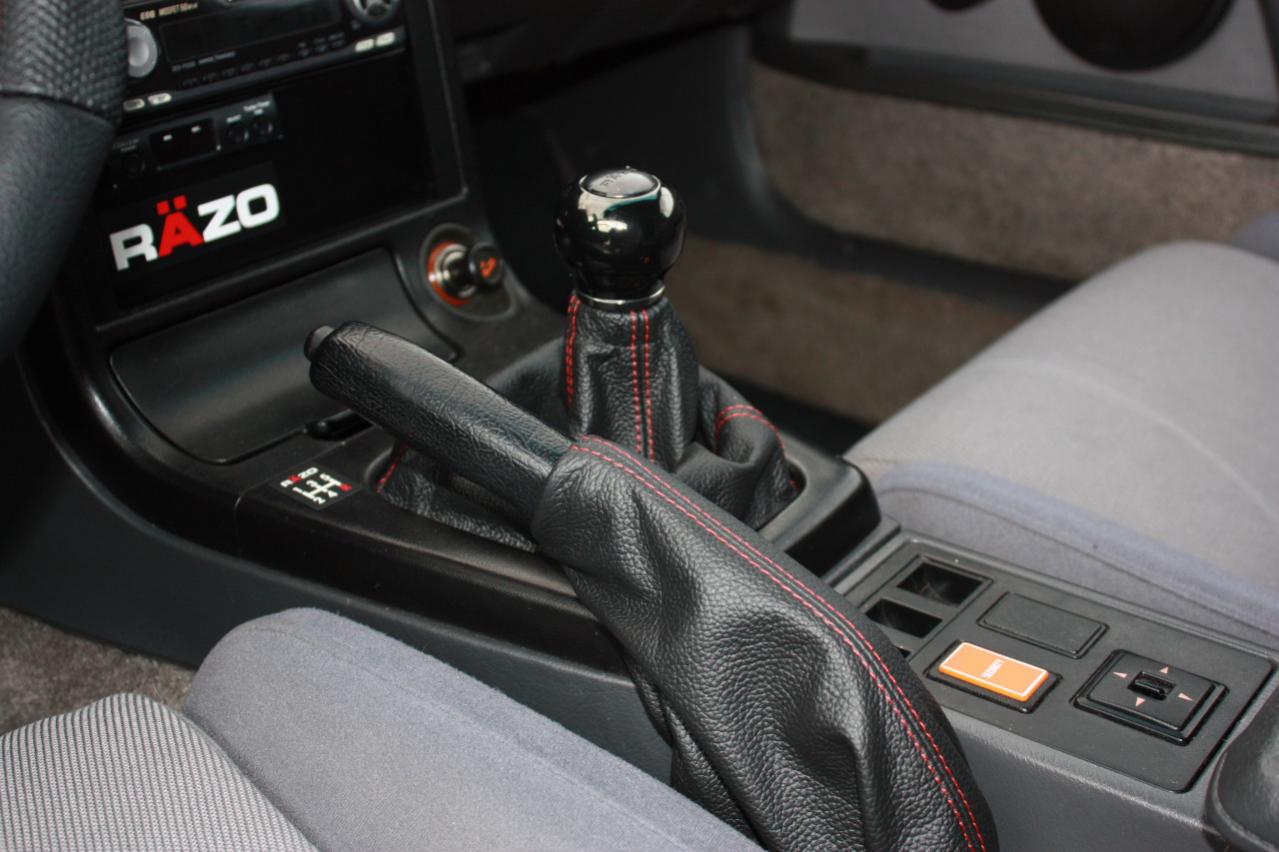
Here's a quick update to my Interior. I received my steering wheel hub so I could install my wheel. A also ordered some really nice shifter/e-brake boots from www.redlinegoods.com, to match the wheel I am really pleased with the quality and fit of these boots, also the shipping was quite quick. Please check them out.
 .
.
 .
.
Trending Topics
12-16-10, 08:06 PM
#9
Excellent!
Nice to see a total build for a change. Most people neglect the interior ...or worse (read: "indiglo gauge overlays, cheap racing seats, clip on pedas etc). Seems like you did a good job of accenting the strong points and removing the weak ones (the stock steering wheel his hedious, huge and flimsy). I was looking at getting those shift boots as well, although I'll likely hold off on the armrest.
Only thing that could make this thread better is full size pics...
12-17-10, 01:09 PM
#11
I'm well aware what at thumbnail is, and how it is used. Clicking on them is nonetheless annoying when compared to simply scrolling down the page. Especially since there isn't a particularly large number of pics.....a minor criticism regardless.
12-17-10, 04:49 PM
#12
Make It Happen!
Thread Starter
iTrader: (11)
Join Date: Jun 2010
Location: Ontario, Canada
Posts: 522
Likes: 0
Received 0 Likes
on
0 Posts
Thanks for the input guys, there's a lot more to come. I am waiting till after the holidays, I will have a new hd camera too (x-mas gift)  As for those of you looking for the shift boots, if you are patient I will be able to get you a 5% discount if you get them through me. I am waiting for a reply from redline before I can do that though. As for the pictures I am not sure how to get them in full size. everytime I upload them they end up being thumbnails.
As for those of you looking for the shift boots, if you are patient I will be able to get you a 5% discount if you get them through me. I am waiting for a reply from redline before I can do that though. As for the pictures I am not sure how to get them in full size. everytime I upload them they end up being thumbnails.
01-07-11, 09:04 PM
#13
Make It Happen!
Thread Starter
iTrader: (11)
Join Date: Jun 2010
Location: Ontario, Canada
Posts: 522
Likes: 0
Received 0 Likes
on
0 Posts
Excellent!
Nice to see a total build for a change. Most people neglect the interior ...or worse (read: "indiglo gauge overlays, cheap racing seats, clip on pedas etc). Seems like you did a good job of accenting the strong points and removing the weak ones (the stock steering wheel his hedious, huge and flimsy). I was looking at getting those shift boots as well, although I'll likely hold off on the armrest.
Only thing that could make this thread better is full size pics...
Nice to see a total build for a change. Most people neglect the interior ...or worse (read: "indiglo gauge overlays, cheap racing seats, clip on pedas etc). Seems like you did a good job of accenting the strong points and removing the weak ones (the stock steering wheel his hedious, huge and flimsy). I was looking at getting those shift boots as well, although I'll likely hold off on the armrest.
Only thing that could make this thread better is full size pics...
I have some updates coming soon I have received some new parts ie. PLX Wideband, Rtek 2.0, Palm Pilot. I am Just waiting for a new cable for my camera before I post. My dog opened my Christmas present for me while I was out and he chewed the cable int pieces.
02-10-11, 11:43 AM
#14
Make It Happen!
Thread Starter
iTrader: (11)
Join Date: Jun 2010
Location: Ontario, Canada
Posts: 522
Likes: 0
Received 0 Likes
on
0 Posts
So Here's a little update, I have my new Camera .
I am currently waiting on new parts to complete my subframe upgrade.
-Rear diff mounts,
-Custom front semi-solid diff mount from Gurew https://www.rx7club.com/group-buy-product-dev-fc-rx-7-268/fc-semi-solid-diff-mount-938333/
-Mazdatrix adjustable camber links and possibly some AWR adjustable toe rods
-Toe eliminator bushings (currently trying to source before going to mazdatrix.)
Here are some new parts that have come in.
-Energy suspension master bushing set

-Header wrap and stainless tie wraps for my downpipe.

-I need to media blast & plug the original o2 bung and weld a new o2 bung on there about 24" down before I can wrap it.

I have been concentrating on the Interior since it's bloody cold outside here in Ontario. I have been able to do most of my work indoors with minimal time outside. The good news is, My Interior is FINISHED!!
I ordered a set of machined aluminum pedals from Sullivan Racing Products. http://www.srpracing.com/pd_rx-7_86-91_2nd_gen_fc.cfm
-Here's what they look like

-I ordered these mats from Mazdatrix and are very nice. With a few kms of driving my heels started to wear into the carpet. I looked online for heel plate. I could not find one that I liked, so I put my skillz to use :p. I started with a sheet of 0.40" aluminum. I made lots and lots of measurements and this is what I ended up with

- I cut 2 pieces of aluminum to the same shape. Using the measurements I made, I used a 1" hole saw to make holes through one piece. Both pieces received holes for rivets and attachment bolts. I brushed the top piece with a wire brush and left the bottom piece alone and riveted them together. All I needed to do was punch 4 holes into the carpet for the bolts and fit some wide washers on the back of the carpet. All completed I put maybe 10hrs into this and about $30.

-With this installed and my interior finished, this is what I am left with. I hope you like

. I am currently waiting on new parts to complete my subframe upgrade.
-Rear diff mounts,
-Custom front semi-solid diff mount from Gurew https://www.rx7club.com/group-buy-product-dev-fc-rx-7-268/fc-semi-solid-diff-mount-938333/
-Mazdatrix adjustable camber links and possibly some AWR adjustable toe rods
-Toe eliminator bushings (currently trying to source before going to mazdatrix.)
Here are some new parts that have come in.
-Energy suspension master bushing set
-Header wrap and stainless tie wraps for my downpipe.
-I need to media blast & plug the original o2 bung and weld a new o2 bung on there about 24" down before I can wrap it.
I have been concentrating on the Interior since it's bloody cold outside here in Ontario. I have been able to do most of my work indoors with minimal time outside. The good news is, My Interior is FINISHED!!
I ordered a set of machined aluminum pedals from Sullivan Racing Products. http://www.srpracing.com/pd_rx-7_86-91_2nd_gen_fc.cfm
-Here's what they look like
-I ordered these mats from Mazdatrix and are very nice. With a few kms of driving my heels started to wear into the carpet. I looked online for heel plate. I could not find one that I liked, so I put my skillz to use :p. I started with a sheet of 0.40" aluminum. I made lots and lots of measurements and this is what I ended up with
- I cut 2 pieces of aluminum to the same shape. Using the measurements I made, I used a 1" hole saw to make holes through one piece. Both pieces received holes for rivets and attachment bolts. I brushed the top piece with a wire brush and left the bottom piece alone and riveted them together. All I needed to do was punch 4 holes into the carpet for the bolts and fit some wide washers on the back of the carpet. All completed I put maybe 10hrs into this and about $30.
-With this installed and my interior finished, this is what I am left with. I hope you like
Last edited by AmT_T; 02-10-11 at 12:13 PM.
02-10-11, 01:33 PM
#16
Make It Happen!
Thread Starter
iTrader: (11)
Join Date: Jun 2010
Location: Ontario, Canada
Posts: 522
Likes: 0
Received 0 Likes
on
0 Posts
Thanks man I'm pretty proud of it. I did use a metal washer. I was told that it would work just fine. Are you telling me this from previous experience?
02-10-11, 02:11 PM
#18
When I rebuilt my motor I welded this washer on (all the white is marking fluid, it was how I checked to see if it was sealing reasonably).


The welds mostly stayed, but it's pretty useless without the flapper.


So this is what I went with and it's been holding up quite well. Last pic doesn't really show the new flapper very well... I did end up doing this twice, but only because when I ported it after the first failure I was still creeping (the wastegate opening simply wasn't big enough), so I eventually tore it apart, ported it bigger still, then welded on a bigger flapper which is the one you see in the vise. I'm pretty sure I've documented this on this forum, too, so you should be able to find it if you search.

 06-15-11, 08:29 PM
#20
Make It Happen!
Thread Starter
iTrader: (11)
Join Date: Jun 2010
Location: Ontario, Canada
Posts: 522
Likes: 0
Received 0 Likes
on
0 Posts
Well I finally have the 7 back on the road. I now have time to update this build thread.
First thing I tackled was the Downpipe.
Cut and fill the original o2 Bung and weld in a new one further downstream for the PLX Wideband


NICE WELDS

Coat of paint

Wrapped and sealed with DEI silicone exhaust wrap paint.

Next was to tackle the subframe.
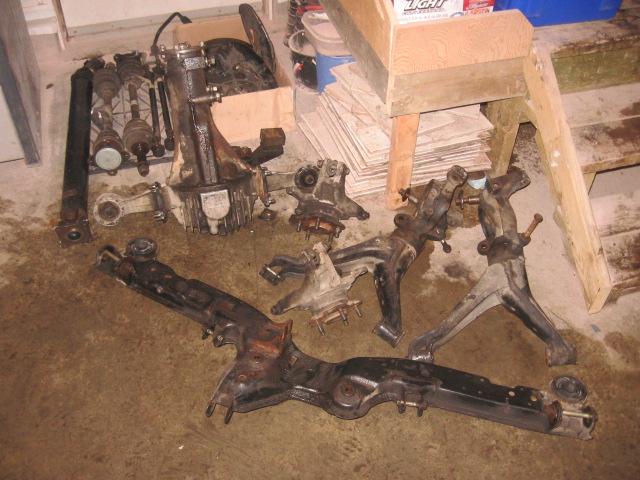
I sandblasted all the components and painted them. I also used MAZDATRIX adjustable camber links and MAZDACOMP front and rear Diff Mounts to go along with the polyurethane bushings kit.


I cleaned and painted the diff and installed a new pinion seal


Next job was to install the polyurethane bushings for the front control arms, tie rod and balljoint boots and the racing beat sway bar end links, I did not use the Polyurethane bushings for the rear trailing arms because they are not compatible with the MAZDATRIX camber links.
Here is a little taste of what the "old" sway bar end links looked like when they were removed

Front Control arm ready for Install

First thing I tackled was the Downpipe.
Cut and fill the original o2 Bung and weld in a new one further downstream for the PLX Wideband
NICE WELDS
Coat of paint
Wrapped and sealed with DEI silicone exhaust wrap paint.
Next was to tackle the subframe.
I sandblasted all the components and painted them. I also used MAZDATRIX adjustable camber links and MAZDACOMP front and rear Diff Mounts to go along with the polyurethane bushings kit.
I cleaned and painted the diff and installed a new pinion seal
Next job was to install the polyurethane bushings for the front control arms, tie rod and balljoint boots and the racing beat sway bar end links, I did not use the Polyurethane bushings for the rear trailing arms because they are not compatible with the MAZDATRIX camber links.
Here is a little taste of what the "old" sway bar end links looked like when they were removed
Front Control arm ready for Install
06-15-11, 08:30 PM
#21
Make It Happen!
Thread Starter
iTrader: (11)
Join Date: Jun 2010
Location: Ontario, Canada
Posts: 522
Likes: 0
Received 0 Likes
on
0 Posts
Here is another shot of my interior after installing CUSTOM leather door inserts.

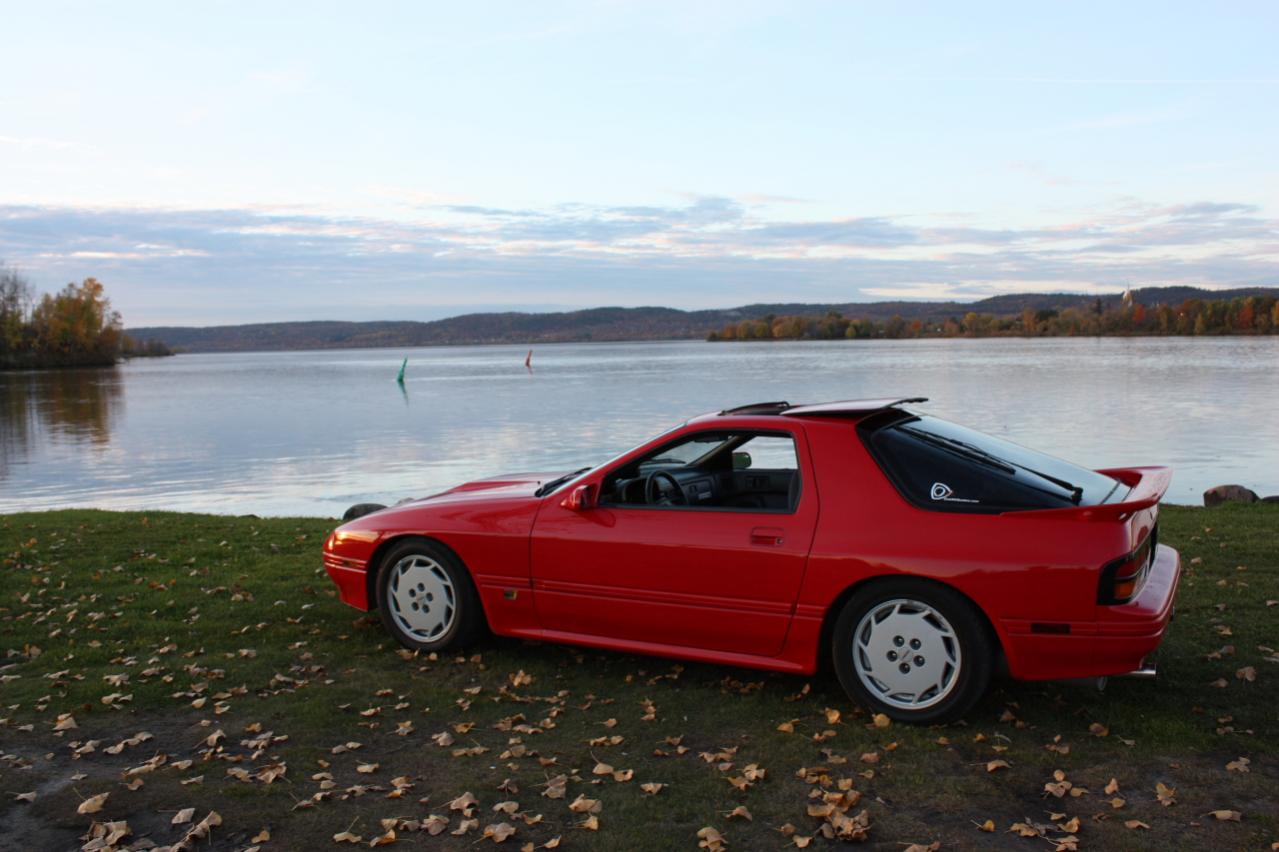
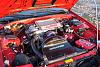
This is what my 7 looks like now that it's back on the road. The wheels are R32 Skyline GTR's 16x8 et30mm The tires are Falken fk452's 225/50/16


This is what my 7 looks like now that it's back on the road. The wheels are R32 Skyline GTR's 16x8 et30mm The tires are Falken fk452's 225/50/16
07-30-11, 12:30 PM
#24
French from Montr�al,Qc
I never saw you before at one of our meet at st-doroth� ?
I really like your car ,and the details.
Vien nous montr� ton ride,i saw the stiker from the Clubrxquebec!
Lache pas!
I really like your car ,and the details.
Vien nous montr� ton ride,i saw the stiker from the Clubrxquebec!
Lache pas!
