
4 lug to 5 lug conversion (rear) write up

Thread Starter
I am Batman
Joined: Mar 2006
Posts: 197
Likes: 0
From: Colorado Springs
4 lug to 5 lug conversion (rear) write up
I have done some searching already but was not able to find any write-ups on this. So I decided to make my own. This is my first and I am open to input. This is written from my own experience of doing this conversion. Here it goes.
To start you are going to need the following:
1- Rear spindles with 5 lugs
2- Rear 5 lug brake rotors
3- Rear brake pads
4- Rear 5 lug calipers
5- Brake fluid
6- 5 lug wheels
You are going to need to have a full 3/4" ratchet set in metric, wrench set, a pry-bar, an axel nut socket, brake or carb cleaner, a jack, jack stands, a couple feet of wire or string, screw drivers, and gloves (optional but recommended)
-The brake or carb cleaner will be used to loosen some of the bolts and nuts that have been rusted on. So spray any where that you are having trouble loosening a bolt or nut and wait for a few minutes. Eye protection is recommended.
This would also be a good time to update some of the suspension bushings that you will have easy access to.
1- Before jacking the car up gain access to the axel nut and using the axel nut socket and the pry-bar take off the nut on both sides. Make sure the e-brake is on and put the car in gear.
2- Starting with one side take the wheel off (and it can be used as a nice seat)
3- Release the e-bake or that caliper is not going to come off. Remove the brake caliper and hang it from the spring with the length of wire or string.
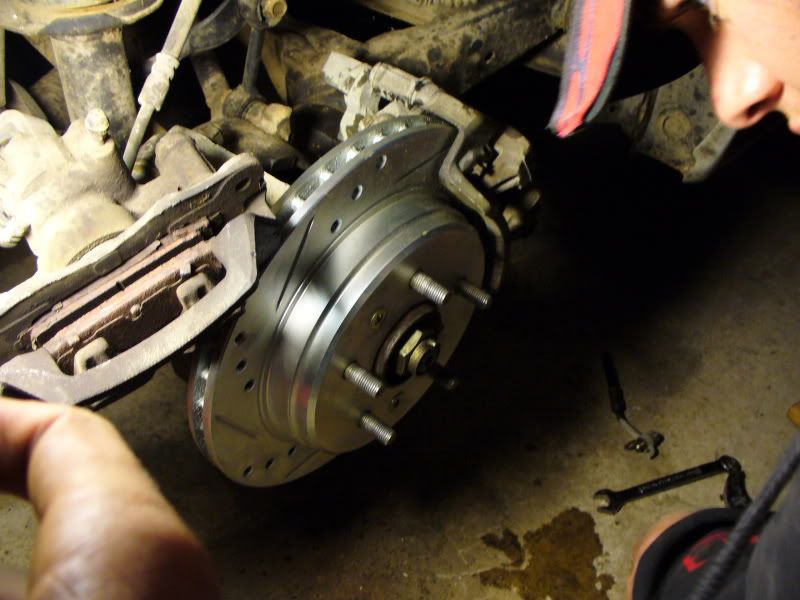
4- Remove the two screws that are holding the rotor on.
5- Take the rotor off. This might be hard because of rust so using a hammer will help. A wrench can also be used to pry it off.
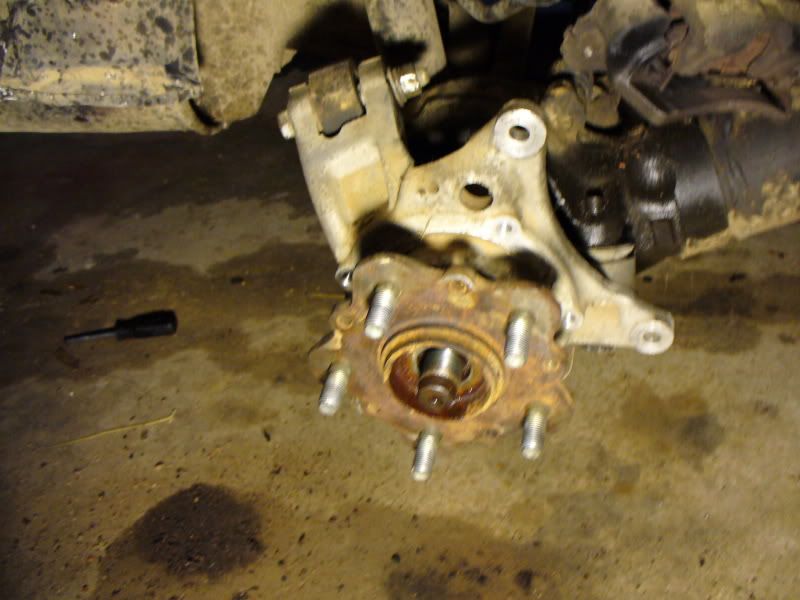
6- There will be three bolts that hold on the spindle on the top, side and bottom. Take all three bolts out and keep the washers on in the order they were so you will not forget.
7- Remove the spindle.
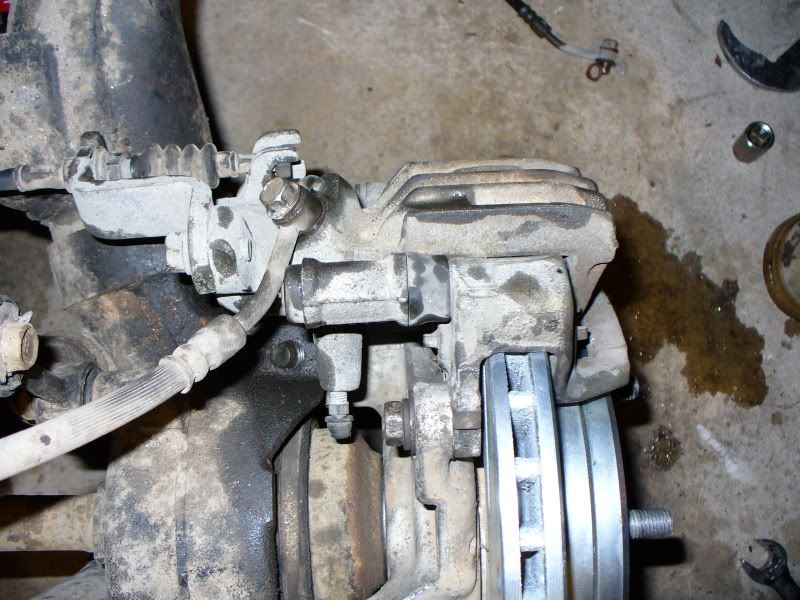
8- This would be a good time to change the caliper because of the amount of room available. Start will undoing the e-brake cable. Loosen the nut that holds the cable in place and slide it up and out. Now remove the end from the hooks.
9- Go to the front of the car and take off the brake fluid cap to relive pressure. You have now reached the half way point. Its time to get up and stretch a little bit.
10- Have the other caliper at hand (making sure it is the correct side). Take out the screw that hold the brake line to the caliper. Brake fluid is going to leak out. Transfer the brake line to the other caliper and bolt it down with the screw, one washer on top and one on the bottom of the brake line. Tighten down.
11- Now reconnect the e-brake cable by hooking the end up first and then sliding it into the slot and tightening down the nut.
12- Put the 5 lug spindle on and reconnect the 3 bolts and nuts. Tighten everything down.
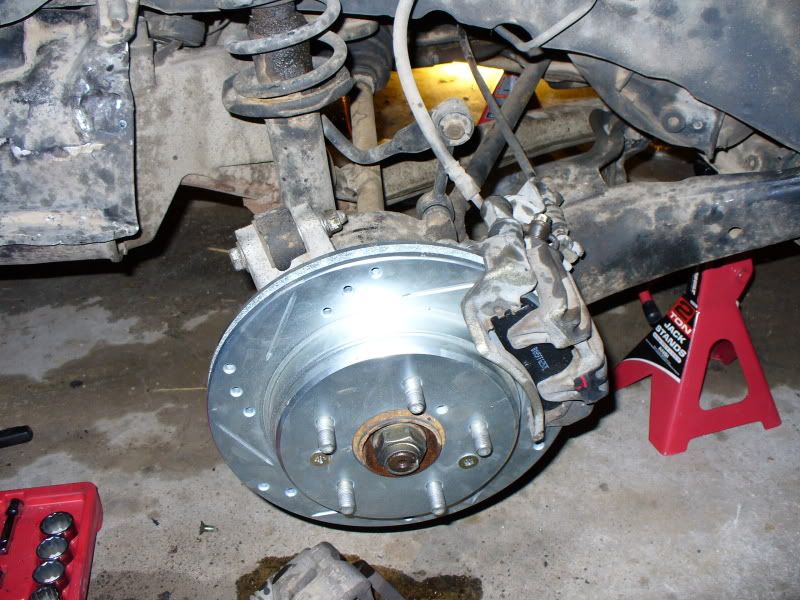
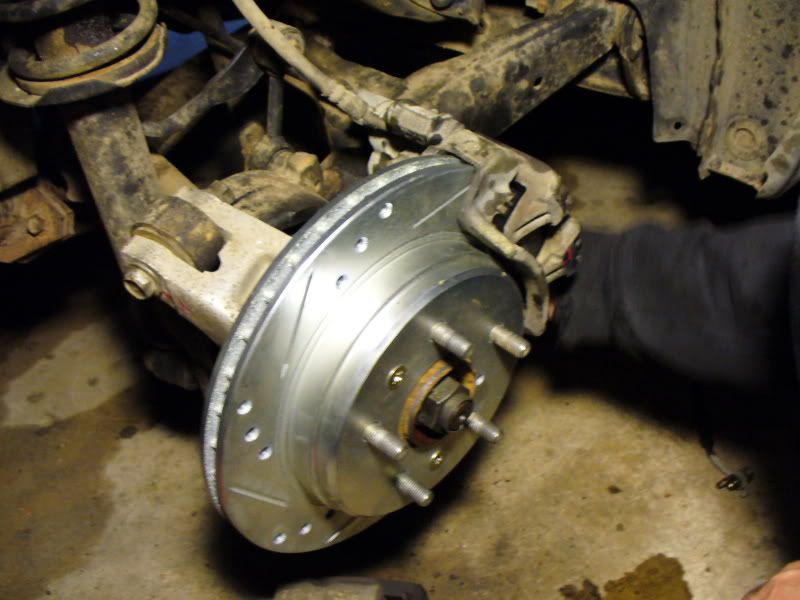
13- Put on the new or machined 5 lug rotor and replace the two screws and tighten.
14- It is time to put the brake pads in the caliper and put them over the rotor. Make sure that all the clips and spacers are in place. The only thing that is tricky it that the small peg on the back of the brake pad must go into the recessed part of the piston face or the rotor will not fit in between the pad faces.
15- Put the caliper onto the rotor and line up the bolt holes. Put both bolts in and tighten down.
16- Replace the axel bolt and washer and tighten down by hand.
17- Now it is time to bleed the brakes. So get a friend to help.
18- Put the new 5 lug wheel on and lower car off the jack stands. Pull the e-brake and put the car in gear to make sure that the car does not role. Using the axel socket and pry-bar tighten the axel nut down.
19- You are now done with one side. Repeat this on the other side.
20- IMPORTANT: Remember that you have removed the brake fluid cap and released the pressure in ALL the brake lines. You must bleed the front brakes now!
21- Now drive the car CAREFULLY testing out the brakes to see that all the air is removed.
22- You have now completed your 4-5lug conversion on the rear wheels.
I hope this helped. It is a very easy conversion to do and will let you have vented rear discs.
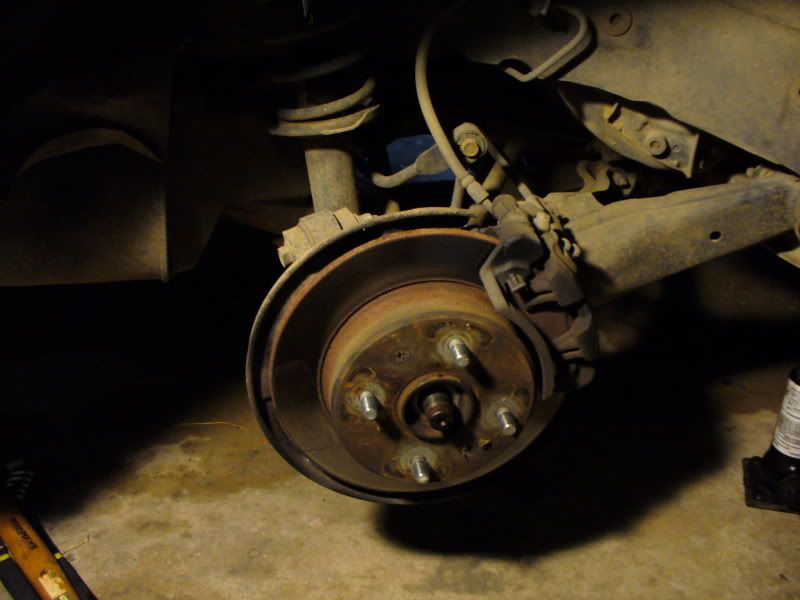
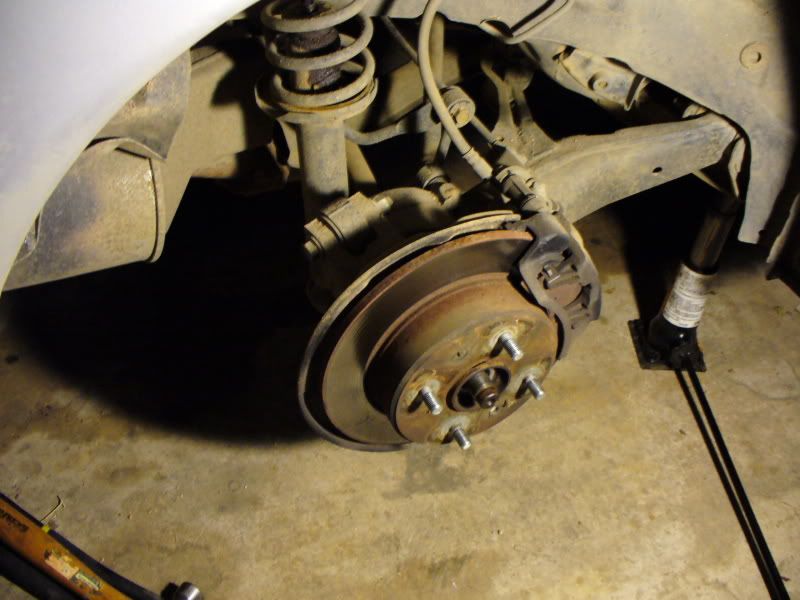
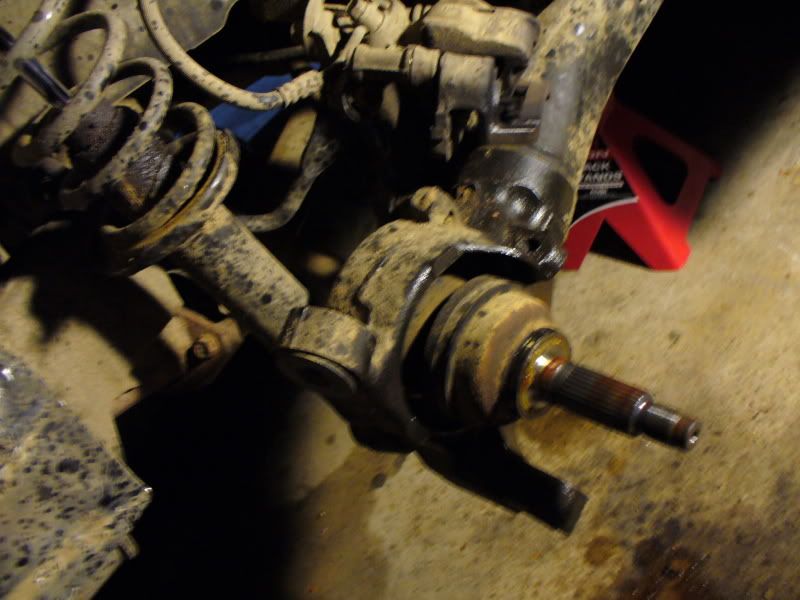
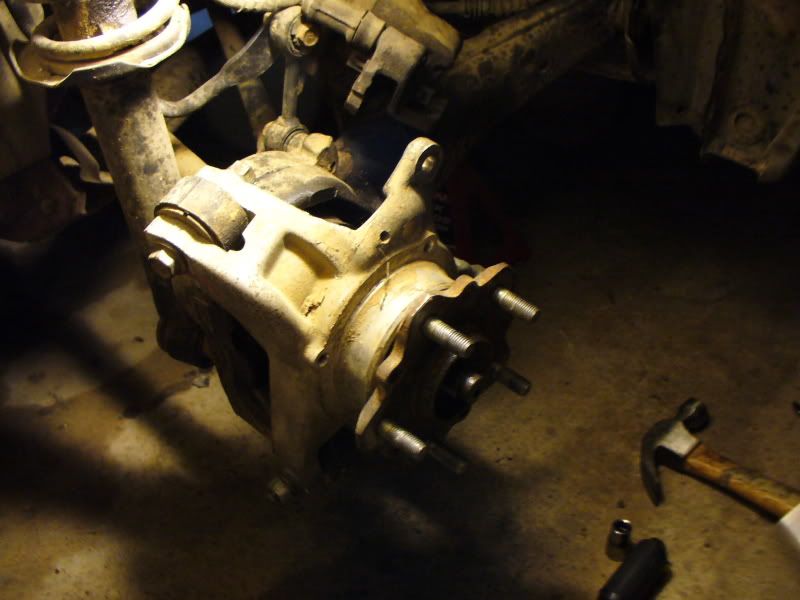
Here are some more photos that I took:
To start you are going to need the following:
1- Rear spindles with 5 lugs
2- Rear 5 lug brake rotors
3- Rear brake pads
4- Rear 5 lug calipers
5- Brake fluid
6- 5 lug wheels
You are going to need to have a full 3/4" ratchet set in metric, wrench set, a pry-bar, an axel nut socket, brake or carb cleaner, a jack, jack stands, a couple feet of wire or string, screw drivers, and gloves (optional but recommended)
-The brake or carb cleaner will be used to loosen some of the bolts and nuts that have been rusted on. So spray any where that you are having trouble loosening a bolt or nut and wait for a few minutes. Eye protection is recommended.
This would also be a good time to update some of the suspension bushings that you will have easy access to.
1- Before jacking the car up gain access to the axel nut and using the axel nut socket and the pry-bar take off the nut on both sides. Make sure the e-brake is on and put the car in gear.
2- Starting with one side take the wheel off (and it can be used as a nice seat)
3- Release the e-bake or that caliper is not going to come off. Remove the brake caliper and hang it from the spring with the length of wire or string.
4- Remove the two screws that are holding the rotor on.
5- Take the rotor off. This might be hard because of rust so using a hammer will help. A wrench can also be used to pry it off.
6- There will be three bolts that hold on the spindle on the top, side and bottom. Take all three bolts out and keep the washers on in the order they were so you will not forget.
7- Remove the spindle.
8- This would be a good time to change the caliper because of the amount of room available. Start will undoing the e-brake cable. Loosen the nut that holds the cable in place and slide it up and out. Now remove the end from the hooks.
9- Go to the front of the car and take off the brake fluid cap to relive pressure. You have now reached the half way point. Its time to get up and stretch a little bit.
10- Have the other caliper at hand (making sure it is the correct side). Take out the screw that hold the brake line to the caliper. Brake fluid is going to leak out. Transfer the brake line to the other caliper and bolt it down with the screw, one washer on top and one on the bottom of the brake line. Tighten down.
11- Now reconnect the e-brake cable by hooking the end up first and then sliding it into the slot and tightening down the nut.
12- Put the 5 lug spindle on and reconnect the 3 bolts and nuts. Tighten everything down.
13- Put on the new or machined 5 lug rotor and replace the two screws and tighten.
14- It is time to put the brake pads in the caliper and put them over the rotor. Make sure that all the clips and spacers are in place. The only thing that is tricky it that the small peg on the back of the brake pad must go into the recessed part of the piston face or the rotor will not fit in between the pad faces.
15- Put the caliper onto the rotor and line up the bolt holes. Put both bolts in and tighten down.
16- Replace the axel bolt and washer and tighten down by hand.
17- Now it is time to bleed the brakes. So get a friend to help.
18- Put the new 5 lug wheel on and lower car off the jack stands. Pull the e-brake and put the car in gear to make sure that the car does not role. Using the axel socket and pry-bar tighten the axel nut down.
19- You are now done with one side. Repeat this on the other side.
20- IMPORTANT: Remember that you have removed the brake fluid cap and released the pressure in ALL the brake lines. You must bleed the front brakes now!
21- Now drive the car CAREFULLY testing out the brakes to see that all the air is removed.
22- You have now completed your 4-5lug conversion on the rear wheels.
I hope this helped. It is a very easy conversion to do and will let you have vented rear discs.
Here are some more photos that I took:


Thread
Thread Starter
Forum
Replies
Last Post
diabolical1
2nd Generation Specific (1986-1992)
30
Jan 30, 2016 05:50 AM
Frisky Arab
2nd Generation Specific (1986-1992)
13
Aug 18, 2015 05:30 PM